

An administrator account on Windows 11 comes with several privileges. They can update security settings, install or remove apps and make other tweaks. But what happens if the administrator or their name changes? Well, you can always change the person’s name in Windows 11.
You need to have access to the administrator account to change the name. Also, the name change doesn’t affect your personal files on your laptop or the desktop. There are several ways to change the administrator name in Windows 11. You can use the Settings app, Control Panel, Run menu or the Command Prompt app to do the job.
How to change the administrator name in Windows 11 through the Control Panel
When you want to change the administrator name and the PC is set up using a local account, you can head to the Windows 11 Control Panel to change it. Here’s what to do:
- Open the Windows 11 Start Menu.
- Search for Control Panel and click the top result.
- Switch to Category View by clicking View by: and then choose Category
- Choose User Accounts.
- Choose Change your account name.
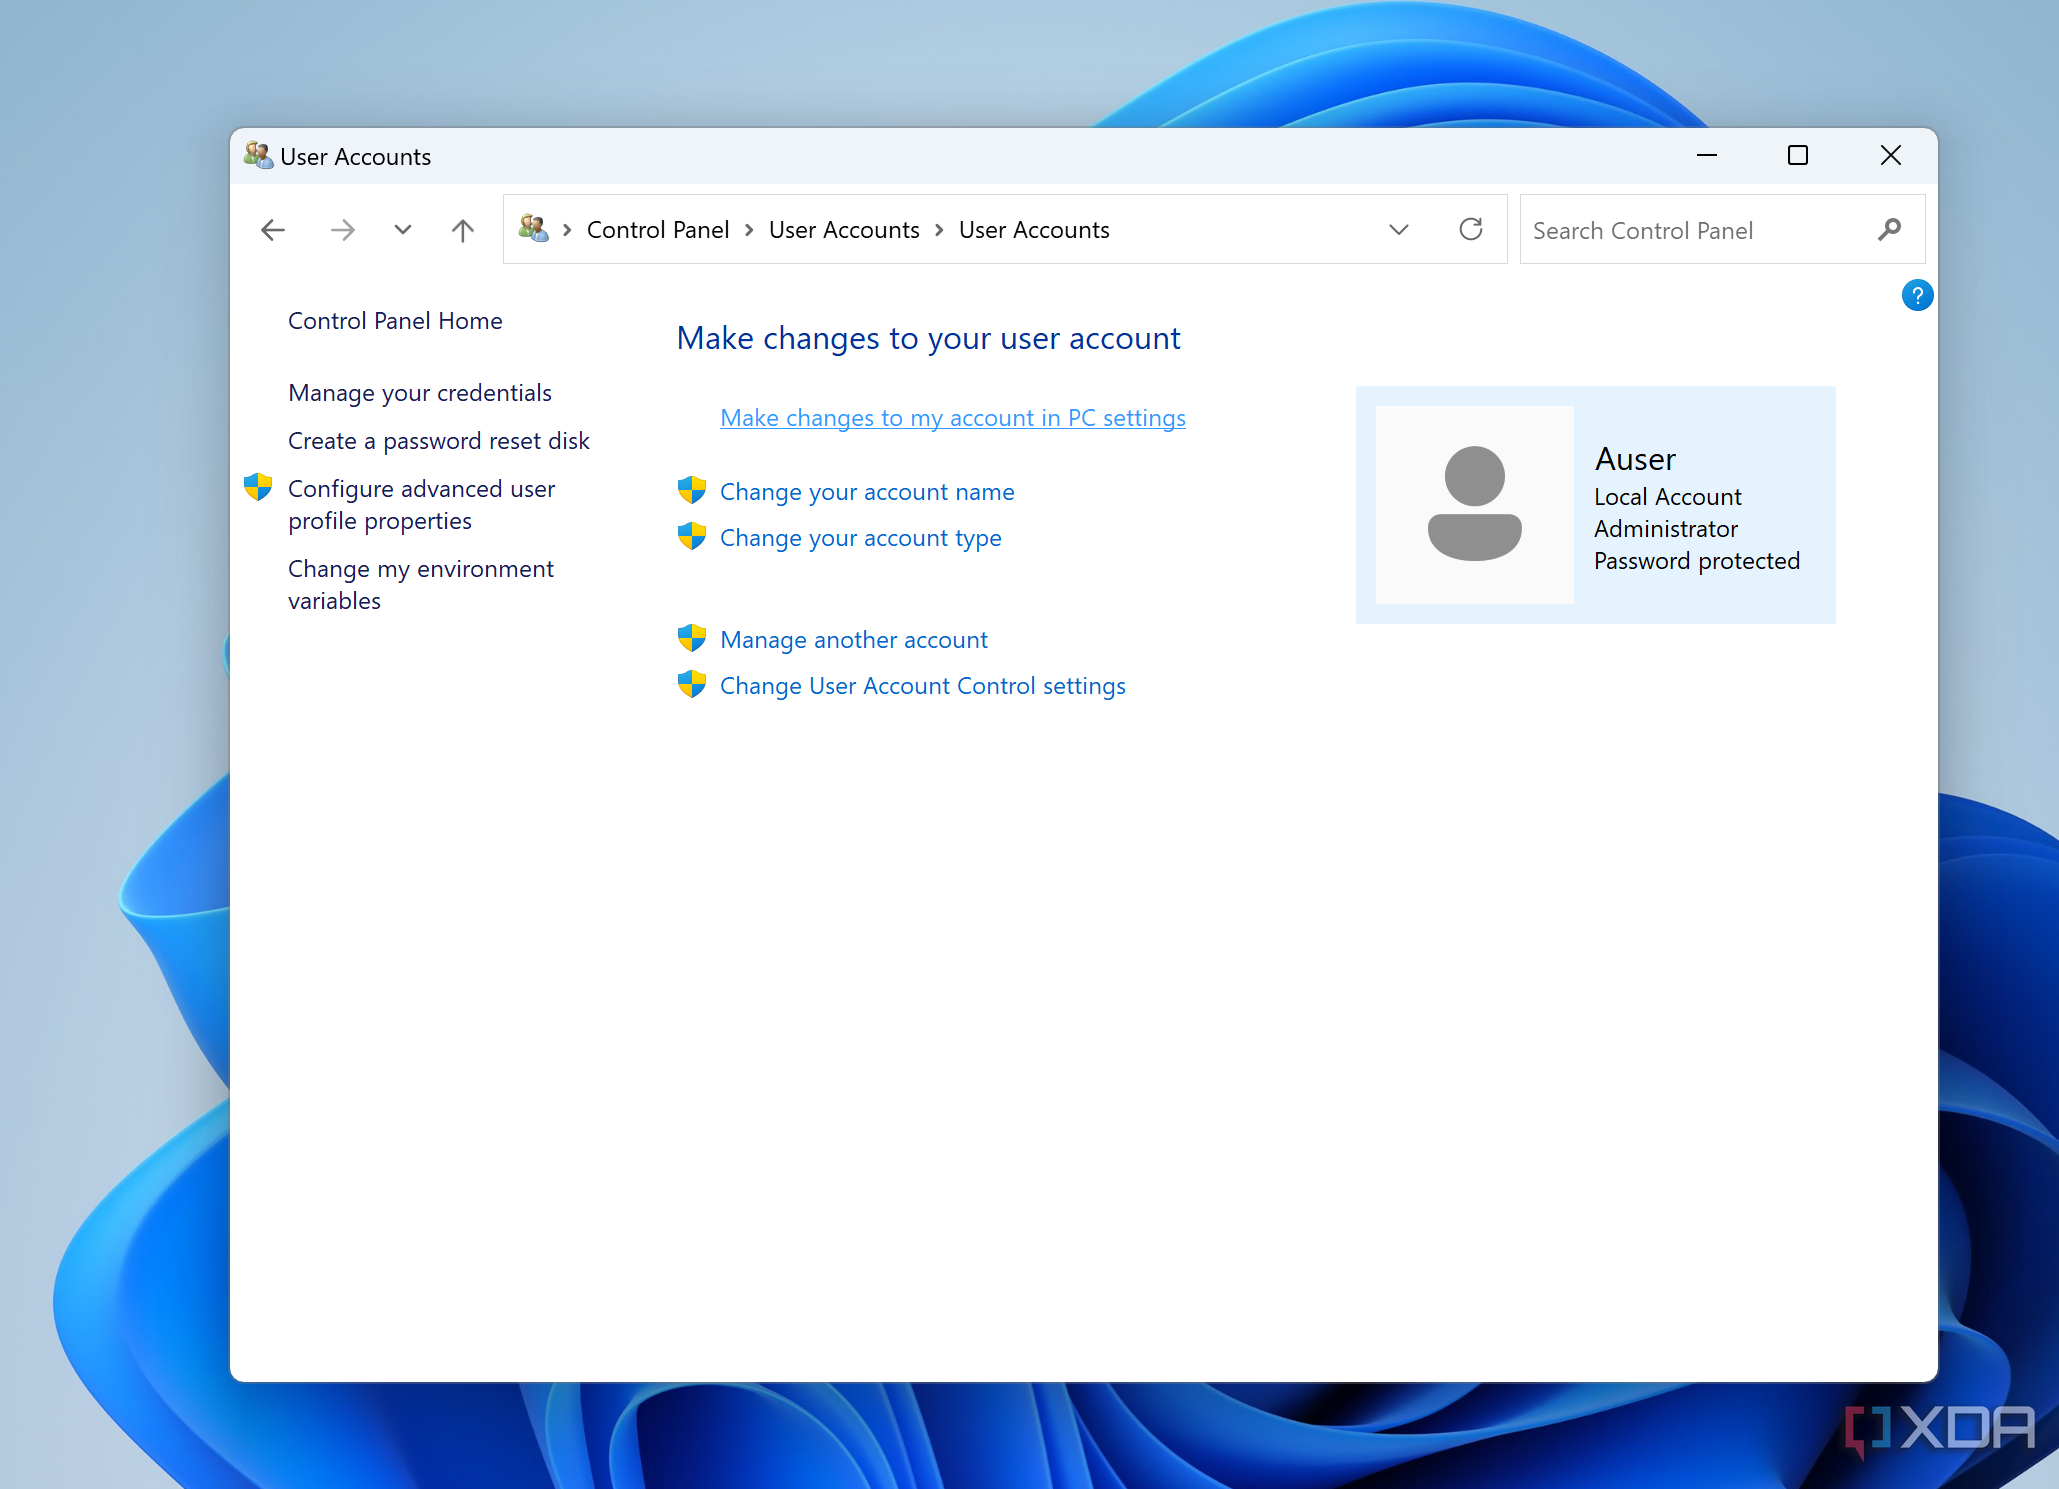
- Enter the new name, and click Change Name.
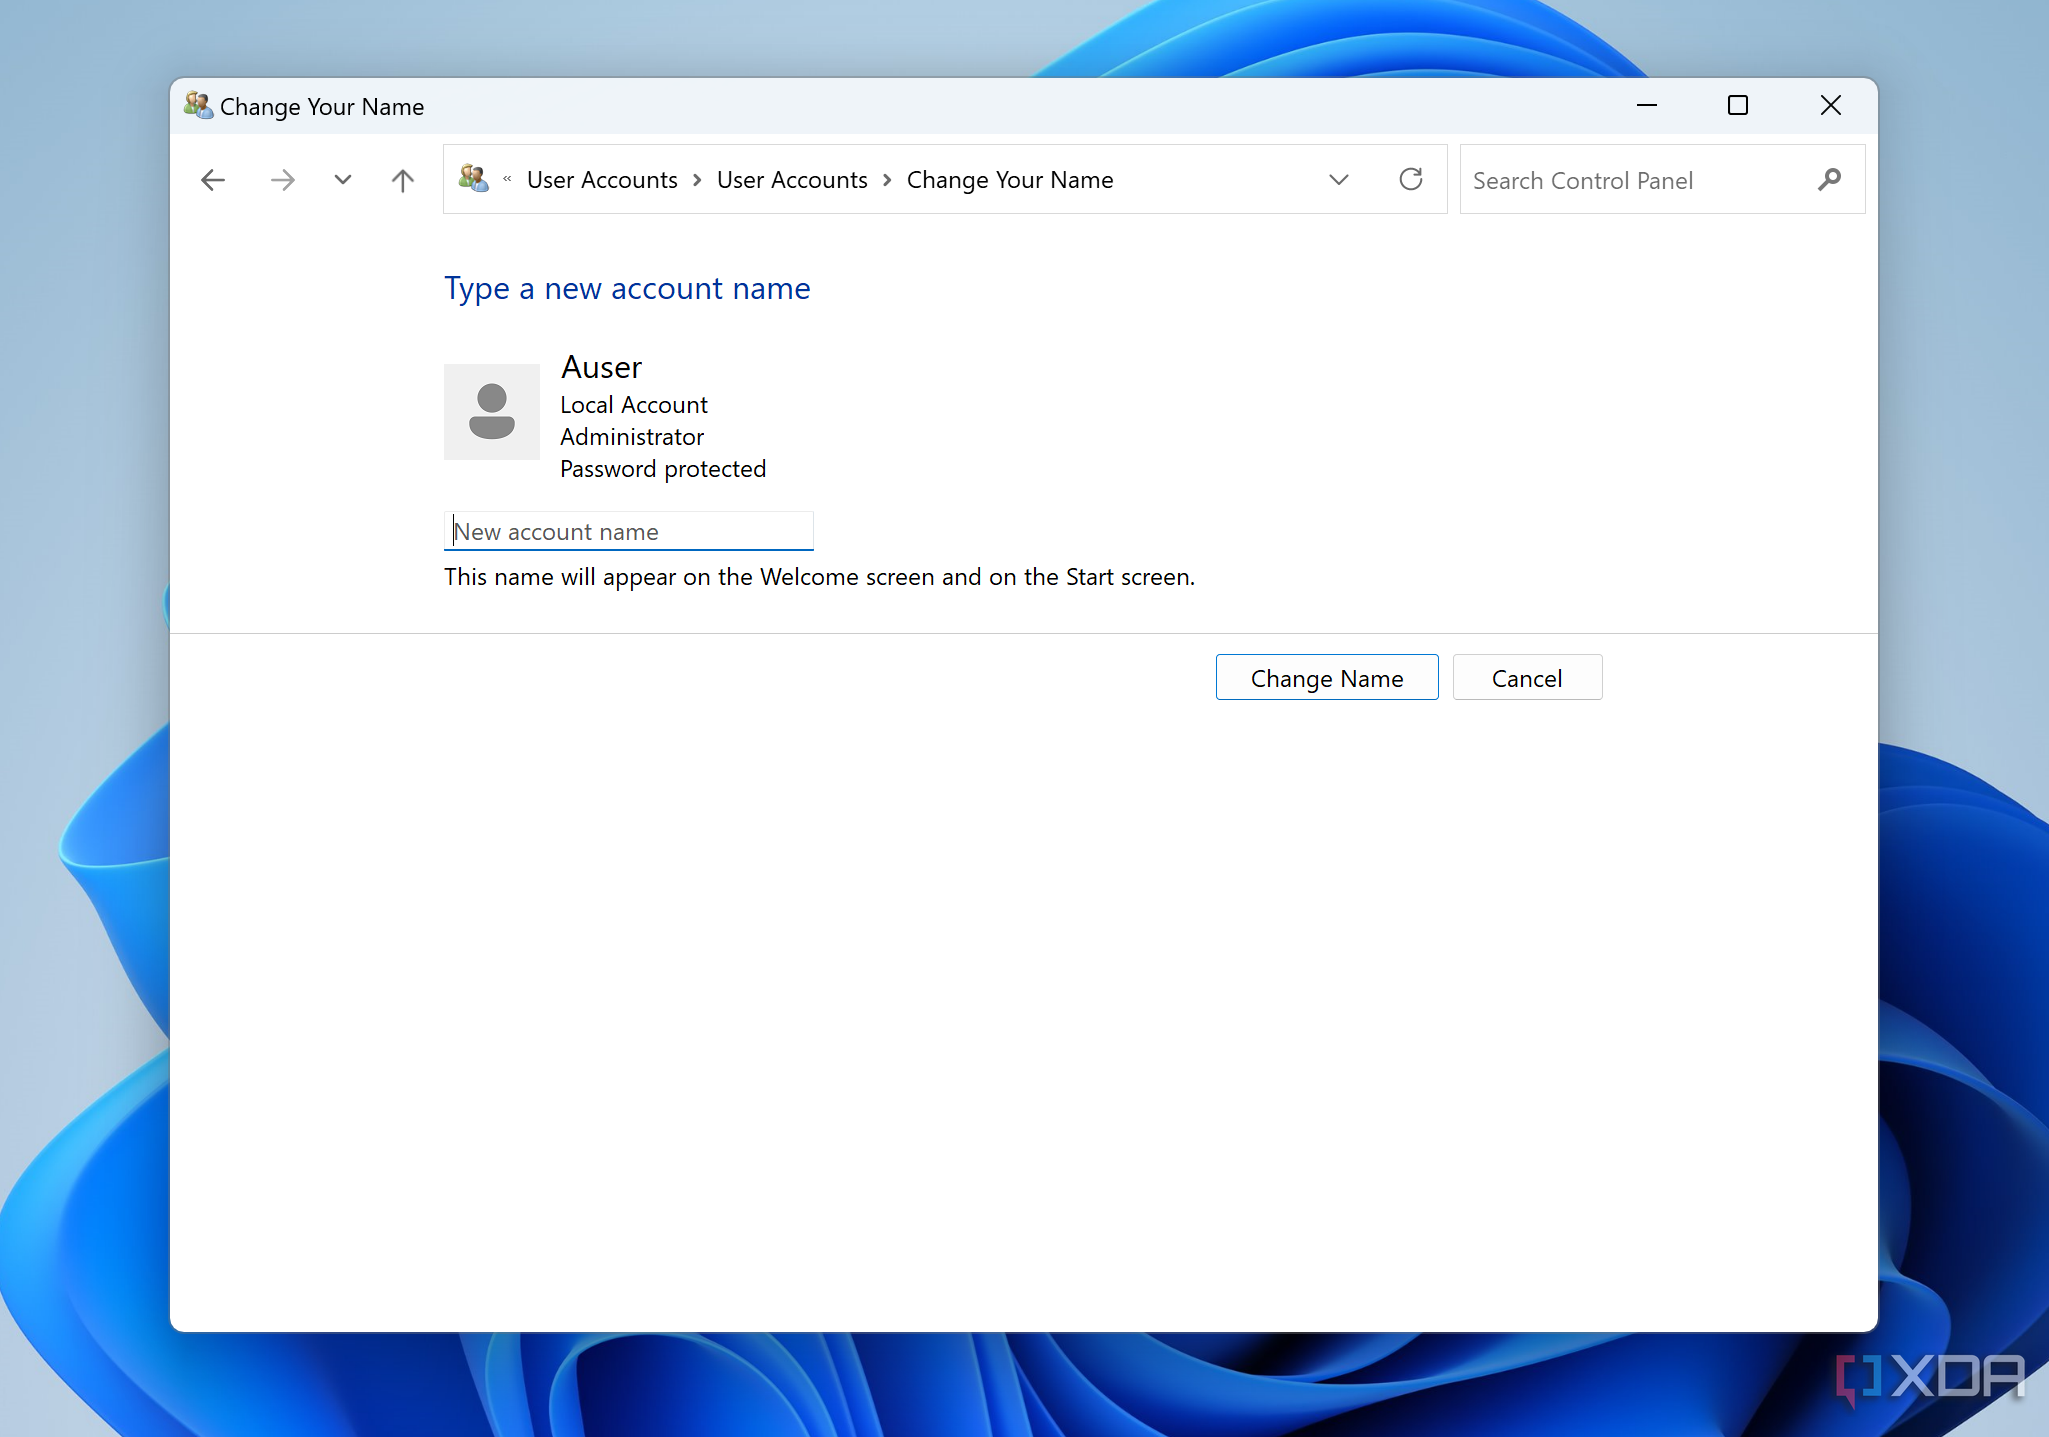


Once you click the Change Name button, the change will take immediate effect. You won’t need to reboot your PC.
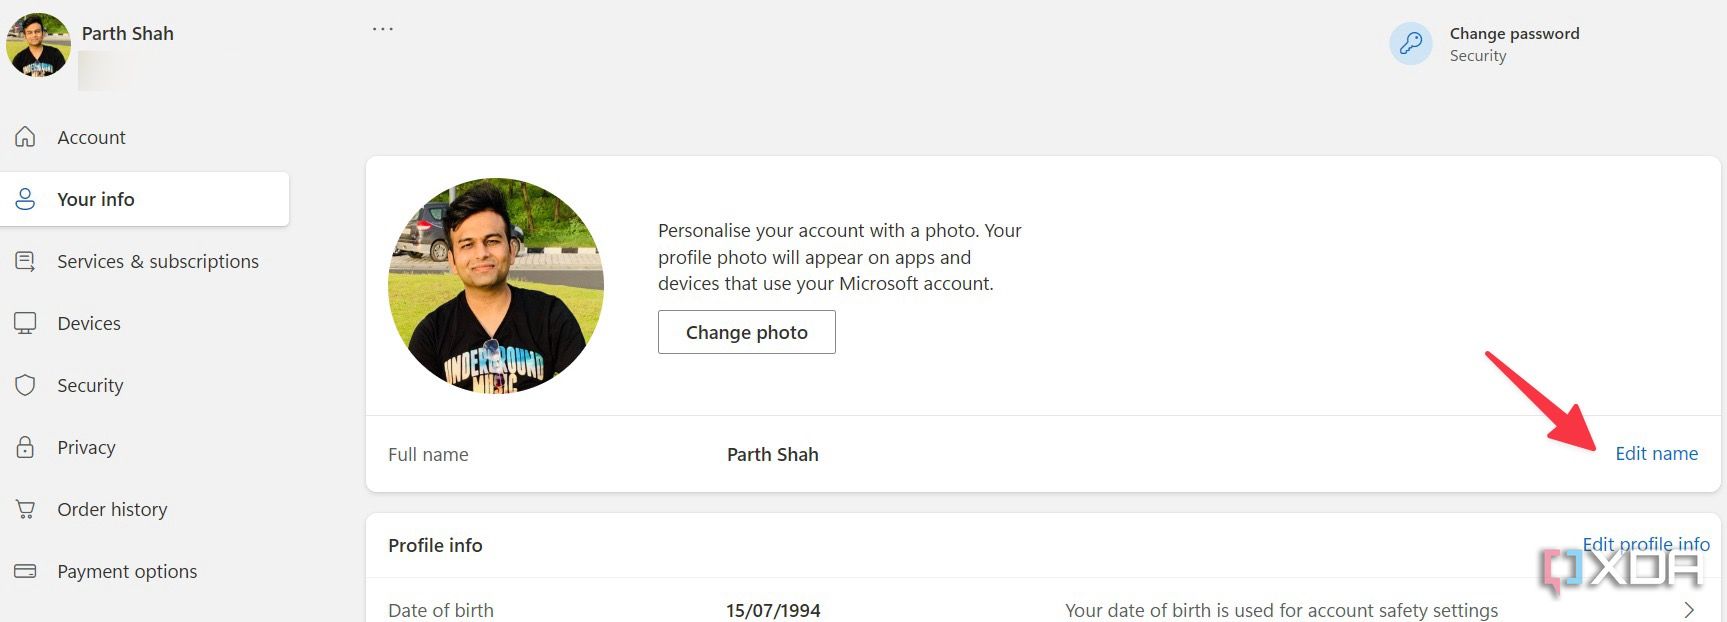
How to change the administrator name in Windows 11 through a Microsoft account
If the administrator is using a Microsoft account, then changing the name is a little bit more complicated. You’ll have to go through the Microsoft account website experience to complete this process.
- Open the Windows 11 Settings app.
- Choose Accounts.
- Choose Your Info.
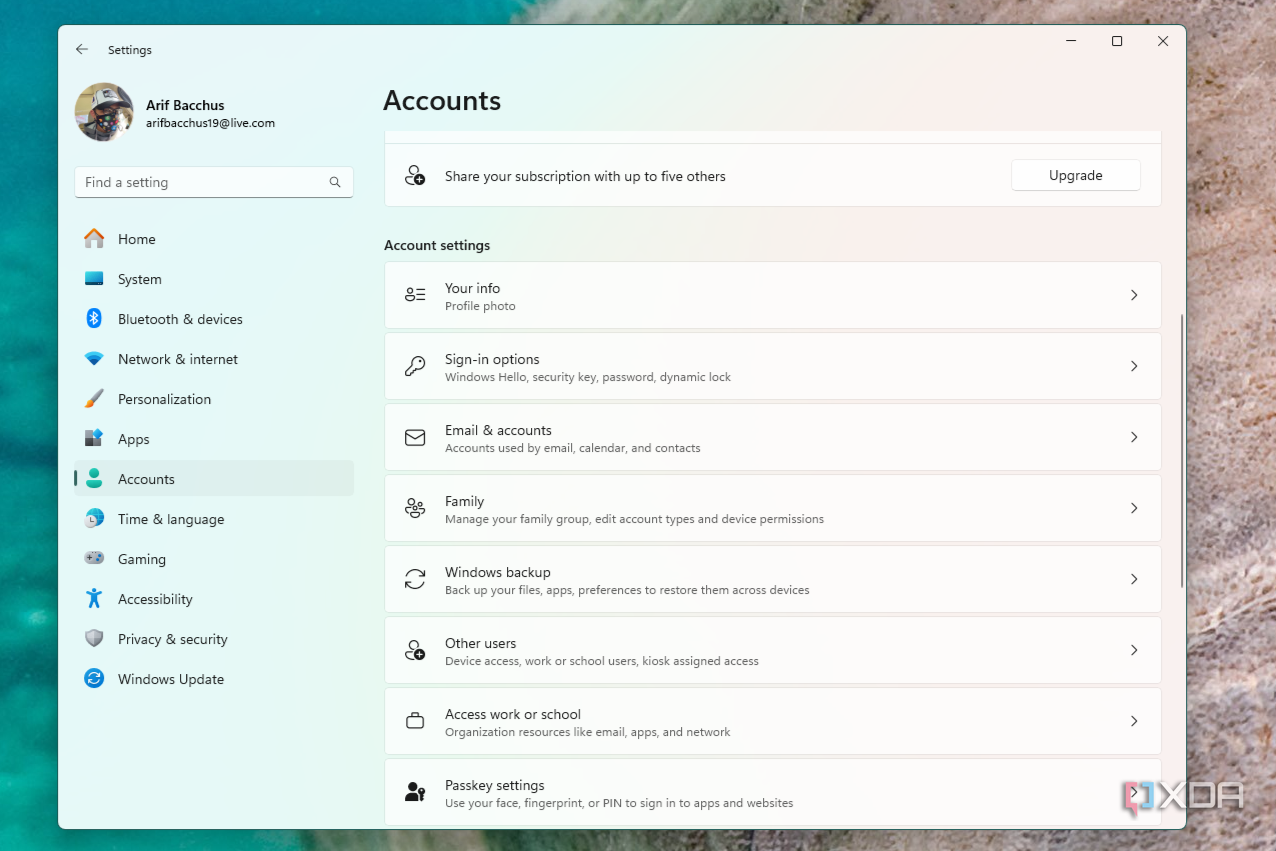
- Click the link for Manage my accounts.
- You’ll be redirected to a web browser and will be asked to sign in.
- Select Your info from the sidebar.
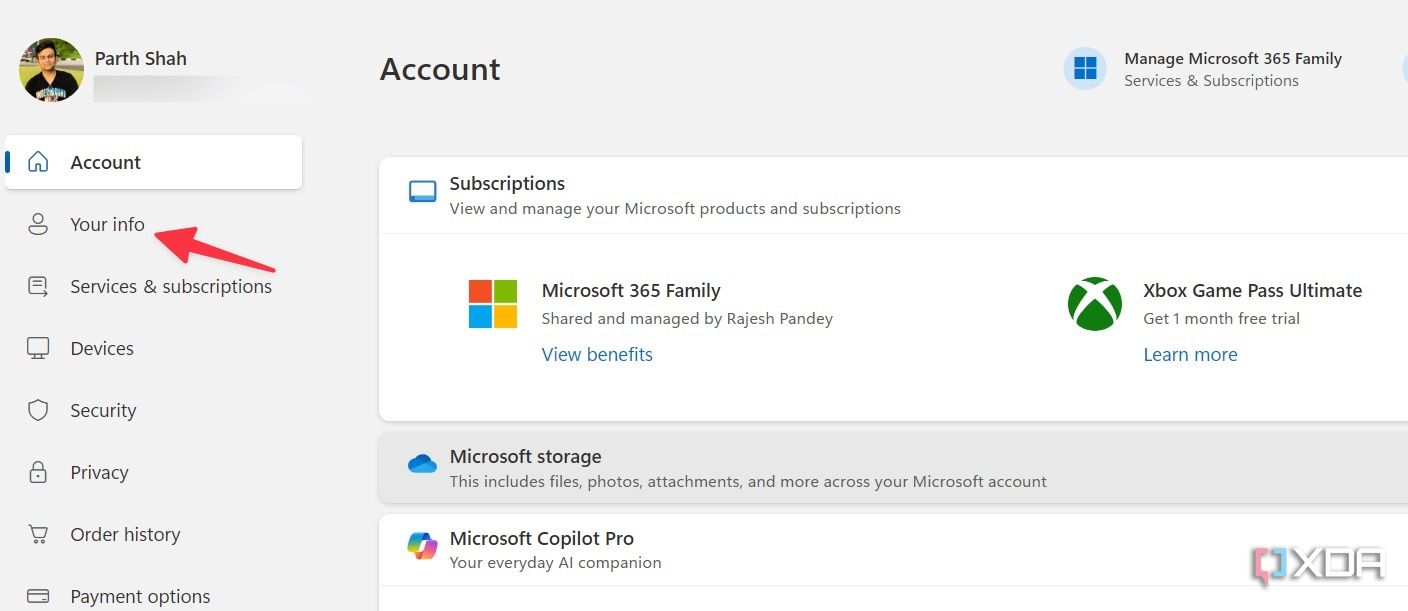
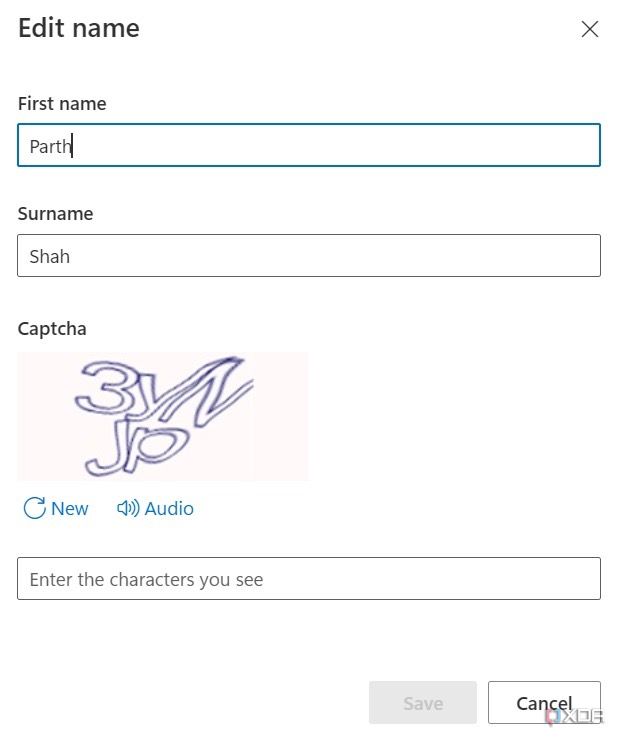
- Choose Edit name.
- Enter a new name and finish verification.
- Restart your PC.


The next time you restart your PC, you should see the change reflected. Just make sure your PC is connected to the internet first.
Edit the administrator name in Windows 11 using Run command
Most Windows 11 users should be completely fine with changing the admin name via the Control Panel or the Settings menu. That said, you can use the Run menu to make the changes as well. Here’s what you need to do.
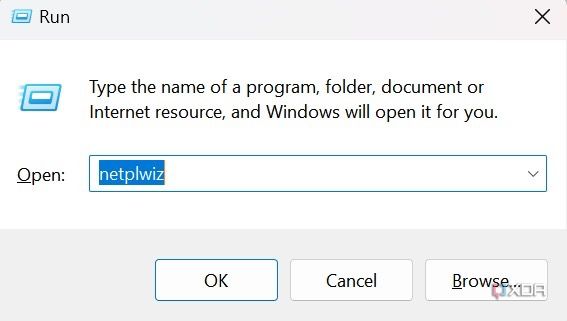
- Press the Windows + R keys to open the Run menu.
- Type netplwiz and hit Enter.
- It opens User Accounts menu. Select Properties.
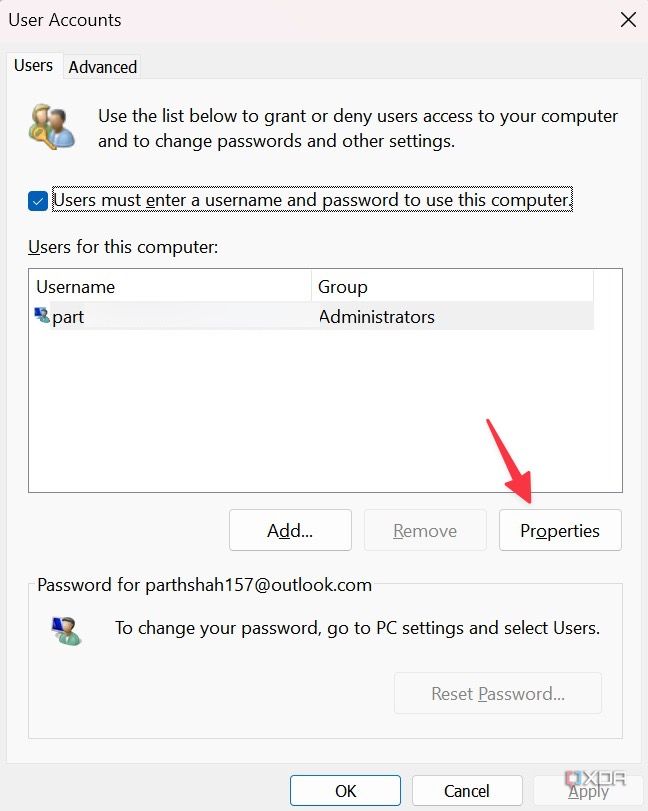
- Edit your name in the Full name menu. Click Apply. Select OK.
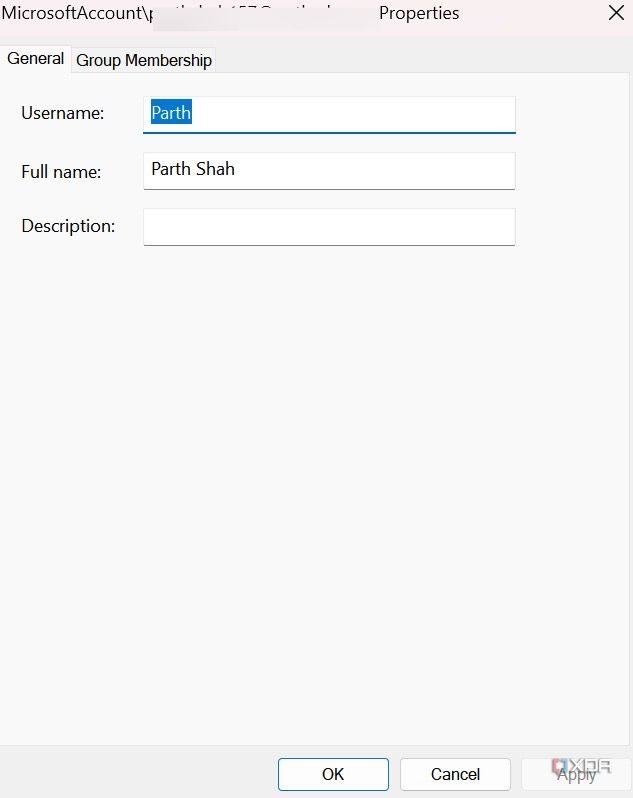


You should notice a new adminstrator name for your Microsoft account.
Change the administrator name in Windows 11 via Command Prompt
You can also use a command line interpreter tool to modify administrator name in Windows 11. Go throguh the steps below to make changes.
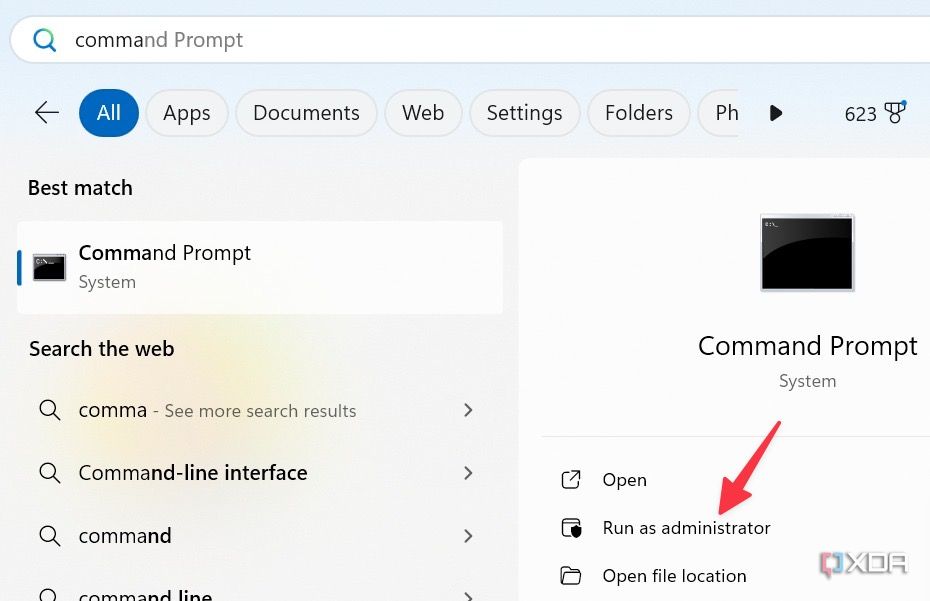
- Press the Windows key and search for Command Prompt. Run it as administrator.
- Enter the command below.
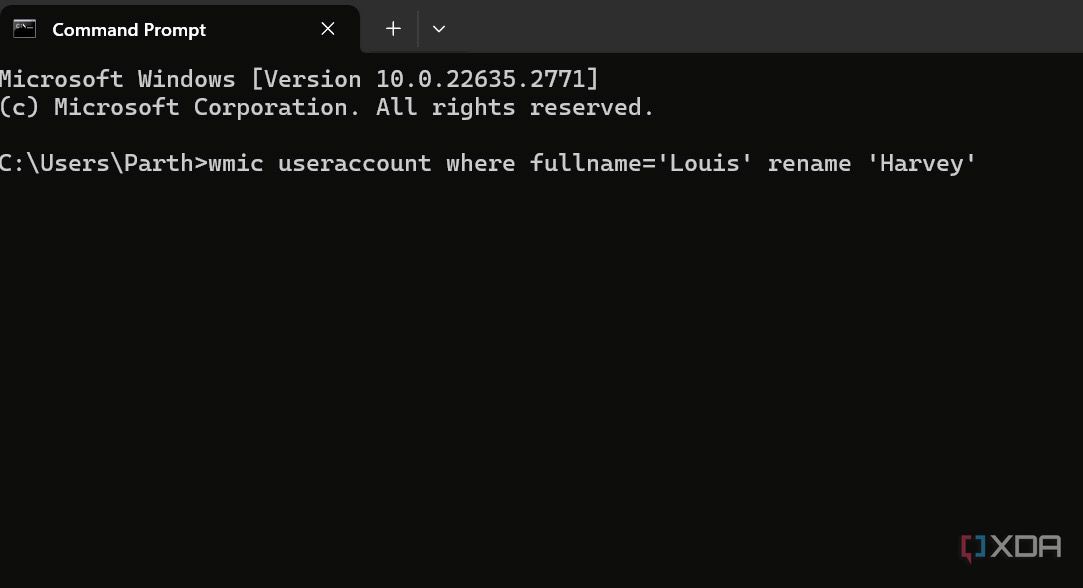


wmic useraccount where fullname='userame' rename 'newname'
As expected, replace username with your existing adminstrator name and newname with a new account name that you want to set. For example, if you want to change your PC name from Louis to Harvey, type the command below and hit Enter.
wmic useraccount where fullname='Louis' rename 'Harvey'
Use a relevant admin name on Windows 11
That’s all you need to know about changing the administrator name in Windows 11. These are the four easiest methods. If you have changed your primarly email address, make sure to reflect the same on your PC as well. Check our dedicated guide to learn about changing administrator email on Windows 11.
#change #administrator #Windows
source: https://www.xda-developers.com/how-change-administrator-name-windows-11/

