

An IDS, or an intrusion detection system, is a popular security tool that scans a network 24/7 and alerts you the moment it detects something fishy – like unauthorized devices attempting to connect to your system. Thankfully, you don’t have to shell out thousands of dollars just to detect intruders on your network. So long as you have a Raspberry Pi, you can build your own network monitoring server with the help of Pi.Alert.
Related
I use my NAS to secure my home network – here’s how
Besides backing up important files, your storage server can also safeguard your home network
What you’ll need
Pi.Alert is a fairly lightweight tool, so you can install it on pretty much any Raspberry Pi SBC. The same holds for the microSD card, though you’ll need to configure a couple of things on the software front.
For example, you’ll need an OS pre-installed on your Raspberry Pi. I’ve put together this guide using the GUI version of Raspberry Pi OS, but you can just as easily use the CLI variant – or even an ultra-light distro such as DietPi – if you’re rocking some of the low-power boards.
Since Pi.Alert requires an SMTP server, you’ll want to configure that before attempting to install this tool. Unfortunately, configuring an SMTP server is well beyond the scope of this article, though I plan to work on a detailed guide for that in the future.

Raspberry Pi 5
$75 $80 Save $5
Installing Pi.Alert
While establishing an IDS may sound complicated, developer pucherot provides an installation script that simplifies the Pi.Alert setup procedure.
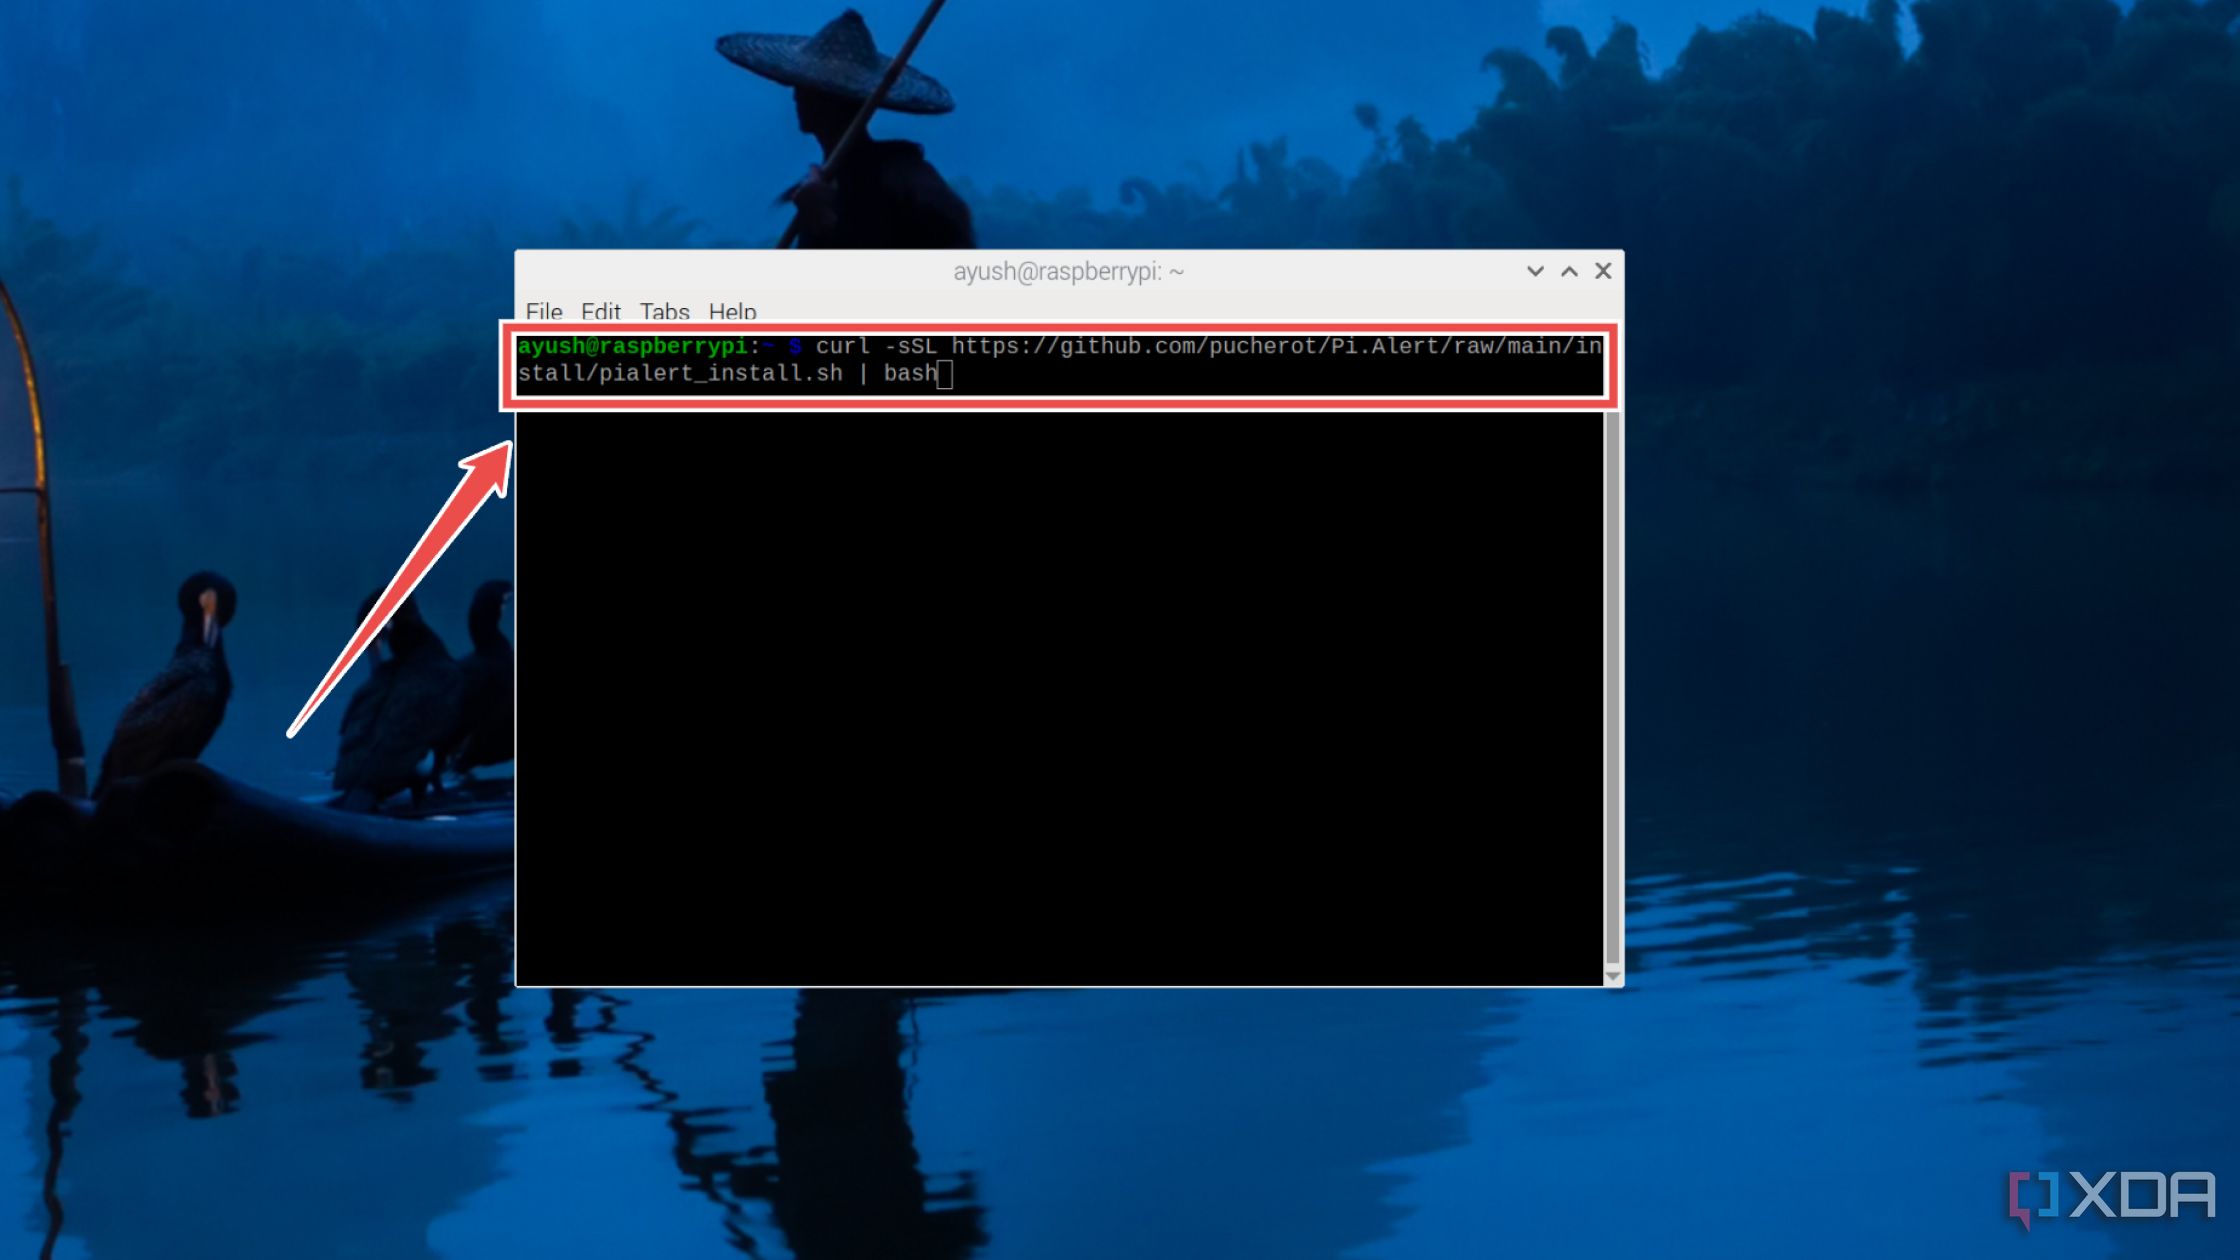
- If you’re running a GUI distro, launch the terminal interface.

- Paste the following command in the terminal and hit Enter: curl -sSL https://github.com/pucherot/Pi.Alert/raw/main/install/pialert_install.sh | bash
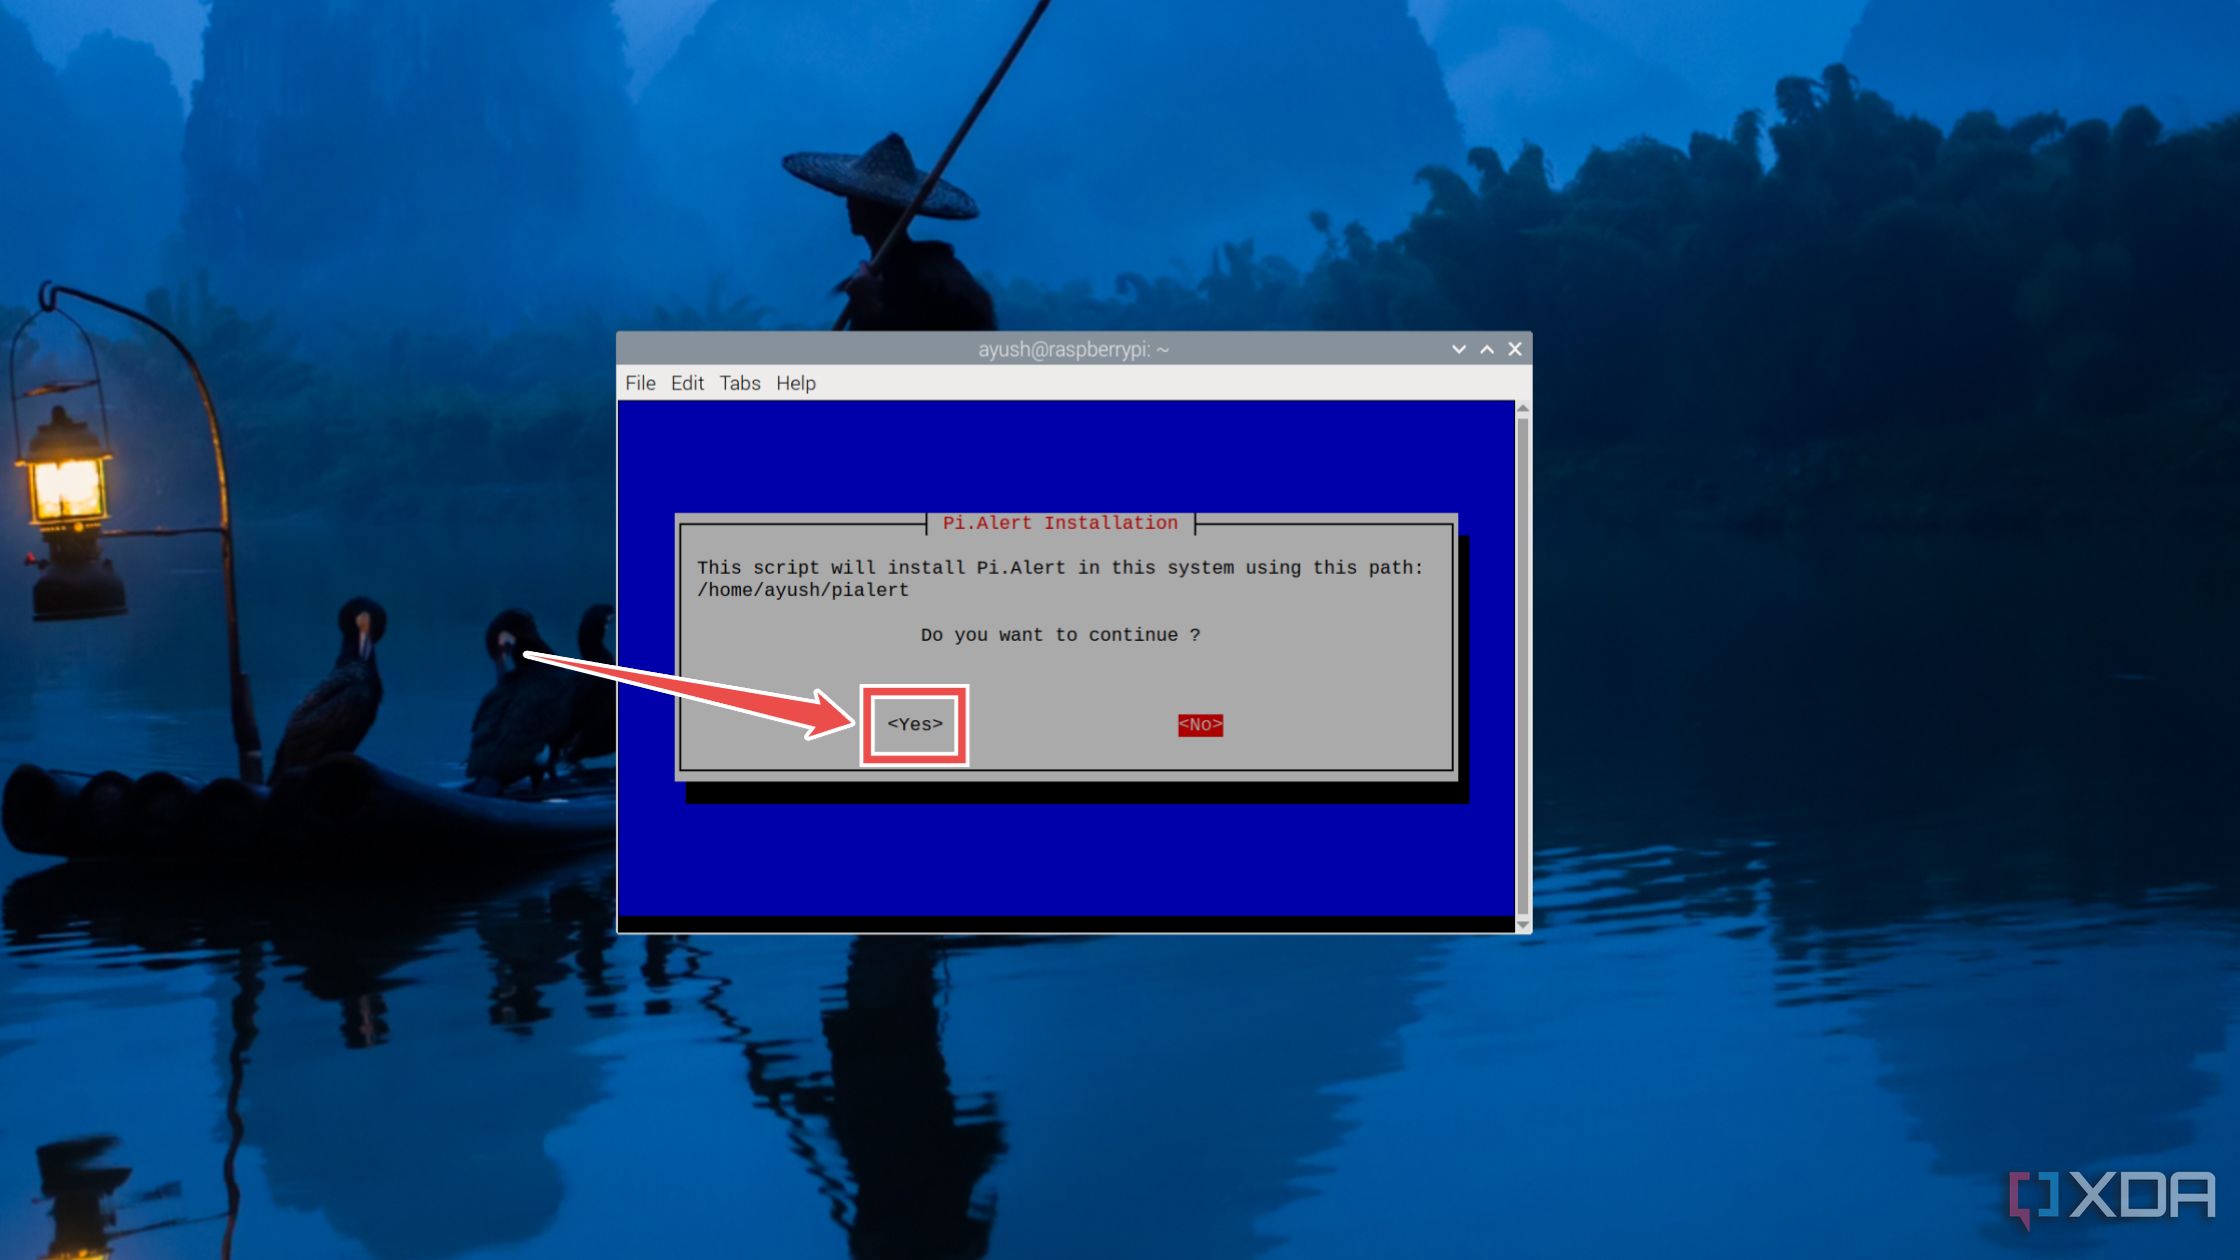
- Hit Yes when the installation wizard asks for confirmation.
- (Optional) If you haven’t already installed Pi-hole and want Pi.Alert to scan the network with the tool, press Yes.

Otherwise, tap No to proceed with the Pi.Alert installation.
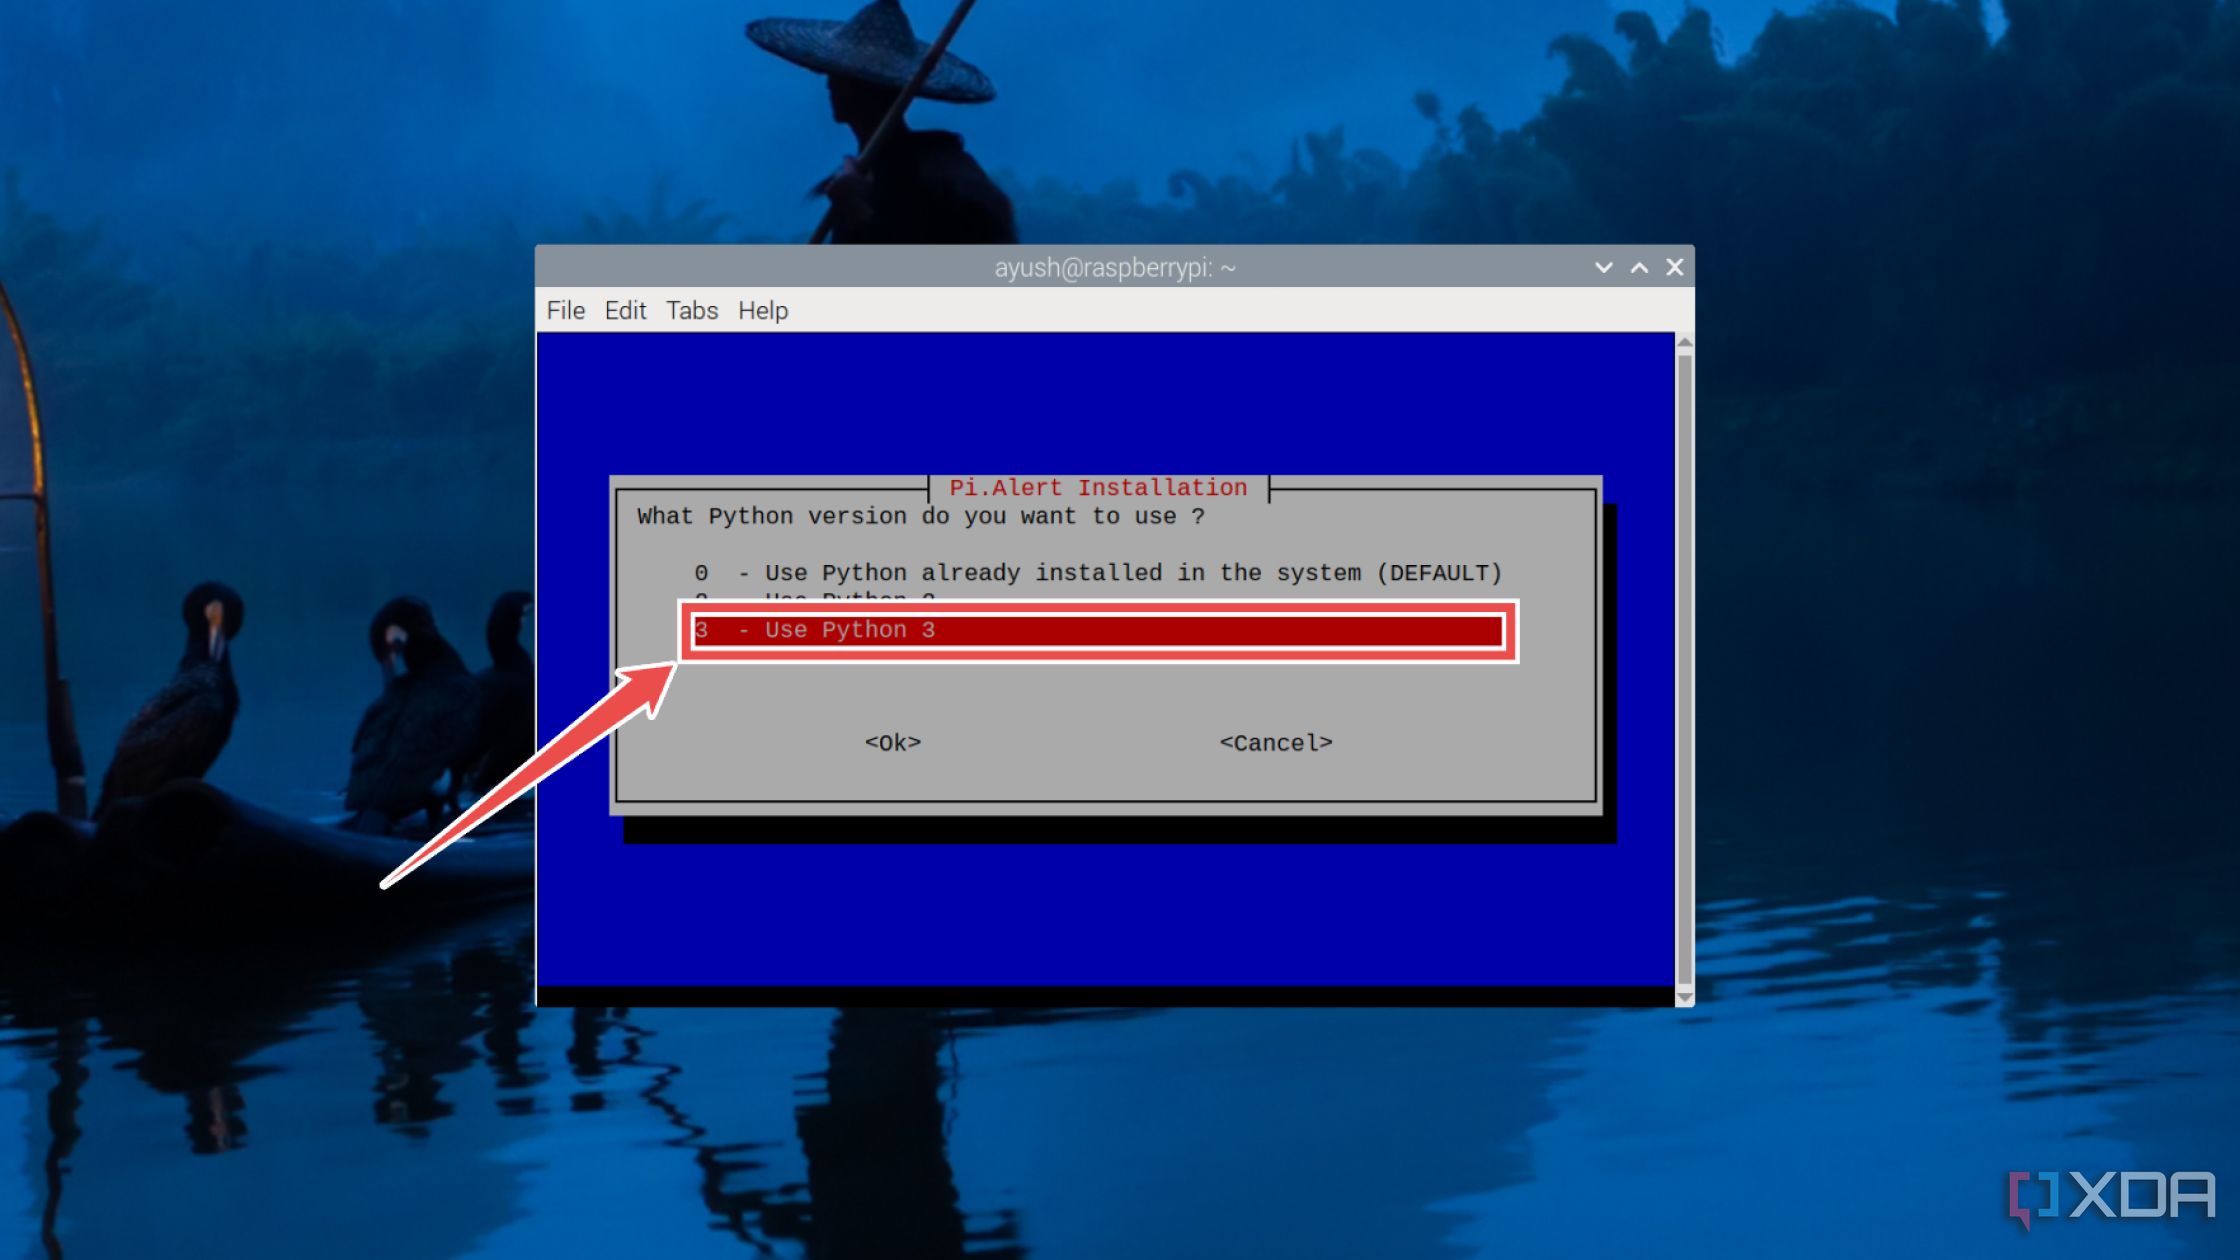
- Assuming you’re running the script on a newly-installed OS, choose Python 3 as the version of Python for Pi.Alert.


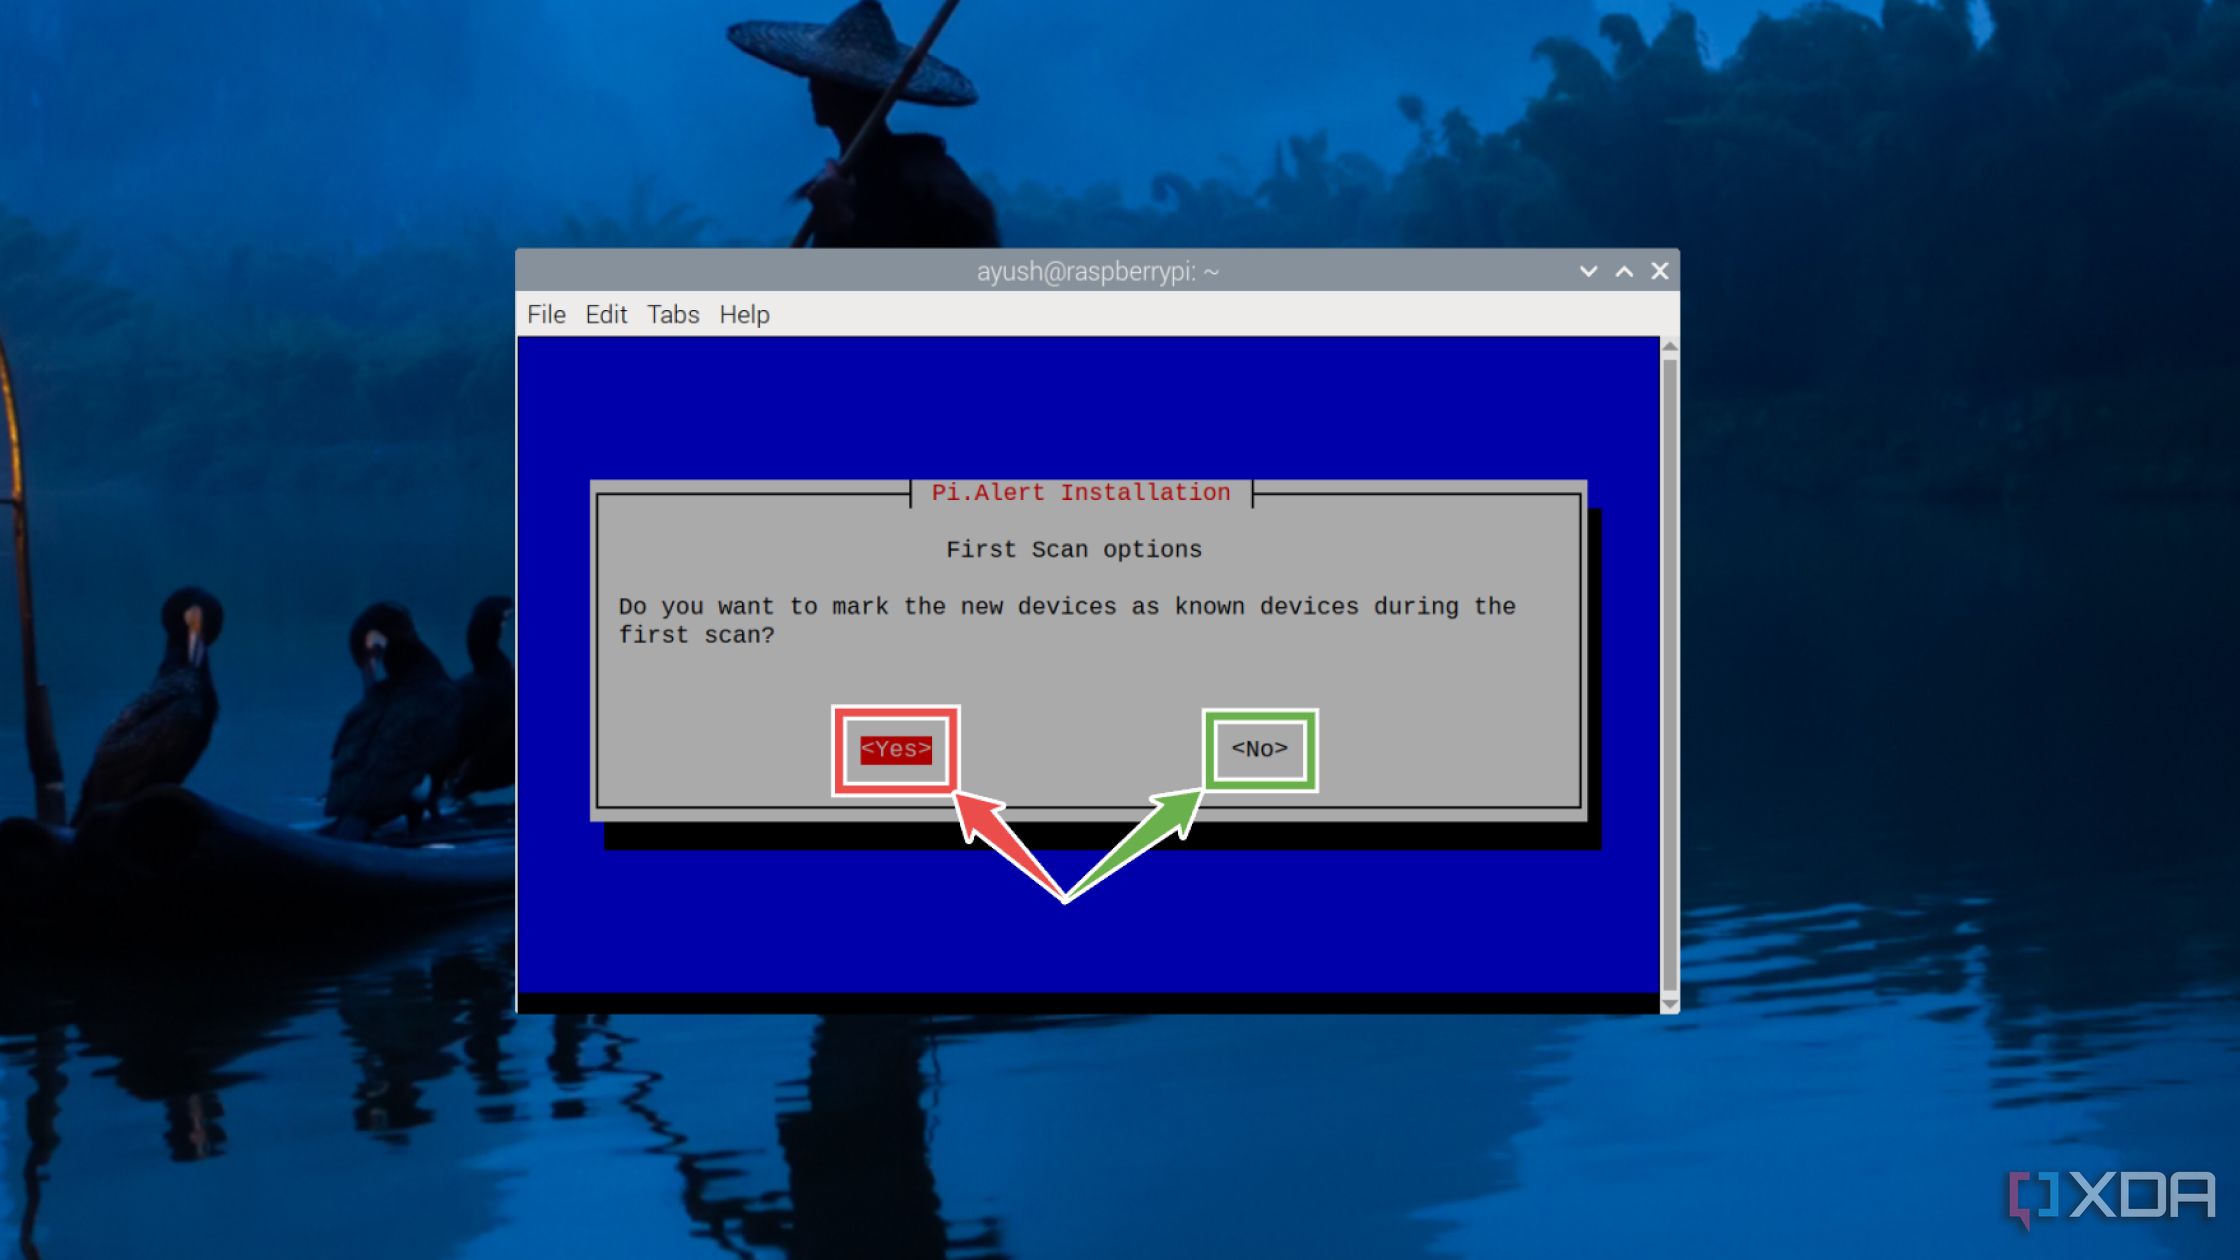
- Depending on how much you trust the devices in your network, pick Yes or No when the installer asks you to mark all the systems detected during the first scan as known devices.
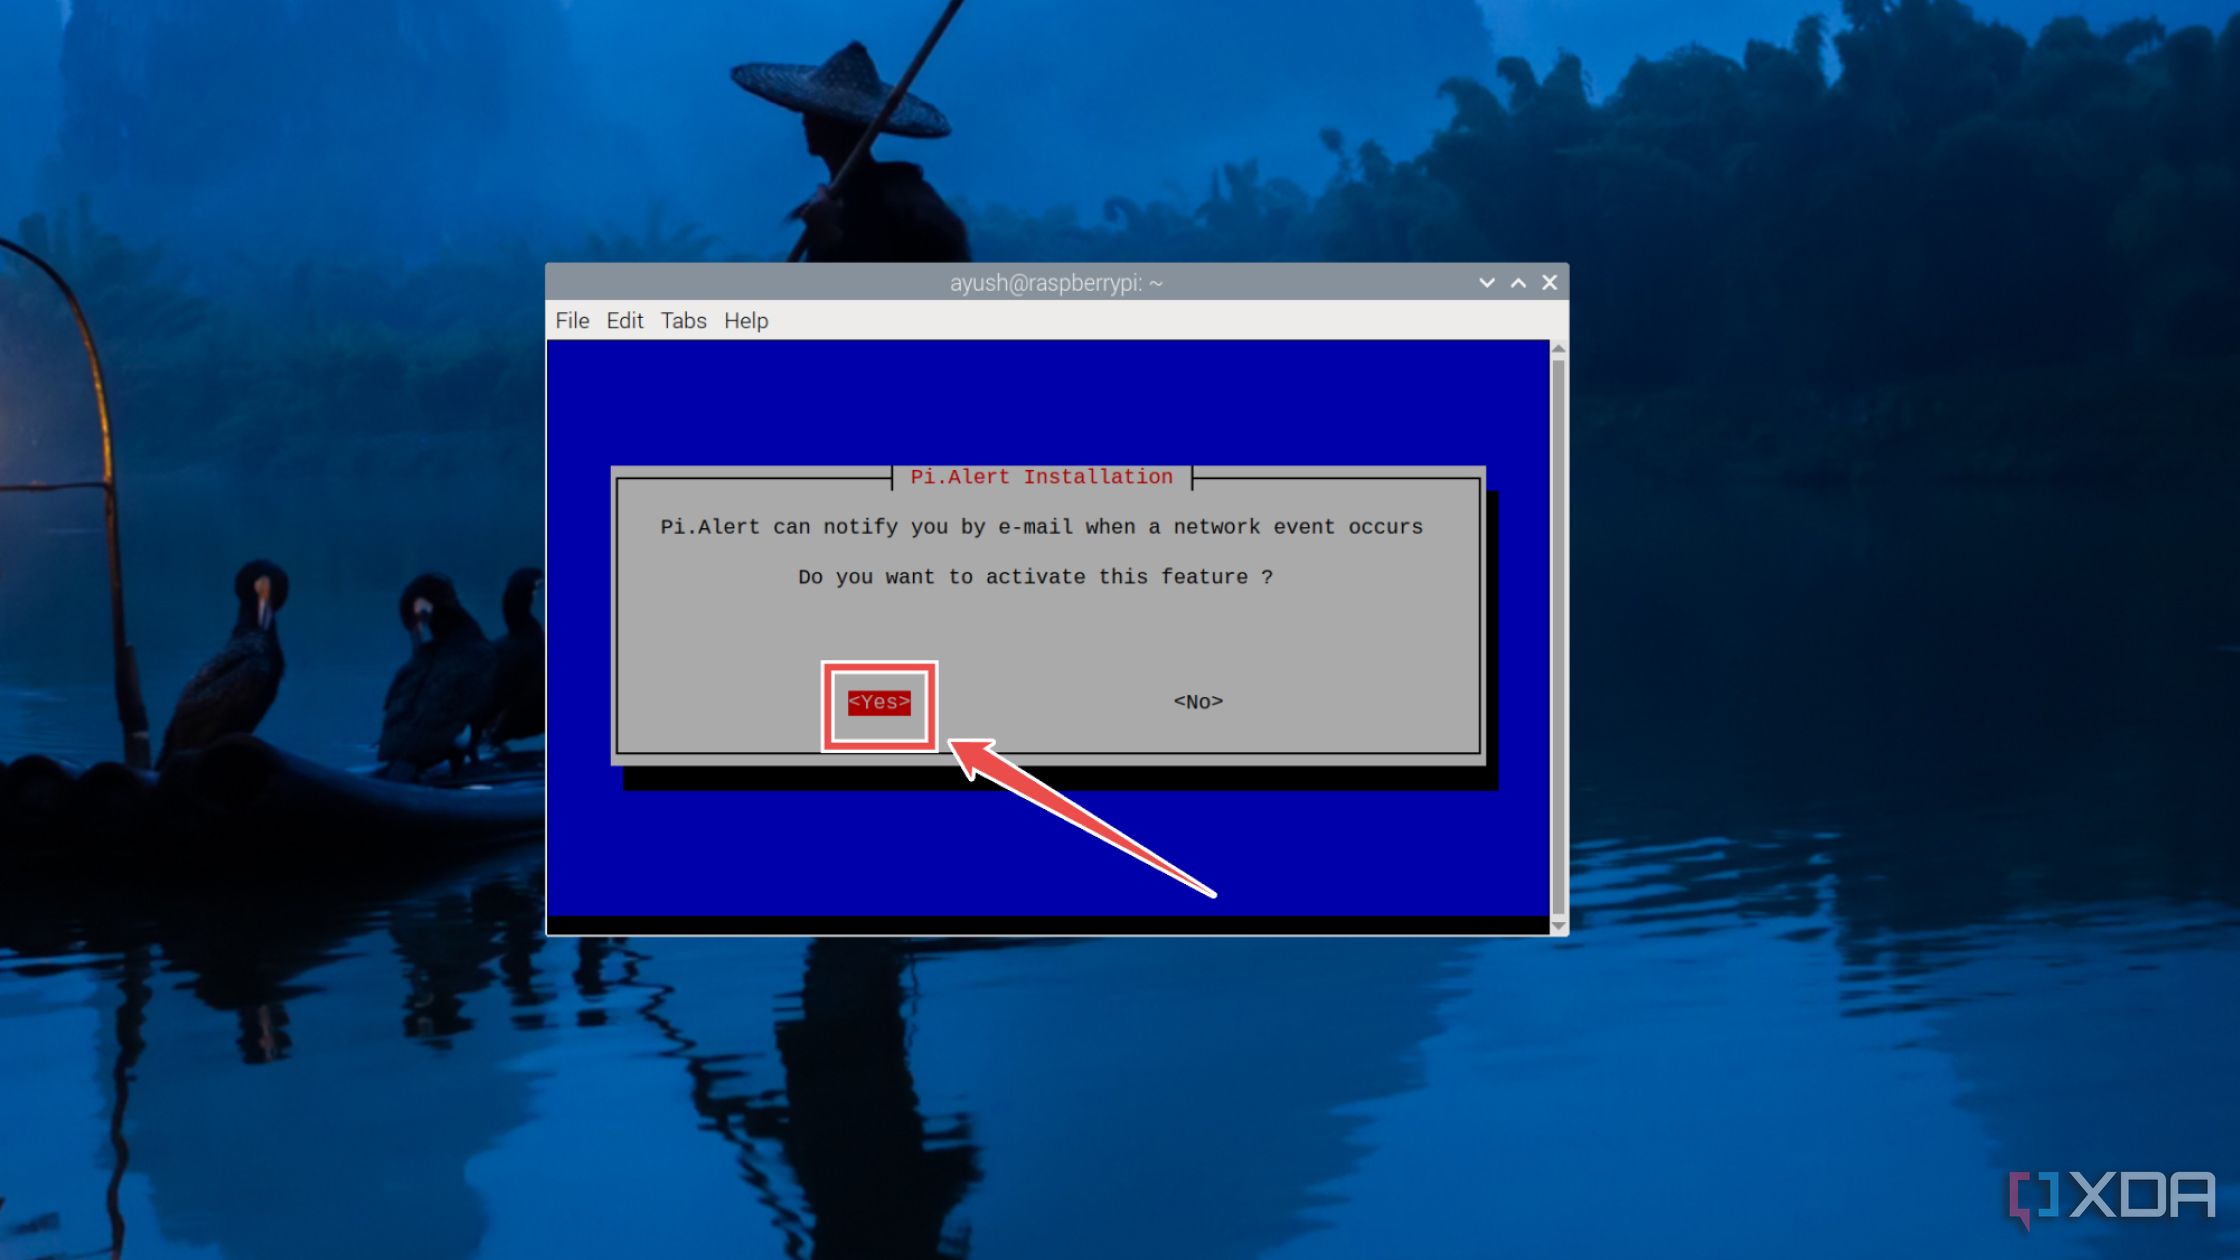
- Press Yes to set up the email notification.
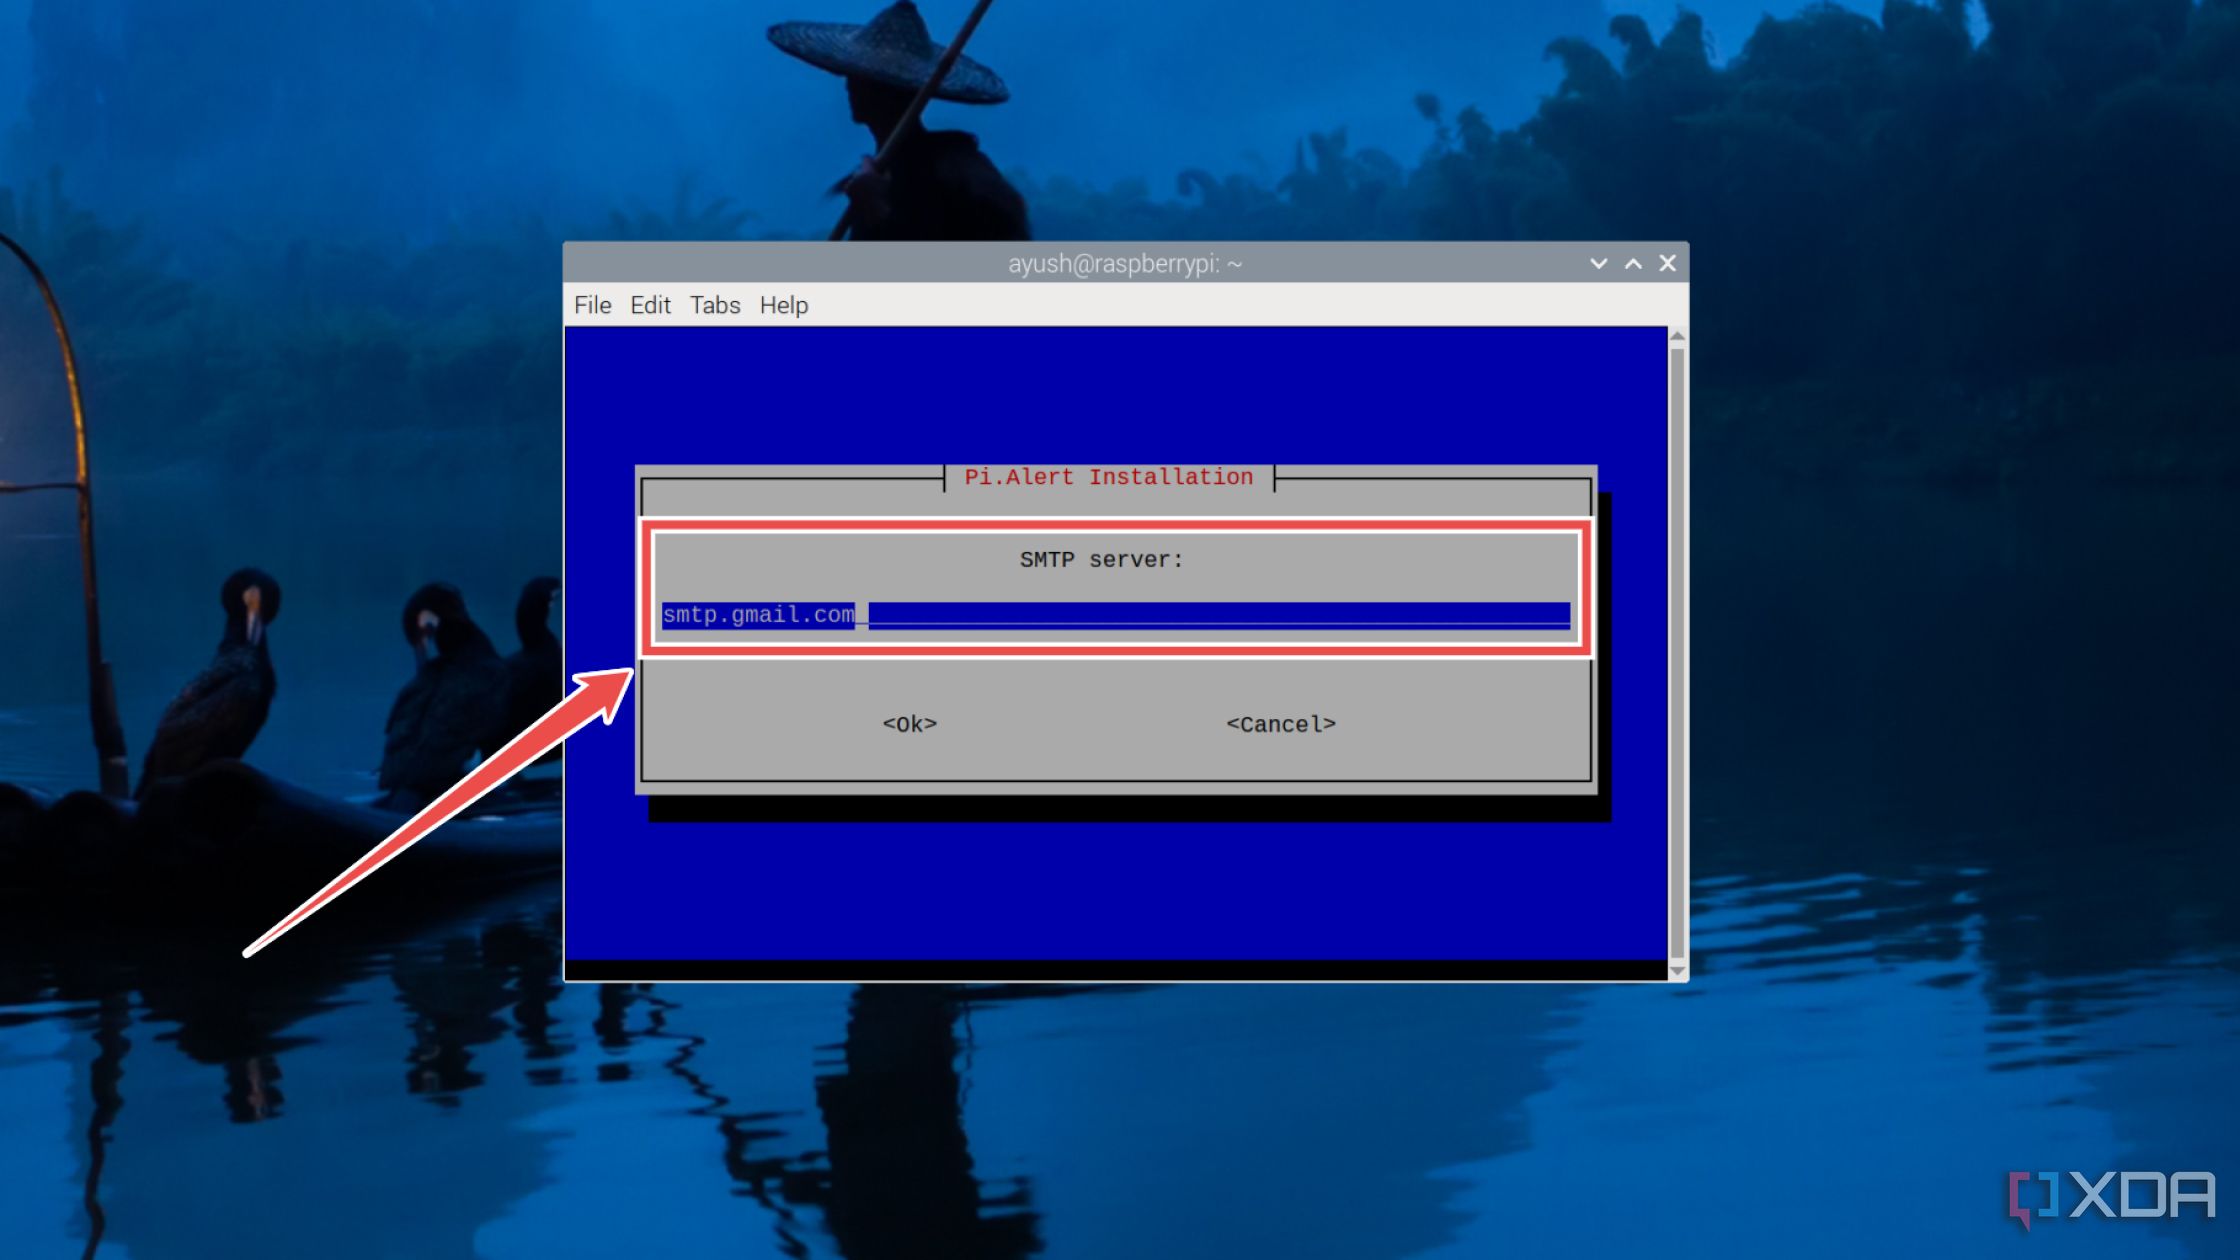
- Enter the Name of the SMTP server followed by the User name and Password associated with it.
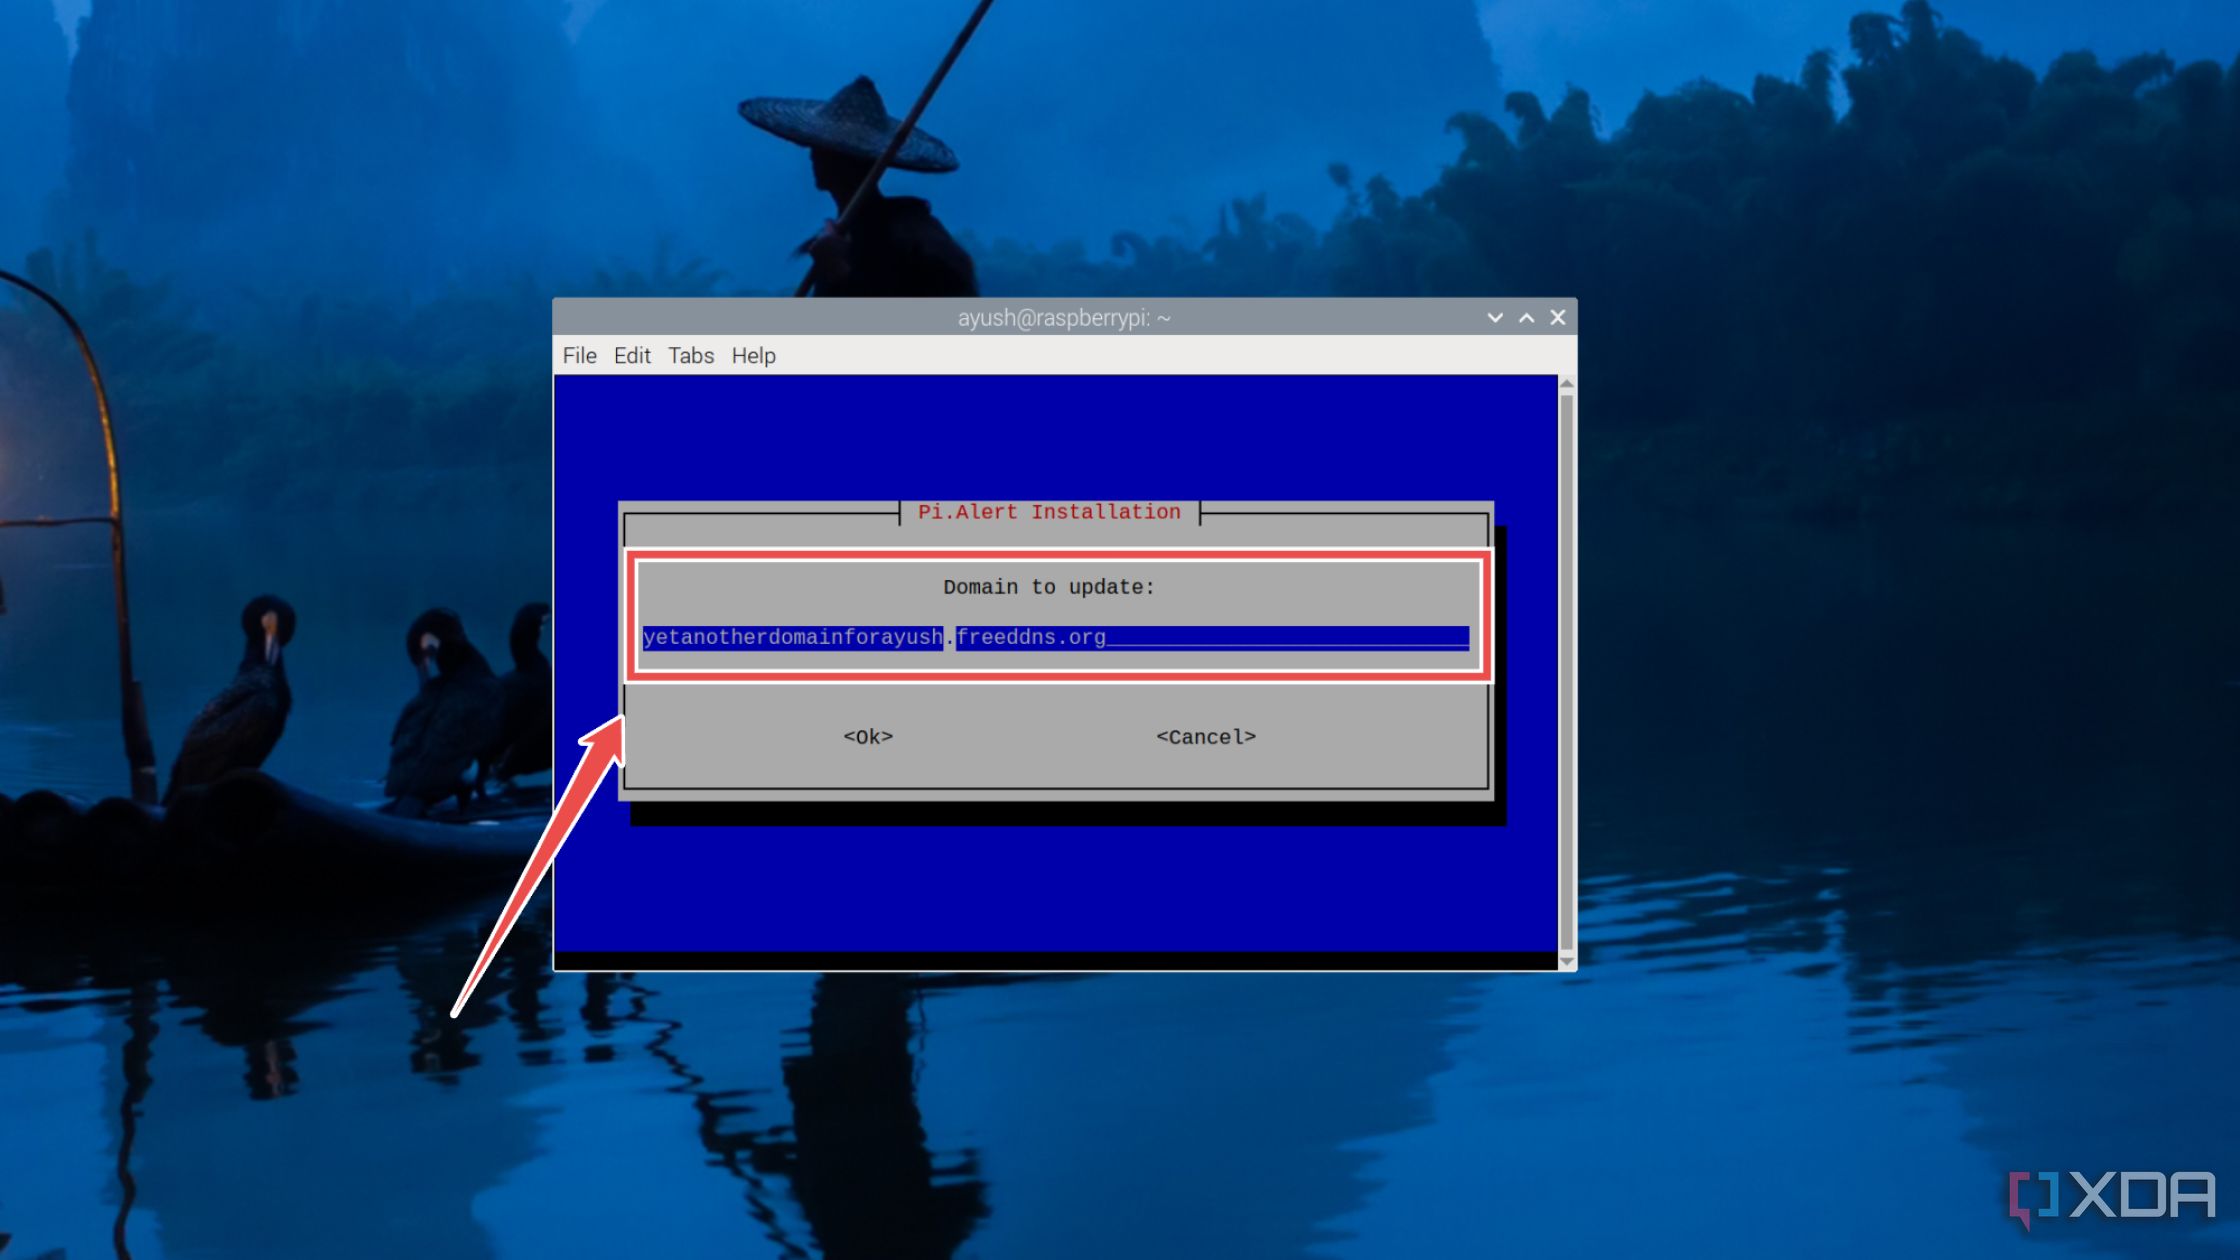
- (Optional) Assuming you’ve got a Dynamic DNS that you want to use in tandem with Pi.Alert, enter the Domain followed by the Update URL.
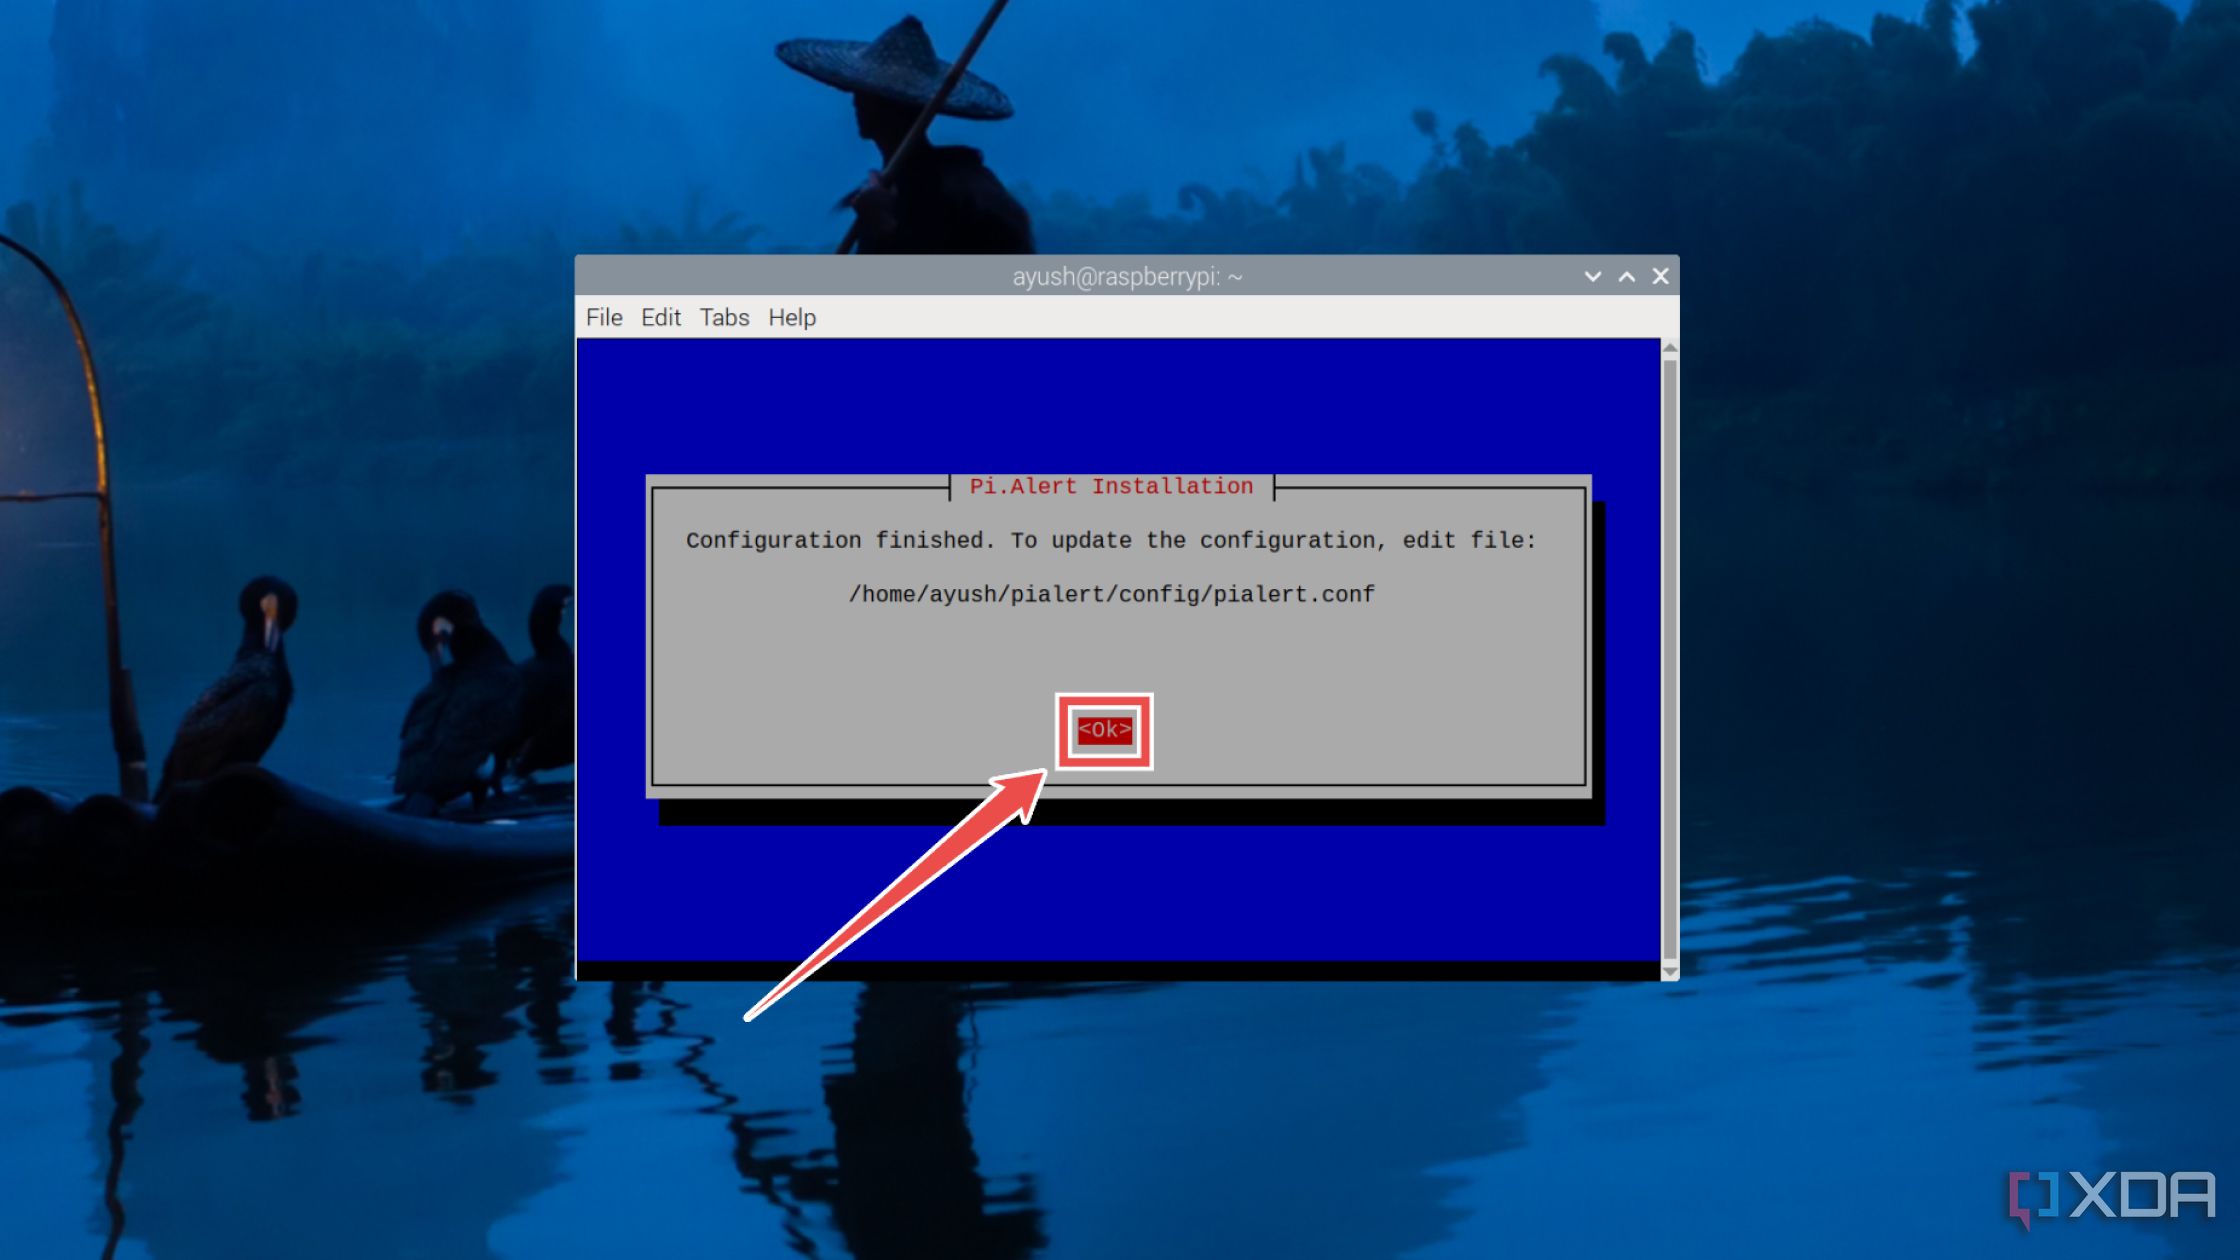
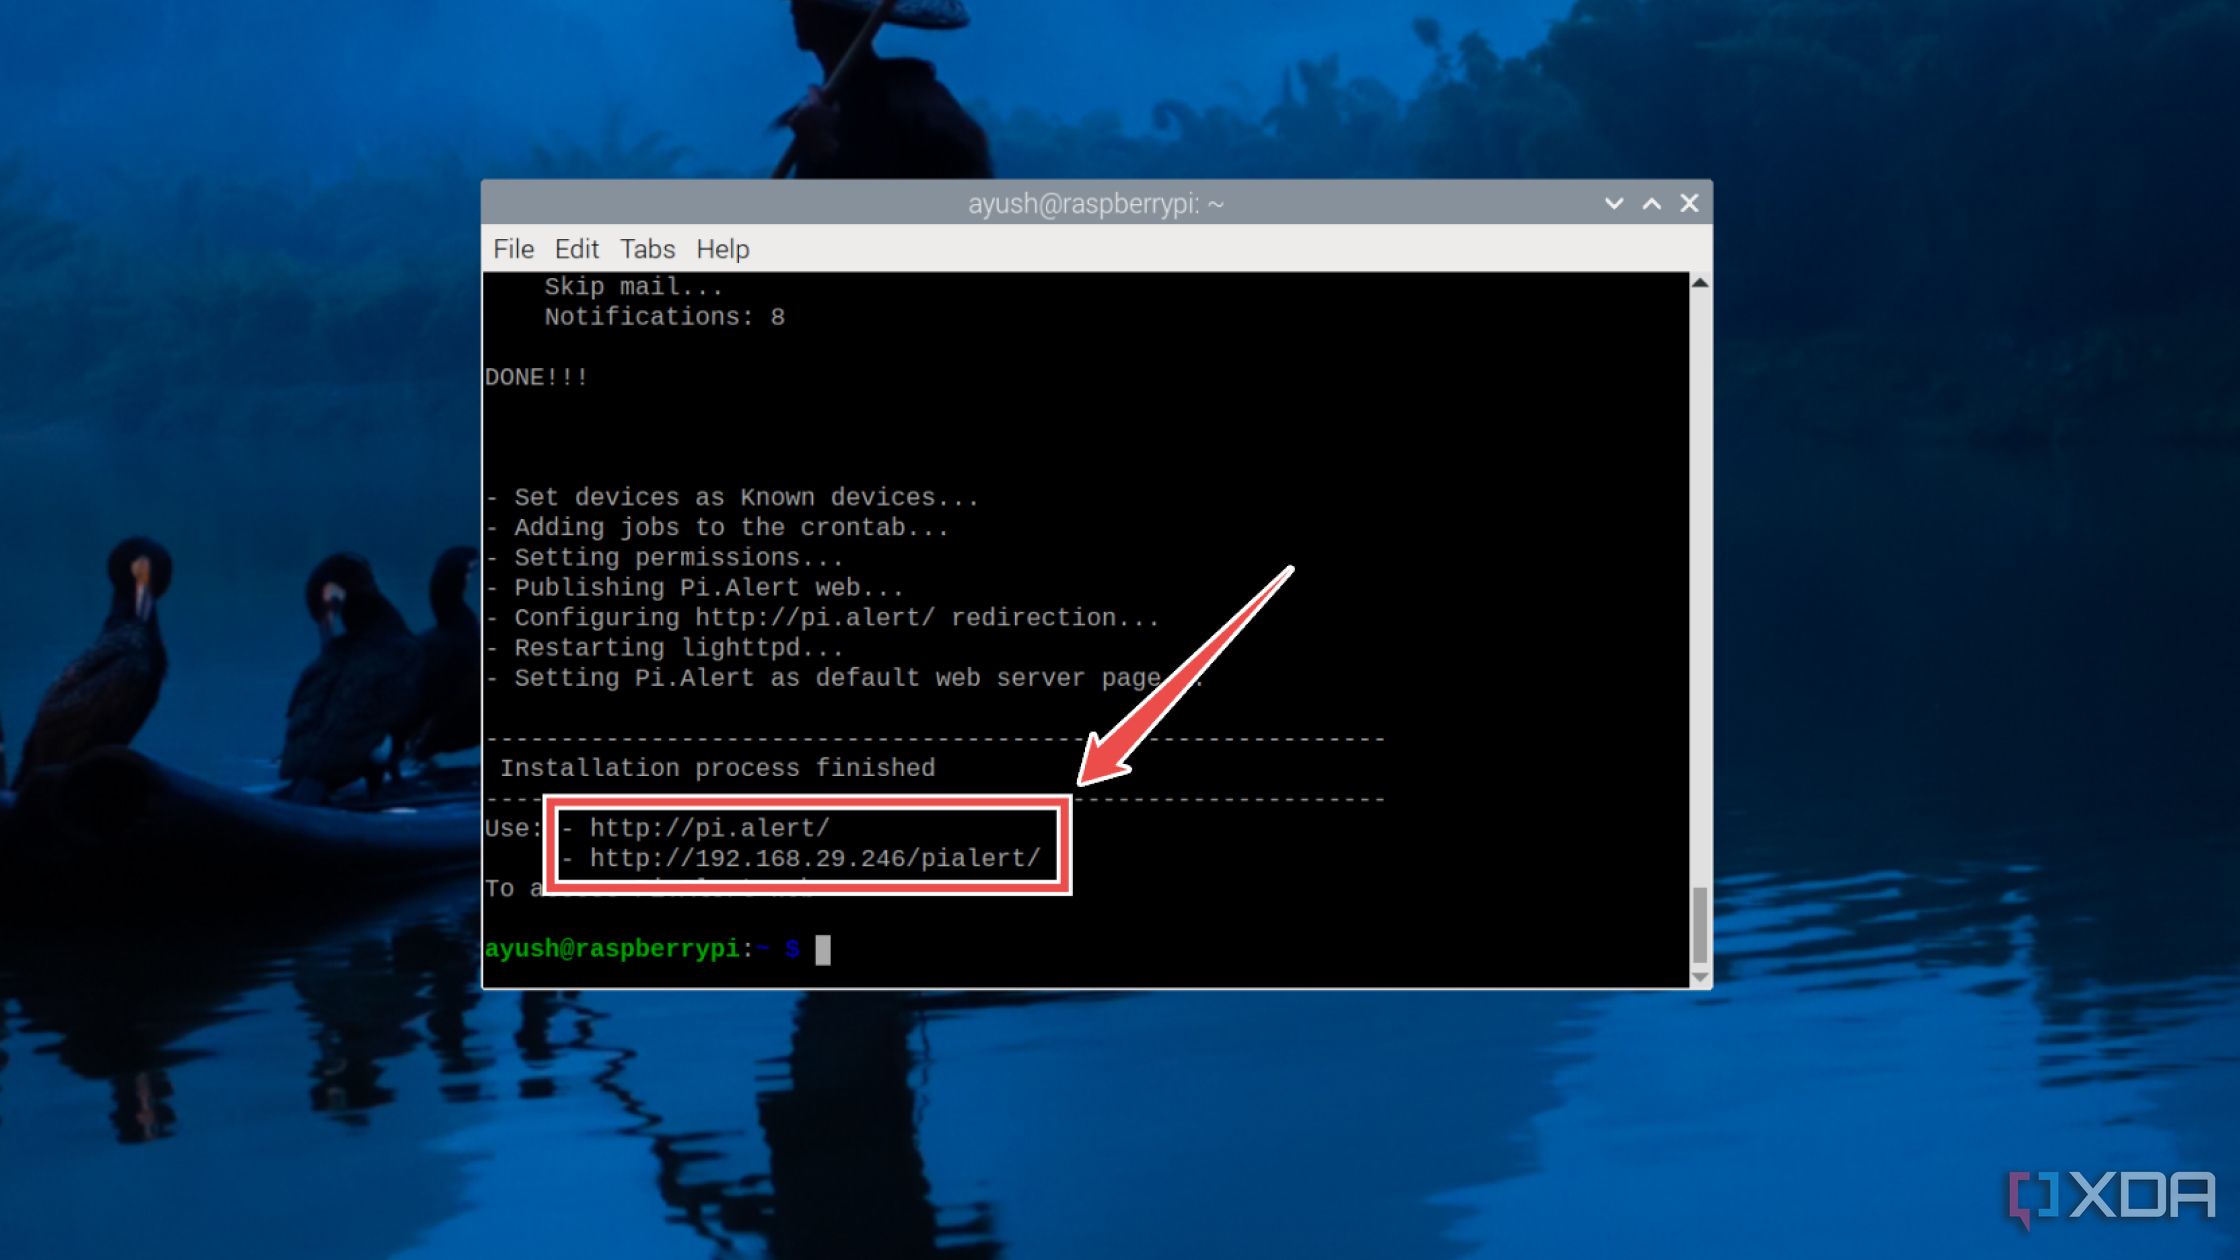
- Hit OK and wait for Pi.Alert to finish installing all the files.
- Paste the IP address displayed in the terminal into the web browser of your choice.


Keeping your local network safe with different tools

If you followed all the steps properly, the Pi.Alert homepage should appear, and you’ll be able to view the IPv4 address, MAC address, and other details of the systems connected to your home network. If you’ve properly configured the email setting, Pi.Alert will notify you when a known device goes offline or another system attempts to access your network.
Besides configuring Pi.Alert, there’s a lot more you can do to safeguard your home network. With hackers utilizing all sorts of dirty tricks to break into your network, setting up firewalls with rigid rules can add extra layers of protection against their nefarious machinations. Since Pi.Alert is merely an intrusion detection system, it can’t deny unauthorized access, meaning you’ll have to look into solutions such as Snort to prevent devices from transferring suspicious packets to and from your network.

Related
5 cool things you didn’t know you could do with the Raspberry Pi
Put your spare Raspberry Pi to good use with these fun projects
#Turn #Raspberry #intrusion #detection #system #Pi.Alert
source: https://www.xda-developers.com/turn-your-raspberry-pi-into-an-intrusion-detection-system/
/cdn.vox-cdn.com/uploads/chorus_asset/file/22461382/vpavic_4547_20210421_0058.jpg?w=1068&resize=1068,0&ssl=1 "Apple will let you share AirTag locations with a link")
