

If you’re fond of distro hopping or love working on different projects, you probably rely heavily on virtual machines. However, manually provisioning VMs for your pragmatic projects (or insane ideas, if you’re anything like me) can get rather tiresome. Thankfully, automation tools like Ansible and Terraform are more popular than ever, with the latter providing terrific VM provisioning facilities.
The best part? Telmate’s Proxmox provider lets you combine this tool with the community-favorite virtualization platform. So, here’s a step-by-step guide to help you configure Terraform to deploy virtual machines on your Proxmox host automatically.
Related
10 Proxmox tools that can transform your entire experience
Even the all-powerful Proxmox needs some extra utilities to reach its full potential
Creating a VM template in Proxmox
Before you can get your hands dirty with Terraform scripts, you’ll need a template to serve as the base for the virtual machines. While there are a couple of ways to add templates to Proxmox, the simplest method involves building one with a virtual machine. To do so,
-
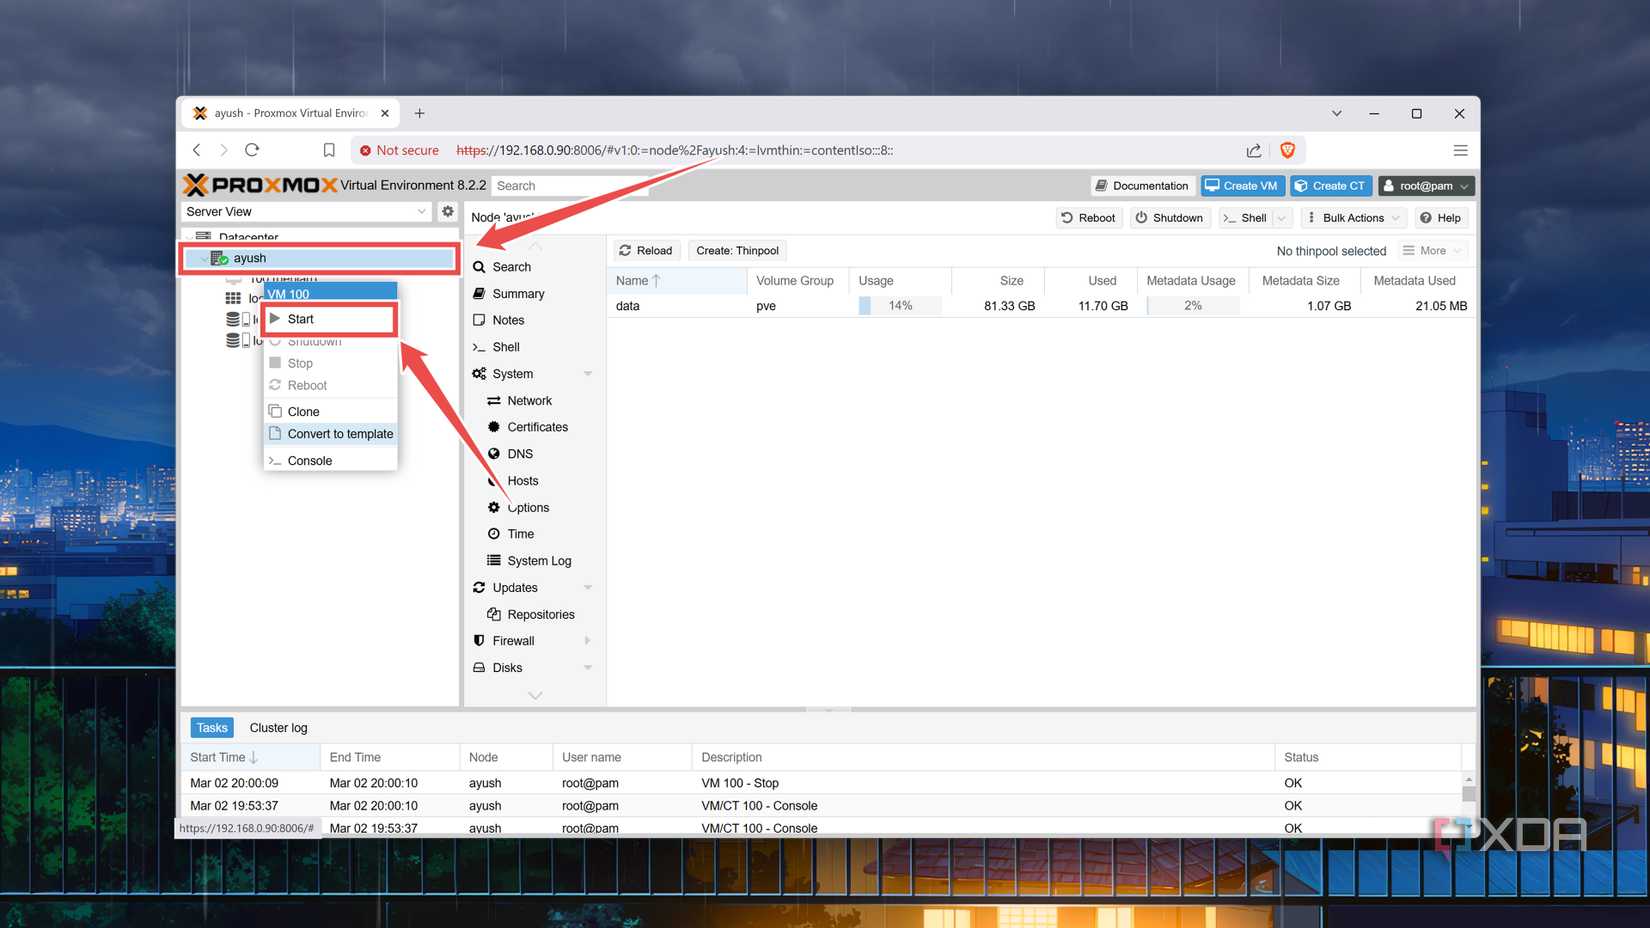
Inside the Proxmox web UI, right-click on a virtual machine and choose Convert to template.
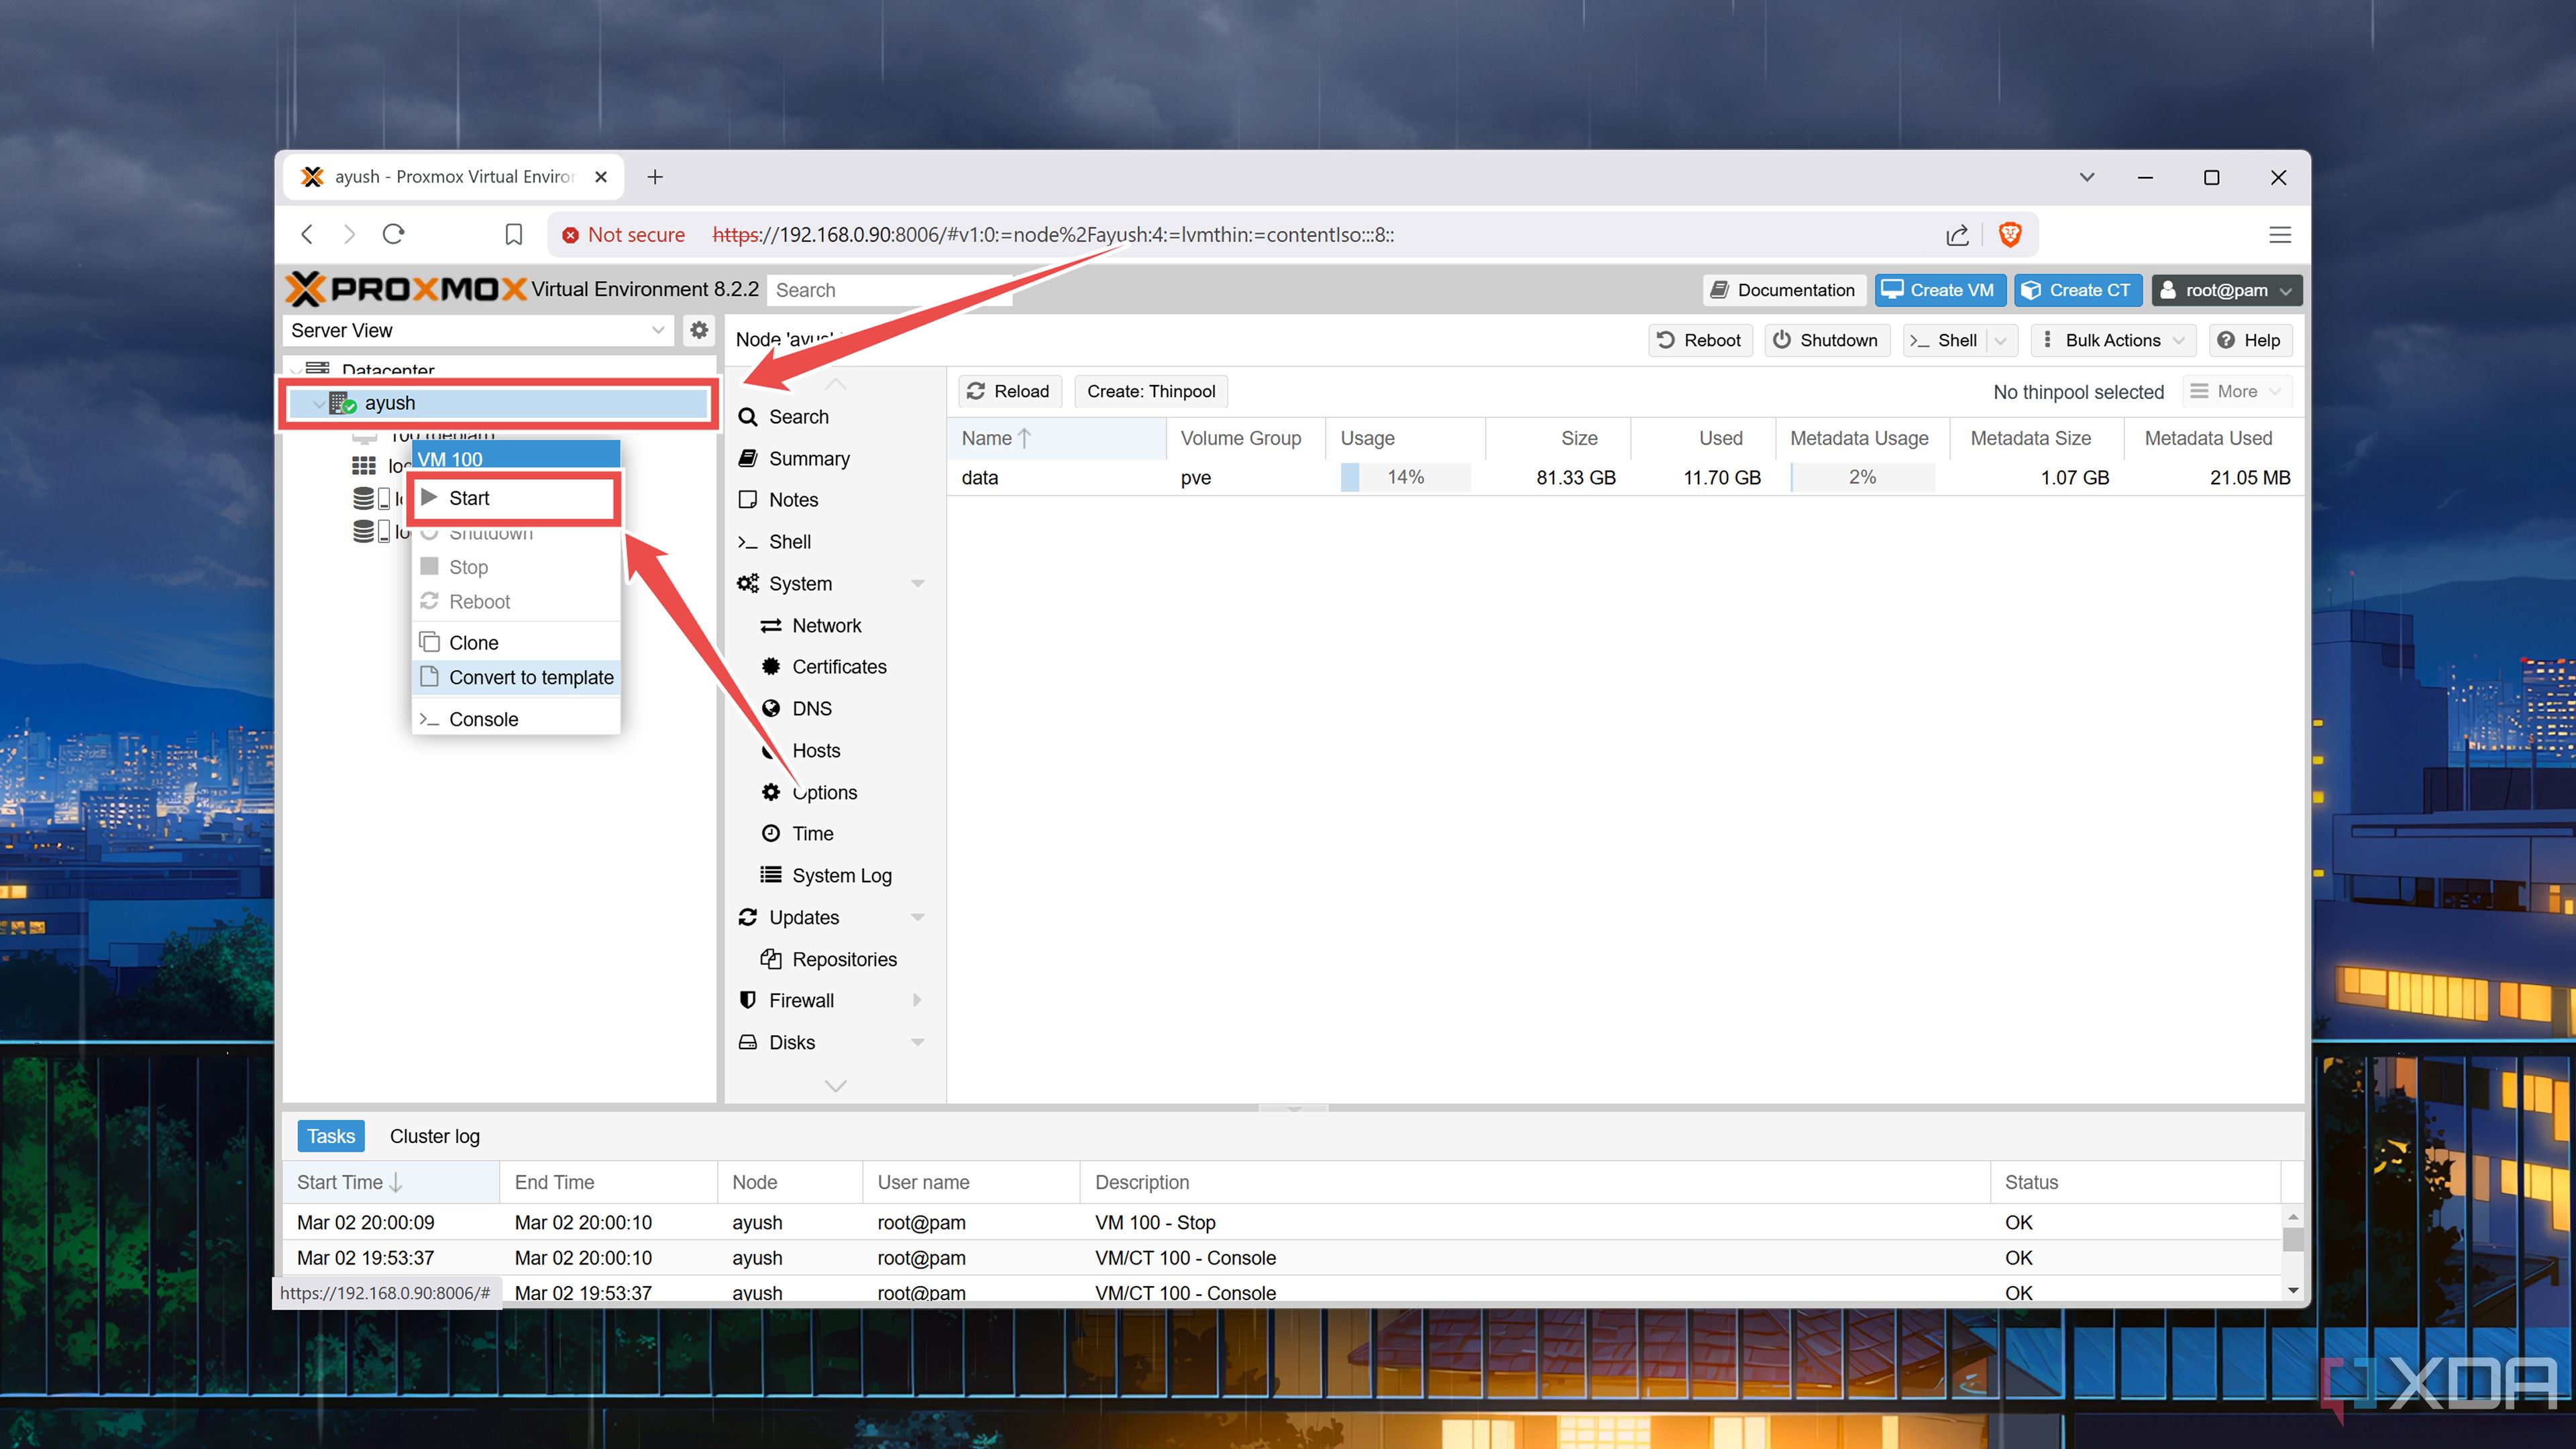
-
Press OK and wait for the Proxmox console to display Task OK as the output.

Converting a virtual machine into a template will make the original VM unusable. So, you should be careful while picking one as the template.

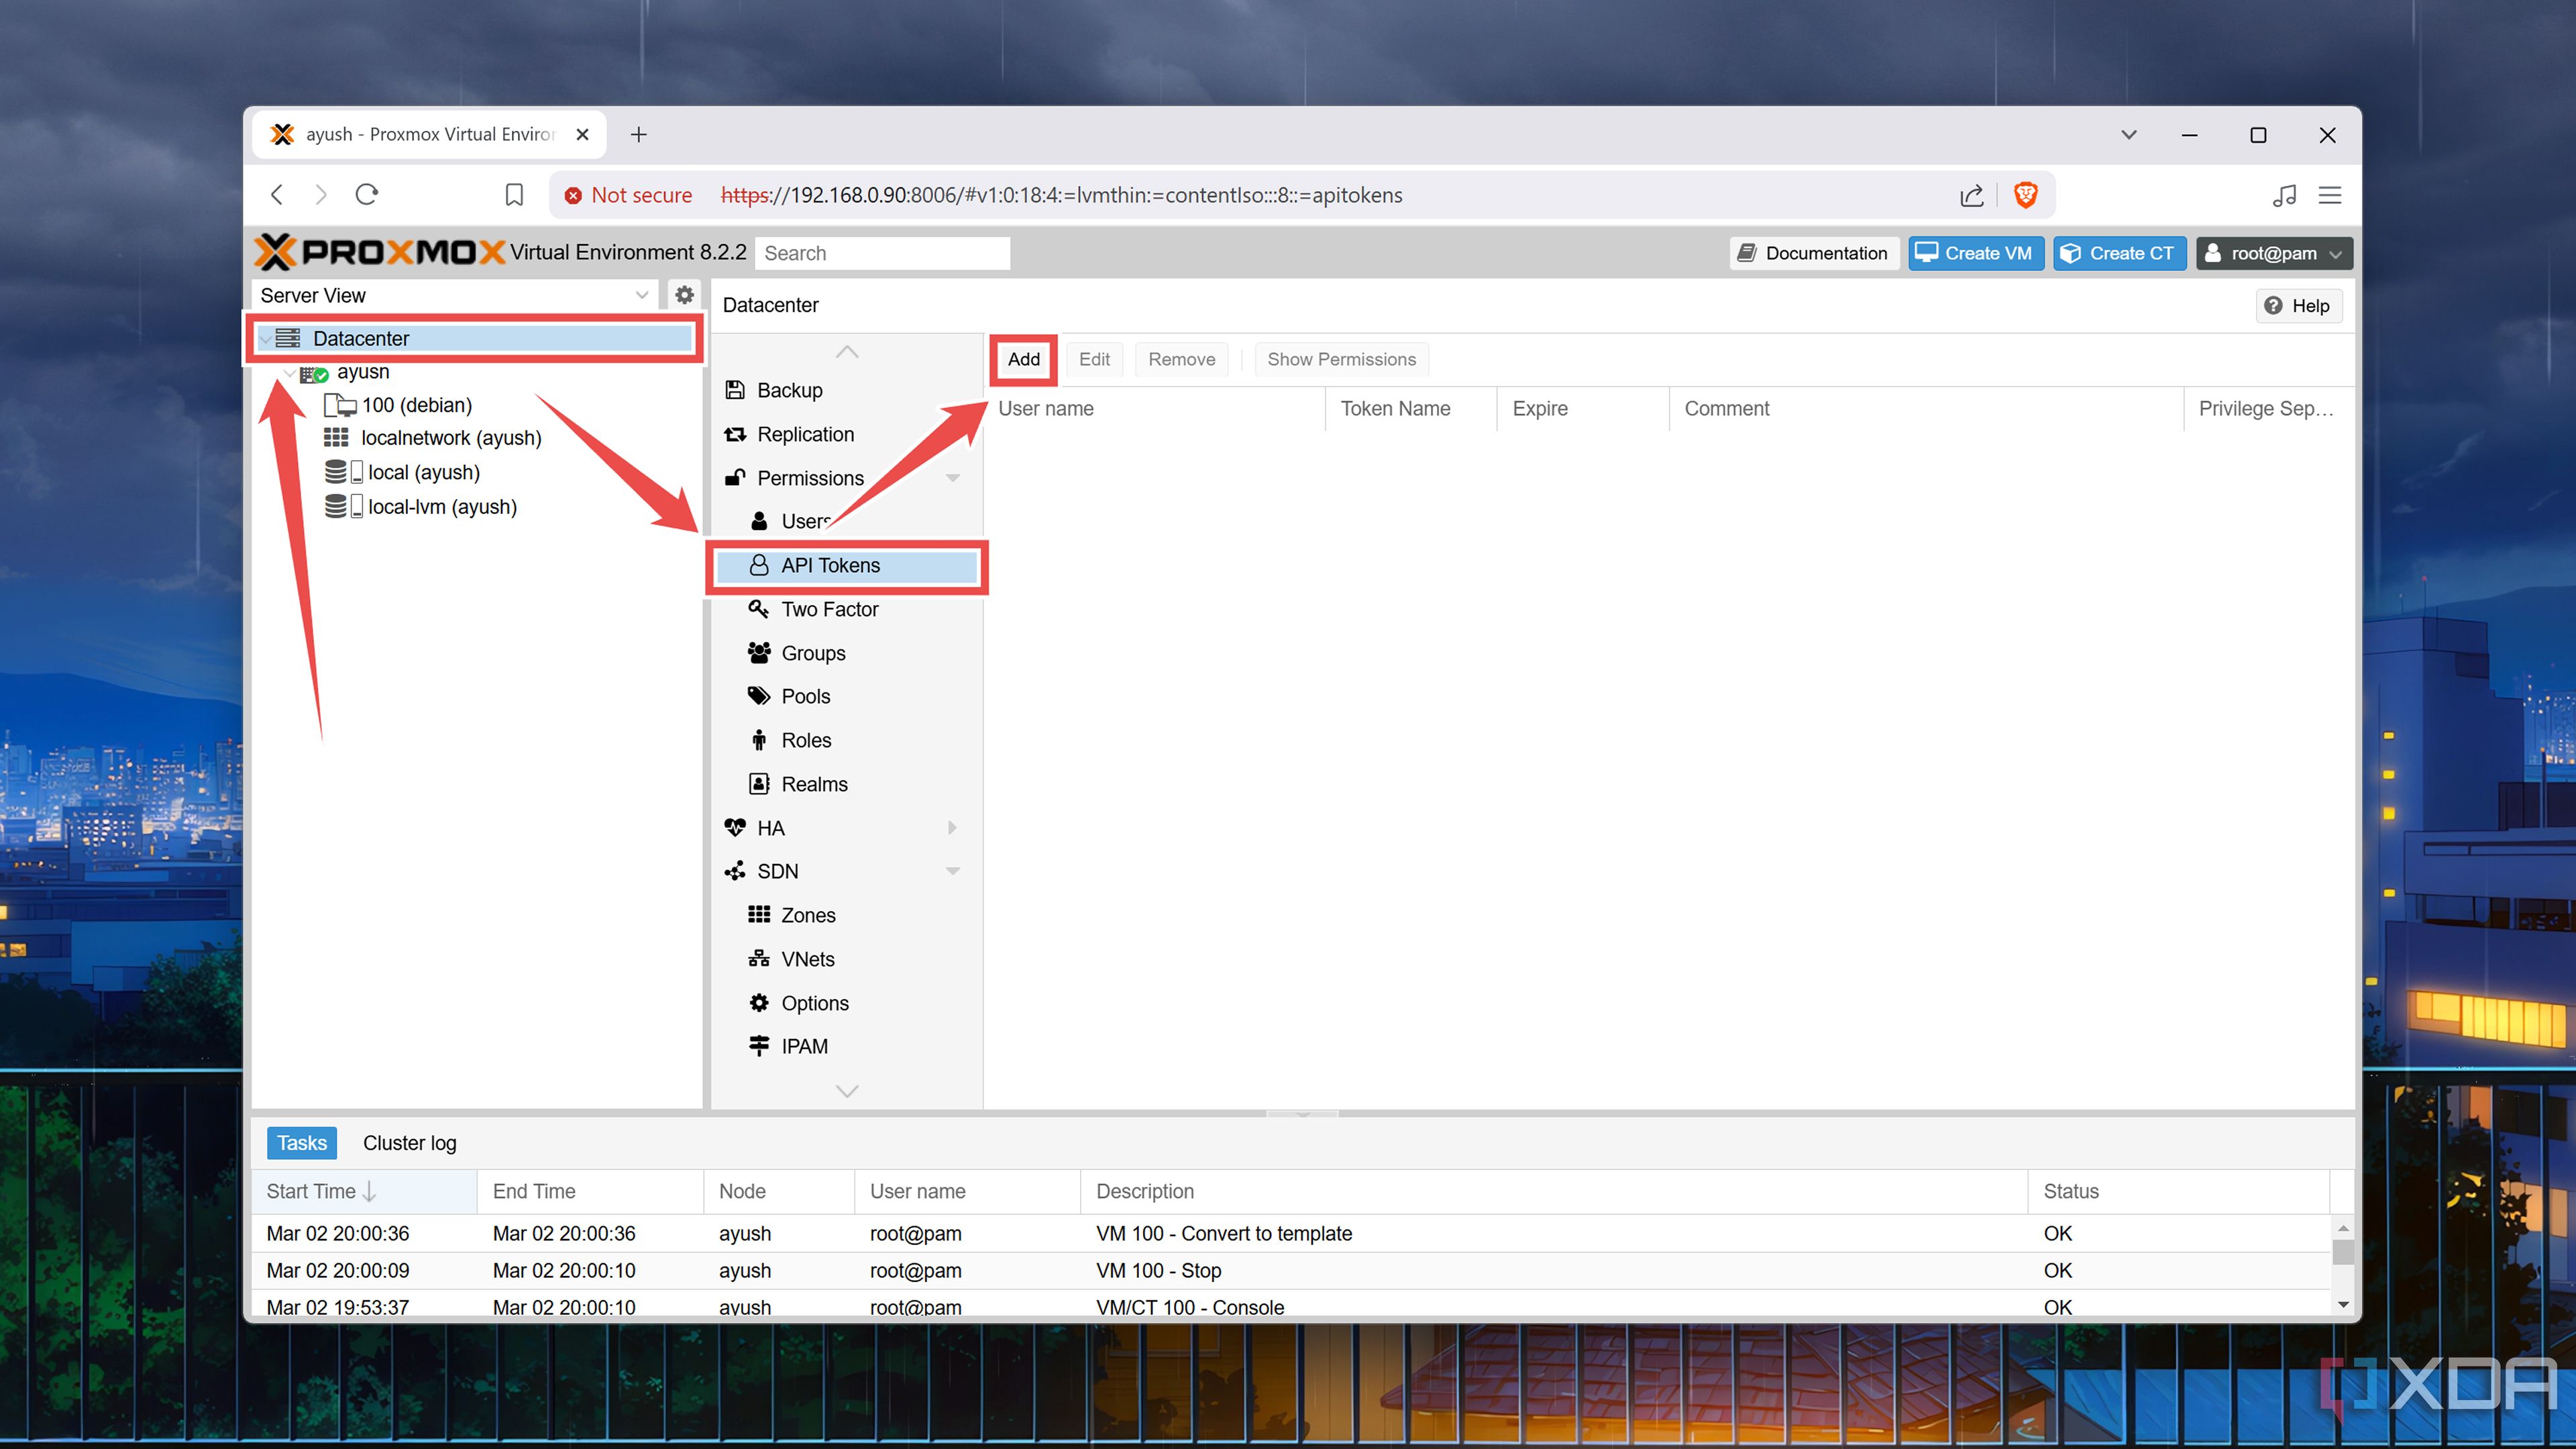
Acquiring the Proxmox API token
Next, you’ll require an API token to connect your PVE host to a Terraform instance. For maximum security, you’d want to use the token of a non-root user. But we’ll go with the root user’s secret API token to keep things simple.
-
Select the Datacenter tab, choose API Tokens under the Permissions section, and press Add.
-
Select the User, enter a Token ID, and hit the Add button.
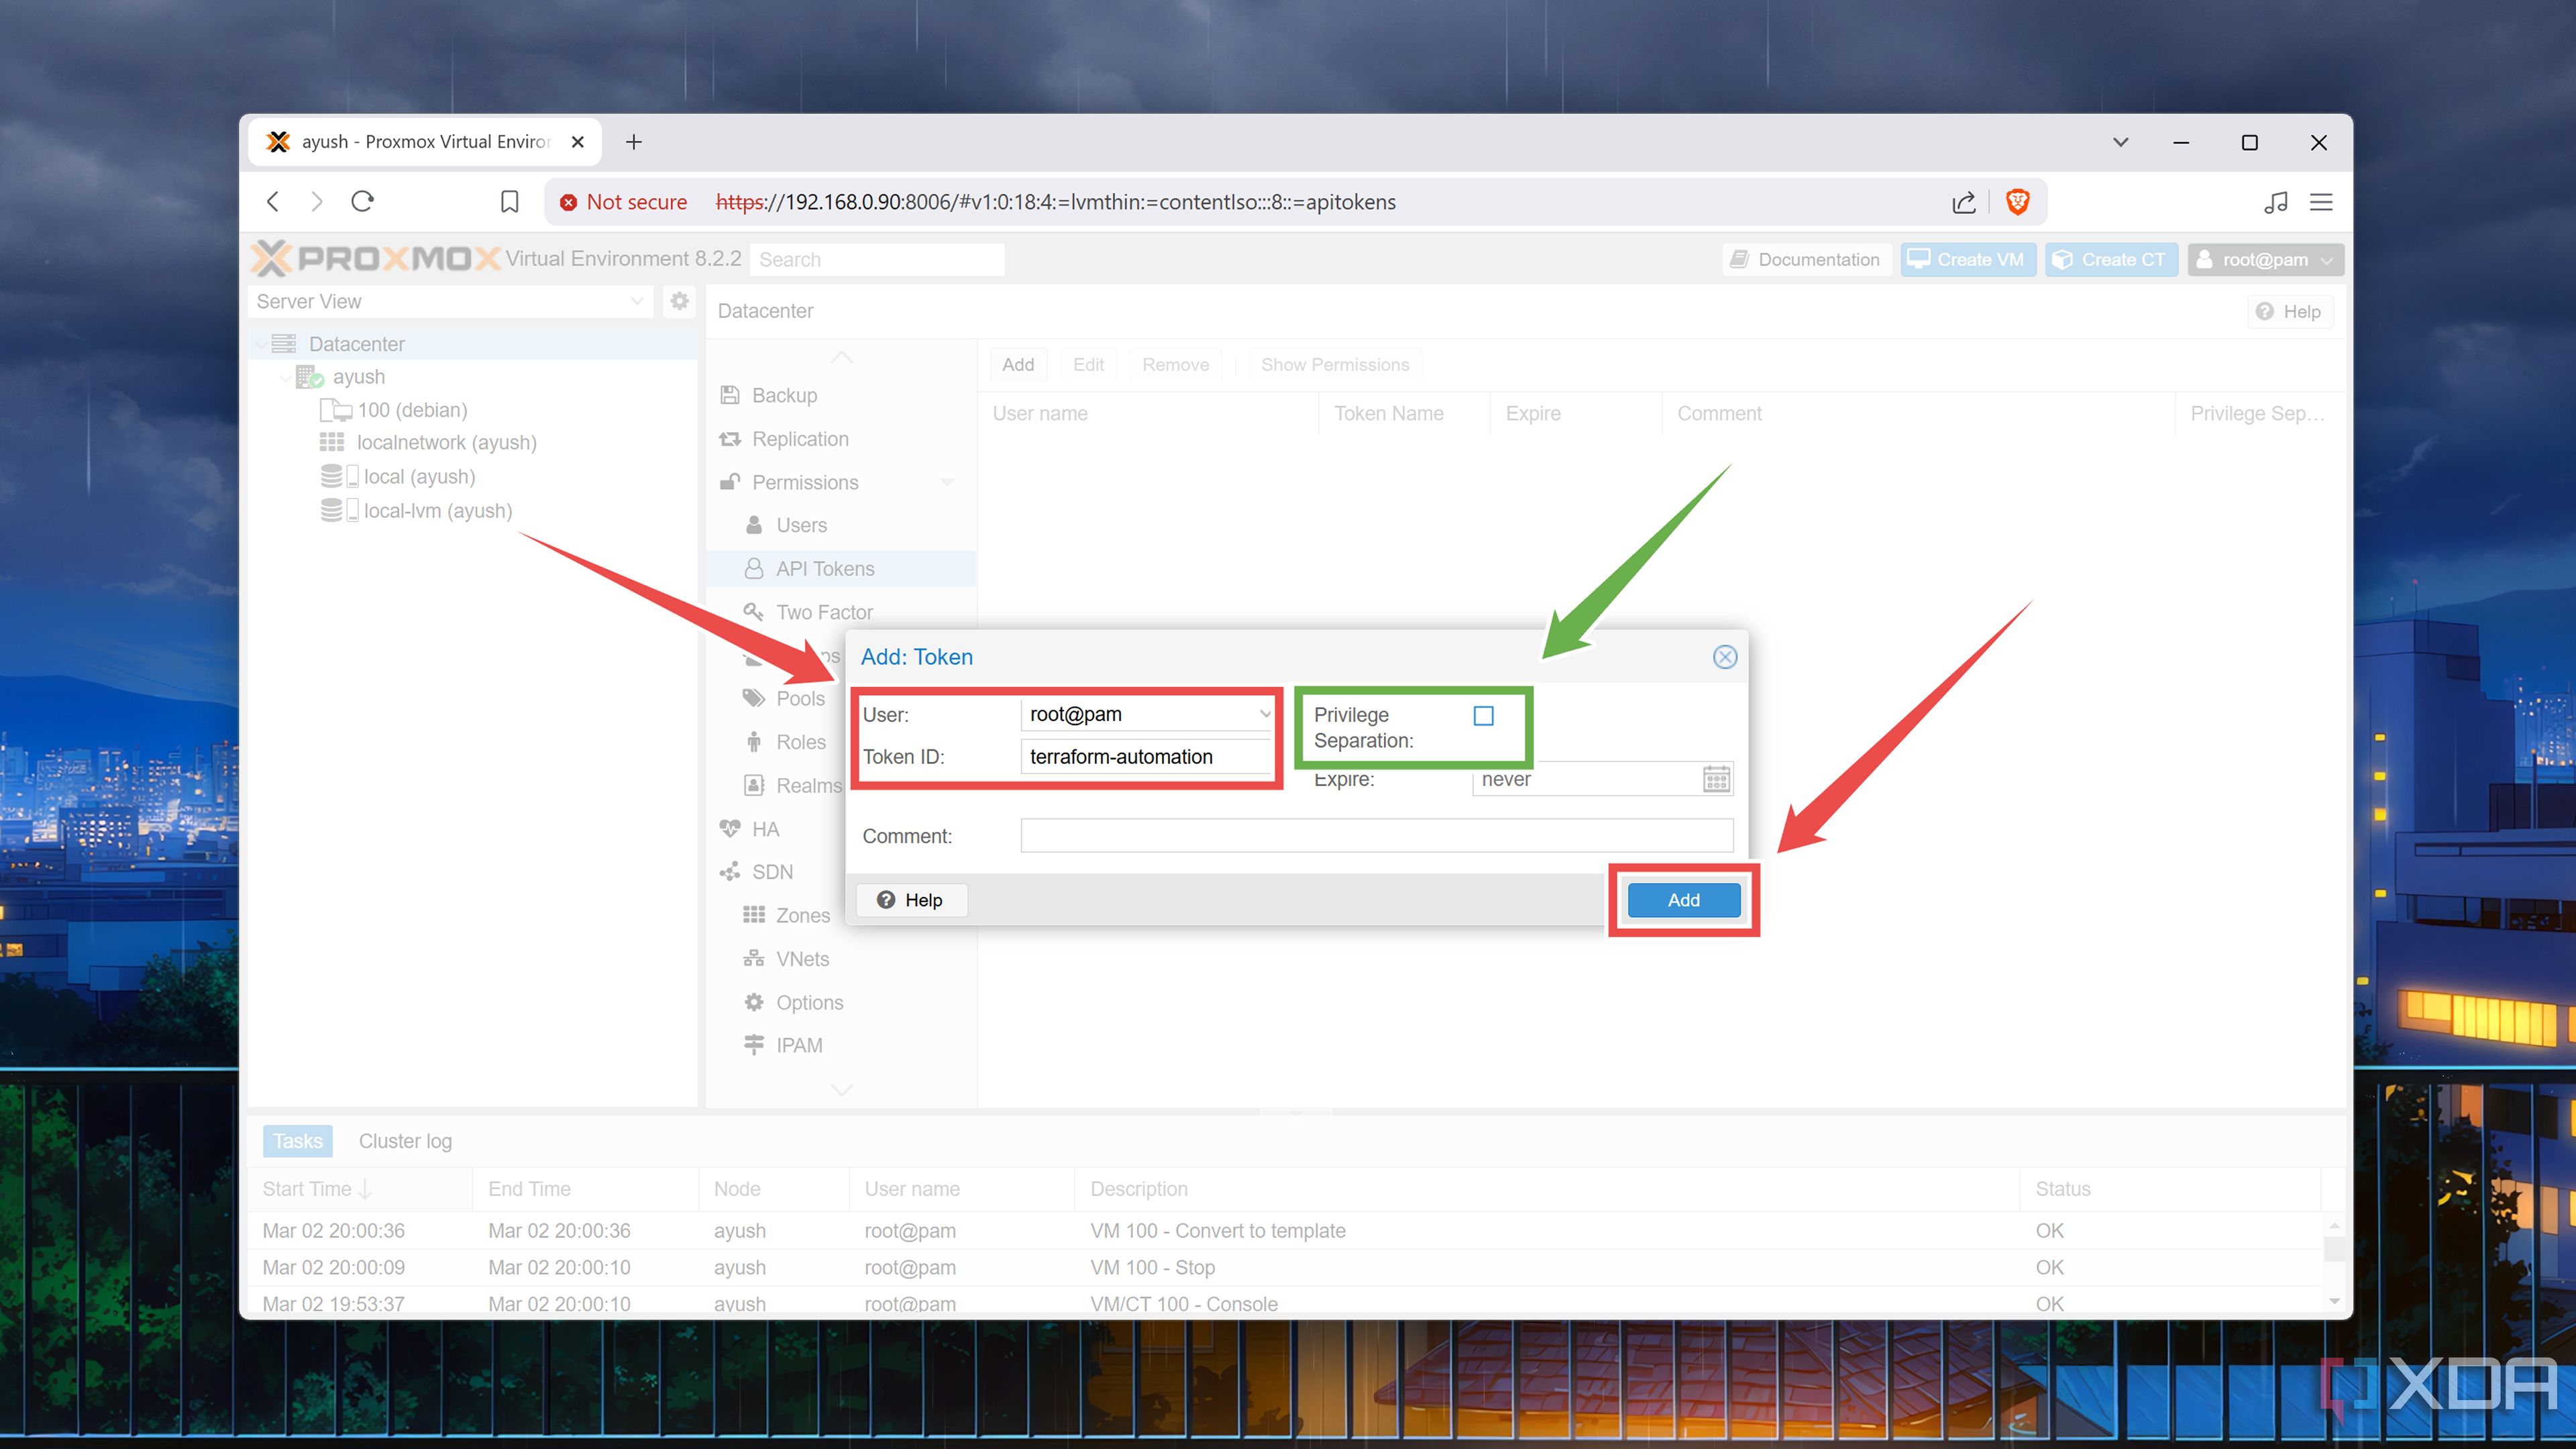
If you want Terraform to have root permissions, uncheck the Privilege separation box.
- Since you won’t be able to access the Token Secret string again, be sure to copy it to a safe document.


Setting up Terraform
With the Proxmox configuration complete, it’s time to switch gears and install Terraform. As with other home lab utilities, there are a couple of ways to add Terraform to your toolkit. You could either install it on a spare PC, configure it on a virtual machine, or even host it as a Docker container. The first two options are fairly simple, so we’ll go with those. Assuming you’ve got a Debian-based machine,
- Open the terminal app included in your Linux distro.
-
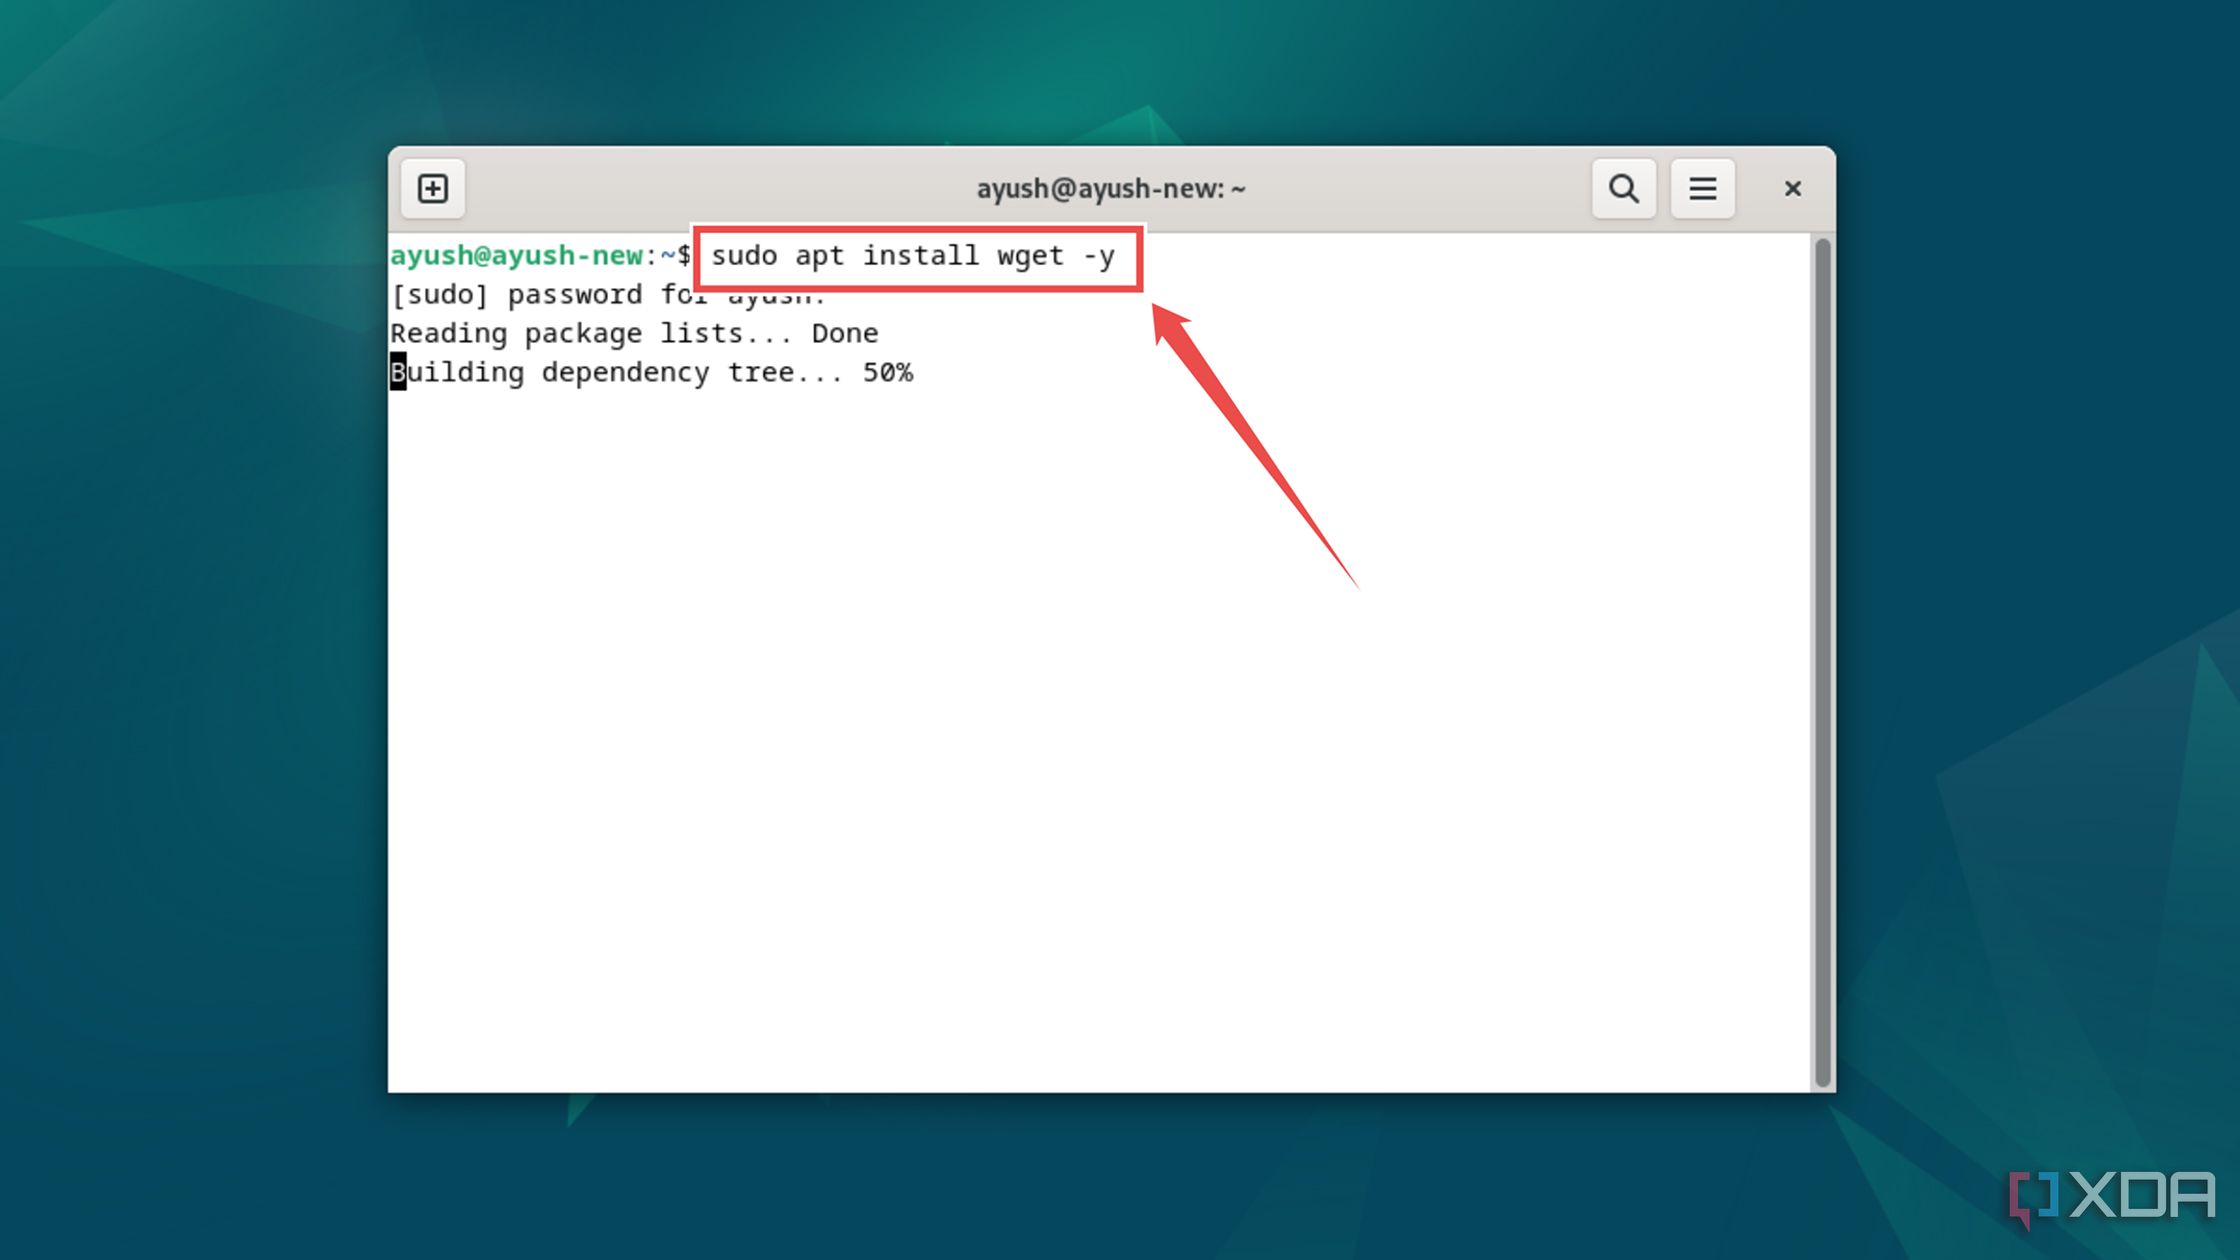
(Optional) If your distro doesn’t possess the wget package, you can install it from the apt repository.
sudo apt install wget -y
-
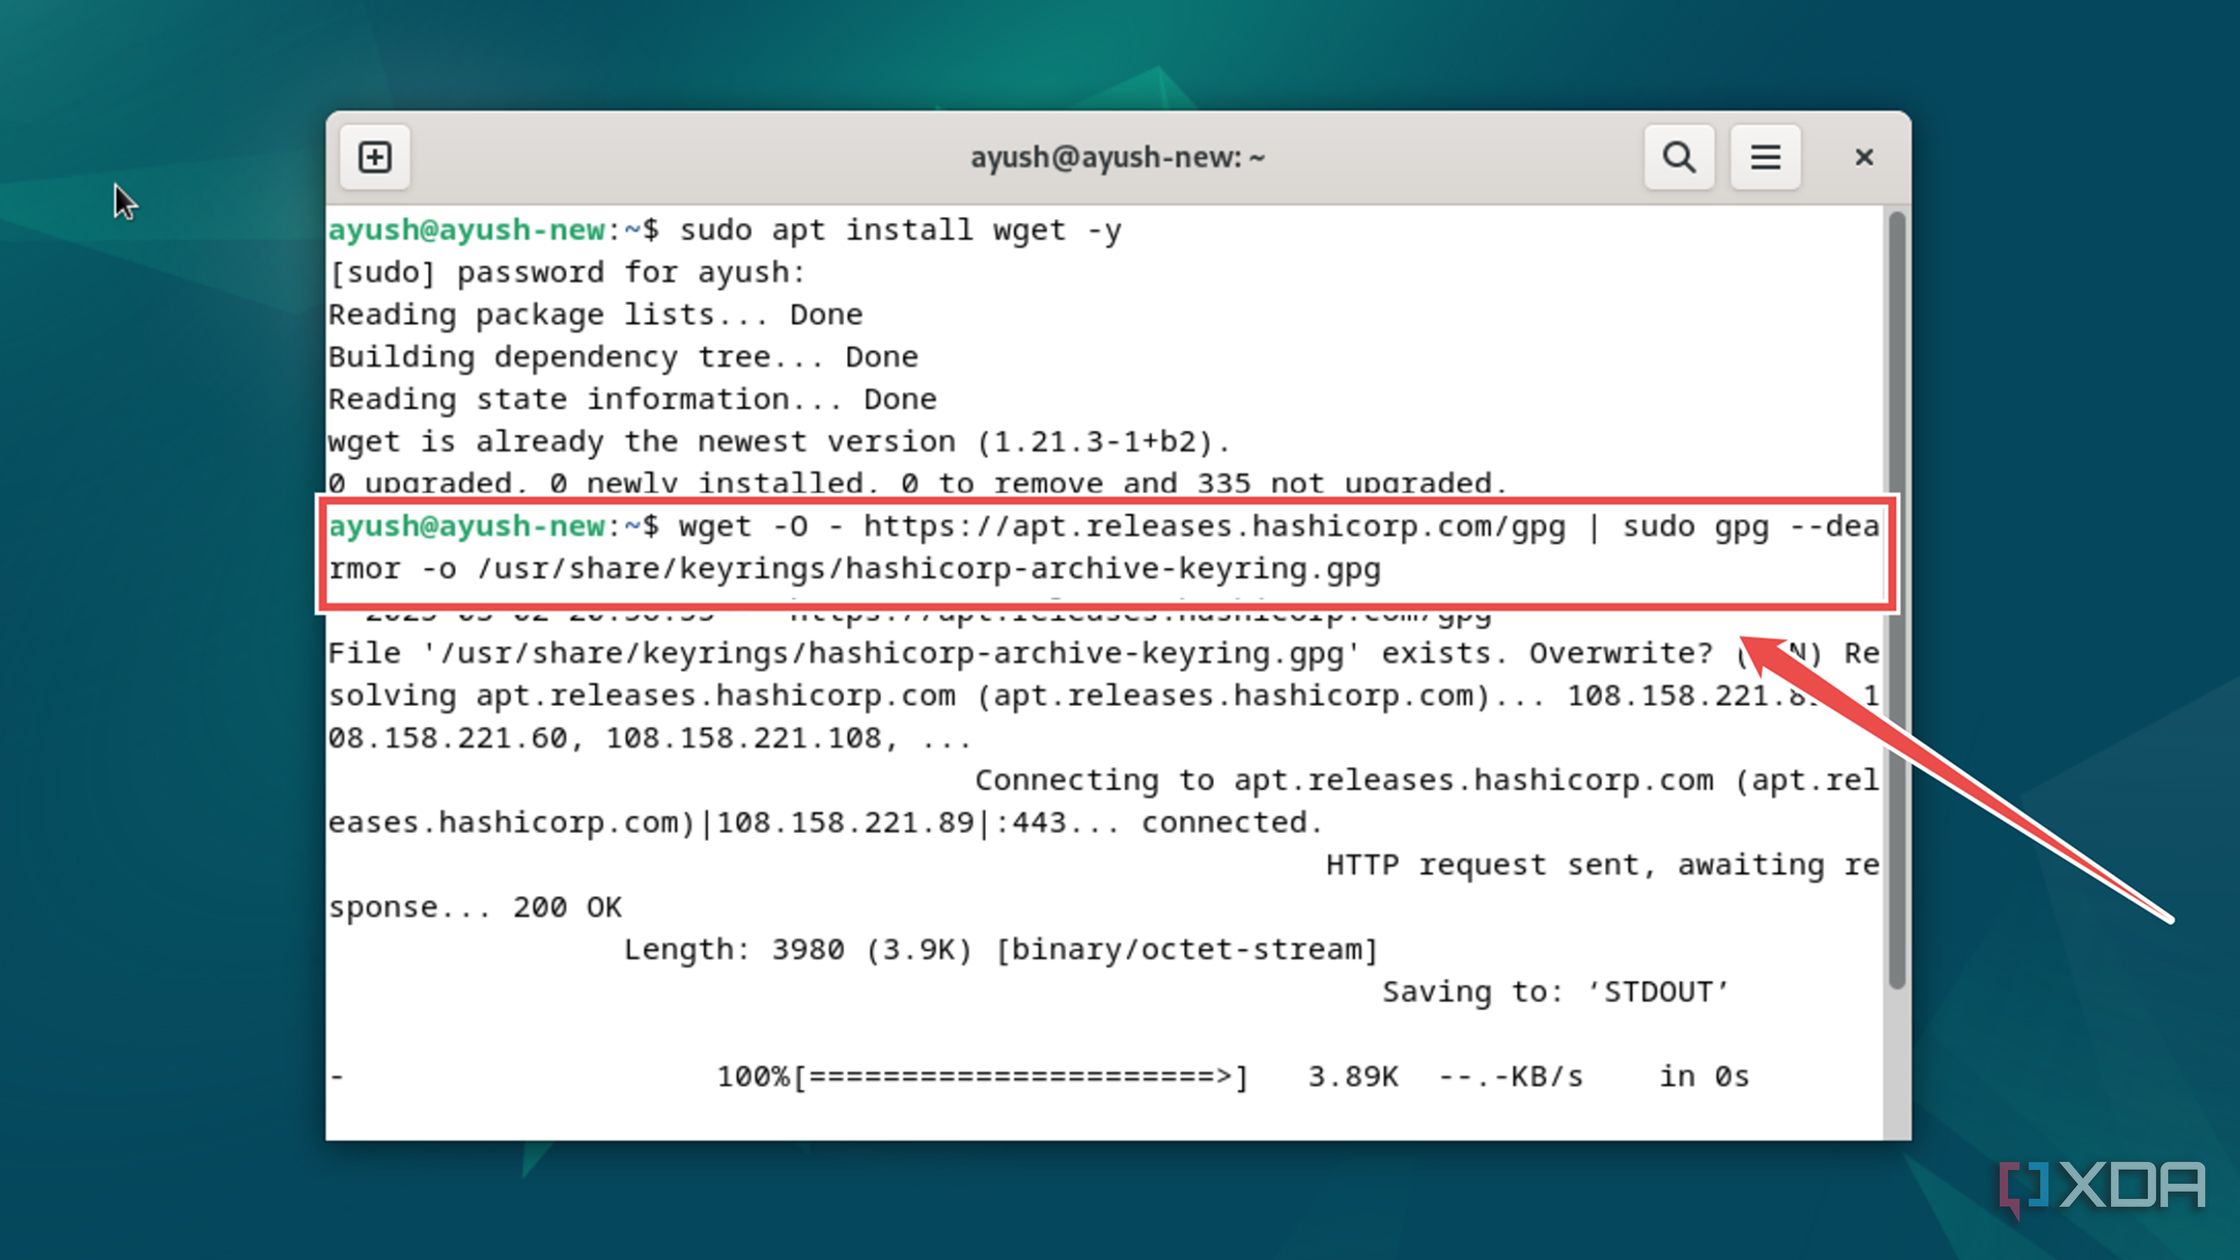
Use this set of commands to grab Hashcorp’s key.
wget -O - https://apt.releases.hashicorp.com/gpg | sudo gpg --dearmor -o /usr/share/keyrings/hashicorp-archive-keyring.gpg
-
Execute the echo command to append these extra strings to the key.
echo "deb [arch=$(dpkg --print-architecture) signed-by=/usr/share/keyrings/hashicorp-archive-keyring.gpg] https://apt.releases.hashicorp.com $(lsb_release -cs) main" | sudo tee /etc/apt/sources.list.d/hashicorp.list

-
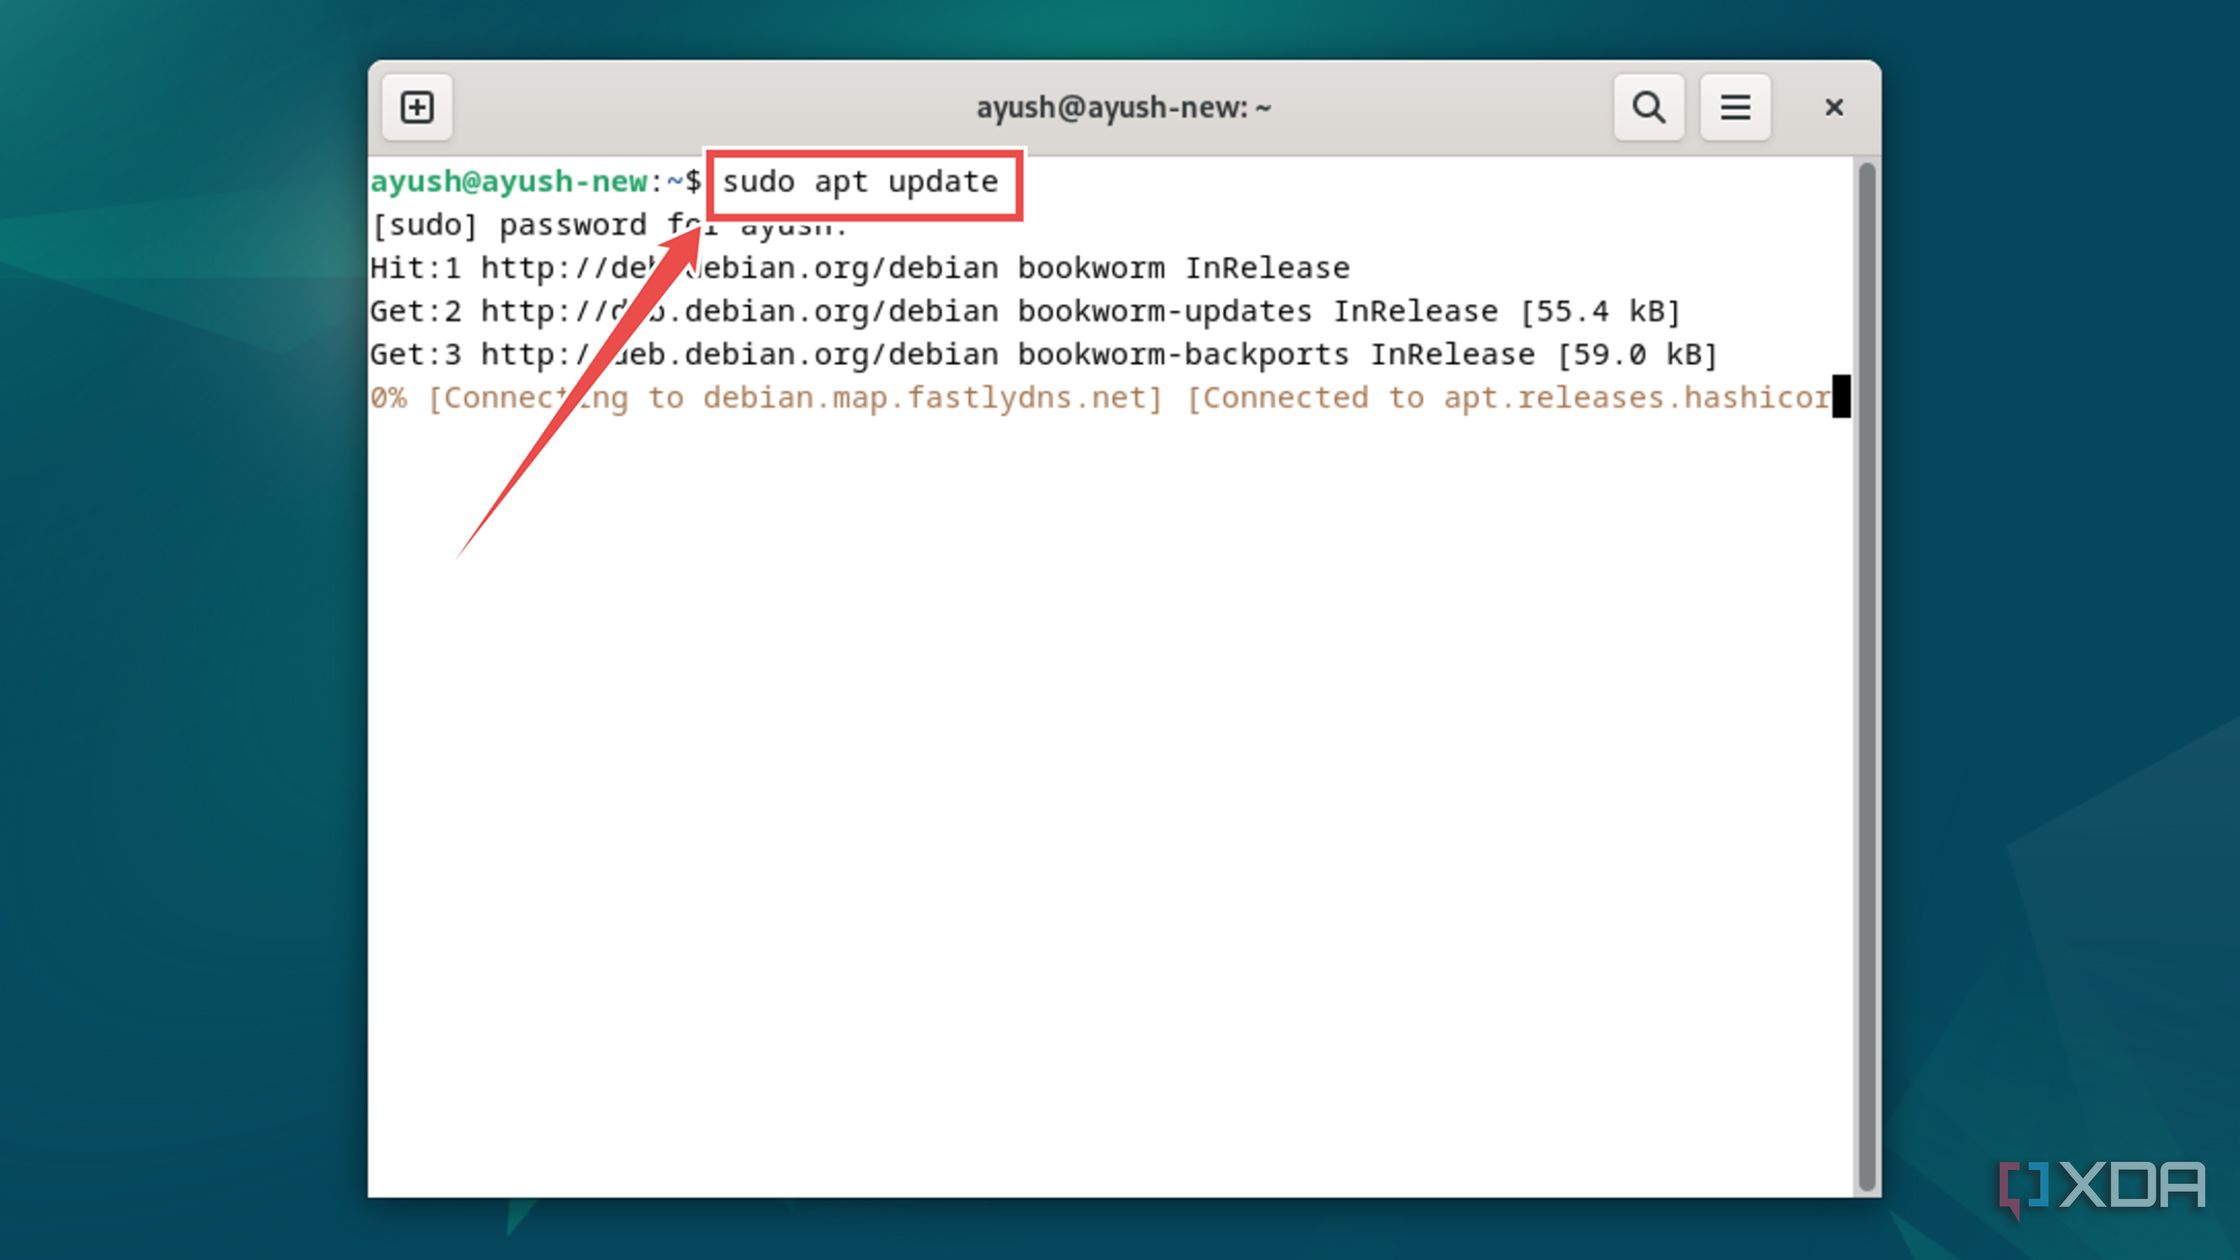
Update the package list to include the newly added links.
sudo apt update
-
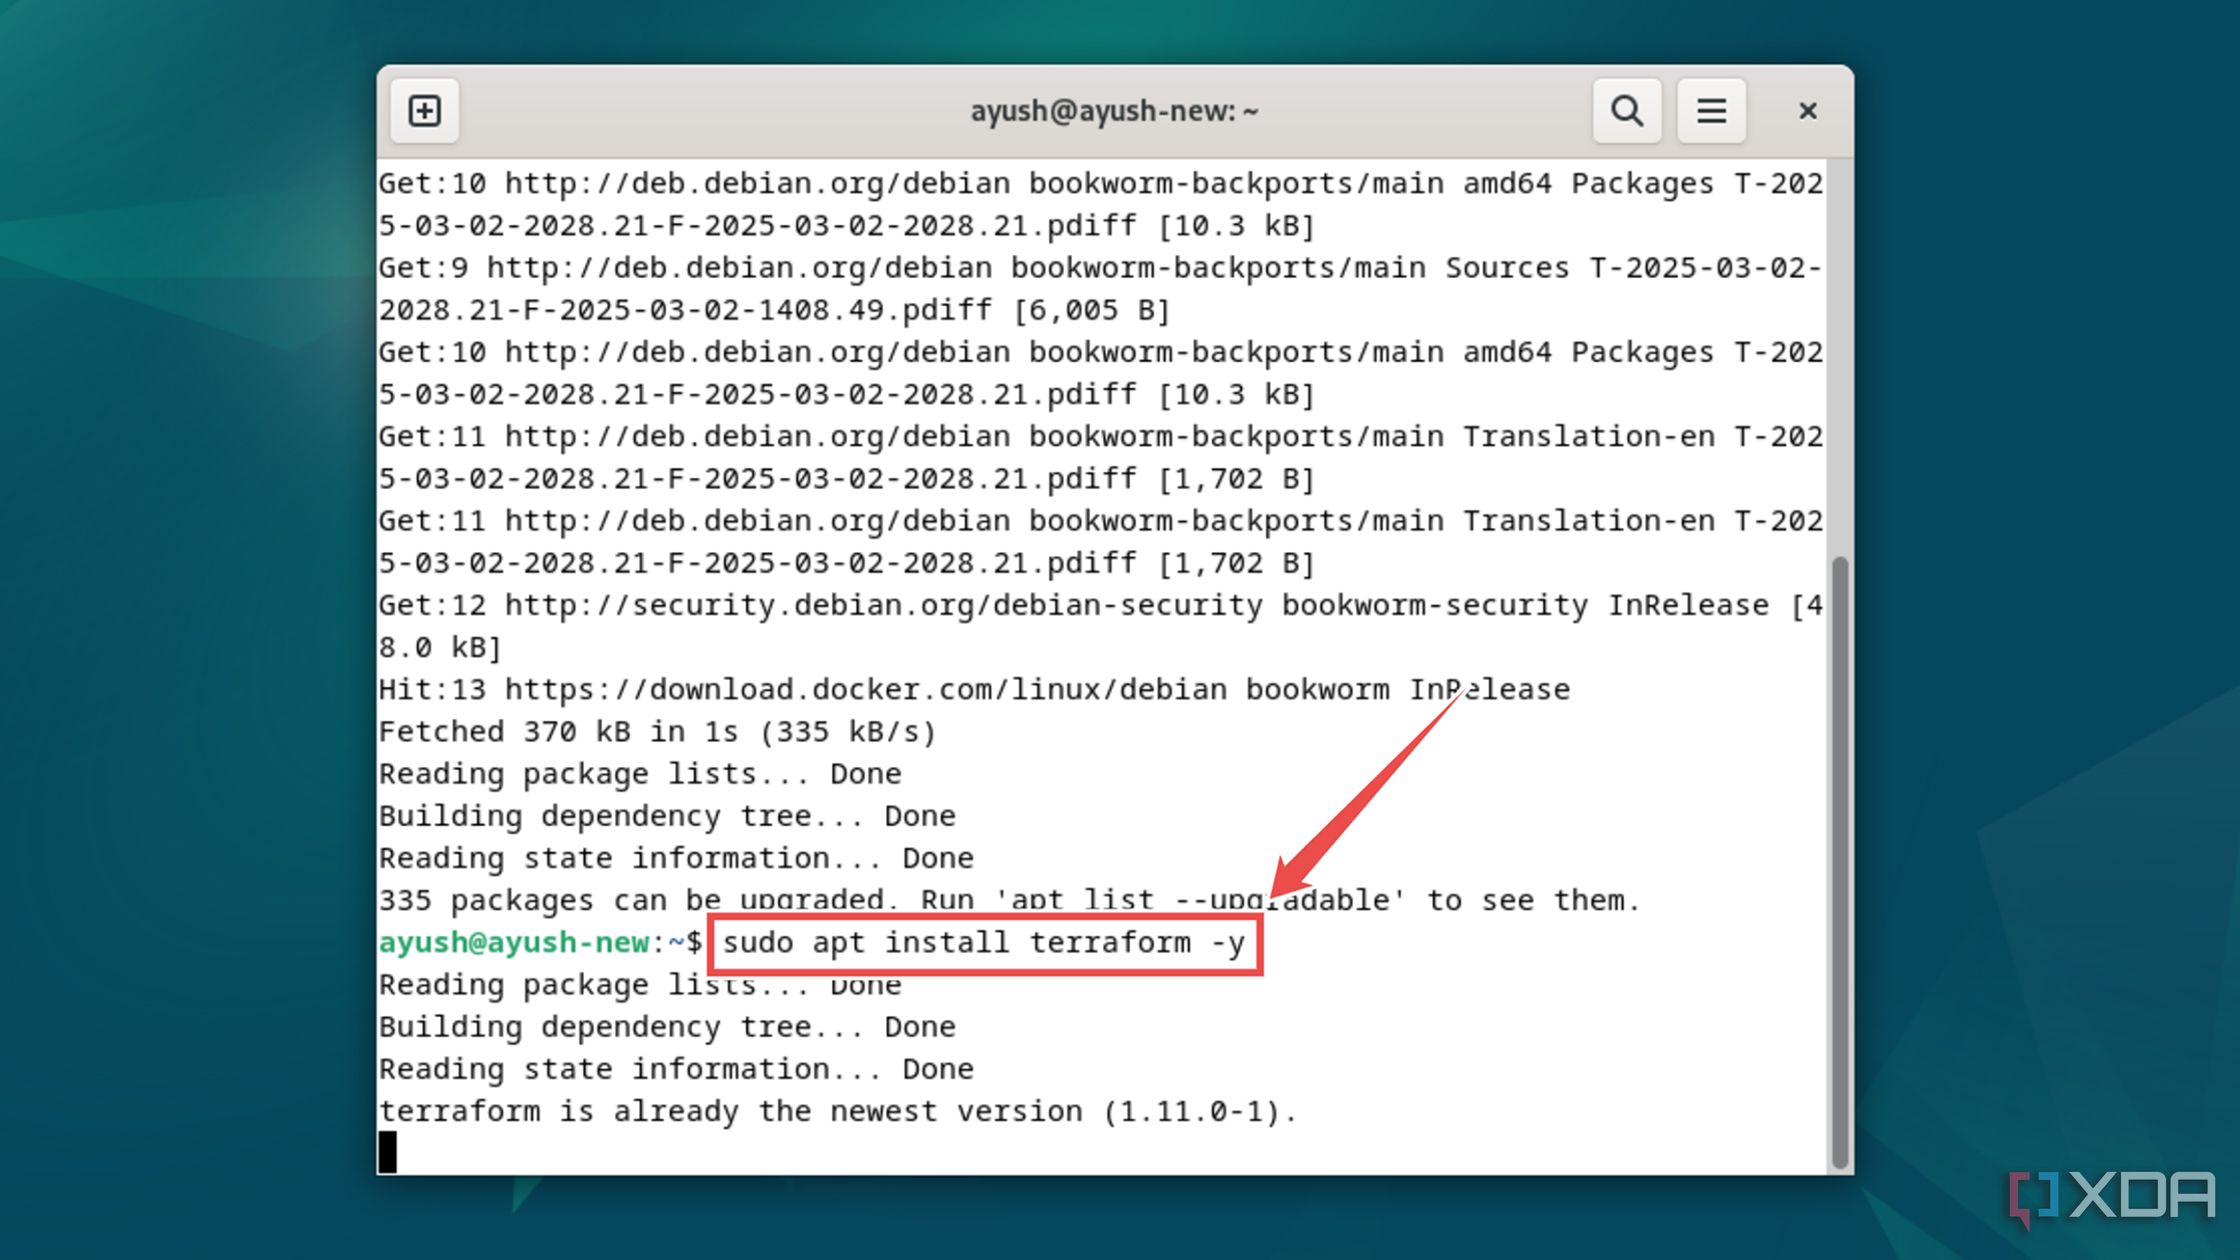
Finally, install Terraform using the apt repository.
sudo apt install terraform -y


Creating the Terraform configuration file
Now that you’ve got a working instance of Terraform, you’re free to create scripts that can leverage this powerful tool. Technically, you can use any ol’ text editor to work with Terraform, but I recommend installing VS Code as it includes a host of useful features to simplify coding automation scripts.
-
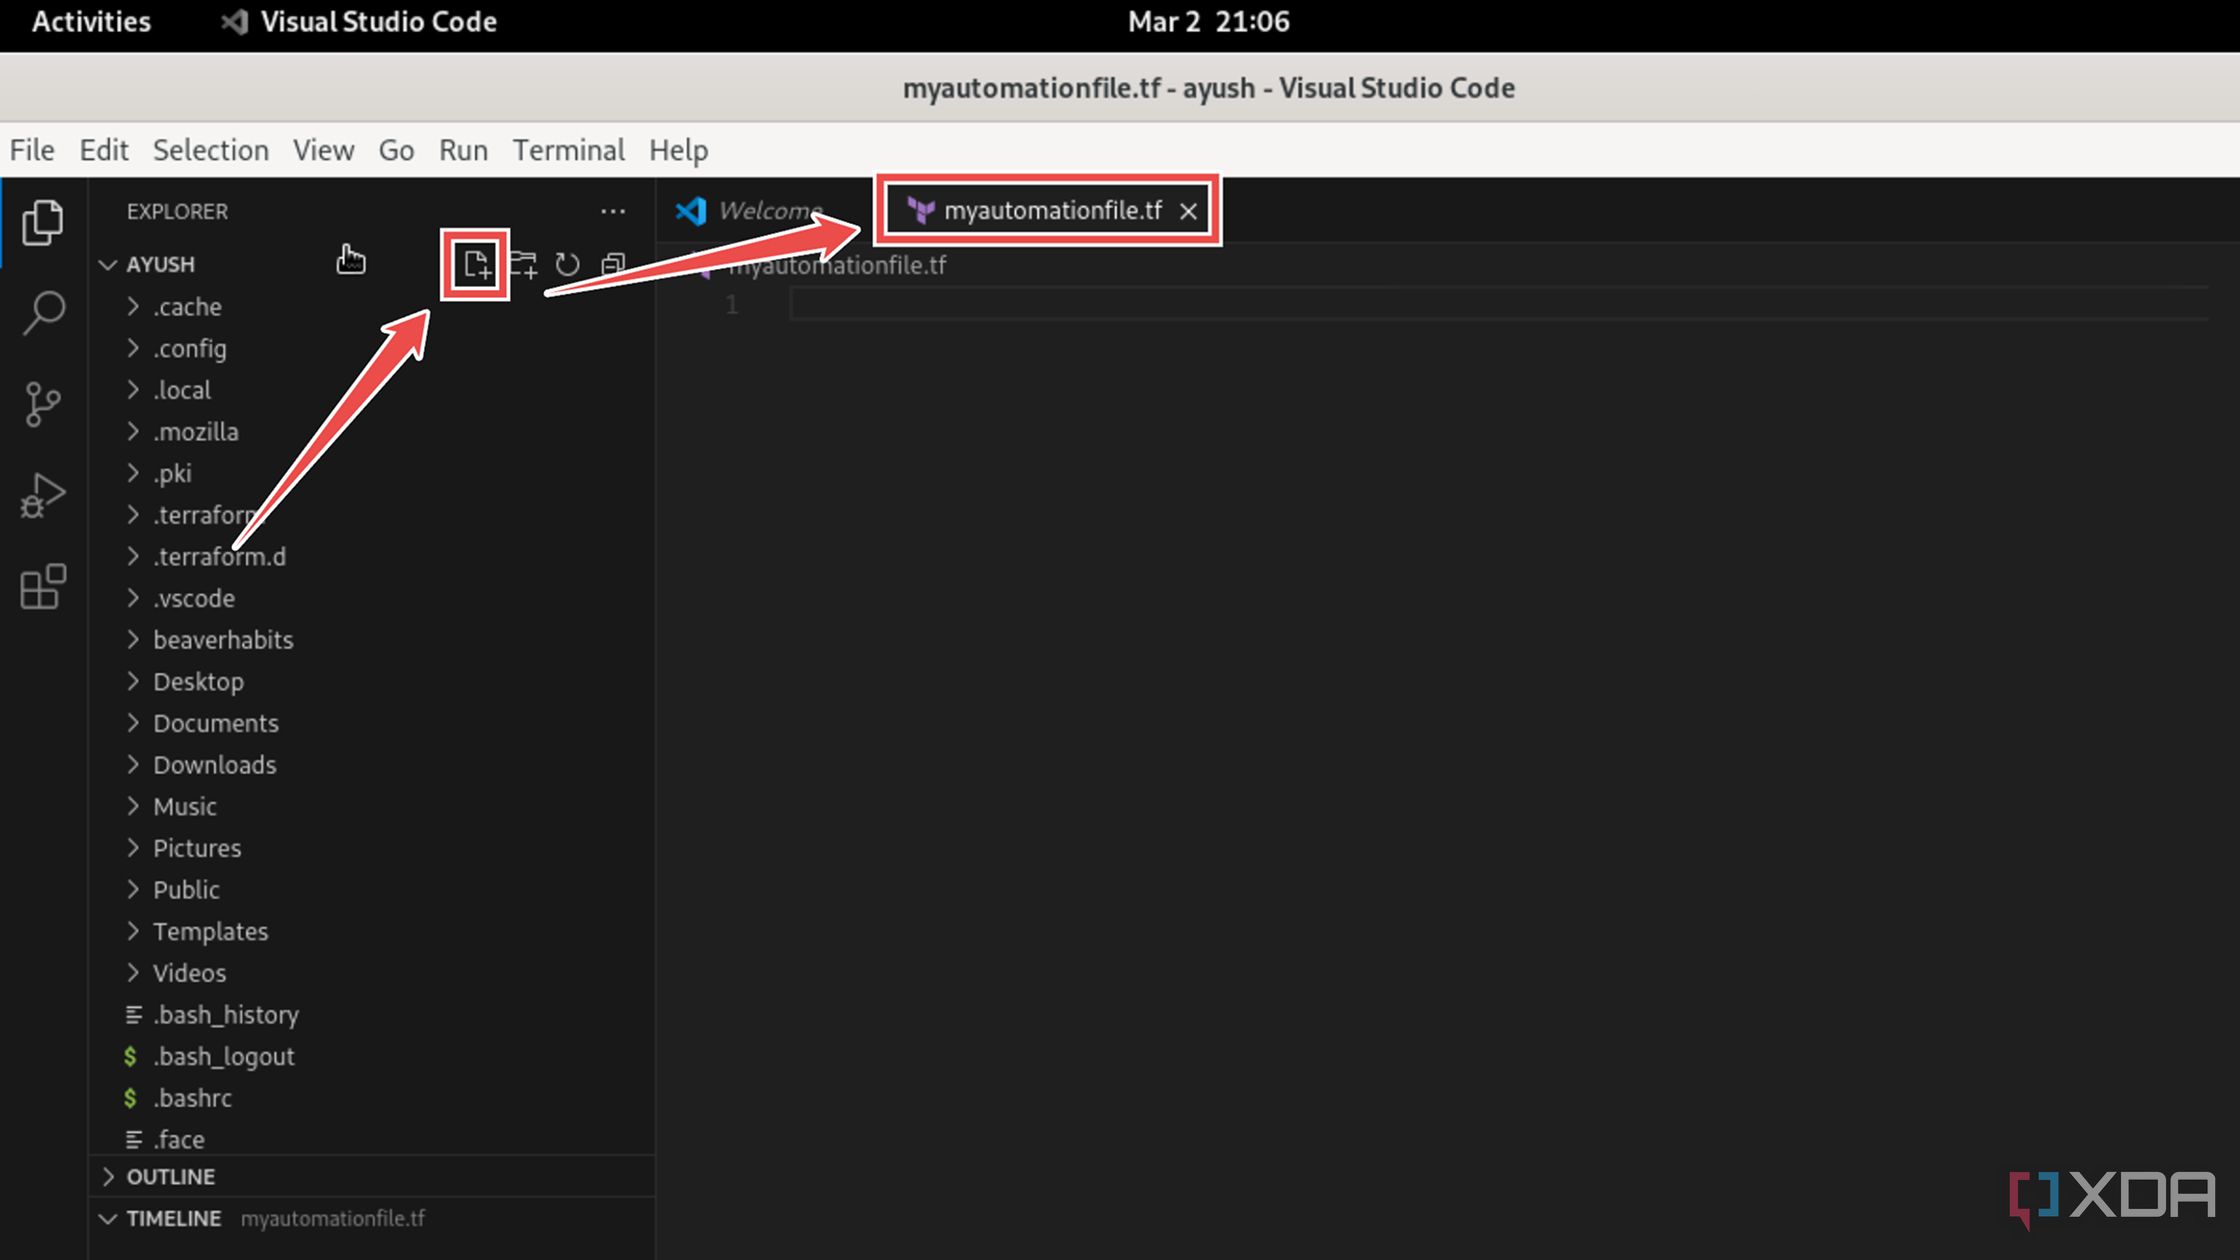
Click on the new file button on VS Code and give a name that ends with the .tf file extension.
-
For a barebones setup, paste the following syntax into the file:
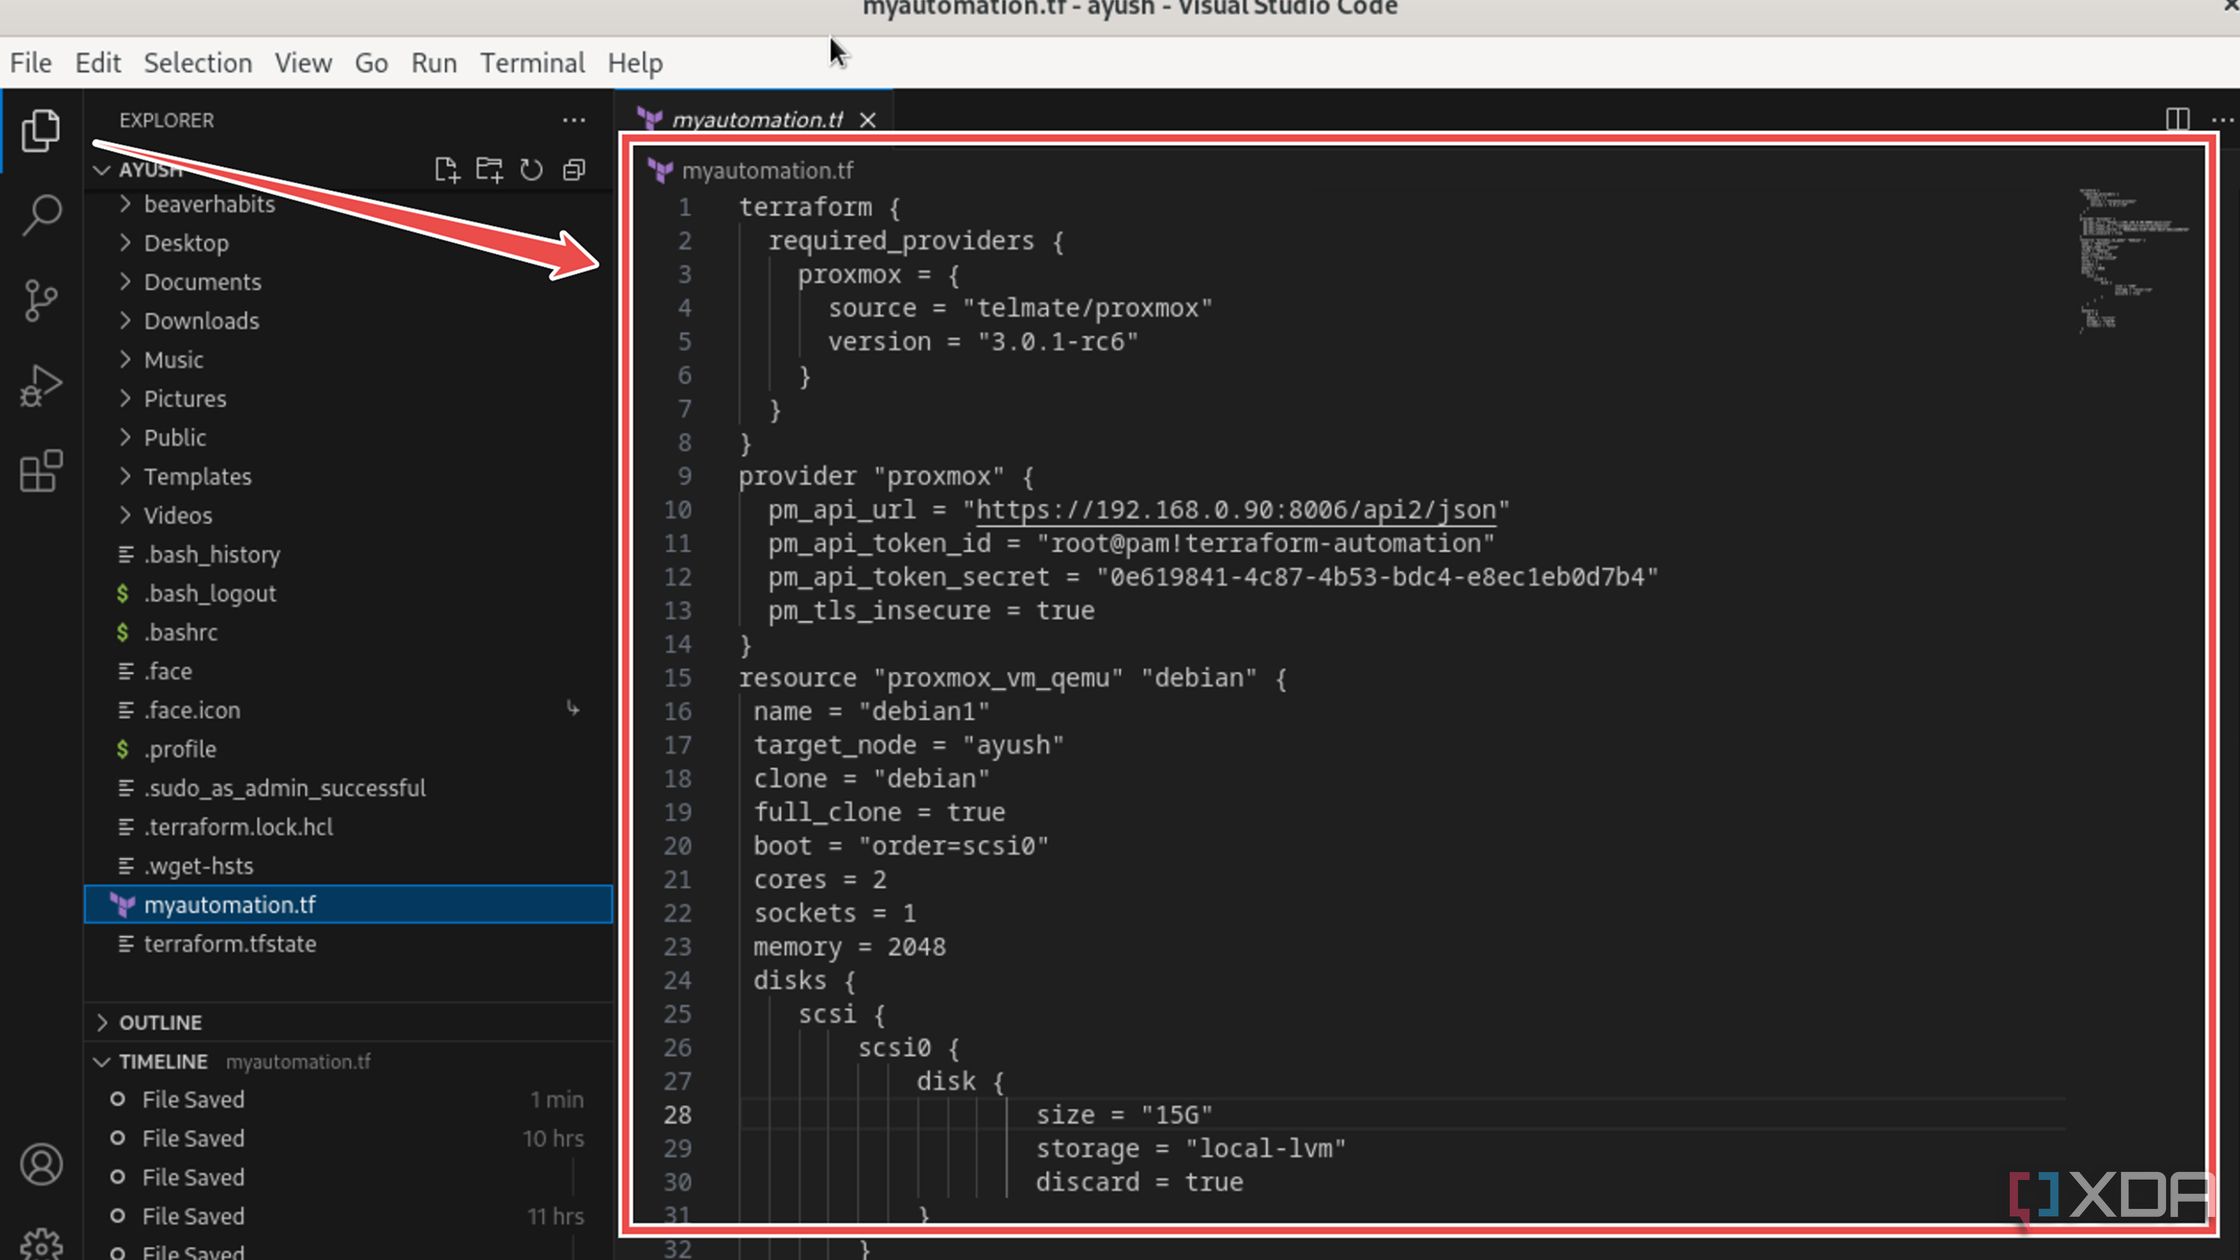
terraform {
required_providers {
proxmox = {
source = "telmate/proxmox"
version = "3.0.1-rc6"
}
}
}
provider "proxmox" {
pm_api_url = "https://Proxmox_machine’s_IP address/api2/json"
pm_api_token_id = "Proxmox_user@token_ID"
pm_api_token_secret = "token_string"
pm_tls_insecure = true
}
resource "proxmox_vm_qemu" "VM’s_name" {
name = "VM_name"
target_node = "node_name"
clone = "template_name"
full_clone = true
boot = "order=scsi0"
cores = 2
sockets = 1
memory = 2048
disks {
scsi {
scsi0 {
disk {
size = "15G"
storage = "local-lvm"
discard = true
}
}
}
}
network {
id = 0
model = "virtio"
bridge = "vmbr0"
firewall = false
}
}
Keep in mind that you’ll need to follow the proper rules of indentation to create this config file.
- Press Ctrl + S to save the document.


Here’s a quick breakdown of the important parameters:

- First, there’s the required_providers keyword, which we’ll use to leverage the functions supported by Telmate’s Proxmox provider into our config file.
- Then you’ve got the fields containing information on the actual Proxmox machine. This is where you’ll need to enter your Proxmox server’s IP address alongside the token ID and token name you’d created earlier.
- The resources section may seem familiar if you’ve worked with Proxmox. It’s essentially the same as the menu-based UI on Proxmox, where you allocate the cores, memory, storage, and network resources to the VM. The only difference is that you’ll use programming syntax to complete the provisioning process.
- A word of caution: You’ll want to make the disks snippet identical to the VM template on Proxmox. This includes everything from the disk name to the size and storage location. Otherwise, Proxmox may not recognize the boot drive from the template.
Provisioning a VM with Terraform
At last, you’ve got everything you need to automate the VM deployment procedure using Terraform. Since it’s a set of CLI tools, you’ll need to execute some terminal commands to wrap up the project:
- Switch to the terminal app again.
-
Assuming it’s your first time running Terraform on the system, run the init command to configure the automation package.
terraform init

-
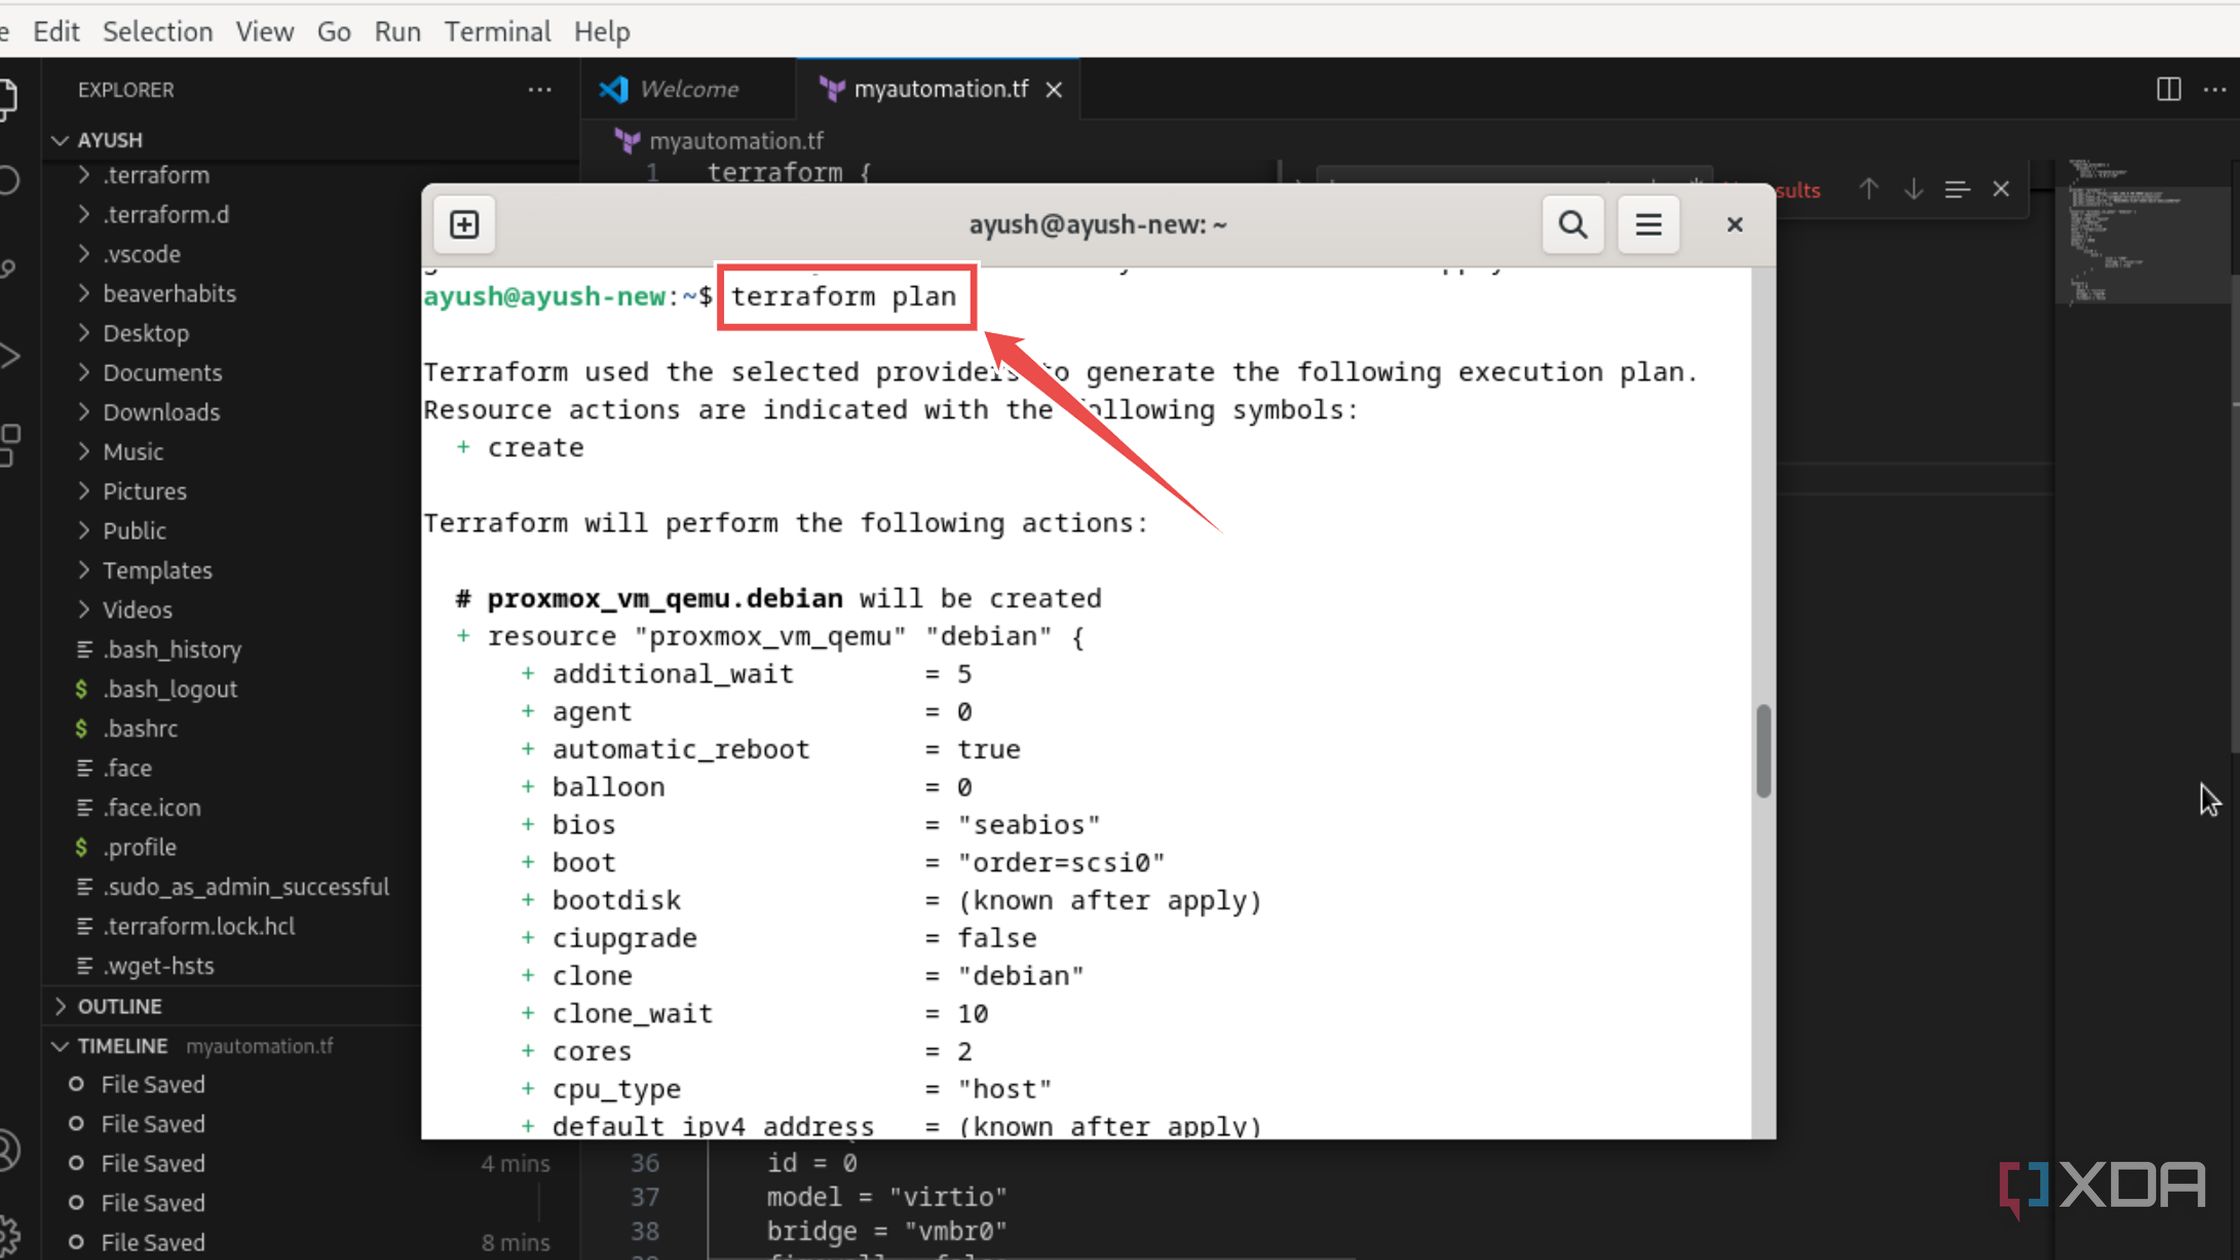
Run the terraform plan command and double-check all the parameters.
terraform plan
-
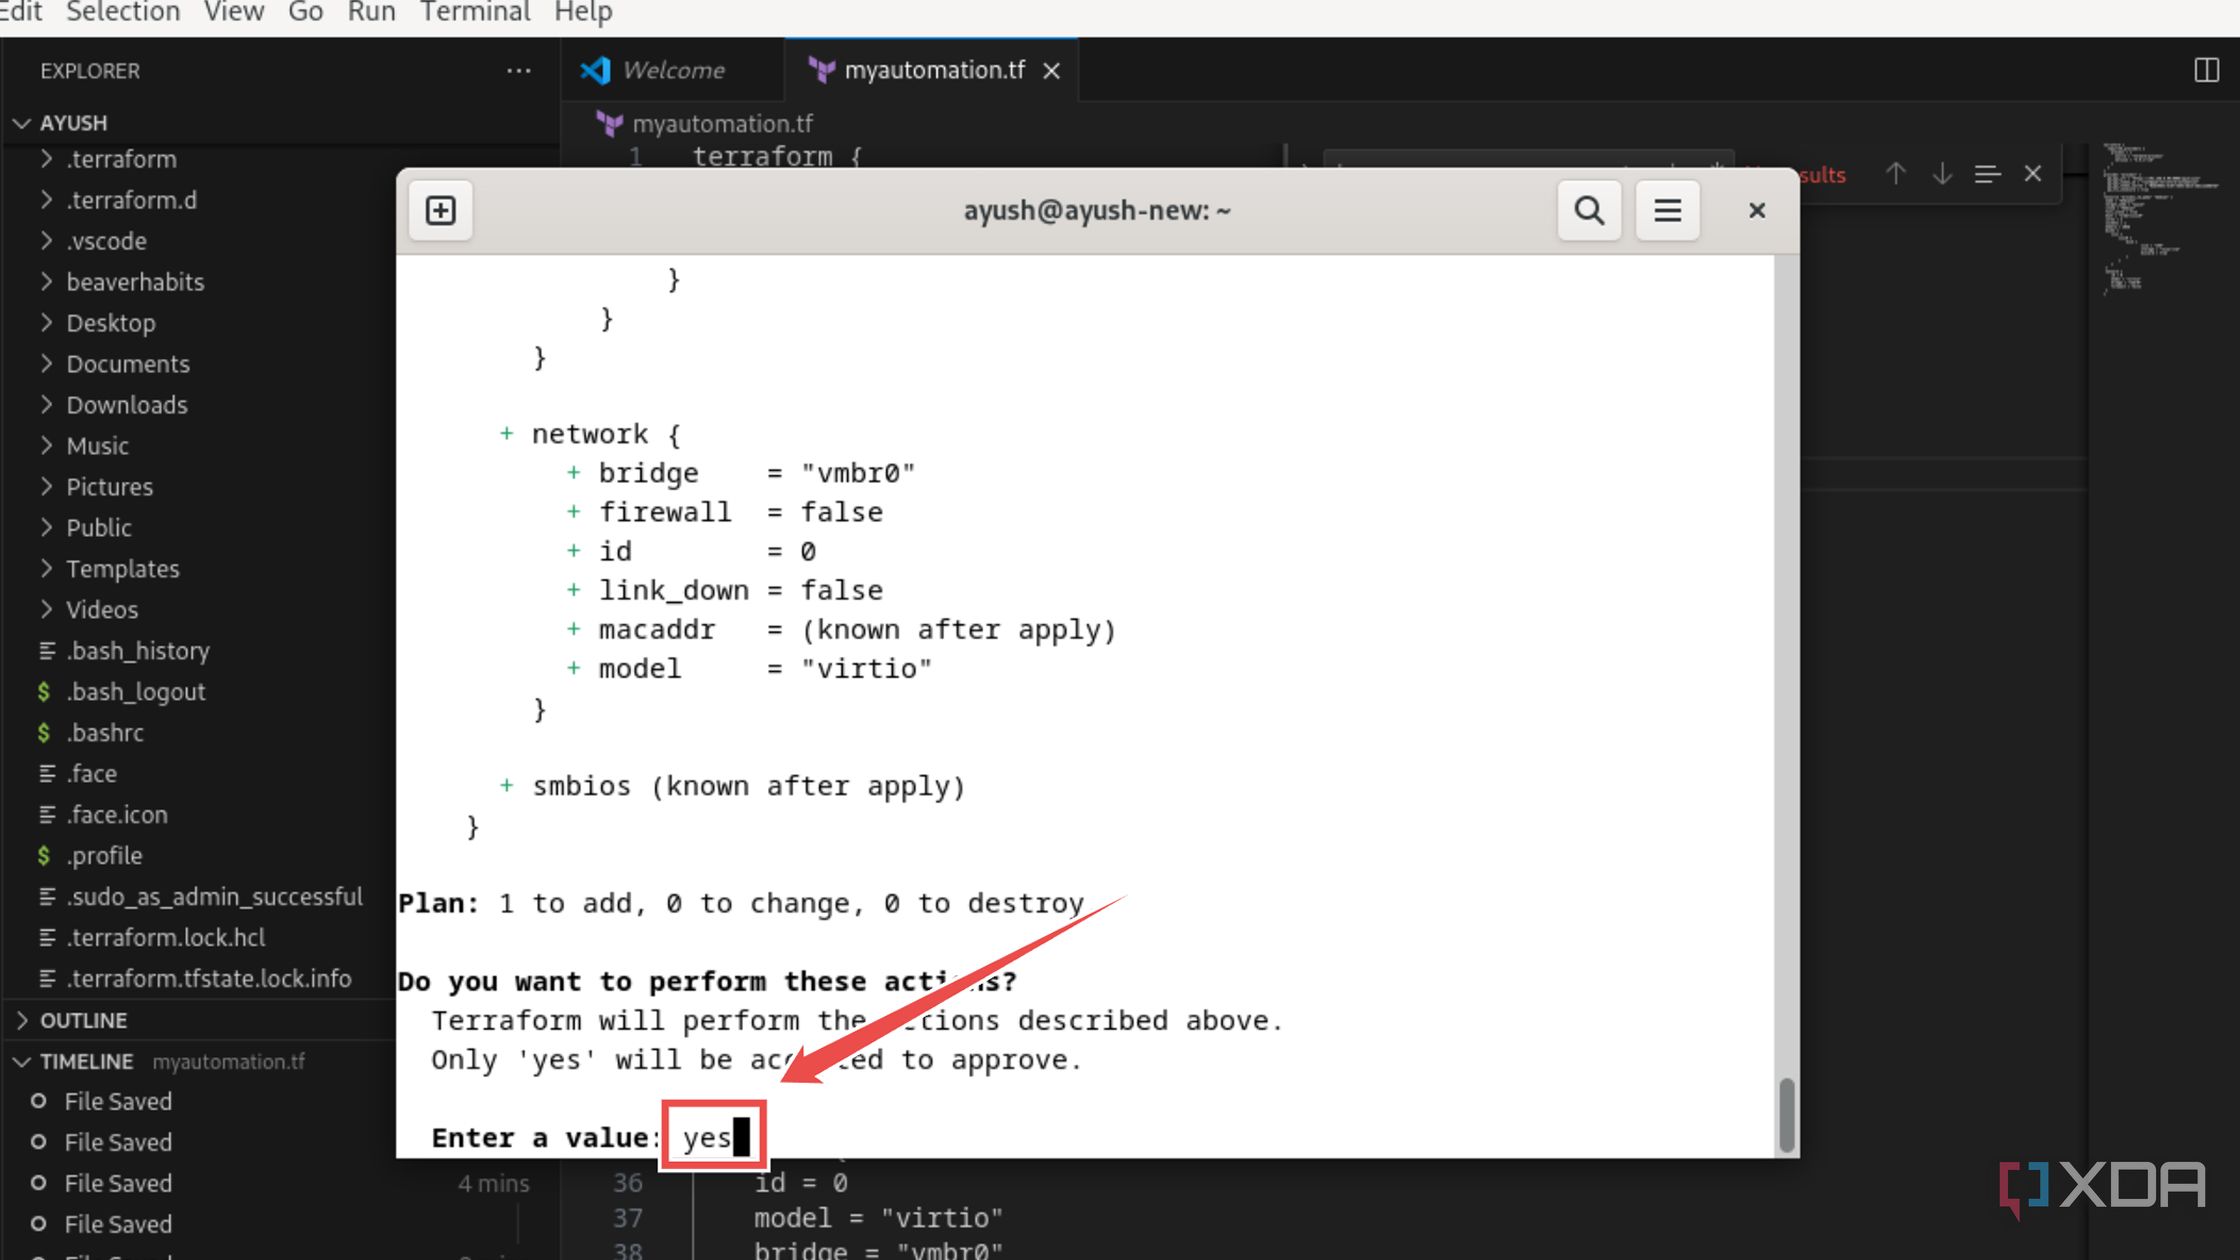
Execute the terraform apply command to provision the virtual machine on Proxmox.
terraform apply

-
Tap yes and wait for Terraform to work its magic.


Build a fully-automated home lab with Terraform
If you’ve followed all the steps properly, Terraform will start provisioning the virtual machine on your Proxmox server. Since we’ve enabled the full-clone parameter, it might take Terraform a minute or two to complete the operation. But once it does, you’ll have a new virtual machine deployed using nothing more than some lines of code and a lot of patience.
With that, you’re free to use the configuration.tf file to provision as many VMs as your Proxmox server allows. Likewise, you can turn your home lab into an automated beast by combining Terraform’s virtual machine provisioning facilities with the automatic configuration, package update, and backup features offered by Ansible.

Related
I tried building a Proxmox home lab… inside Windows 11
With the power of nested virtualization, it’s possible to run a Proxmox server on top of your Windows 11 PC
#Terraform #automatically #provision #VMs #Proxmox #here039s
source: https://www.xda-developers.com/use-terraform-with-proxmox/

