

Microsoft’s Edge browser is much better today than it was when it debuted in Windows 10 almost ten years ago, but it’s still not for everybody. Unfortunately, Microsoft not only includes Edge with every copy of Windows 11 (and 10), but it’s also impossible to uninstall normally, on top of forcing you to use it with certain system features like Widgets.
Thankfully, though, it is possible to remove Edge from your Windows PC if you’re willing to put in the work. We’re here to help with that. By the way, if you’re in the European Economic Area (EEA), you can uninstall Edge normally in the latest versions of Windows.
Related
Best web browsers for Windows in 2023
There are plenty of options when it comes to web browsers for Windows, but if you’re trying to choose one, here are our top recommendations.
How to uninstall Microsoft Edge in Windows 11 if you’re in the EU
Users in the EEA can thank the Digital Markets Act, which made it mandatory for Microsoft Edge to be possible to uninstall in Windows 11. Because of this regulation, Microsoft has made it easy to uninstall Edge in these regions, so this is all you need to do:
- Open the Windows 11 Settings app.
- Choose Apps.
- Choose Installed Apps.
- Find Microsoft Edge in the list choose the three dots and then Uninstall.
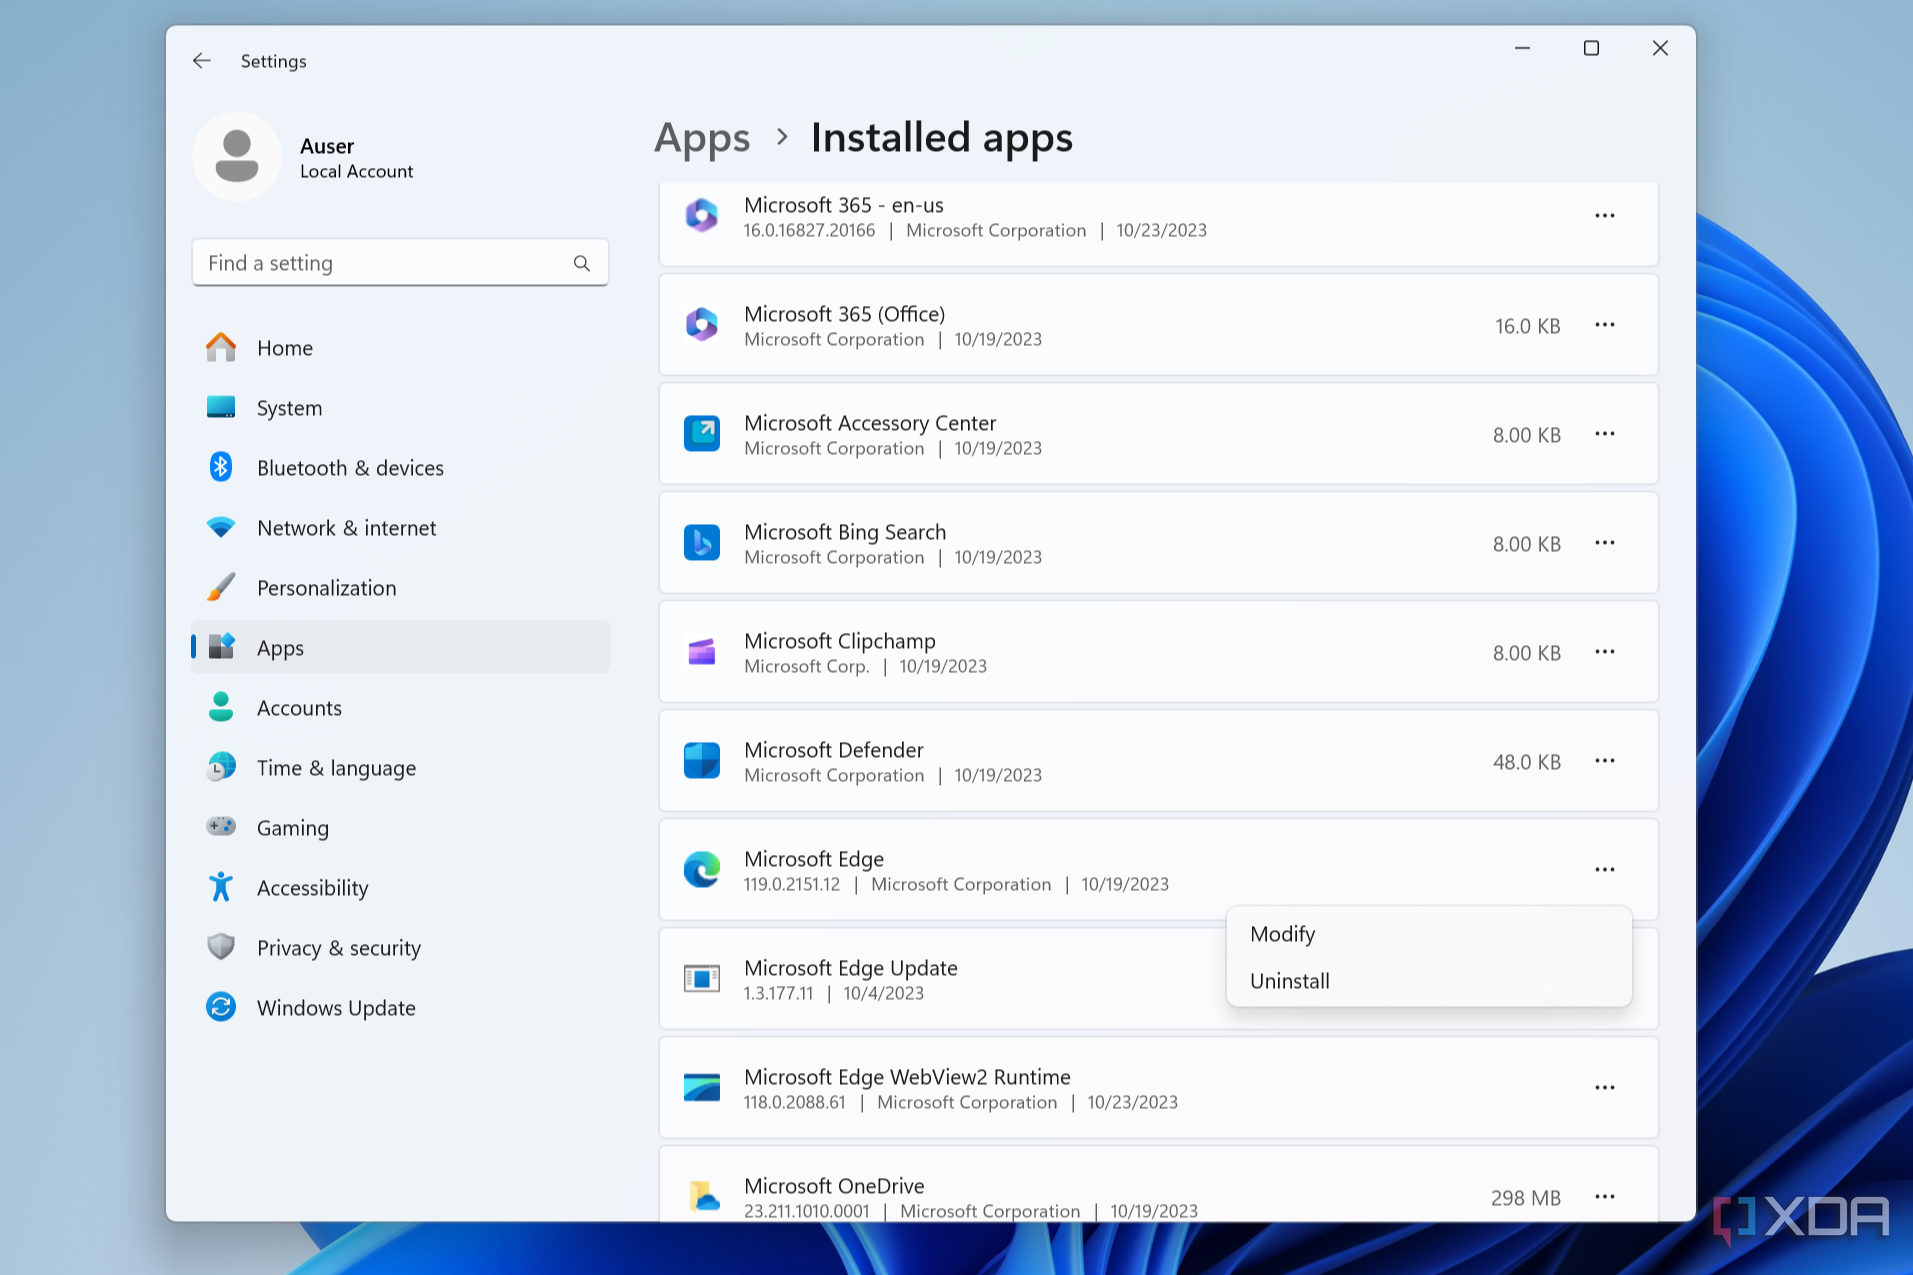
- Click Uninstall again to confirm your choice, and once more in the last dialog that appears.

Your PC will remove Microsoft Edge and you’ll have to restart your PC. Microsoft does warn you that certain system features may not work as expected if you remove Edge, so if you notice anything weird, you may need to install it again.
How to uninstall Microsoft Edge everywhere else
If you’re not in one of the regions affected by the Digital Markets Act, you’ll need to do a lot of tinkering. Here’s how it works:
- Start by downloading ViVeTool from GitHub.
- Extract the content of the ZIP file and copy the path of where you extracted the folder.
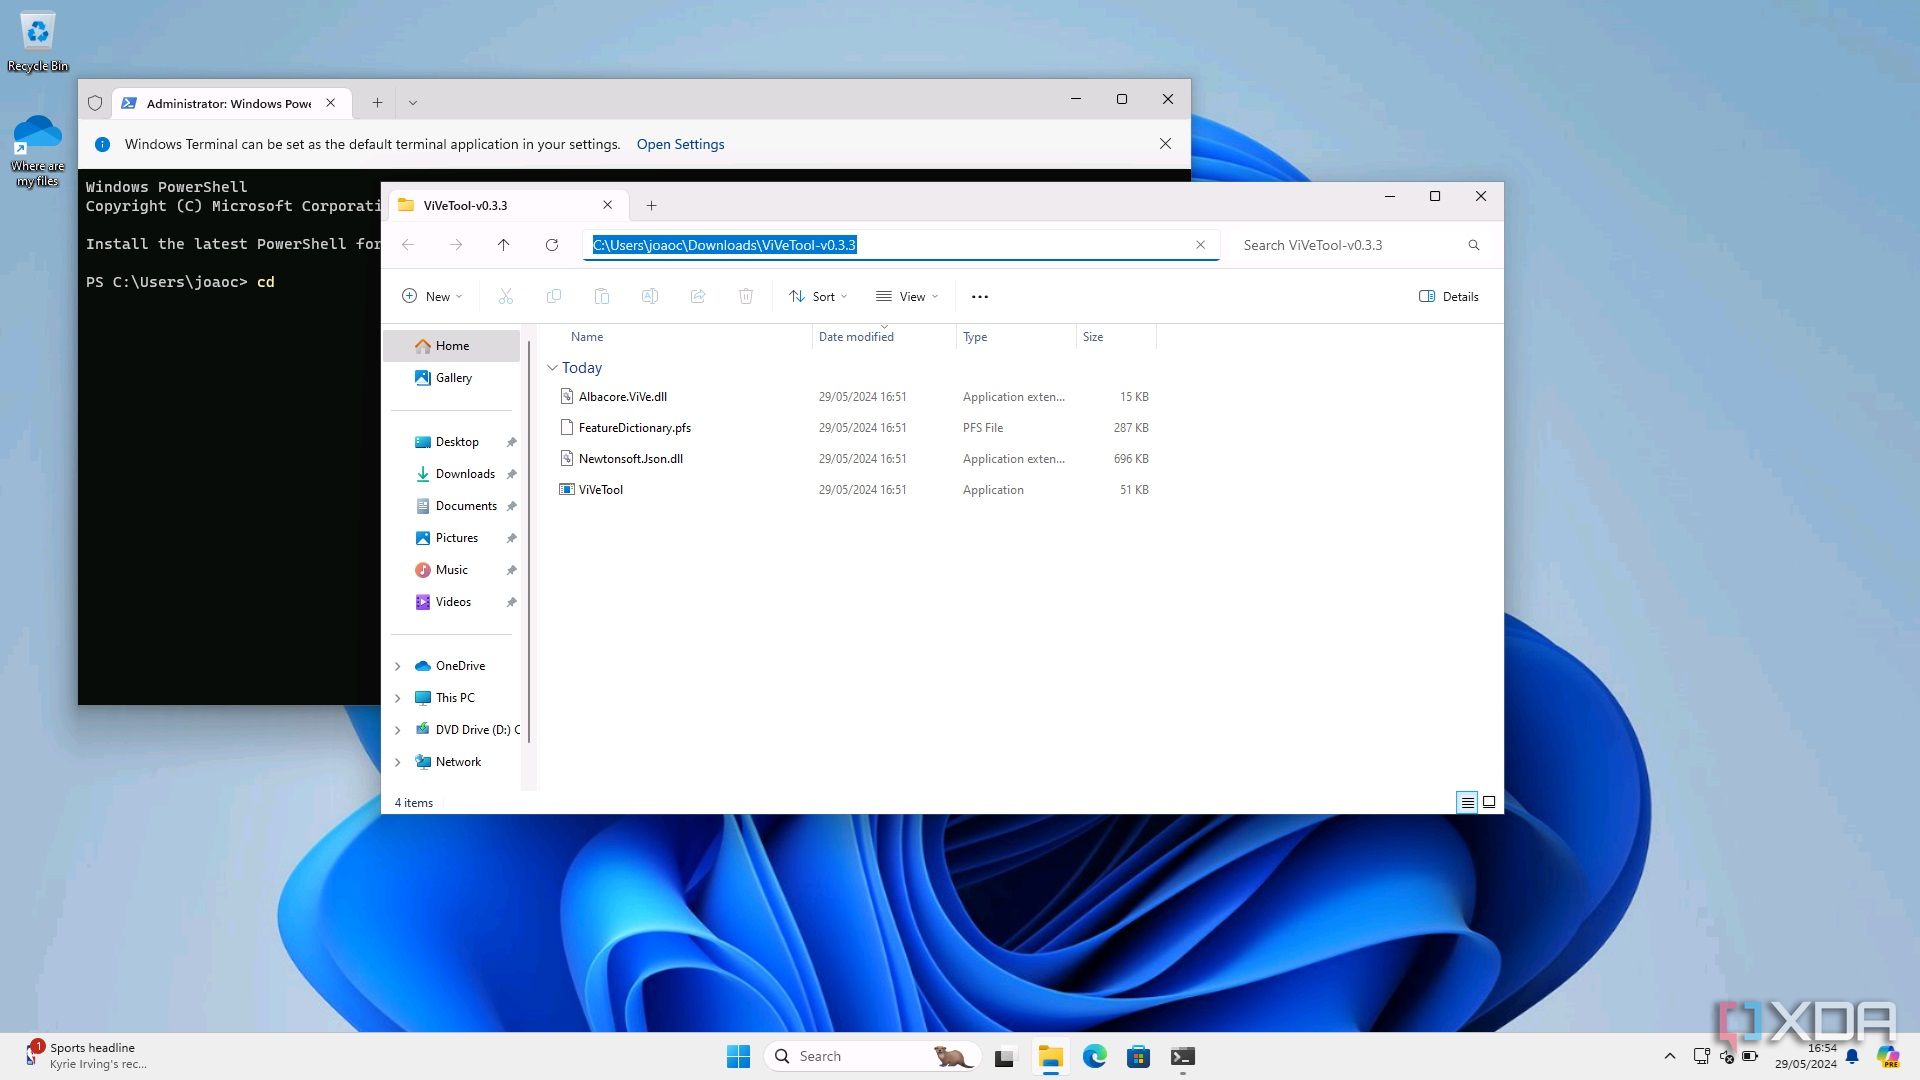
- Right-click the Start menu icon (or press Windows + X on your keyboard) and choose Terminal (Admin).
- Type cd followed by the path you copied above. In our case, it will look like this:
cd C:\Users\joaoc\Downloads\ViveTool-v0.3.3
- Now, enter the following text:
./vivetool /enable /id:44353396
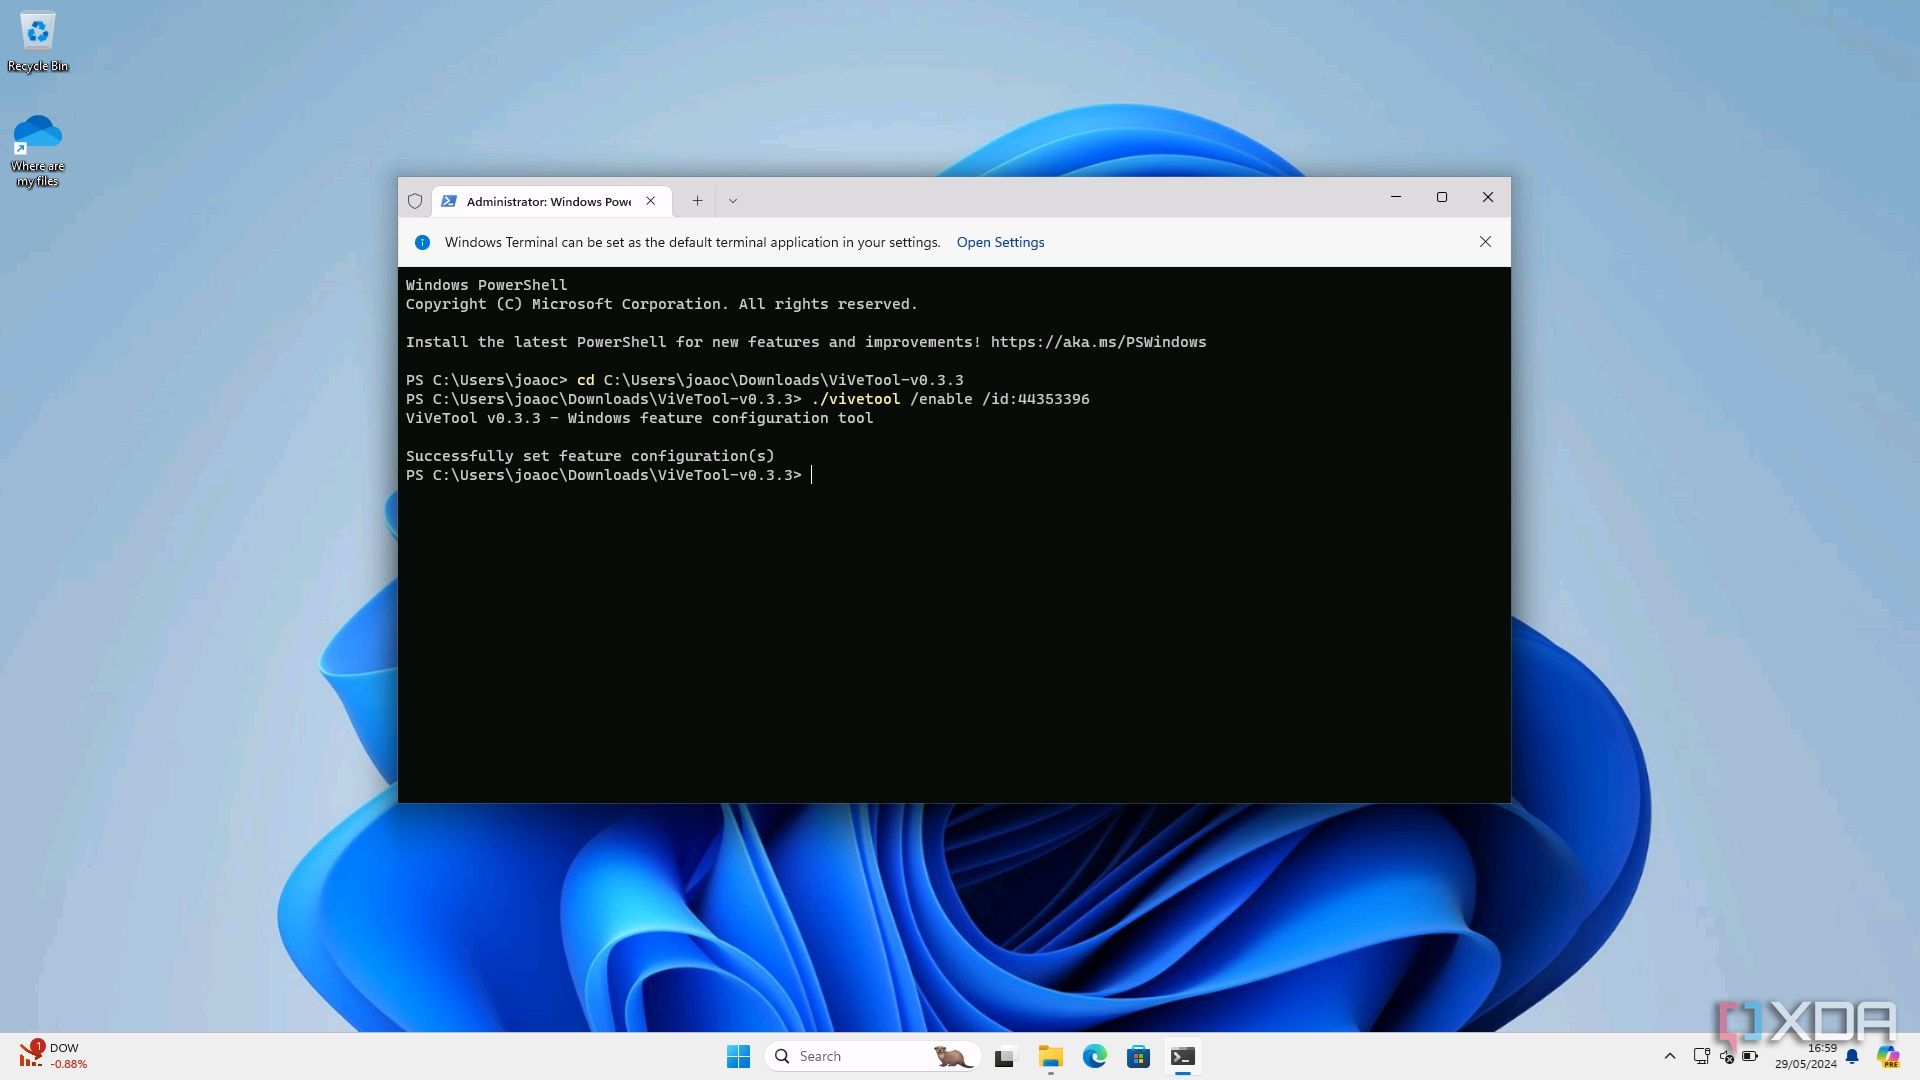


- Restart your PC for the changes to take effect.
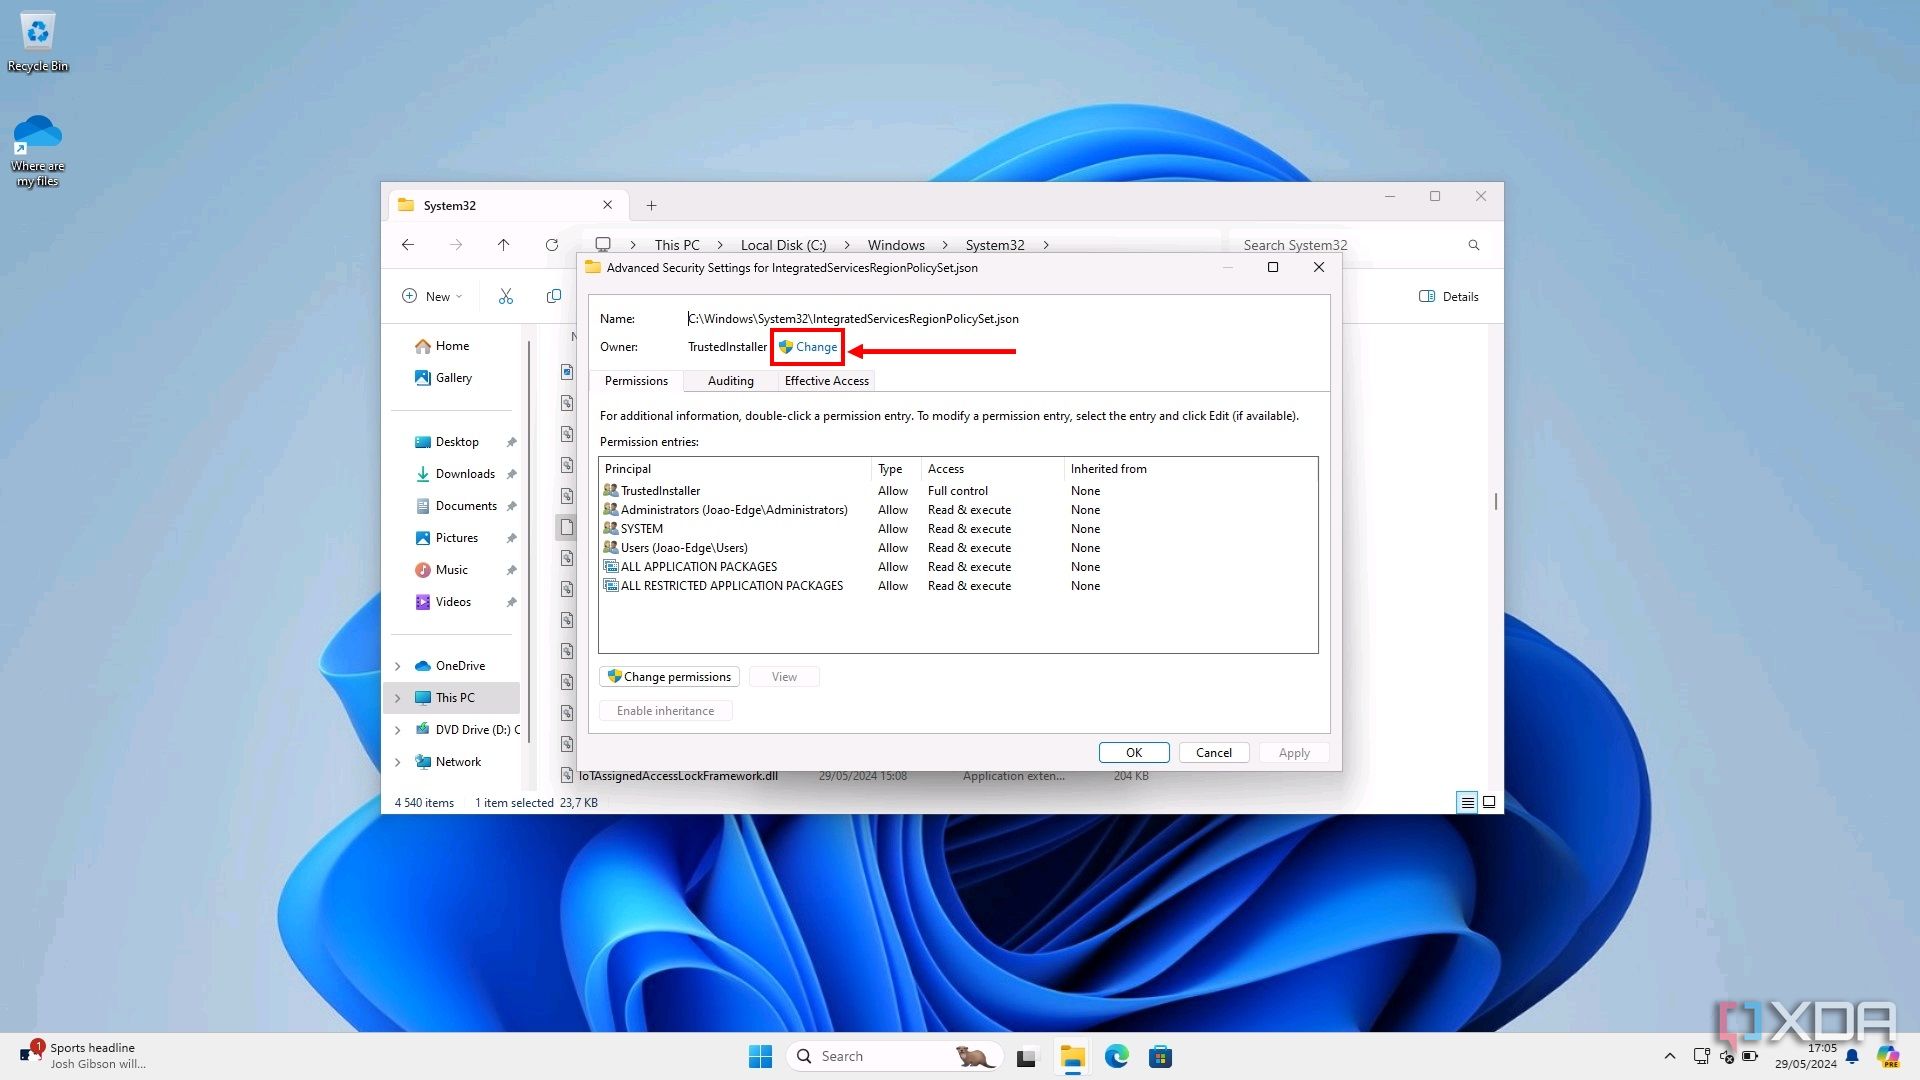
- Now, open File Explorer and navigate to C:\Windows\System32.
- Find the file called IntegratedServicesRegionPolicySet.json, then right-click it and choose Properties.

- Switch to the Security tab and click Advanced.
- Here, click Change near the top next to Owner:TrustedInstaller.


- Enter the text Administrators in the box at the bottom and then click Check names to make sure it’s working as intended. It should look like this, but with your PC’s username instead:
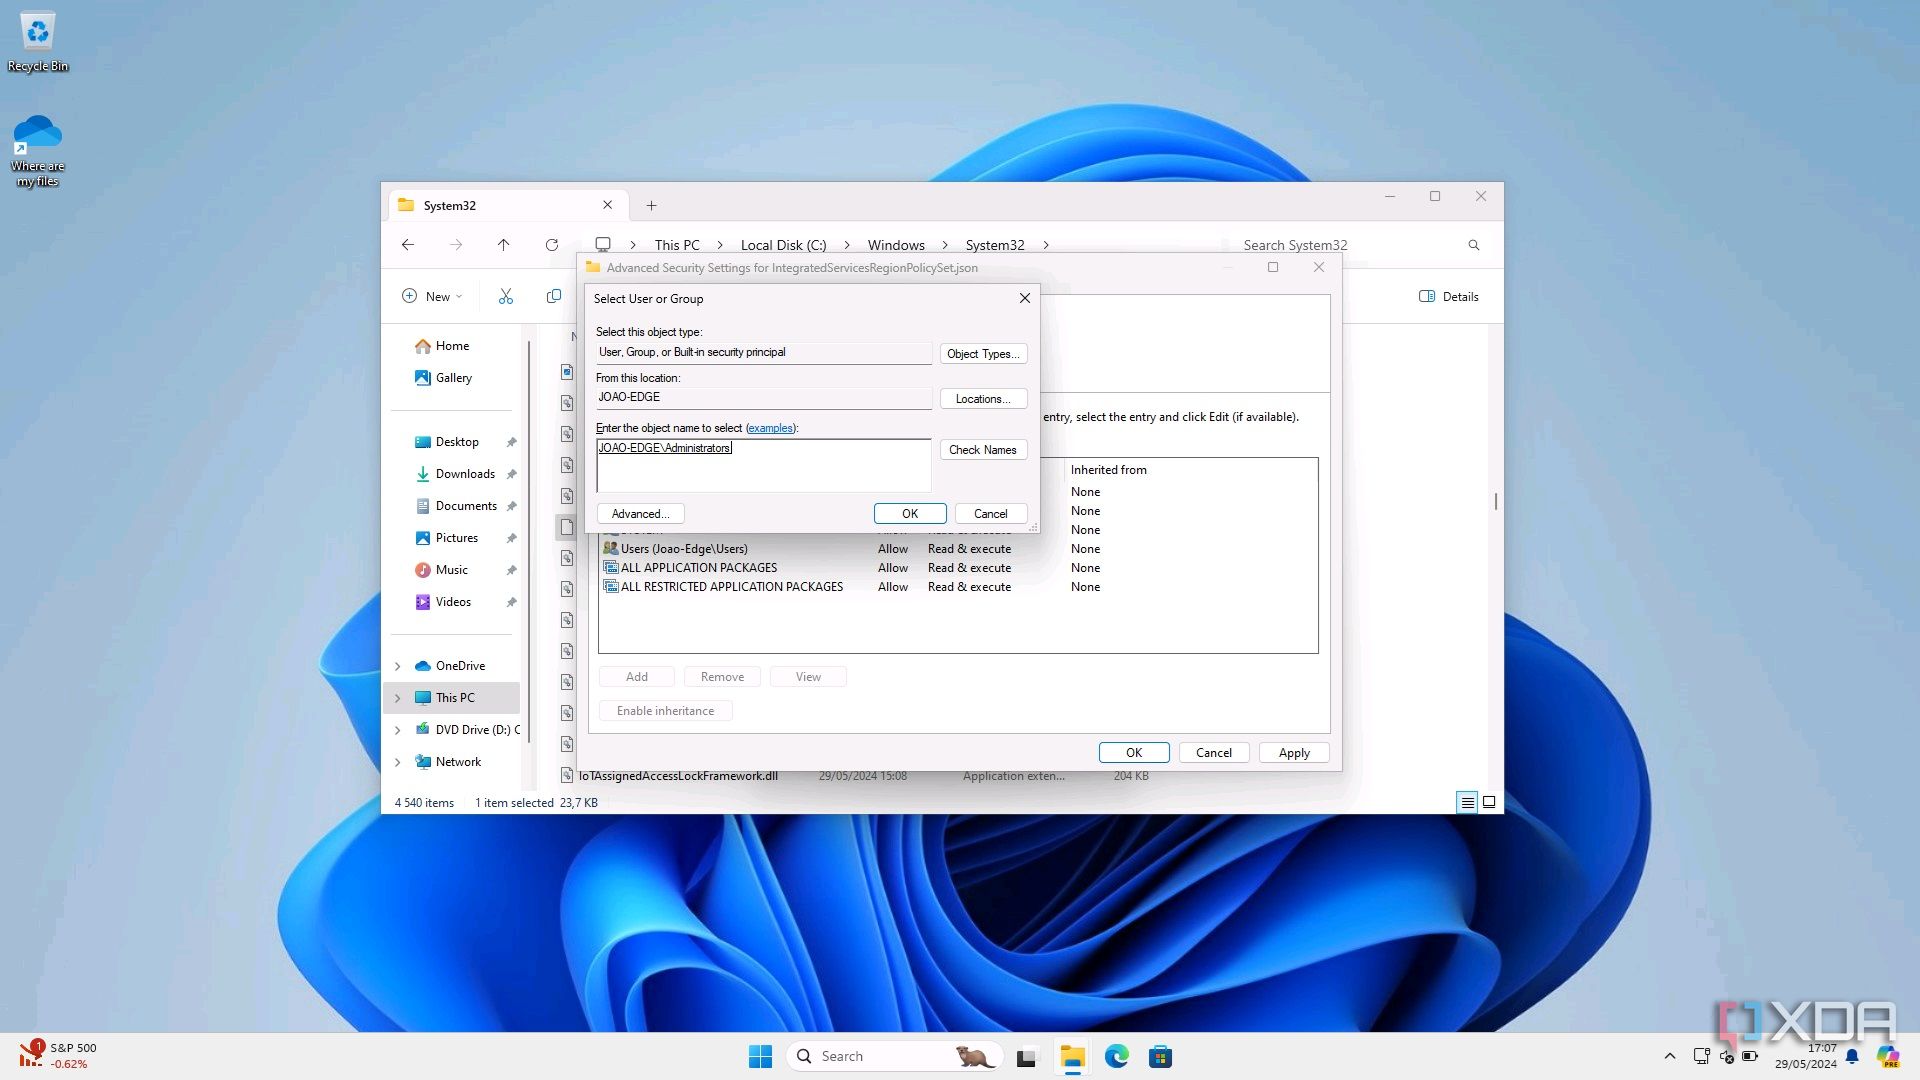
- Click OK and then OK again until you’re back in the Properties window.
- Click Edit.
- Select the Administrators group in the pane at the top, then check the box that says Full control in the pane at the bottom.
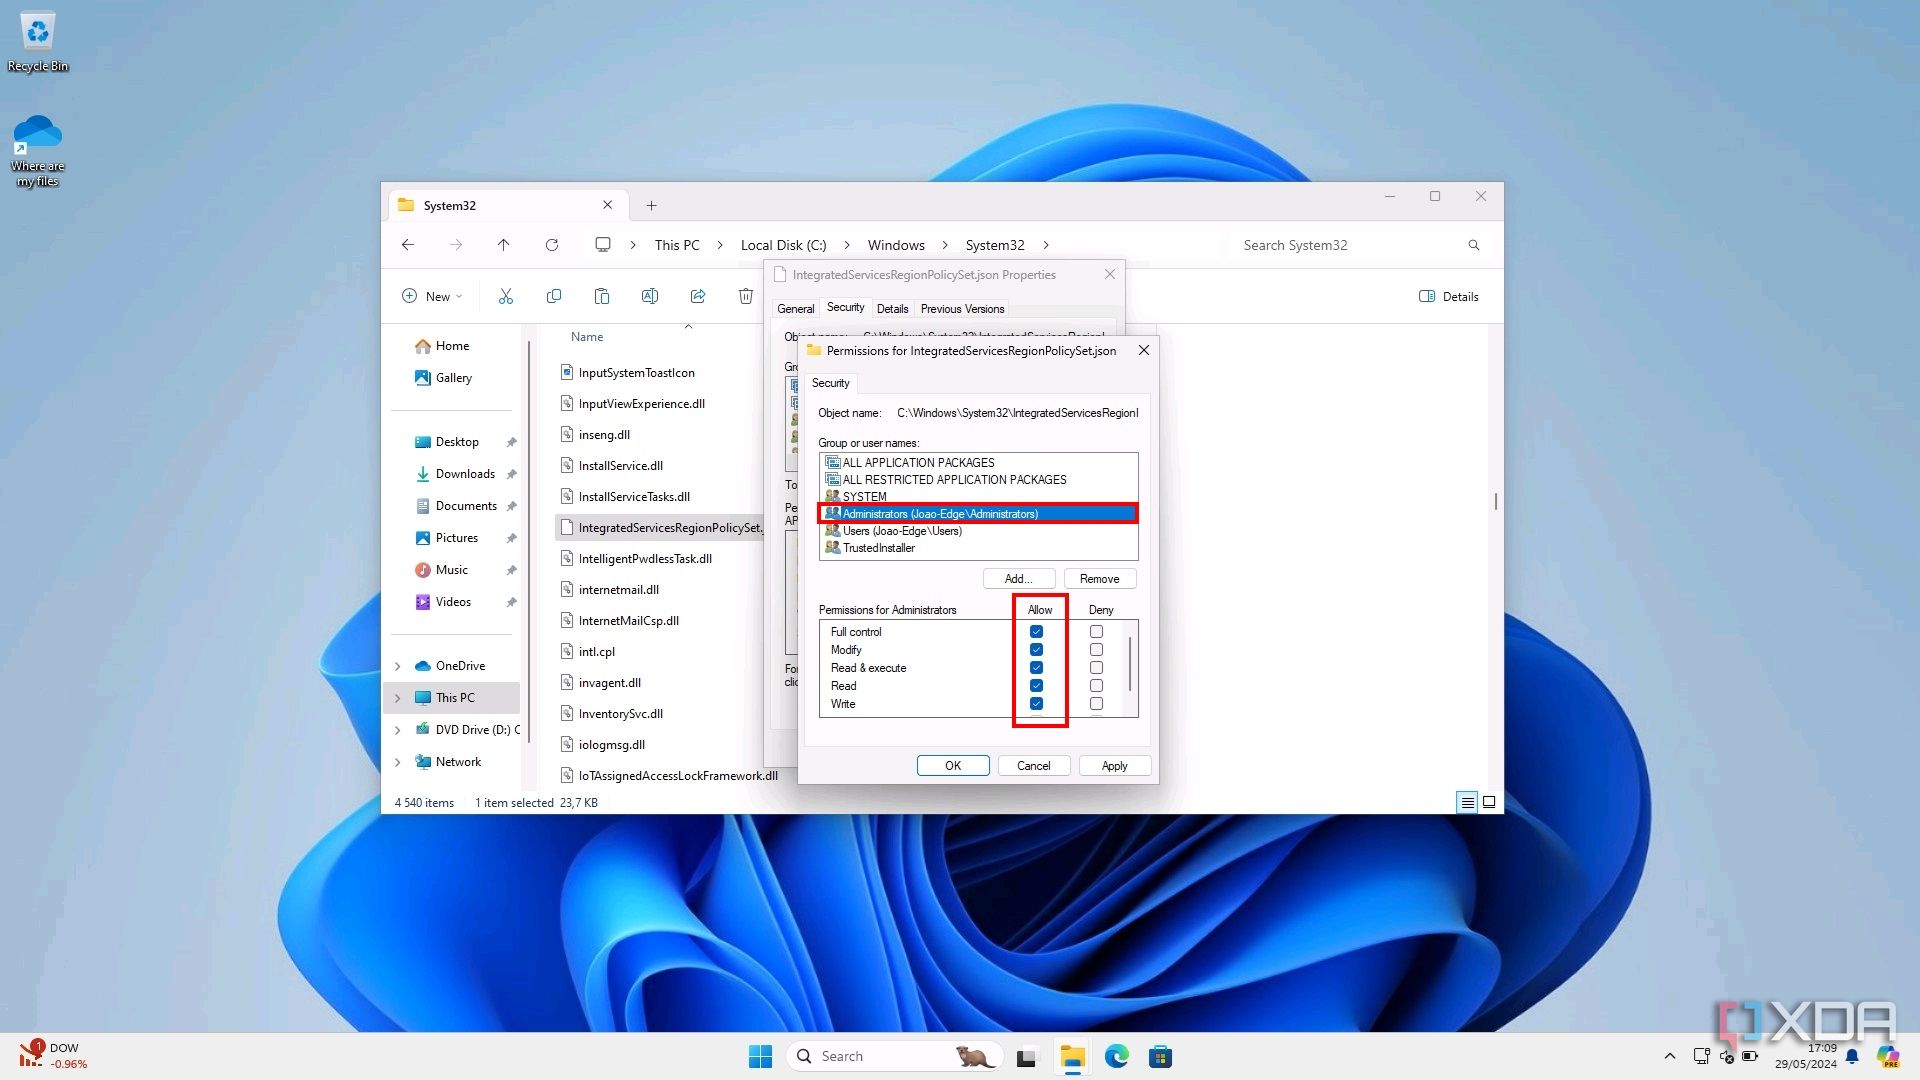
- Click OK, then Yes, and then OK again to confirm the changes.


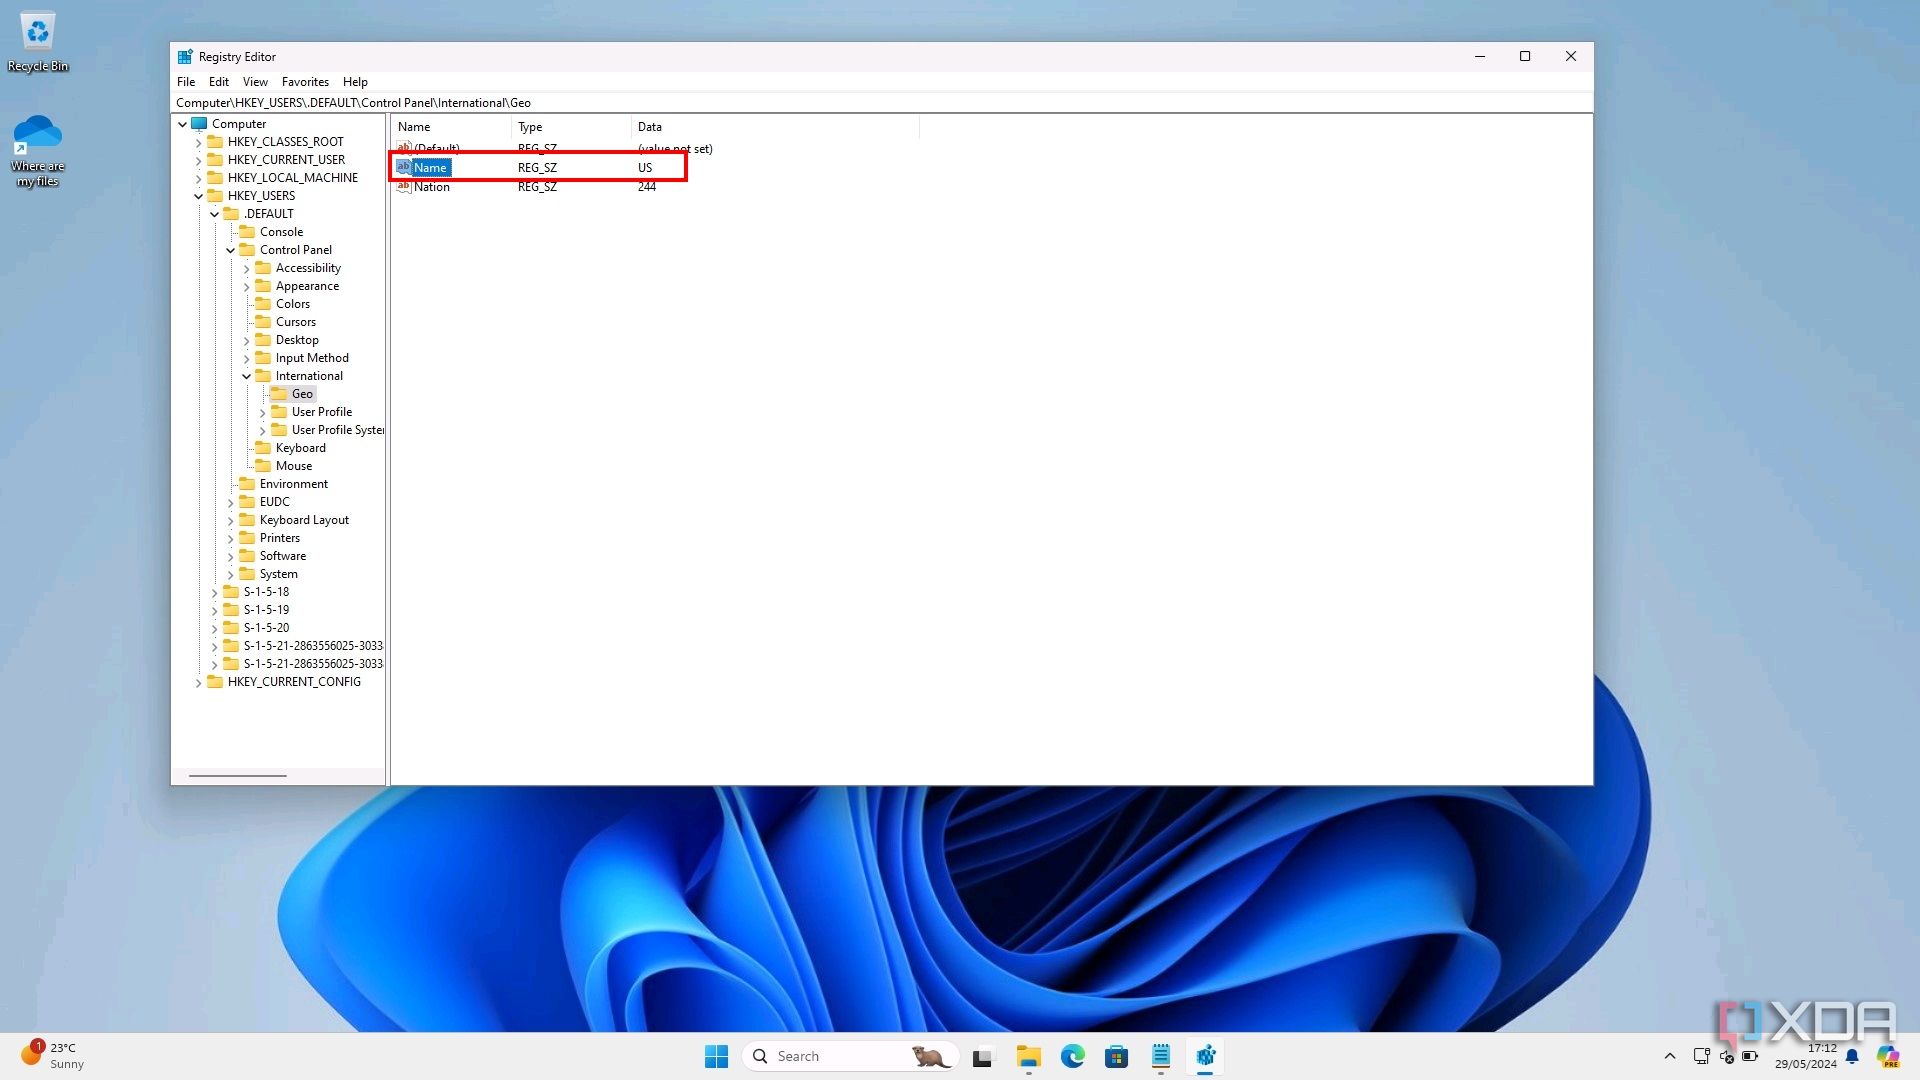
- Open the Start menu and type regedit then press Enter to open the Registry Editor.
- Navigate to this path (or copy and paste it in the address bar):
HKEY_USERS\.DEFAULT\Control Panel\International\Geo
- Note down the value next to Name.
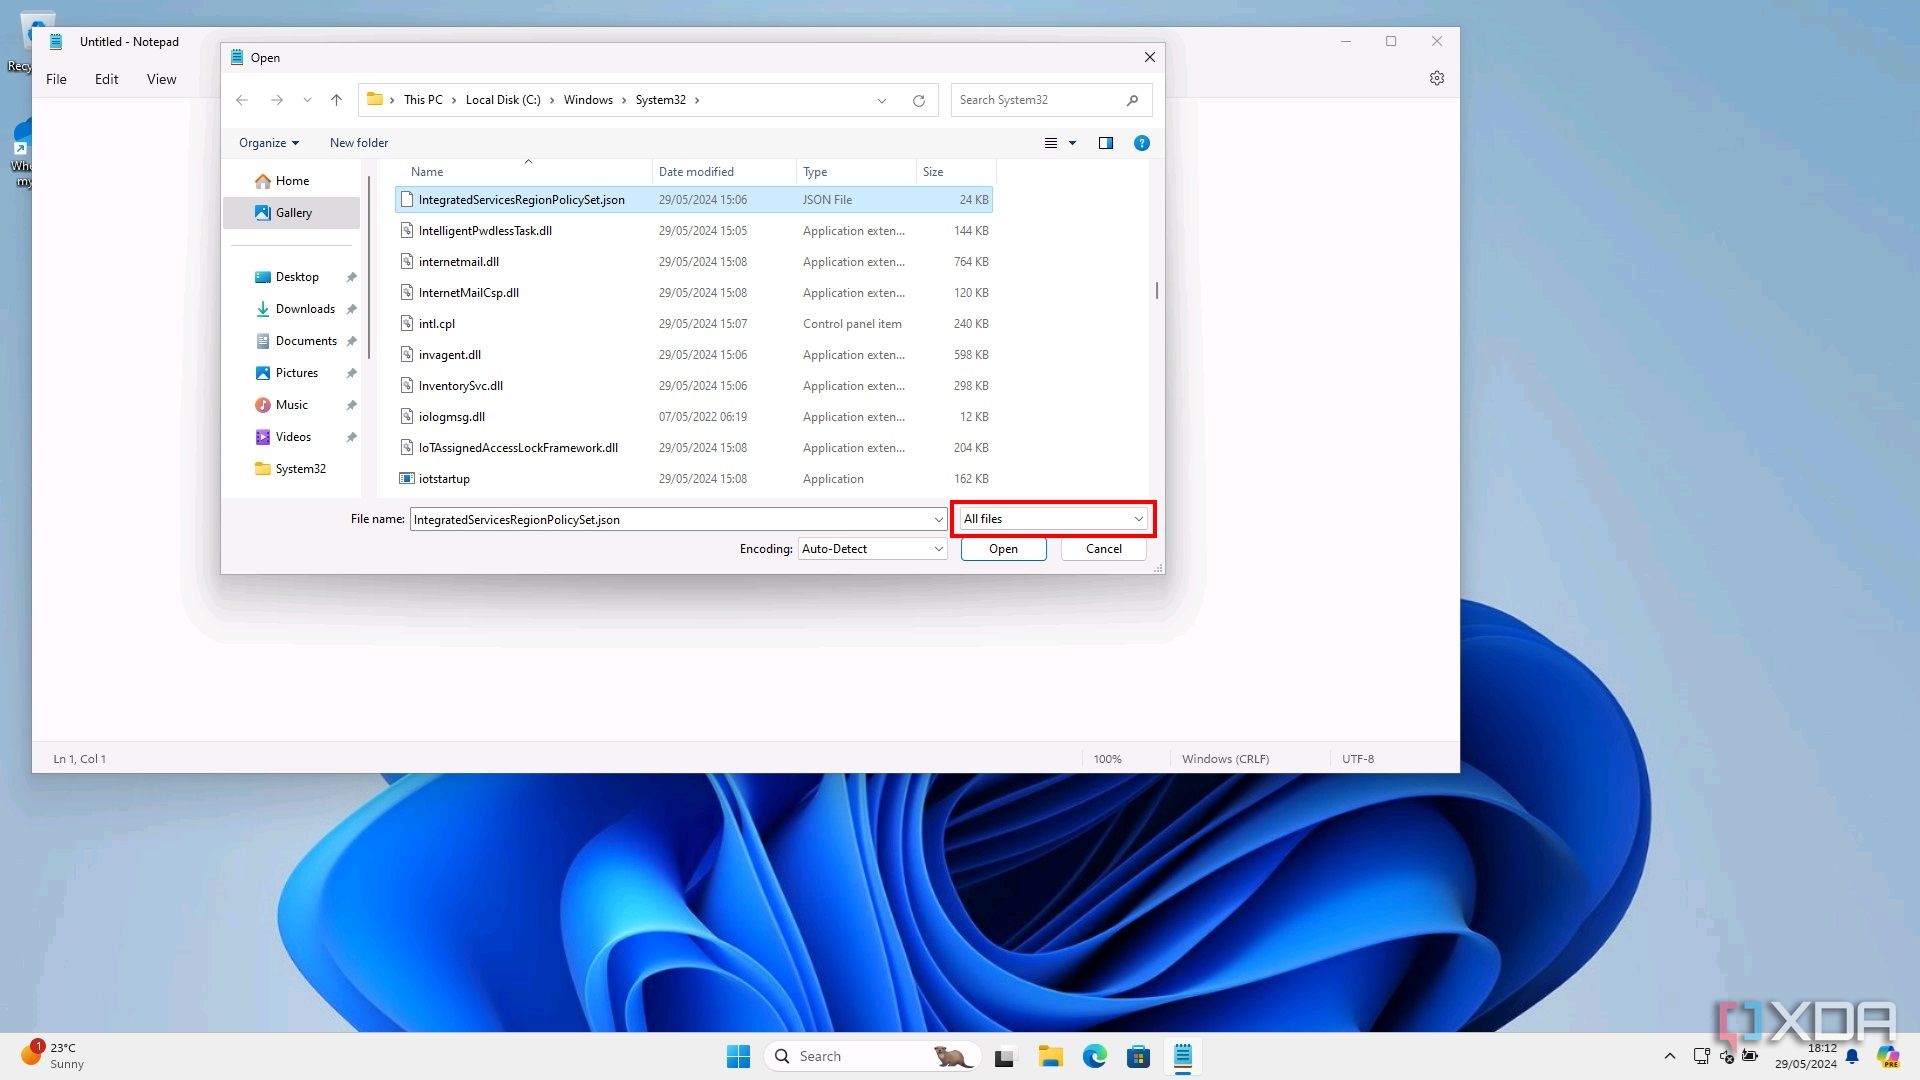
- Now, open the Start menu and search for Notepad. Select the Run as administrator option.
- Click File > Open and browse to C:\Windows\System32.

- Change the Text documents dropdown menu in the bottom left to All files, and then select the IntegratedServicesRegionPolicySet.json file.
- Note the first block of text that starts with Edge is uninstallable, make the following changes:
- Next to defaultstate, change the text in the brackets to enabled. The line should look like this:
"defaultstate": "enabled",
- Towards the end of this block, next to enabled, add the value from step 18. For example, we’re going to add “US” followed by a comma. It will look like this:
"enabled":{"US", "AT", "BE", (...)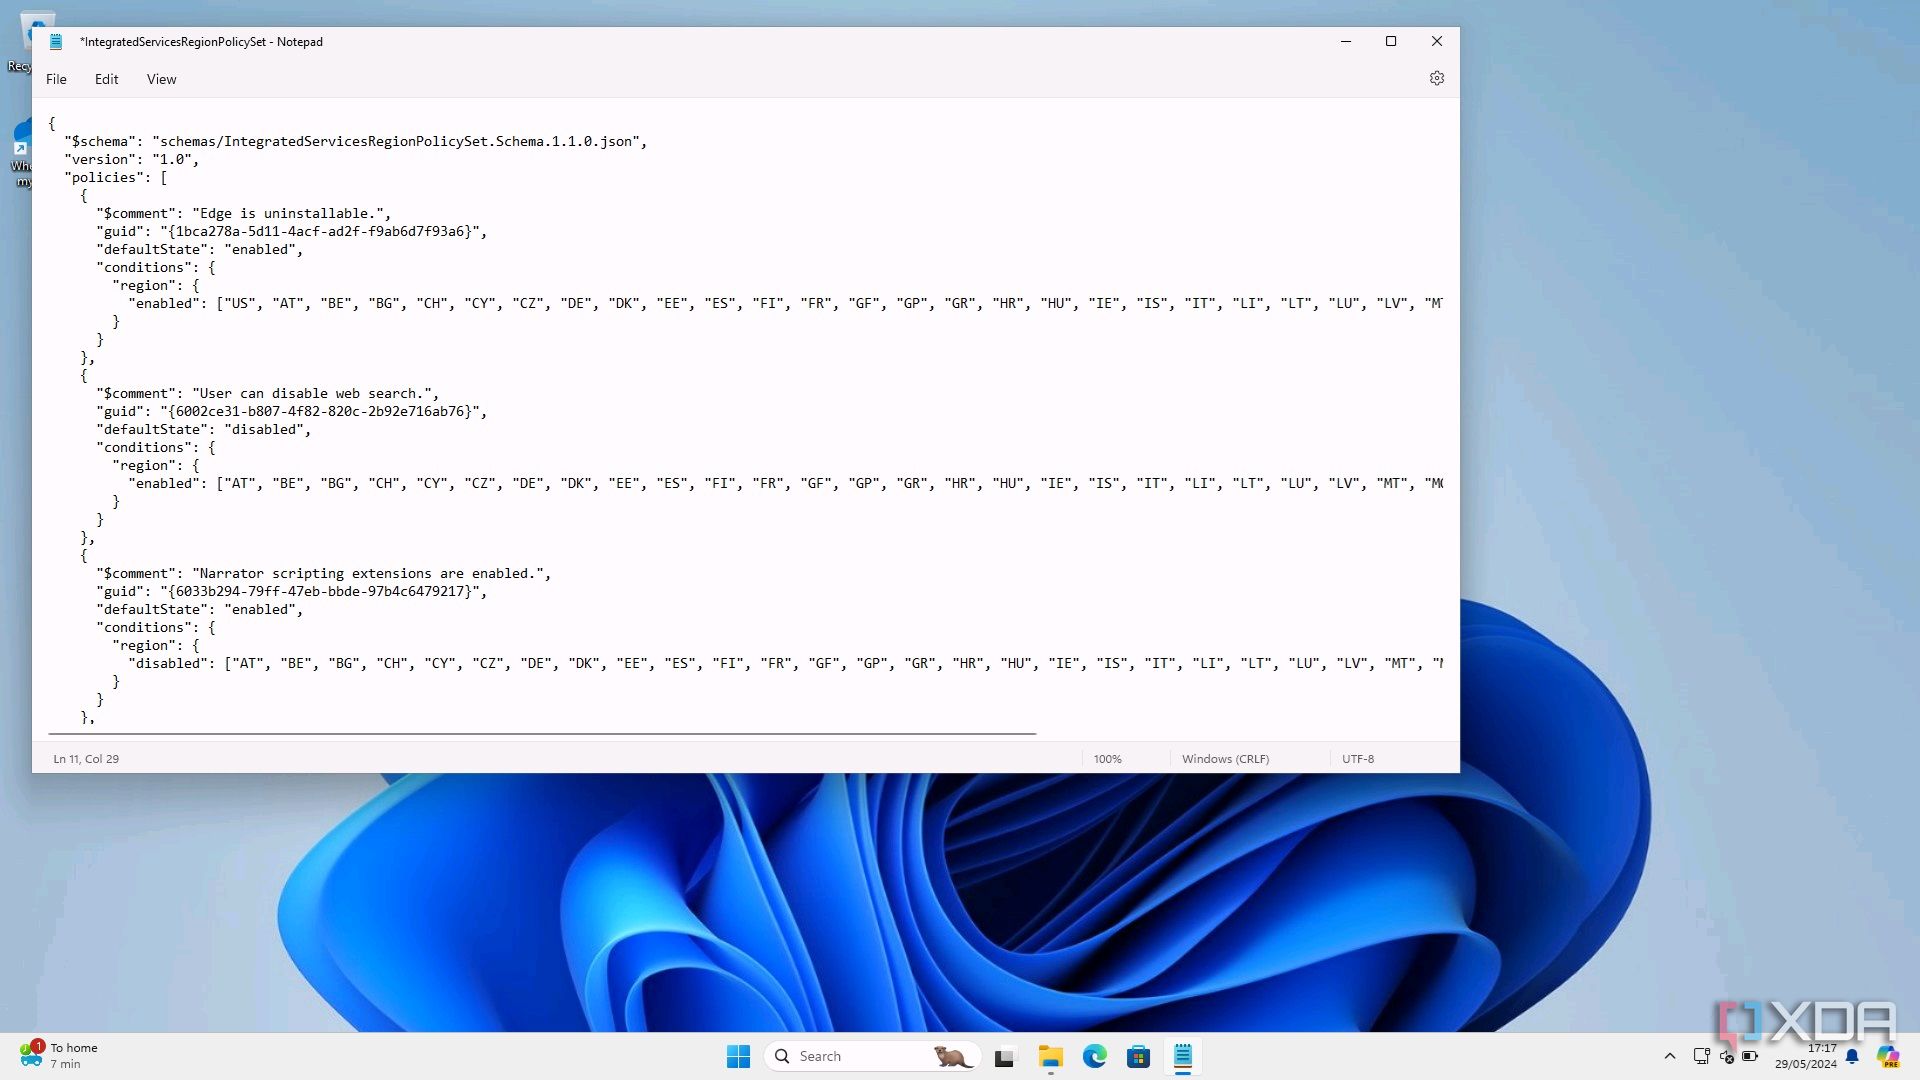
- Next to defaultstate, change the text in the brackets to enabled. The line should look like this:
- Click File > Save and close Notepad.
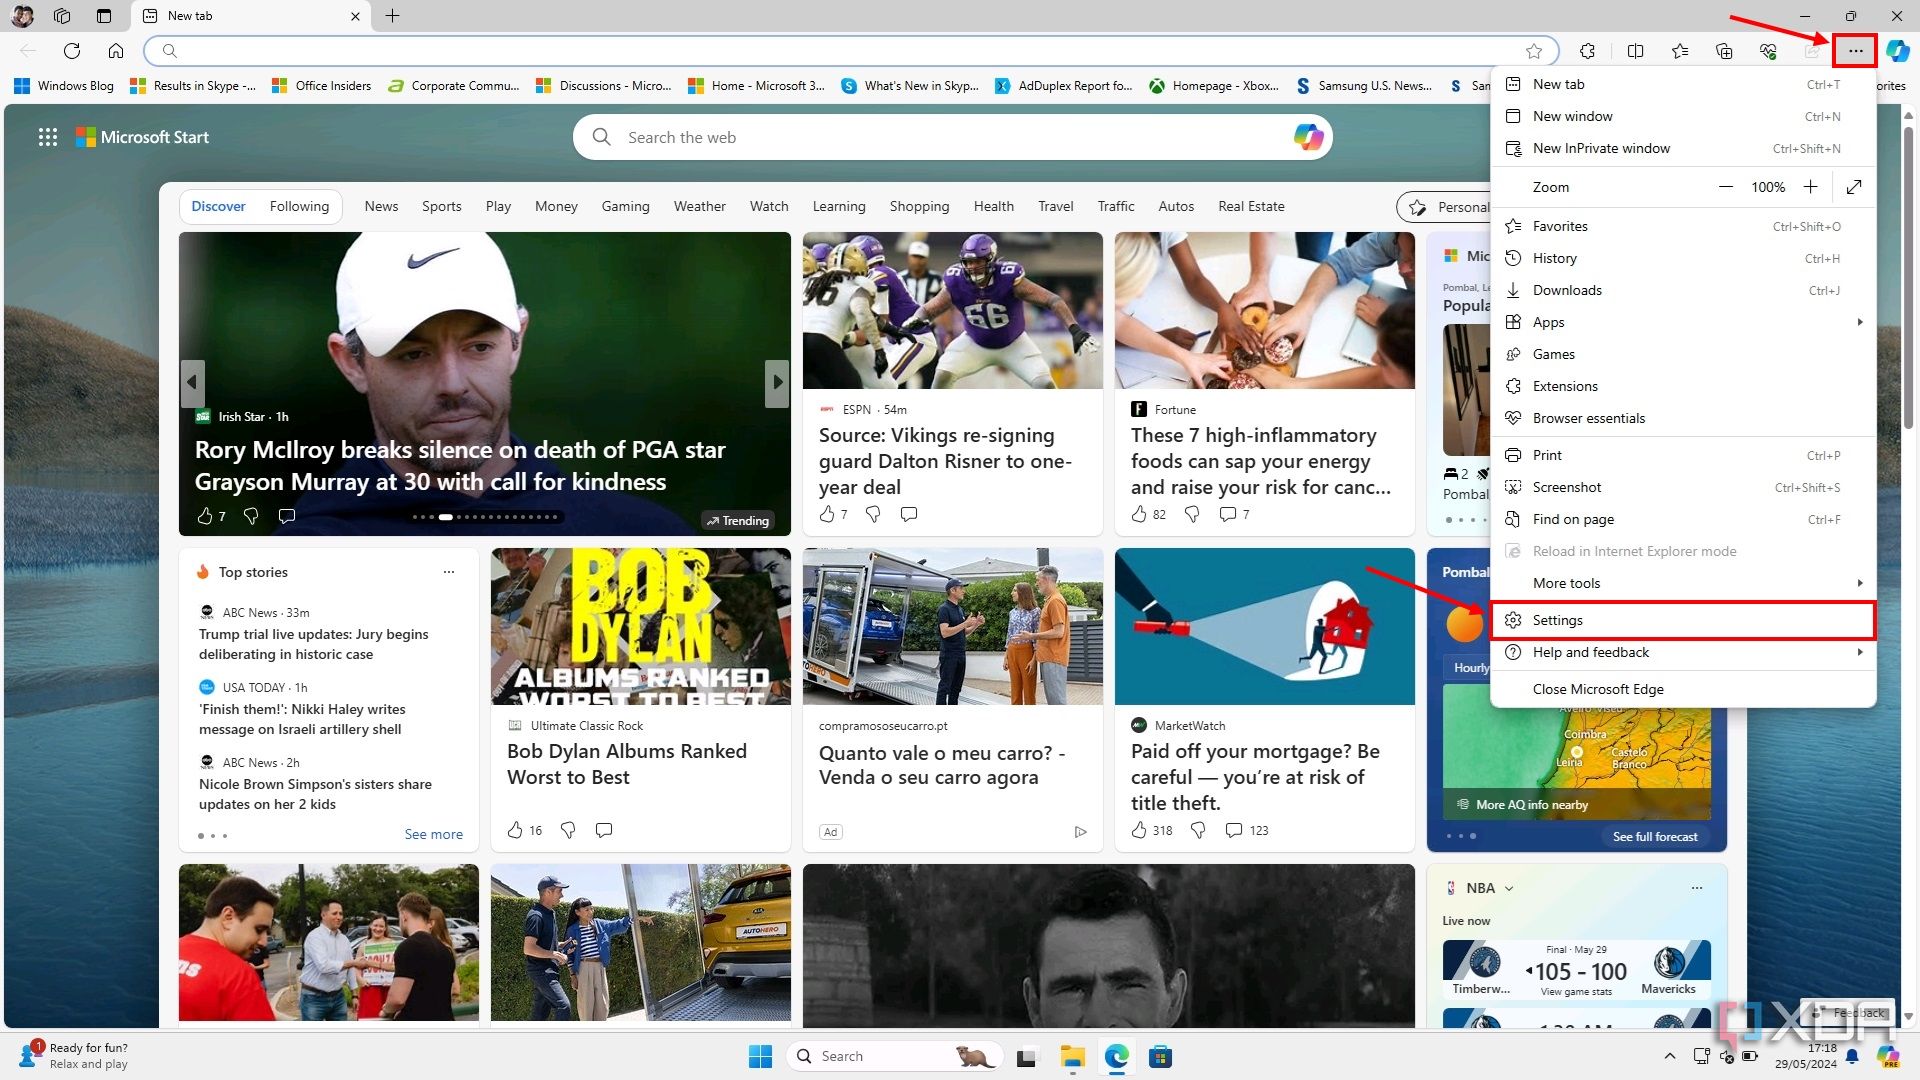
- Open Microsoft Edge.
- Click the ellipsis icon in the top right and choose Settings.


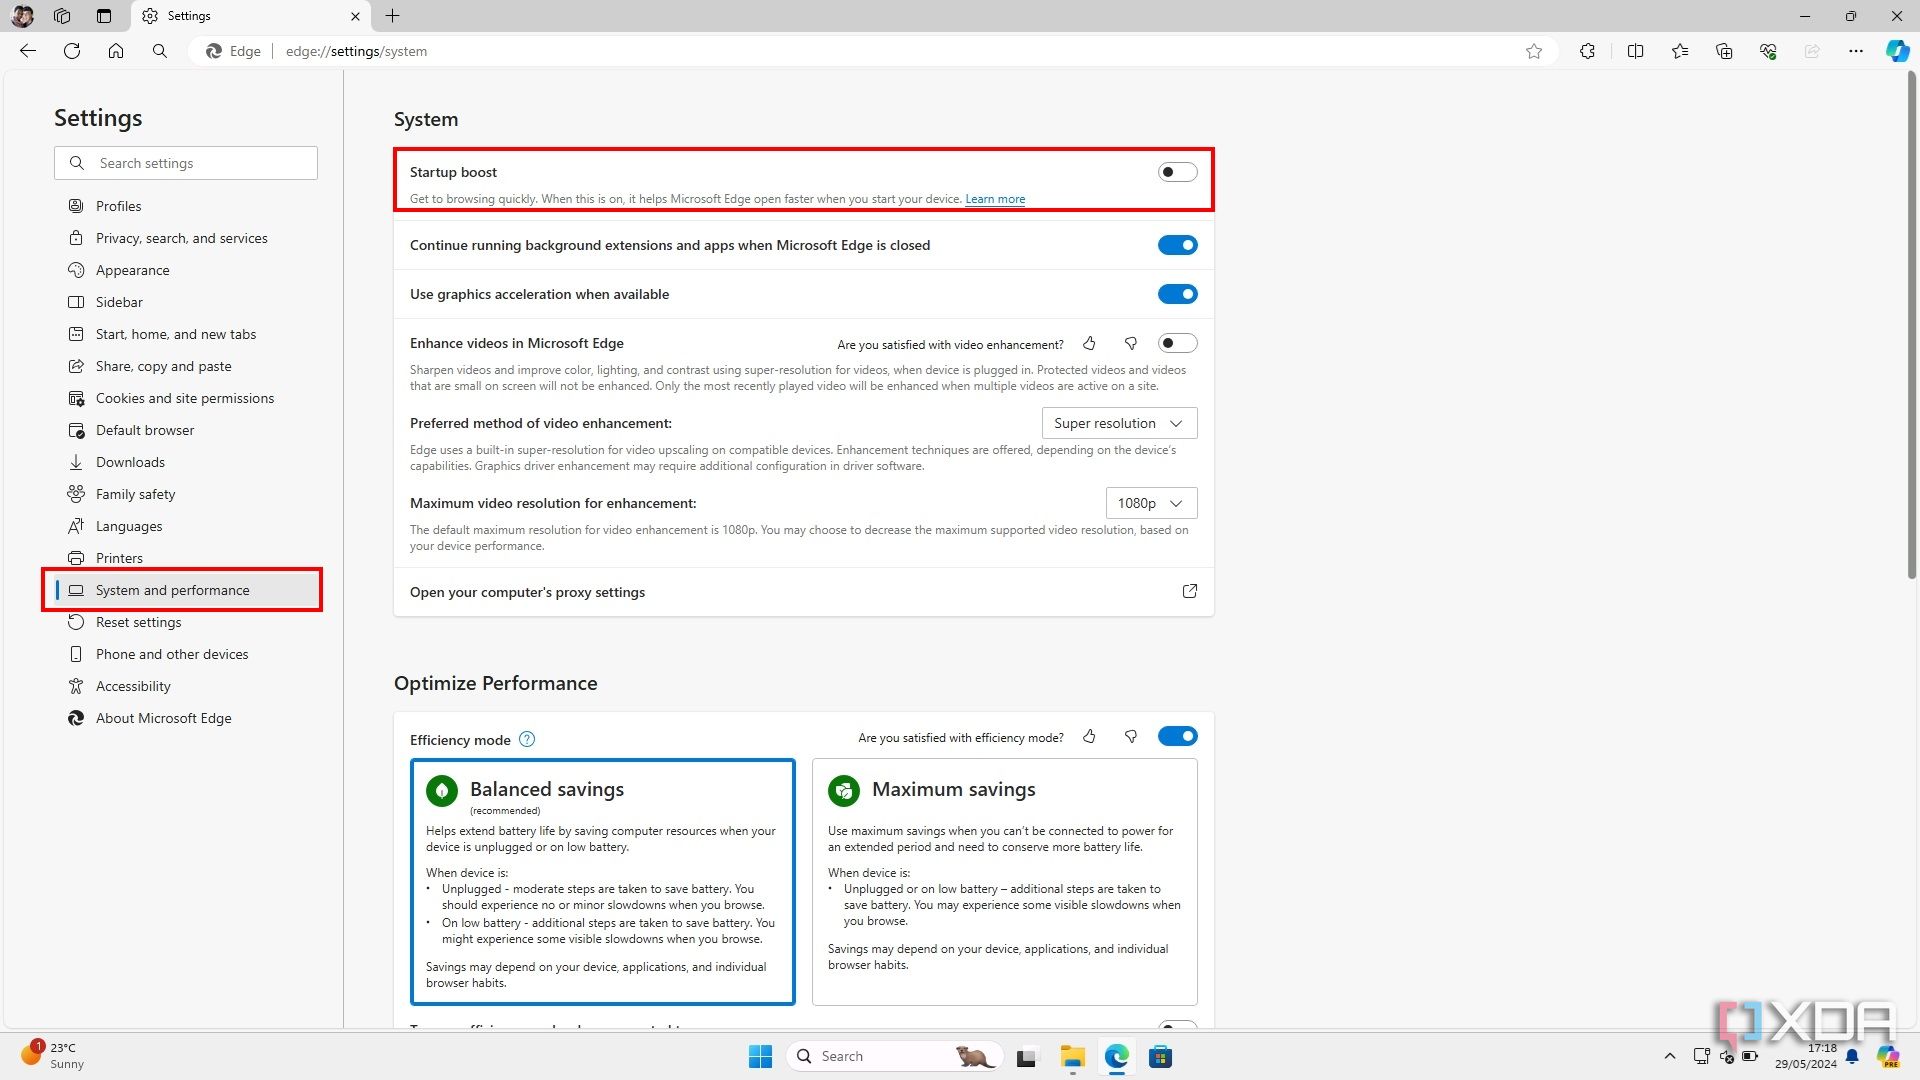
- Go to the System and performance section and turn off Startup Boost.
- Close the browser and restart your PC.
- Open the Settings app.
- Choose Apps.
- Choose Installed Apps.
- Find Microsoft Edge in the list choose the three dots and then Uninstall.
If the Uninstall button is greyed out, restart your PC again to make sure all the changes have kicked in. If it’s not working after a couple of reboots, recheck your steps.
- Click Uninstall again to confirm your choice, and once more in the last dialog that appears.

You don’t have to uninstall Edge
As you can tell, Microsoft doesn’t make it easy to remove the Edge web browser in Windows 11. However, you don’t really have to uninstall Edge. Once you’ve changed your default browser, you can just ignore Edge for the most part, so you don’t have to go through all of this trouble. If you don’t even want to see Edge when you use Widgets or the Windows Search bar, a tool like MSEdgeRedirect can reroute links from these features to your default browser.
#uninstall #Microsoft #Edge #Windows
source: https://www.xda-developers.com/how-uninstall-microsoft-edge-windows/

