

Readers help support Windows Report. We may get a commission if you buy through our links.
Read our disclosure page to find out how can you help Windows Report sustain the editorial team Read more
Sometimes you need multiple signatures in a document, and in today’s guide, we’re going to show you how to create multiple signature lines in Microsoft Word.
How can I create multiple signature lines in Word?
1. Use the Signature Line option
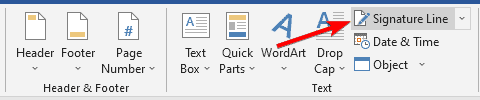
- Go to the Insert tab and click on Signature Line.

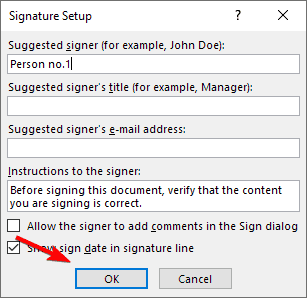
- Enter the necessary information and click on OK.

- Next, repeat the same steps to add another signature.


This is the best way to add multiple signatures on a Word document since it will allow it to digitally sign it.
2. Use Text Box
- Go to the Insert tab and choose Text Box.

- Select the desired style.
- Draw the text box and enter several underlines to create a line.
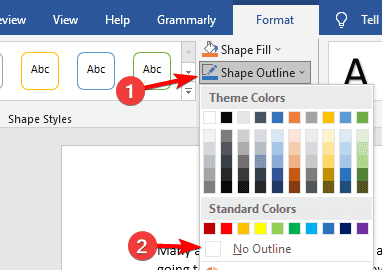
- Next, double-click the border.

- In the Outline options, set No outline.

- Once done, just select the text box, and press Ctrl + C and Ctrl + V to paste it.

- If needed, remove the outline on the second signature line.


How to add a blank signature line in Word?
If you want to add a blank signature line, you can do that with a Text Box, or you can use methods from our article on how to add a signature line without X in Microsoft Word.
Now you know how to insert multiple signature lines in Word, so go ahead and give these methods a try and see which one works best for you.
We also have a guide on how to add a signature to Microsoft Word that might be useful to you. If you encounter any issues, we have a great guide on what to do if your signature in Microsoft Word is not showing.
#Insert #Multiple #Signature #Lines #Microsoft #Word
source: https://windowsreport.com/microsoft-word-multiple-signature-lines/

