

You’ll need to enable virtualization if you want to run virtual machines on Windows 11 or use the Windows Subsystem for Linux. Here’s how.
Quick Links
Whether you’re running a standard virtual machine with Hyper-V or using the Windows Subsystem for Linux, virtualization is a crucial feature for many Windows users and developers. This technology allows you to create an isolated, emulated computer within your own PC, which should let you run apps in a safe environment or try operating systems which are not usually supported.
While we’ve covered the general process of creating a virtual machine in previous articles, you can’t actually do that unless you enable virtualization first. This process consists of two major steps. First, you might need to activate virtualization in your computer’s BIOS, if your hardware supports it (which most modern PCs can). Next, you’ll need to enable virtualization features in Windows 11 itself. Let’s take a look at how to do these things.
How to enable virtualization in the BIOS
Enabling virtualization in the BIOS isn’t the most straightforward process because your PC’s manufacturer and operating system will impact the way you can get into and use its BIOS. Thankfully, Windows 11 streamlines the process overall. Here’s what you need to do:
- Press the Start button.
- Open the Settings app.
- Select System, then choose Recovery.

- Click on Advanced startup, then click Restart now. This should bring you into your computer’s advanced startup settings after you reboot.
-

Alternatively, you can hold Shift on your keyboard while restarting your PC through the Start menu.


- After your computer restarts, click Troubleshoot, then Advanced options.
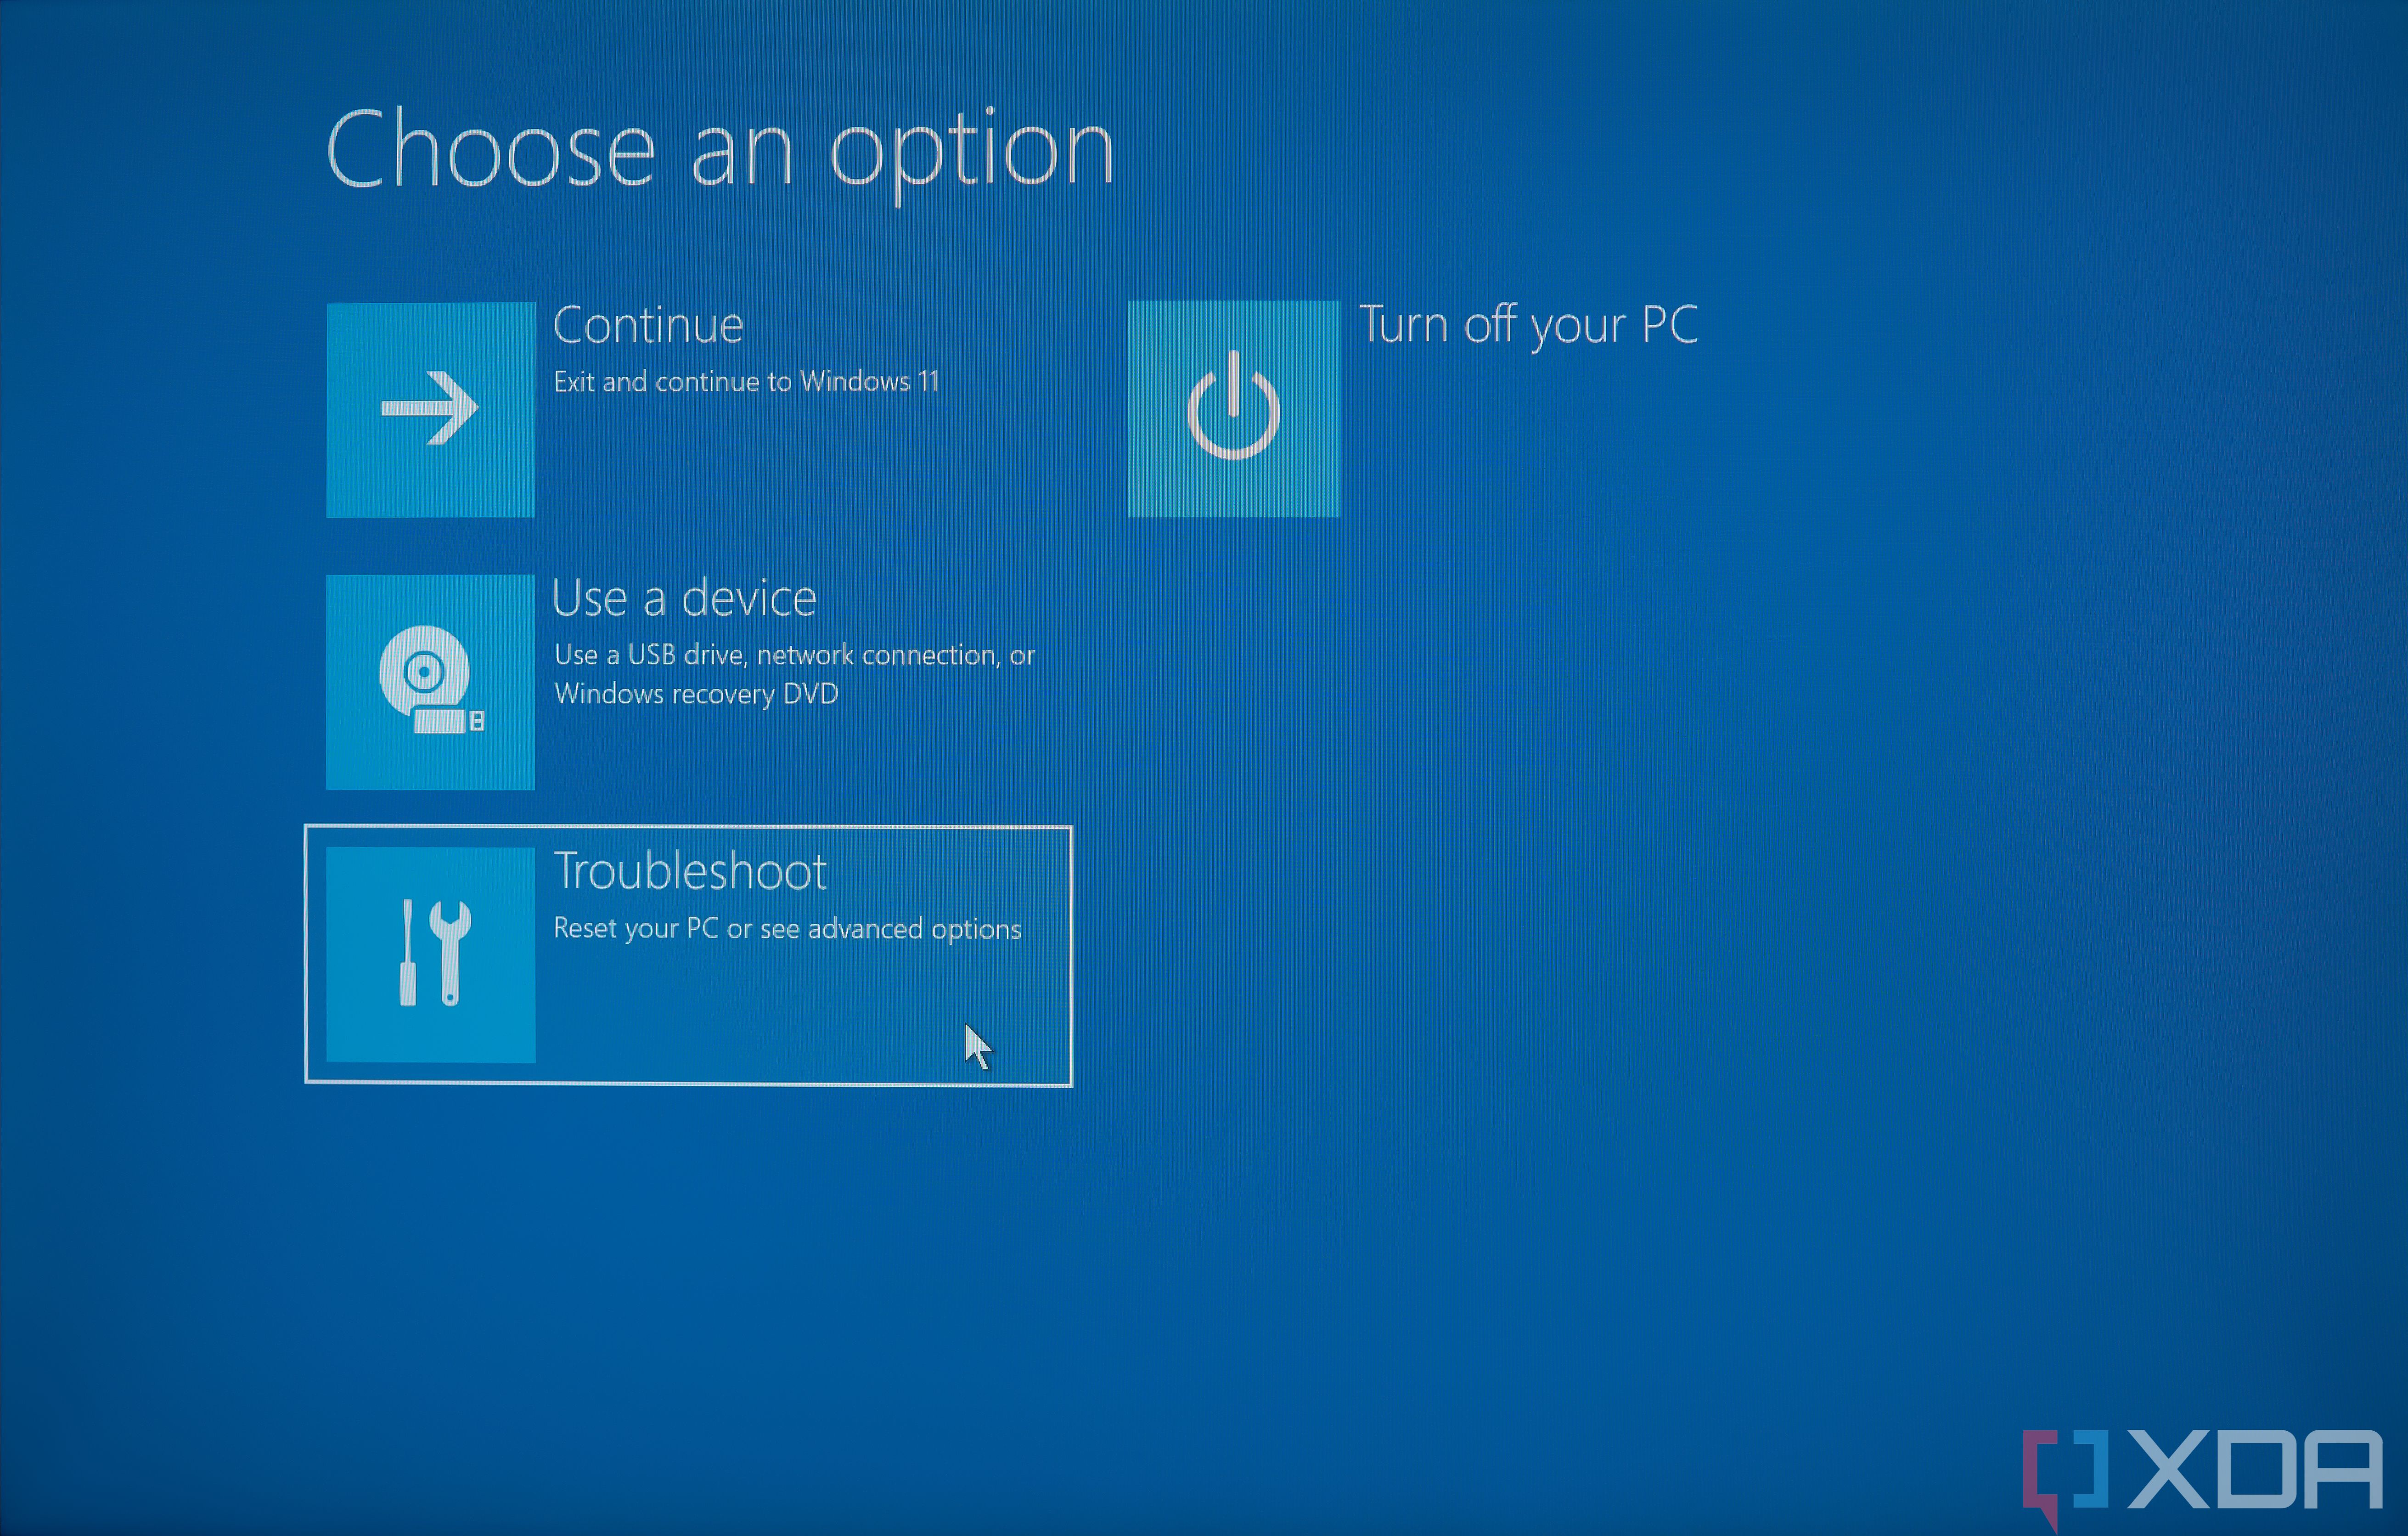
- Choose UEFI Firmware Settings, then Restart. Now, you’ll be taken to your PC’s BIOS/UEFI settings, which will vary depending on your device.
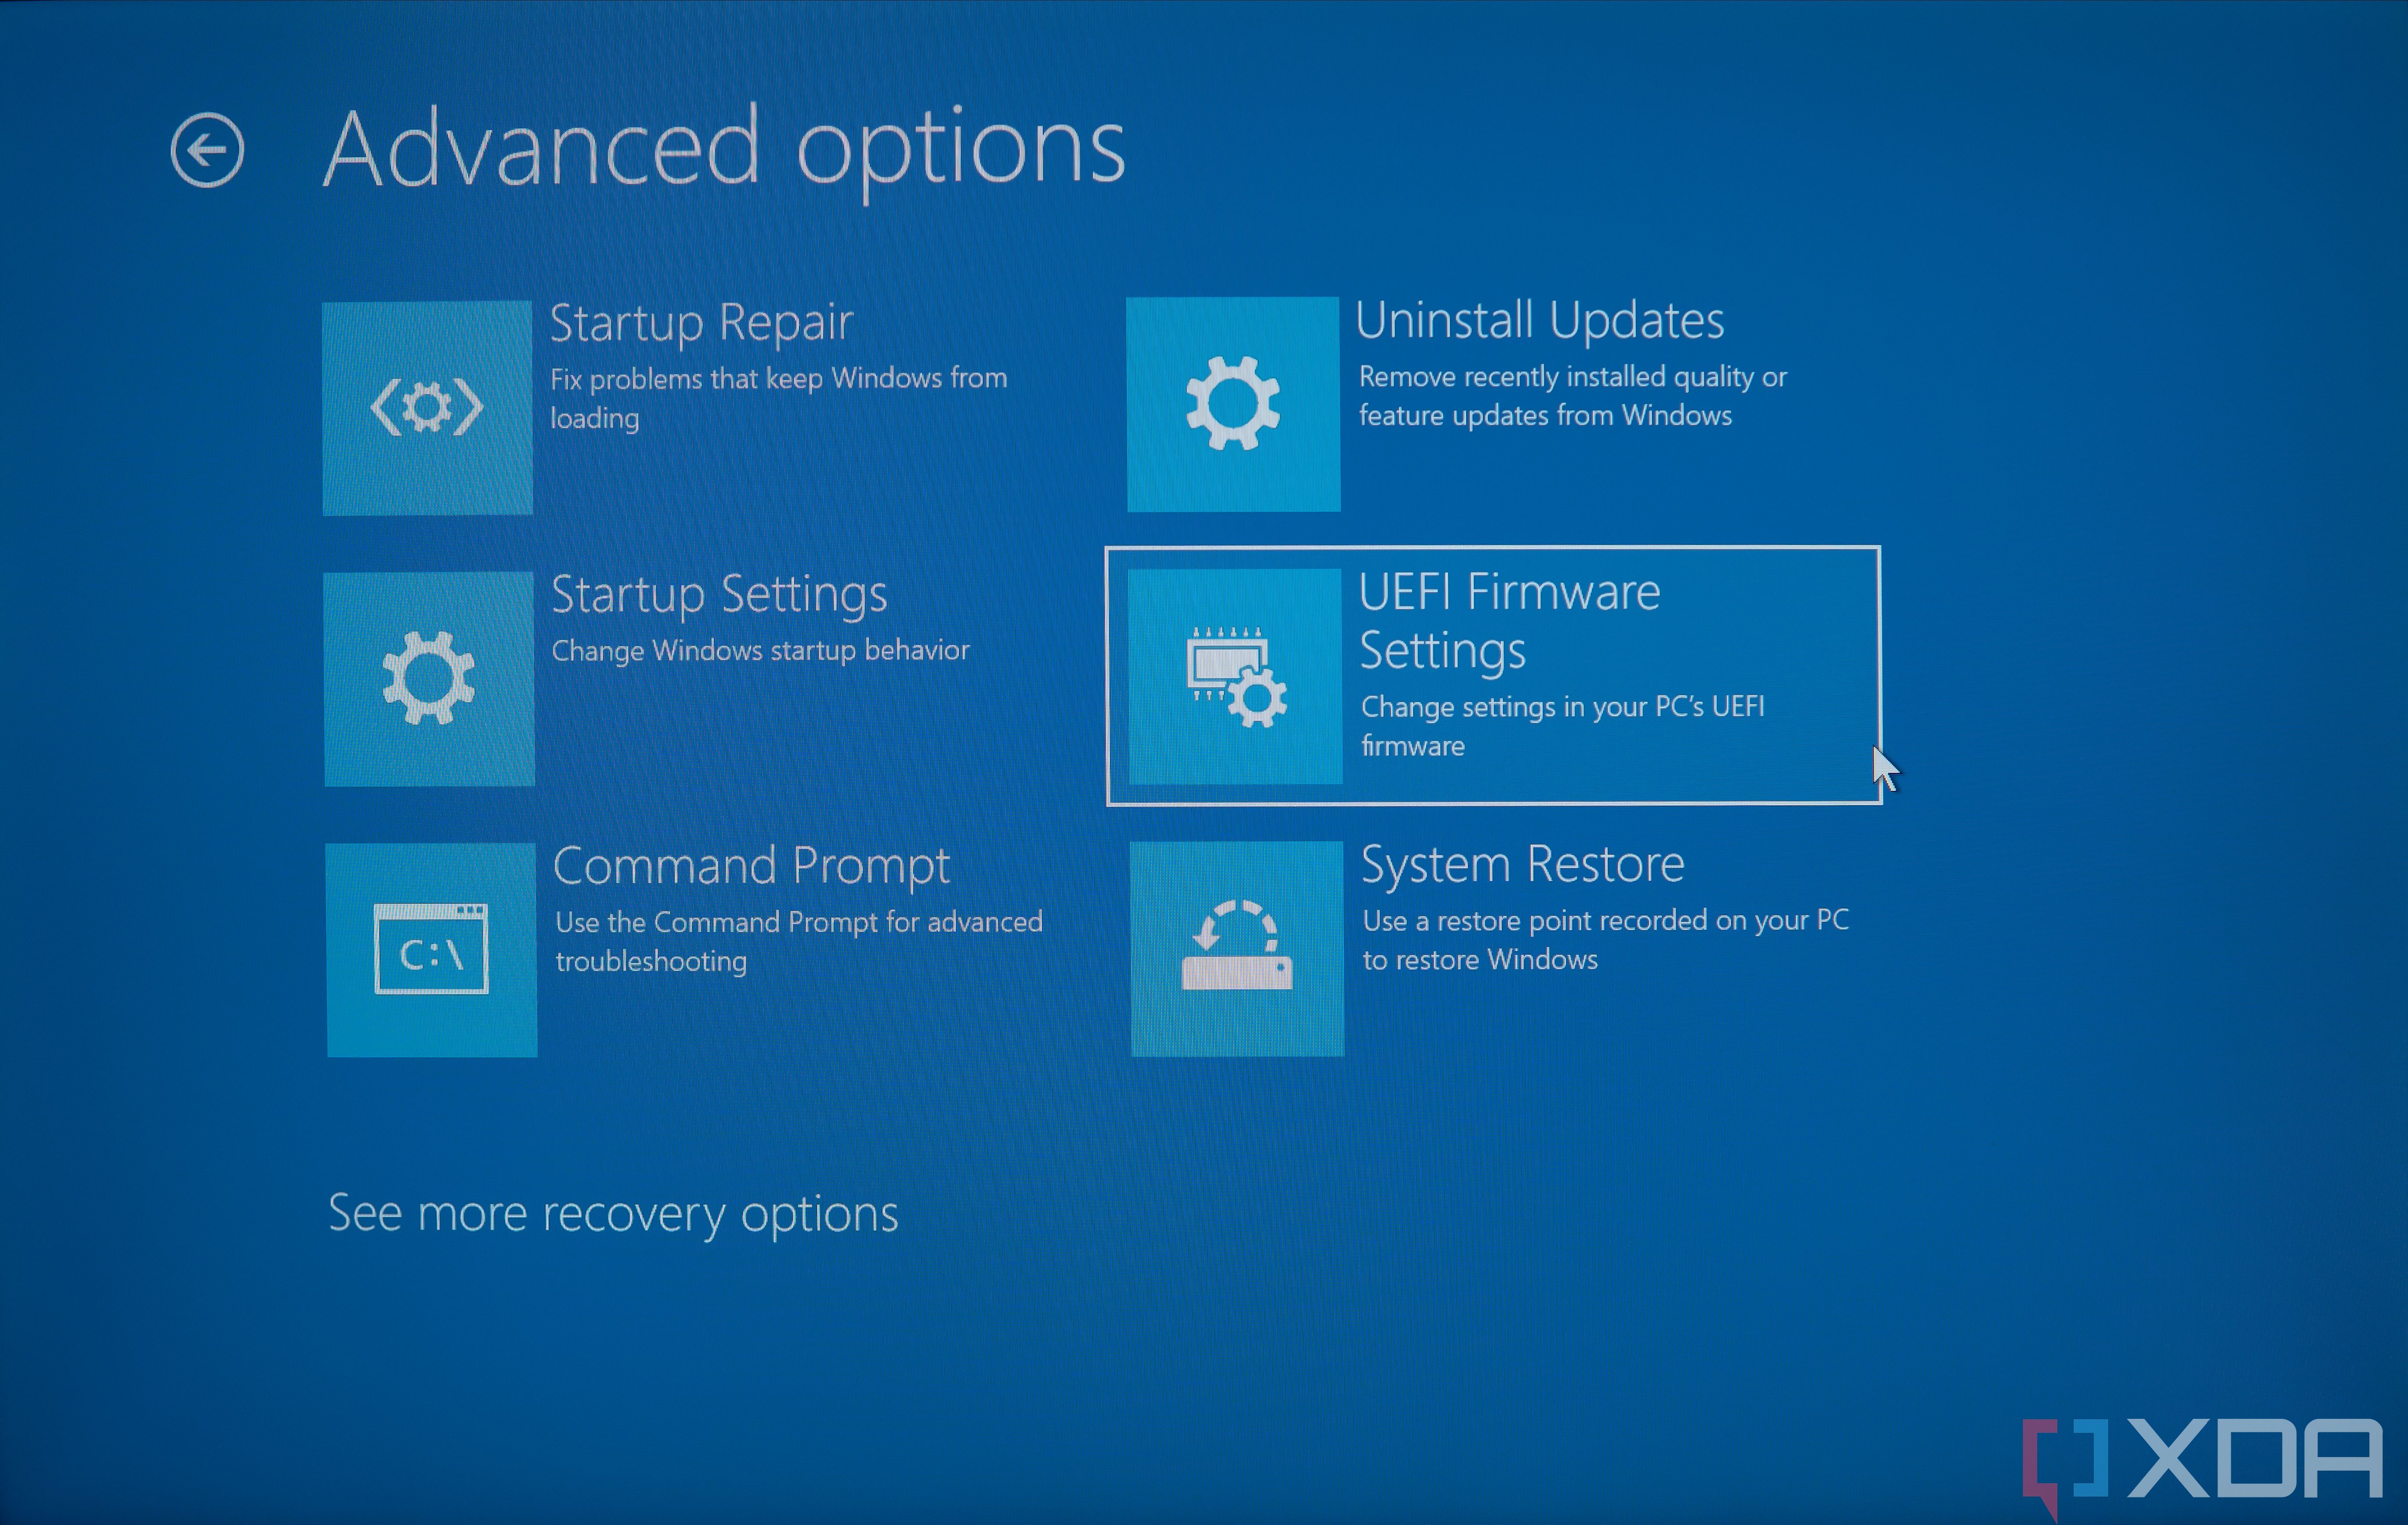
- Virtualization settings are often under an Advanced, Configuration, or Security section or tab, so take a look around. The exact location depends on your computer’s motherboard. Refer to your manufacturer’s documentation or support site for help if needed.
- Look for an option called Virtualization Technology or Virtualization, then set it to Enabled. Once again, this option might have a different name depending on your PC’s model. Refer to your manufacturer’s documentation or support site for help.
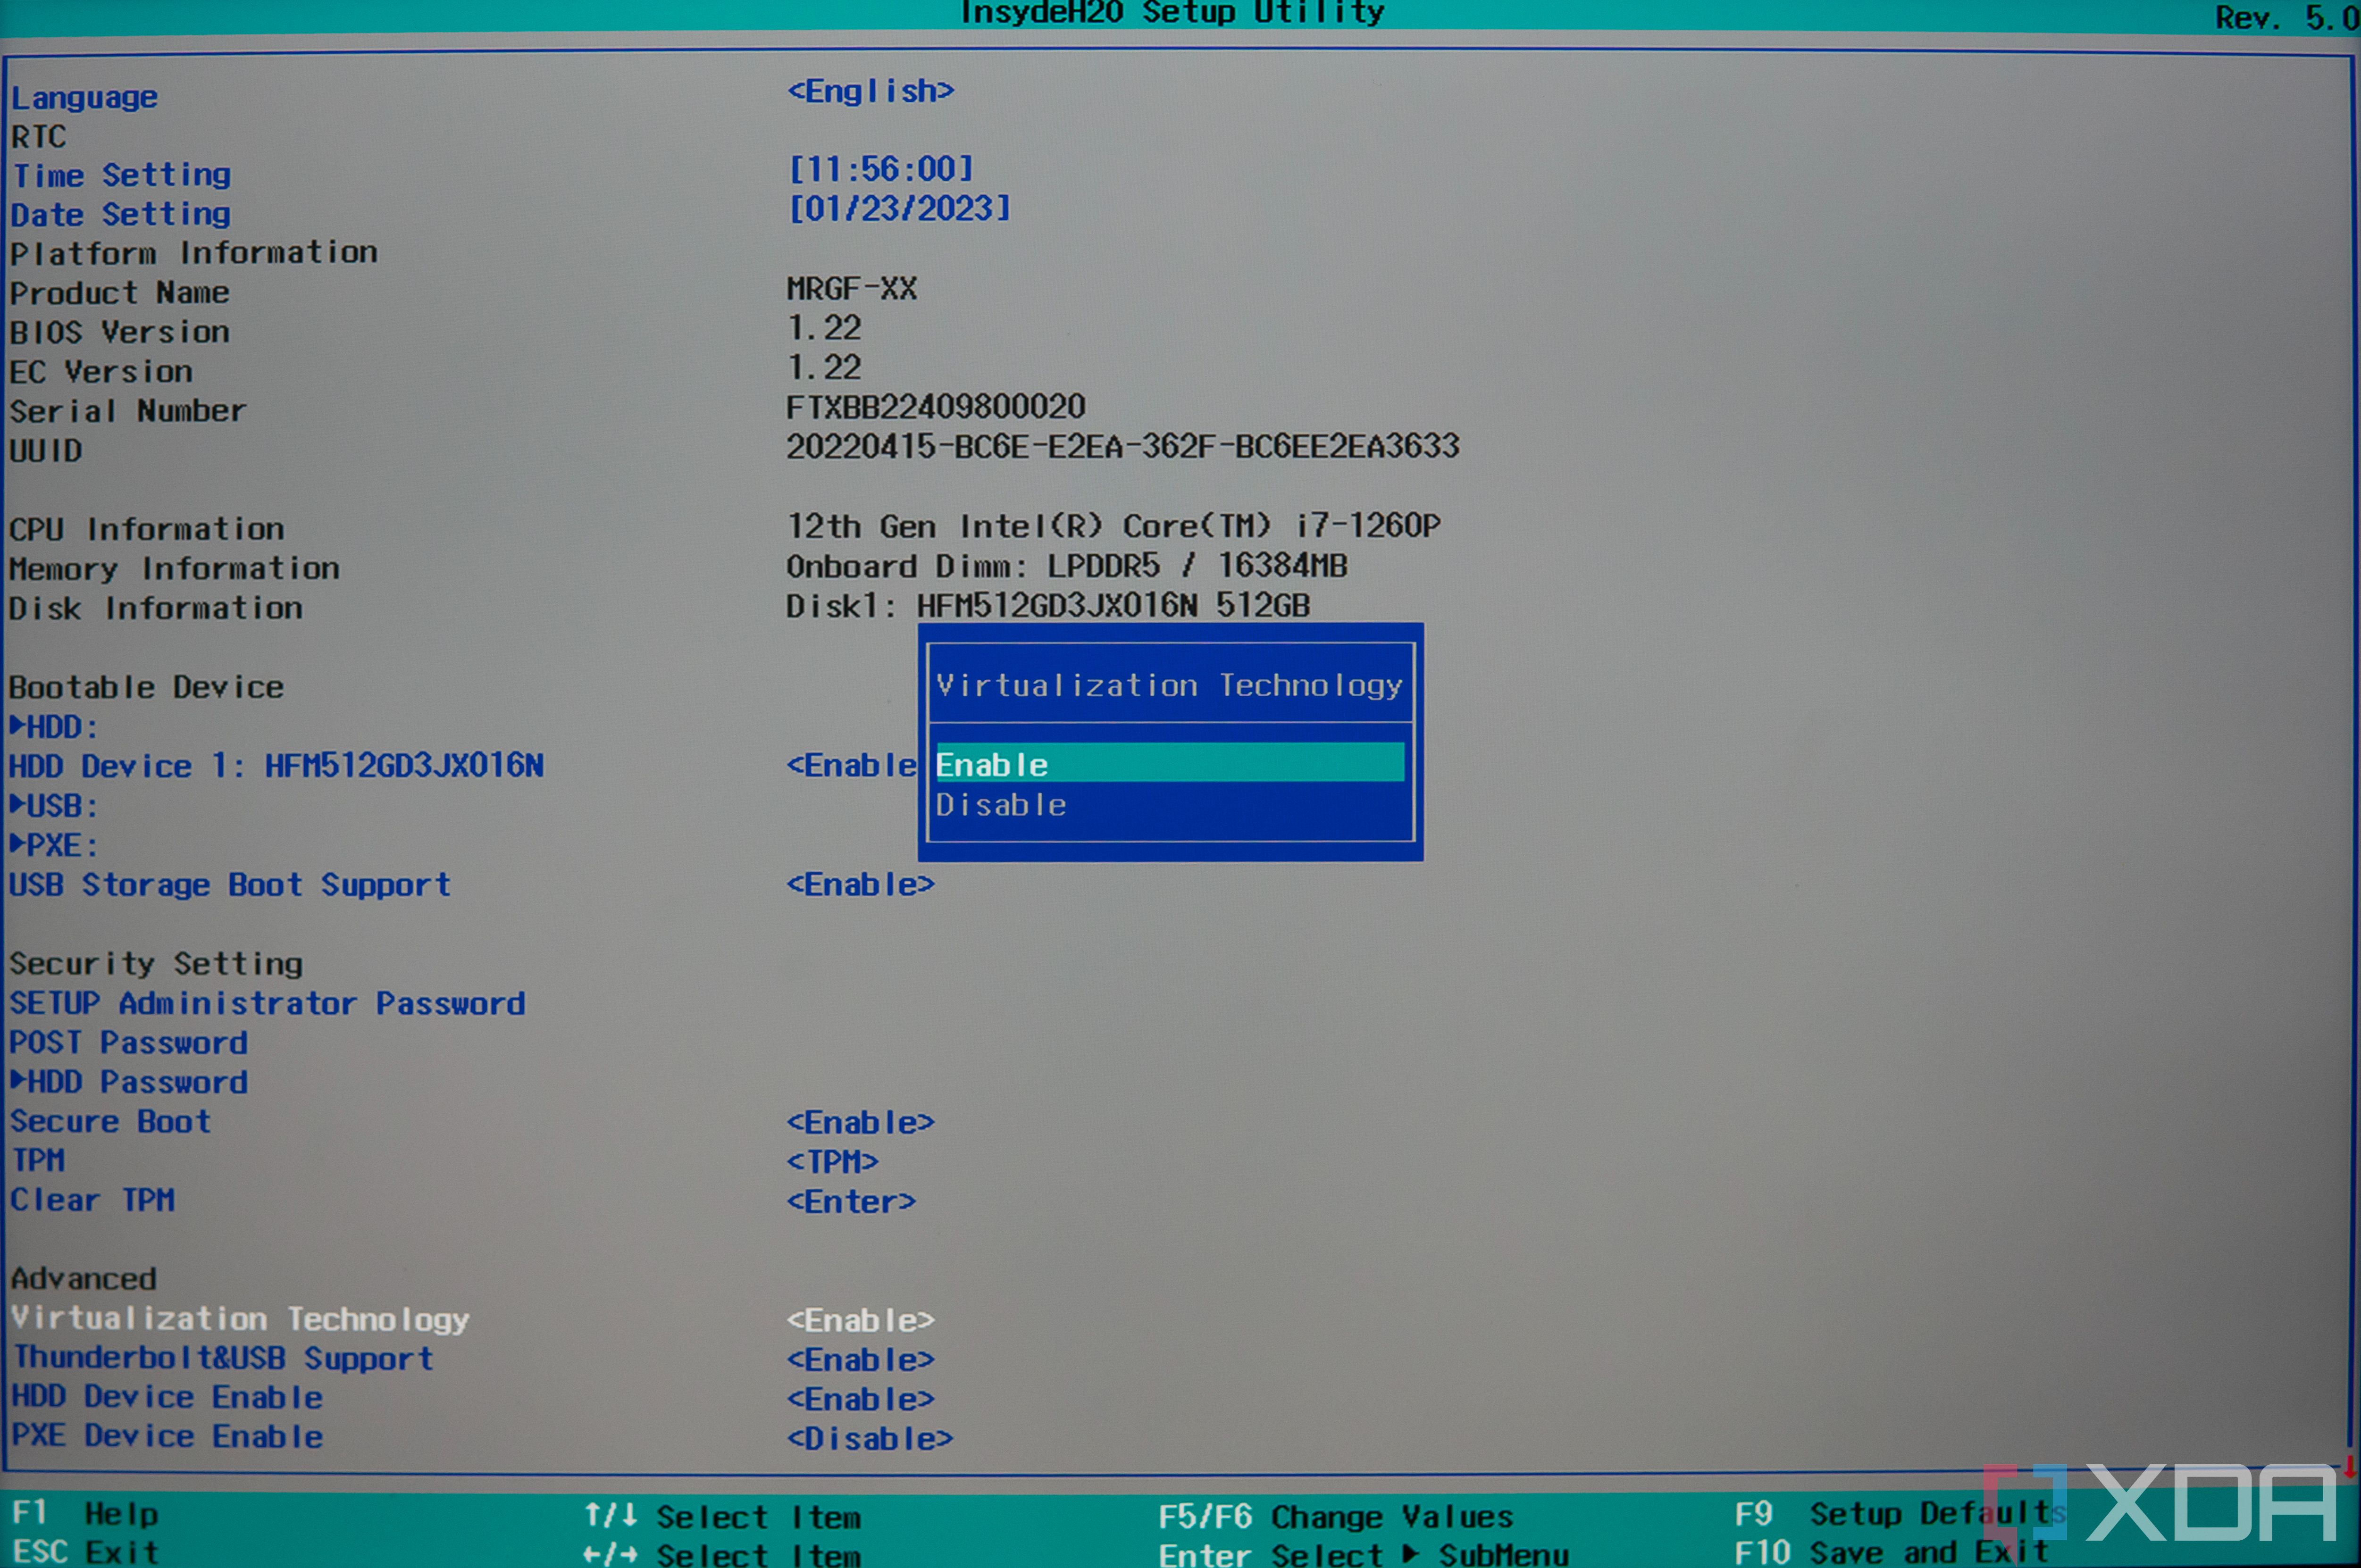
- Save your settings and restart the computer.


Your PC should now have virtualization enabled at the BIOS level. Next, you have to turn on virtualization features in Windows 11.
How to enable Windows 11 virtualization features
Depending on how you plan to use your virtual system, you might need to turn on several virtualization features in Windows 11. Here’s how to enable them.
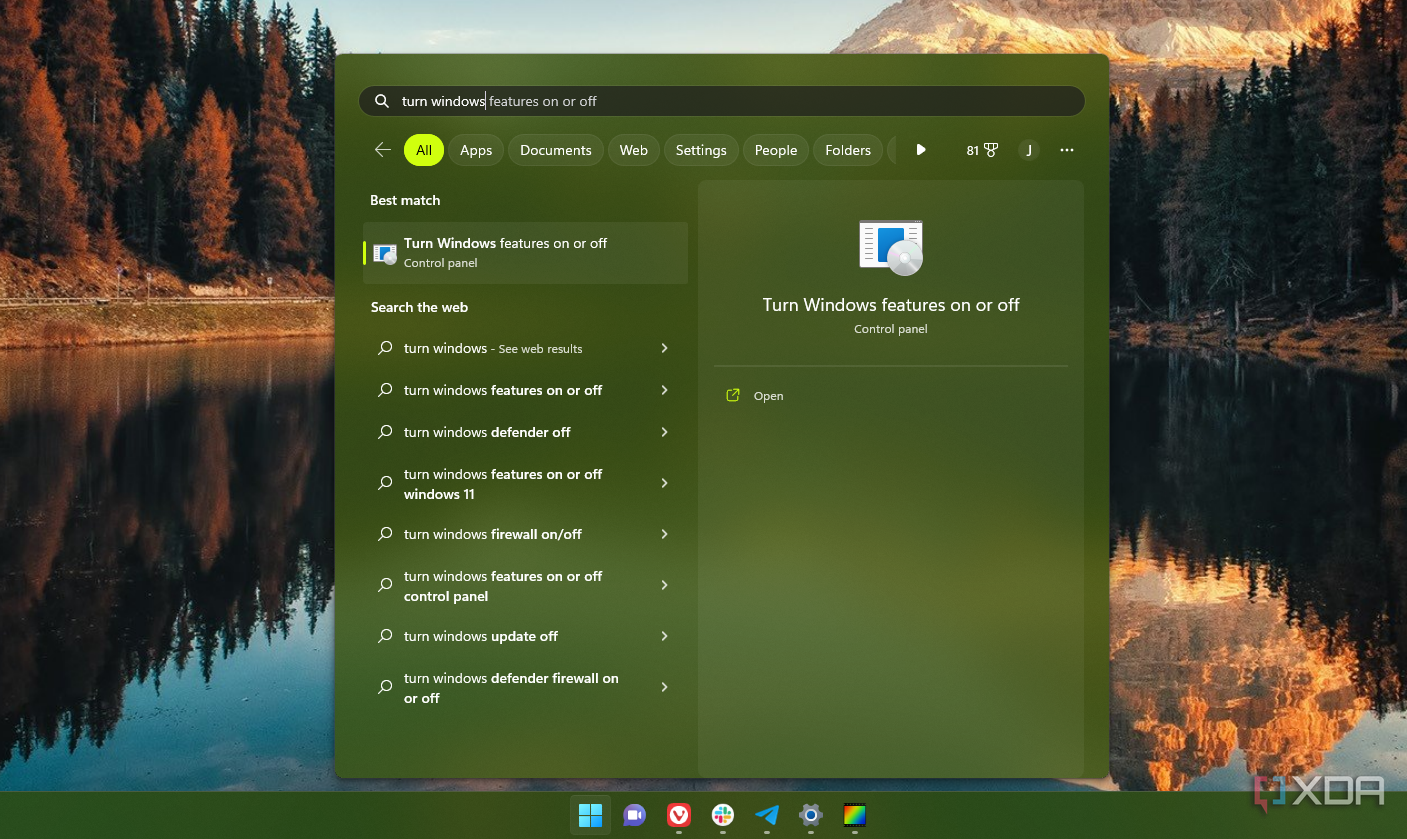
- Open the Start menu (or Windows Search) and search for Turn Windows features on or off. Choose the first result.
- There are three main options you can choose from:
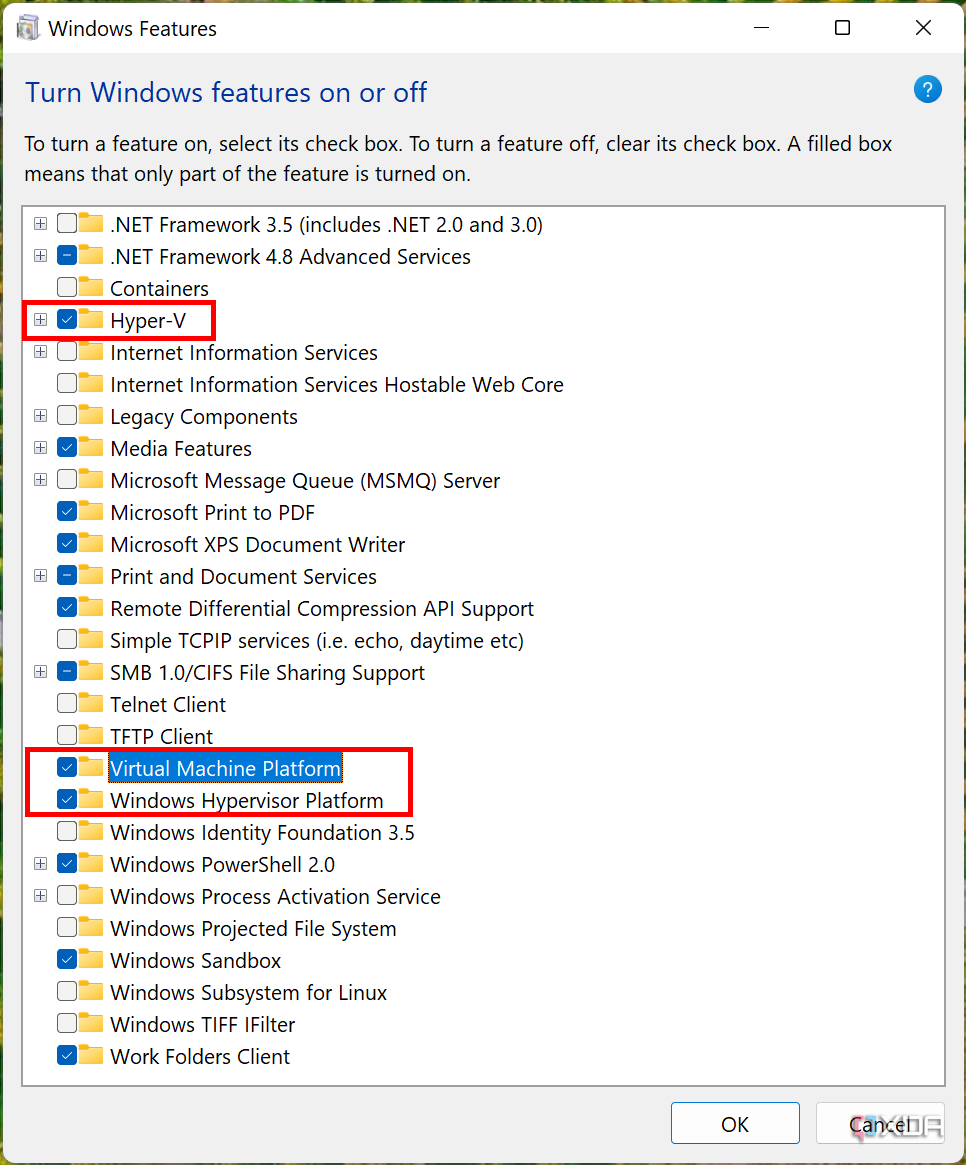
- Hyper-V enables the built-in virtual machine management solution on Windows 11, letting you create and manage multiple virtual machines. Whether you want to run a different operating system or a previous version of Windows, you’ll still need to make sure all the subcomponents are selected here. Hyper-V is only natively available on Windows 11 Pro or higher SKUs, but we have a guide on how to install Hyper-V on Windows 11 Home.
- Virtual Machine Platform enables some virtualization components required for specific Windows 11 features. These include the Windows Subsystem for Linux and Windows Subsystem for Android, which let you run Linux and Android apps on Windows 11, respectively. Other apps might also require use of the Virtual Machine Platform.
- Windows Hypervisor Platform is a less common option that enables certain virtualization features for third-party apps. Unless you know you are planning to use a specific program or need to use Windows Hypervisor Platform for a particular troubleshooting solution, you probably don’t need to enable this virtualization feature.
- Check the boxes for the features that you want to enable, then click OK.
- Wait for the necessary components to finish installing.
- Restart your PC if required.


Virtualization should now be available on your PC. If you enabled Hyper-V, you can search for Hyper-V Manager to start setting up virtual machines. You can also download the Windows Subsystem for Linux and Windows Subsystem for Android from the Microsoft Store if you’d like to use those options. If you have other solutions needing virtualization, they should work once you’ve followed the above steps.
#enable #virtualization #Windows
source: https://www.xda-developers.com/how-enable-virtualization-windows-11/

