

Unlike Virtualbox, VMWare Workstation Pro, or other Type-2 hypervisors, Proxmox requires you to dedicate an entire PC to it. But if you’re willing to set it up, Proxmox can serve as a powerful base for any home lab or virtualization server. You can even take Proxmox’s utility a step further by enabling PCI passthrough.
By default, virtual machines inside Proxmox can’t access the devices attached to your motherboard’s PCI Express expansion slots. But by enabling PCI passthrough, you can leverage the NICs, sound cards, raid controller, and other PCIe cards inside your favorite VMs. The only caveat is that the process can get extremely complex, especially if you’re trying to use GPUs with Proxmox VMs. So, we’ve created a detailed guide to help you set up PCI passthrough on Proxmox.
Related
4 BIOS settings every PC user should know
While you shouldn’t tweak them on a whim, here are 4 important options hidden inside your motherboard’s BIOS
Enabling IOMMU in the BIOS
Before you can start entering commands in the Proxmox shell, you’ll have to turn on a setting called IOMMU in your motherboard’s BIOS. As you can imagine from the name, the Input-Output Memory Management Unit oversees the assignment of memory addresses to all your peripherals, including those attached to the PCIe slots.
Despite being the primary requirement for PCI passthrough, IOMMU isn’t compatible with many motherboards and processors. For the CPU, you should be fine as long as it’s not too old, but the situation is a bit hairy on the motherboard side, as many cheap, no-name server mobos for older Xeon processors aren’t compatible with this technology.
So, be sure to confirm whether your motherboard supports IOMMU before attempting this process, as you’ll only end up wasting your time if you can’t enable this setting. Once you’ve gone through your motherboard (and CPU) specs and confirmed that both work with IOMMU, it’s time to dive into the BIOS.
- Restart your Proxmox machine and mash the Delete key as it boots up.
- In most cases, the IOMMU option should be located inside the CPU or Miscellaneous settings submenu within the Settings tab.
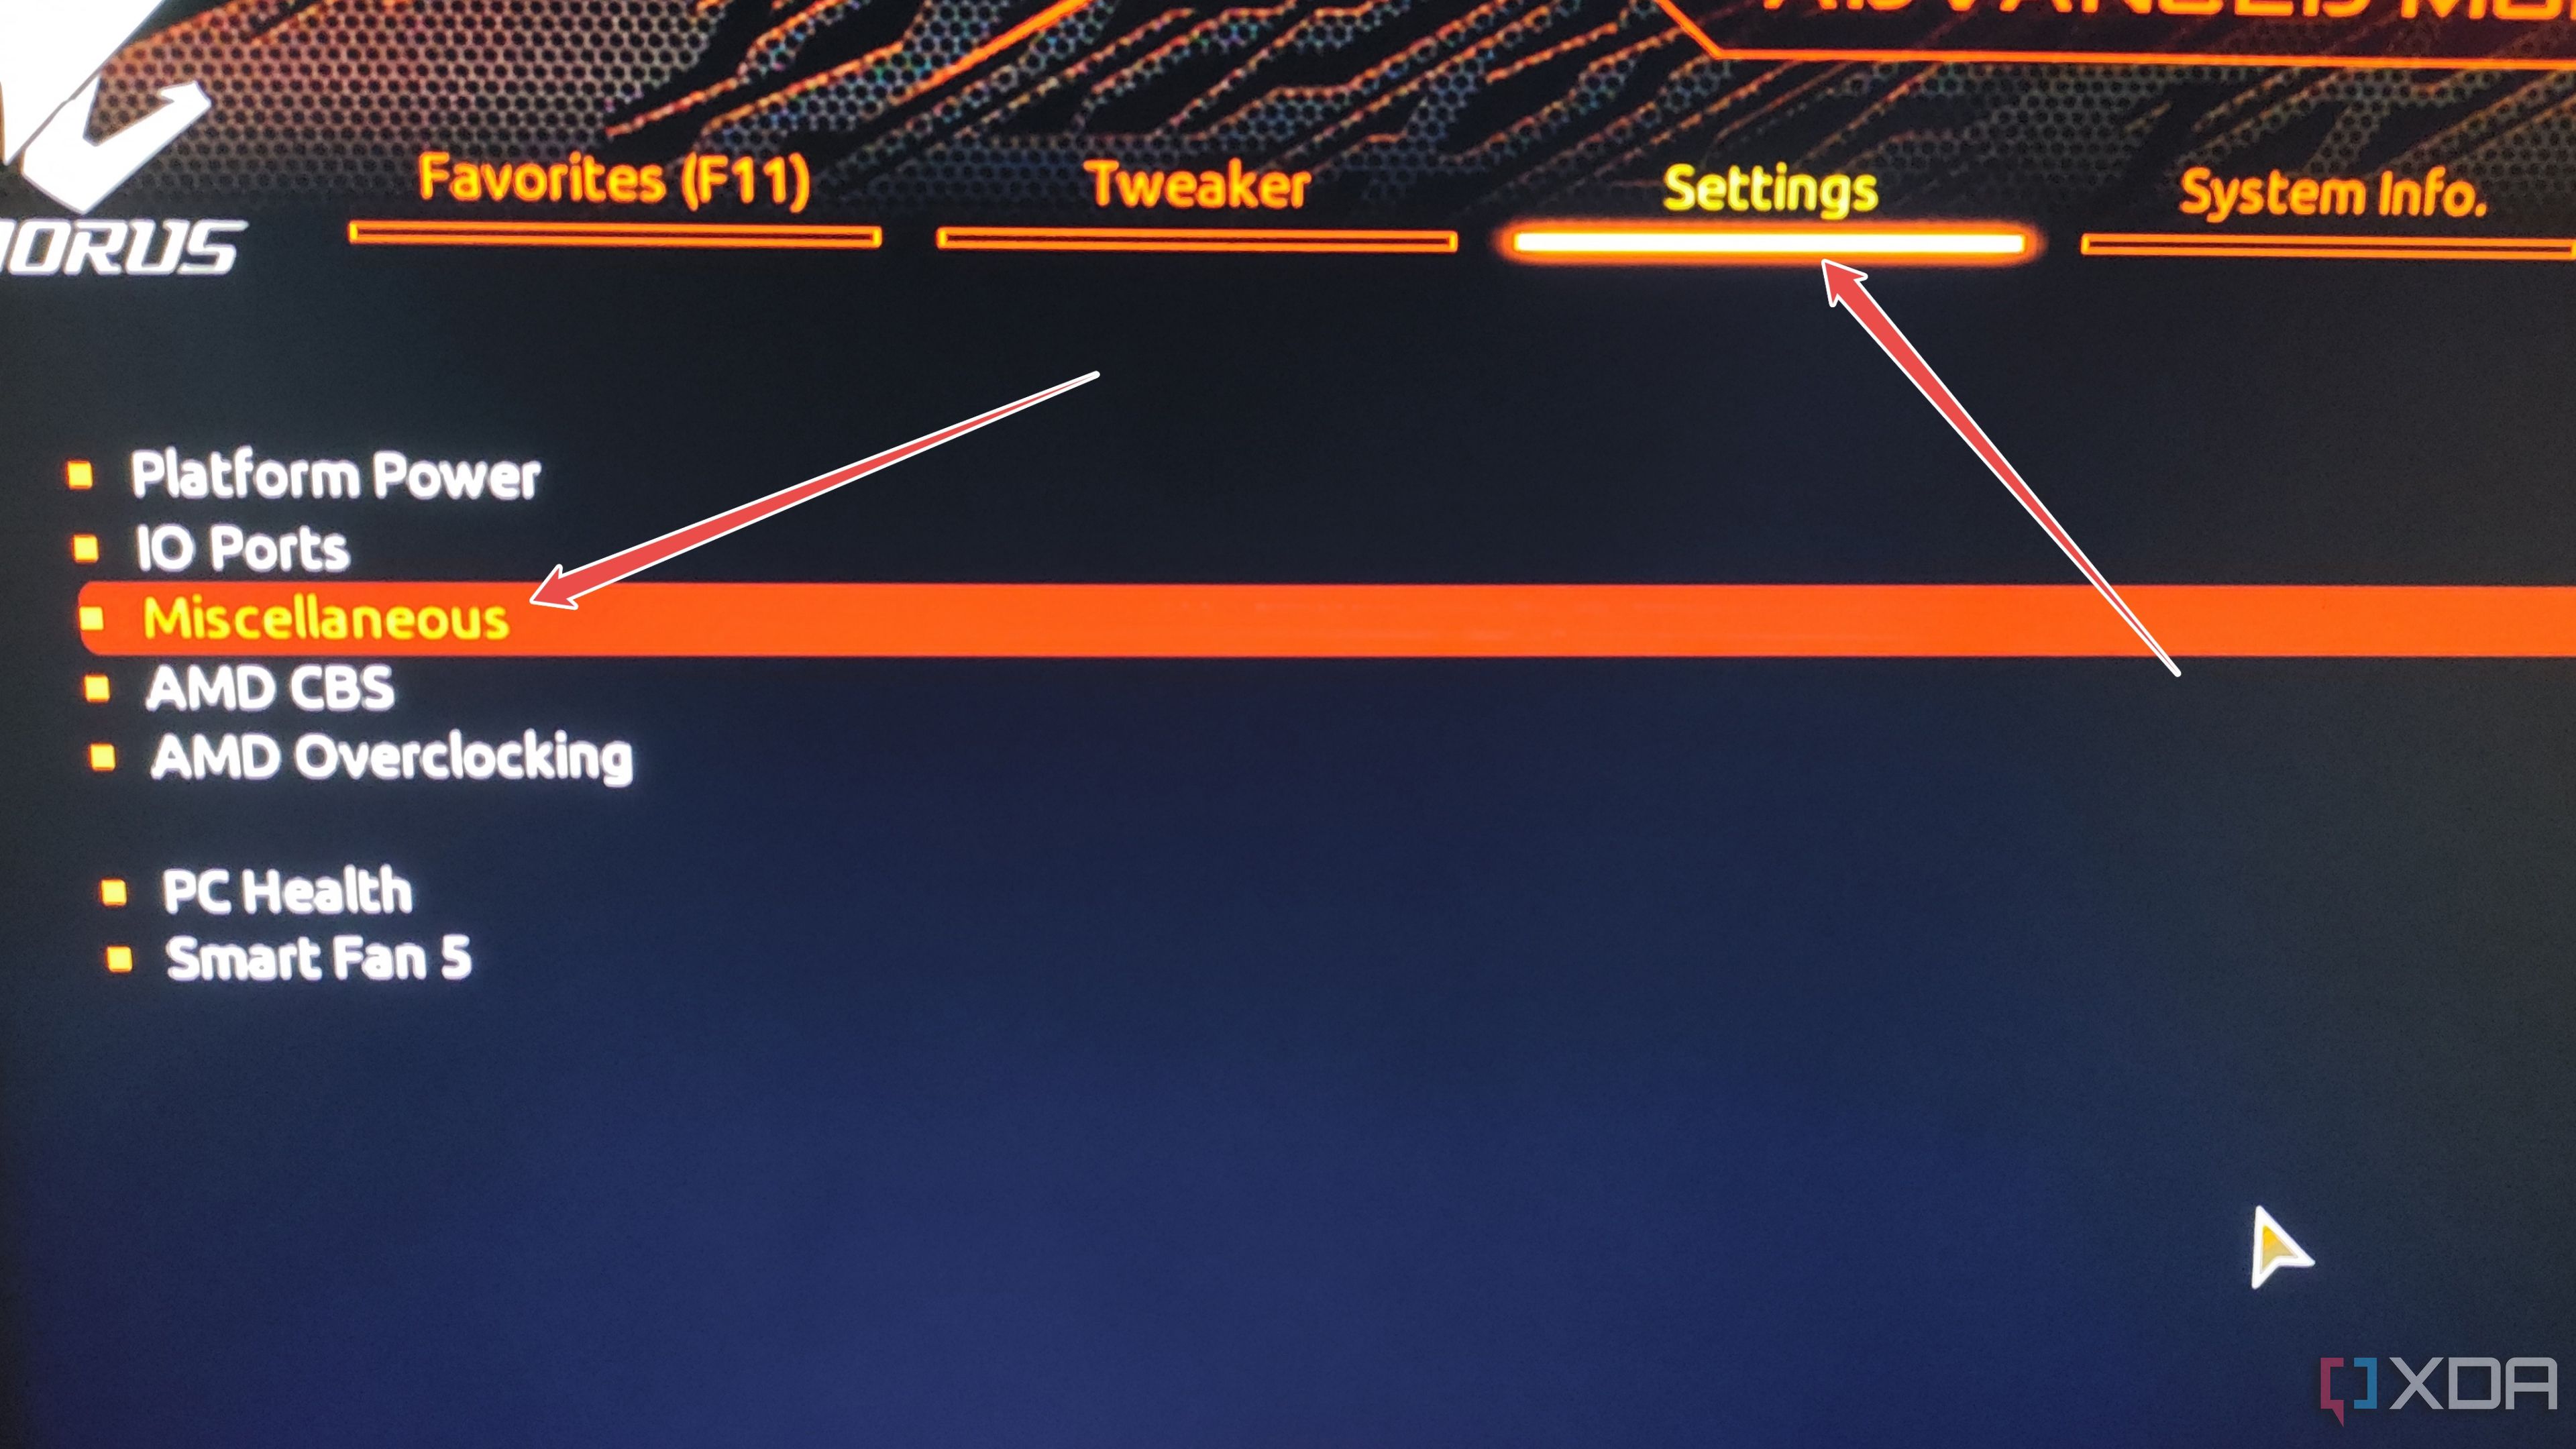
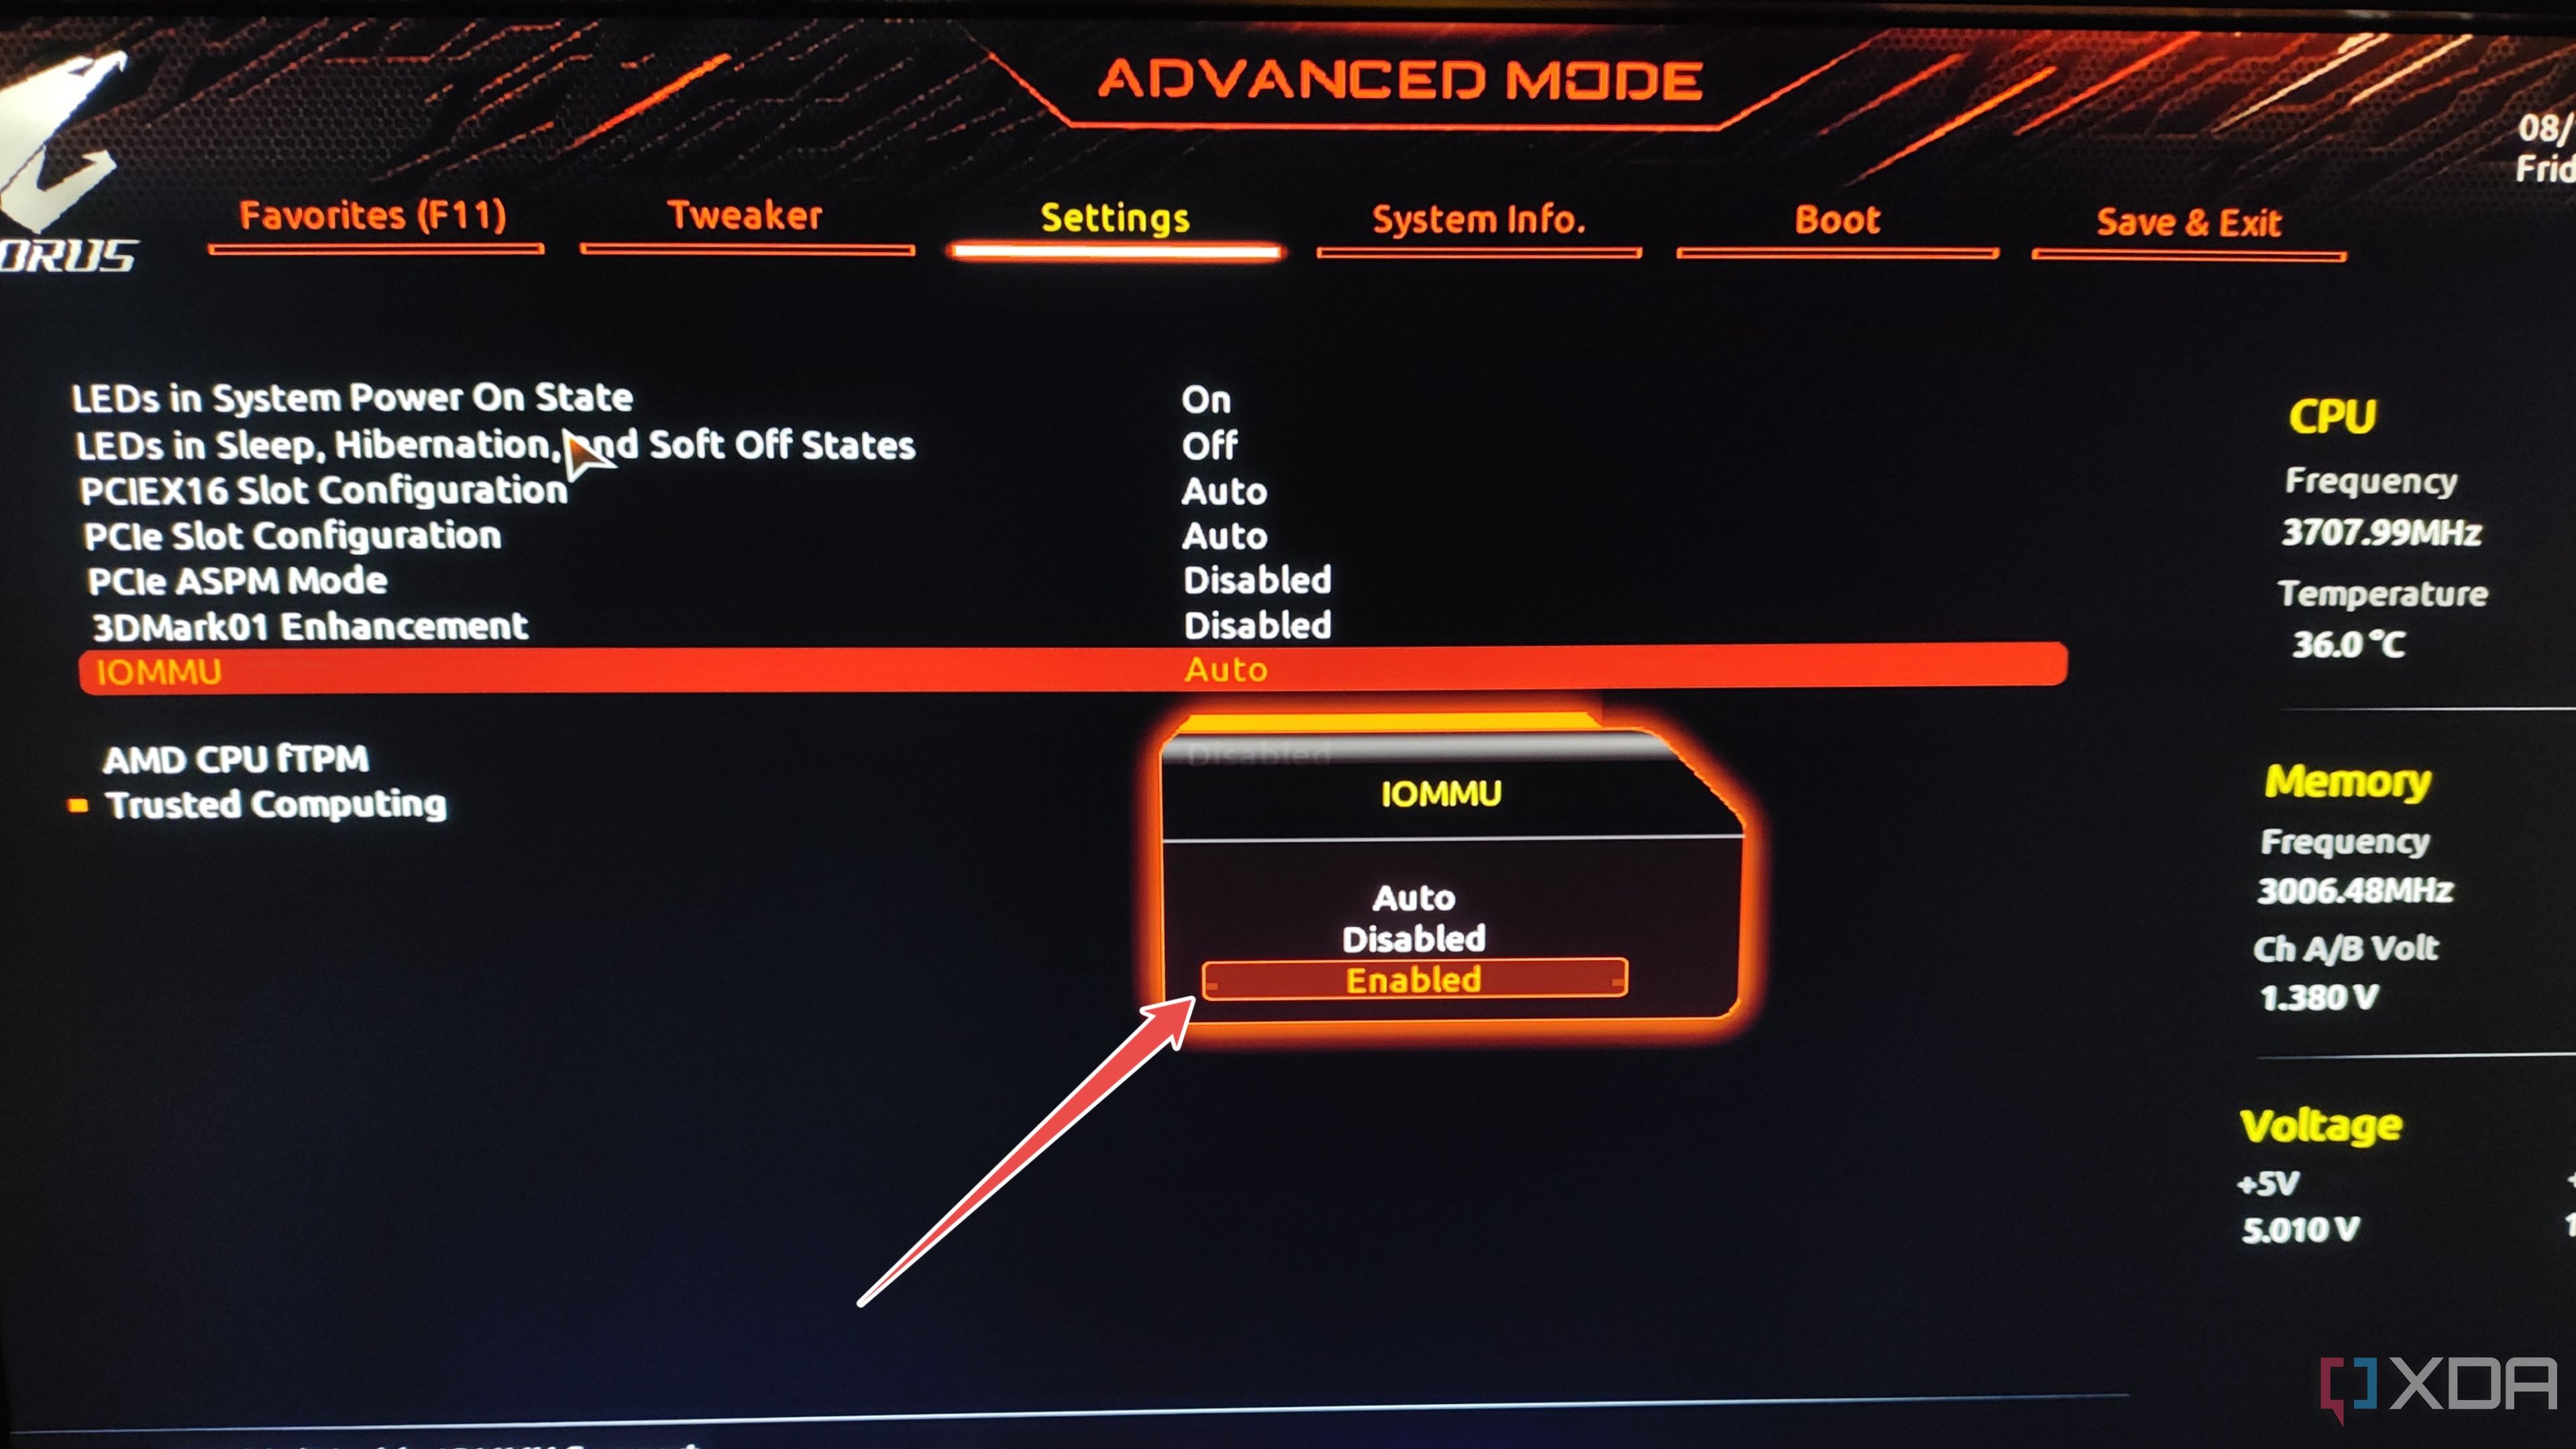
- Click on IOMMU and set its status to Enabled.
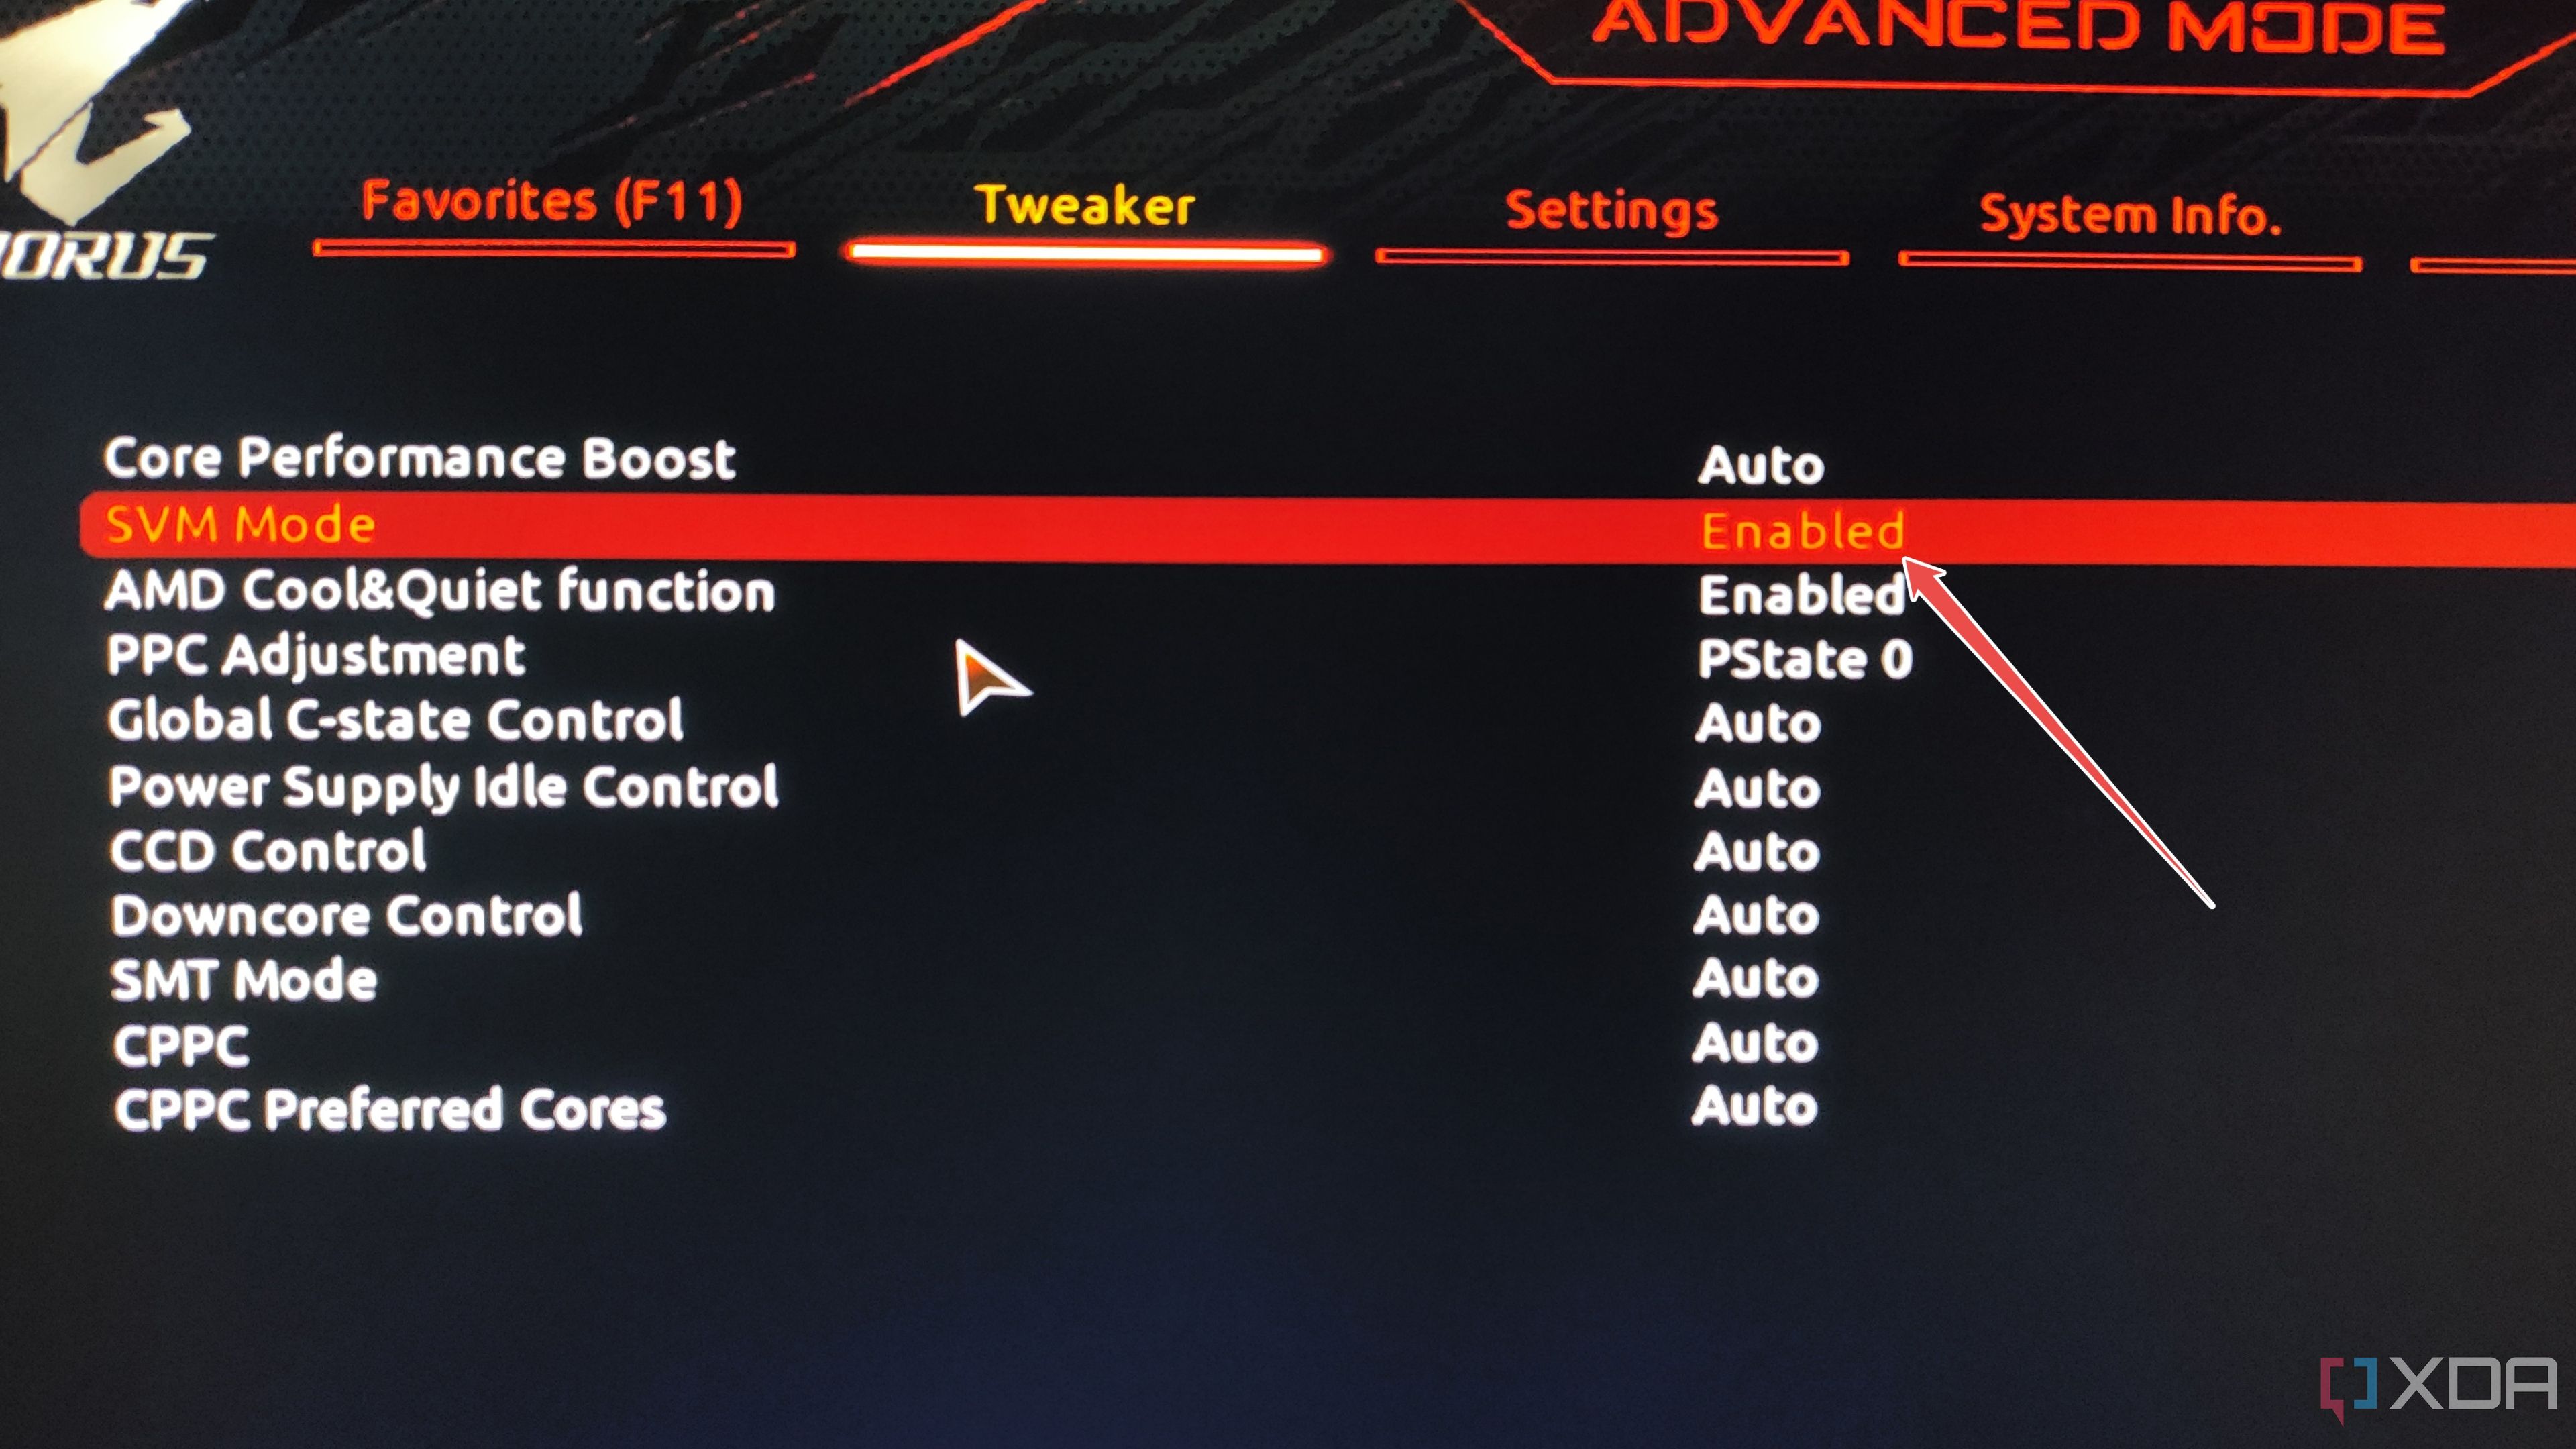
- (Optional) If you haven’t already enabled Virtualization, you can head to the Advanced CPU Settings section and turn on VT-x, SVM Mode, AMD-V, or whatever name your motherboard has for this option.
- Be sure to Save the changes before you exit BIOS.


Confirming whether the IOMMU settings are properly enabled
Once your Proxmox server reboots, it’s time to execute some terminal commands using the web UI from another system on the same network.
- Inside the web UI, select the Node you’re going to use for this project and click on its Shell window.
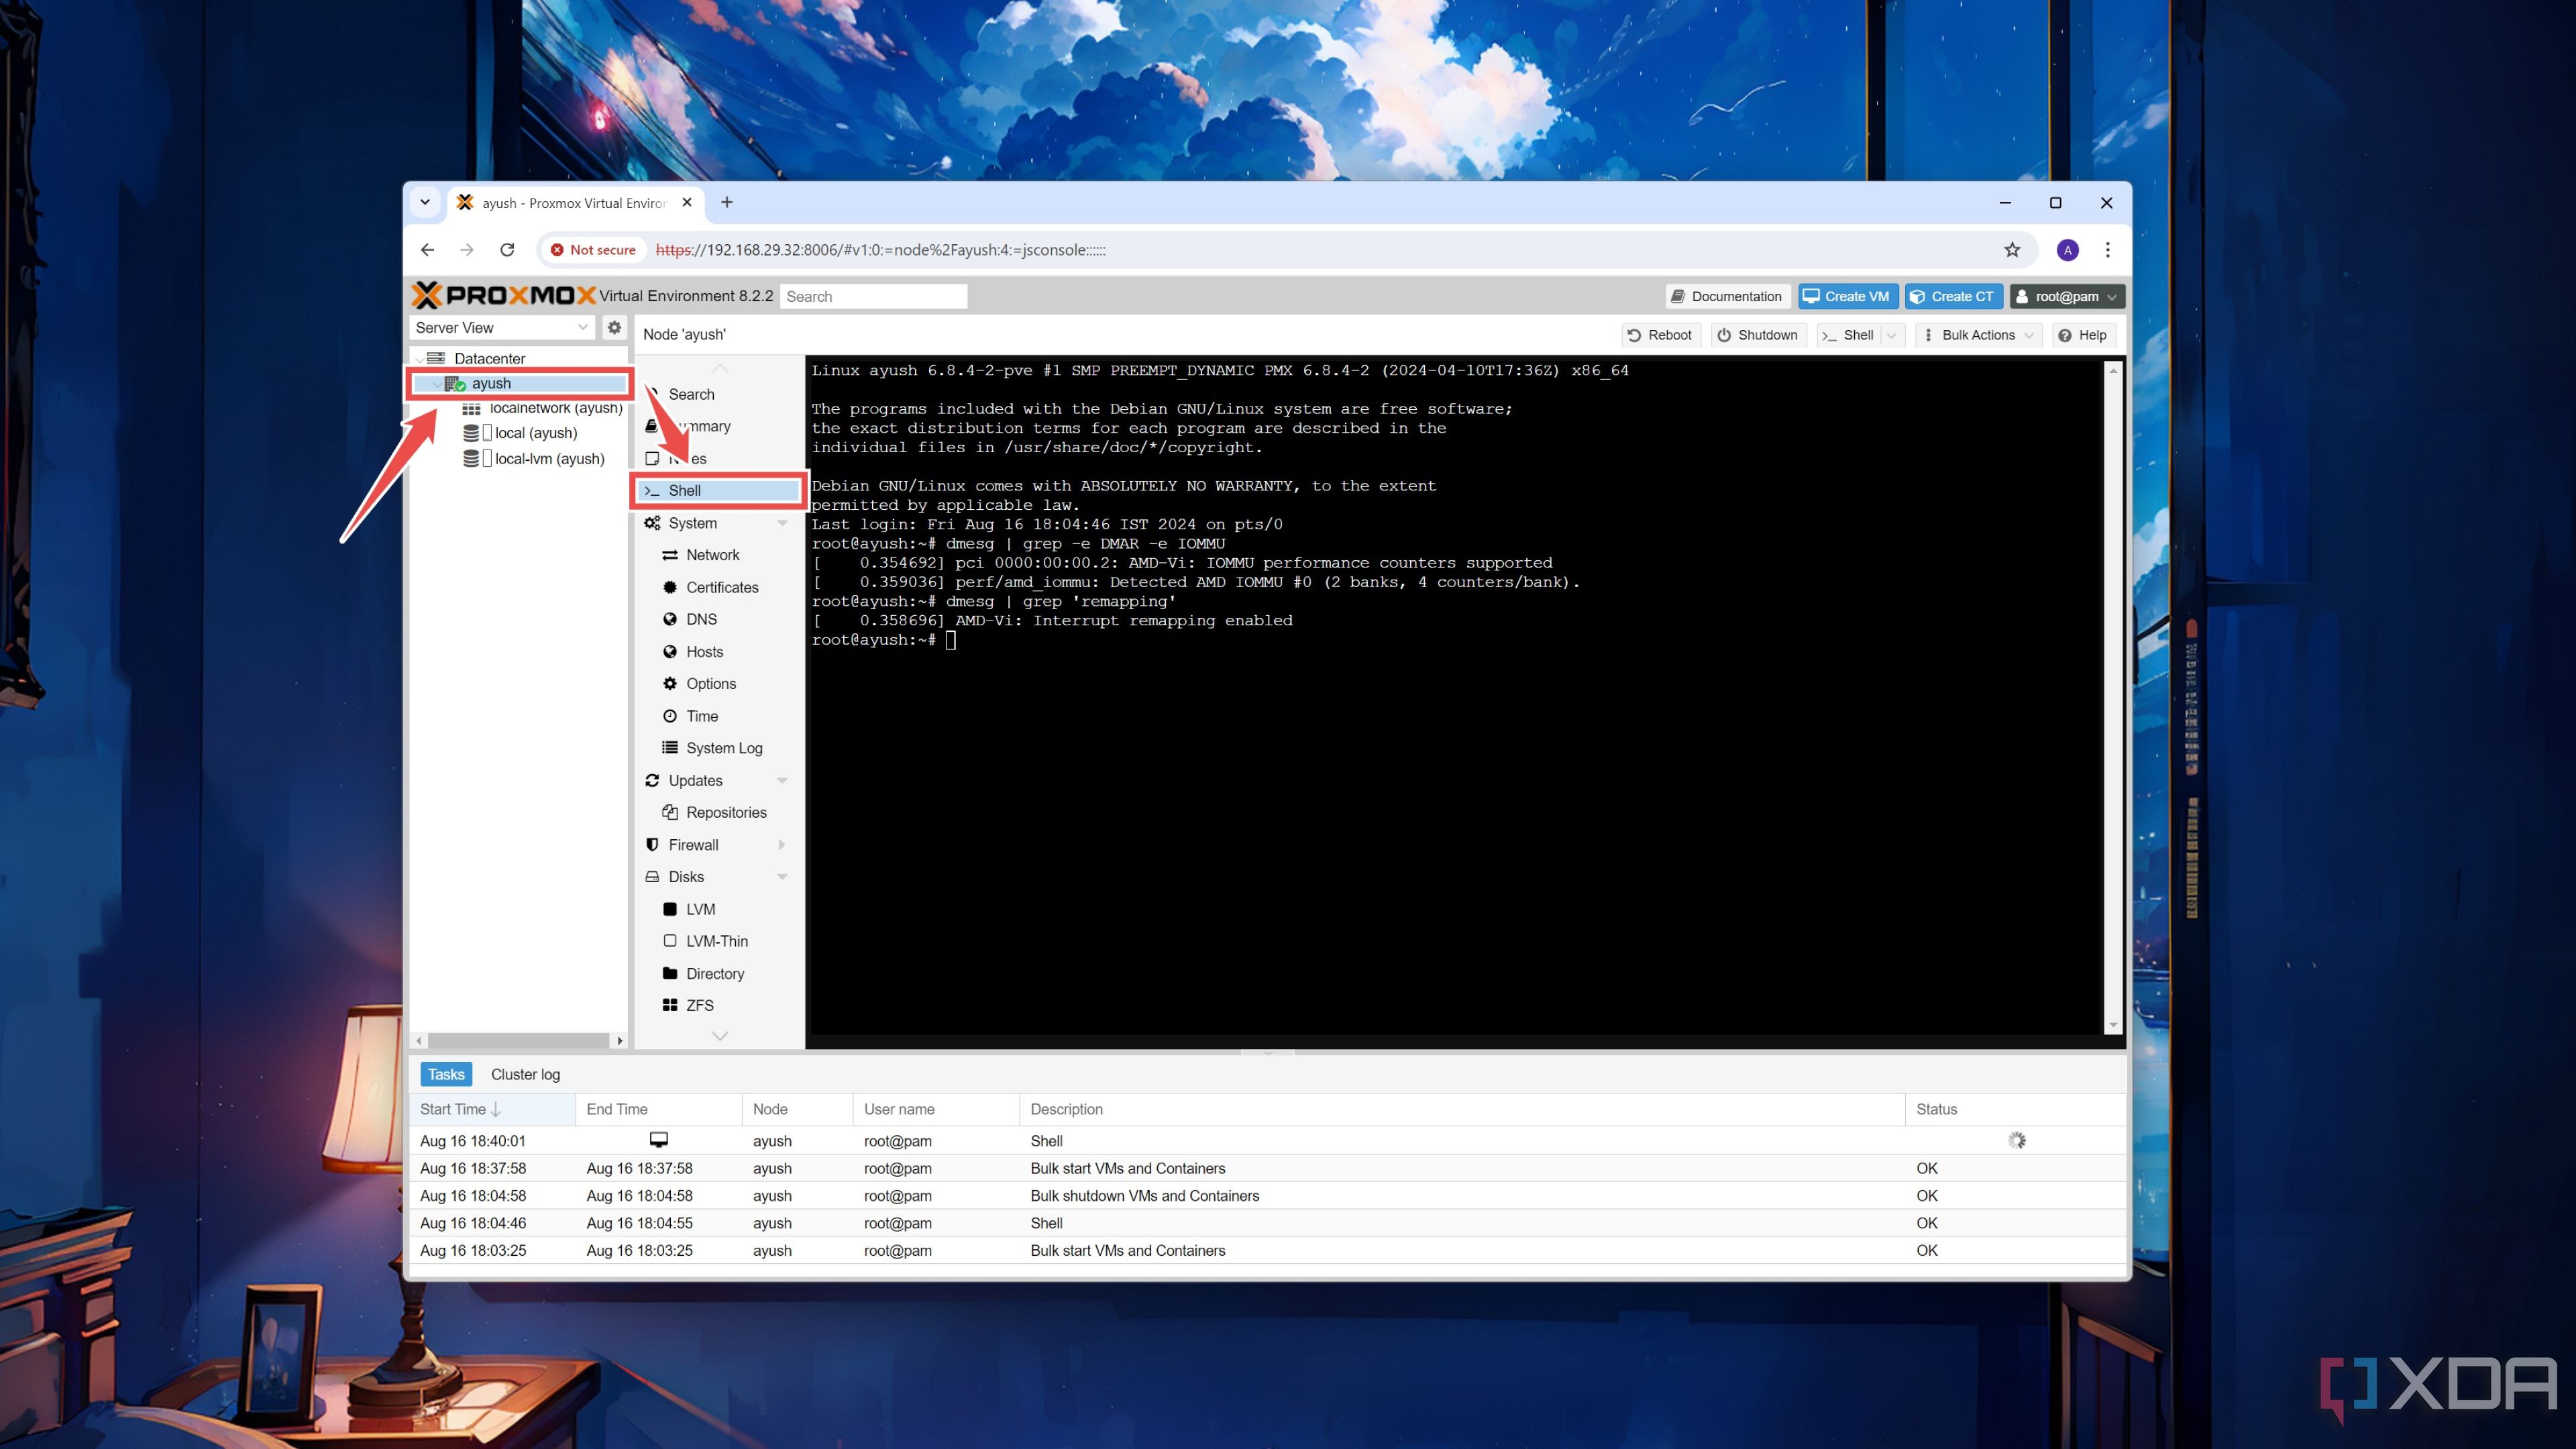
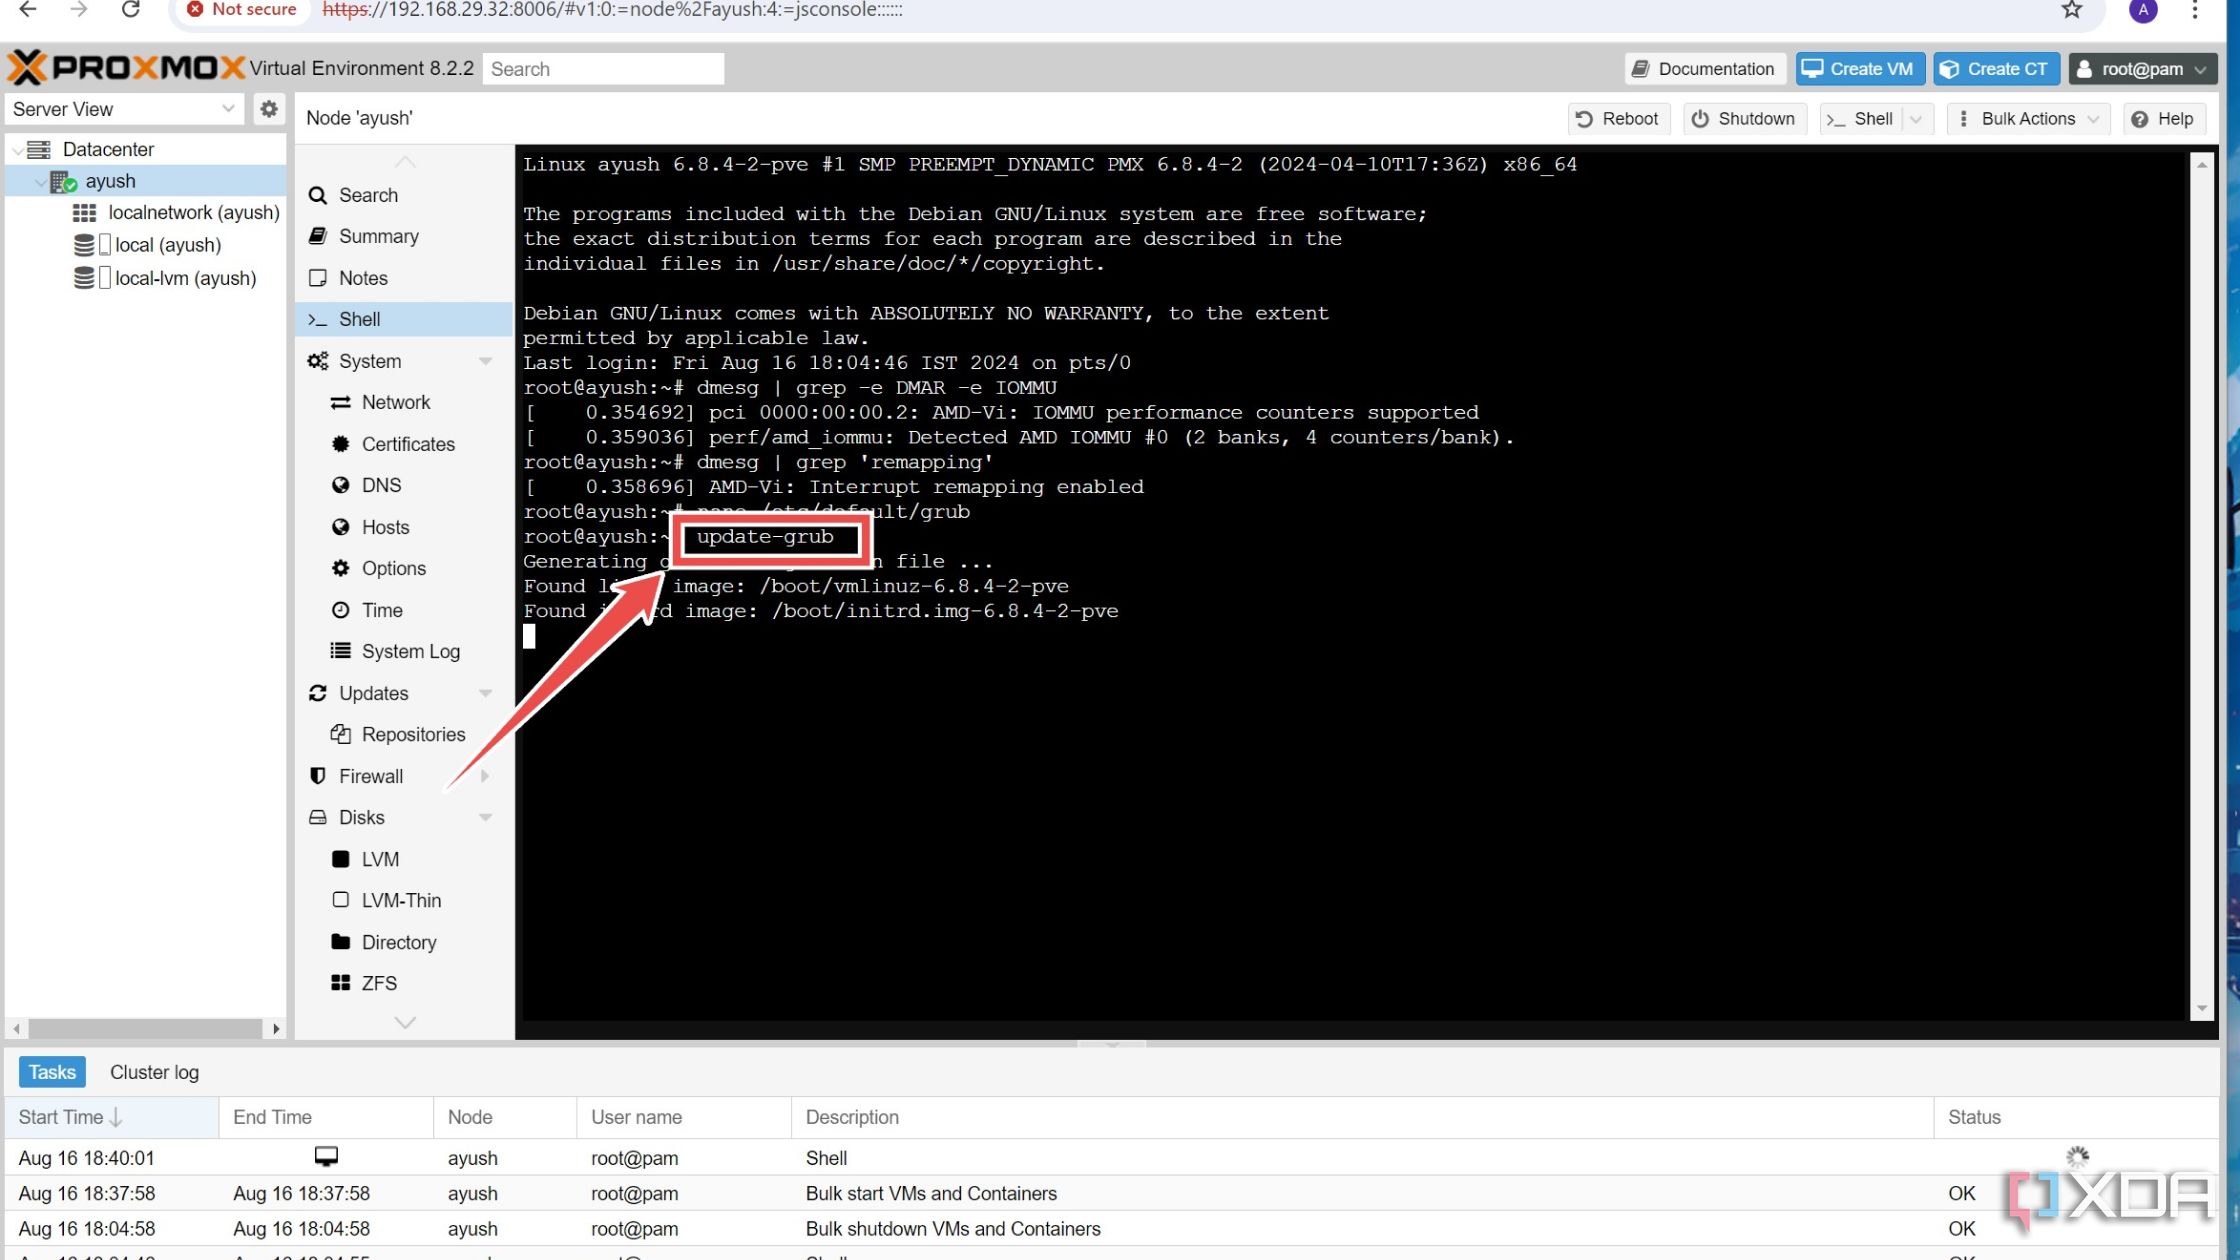
- Run this command to confirm whether IOMMU is properly enabled on your system.
dmesg | grep -e DMAR -e IOMMU
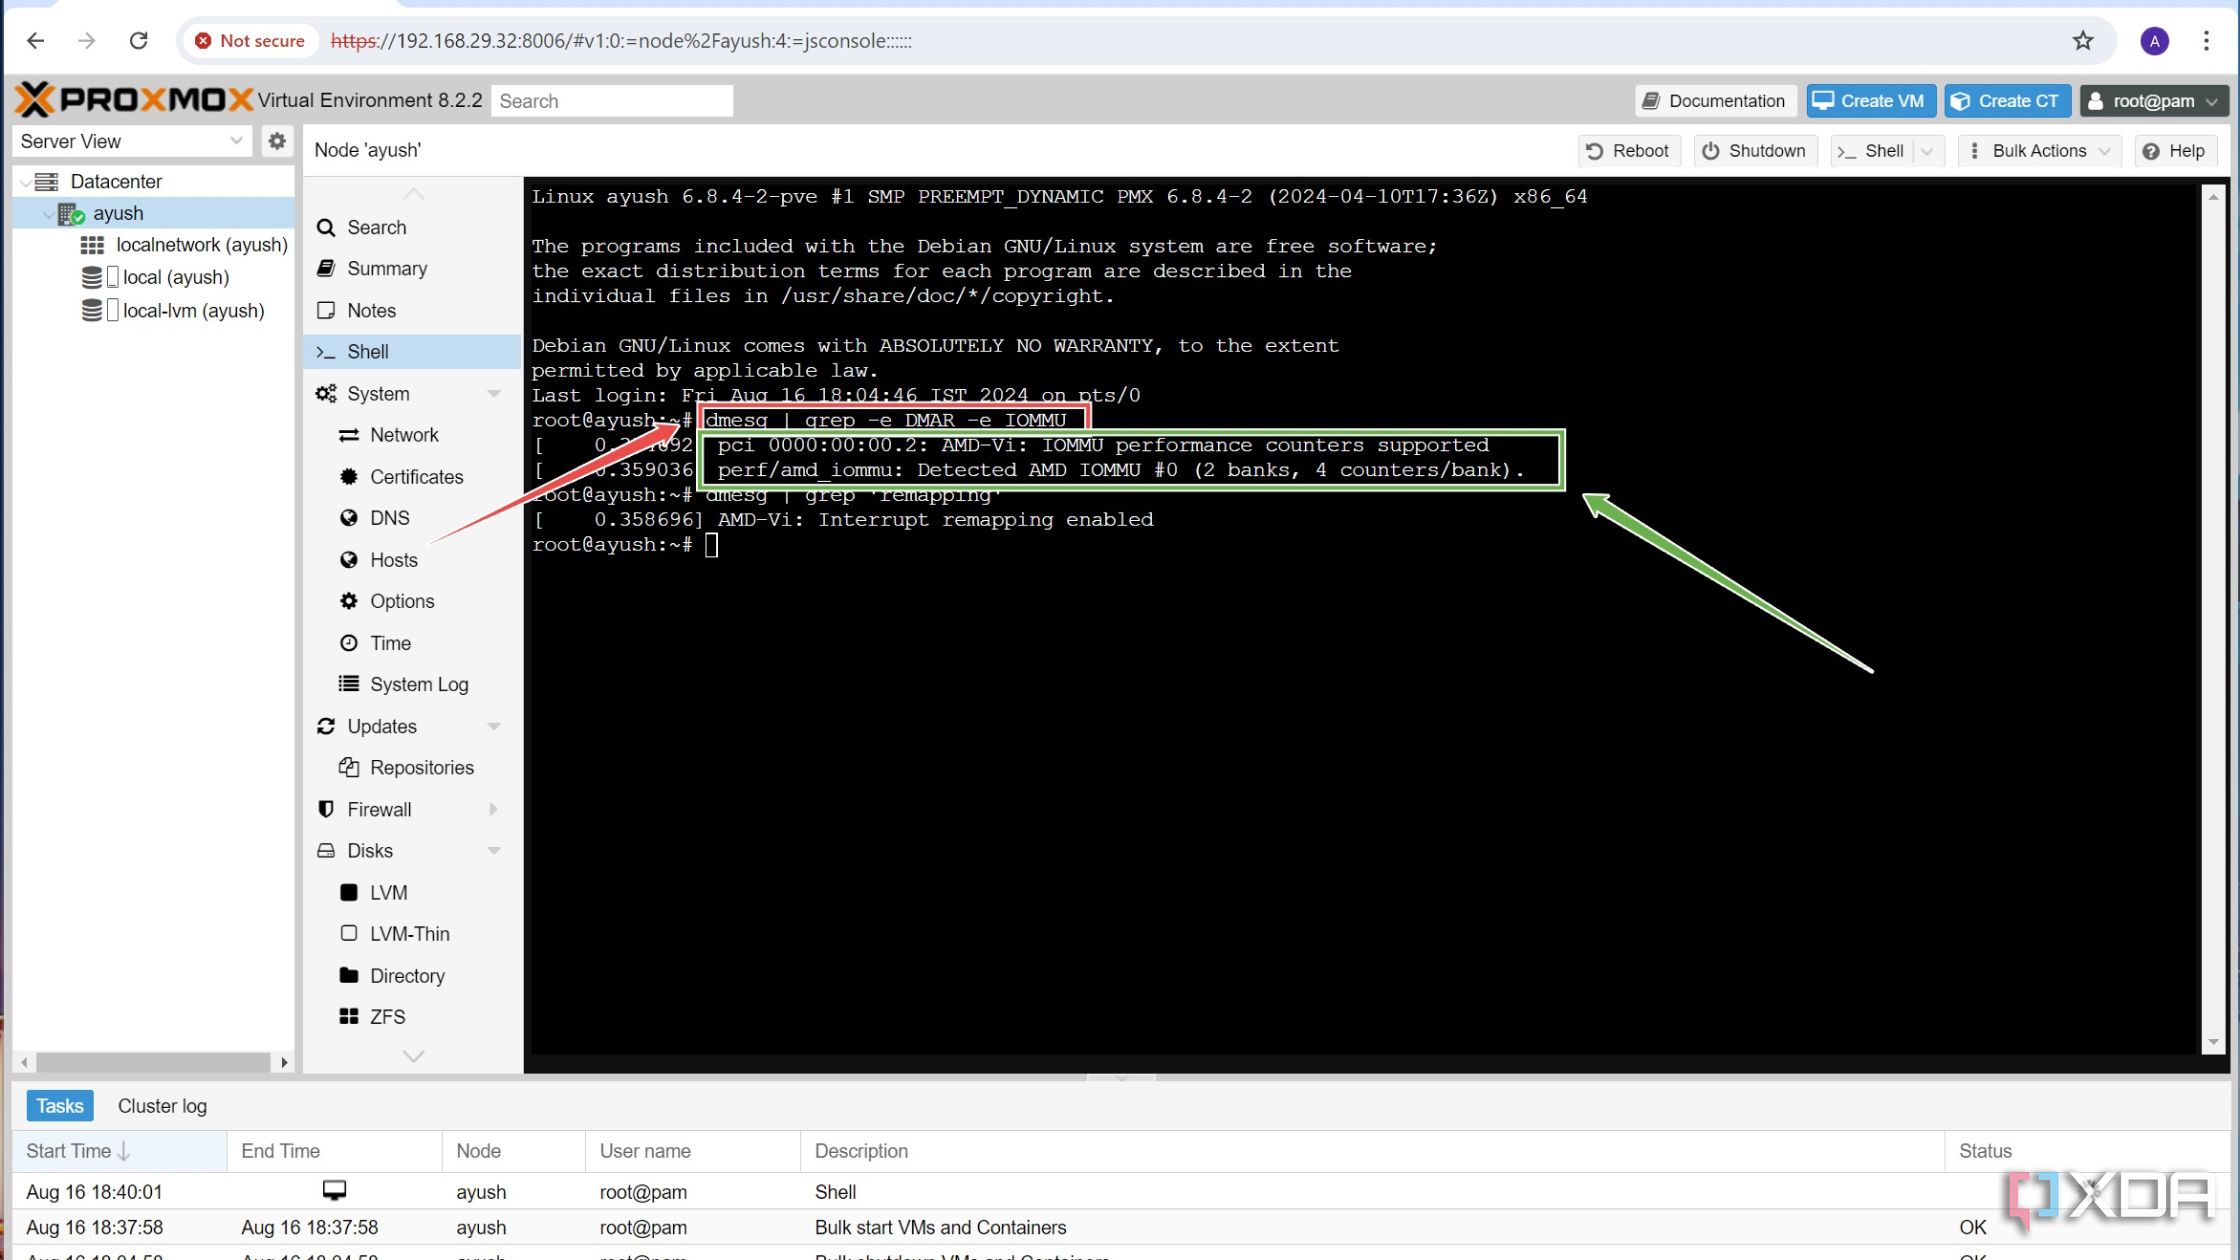
If you properly enabled IOMMU in the BIOS in the previous section, the IOMMU performance counters supported message should appear as the output.
- Make sure Interrupt Remapping is enabled by executing the following command:
dmesg | grep 'remapping'
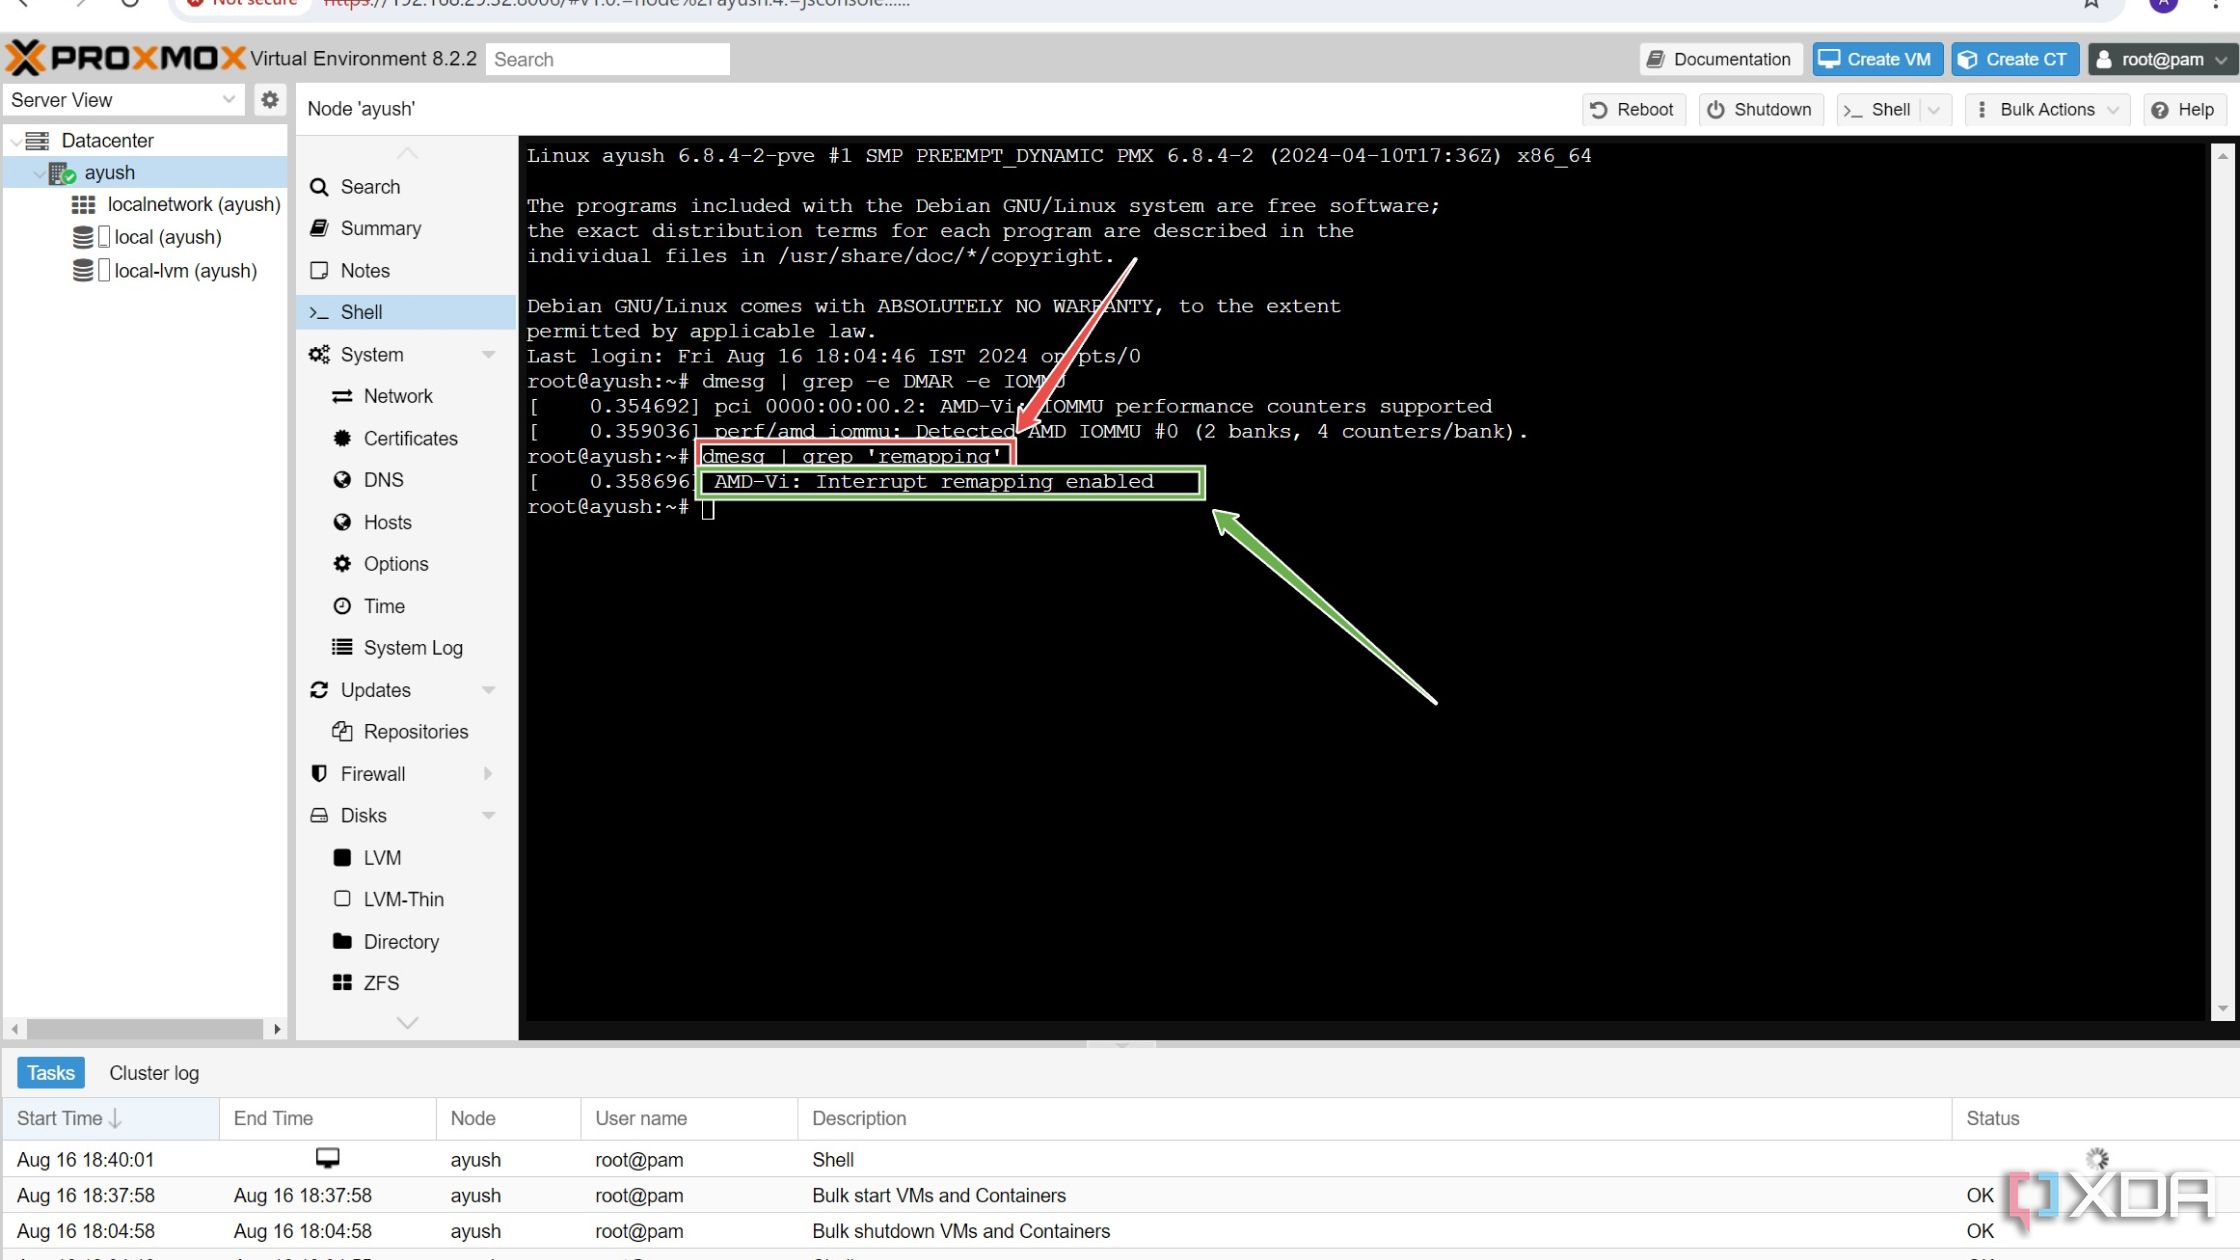
- (Optional) If you don’t see the Interrupt/IRQ mapping enabled message, open the iommu_unsafe_interrupts.conf file using the Nano editor.
nano iommu_unsafe_interrupts.conf
Paste this line into the file before pressing Ctrl+X to save and Y to exit the configuration file.
options vfio_iommu_type1 allow_unsafe_interrupts=1


Enabling PCI passthrough for most devices

With the IOMMU settings properly configured, you can follow these steps to set up the PCI passthrough facility on Proxmox:
- Inside the Proxmox Shell, open the configuration file for the GRUB bootloader using the Nano text editor by entering this command:
nano /etc/default/grub
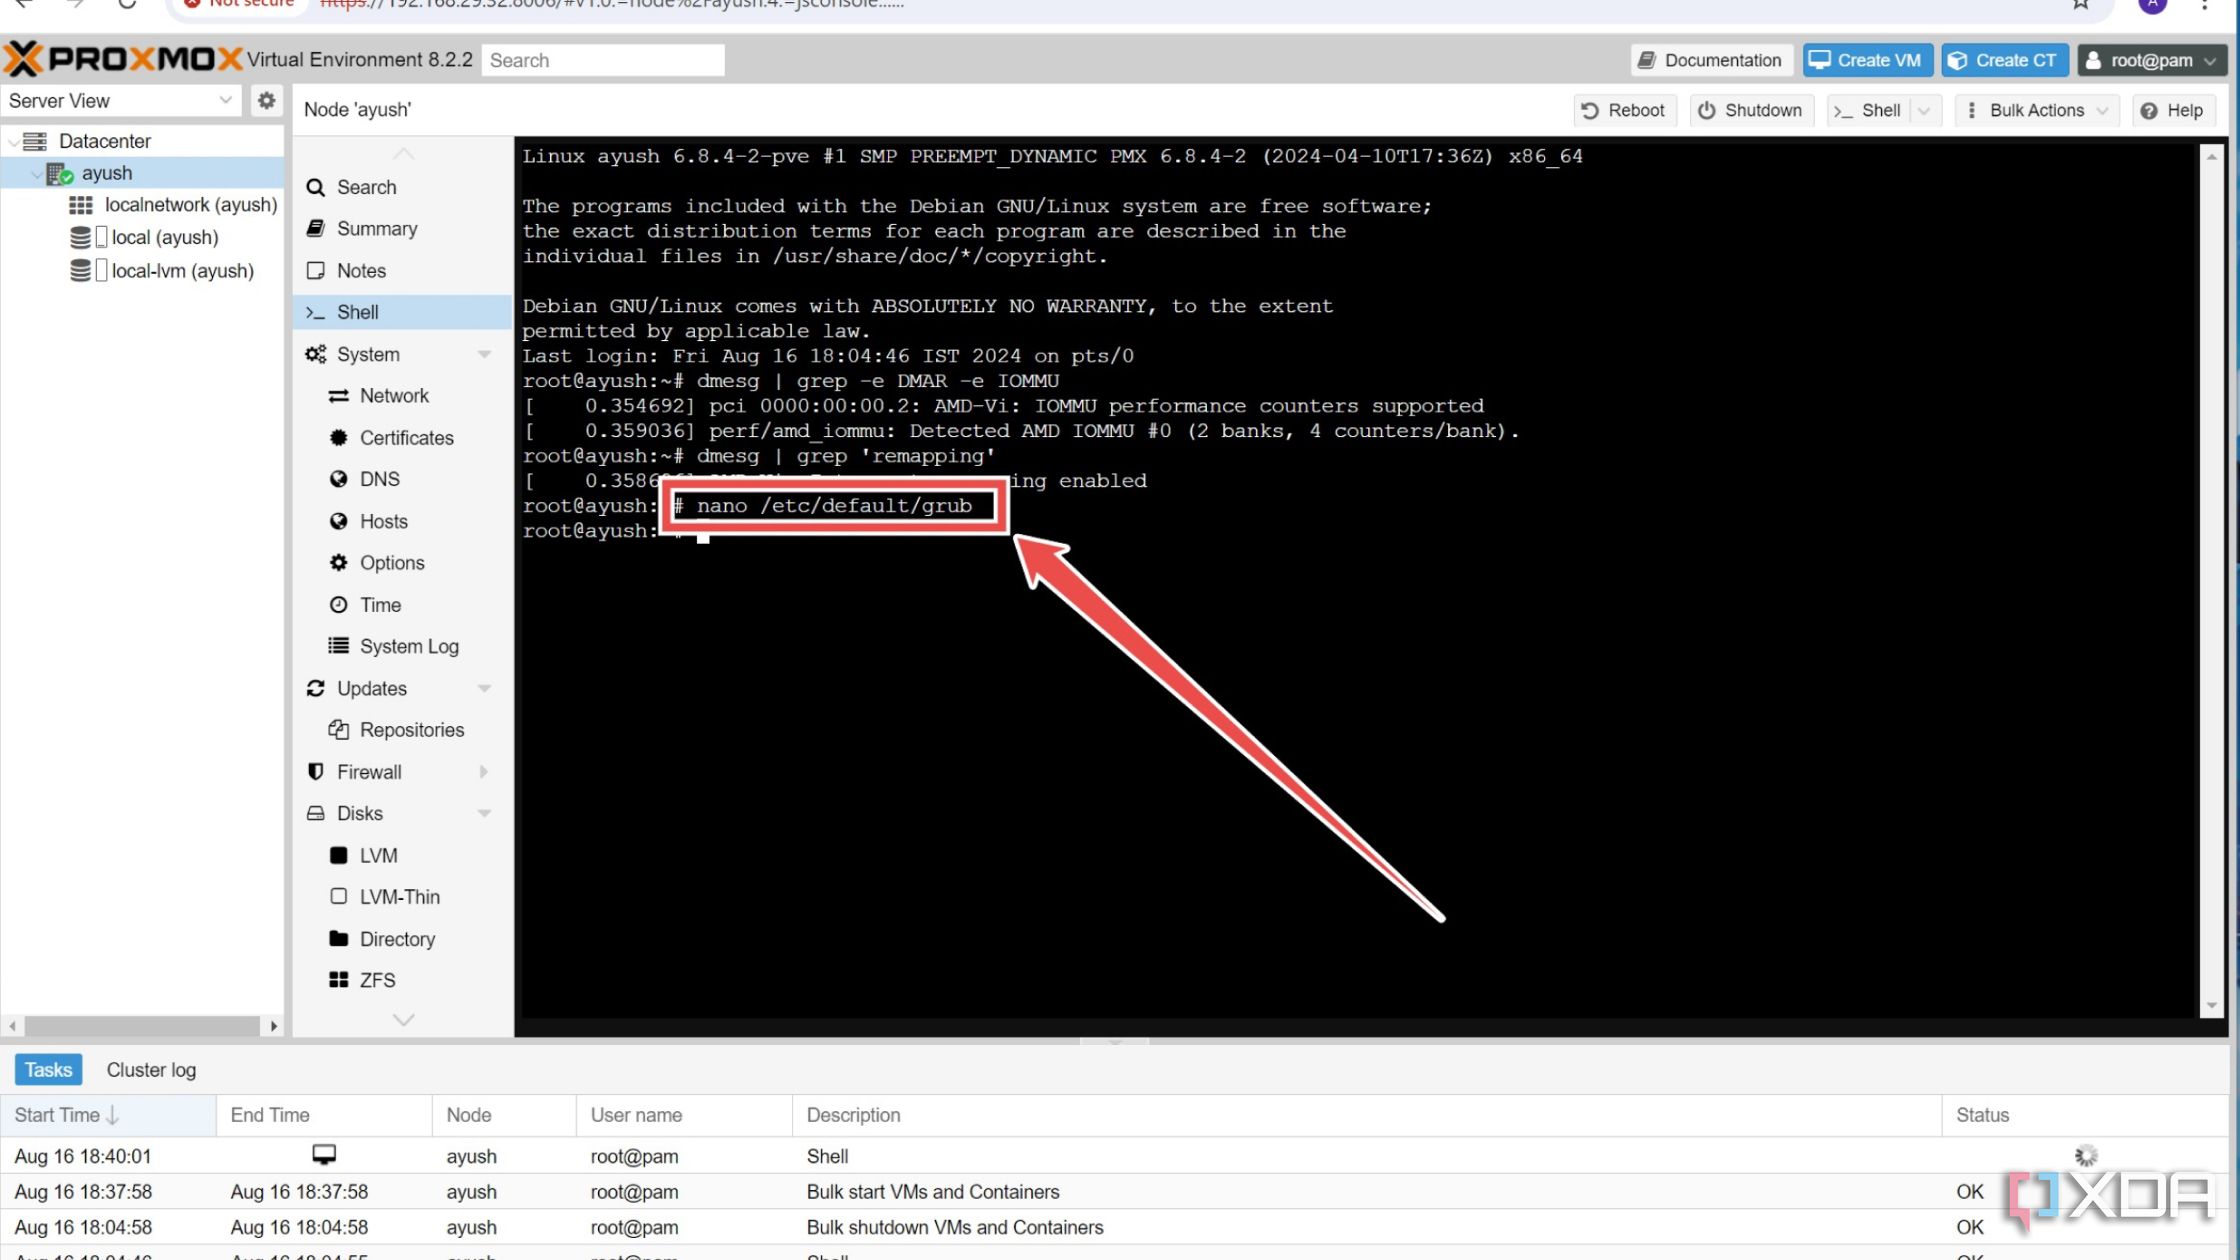
- Locate the GRUB_CMDLINE_LINUX_DEFAULT line and overwrite it with this argument.
GRUB_CMDLINE_LINUX_DEFAULT="iommu=pt"
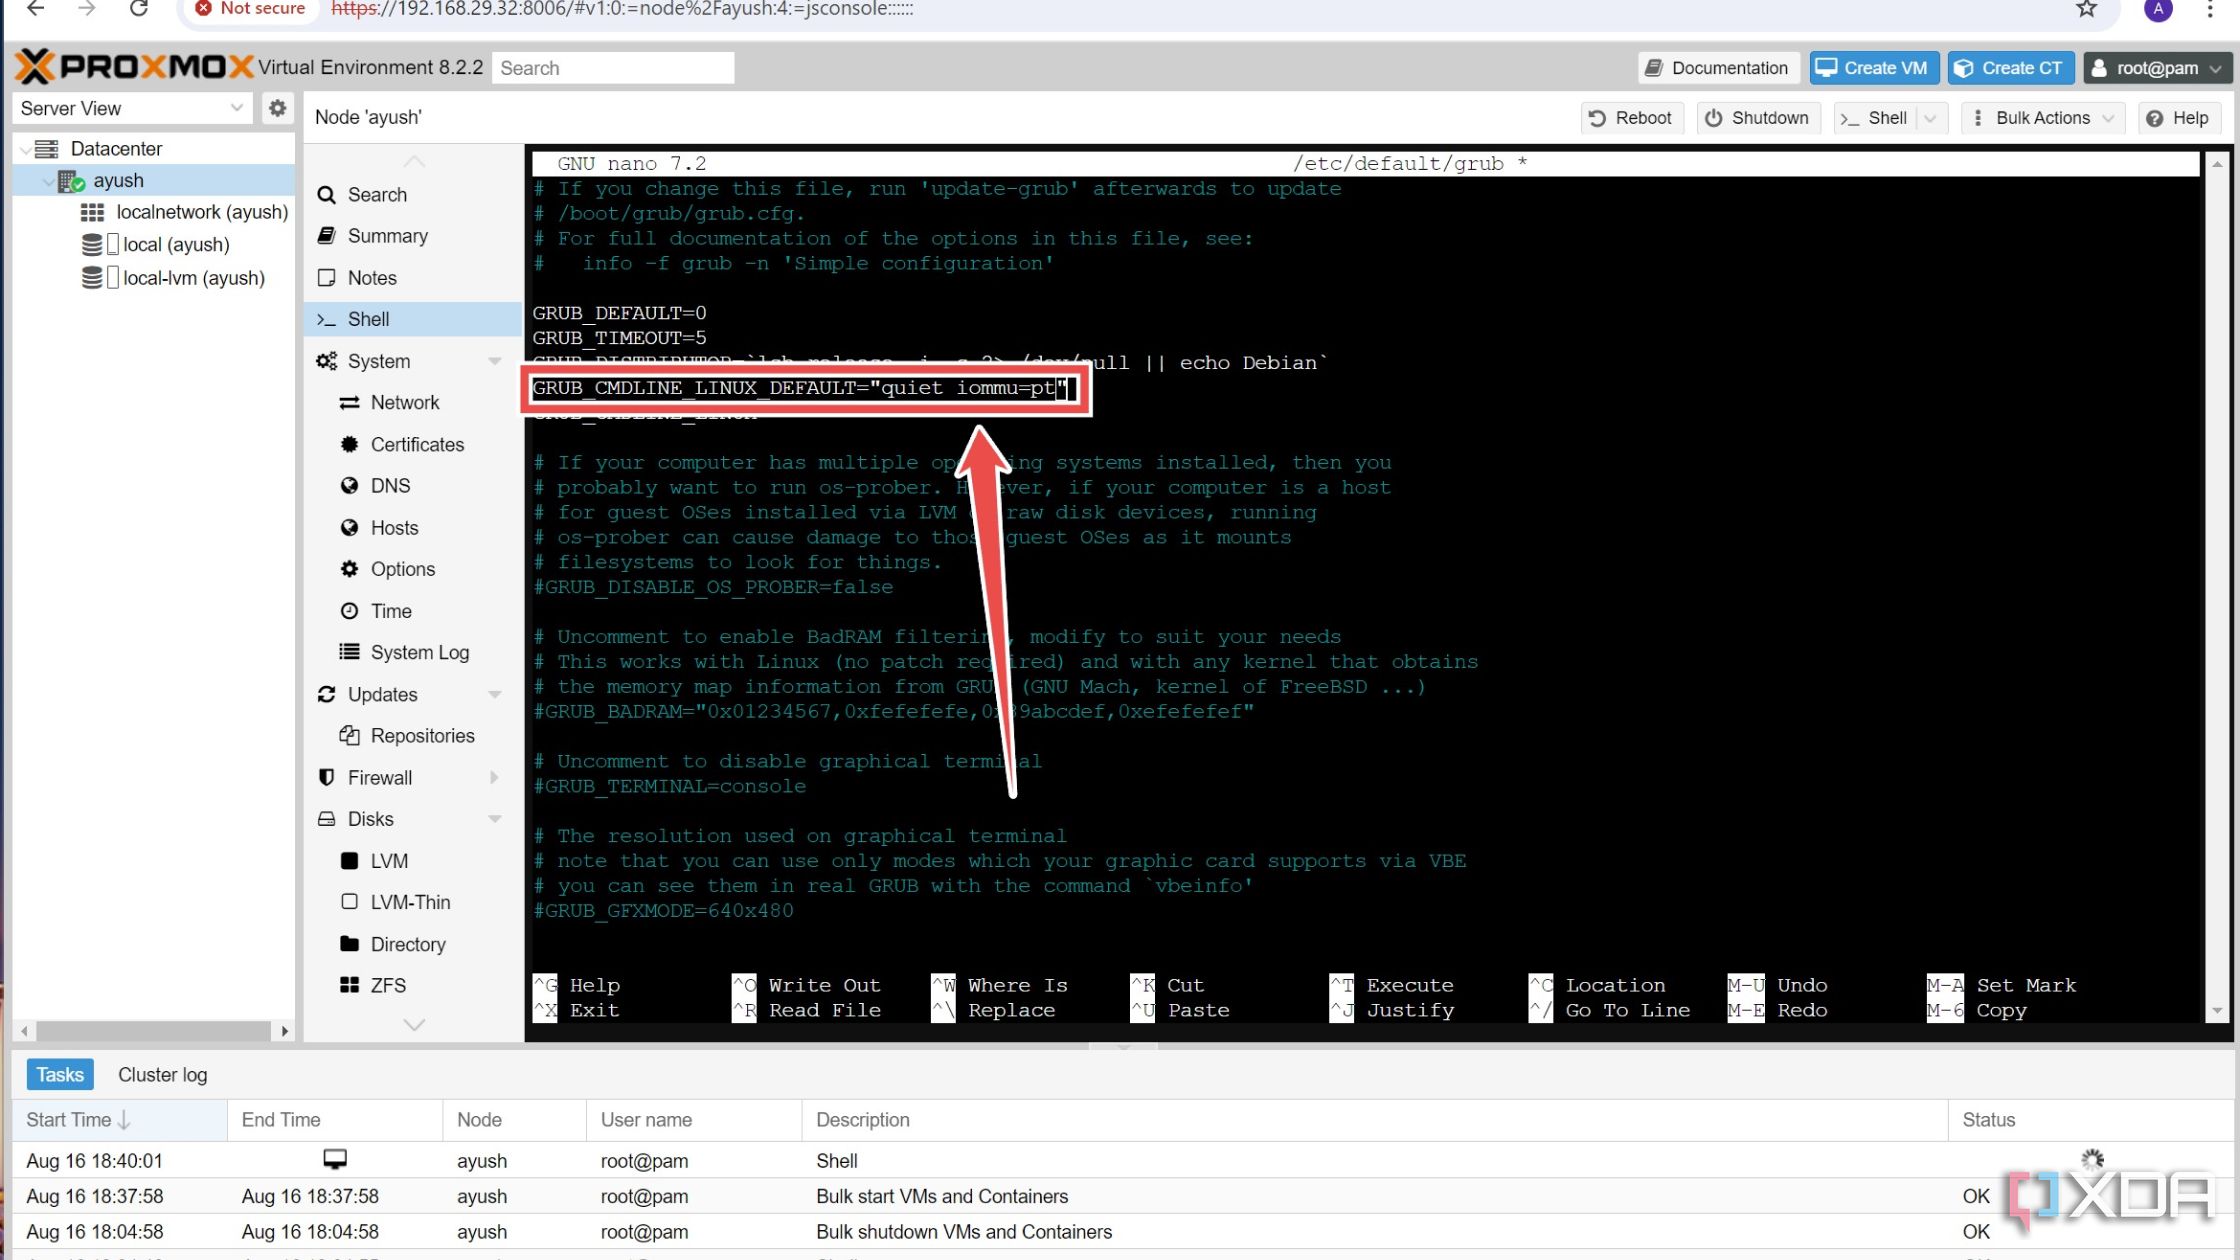
If you’re on an Intel CPU, you’ll need to add a longer argument:
GRUB_CMDLINE_LINUX_DEFAULT="quiet intel_iommu=on"
- Save and exit the config file by pressing Ctrl+X followed by Y.
- Execute this command to update the GRUB bootloader:
update-grub
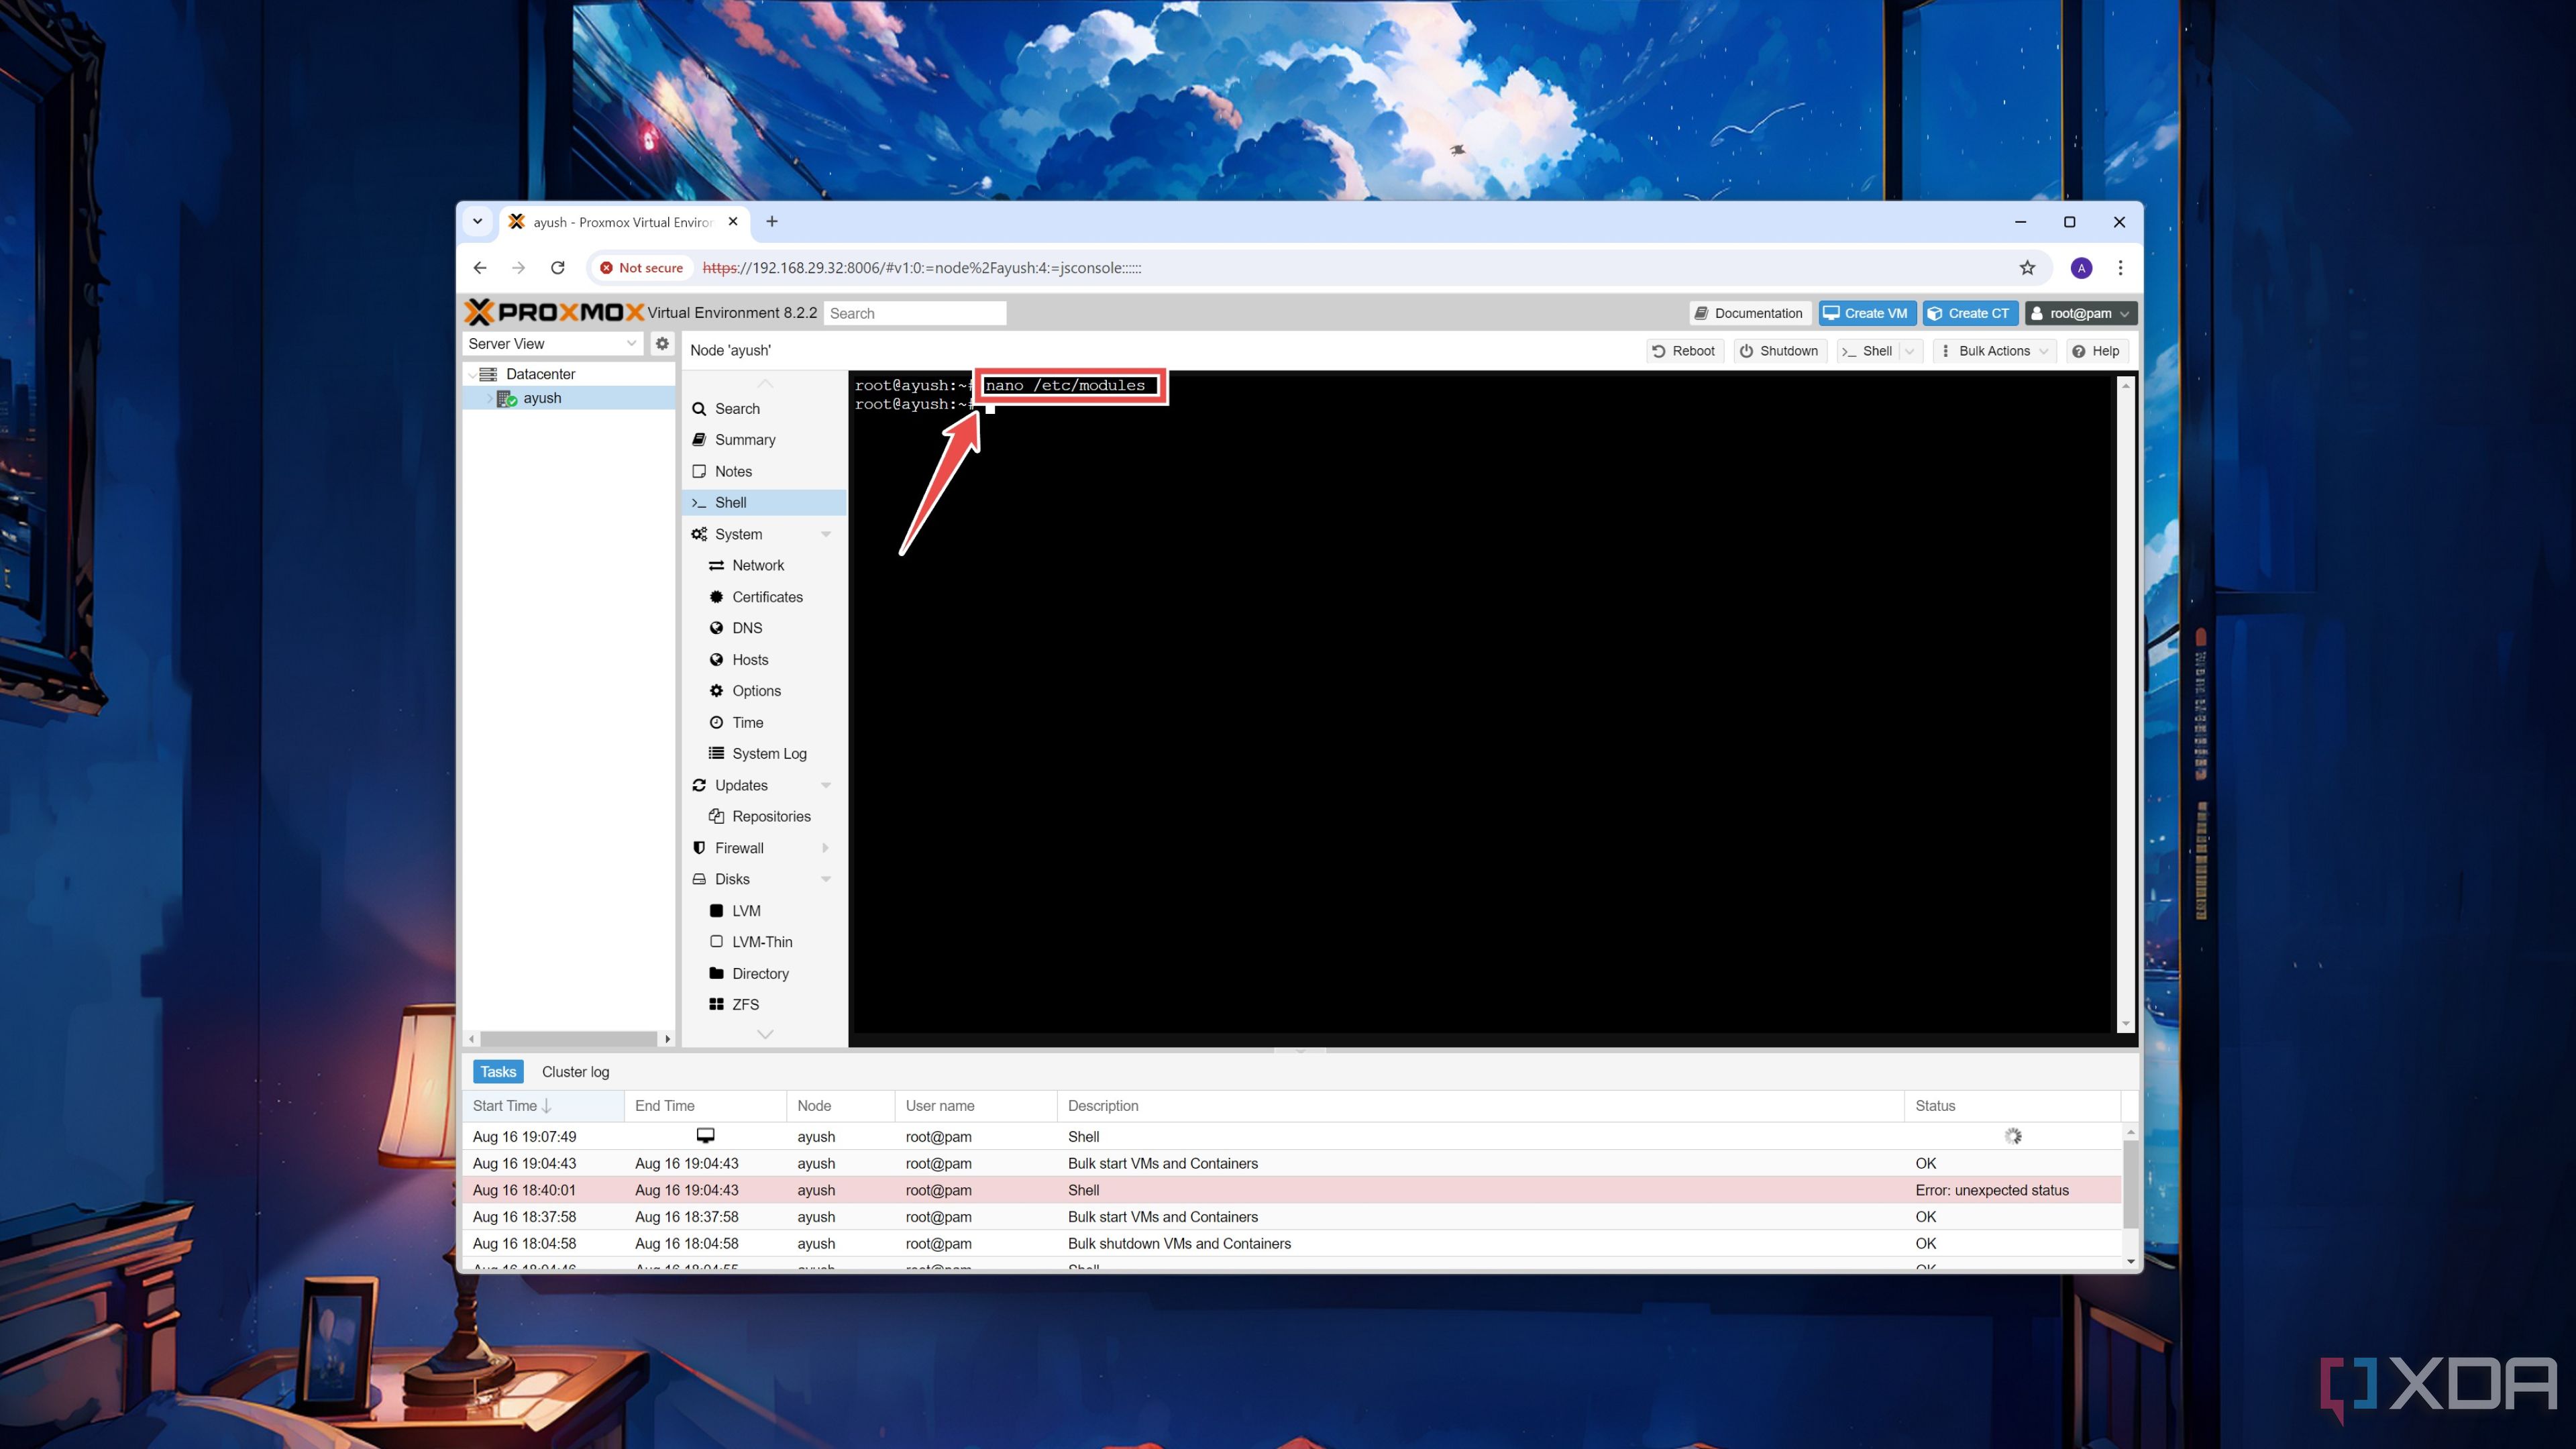
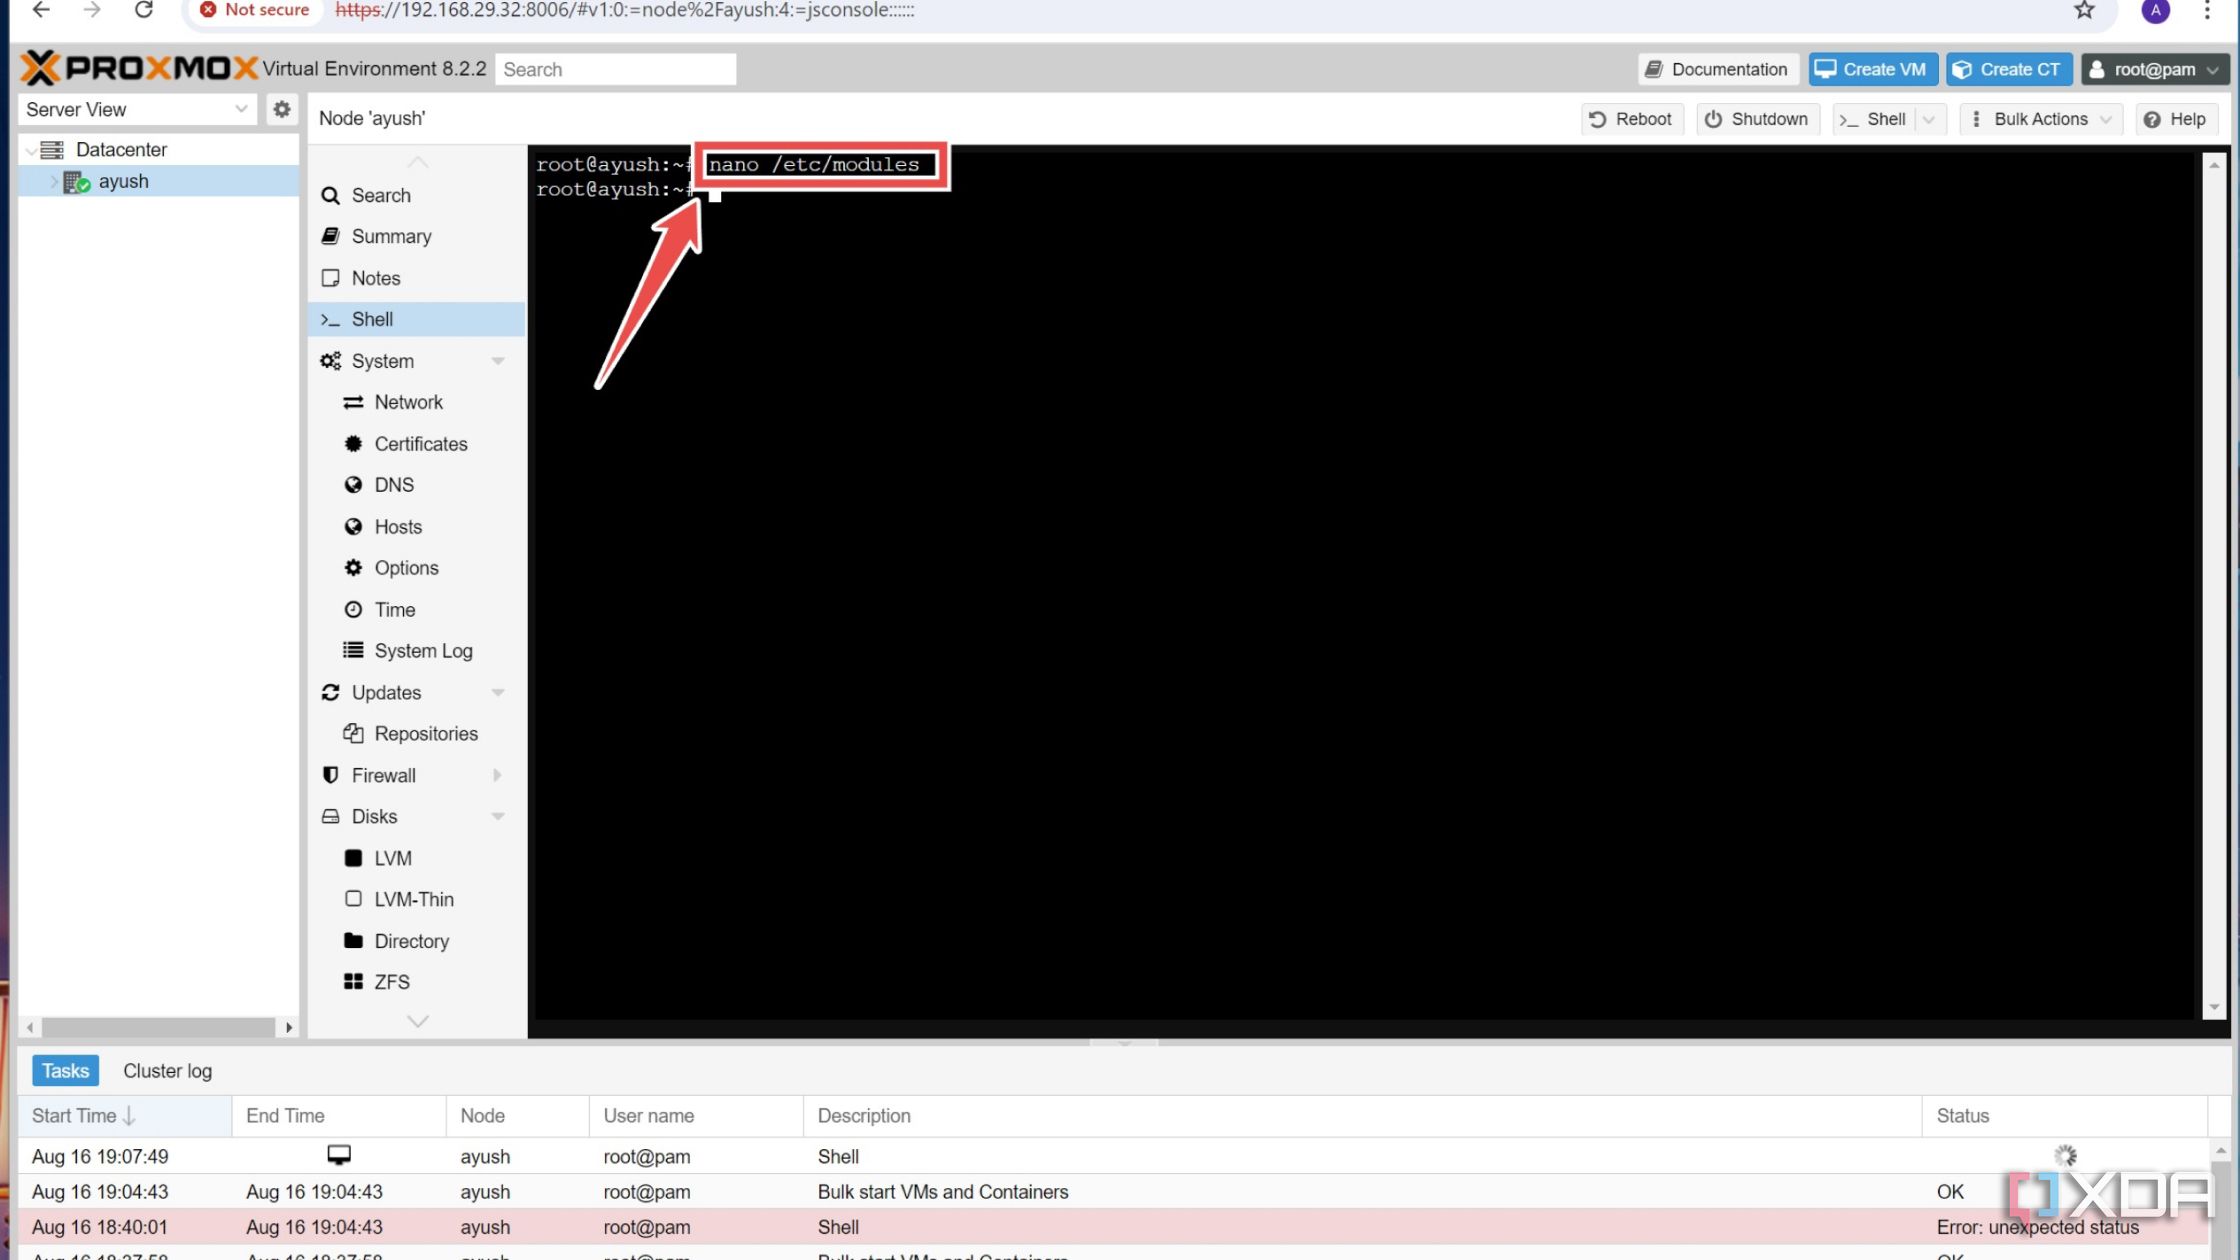
- Access the modules file with the help of the Nano editor.
nano /etc/modules
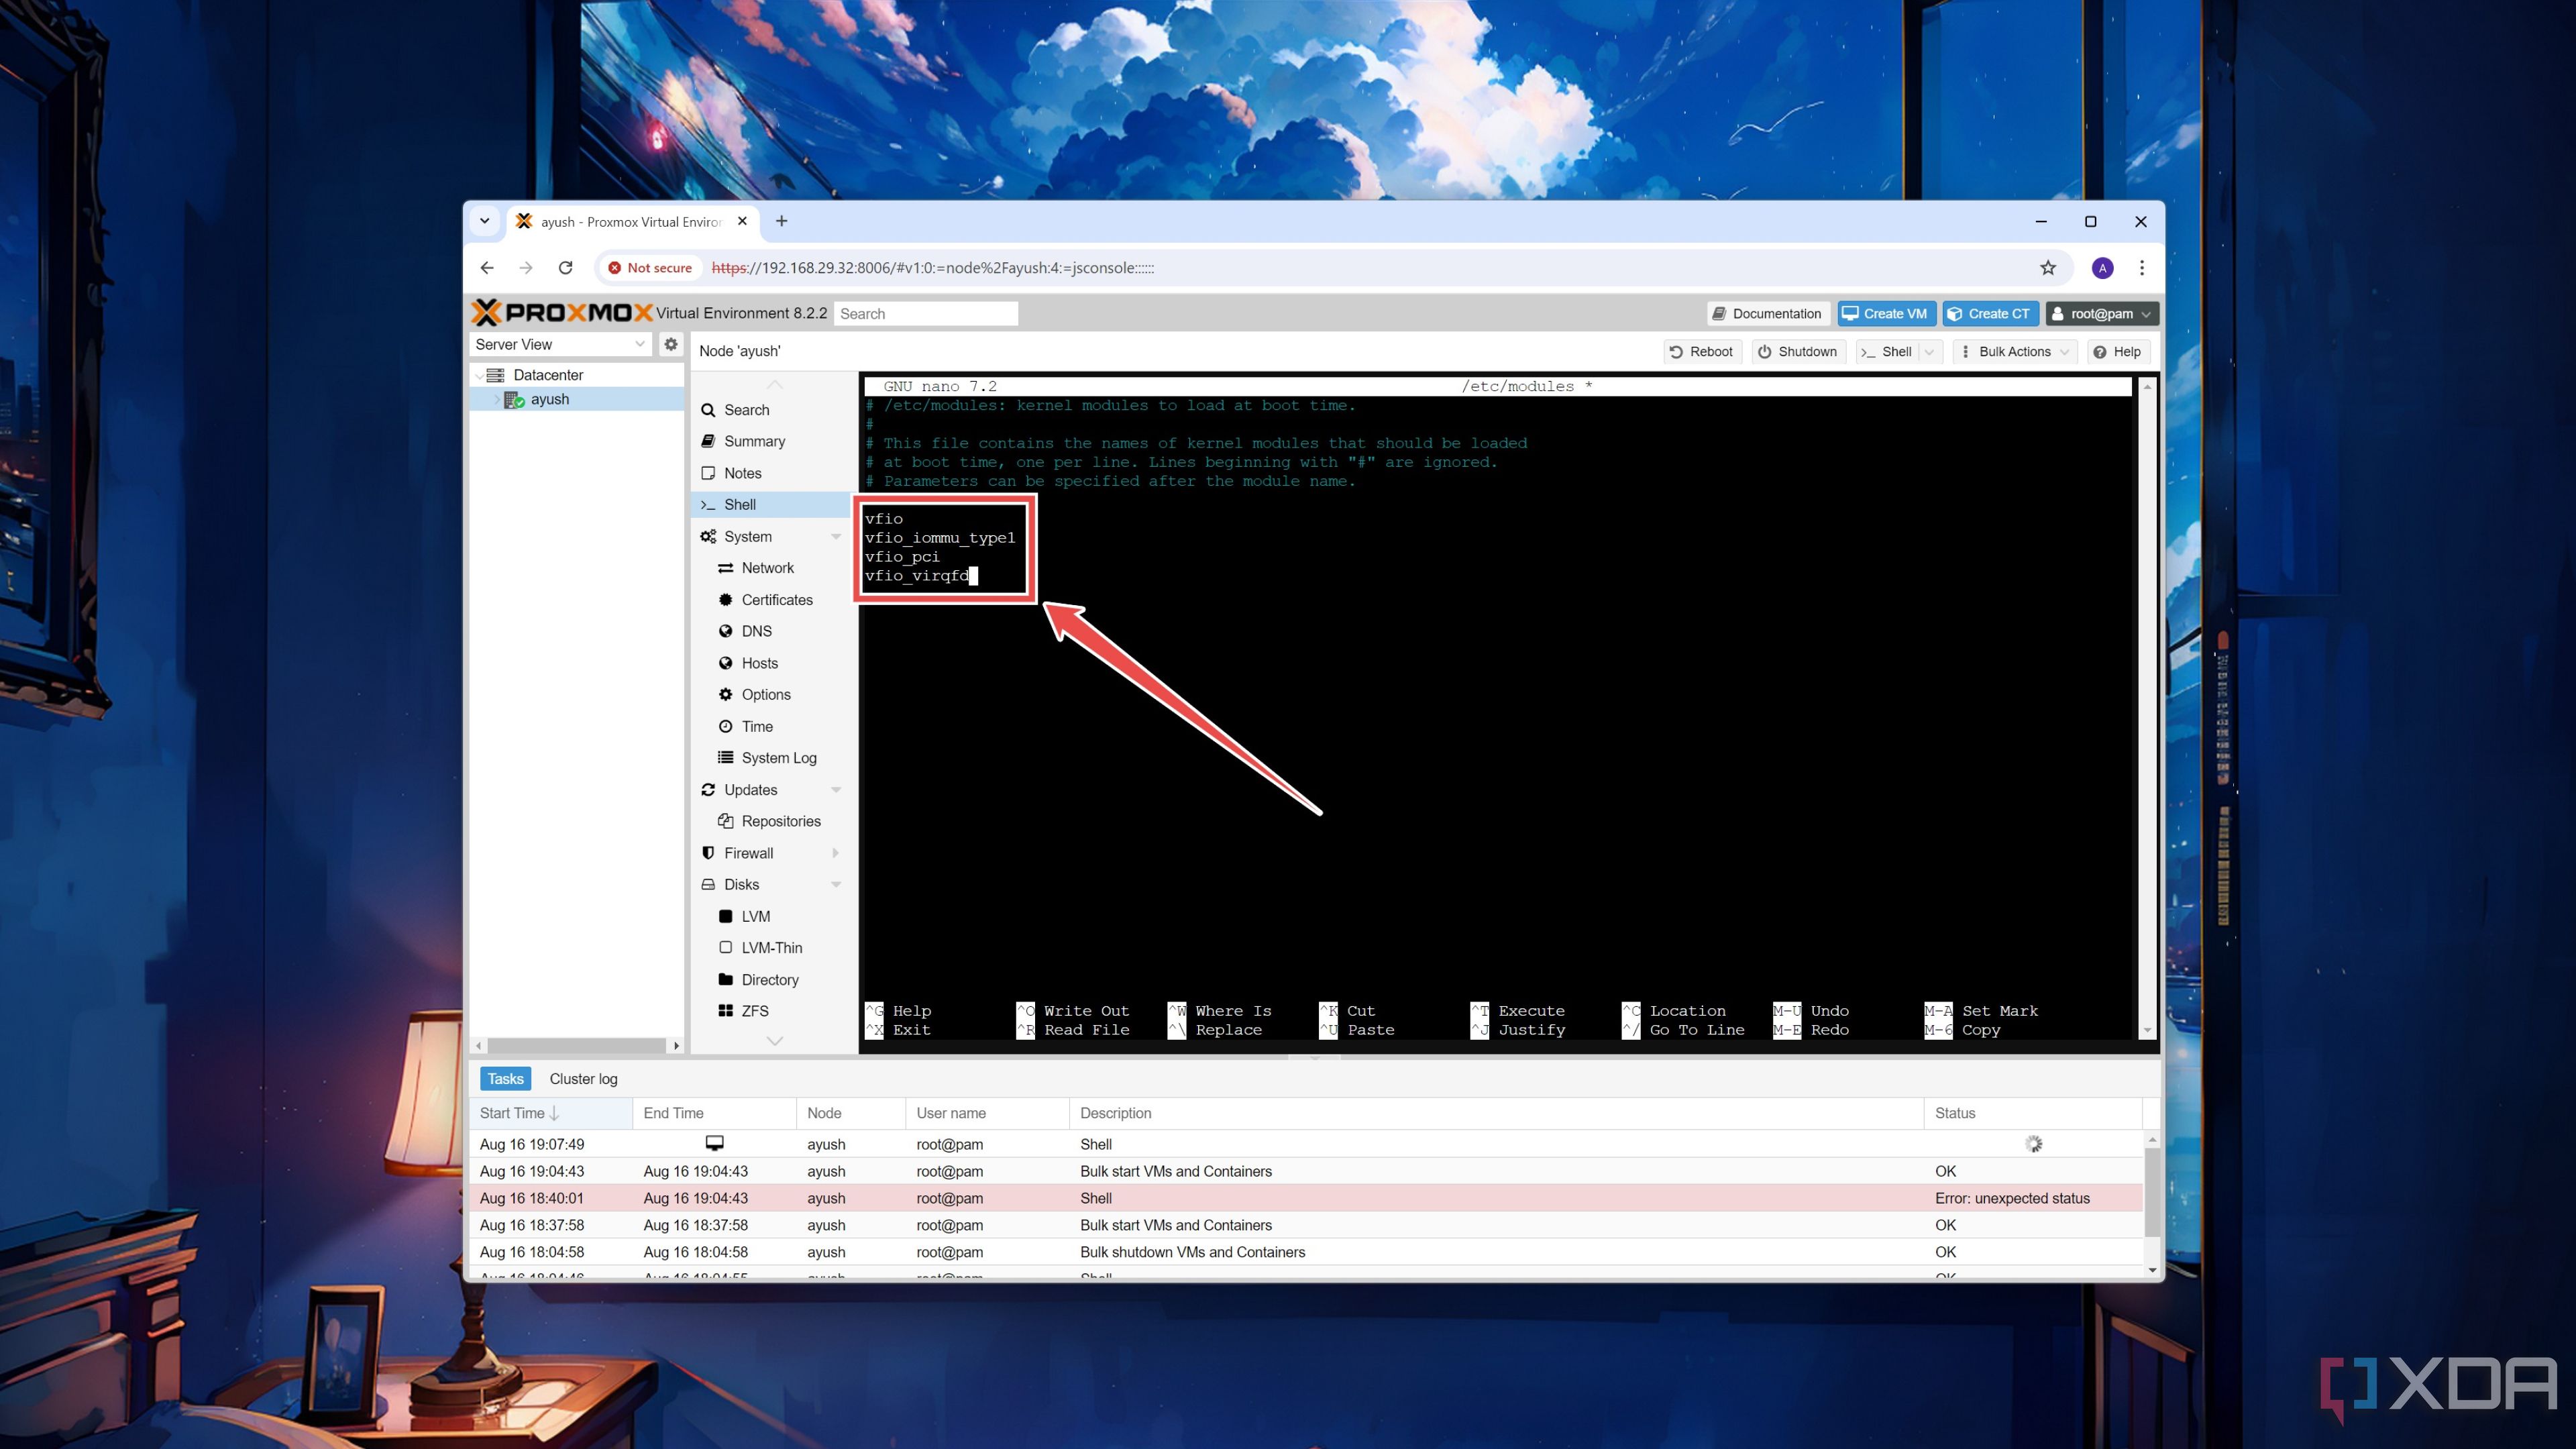
- Add these Virtual Function Input/Output variables to the file before saving and heading back to the shell using the same key combo as earlier.
-
vfio
-
vfio_iommu_type1
-
vfio_pci
-
vfio_virqfd
-
- Reboot your Proxmox system.


Once you’ve completed these steps, you just need to add the PCIe device to your virtual machine. Unless you’re using a graphics card, feel free to skip the next section of the article.
(Optional) Enabling PCI passthrough for GPUs

Let me preface this section by saying this: if you value your sanity, you should forget about using GPUs in Proxmox VMs. Unlike the average PCIe device, setting up the passthrough facility for grahics cards is an excruciating process that can easily fail depending on multiple factors, including the mobo specs and the GPU model, manufacturer, and generation.
But if you’re still determined to follow through, here are some important things to keep in mind. For an error-free experience, I recommend using slightly older GPUs instead of their latest counterparts. And yes, GPUs, as in the plural form of the word. Although you’re accessing the web UI from another system, you’ll need at least one video output source exclusively for the Proxmox machine. Thankfully, this includes the iGPUs in modern processors, but just like I said, your mileage can vary significantly depending on your PC’s specifications.
It’s also important to slot the GPU into the proper PCIe slot on your motherboard. If the GPU is attached to the PCIe socket that has the same IOMMU group as the M.2 SSD, SATA controller, Ethernet jack, or other similar devices, attempting to passthrough the graphics card to a VM can result in the entire Proxmox machine freezing up when you boot said virtual machine. Sure, you could technically run the pcie_acs_override=downstream,multifunction command to split some IOMMU groups, but it can result in some unexpected issues later down the line.
To keep things simple, I suggest plugging the GPU you wish to access from a VM into the fastest PCIe x16 slot, as this one typically has its own IOMMU group. In most cases, it should be the first x16 socket on the motherboard. Then, you can insert your secondary graphics card into any other slot and connect it to your monitor with the help of a display cable. Once that’s done, simply follow these steps inside the Proxmox shell:
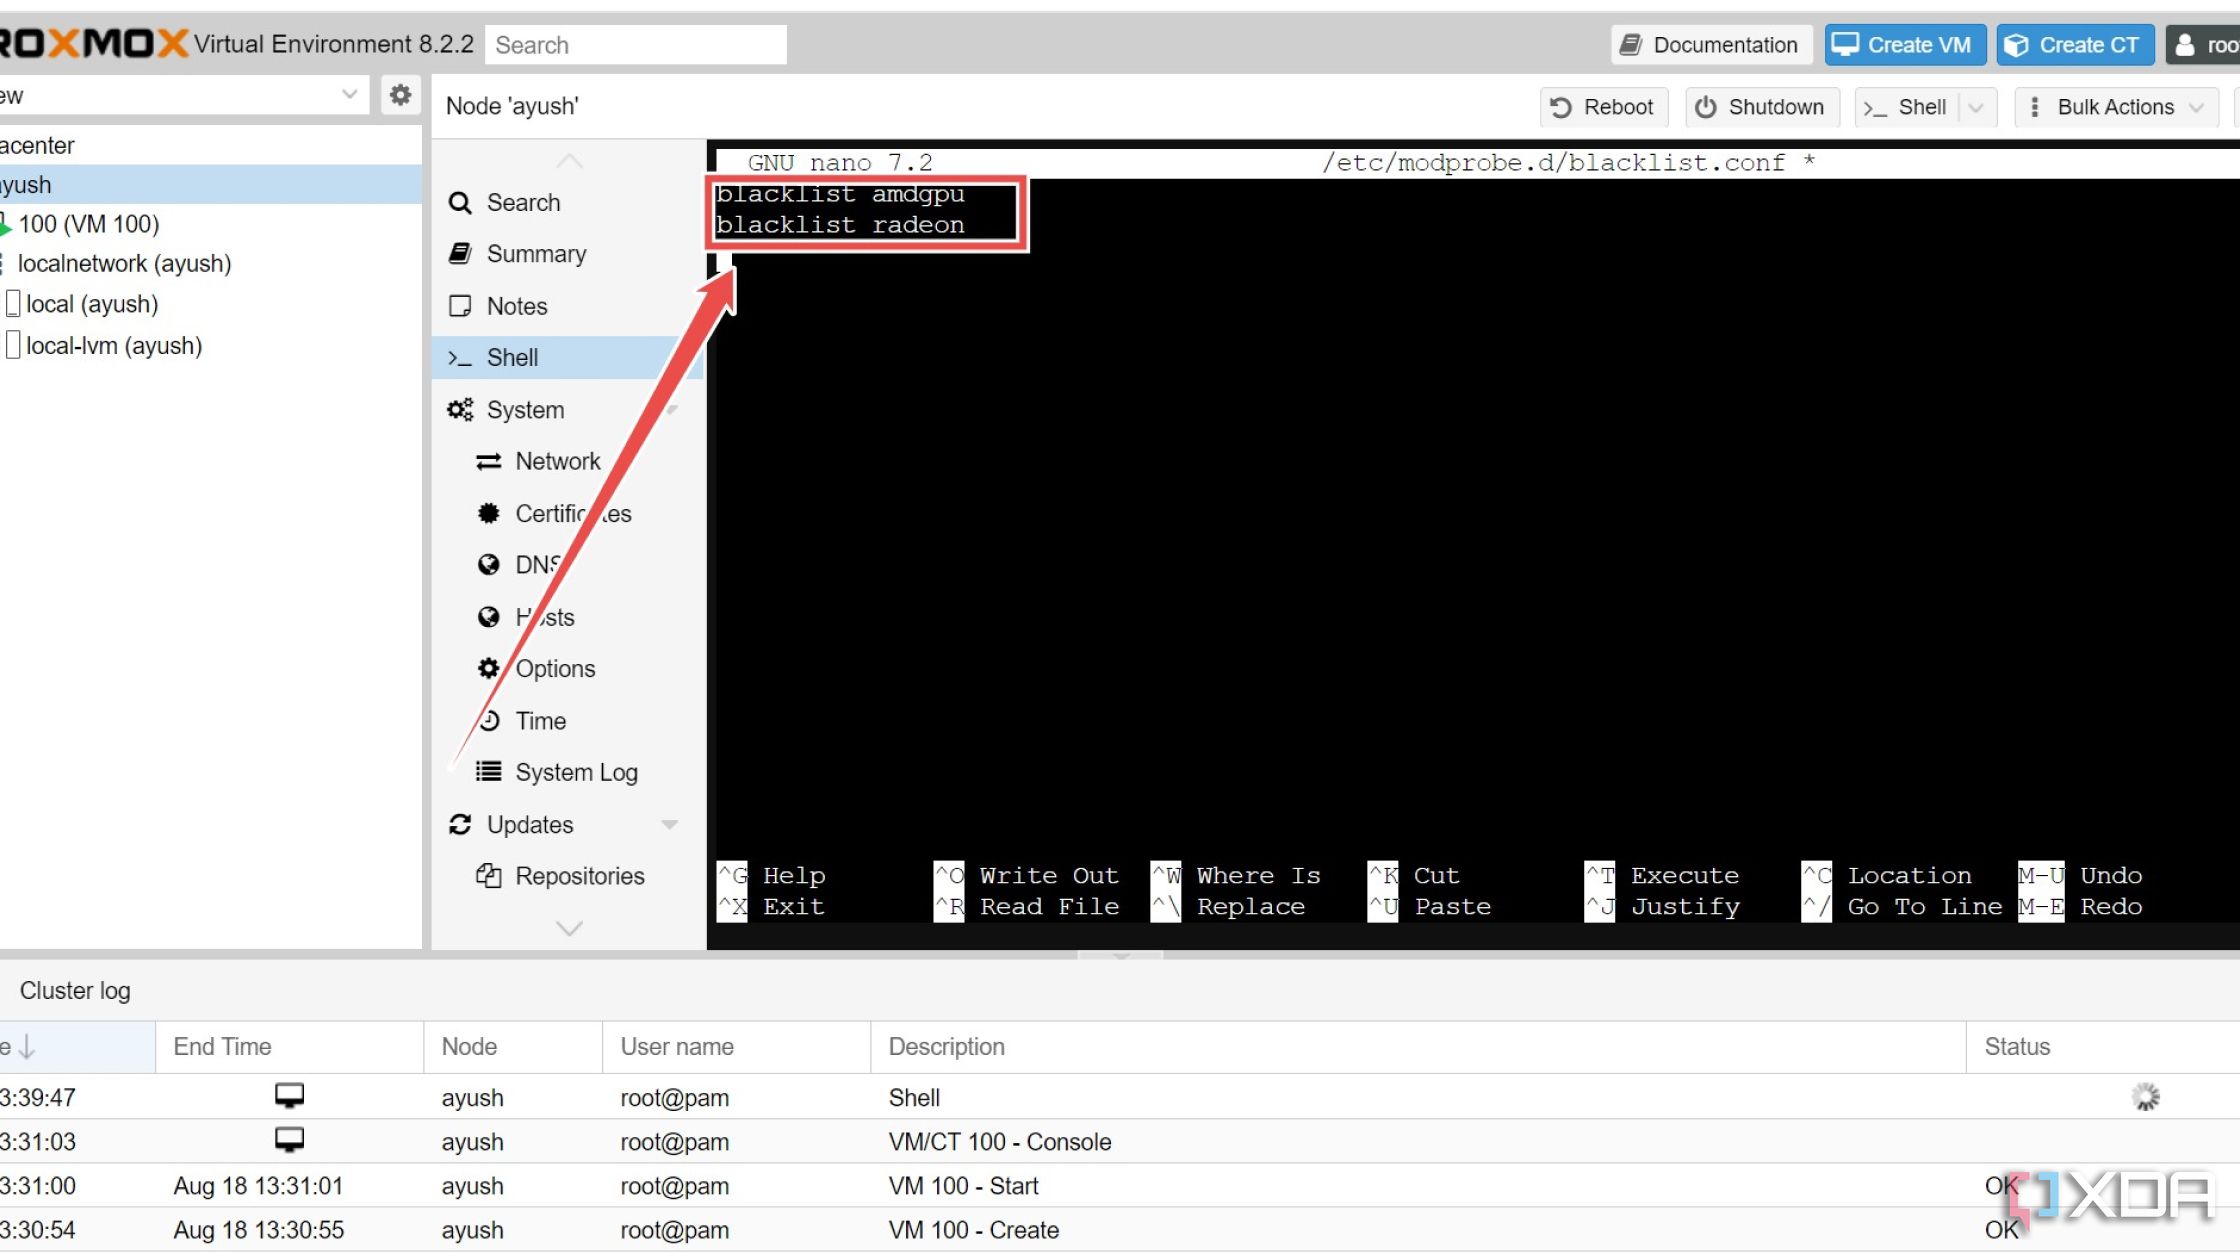
- (Optional) As a precautionary measure, open blacklist.conf to stop the Proxmox machine from accessing the GPU you plan to use inside virtual machines.
nano /etc/modprobe.d/blacklist.conf
- (Optional) Add these parameters inside the file if you’re using an Nvidia graphics card:
-
blacklist nouveau
-
blacklist nvidia
-
blacklist nvidiafb
-
blacklist nvidia_drm

As you may have already guessed, the commands are slightly different on AMD GPUs:
-
blacklist amdgpu
-
blacklist radeon
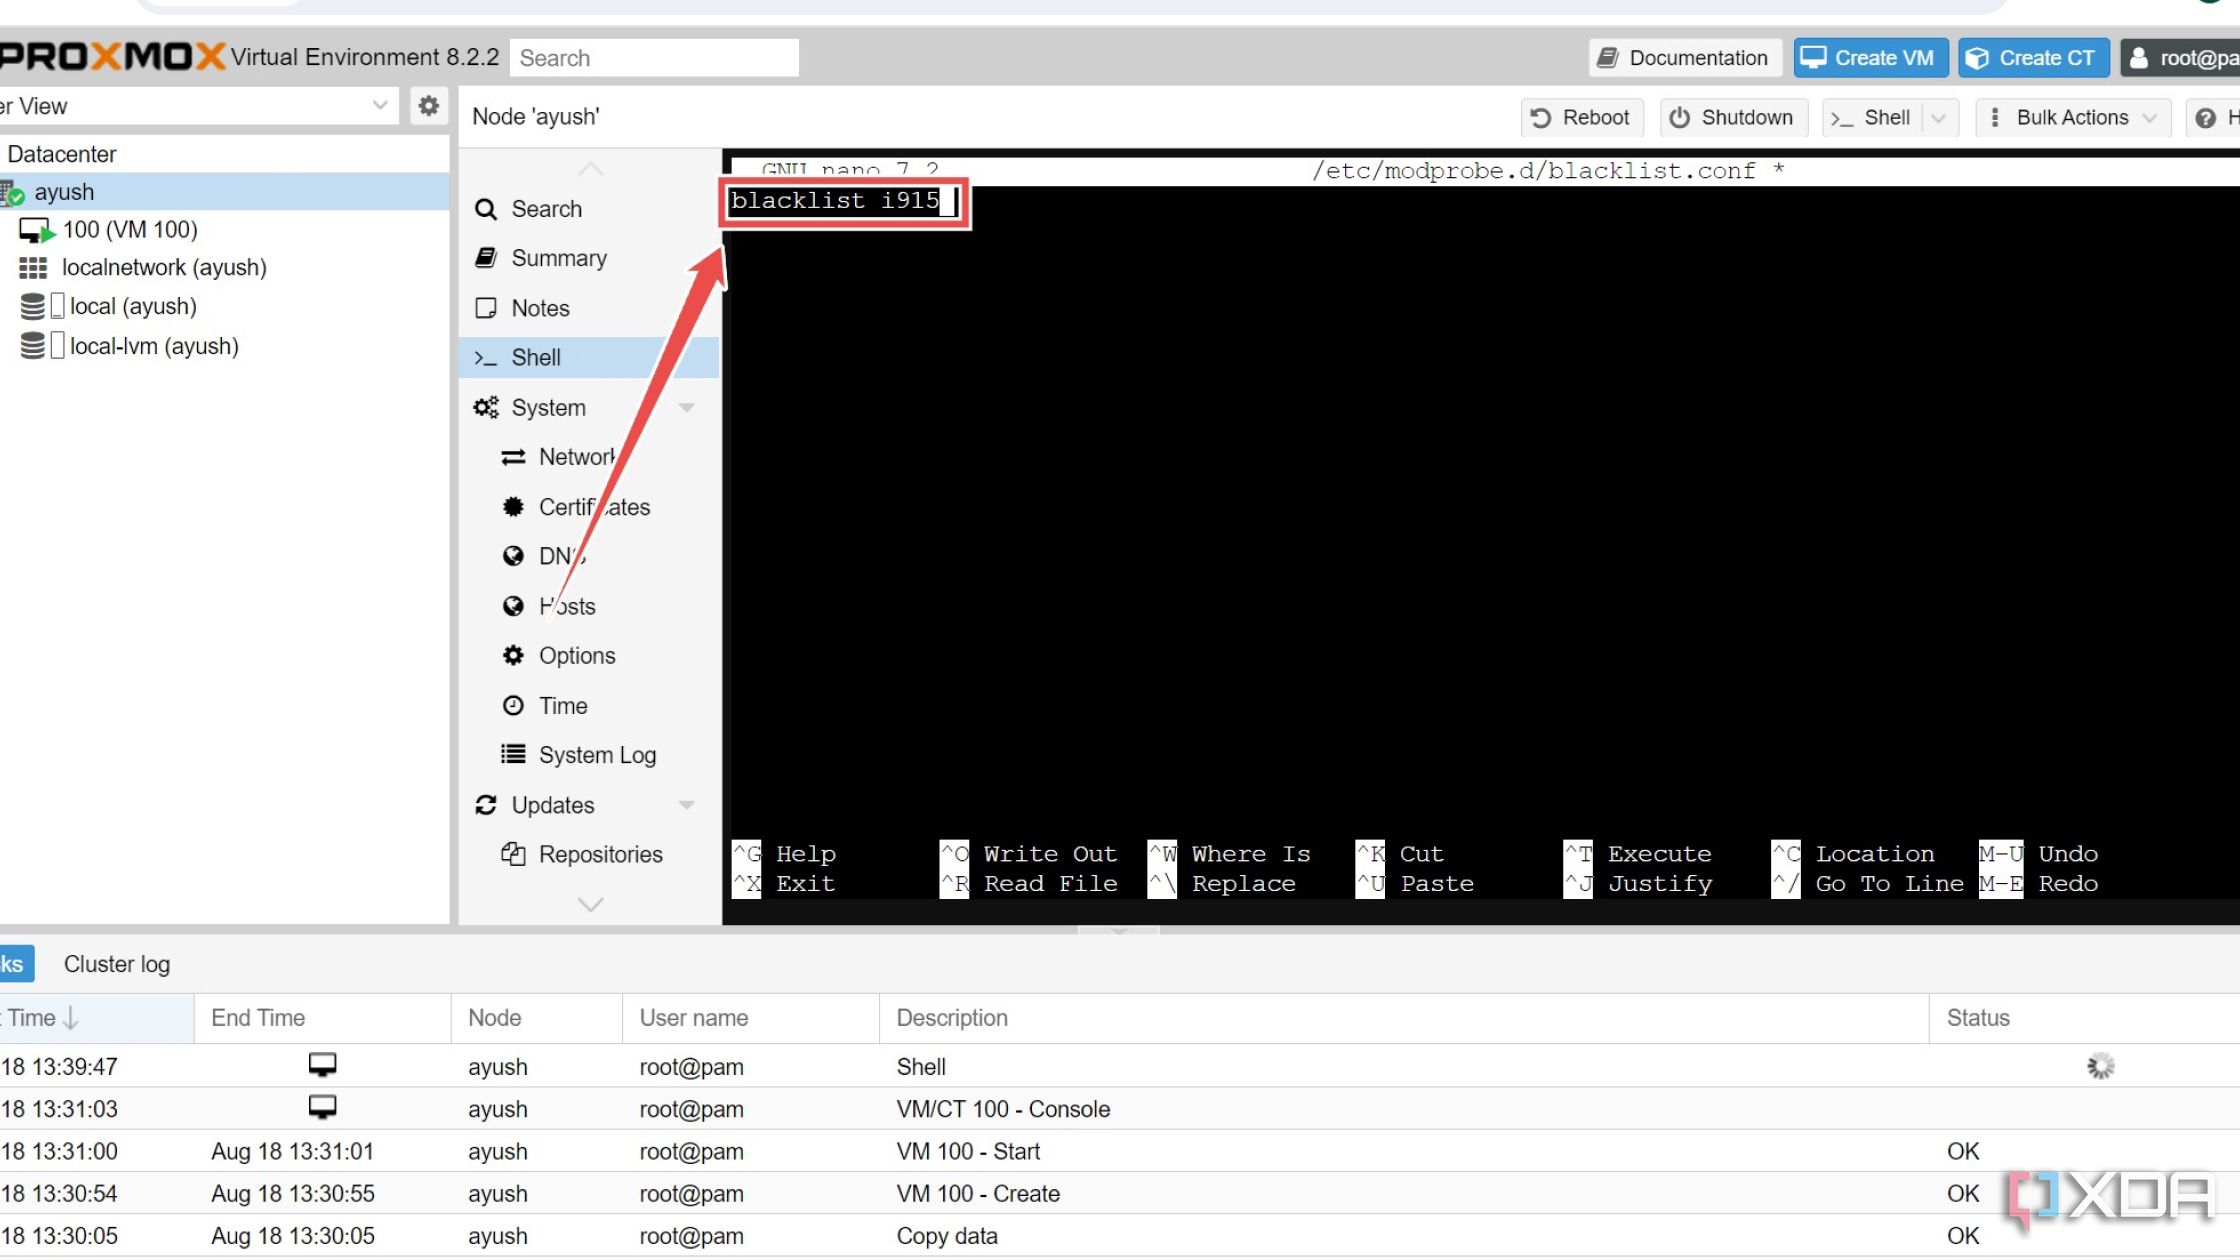
Meanwhile, you only need to append a single parameter for Intel’s offerings:
-
blacklist i915
-
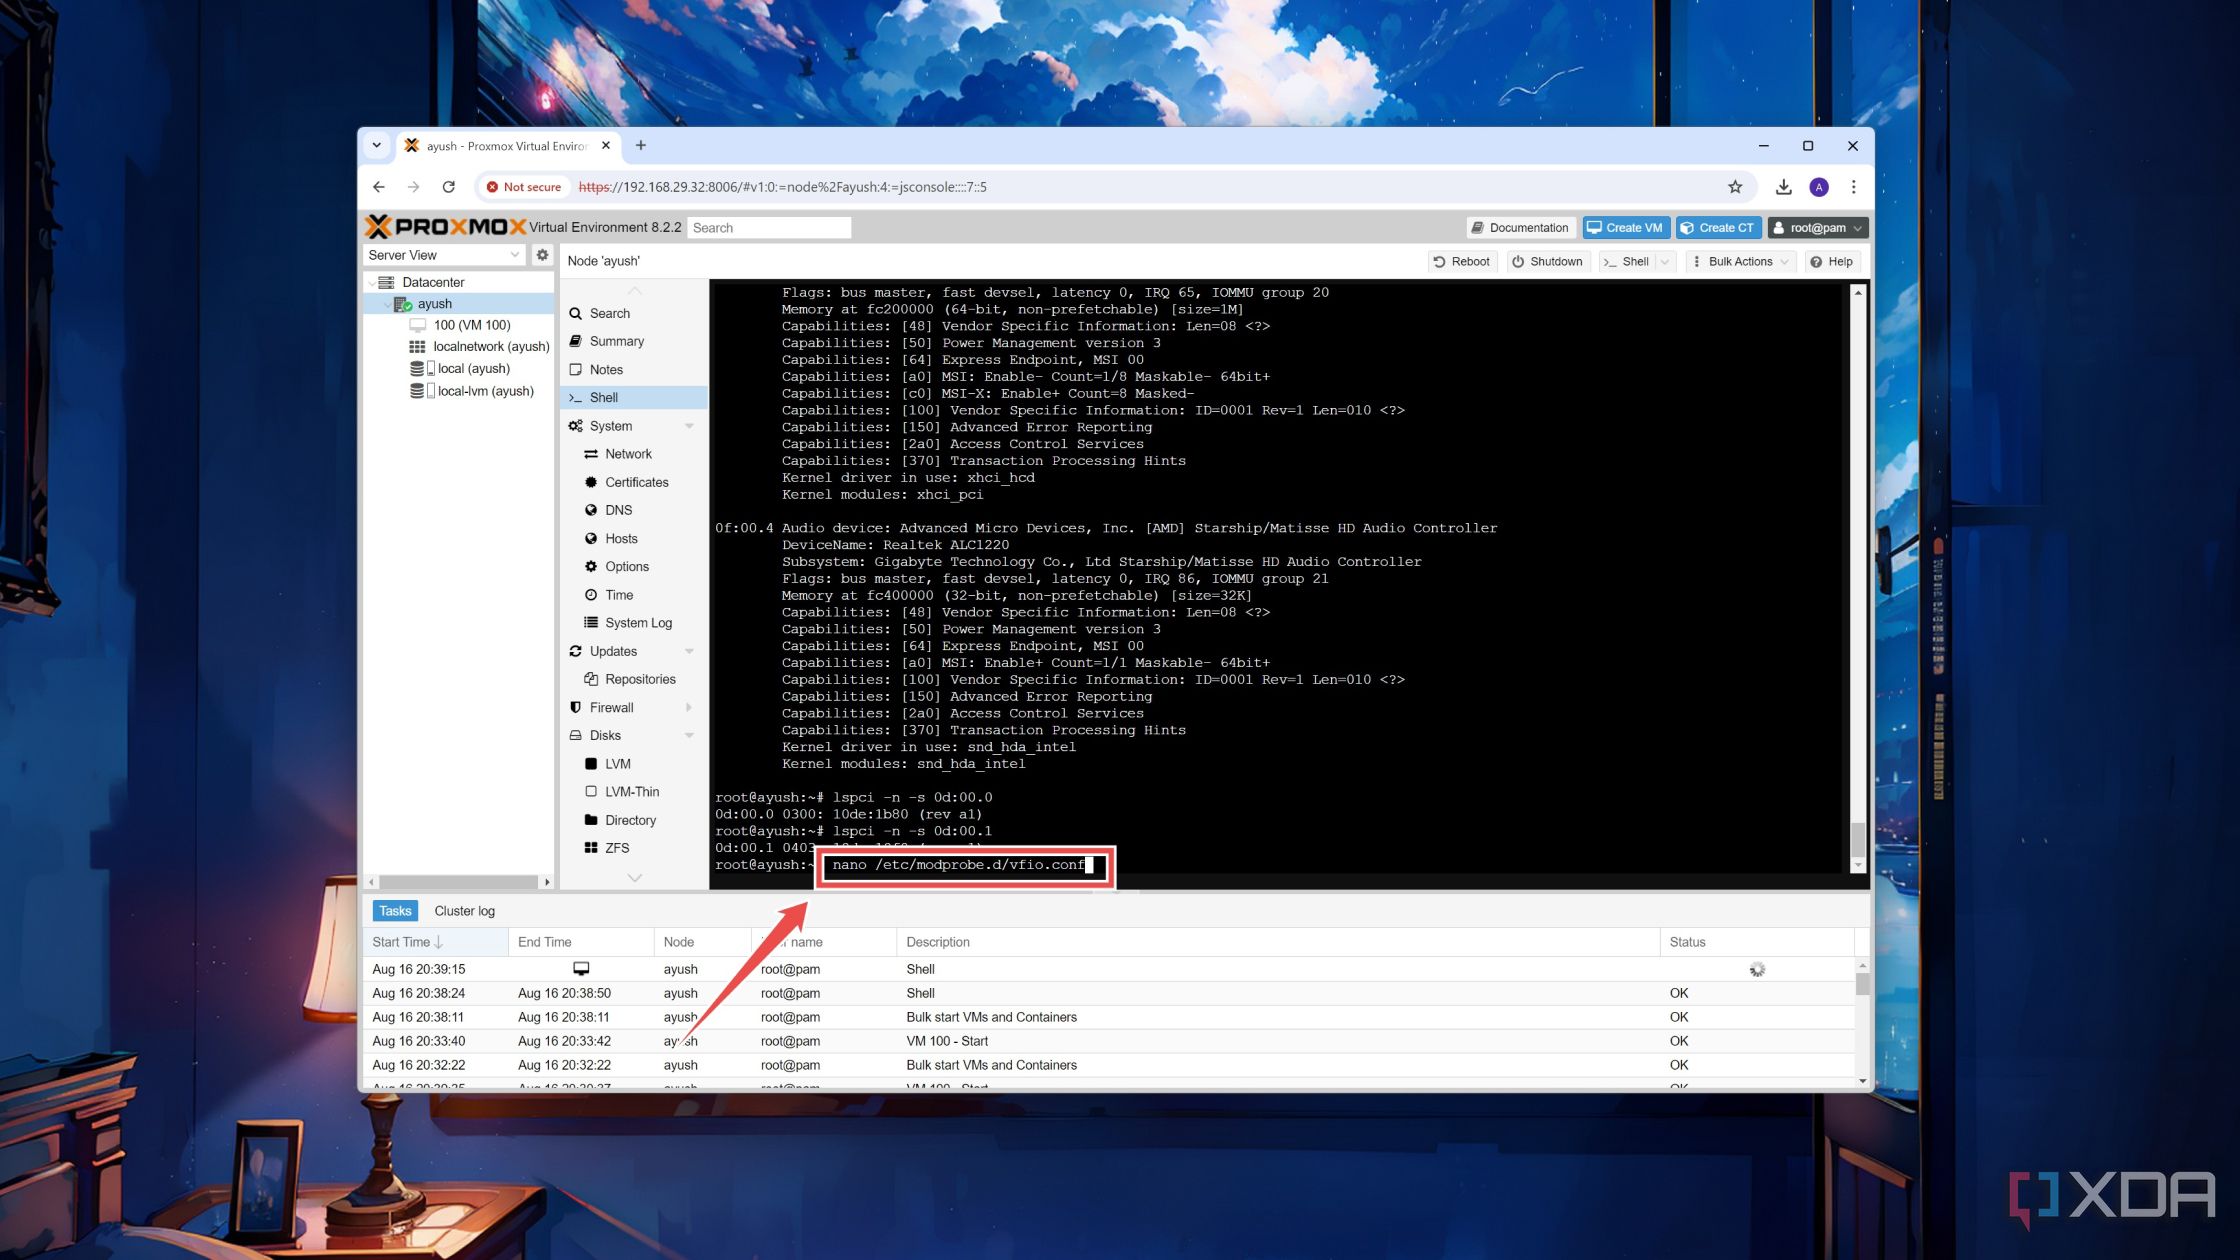
- Note the PCIe slot value of the graphics card’s VGA controller and audio driver by running the following command:
lspci -v
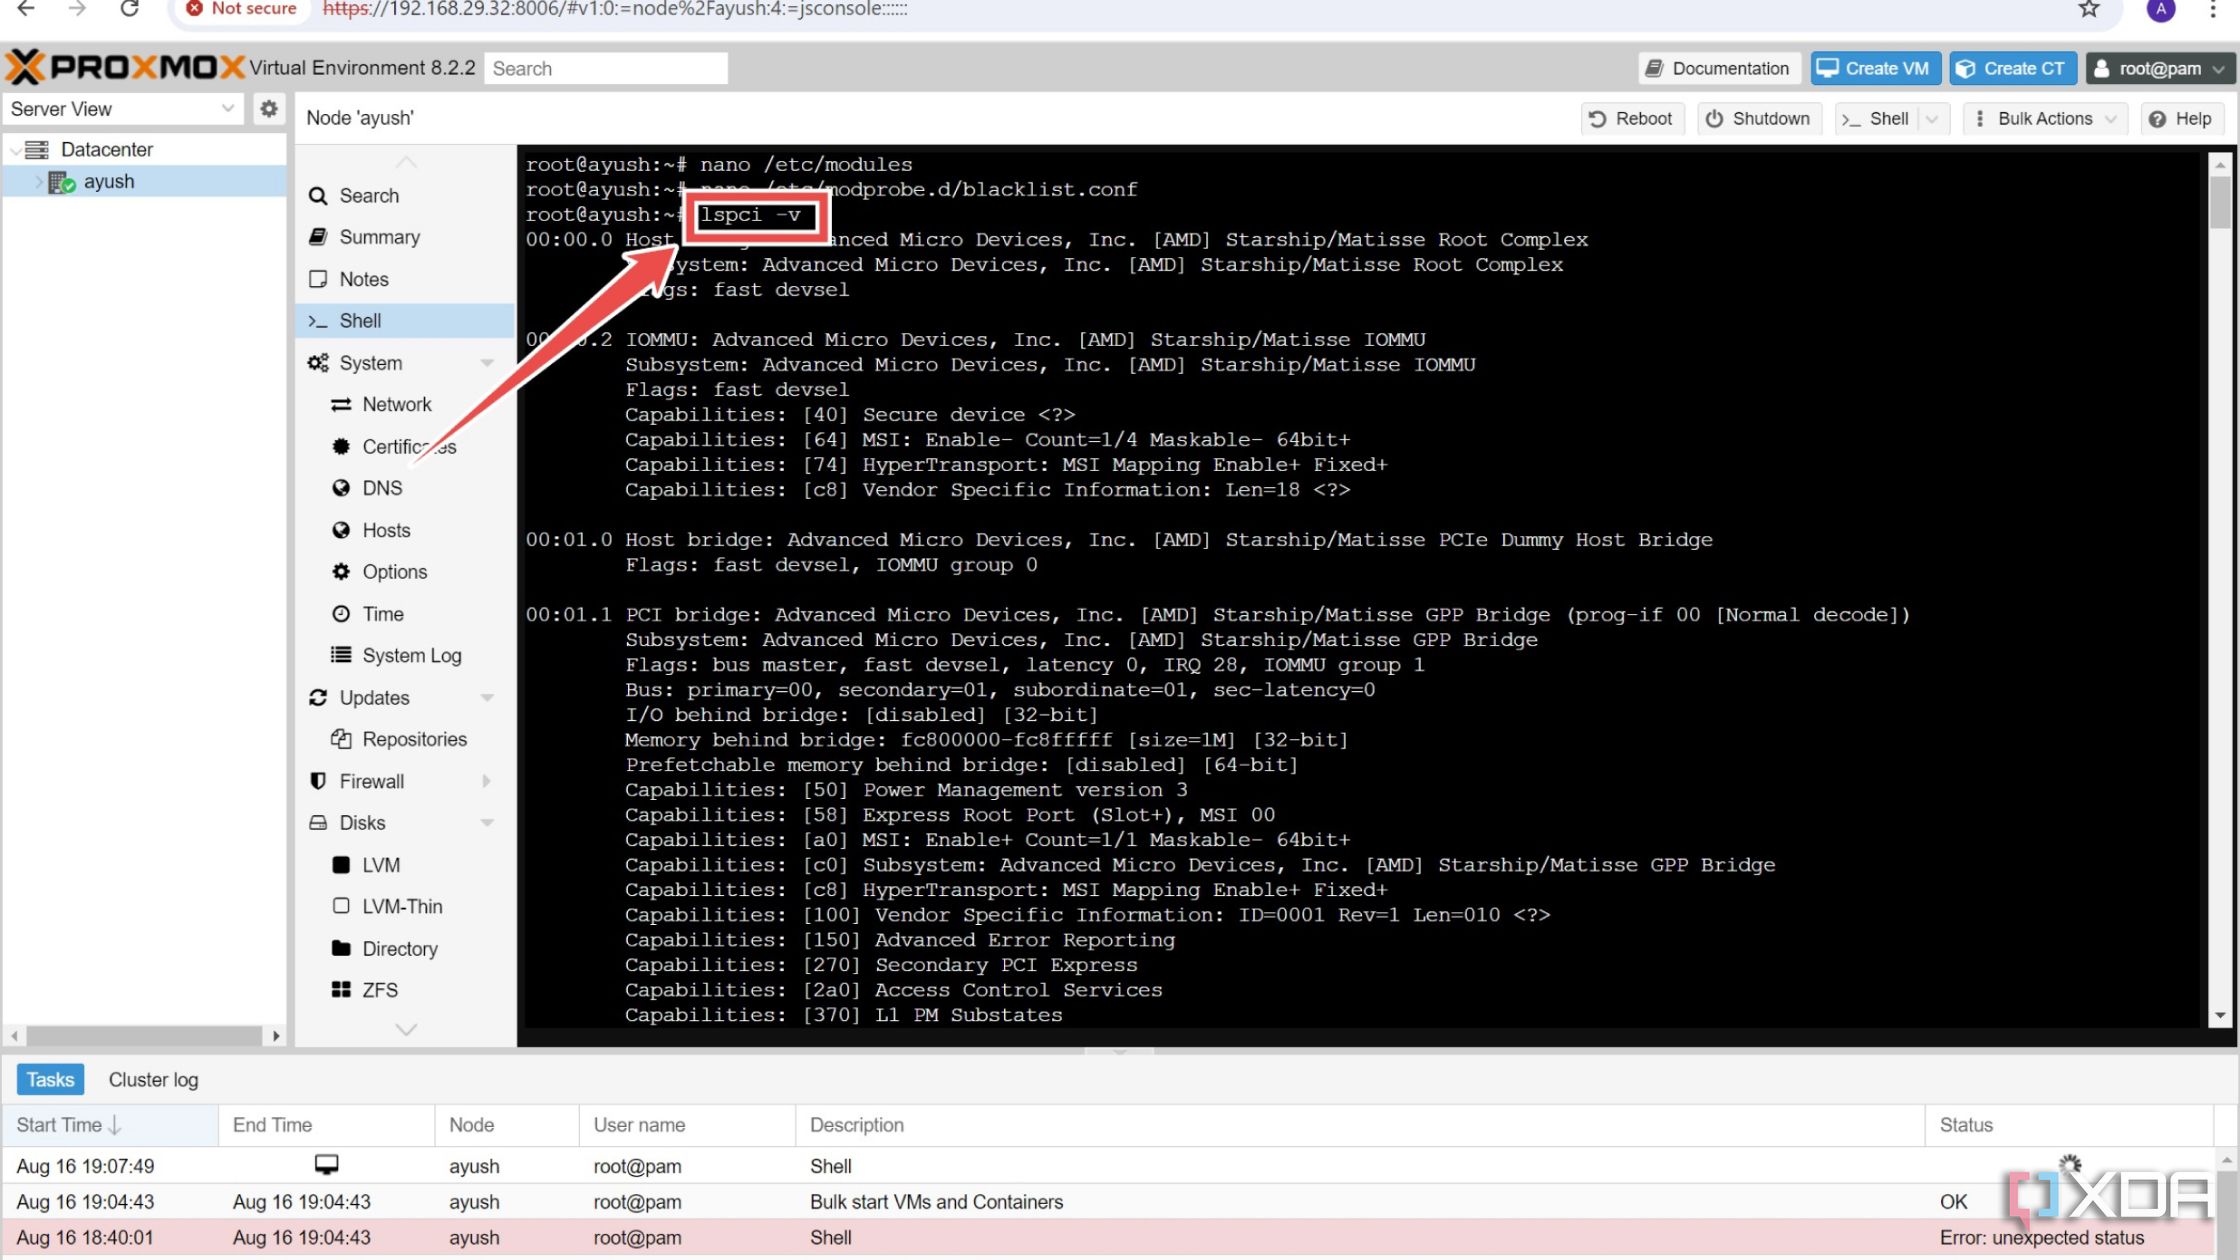
The slot value is the set of numbers that appear in the xx:xx.x format before every PCIe device.
- Execute the lspci command again, except this time, you’ll have to use a different set of flags and include the PCIe slot ID of your GPU.
lspci -n -s slot_ID
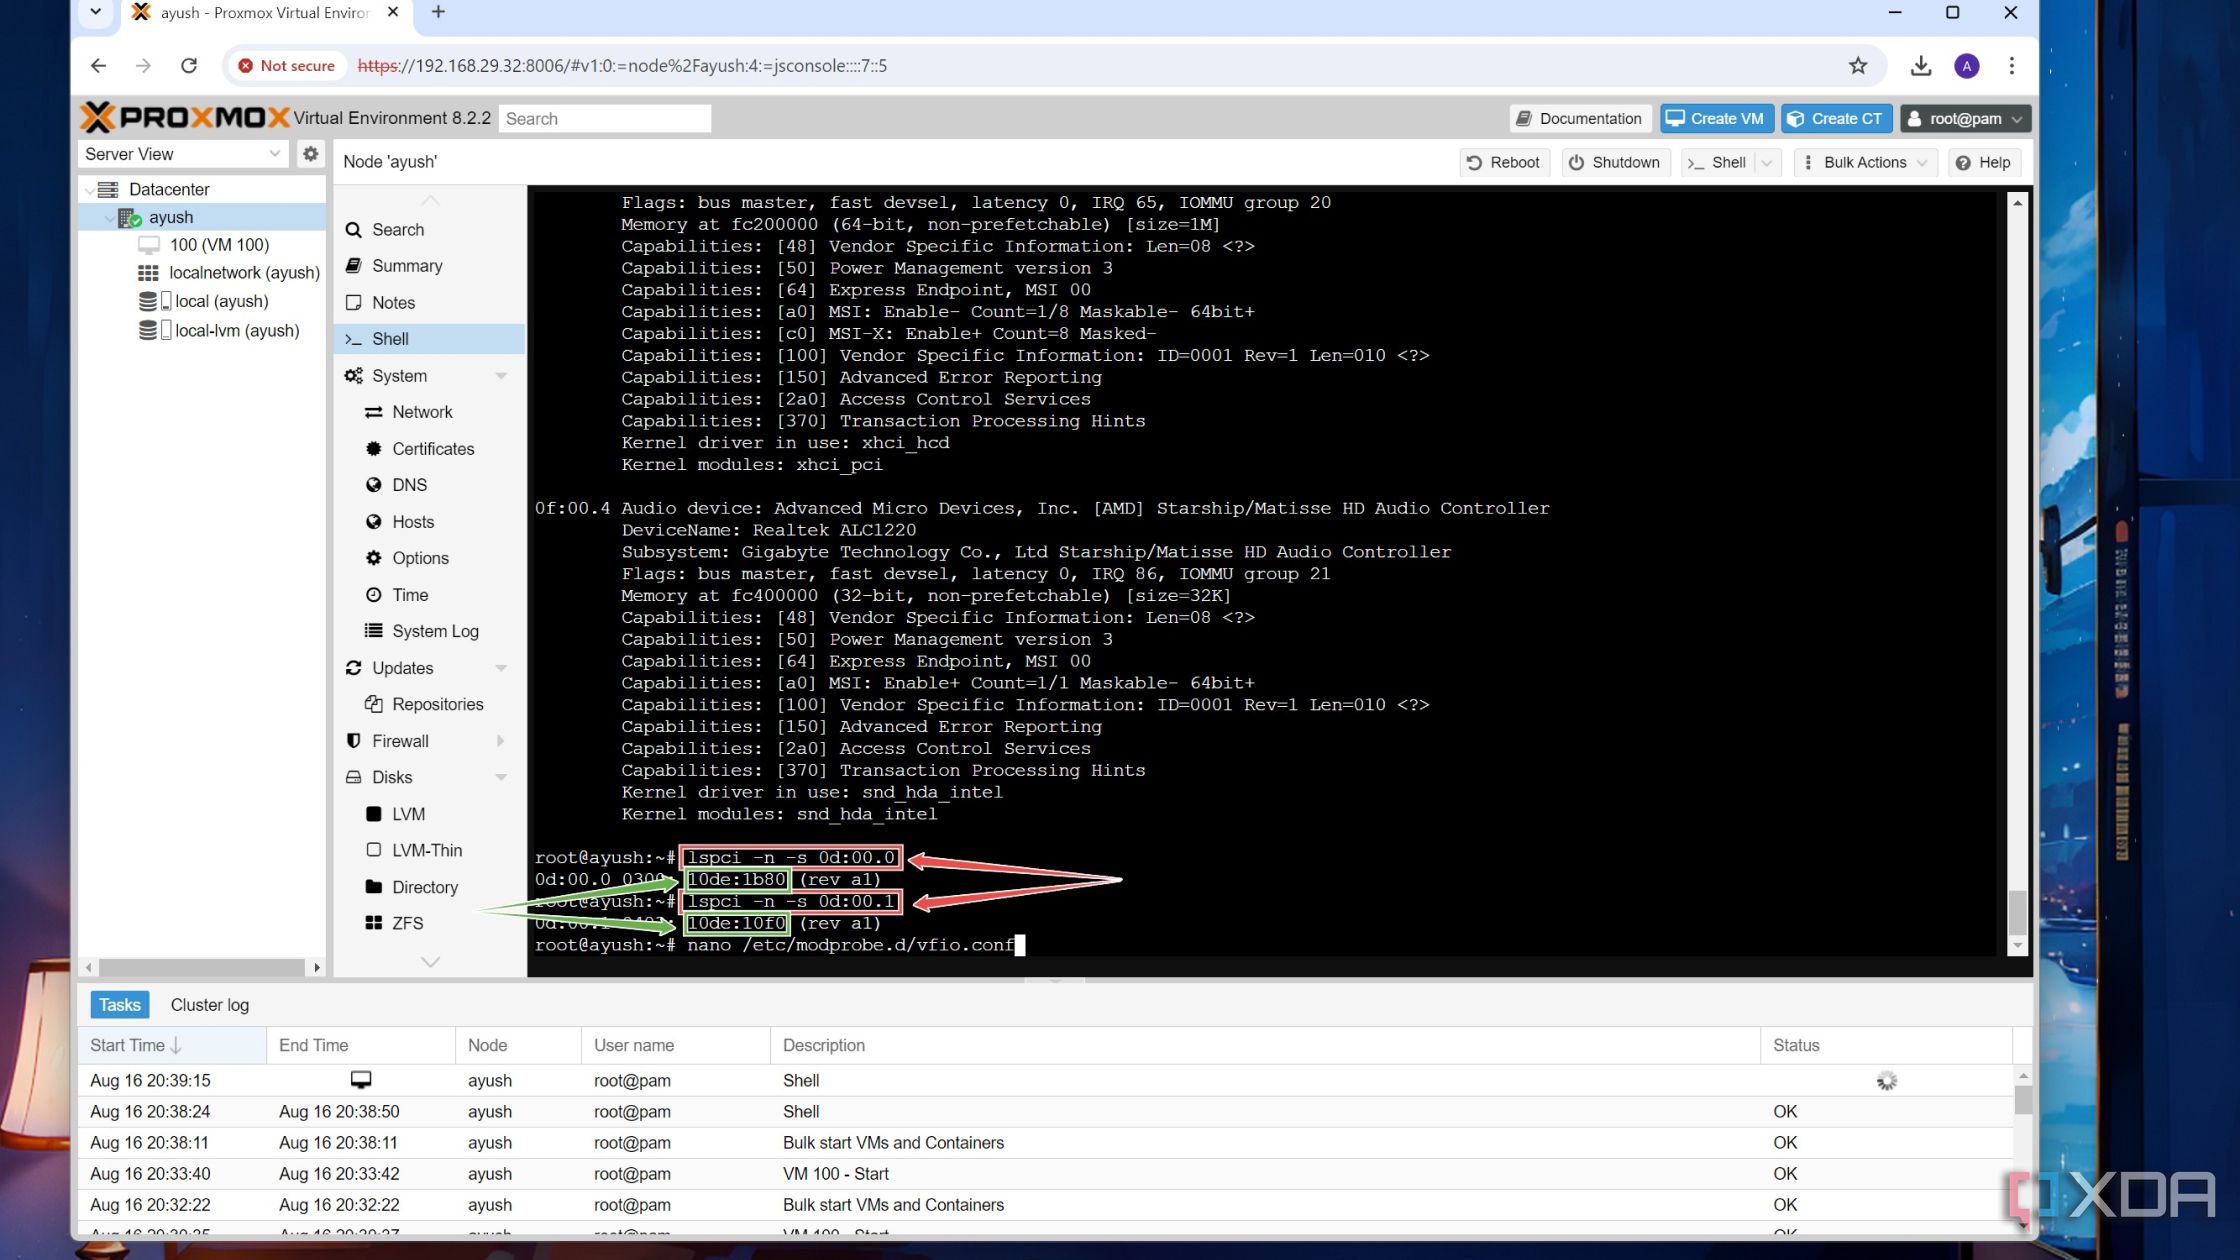
Repeat this process for the audio driver as well and copy the Device IDs for both the VGA controller and audio driver as you’ll need them in the next step.
- Open the vfio.conf file with the help of the Nano text editor.
nano /etc/modprobe.d/vfio.conf
- Paste the following line into the configuration file.
options vfio-pci ids=Device_1,Device_2 disable_vga=1
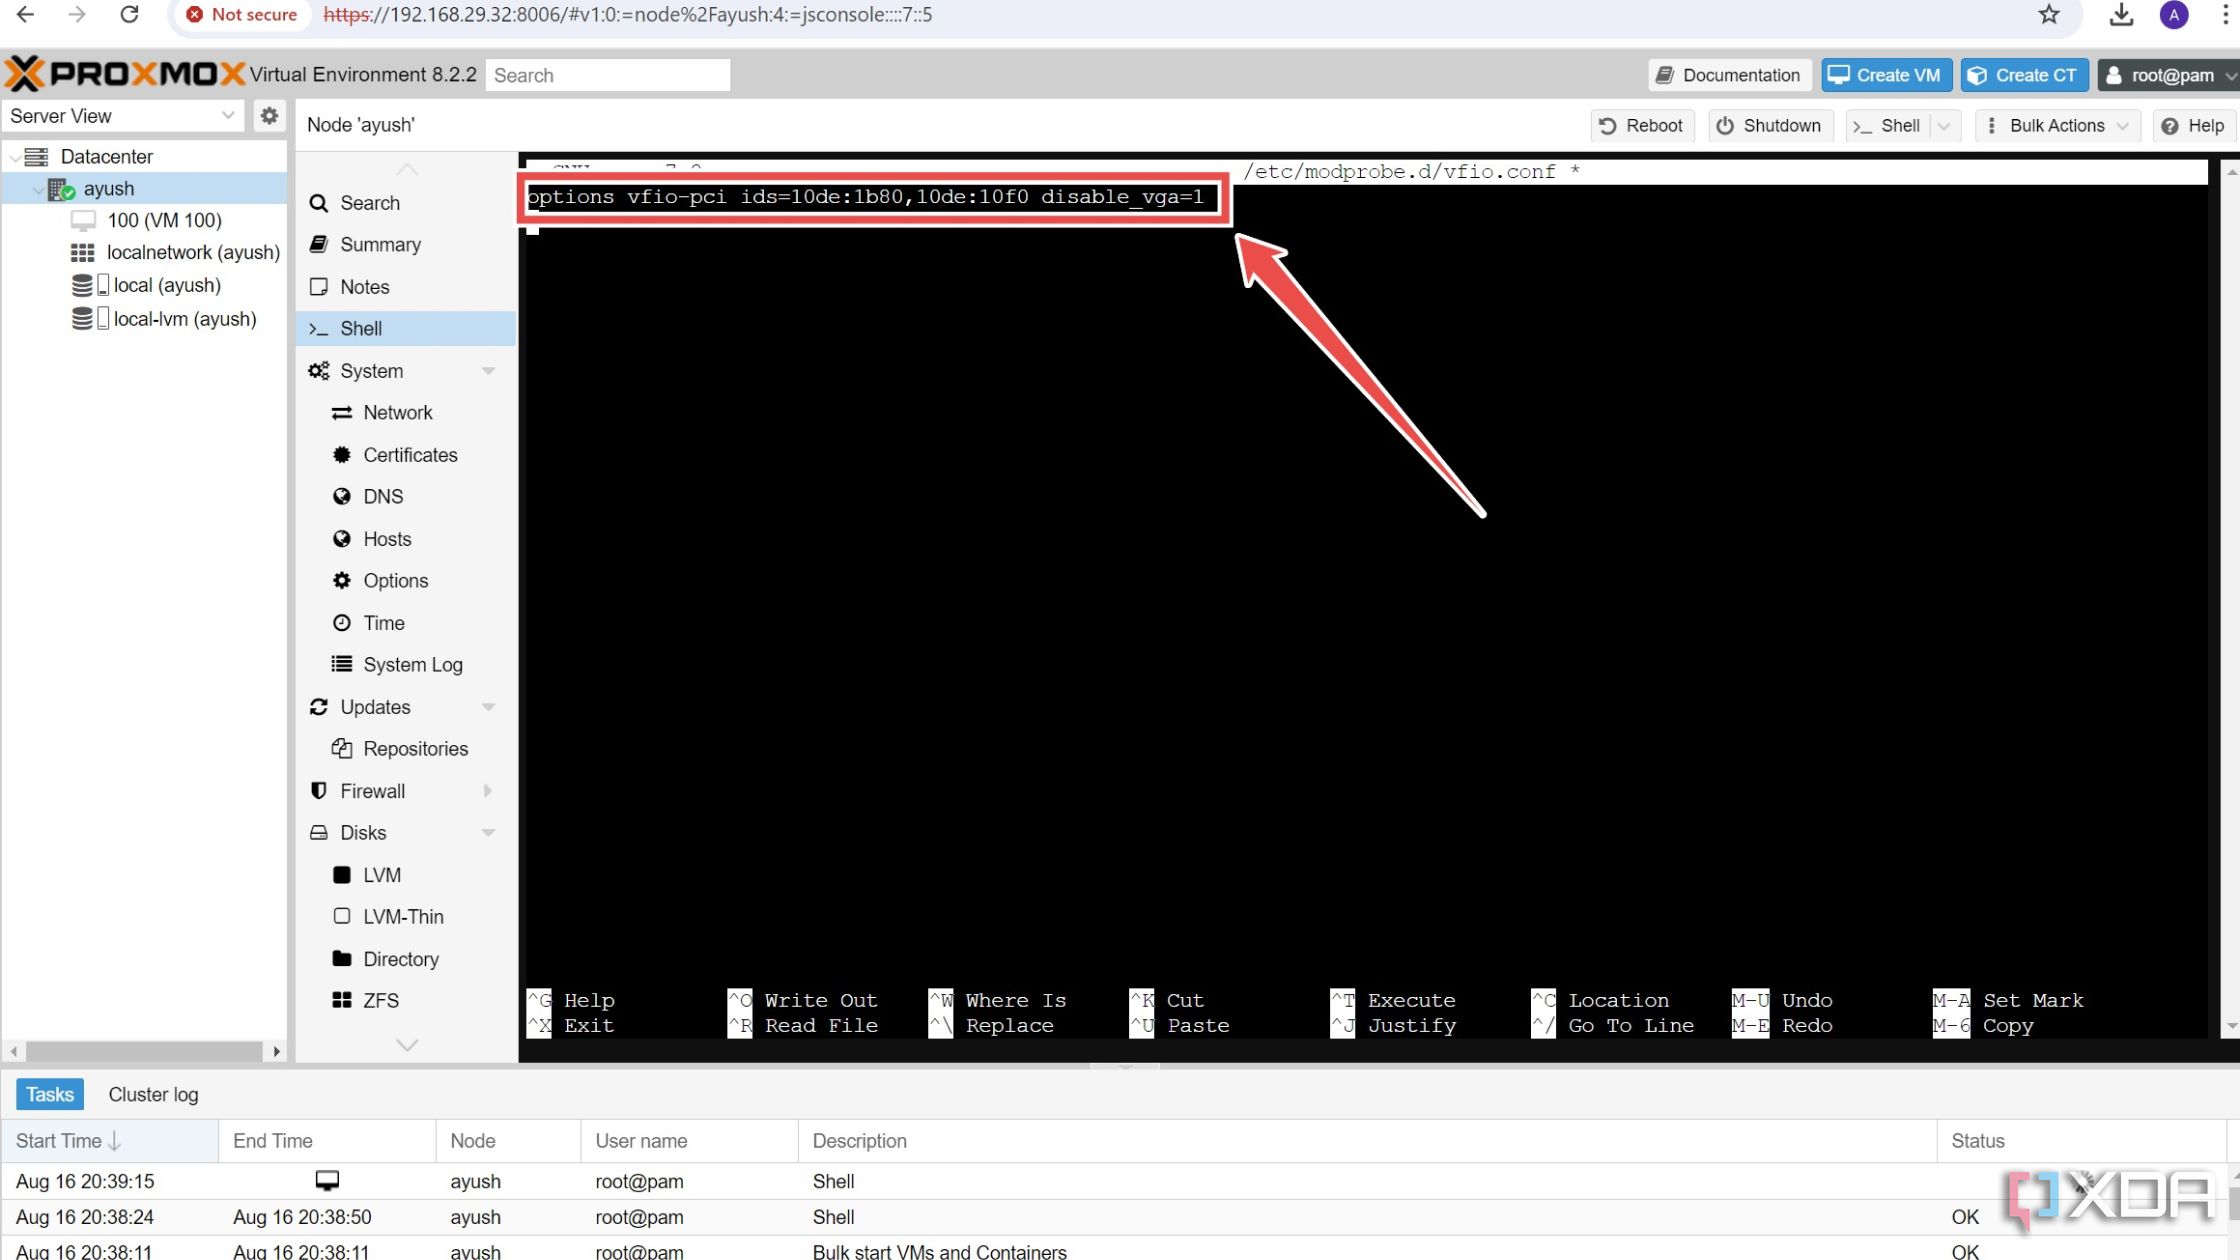
Be sure to save the vfio.conf file after changing the values of Device_1 and Device_2 with the hexadecimal IDs you copied in the previous step.
- Run these two commands to save the changes to the initramfs file system.
-
update-initramfs -u
-
reset
-


Adding PCIe devices to your Proxmox VMs

Finally, it’s time to ditch the Proxmox shell and tweak it with the virtual machine configuration. If you don’t have a VM, now’s the time to create one. When you’re done, these are the steps you have to follow:
- Select the virtual machine where you plan to use the PCIe devices and navigate to its Hardware tab.
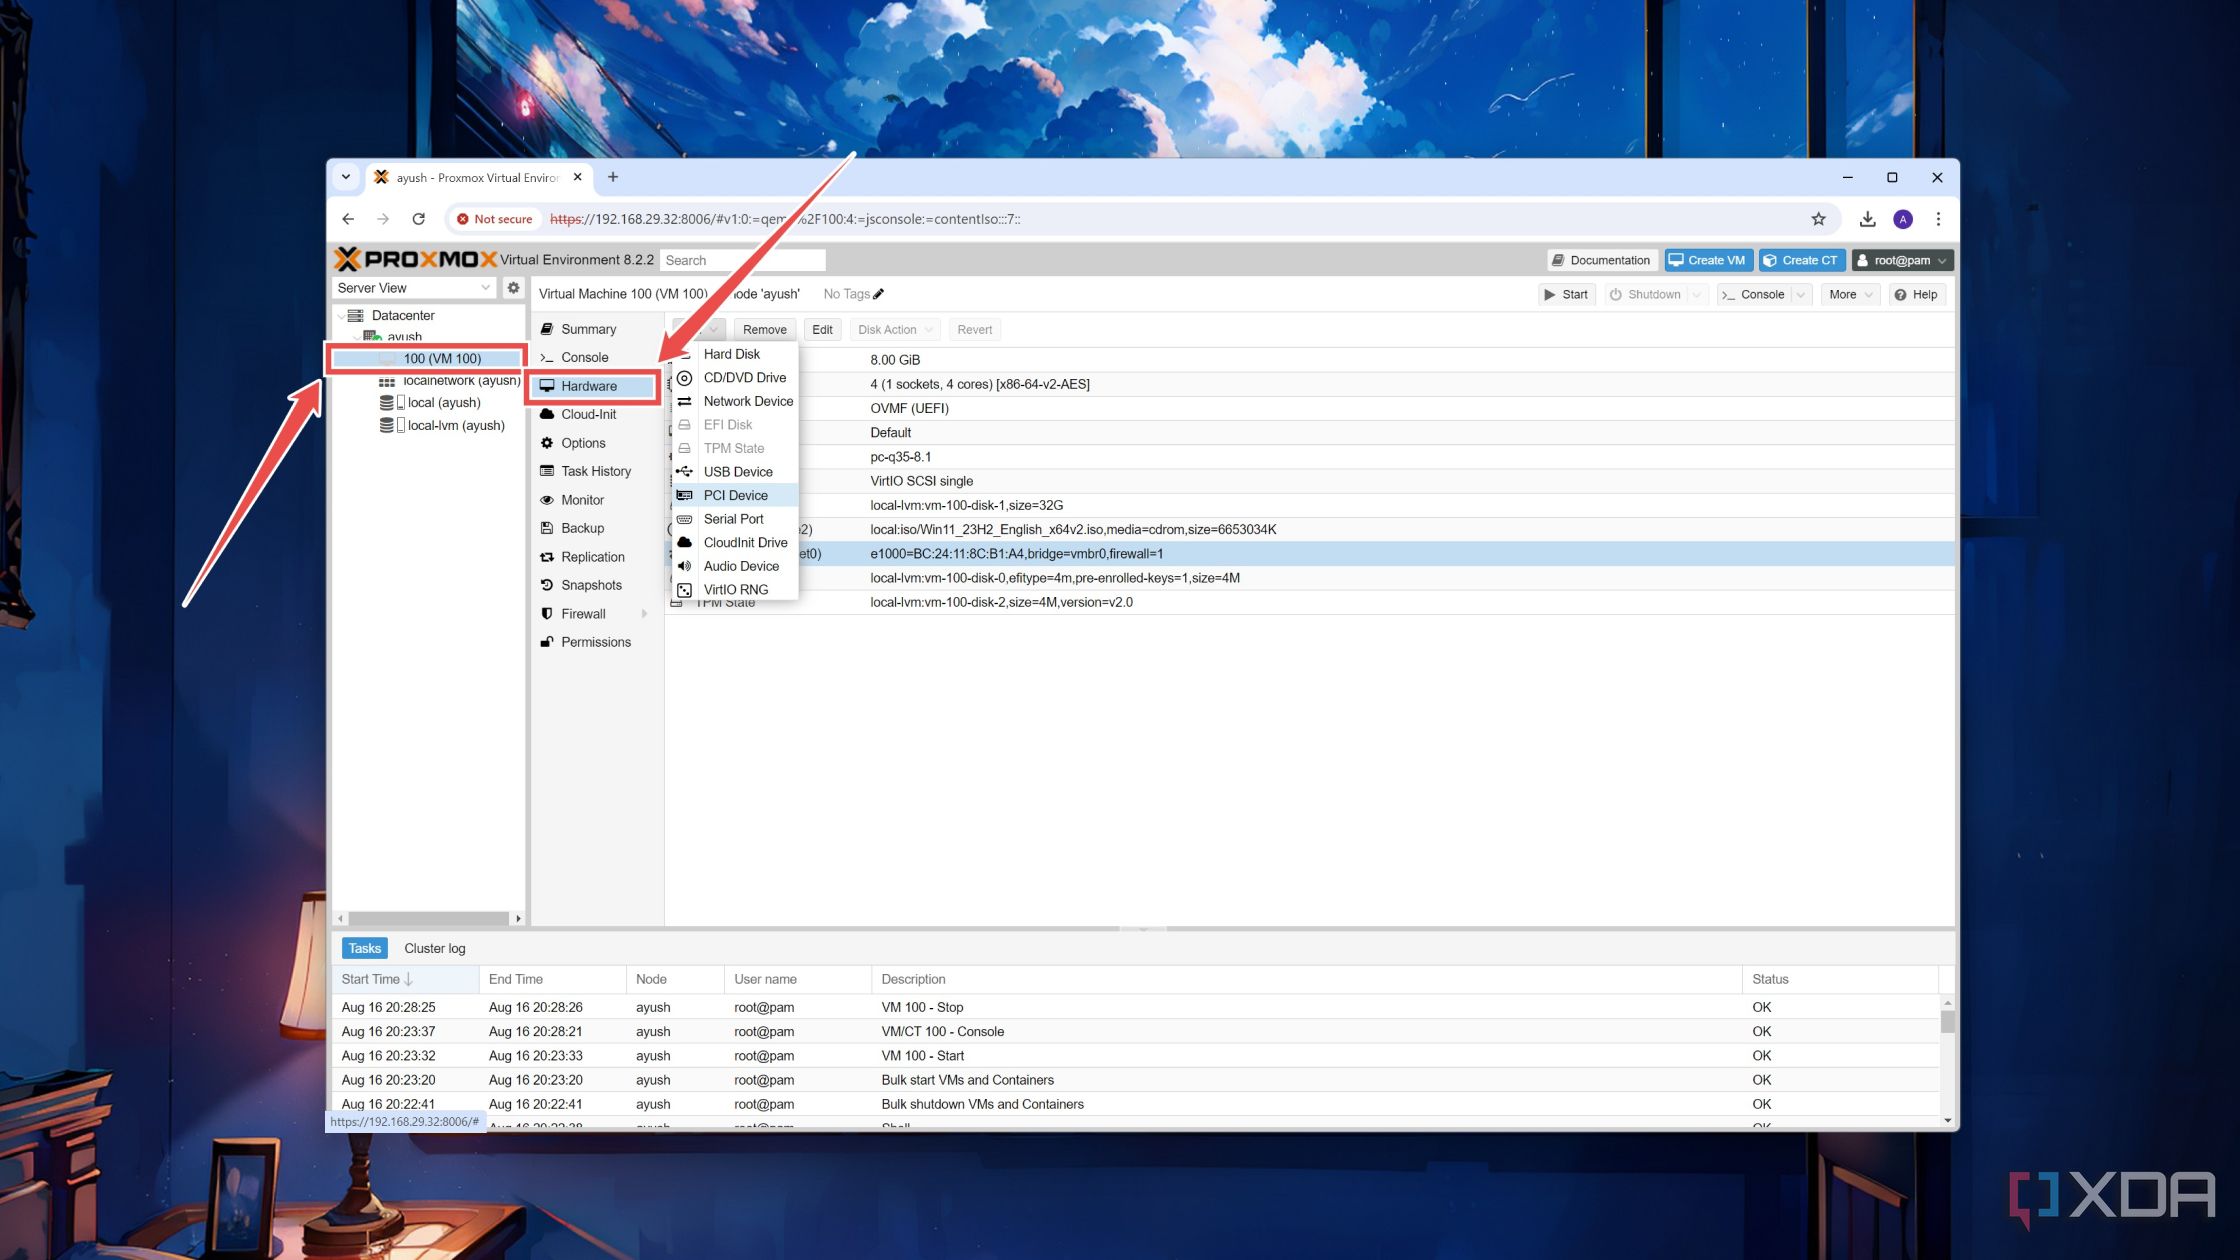
- Click on the Add Device button and choose PCI Device.
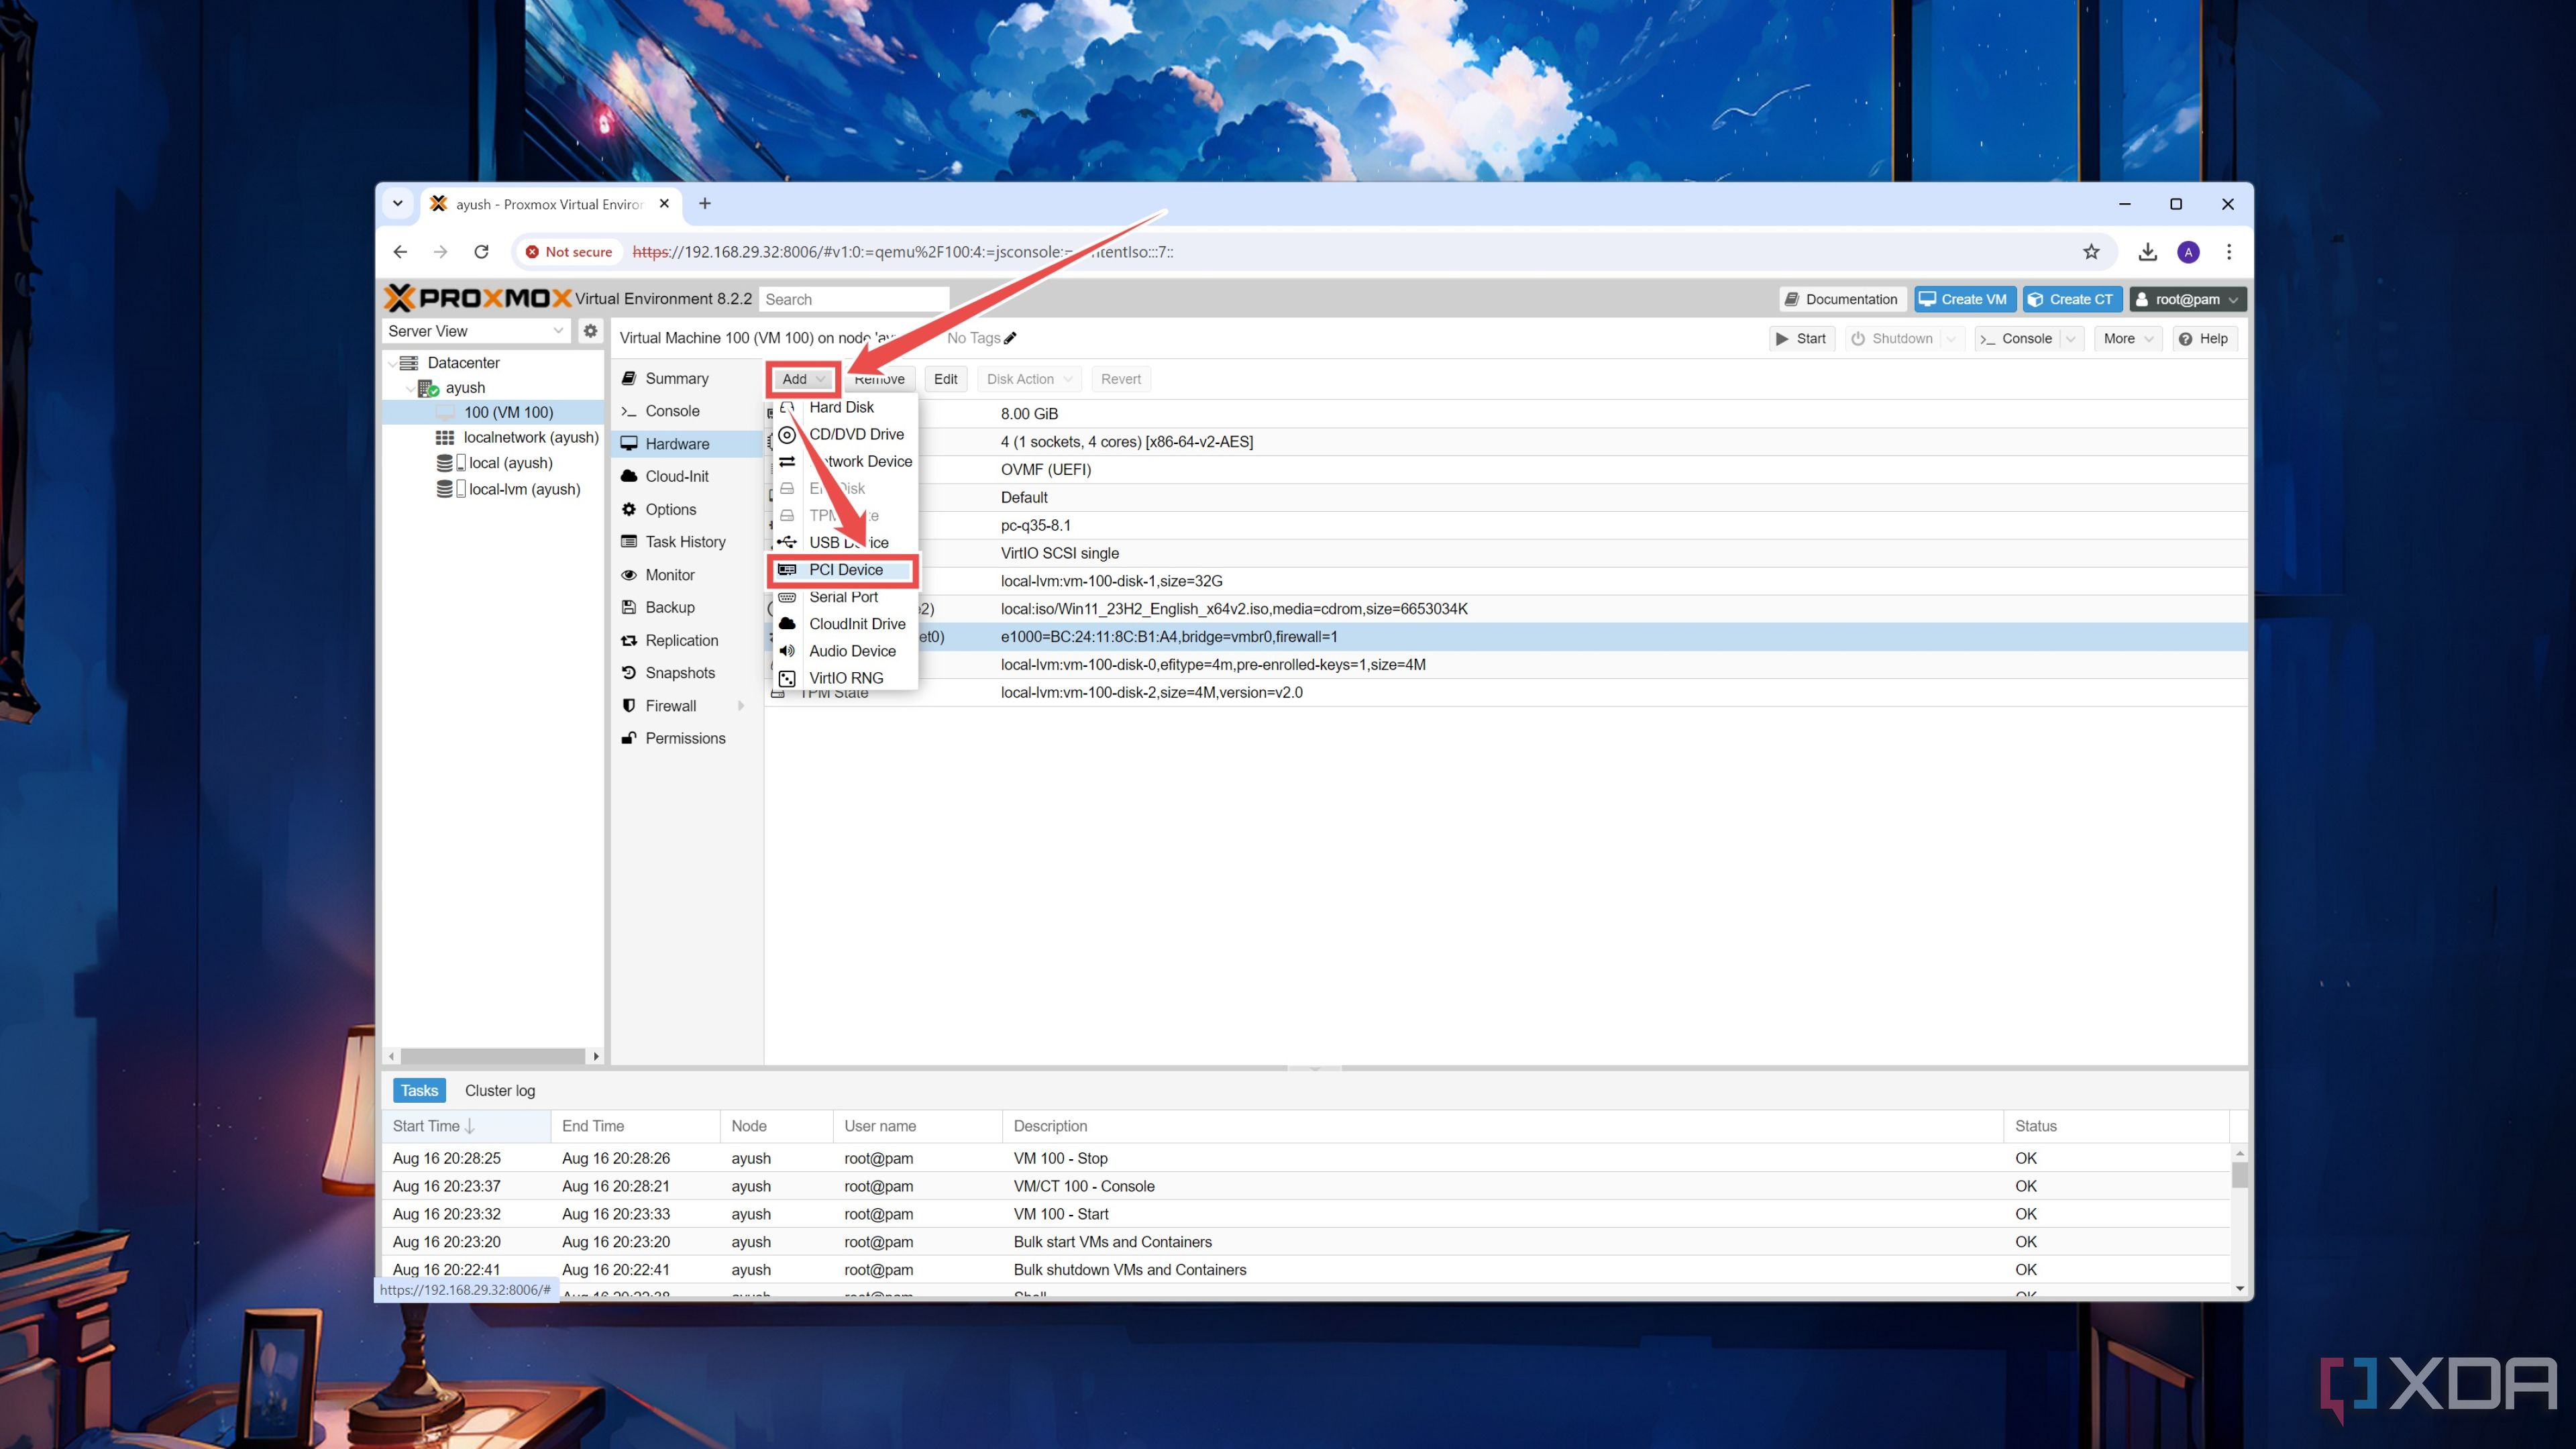
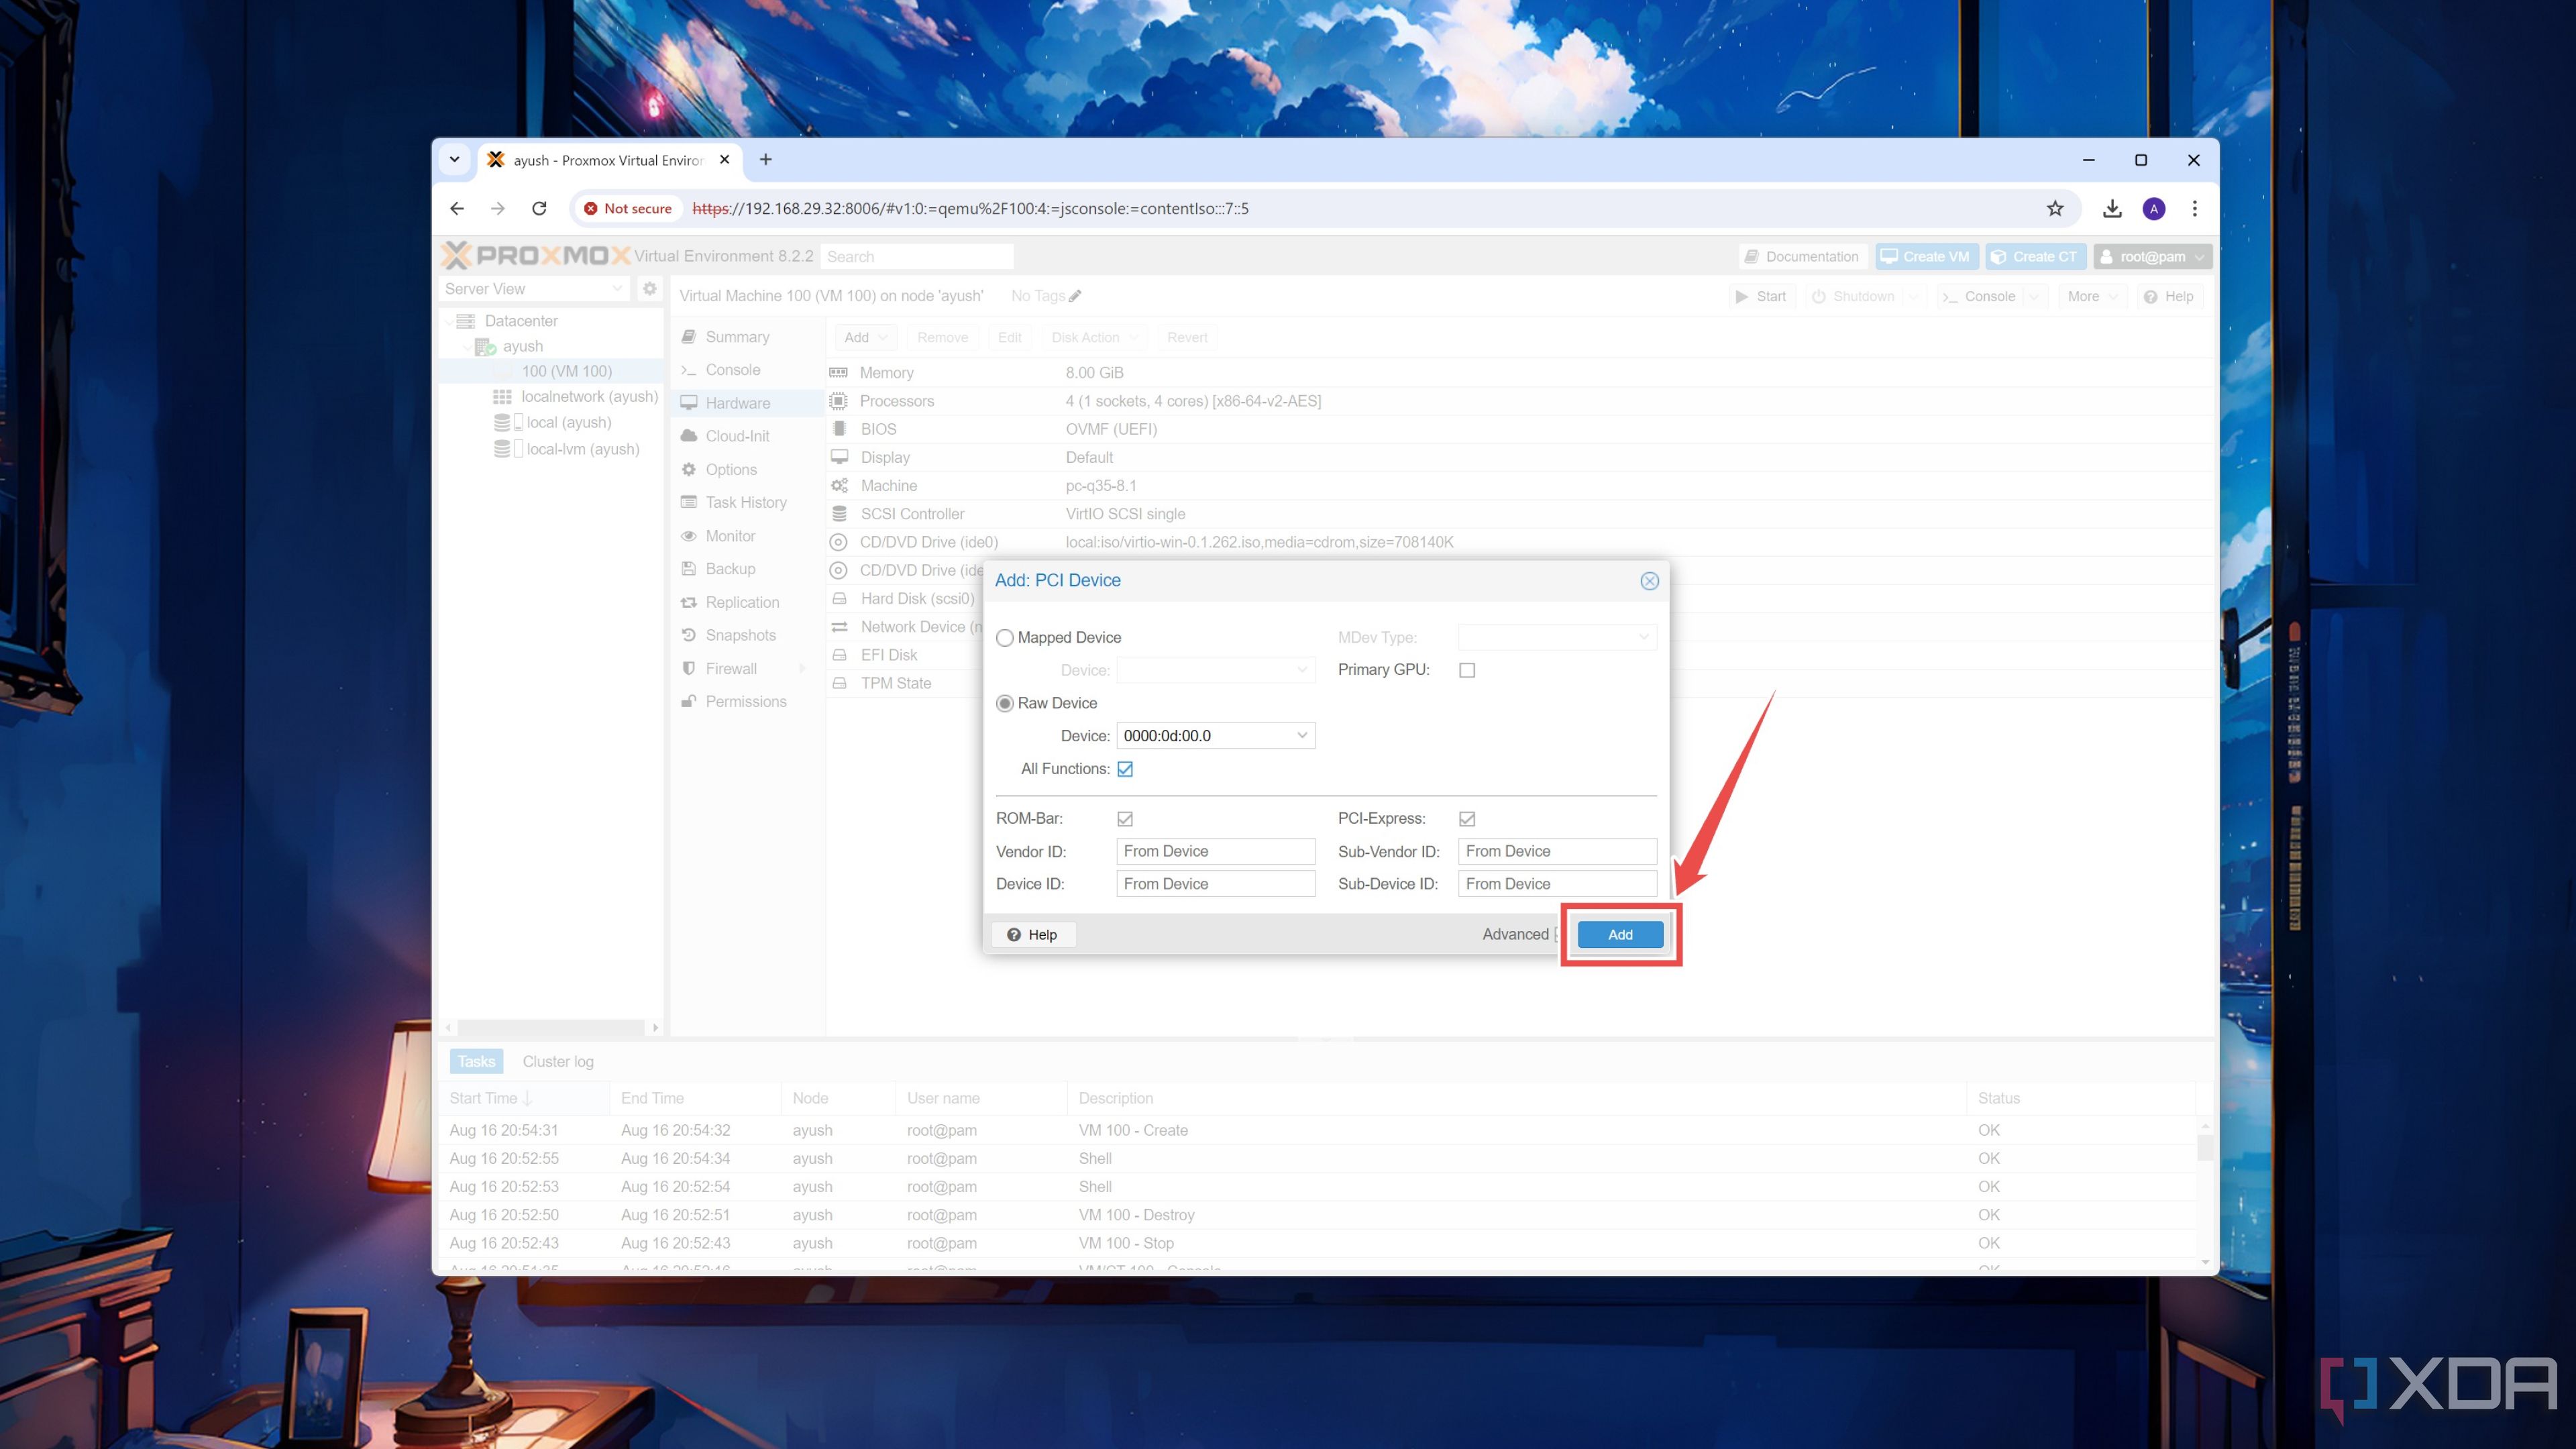
- Toggle the Raw Device radio button and pick your Device from the list.
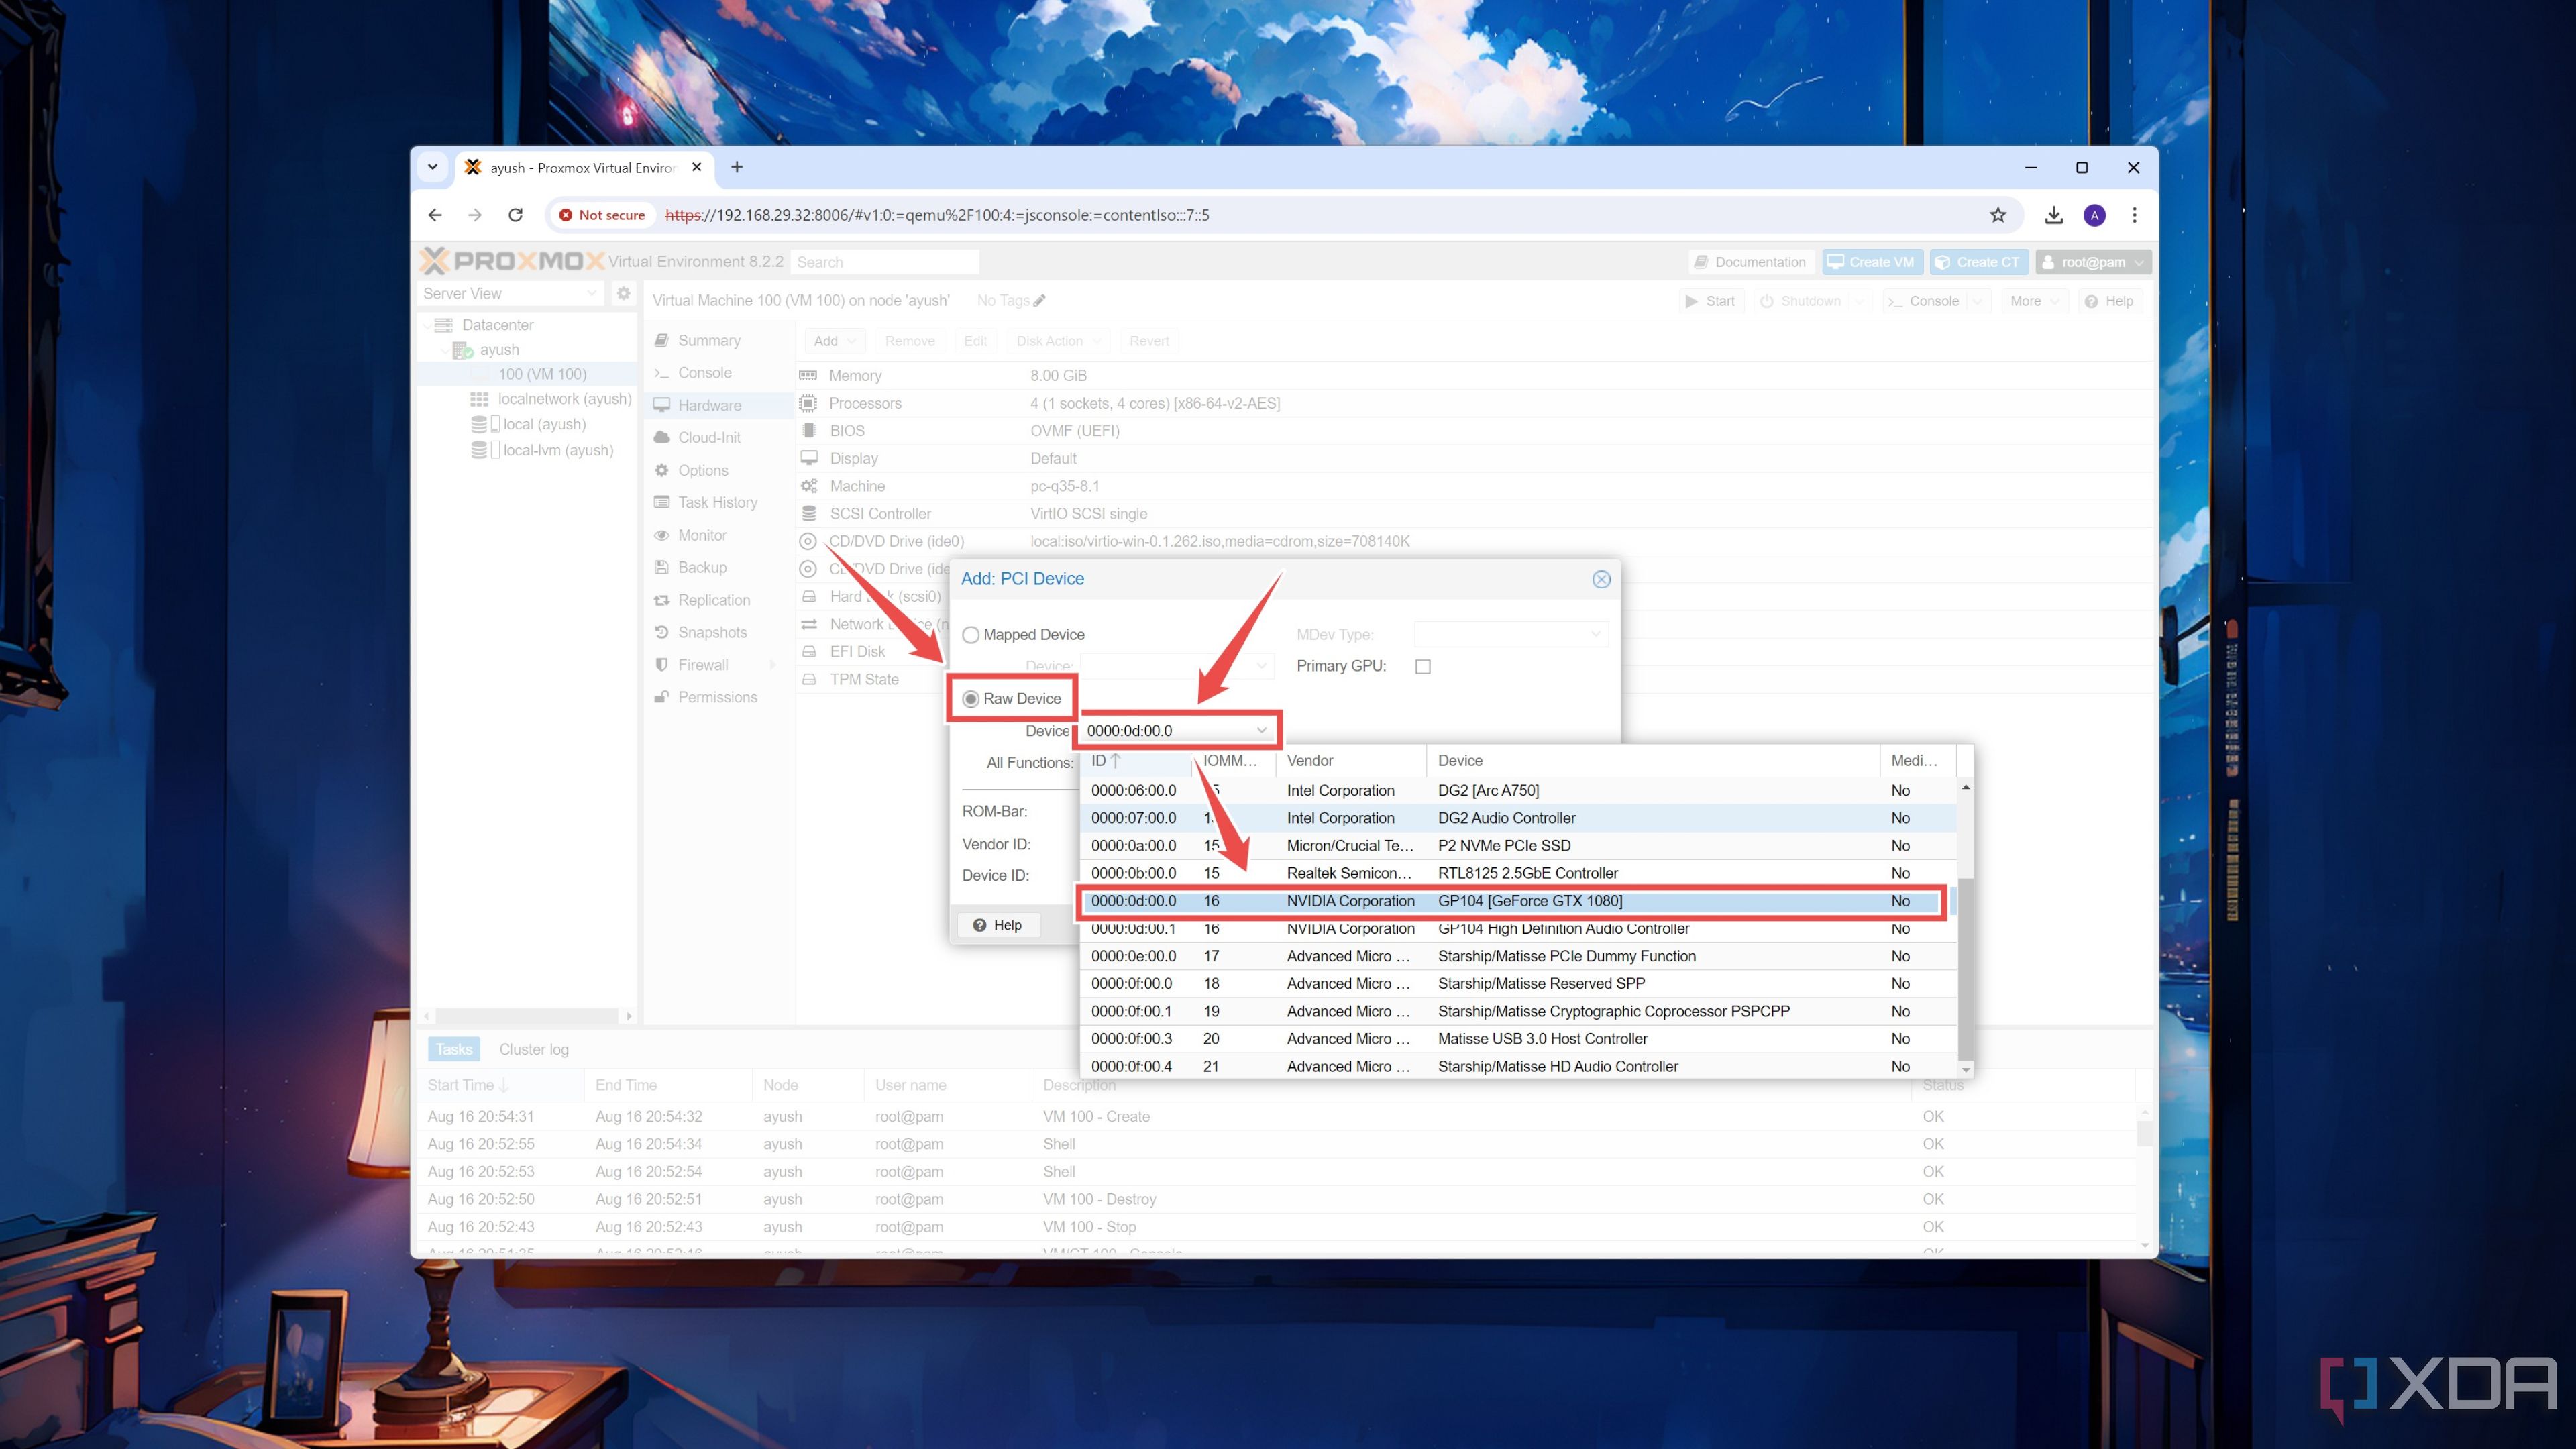
- Press the Add button.


Outfitting your virtual machines with powerful expansion cards

If you followed all the steps closely, your virtual machine should have no trouble detecting a normal PCIe device. GPUs, however, are a completely different story, as they require different calibrations and tweaks to work with different VM operating systems. For example, Windows 11 may not work with the noVNC when you try to set your discrete graphics card as the primary GPU.
In my testing, I followed this procedure for my GTX 1080 (passthrough GPU) and Intel Arc A750 (secondary graphics card), and I was able to get my 1080 working on a Windows 11 Pro virtual machine. As such, you’ll have to install the Pro version of the OS and use Remote Desktop to access the GPU-powered VM. Likewise, Ubuntu has its own set of quirks, while I don’t think I need to mention how much of a pain it is to get GPU passthrough working on the newer releases of macOS.

Related
I tried running macOS on Proxmox — here’s how it went
Thanks to Proxmox, you can convert any old PC into a Hackintosh
#enable #PCI #passthrough #Proxmox
source: https://www.xda-developers.com/enable-pci-passthrough-in-proxmox/

