

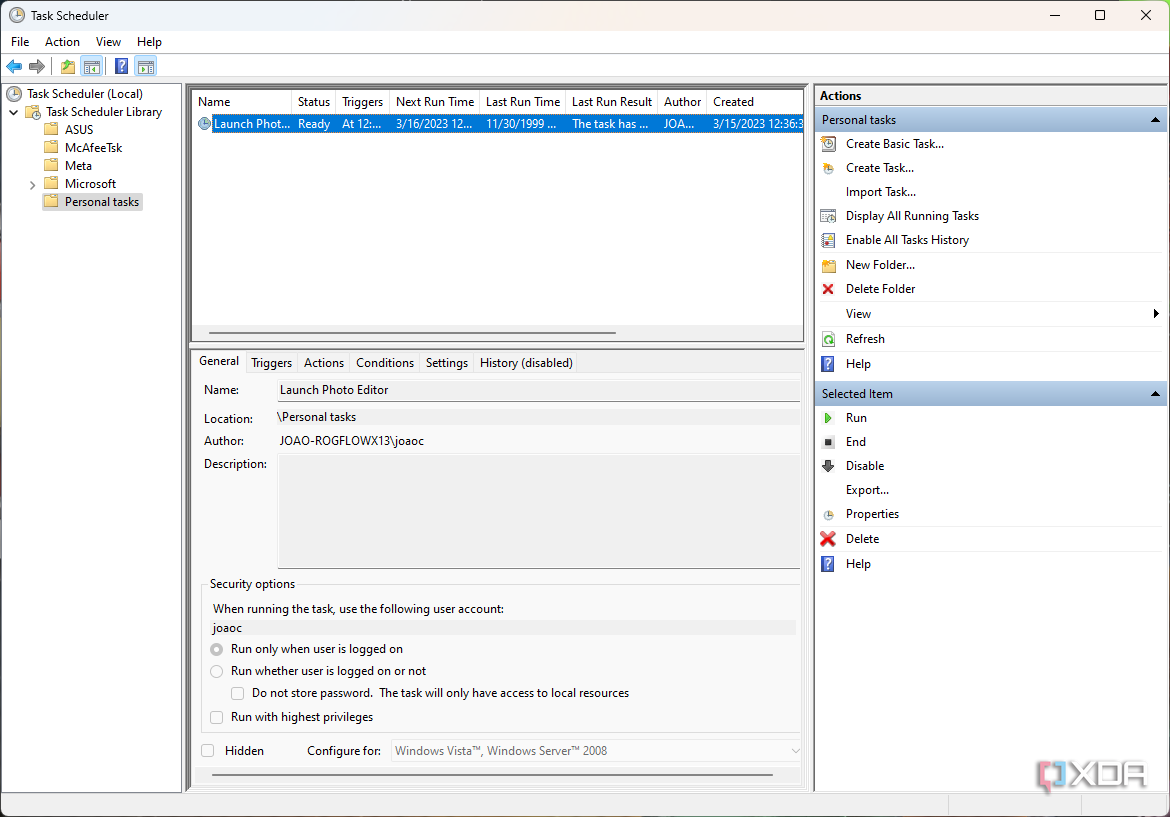
Windows 11 has many features hiding just beneath the surface, many of which have been around for years. One of these is a program called Task Scheduler, which can automate tasks on Windows 11 so that they always happen on a regular basis. You can also create tasks that are triggered by other specific events on the computer.
The Task Scheduler may not be familiar to everyone, but Windows 11 and many installed apps already rely on it by default, allowing them to perform specific maintenance tasks, check for updates, and so on. However, you can take advantage of it yourself for specific tasks, which could be something as simple as launching an app, or a task that takes multiple actions which you’d rather accomplish in one go. Let’s take a closer look.
24 of the best free alternatives to the most popular paid software
You don’t have to pay for professional software to complete simple tasks. Here are our favorite free software programs for getting work done.
How to create a basic task with Task Scheduler
There are two kinds of tasks you can create with Task Scheduler. You can create a basic task, which typically runs a single action, or an advanced task, which can take multiple actions on your behalf and has more customization options.
Let’s start with a basic task.
- Open the Start menu (or Windows Search) and search for Task Scheduler. It should be the first result.
- On the left-side pane, double-click the Task Scheduler Library to see the existing folders of automated tasks.
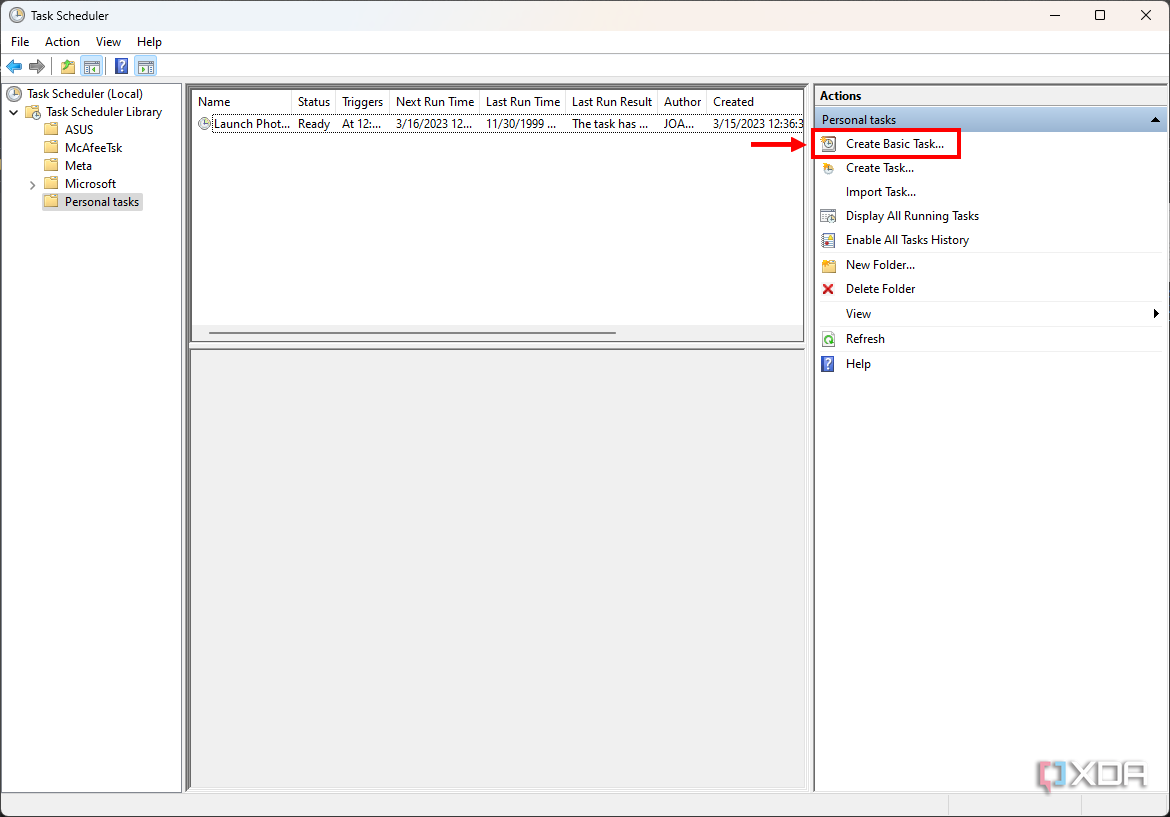
- To separate your personal tasks from other system tasks, right-click Task Scheduler Library and choose New folder. Name it whatever you prefer.
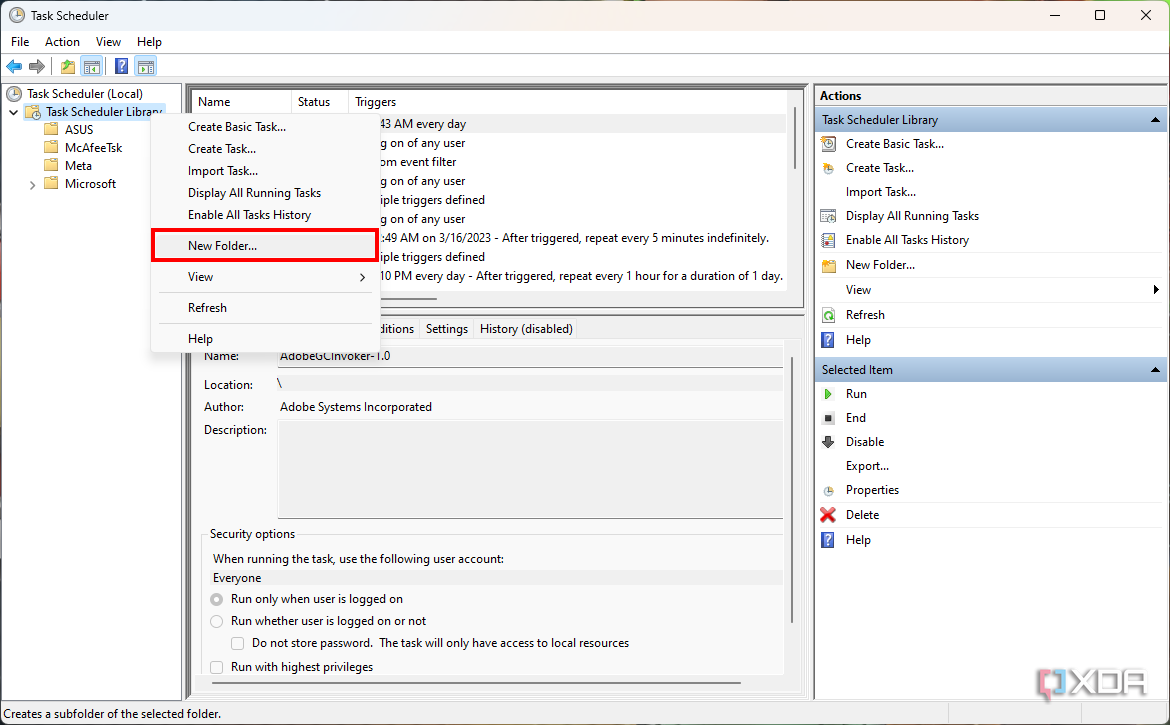
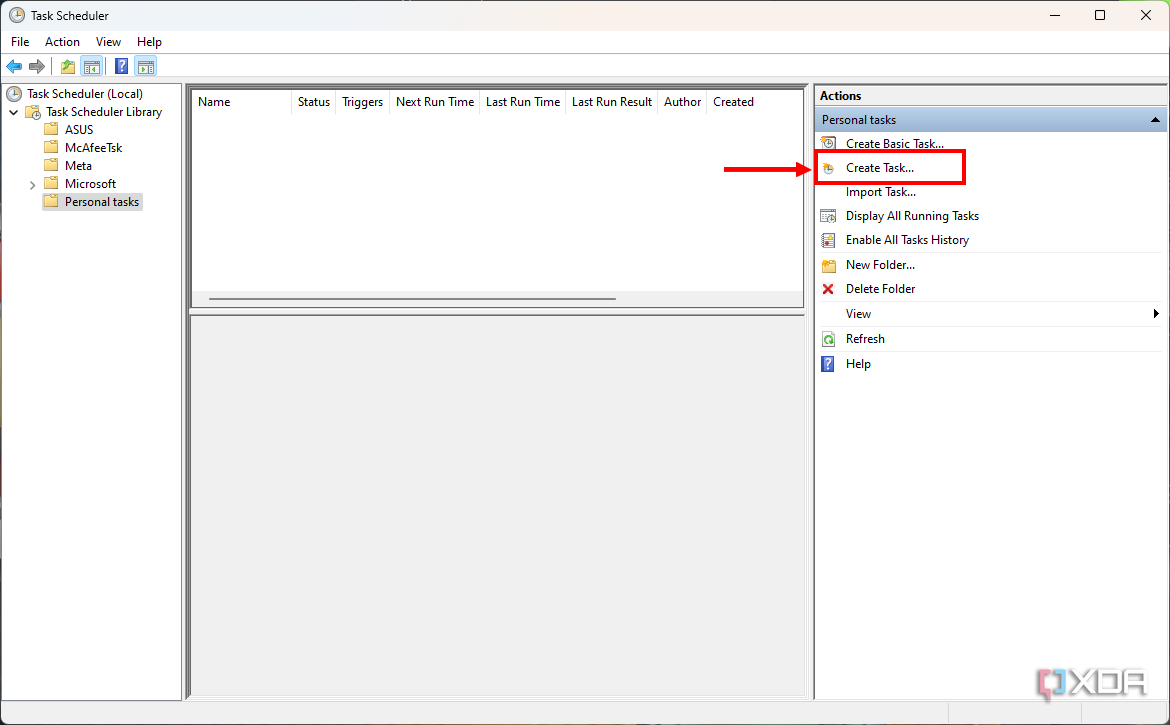
- Select the folder you just created, then choose Create Basic Task… from the menu on the right (you can also use the Action menu at the top).
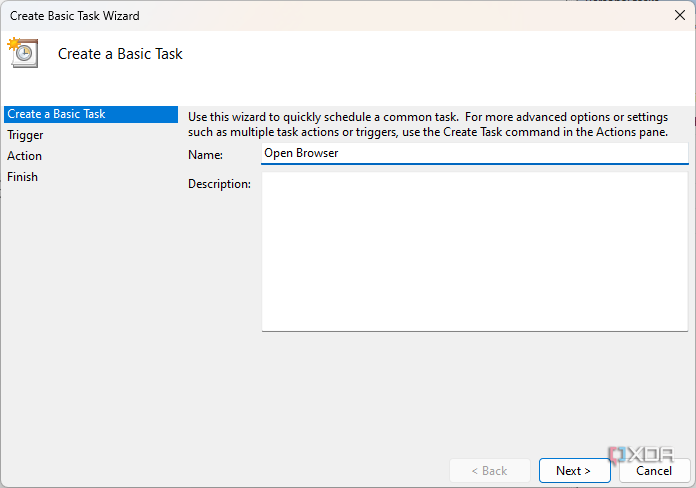
- Start by naming the task (it can be whatever you would like). You can also add a description to make it easier to identify. Click Next.


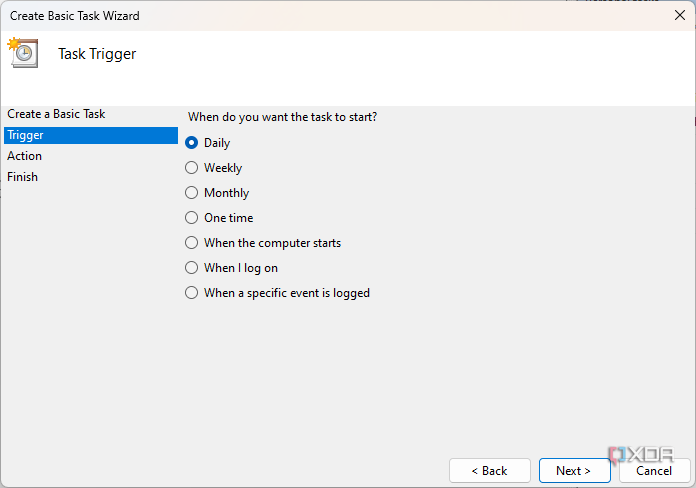
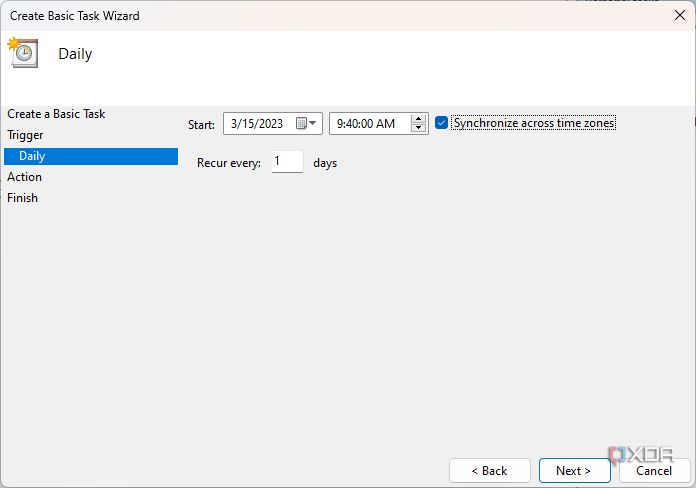
- Choose a trigger for the task. You can decide to do it on a scheduled cadence, or based on specific triggers, such as whenever you log in to the computer. For this example, let’s say you want to run it daily at a certain time. Click Next.
- You’ll have to set specific trigger conditions, such as the exact time and the start date for the task, as well as how often you want the task to repeat. The options will vary depending on the trigger you selected. Click Next.
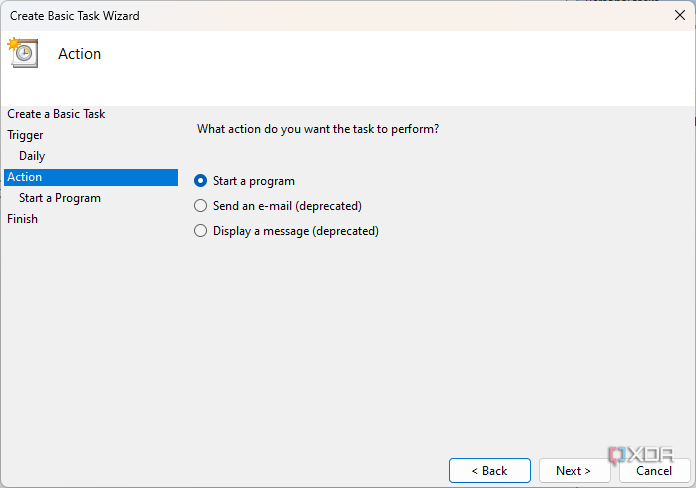
- Choose an action to perform. The Start a program option is the only option that’s still fully supported, as Microsoft has deprecated the Send an e-mail and Display a message options. Click Next.
- Start a program lets you run any program or script on the PC.
- Click Browse to select a program you’d like to run, or enter the path to the program under Program/script.
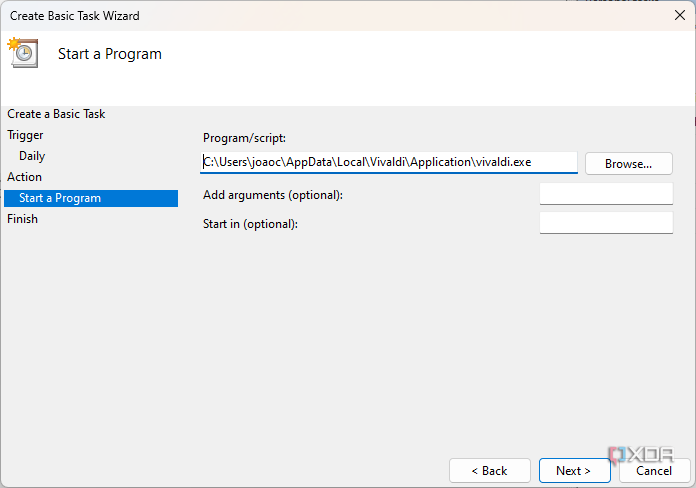
- Optionally, set additional parameters or select a folder for the program or script to start in. This may be useful if you want to condition what the program does when it runs.
- Click Next and confirm the settings for the task you created.
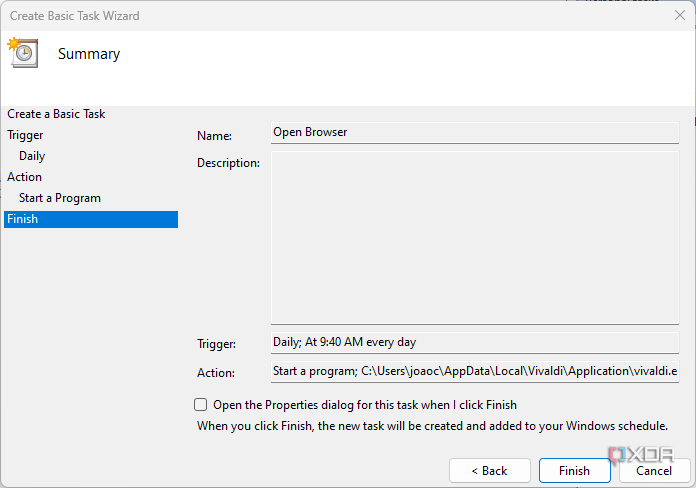
- Click Finish if you’re happy with the way it looks.


Your computer will now automatically run the specified task on the schedule you set, so you never have to think about it again. You can always go back and make changes to the task if you need to.
How to create an advanced task using Task Scheduler
The steps above are good enough for relatively simple tasks, but more advanced users might want to create advanced tasks, which perform more actions at once and have more options for triggers. We’re going to assume you’ve already created a folder for your personal tasks following steps 1-3 above, so let’s get right into how to create an advanced task.
- Select the tasks folder you created and choose Create Task… from the menu on the right.
- Choose a name for the task. You can also add a description if you want to include more information about it for future reference.
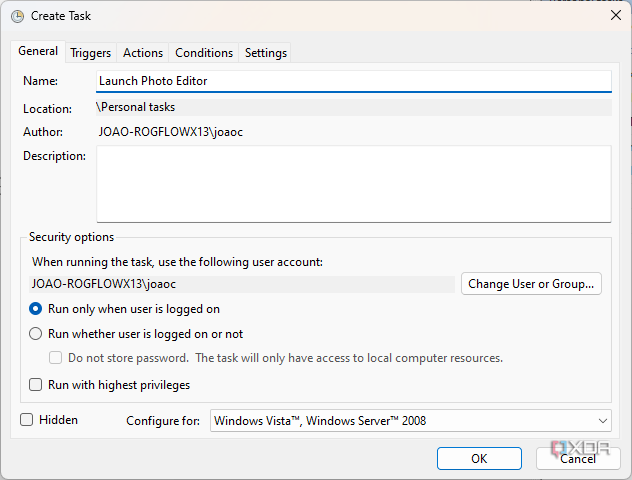
- Select an administrator account to run the task (preferably). If your account is already an administrator account, the default option should do it.
- Choose whether you want the task to run when you’re logged in or regardless of that status. In cases like Command Prompt scripts, running a task before you log in will prevent the Command Prompt window from showing up on the screen.
- You can also choose not to store the user account password with the task. This will make it so that the task can only access local computer resources and not user-specific resources.
- If the task requires administrator privileges, check the Run with highest privileges box.


- At the top of the window, switch to the Triggers tab.
- Click New… to create a new trigger for the task.
- Choose the basic condition for the first trigger. We’ll stick with On a schedule, which is strictly time-based.
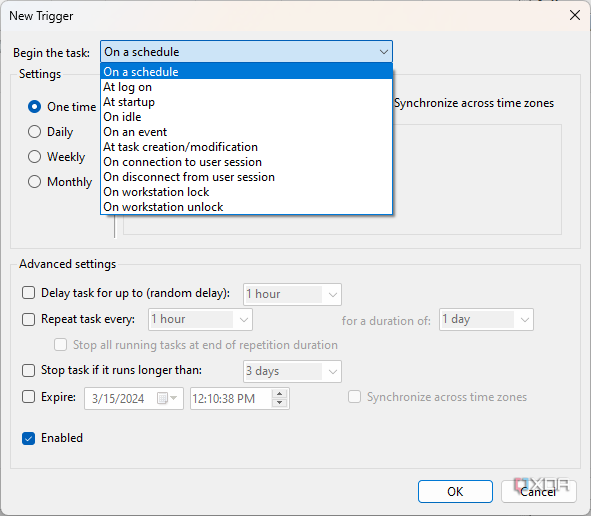
- There are many other conditions, such as At log on, so the task runs when a user logs in, or On idle, so it runs when the computer isn’t being actively used.
- Choose the specific settings for the trigger you’ve selected. For On a schedule, you can start by setting the frequency and then select the start date and time. You can also select specific days of the week or month for it to run if you choose the Weekly or Monthly options.
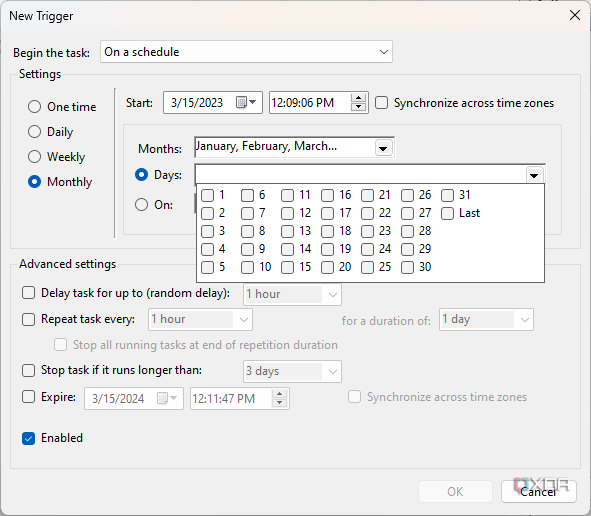
- You can use the Advanced settings options to delay, repeat, or stop running a task after a set period. This is all optional.


- Click OK.
- You can follow steps 7-11 to create additional triggers for the task if you’d like.
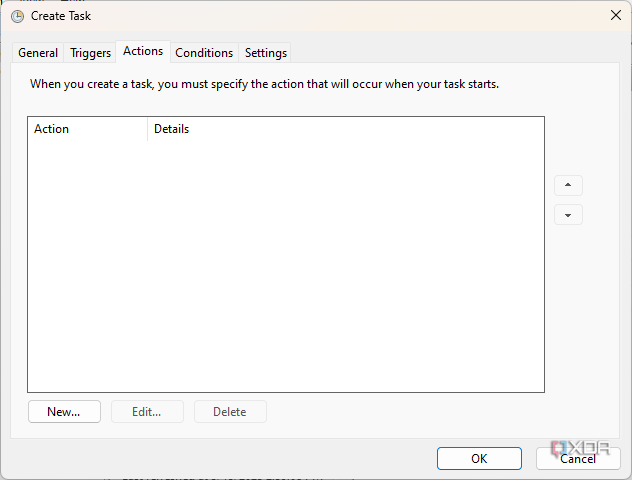
- Switch to the Actions tab at the top.
- Click New… to select an action to be performed when the task runs.
- You will see the option to Start a program (or script), send an e-mail, or display a message. Keep in mind the latter two options are deprecated.
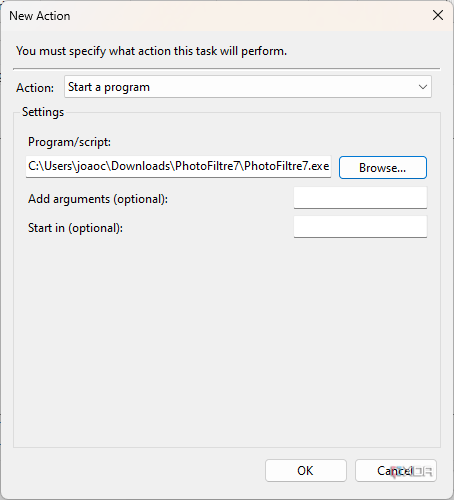

- To start running a program, click Browse to find the program you want to run. Alternatively, enter the path to the program under Program/script, if you already know it. In some cases, such as system apps, you can just enter the name of the executable file without the full path.
- Optionally, you can use the Add arguments field to run the program with specific arguments or Start in to make a script run in a specific folder.
- Click OK.
- Repeat steps 14-18 to create any additional actions you’d like the task to perform.
- Switch to the Conditions tab (optional). Here, you can set additional conditions for the task to run, and it won’t run unless the conditions are true.
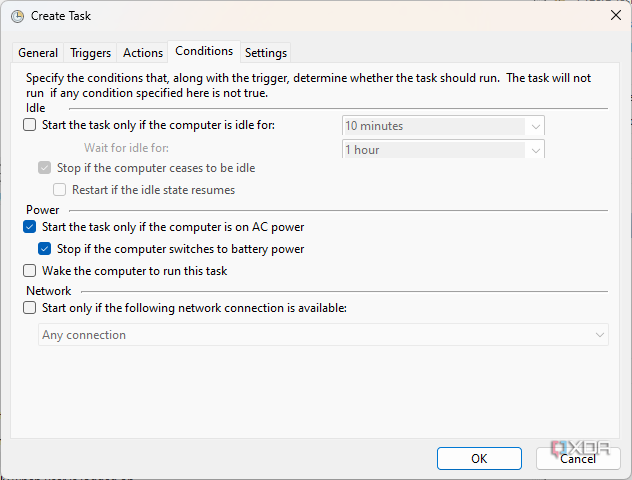
- You may want to pay special attention to the Power options, which affect whether certain tasks will run or not when the computer is on battery power.
- Switch to the Settings tab.
- While many of these settings are optional, you may want to enable Run task as soon as possible after a scheduled start is missed. This will ensure the task runs if your computer isn’t turned on at the scheduled time,.
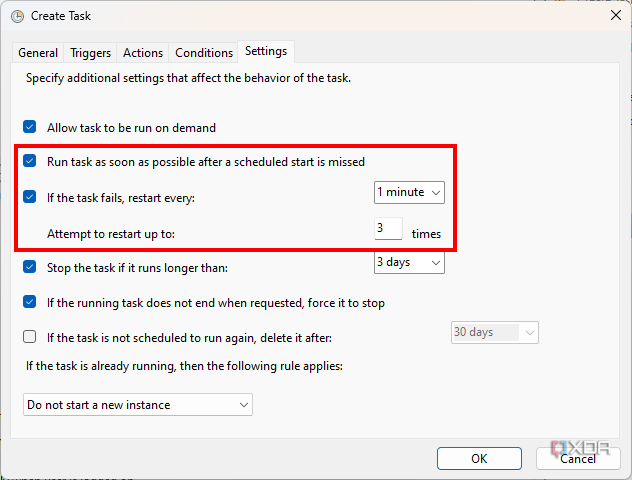
- Also, check If the task fails, restart every: box, then choose how often and how many times it should try to run again.
- Check any other options you deem necessary and click OK.


And with that, your computer will now run the tasks you chose, whenever the conditions you specified are met. This can save you a lot of time launching specific apps that you use frequently.

How to limit battery charge to 80% on Windows 11
Keeping your battery constantly at 100% can reduce its lifespan, but many Windows 11 laptops lets you limit the maximum battery charge to 80%.
Edit an existing task
If you’d like to make changes to a task you’ve already created, the process is fairly simple. Here’s what you need to do:
- Launch Task Scheduler.
- Choose the tasks folder you created from the pane on the left side.
- Click on a task to see its current properties.
- Right-click the task and choose Properties to edit it.

- Follow the same steps as before to make any necessary changes and click OK when you’re done.


You can also run tasks on demand (unless you disabled that option when creating it). Simply right-click the task and choose Run. Although manual, this can still be useful if you have a task with multiple actions that you have programmed to run all at once.
Automating tasks in Task Scheduler makes maintenance easy
That’s about everything you need to know about how to create an automated task using the Task Scheduler on Windows 11. This is actually not the only option you have for automation, though, as Microsoft recently started including something called Power Automate, which gives you other kinds of automation capabilities. That one does require a Microsoft account, but it can perform different sorts of tasks.
If you’re looking to learn more about some other lesser-known Windows 11 features, check out how to use Event Viewer to find records of errors on your PC. Or, maybe check out how to disable Microsoft Defender protection (temporarily) in certain cases.

How to update drivers in Windows 11
If you find that a peripheral attached to your PC isn’t working right, or a part of your PC isn’t working, you’ll have to update the drivers.
#create #automated #tasks #Task #Scheduler #Windows
source: https://www.xda-developers.com/how-create-automated-tasks-task-scheduler-windows-11/
