

If you manage a lot of computers in an organization or you’re performing frequent reinstalls, it can be frustrating to have to set up your Windows 11 install all over again every time. The setup process can take minutes or hours, and you have to actively be paying attention during that time. So what if you could make your own Windows ISO with all the programs you know you’re going to need when you install it?
You’ll be happy to know you can do just that. While it’s a lengthy process, it will save you time in the future, so it’s definitely worth it if this is something you do frequently.
What you’ll need
In order to create a new Windows ISO, you’re first going to need a clean installation of Windows. You can do this on real hardware or on a virtual machine, but the latter option is much easier, so that’s what we’re going with. For this guide, we’re using Hyper-V for the VM-related steps, but you can use any virtualization software you’re familiar with. Hyper-V isn’t included in Windows 11 Home, but you can install it.
How to install Hyper-V on Windows 11 Home
Want to try a different OS? Here’s how to install Microsoft’s Hyper-V on Windows 11 Home to create and manage virtual machines.
If you’re using a virtual machine in Hyper-V, you’re going to need to go into the VM settings and make sure that checkpoints are enabled and set to Standard checkpoints. This should be the default setting.

Step 1: Setting up the Windows installation
In order to set up the custom ISO, you’re going to first need to set up a clean installation of Windows in what we’re going to call a “reference machine”, such as a VM. We’re working with the latest version of Windows 11 (23H2) for this guide, but the same general steps should apply to Windows 10.
- Boot your reference machine and go through the initial installation process until the first reboot. You’ll want to stop at this screen:

If you’re unfamiliar with installing Windows, check out how to install Windows 11 on a new PC.
- Press Ctrl + Shift + F3 to restart your PC in Audit Mode.
- Once in Audit Mode, leave the System Preparation Tool window open.
- Connect your PC to the internet and install any programs you want and make other customizations of your choice.
- Open Notepad and enter this text if you have a 64-bit Windows install (any Windows 11 PC will fall under this umbrella) or this text if you have a 32-bit Windows install.
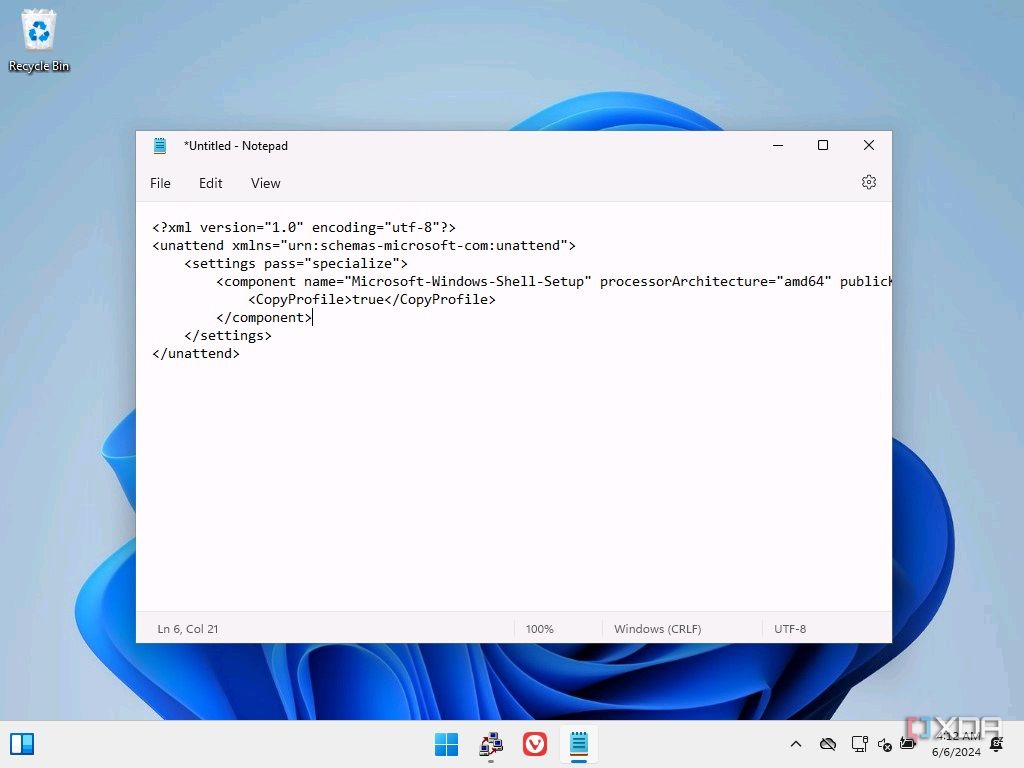


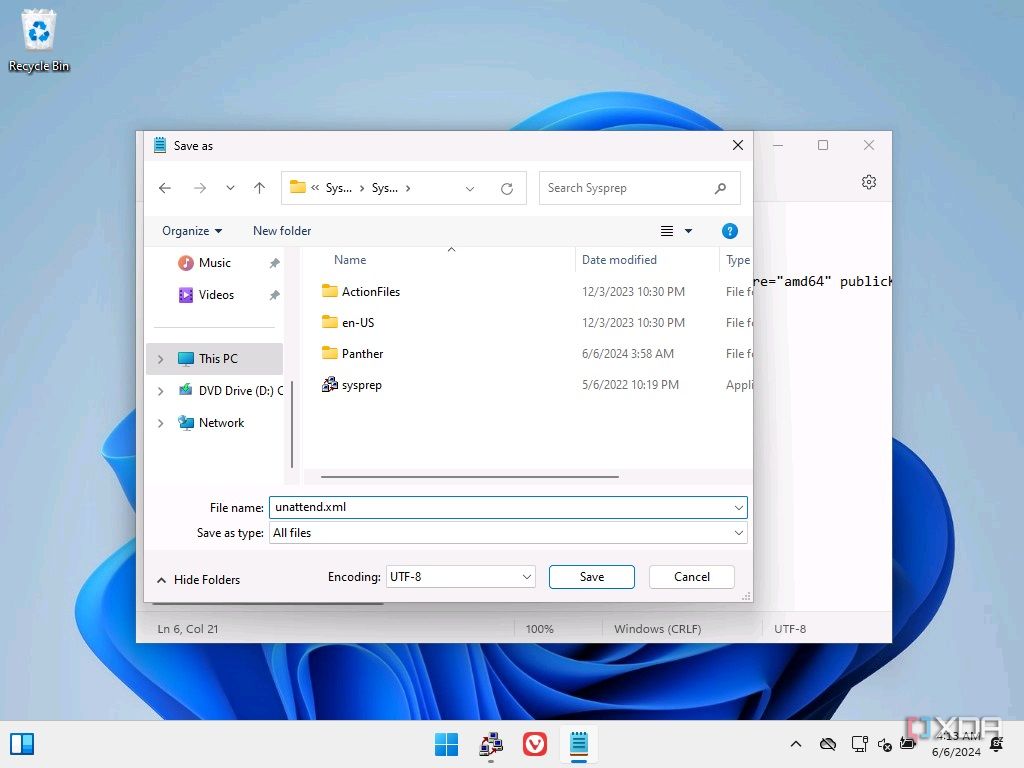
- Click File > Save As and set the Save as type menu to All types. Navigate to C:\Windows\System32\Sysprep and save the file with the name unattend.xml (it needs to be this name).
- The file above will make it so that changes made to the current user profile will be visible in the Home/Quick Access page for the default user profile in the Windows installations that use the ISO we’re creating. To prevent this, we need to create a batch file that removes these folders from view on the first login:
- Open the Start menu and search for Notepad and choose Run as administrator.
- Paste this text into the file.

- Click File > Save As and set the Save as type menu to All files and name it cleanup.bat (or any name ending in .bat). Navigate to %appdata%\Microsoft\Windows\Start Menu\Programs\Startup and save the file there.
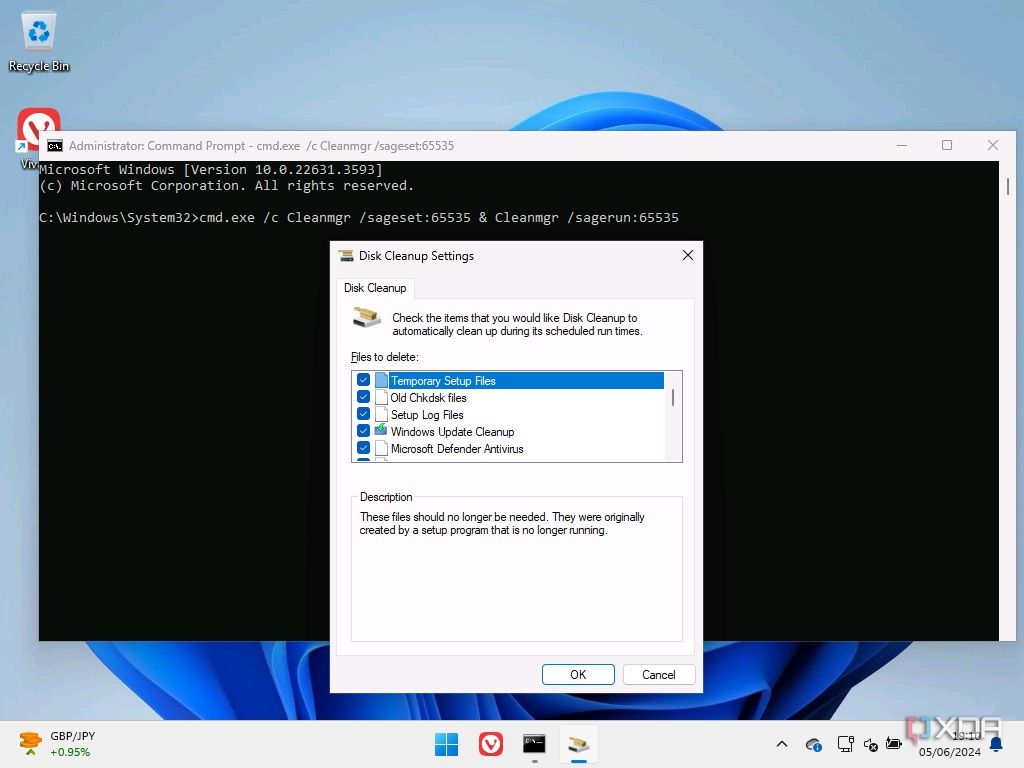
- Open the Start menu and search for cmd then click Run as administrator.
- Enter the following command and press Enter:
cmd.exe /c Cleanmgr /sageset:65535 & Cleanmgr /sagerun:65535
- In the Disk Cleanup dialog, select every possible option and then click Clean. Don’t close Command Prompt until the process finishes.


- Now, open Disk Management (you can search for it in the Start menu).
- Righ-click your C: partition and click Shrink volume. Choose a shrink amount around 15GB (15000MB) (don’t be afraid to go higher if you installed a lot of software).
- Create a new volume in the newly unallocated space and call it Image. Rename the C: partition to something like Windows to make them easier to identify (this may be helpful later). Your disk will look somewhat like this:
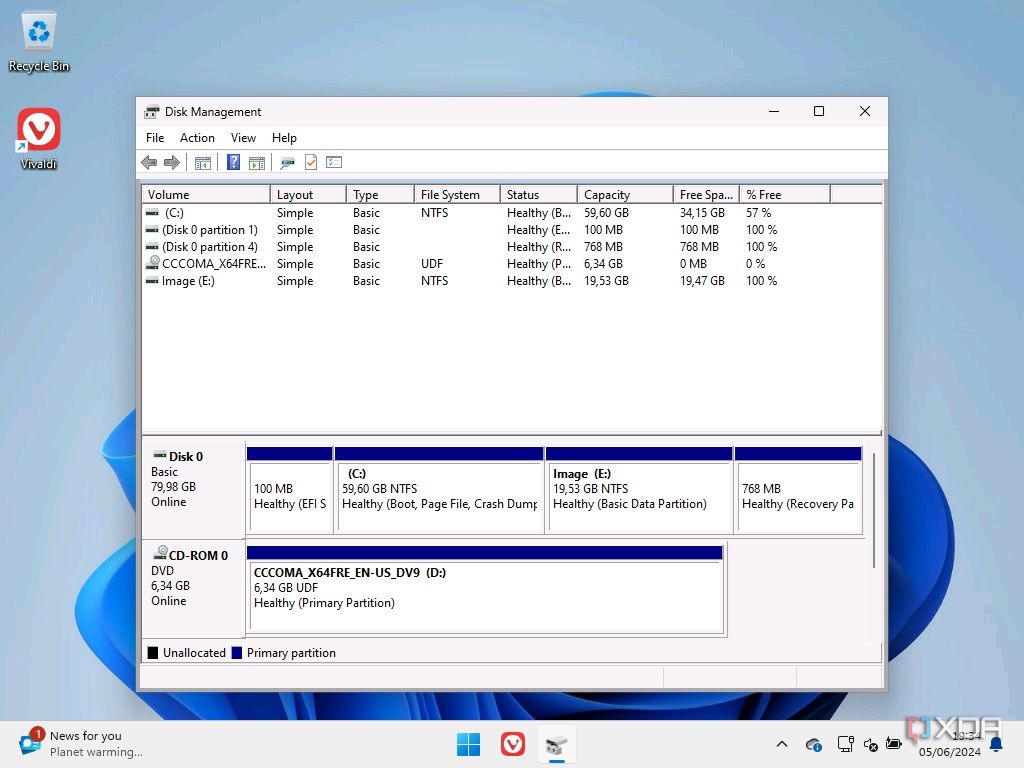
- Open File Explorer and open the Image drive, then create a new folder inside it called Scratch.
- If you’re using Hyper-V, at this point, click Action > Checkpoint in your Hyper-V window, to be safe.
- Go back to the System Preparation Tool window, under System Cleanup Action, choose Enter System Out-of-Box Experience (OOBE) and check the Generalize box.
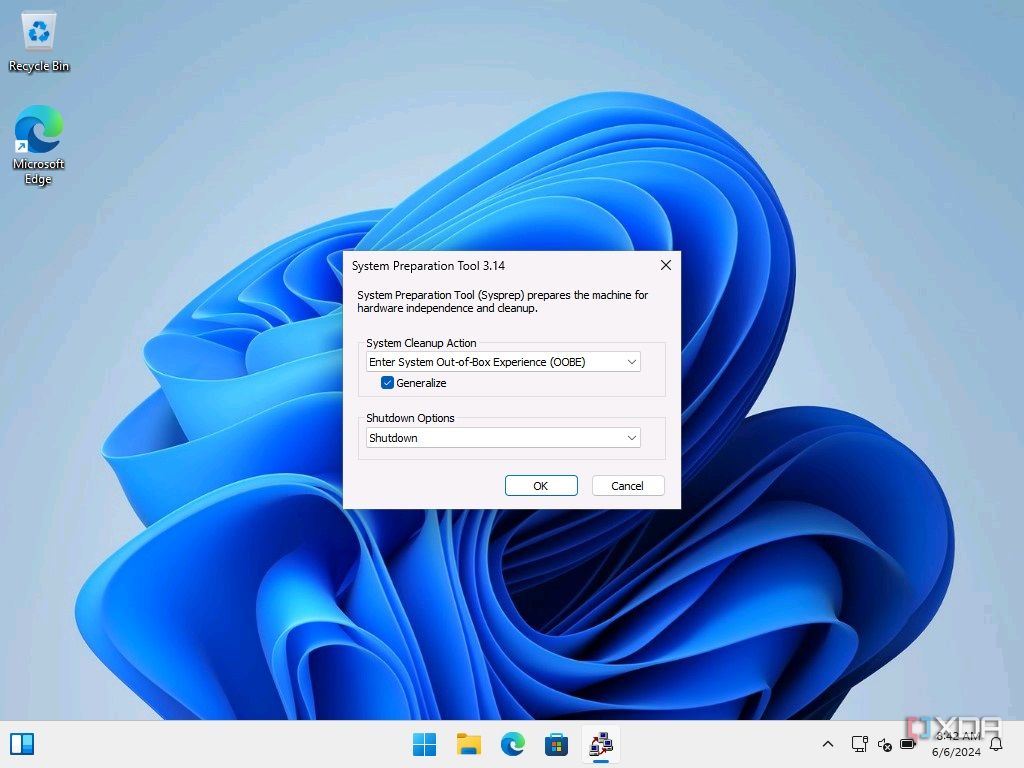
- Under Shutdown options, choose Shutdown. Click OK.
Installing certain apps will cause the system preparation to fail. If you see an error, follow the instructions to review the log and uninstall apps that may be causing conflicts. You may want to repeat the cleanup process afterwards. You can then head to C:\Windows\System32\Sysprep and run sysprep again.
- Click OK and your PC will turn off and restart.


Step 2: Creating the install.wim file
Now that you have the system set up as you want it to be, it’s time to package it into an image file that can be used for installation. Here’s how it works
- Boot your reference machine (VM) using a standard Windows installation media (it can be the same you used for the initial Windows installation).
- On the installation screen where you see the language options, press Shift + F10 to open Command Prompt.
- Enter the following command and press Enter:
diskpart
- Now, enter this command:
list vol
- Identify the Windows partition and the Image partition you created in the steps above. Note the drive letters for each one, which may be different from what they were before.
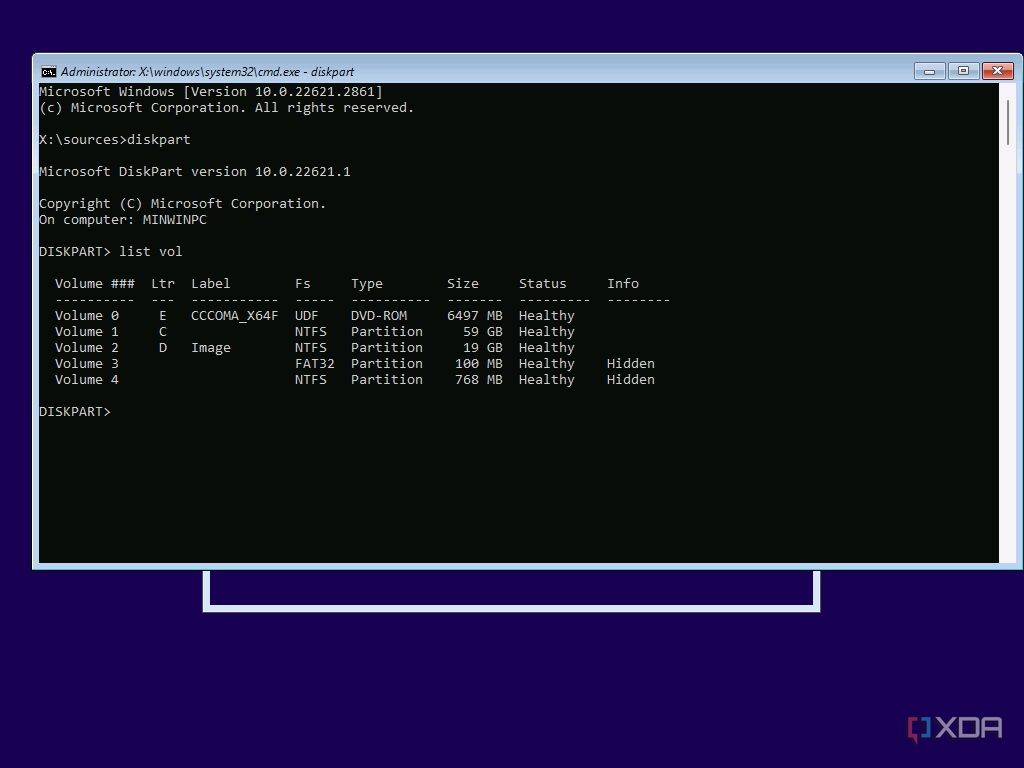
- Exit diskpart with the following command (don’t close Command Prompt):
exit
- Enter the following command, replacing C: with the drive letter for the partition with the Windows installation and D: with the drive letter for the Image drive (if needed):
dism /capture-image /imagefile:D:\install.wim /capturedir:C:\ /ScratchDir:D:\Scratch /name:"CustomWindows" /compress:maximum /checkintegrity /verify /bootable
You can also replace the name CustomWindows with anything you prefer.

This process will take some time to complete, especially if you have a slower machine. Once it’s done, turn off the machine.
Step 3: Creating the ISO
With the install.wim file now created, it’s time to create the ISO itself. At this point, you can either boot the reference machine or use your host machine to avoid having to do the rest of the process in a VM. If you choose the latter option, you have to copy the install.wim file you just created from your VM to your host machine. This is the easier route. Here’s how to do that:
- On your host machine, open Disk Management.
- Click Action > Attach VHD.
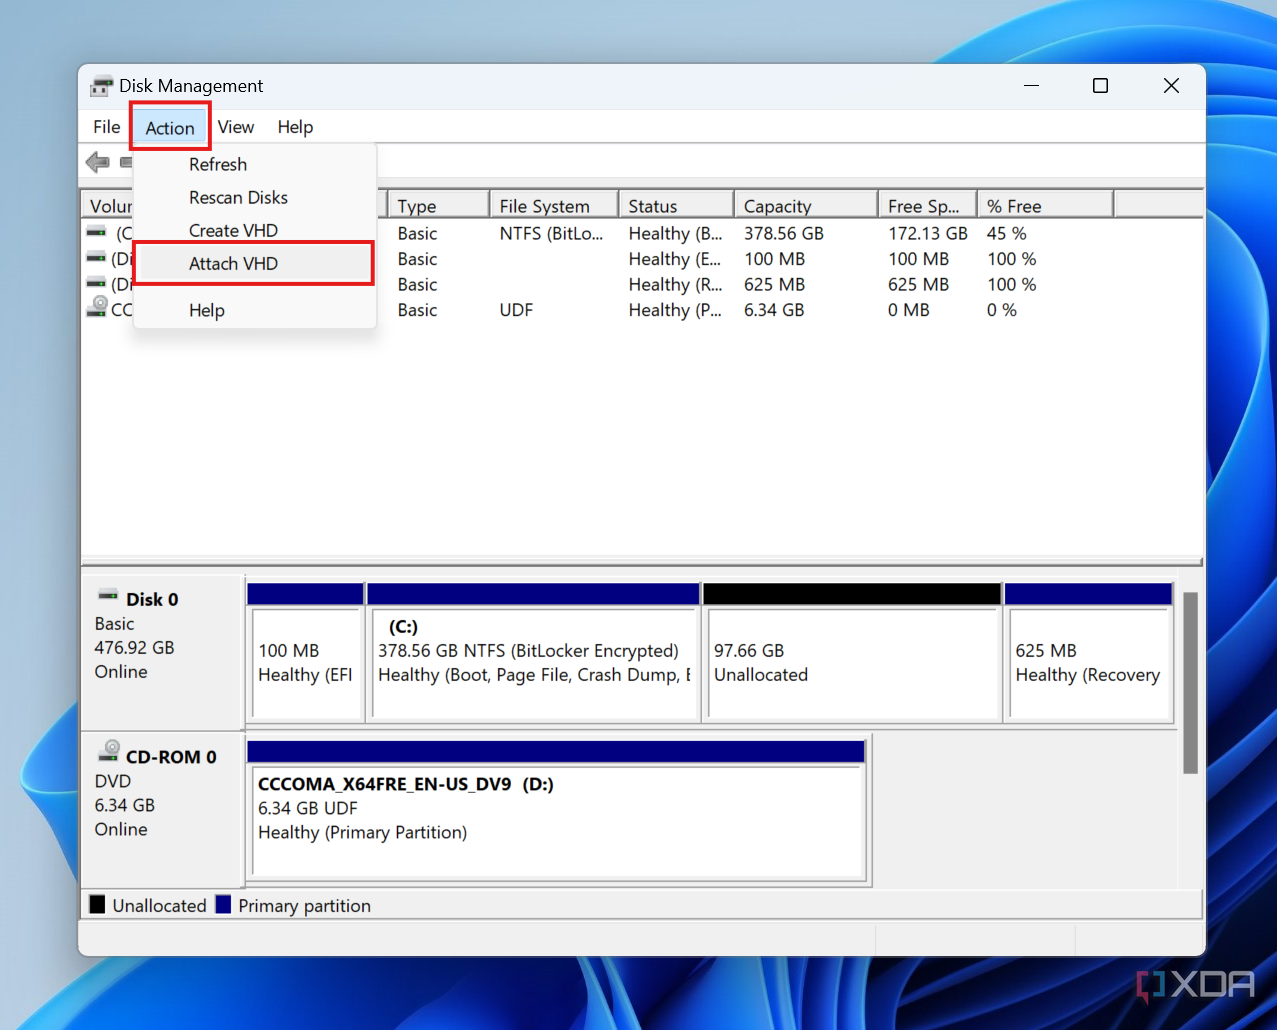
- Click Browse and navigate to where your VHDs are stored (for Hyper-V, this is C:\ProgramData\Microsoft\Windows\Virtual Hard Disks.
- Change the dropdown menu in the bottom right corner to All files so you can see the AVHDX files, which represent your checkpoints. Pick the most recent one for your reference machine.
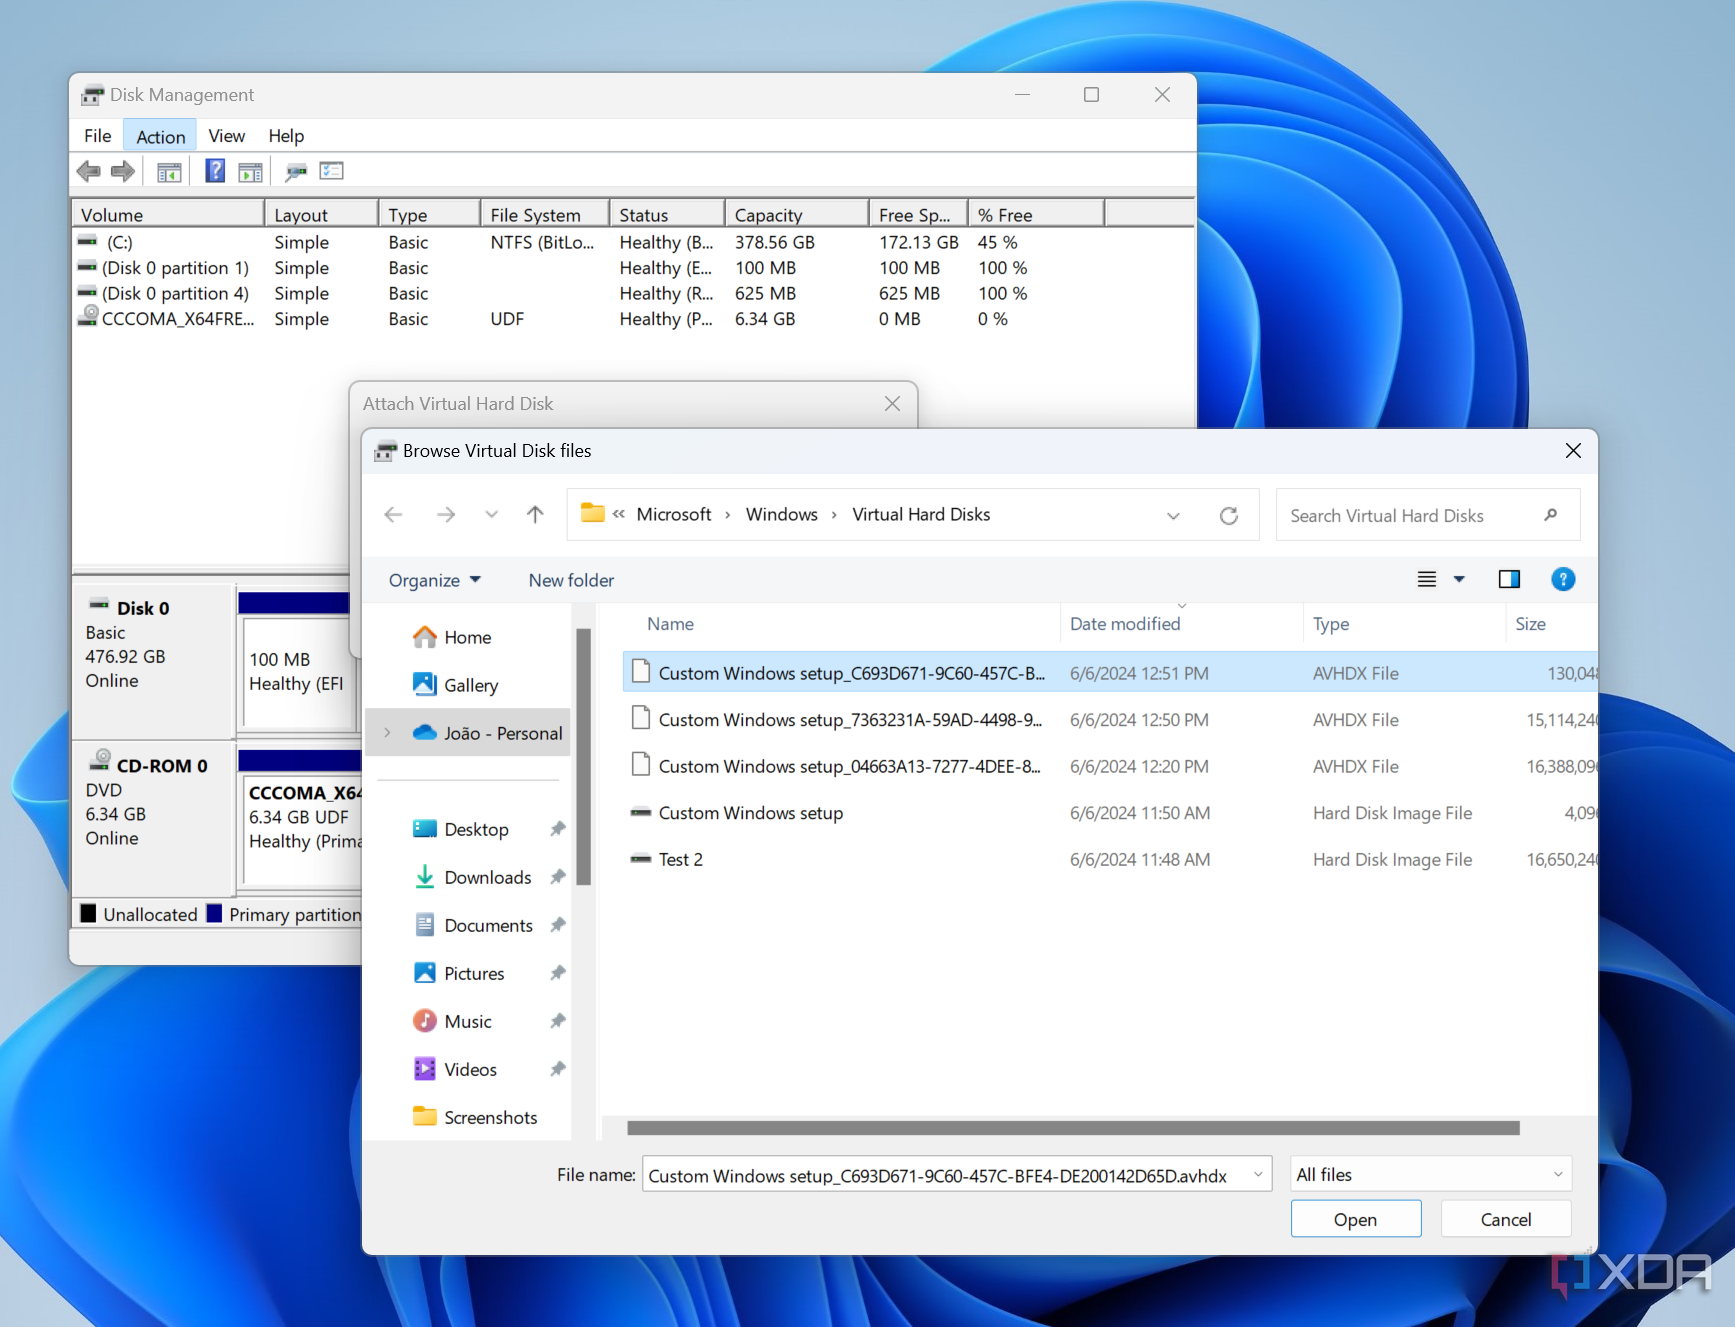
- Check the Read-only box.
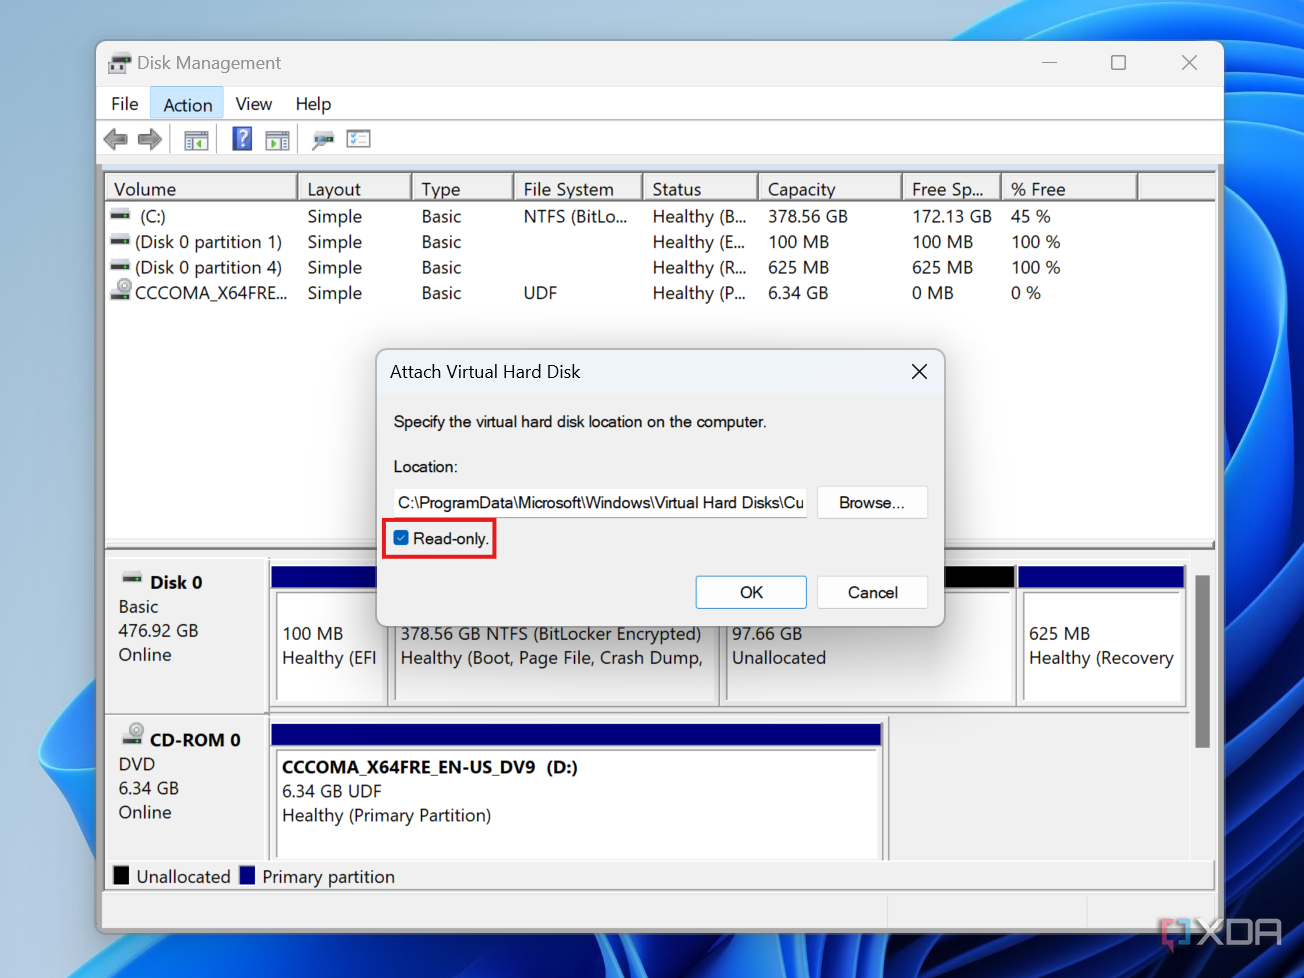
Failing to do this before clicking OK will make your VHD unusable for its virtual machine.
- Click OK.
- In File Explorer, navigate to the Image partition where your install.wim file is and copy it to a location of your choice on your physical drive (most likely drive C:).
- Go back to Disk Management, rigt-click the VHD, and choose Detach VHD, then click OK.


If you’re using the reference machine, you’ll just have to go through the Windows 11 setup as usual so you can get to the desktop. In either case, you’ll then be ready to follow the steps below.
Using the Windows ADK to create an ISO
- Mount a recent, standard Windows ISO as a virtual drive and open it.
- Copy the contents of the virtual drive into a new folder in the root of your main partition. You can name this folder anything you want, but we’ll go with ISO (so the folder path is C:\ISO).
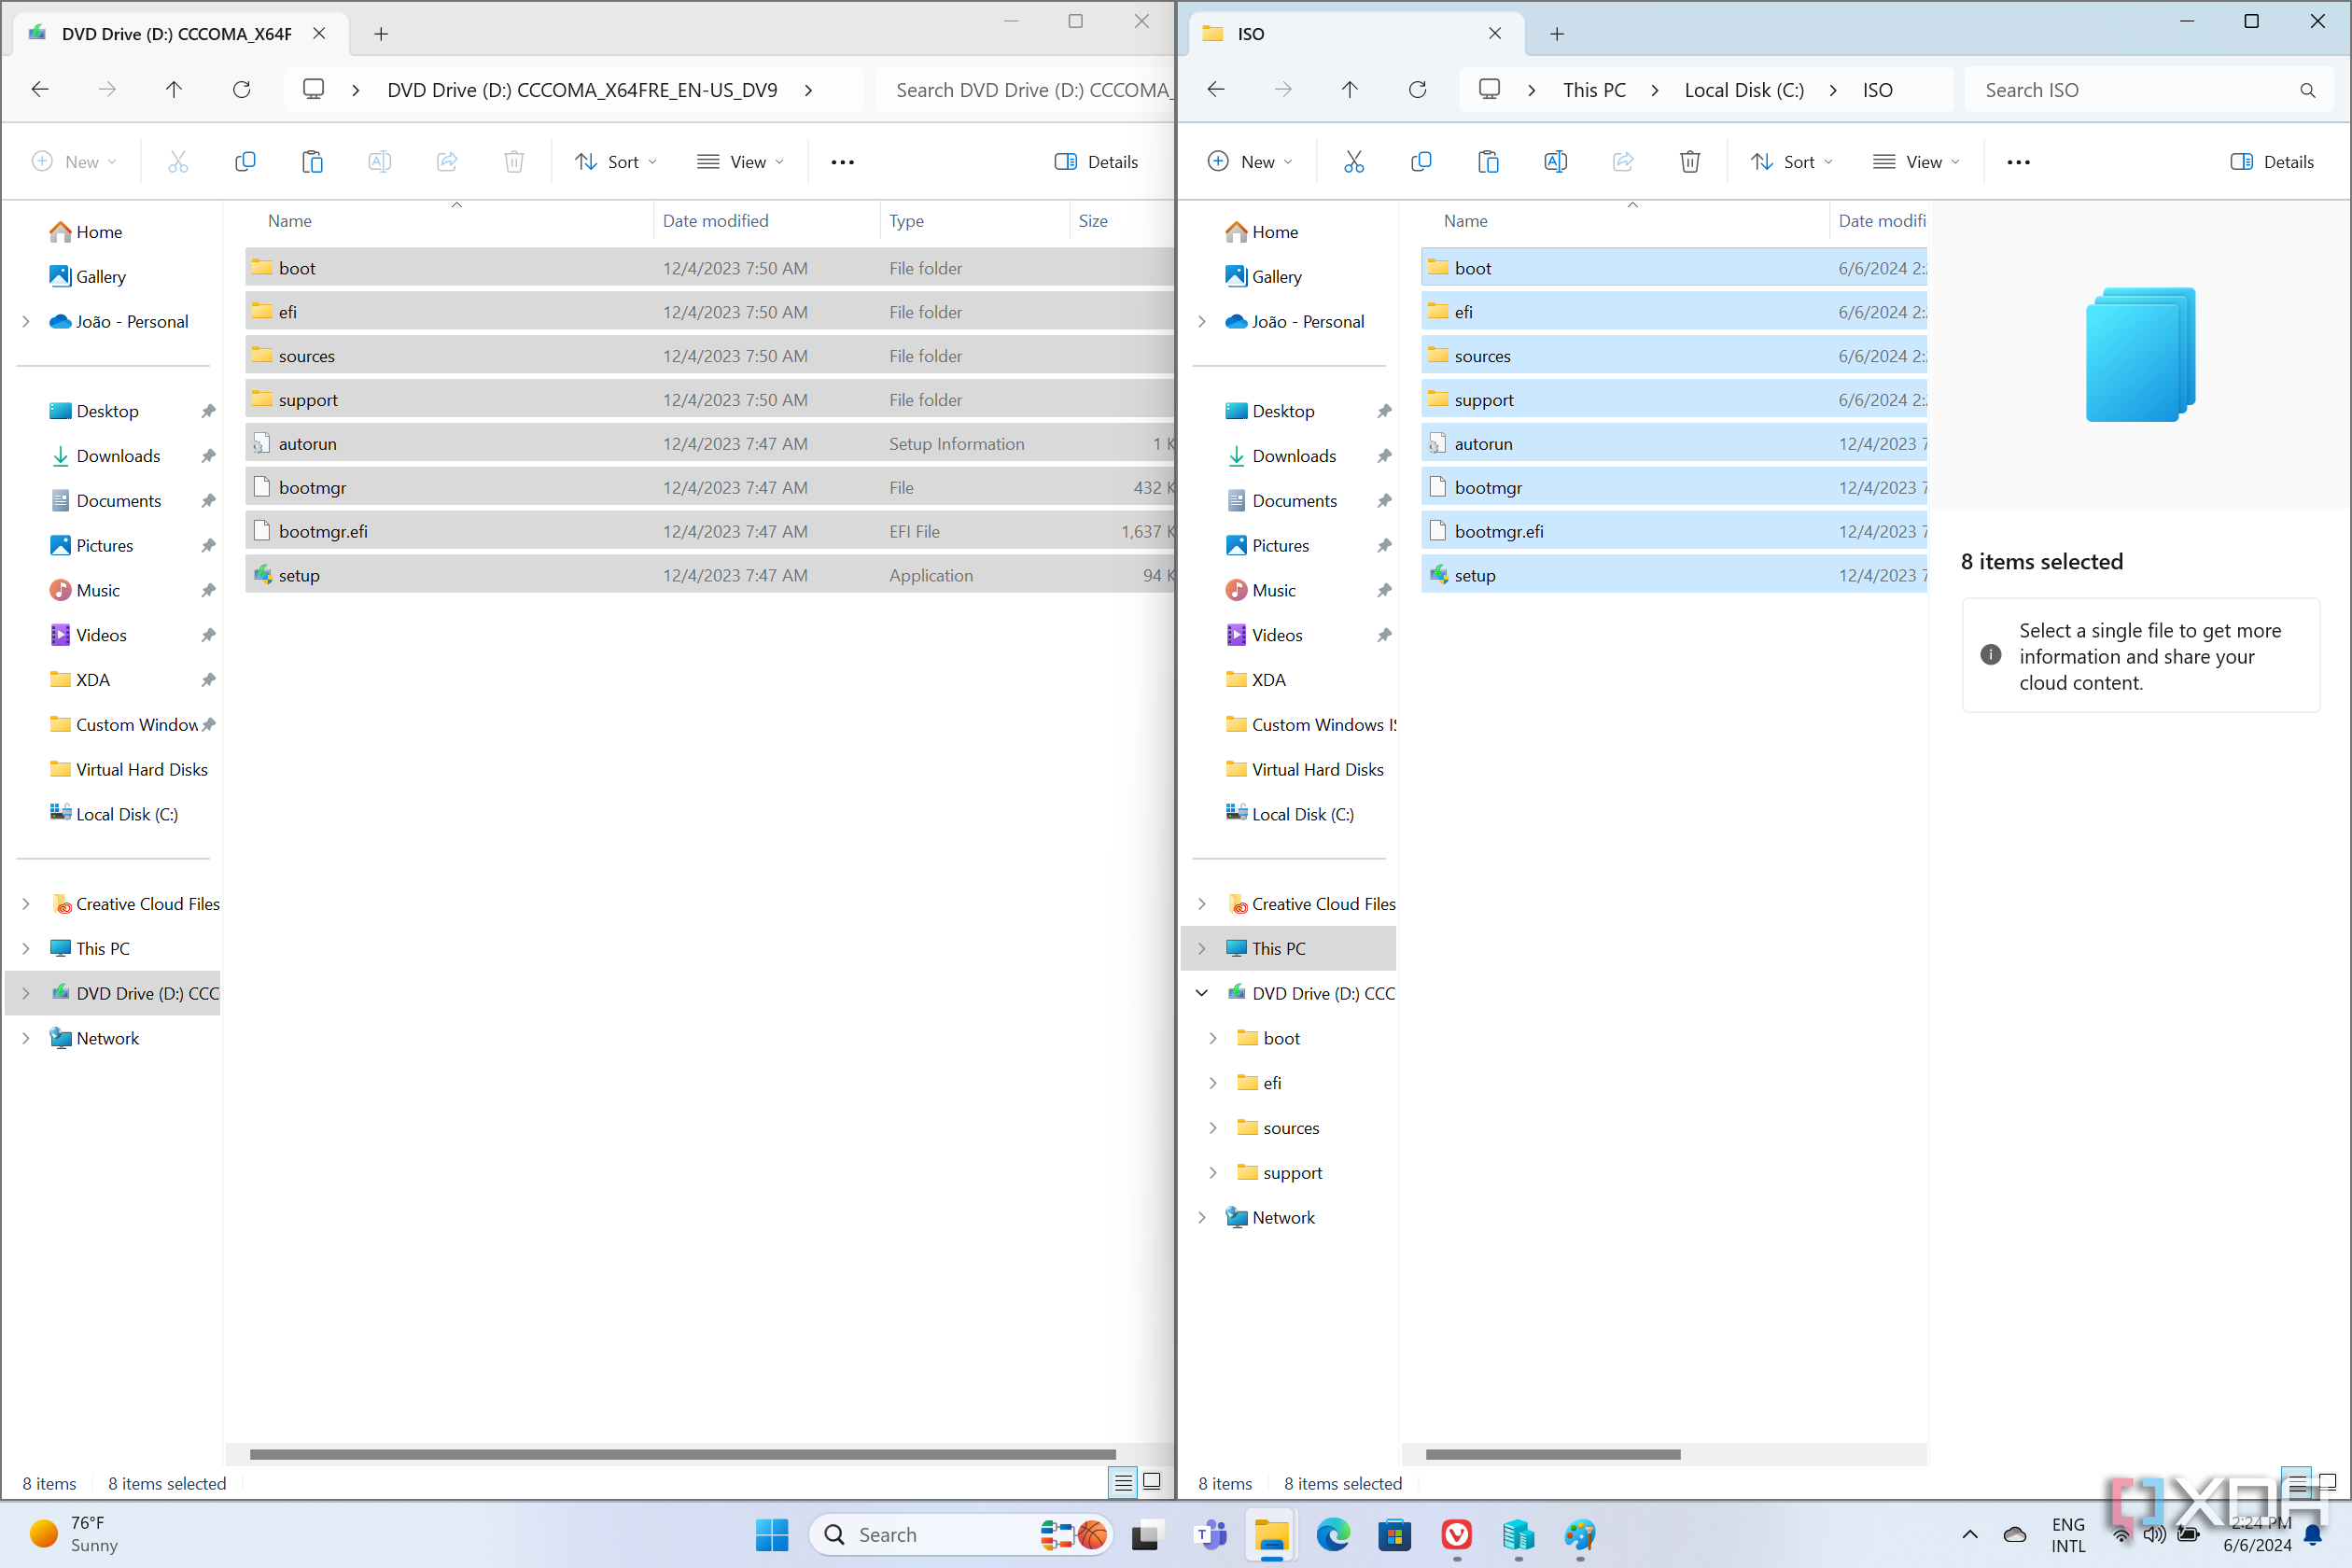
- If you’re using the VM, go into the Image partition we created earlier and copy the install.wim file. If you moved the install.wim file to your host machine, copy it from that location.
- Go to your ISO folder and open the sources folder, and paste the install.wim file, replacing the one that’s already there.
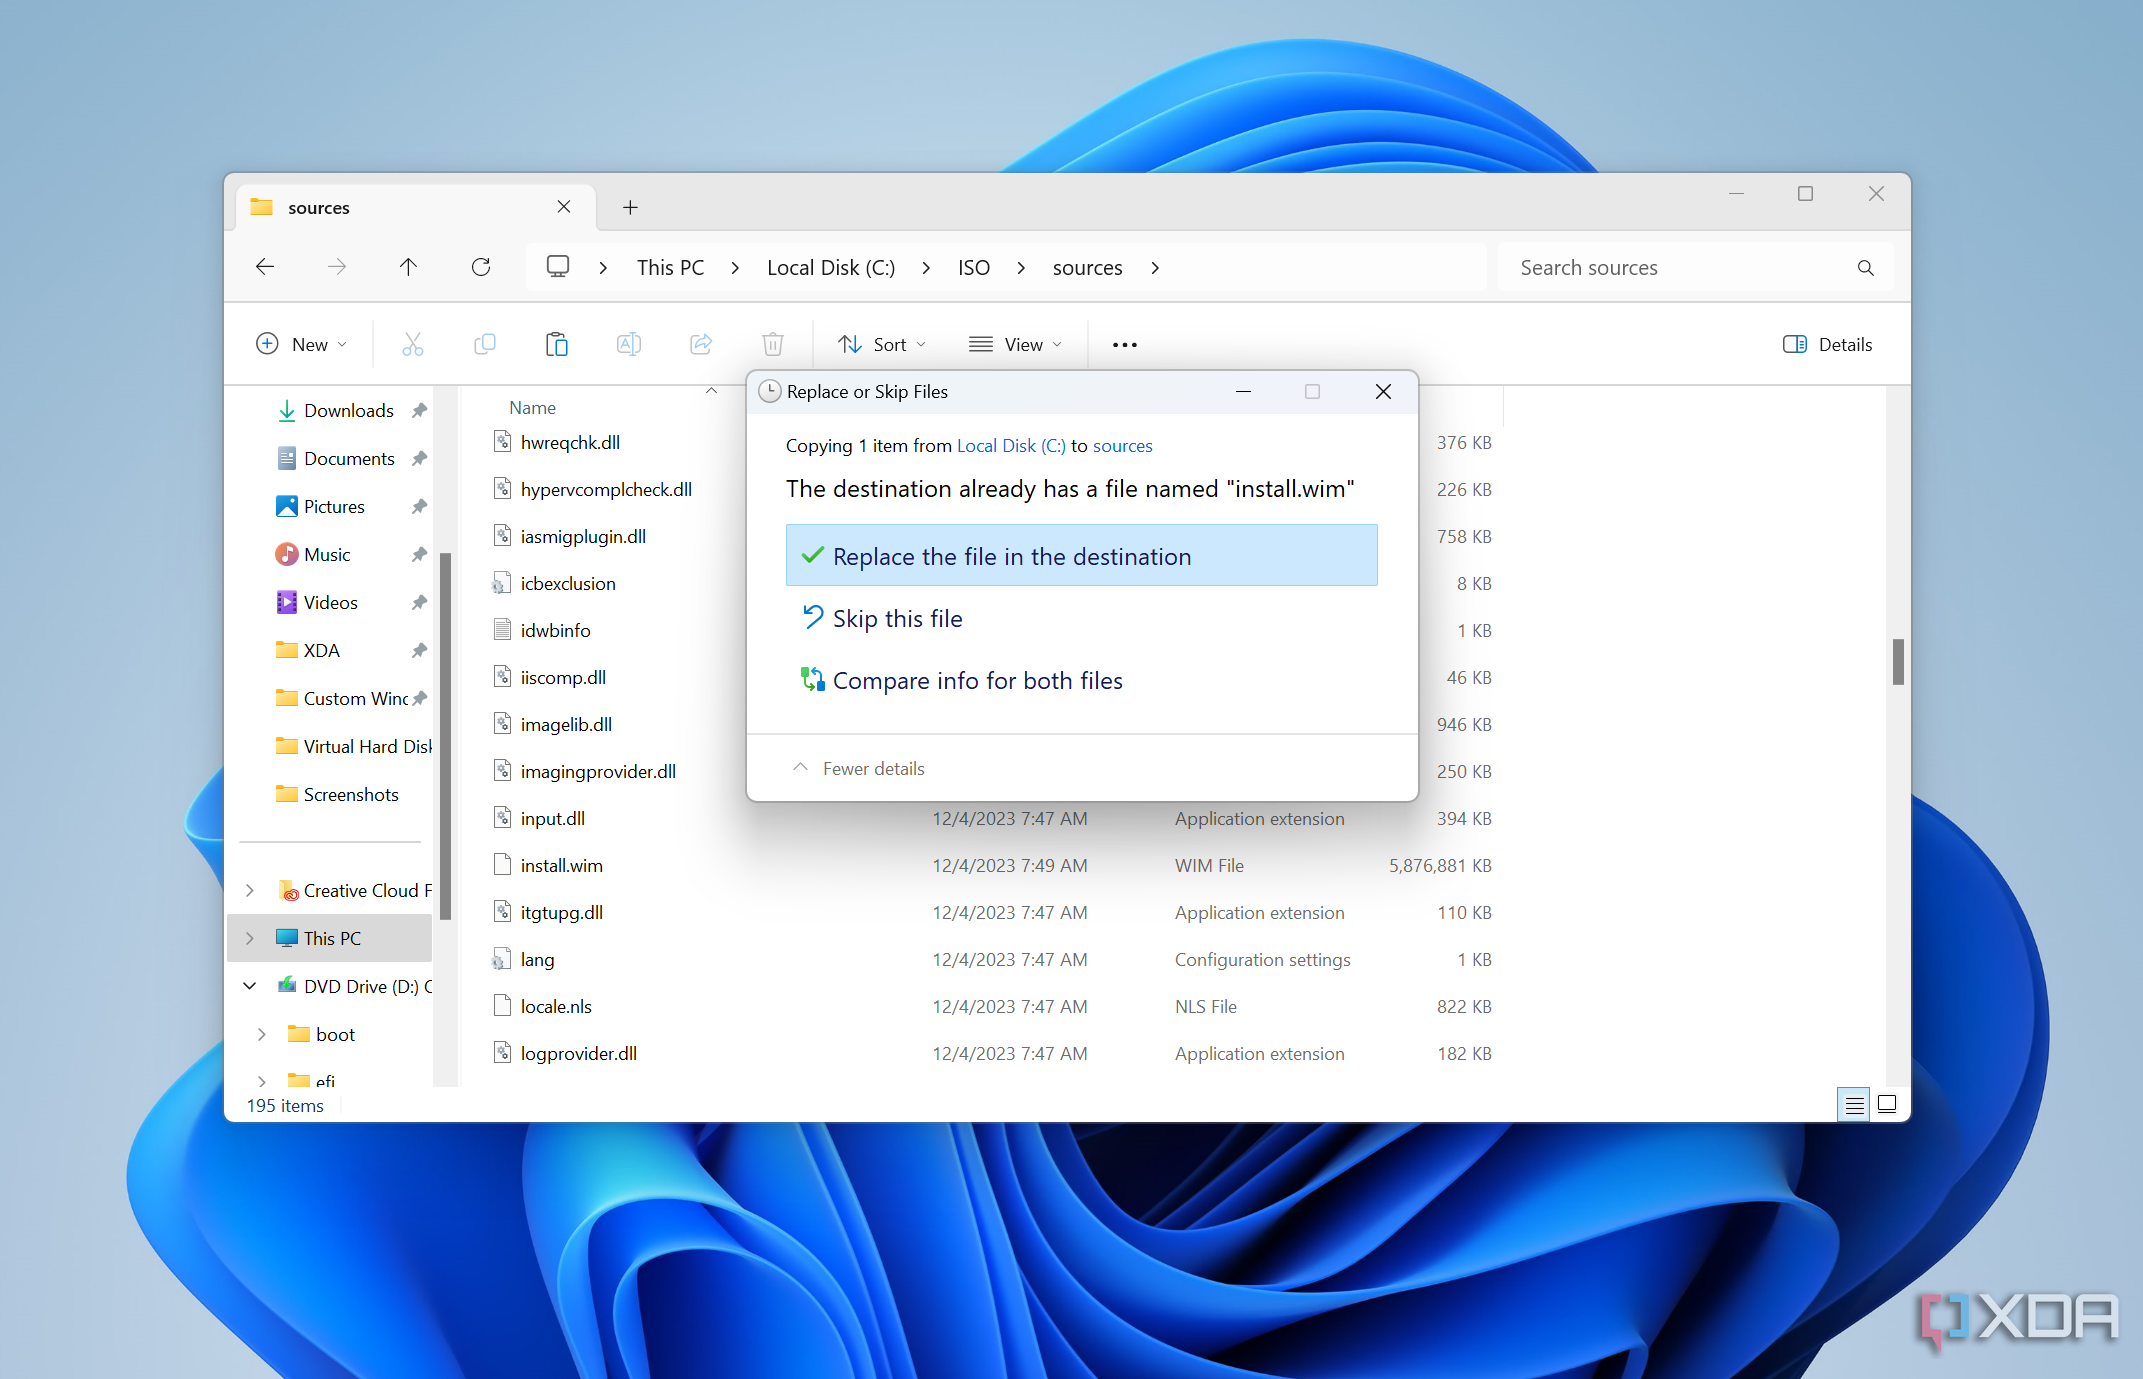
You should see a warning about replacing an existing file in the folder, which you need to accept. If you don’t see this warning, look for a file called install.esd and delete it, leaving only the new install.wim file.
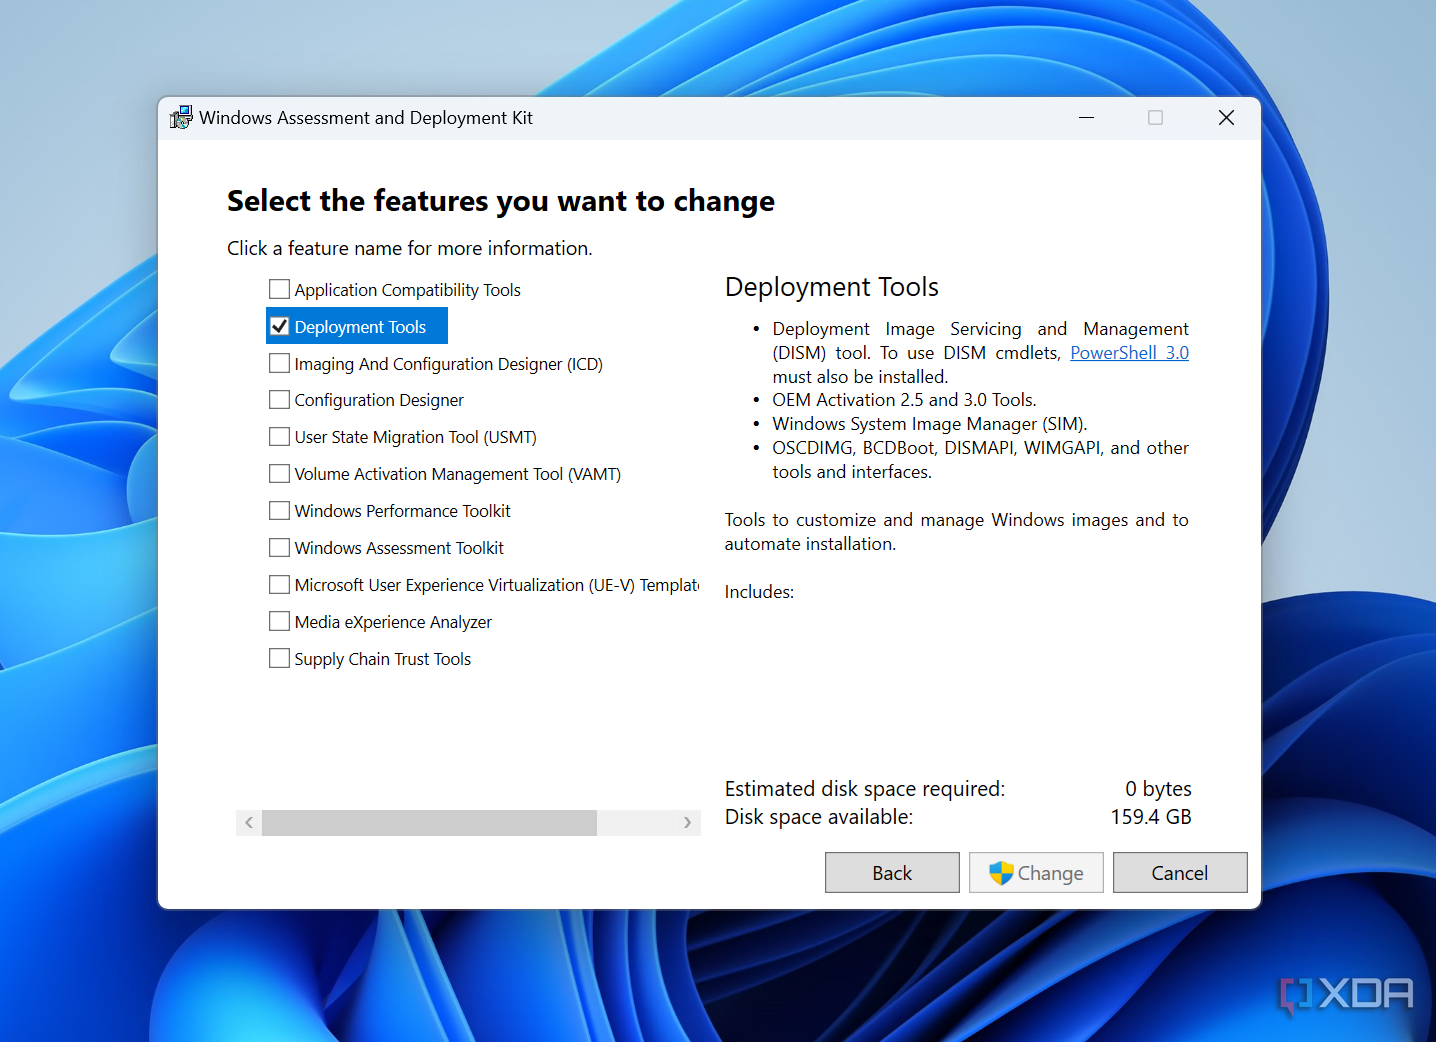
- Download the latest version of the Windows Assessment and Deployment Kit (ADK) from Microsoft’s website.
- Launch the installer and follow the basic steps. When you get to this screen, make sure the Deployment Tools option is selected (you can deselect everything else), then click Install.
- Once it’s installed, navigate to the All apps section of the Start menu and expand the Windows Kits folder. Right-click Deployment and Imaging ToolsEnvironment and choose Run as administrator.
- Type the following command and press Enter to go to the root of the drive:
cd\
- Now, enter the following command to generate an ISO file using those files:
oscdimg.exe -m -o -u2 -udfver102 -bootdata:2#p0,e,bc:\ISO\boot\etfsboot.com#pEF,e,bc:\ISO\efi\microsoft\boot\efisys.bin c:\ISO c:\CustomWindows.iso
You may need to replace c:\ISO depending on the folder path where you chose to store the ISO files in step 2. You can also replace c:\CustomWindows.iso at the end with the path and name of your choice for the ISO file.
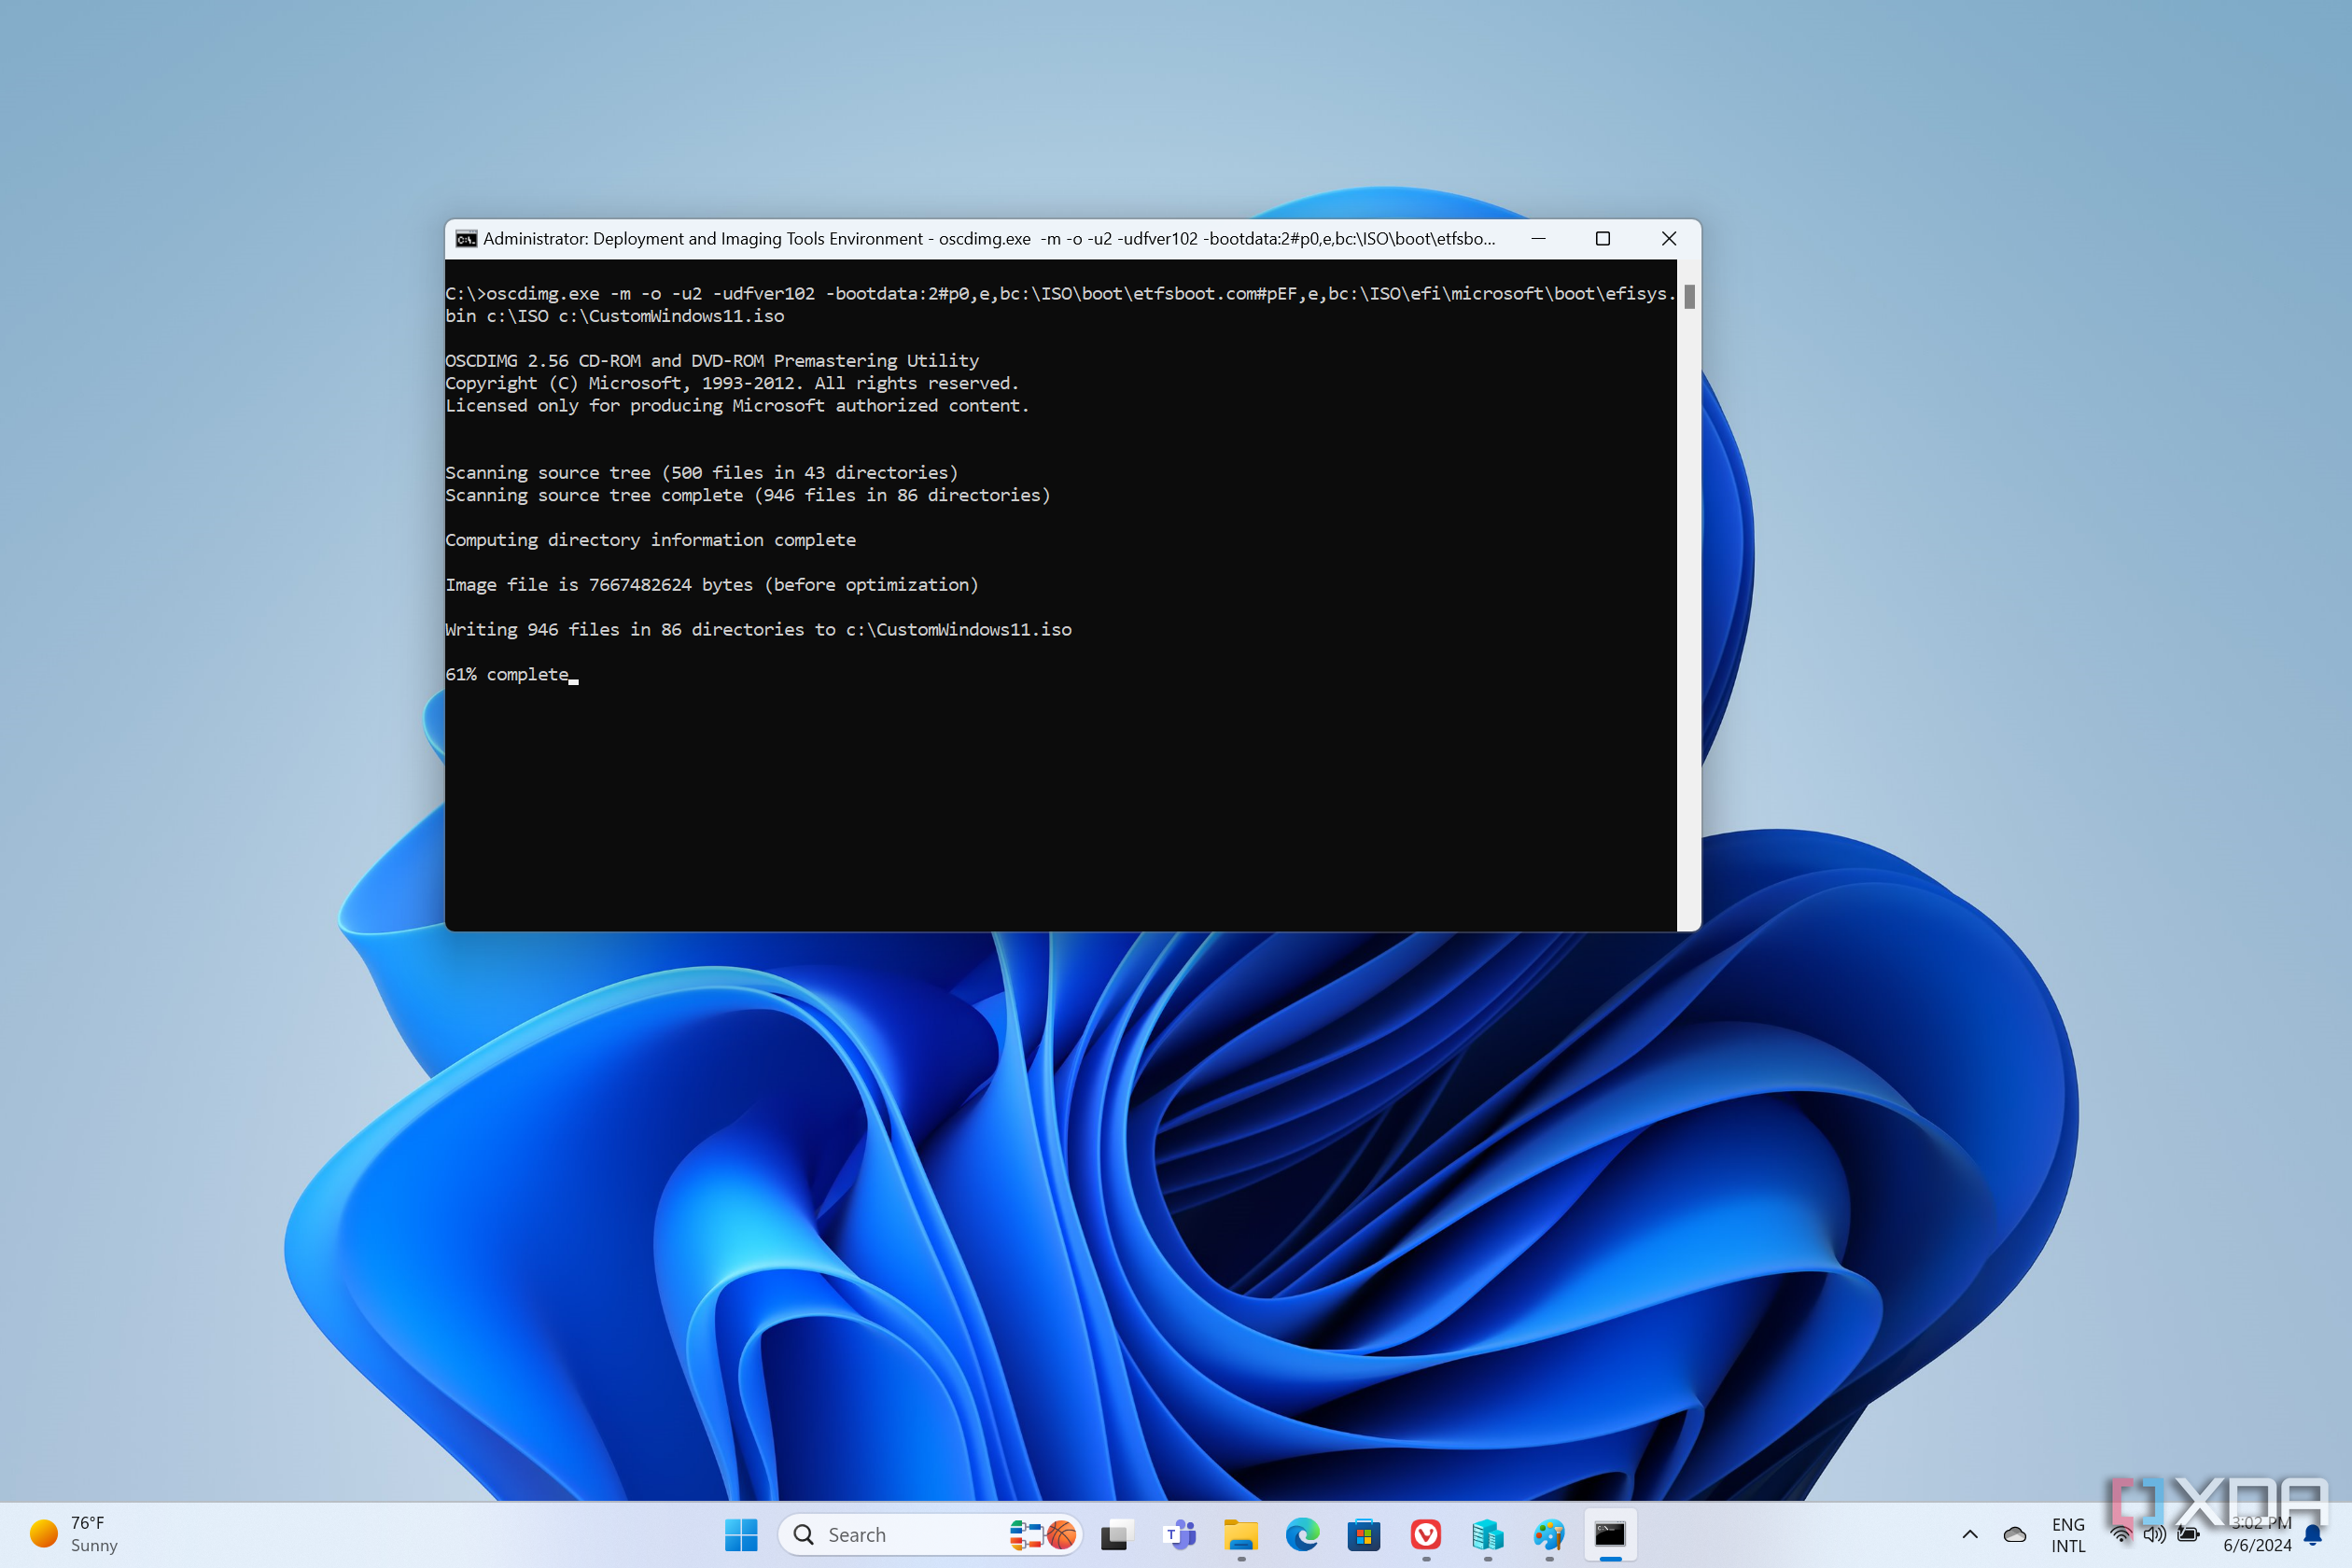


The process may take some time, but when it’s done, you’ll have your ISO file ready to use. You can use it as the installation source for future VMs, or use Rufus to create USB installation media so you can use it to set up a physical PC. The ISO should be hardware-agnostic, so it will work on any PC. If you did all the steps on real hardware, you may also want to back up the ISO file to a different location in case you want to reset your PC afterward.
Have your Windows installation ready faster
While the process may seem complicated, it’s fairly easy to get things up and running if you follow the steps carefully. And if you do, you’ll be able to get your PCs up and running faster in the future, since all your apps will be there by default, so it can save you time in the long run.

Windows 11 2024 Update: What’s new and why it’s not Windows 12
The Windows 11 2024 Update will bring a ton of changes to the operating system, including better support for Arm devices.
#create #custom #Windows #ISO #running #faster
source: https://www.xda-developers.com/how-create-custom-windows-iso/

