

Ask any DIY enthusiast about the best utility for managing smart gadgets and IoT paraphernalia, and they’ll definitely point you to Home Assistant. While HASS is pretty useful on its own, you can pair it with a handful of plugins to automate every aspect of your living space.
Node-RED is one such add-on that relies on flow-based programming to create trigger-action conditions for your Home Assistant devices. But due to its high difficulty curve, it can appear intimidating when you’re a newcomer. So, here’s a detailed guide to help you integrate Node-RED’s amazing automation provisions into your Home Assistant server.
Related
A beginner’s guide to Ansible automation
Why bother with the tedious aspects of server management when Ansible can do all the heavy lifting?
Setting up Node-RED
If you’re running Home Assistant as a bare-metal OS or a virtual machine, you can install Node-RED as an add-on. To do so,
-
Head to the Settings tab and select Add-ons.
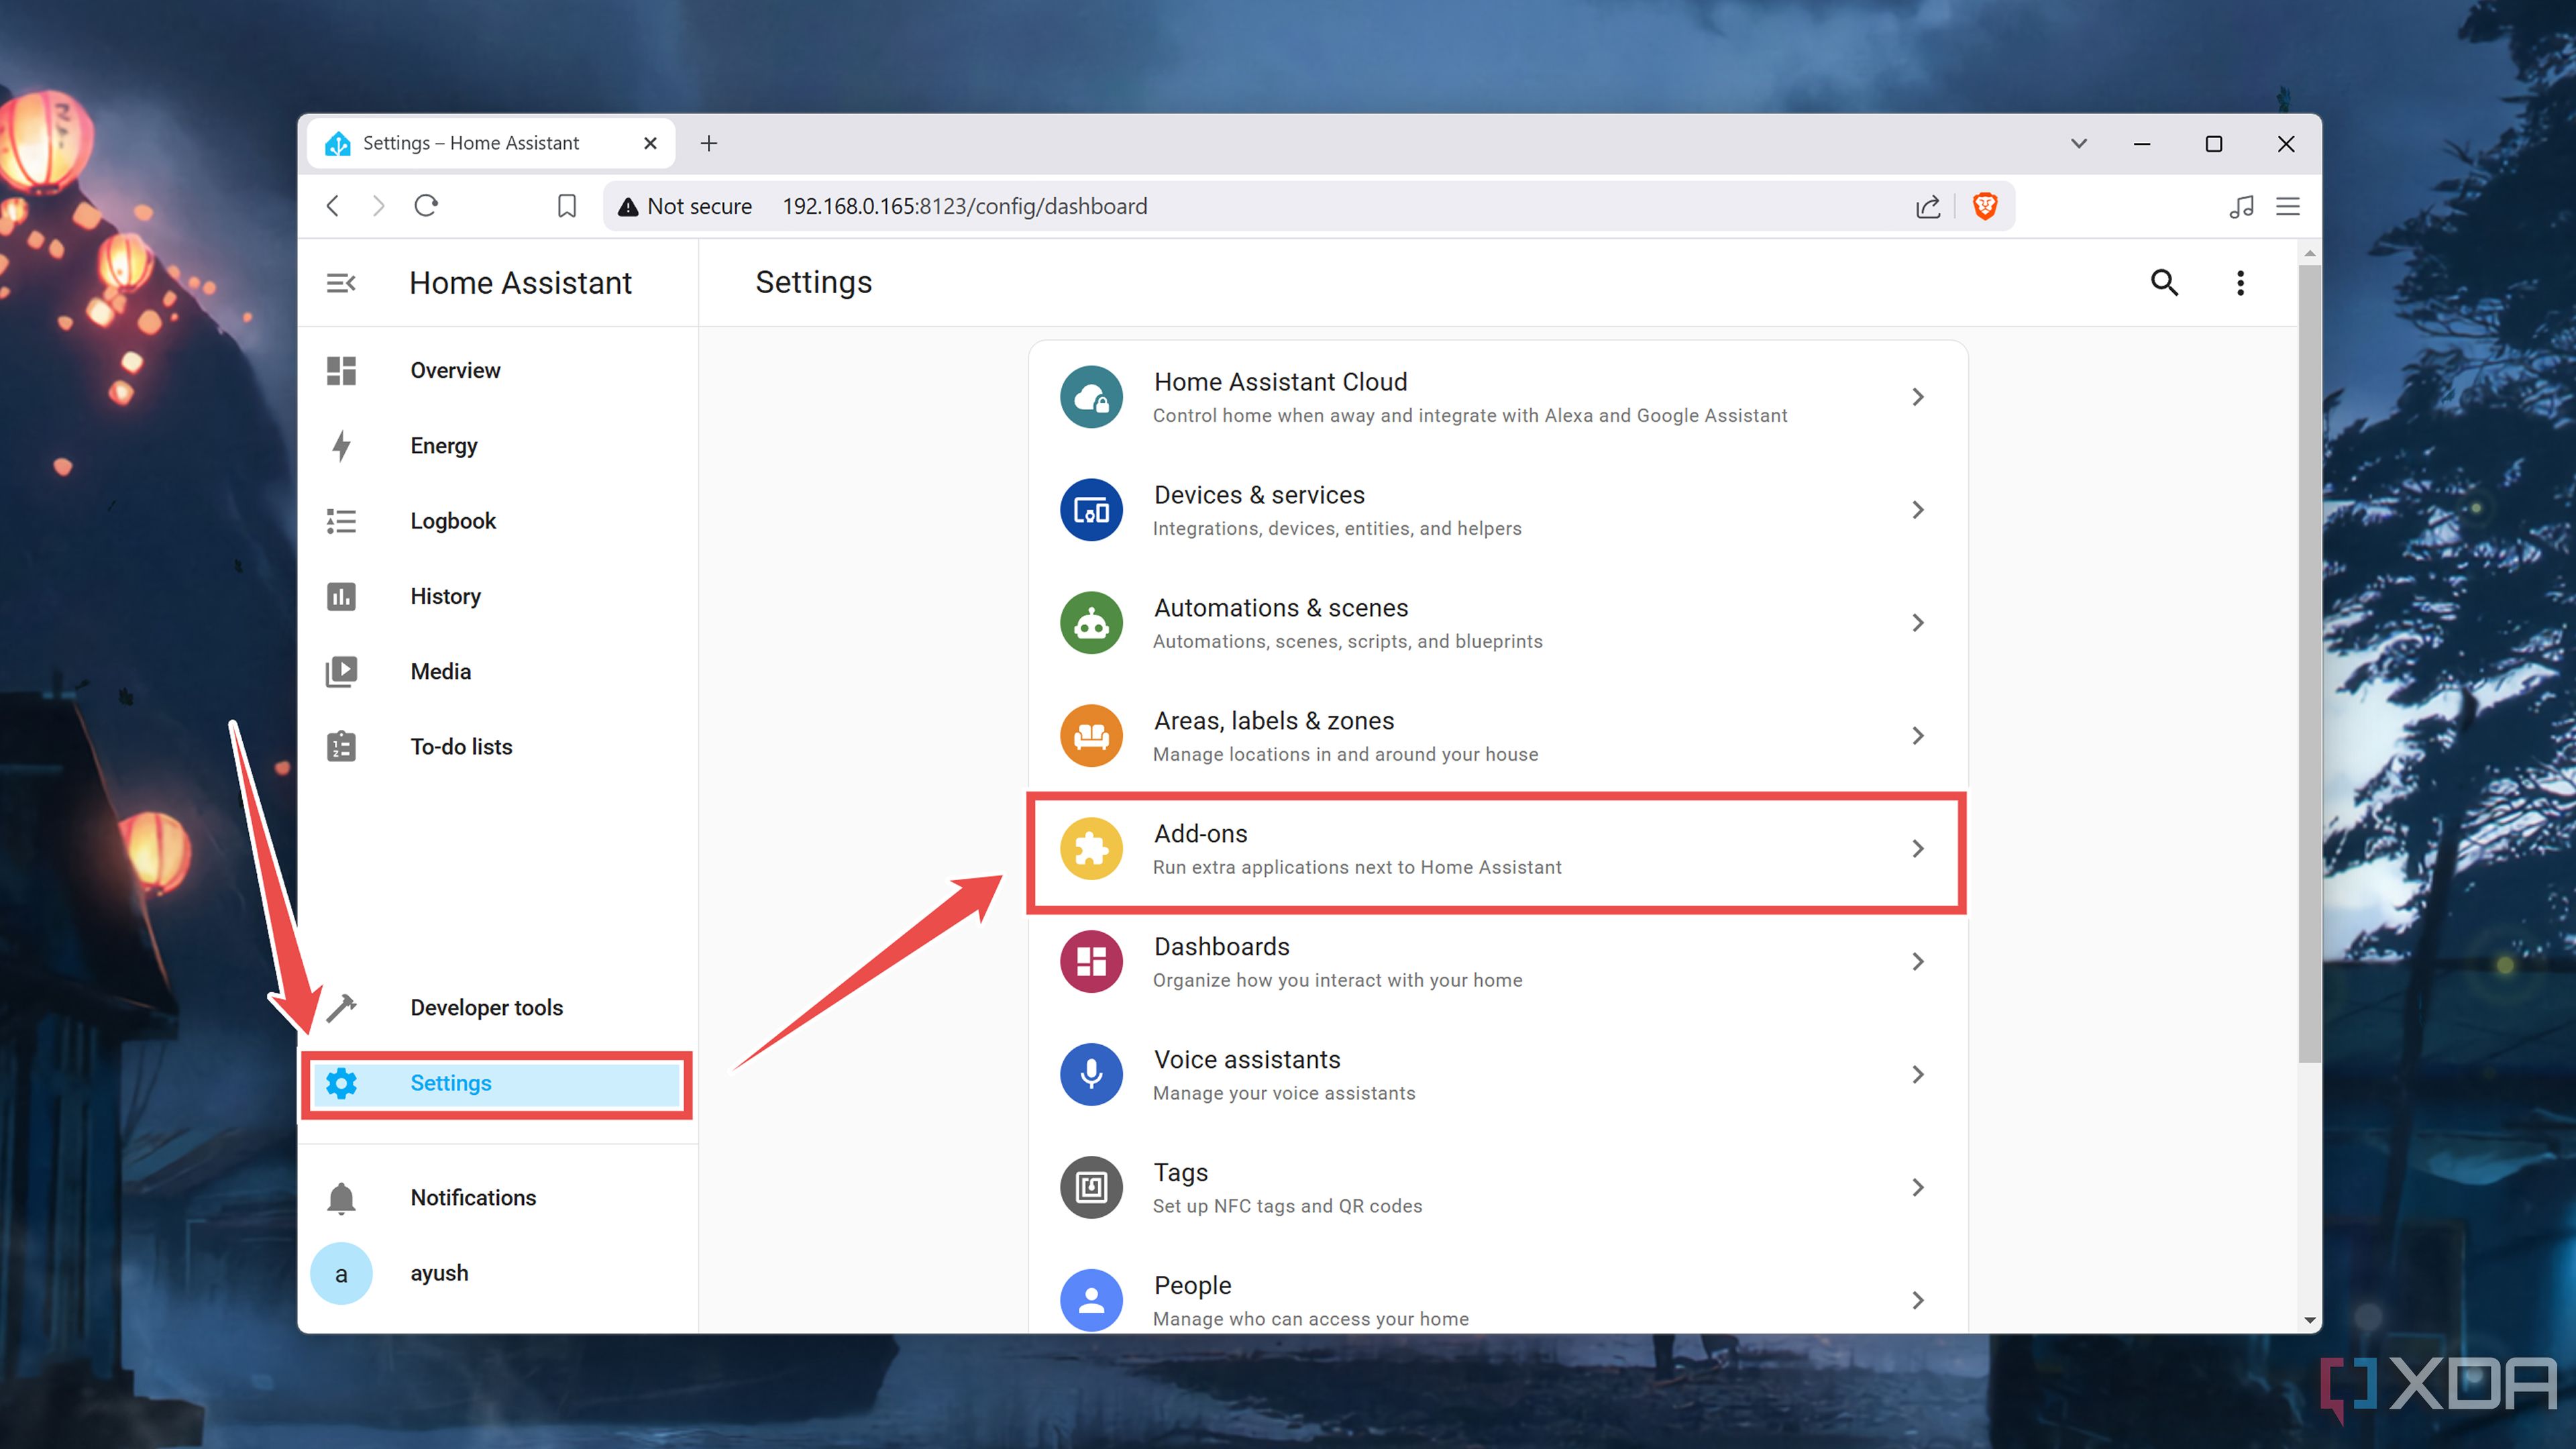
-
Click on the Add-on Store.

-
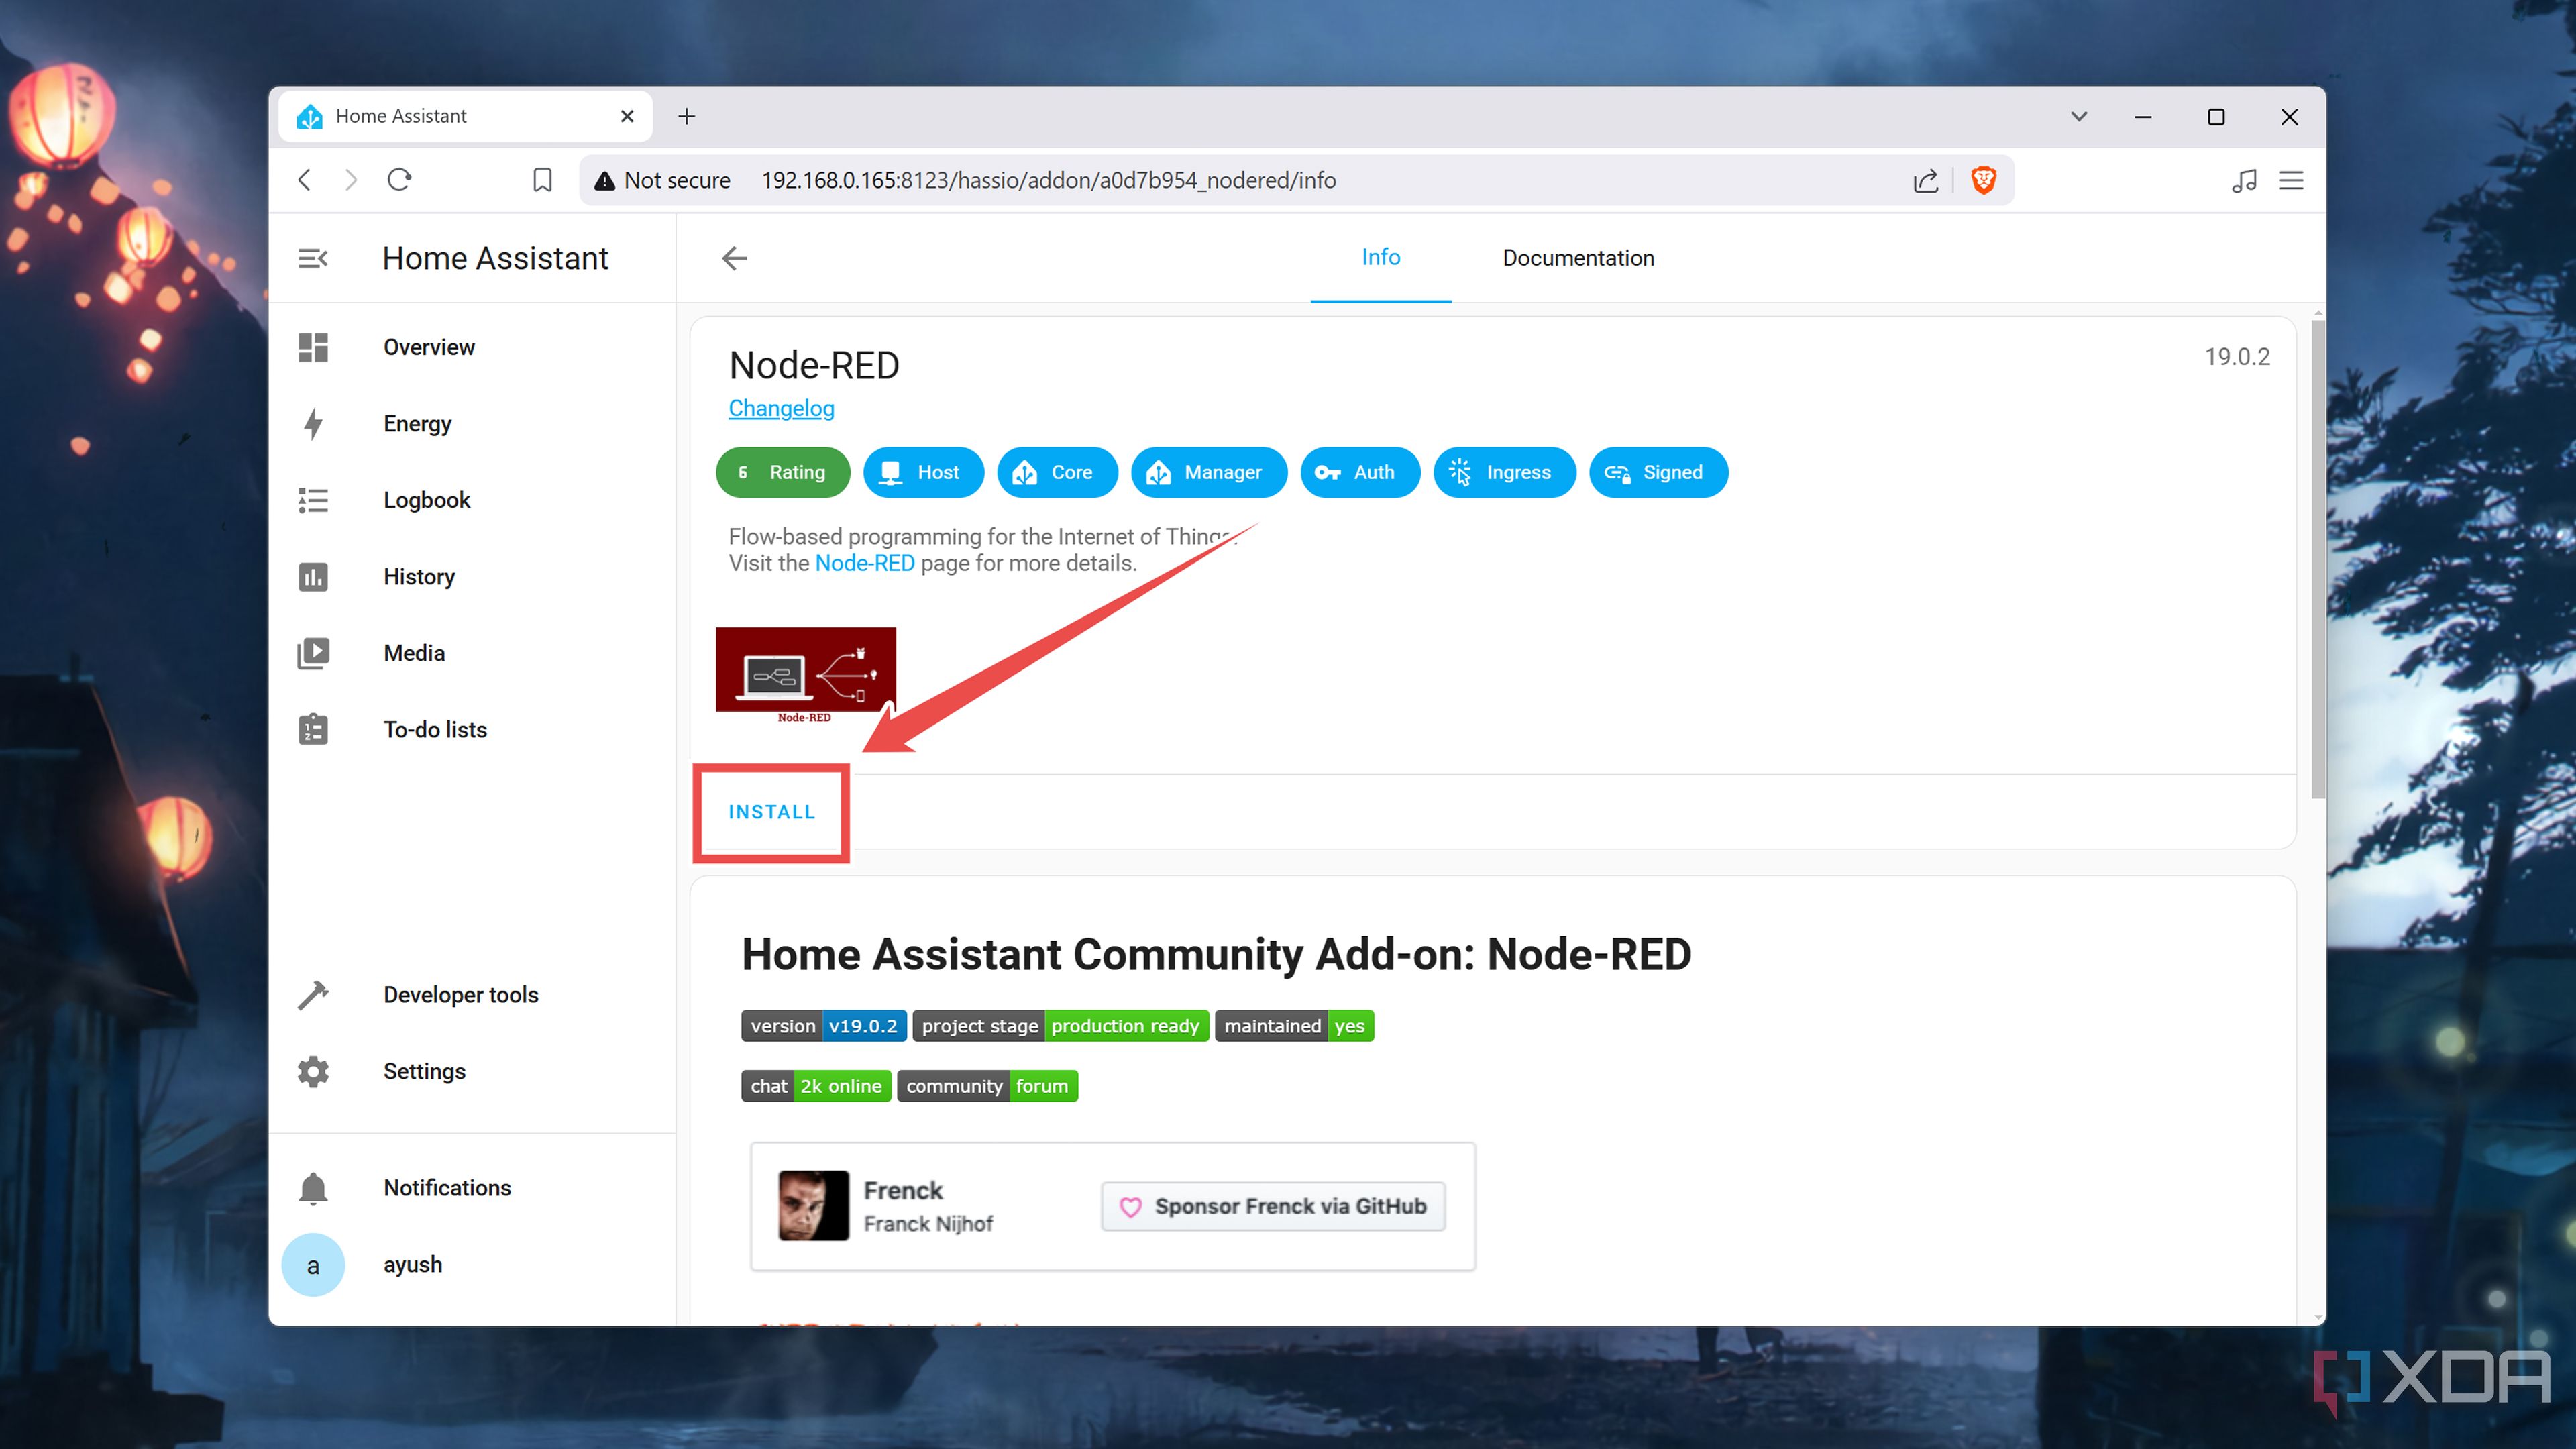
Scroll down until you see Node-RED before clicking on it and selecting Install.
-
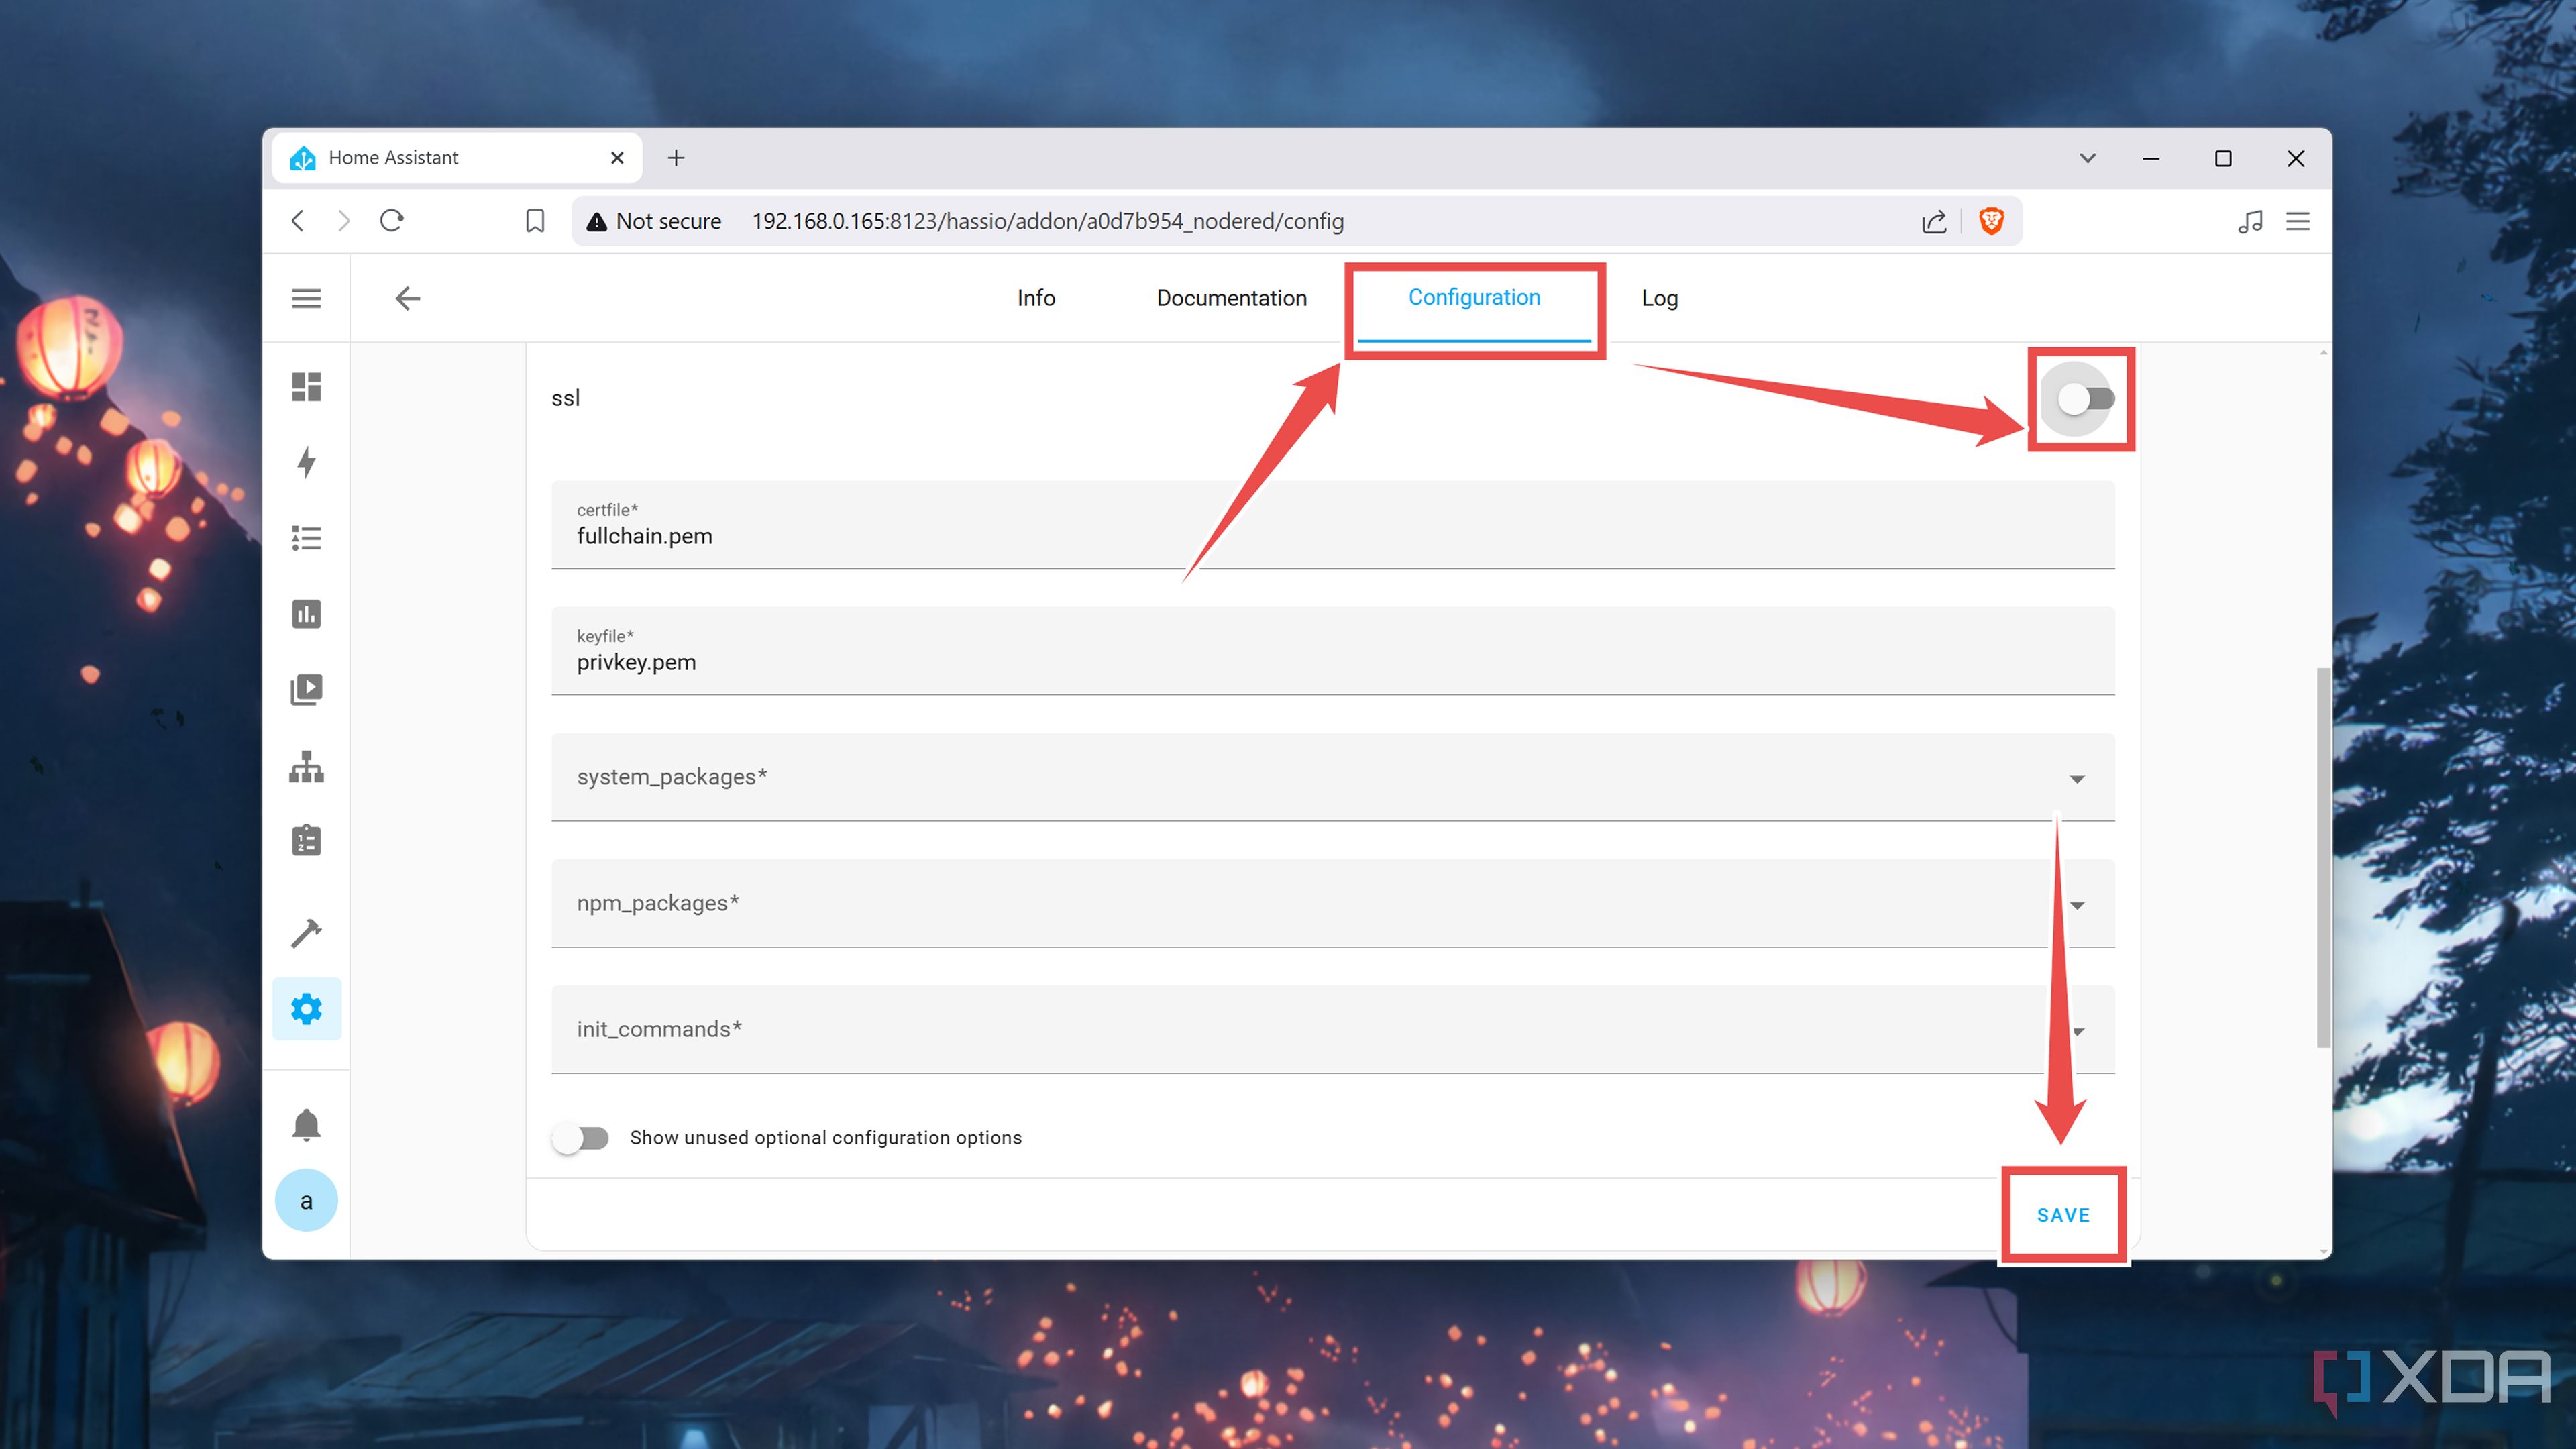
(Optional) If you haven’t set up proper SSL certificates for your Home Assistant system, the Node-RED add-on won’t boot. To fix this, you can navigate to the Configuration tab, disable the checkbox next to SSL, and hit Save.
-
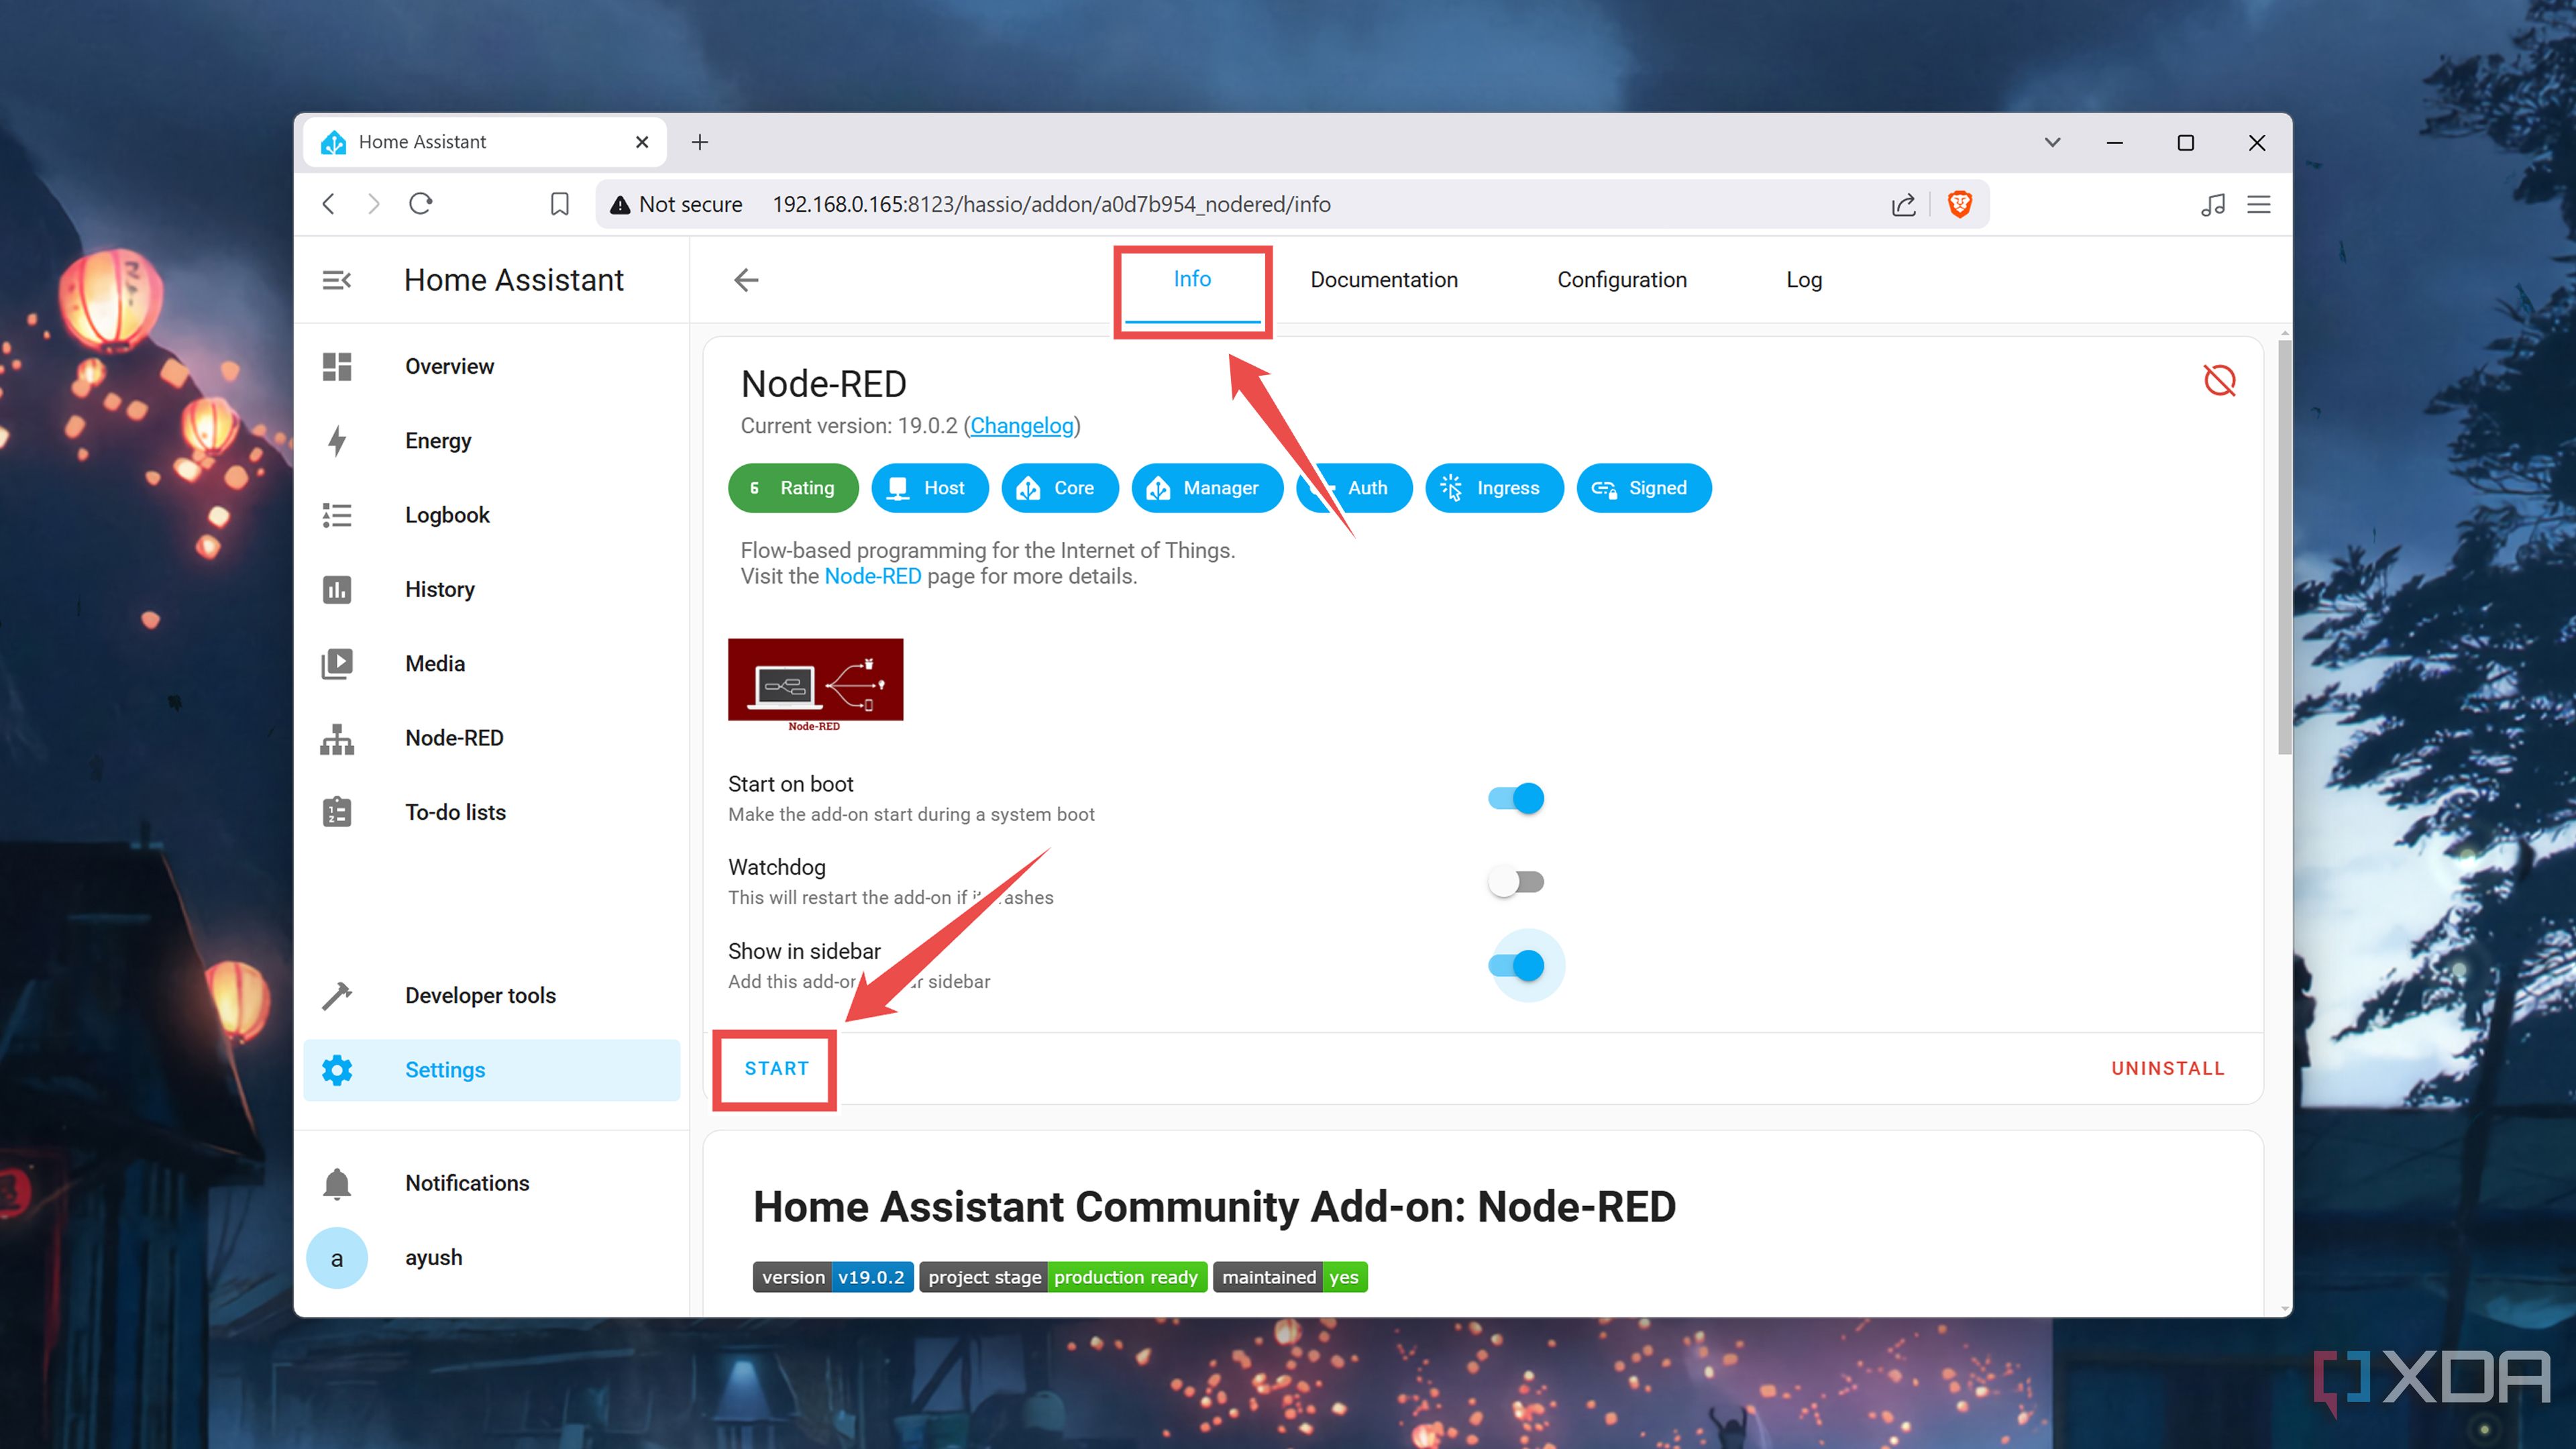
Switch back to the Info tab and tap Start.
-
Select Open Web UI to access the Node-RED interface.


But if you’re running Home Assistant inside a container or are using the Core version of the service, you won’t be able to access the Add-on Store. A simple solution involves deploying Node-RED as a container and linking it with your containerized HASS instance. Assuming you’ve set up Docker beforehand,
- Open the terminal app bundled with your OS.
-
Execute the docker pull command to grab the Node-RED image,
sudo docker pull nodered/node-red

-
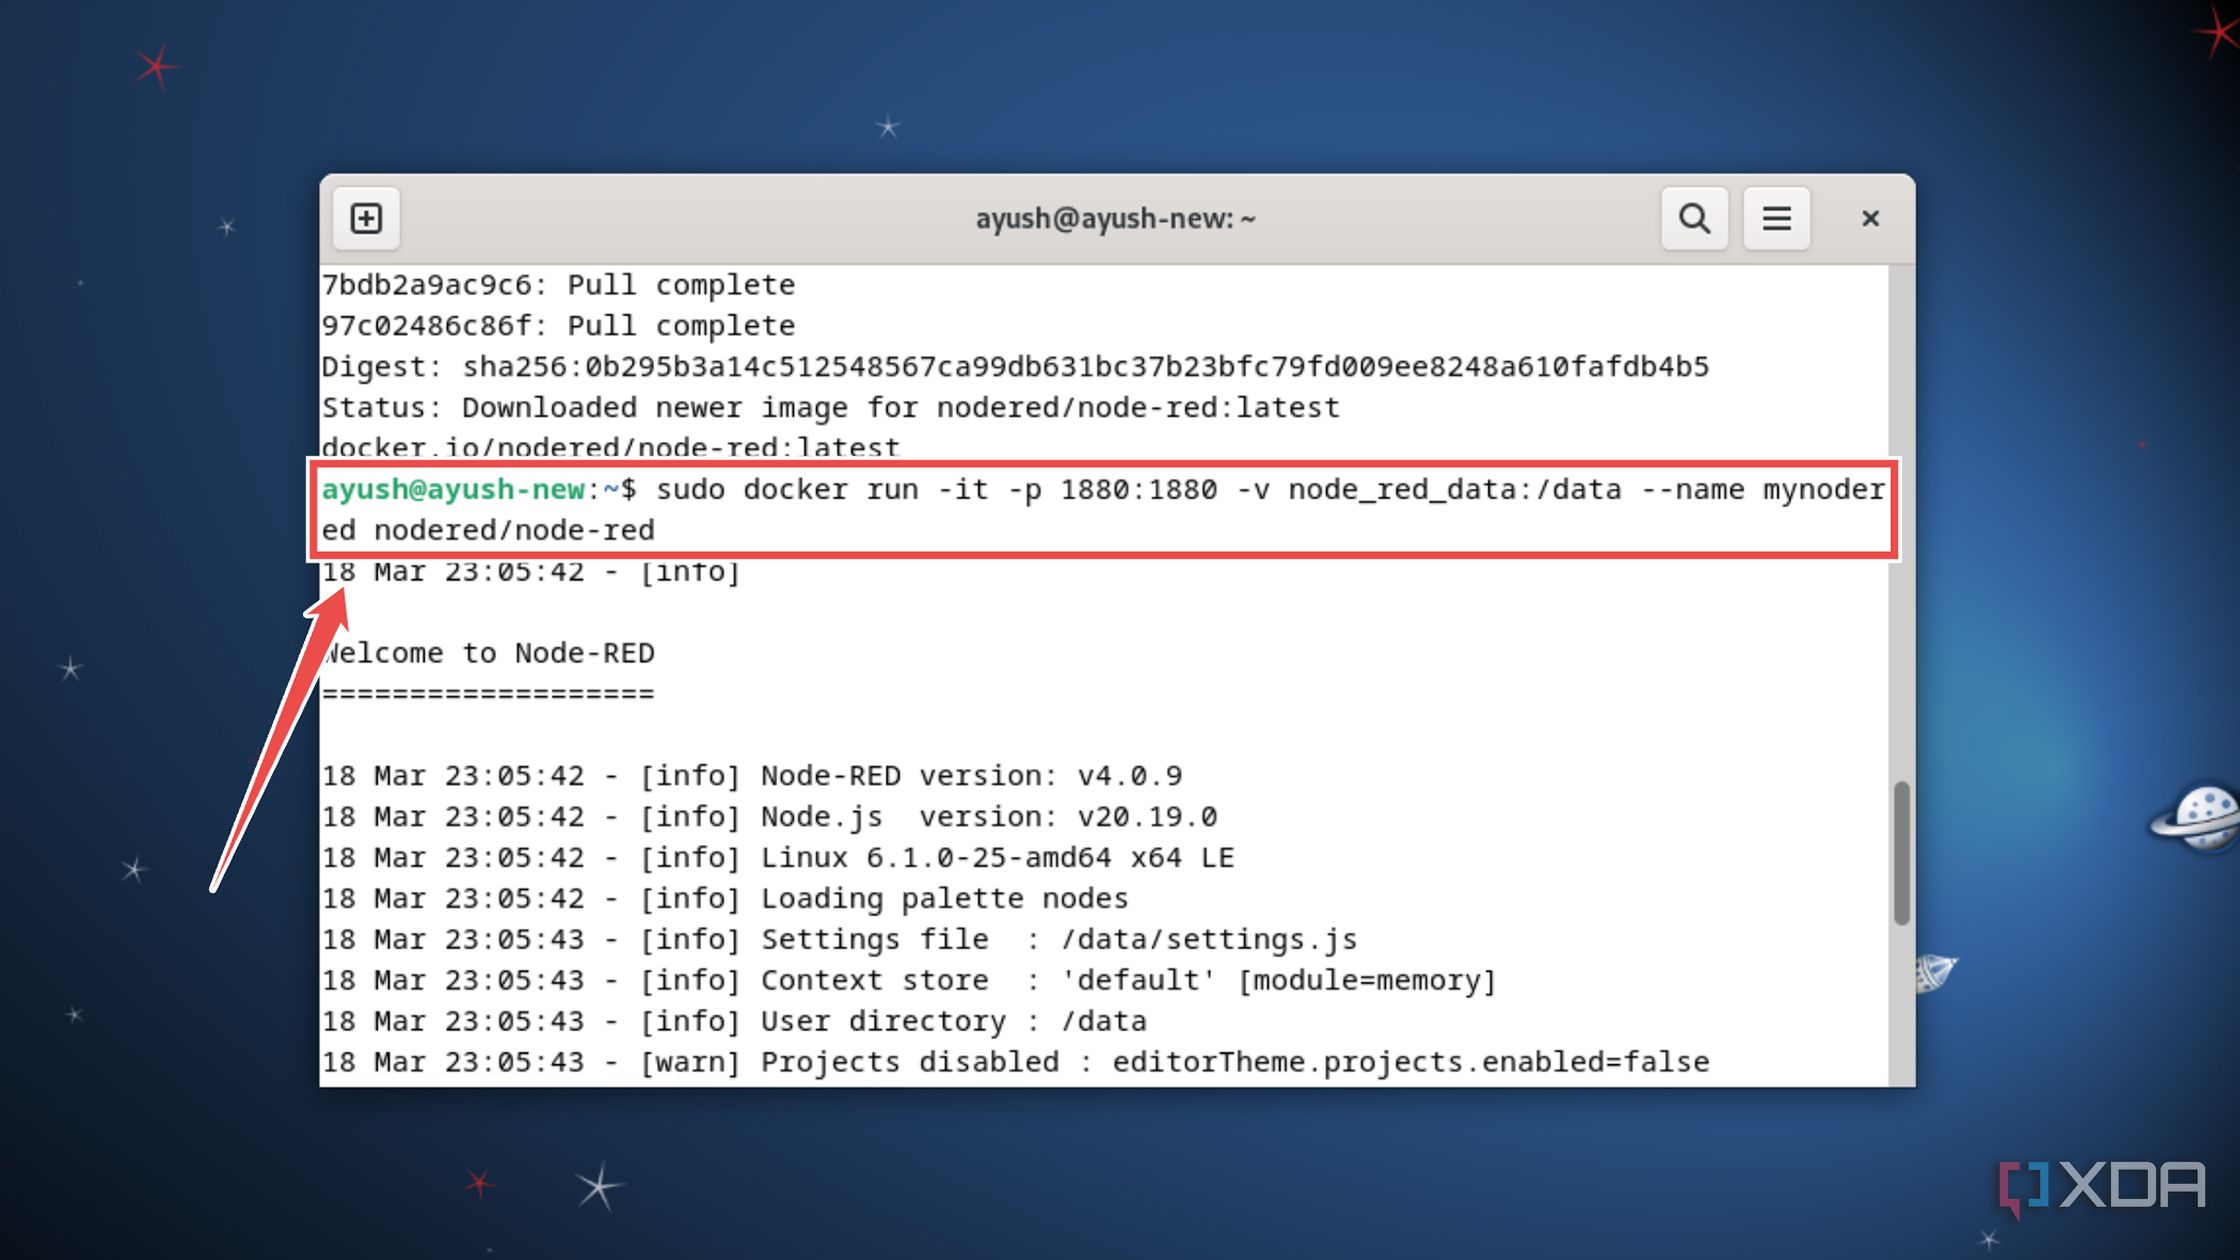
Deploy the Node-RED container using the docker run command with a couple of arguments.
sudo docker run -it -p 1880:1880 -v node_red_data:/data --name mynodered nodered/node-red
-
You can access the Node-RED web UI by entering http://localhost:1880 into a web browser.
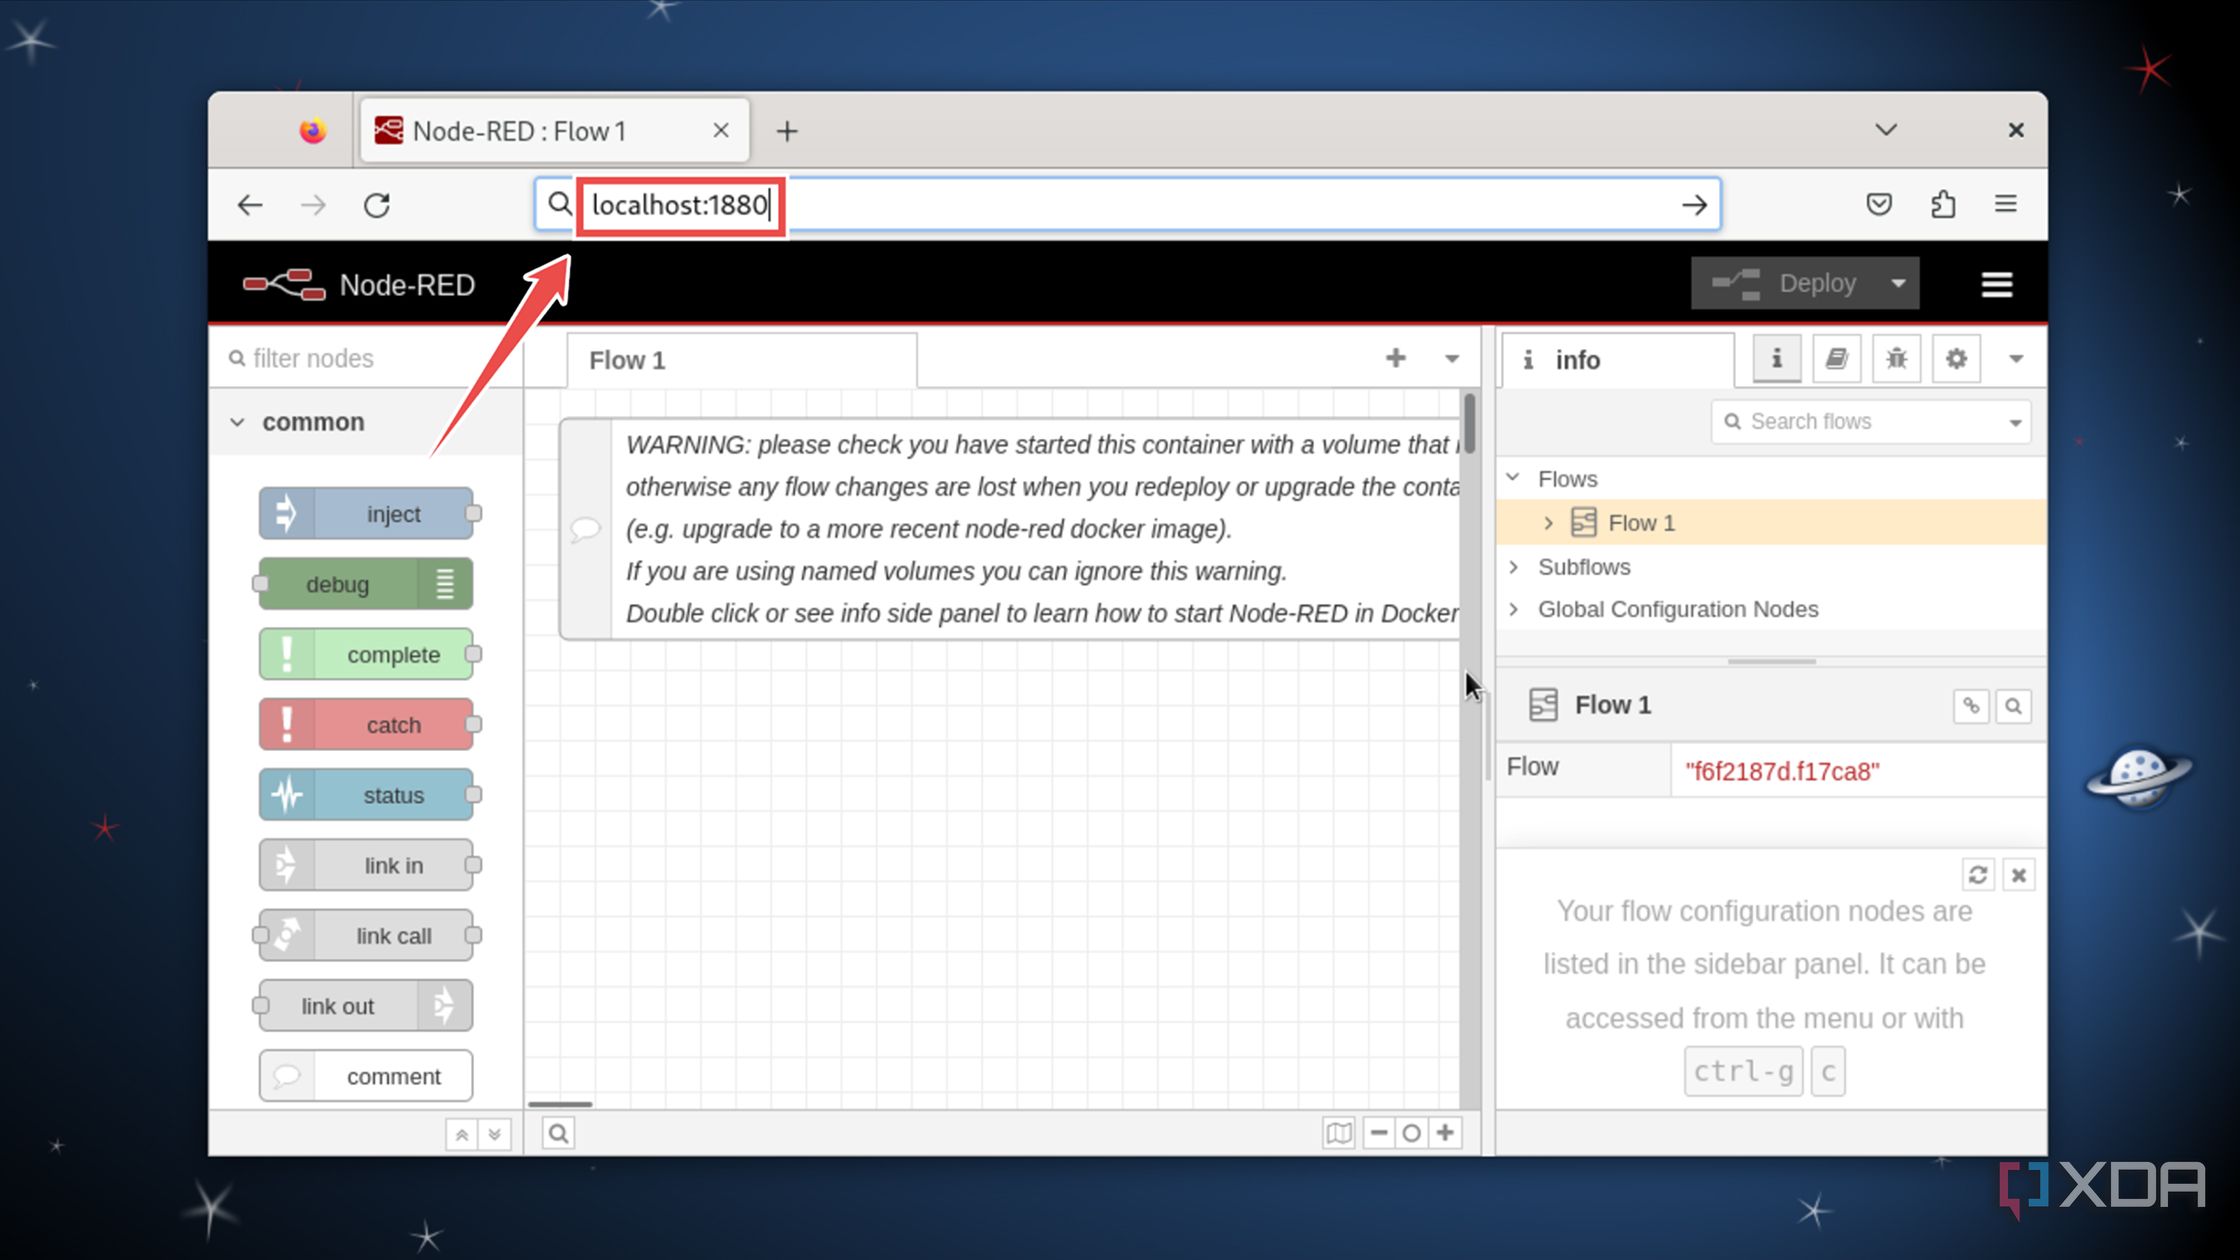
Alternatively, you can replace the localhost string with the IPv4 address of the system running the Node-RED container.
-
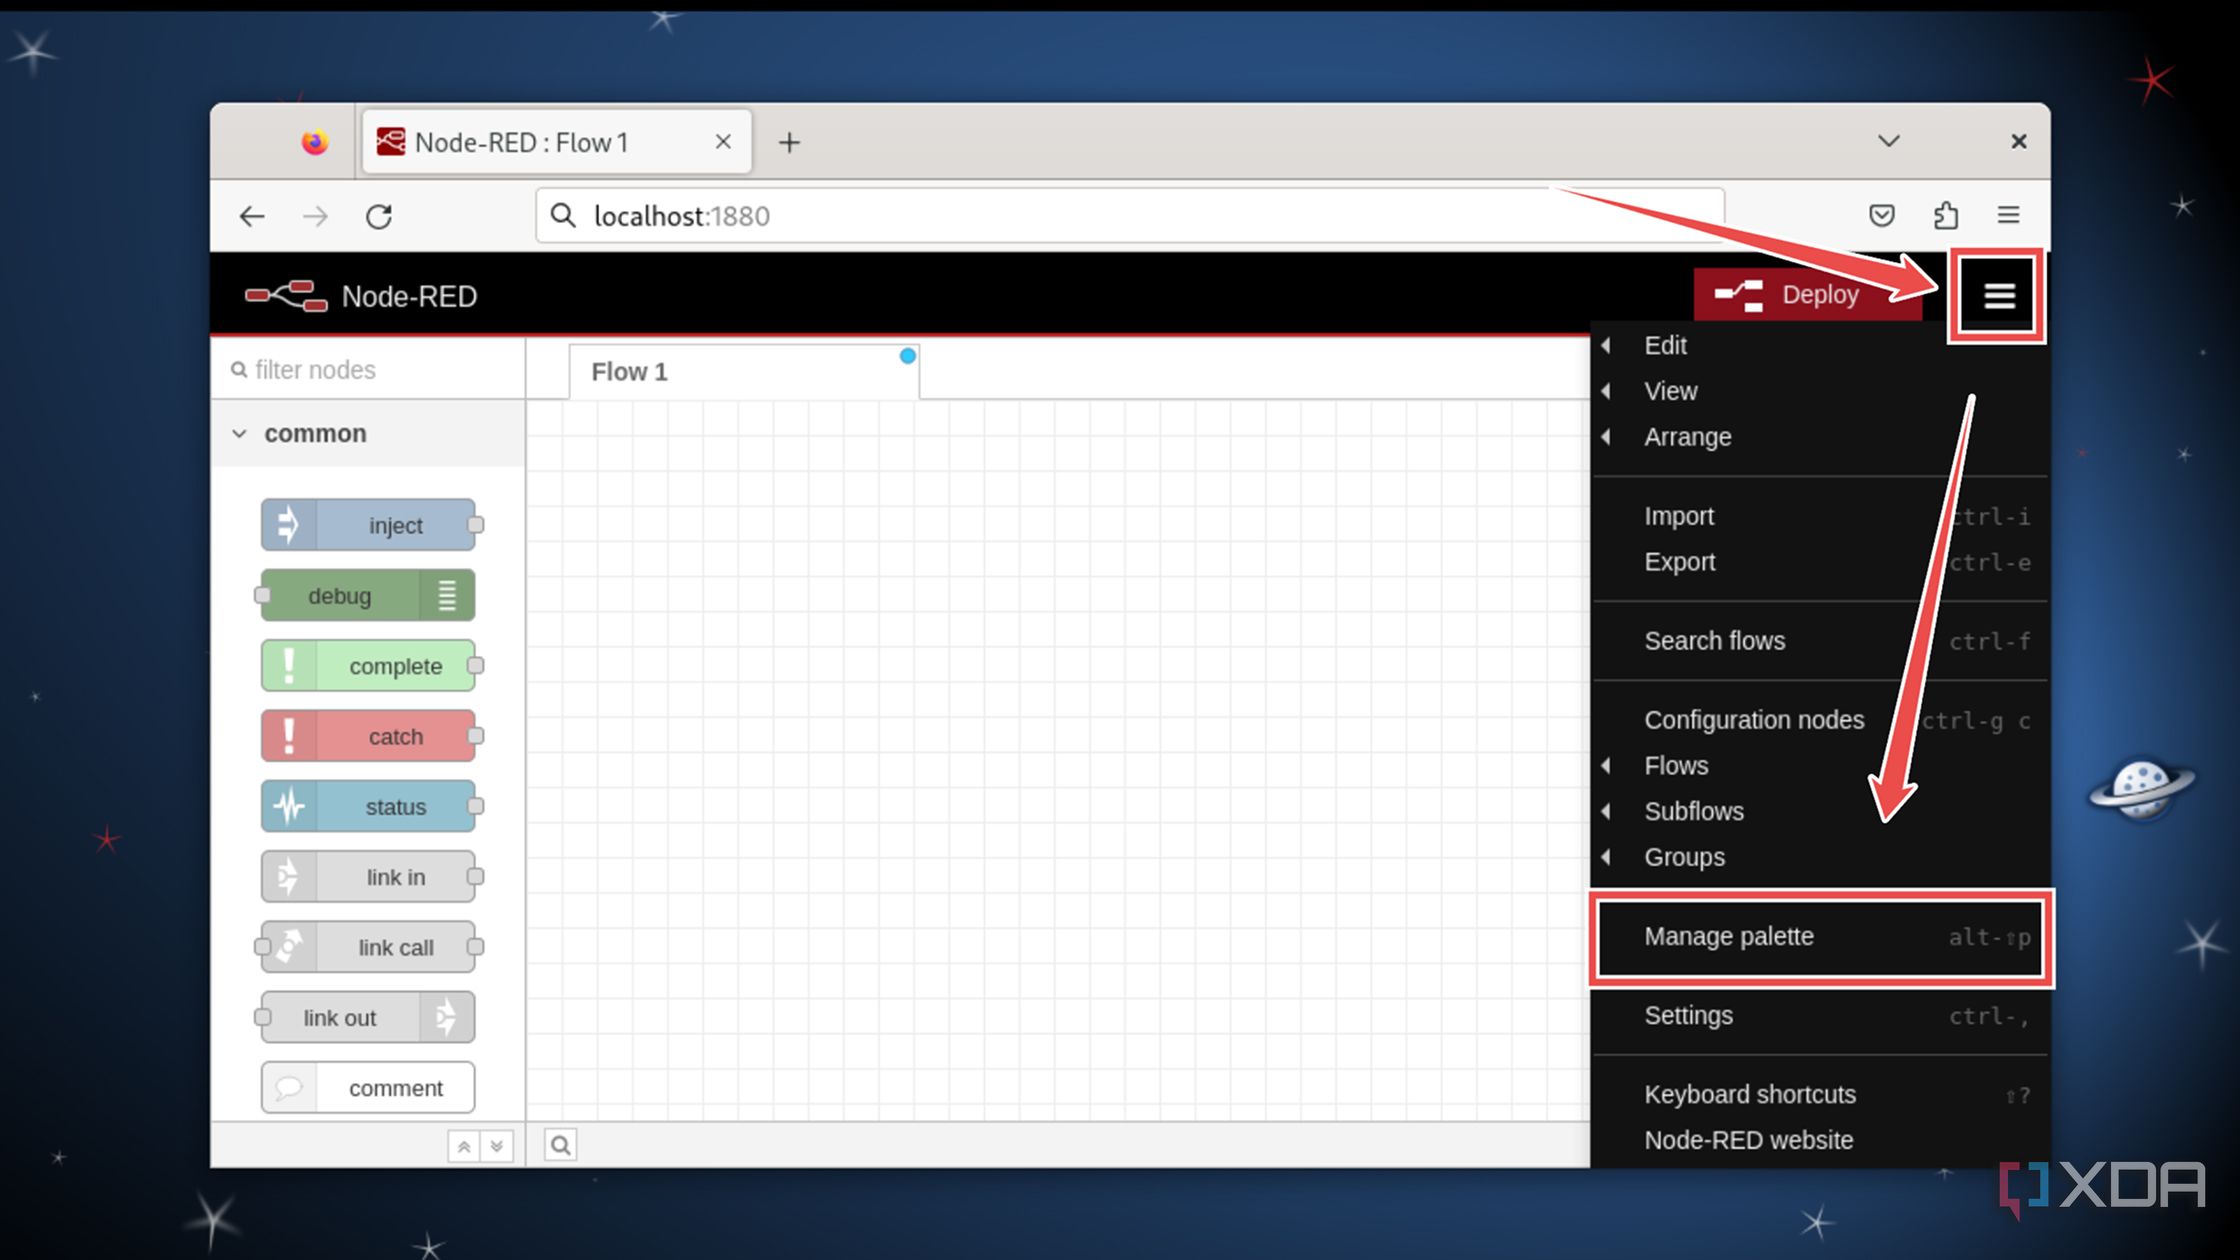
Inside the Node-RED UI, click on the menu button and select the Manage palette option.
-
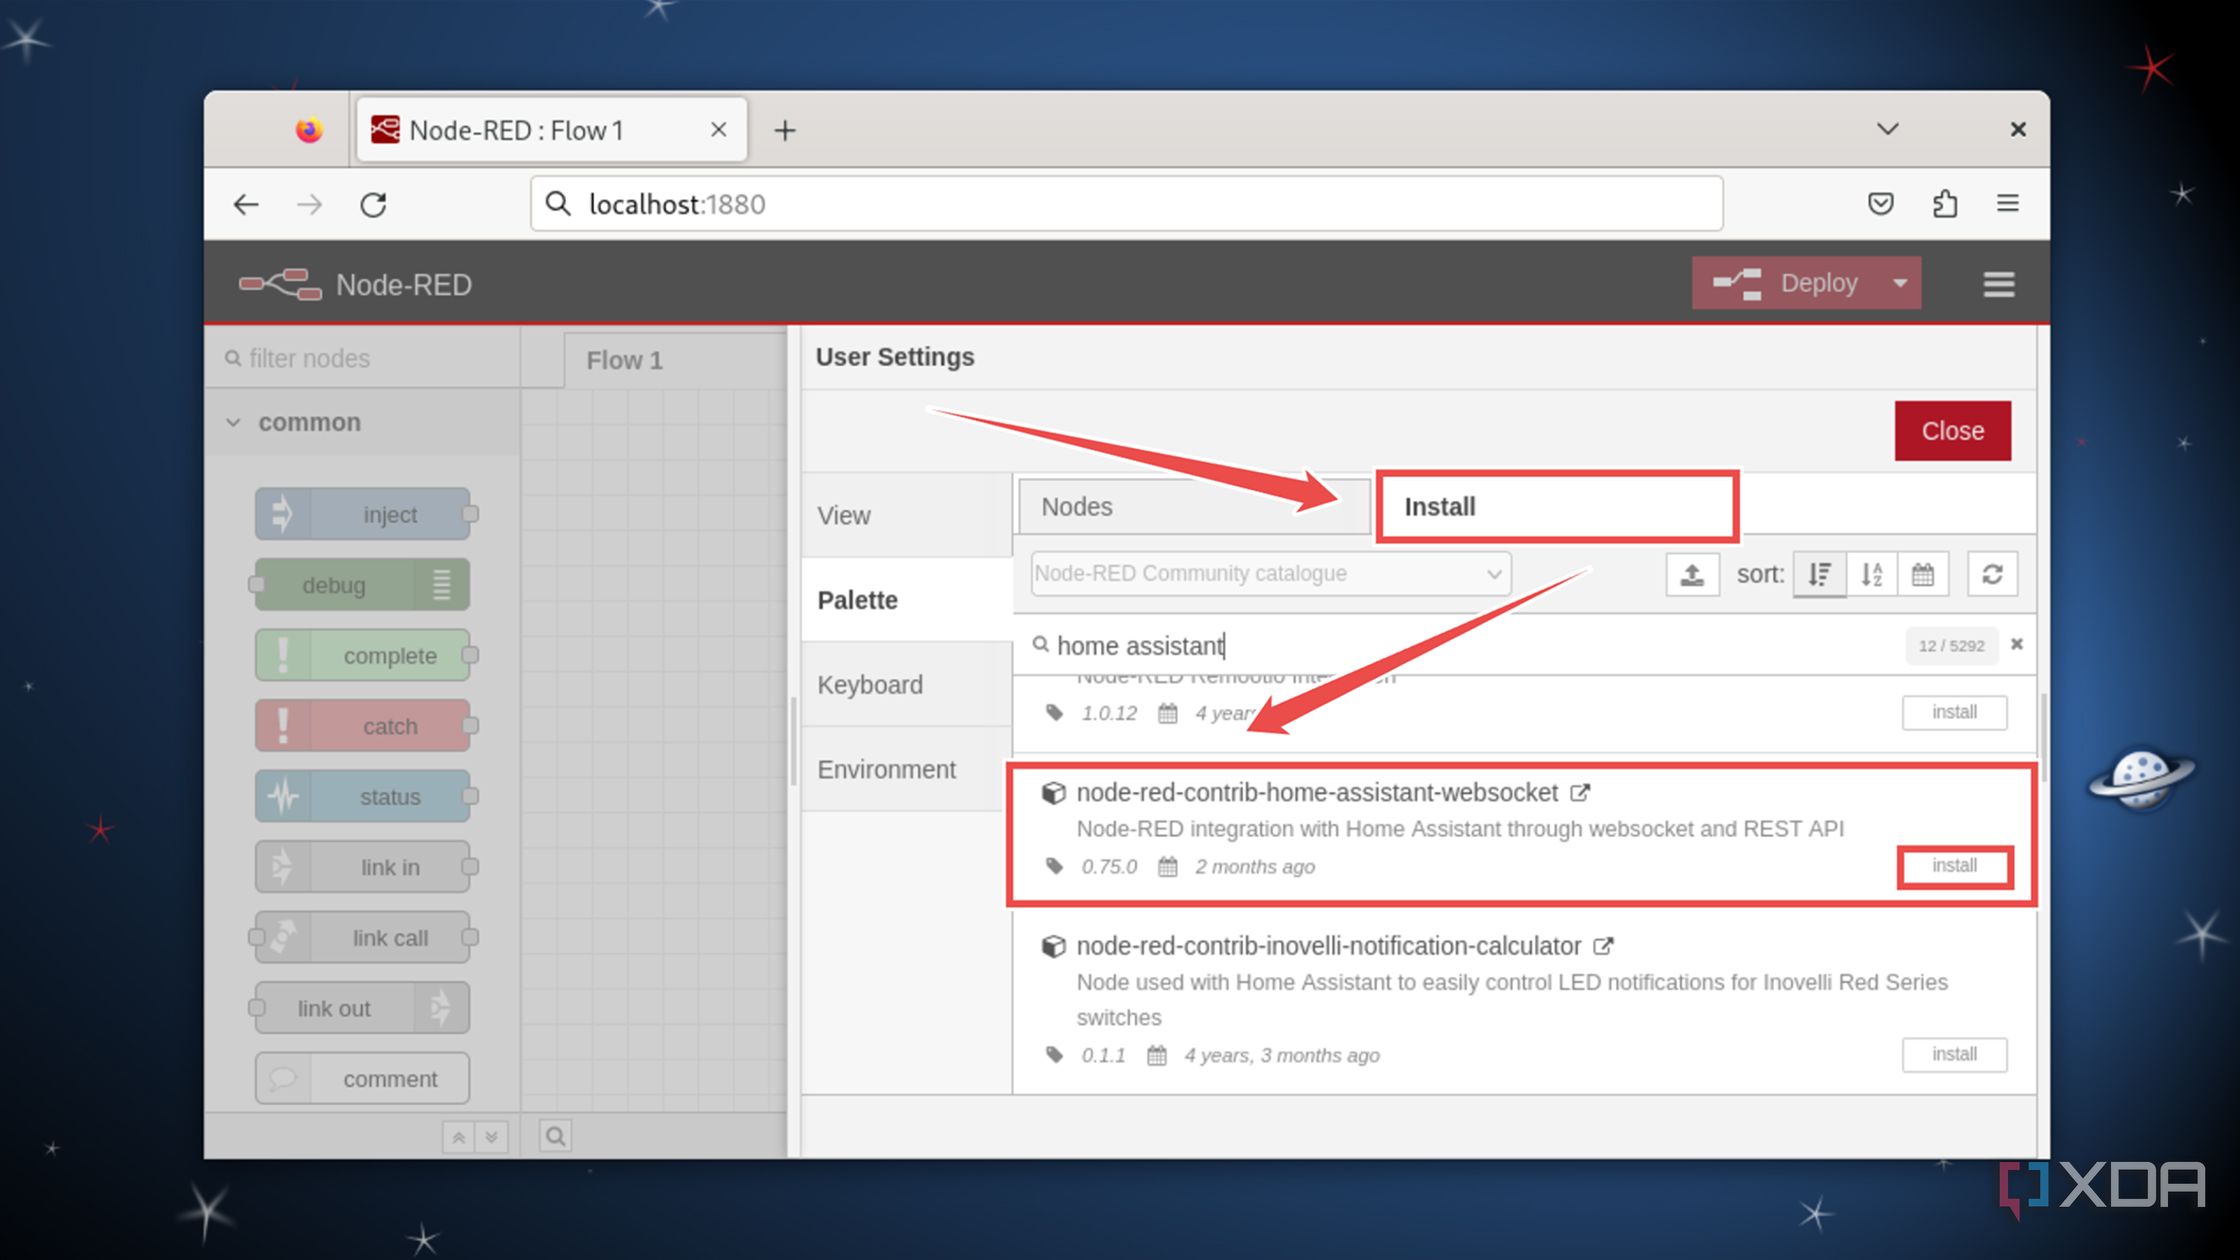
Switch to the Install tab, scroll down until you can spot node-red-contrib-home-assistant-websocket, and tap the Install button next to it.
-
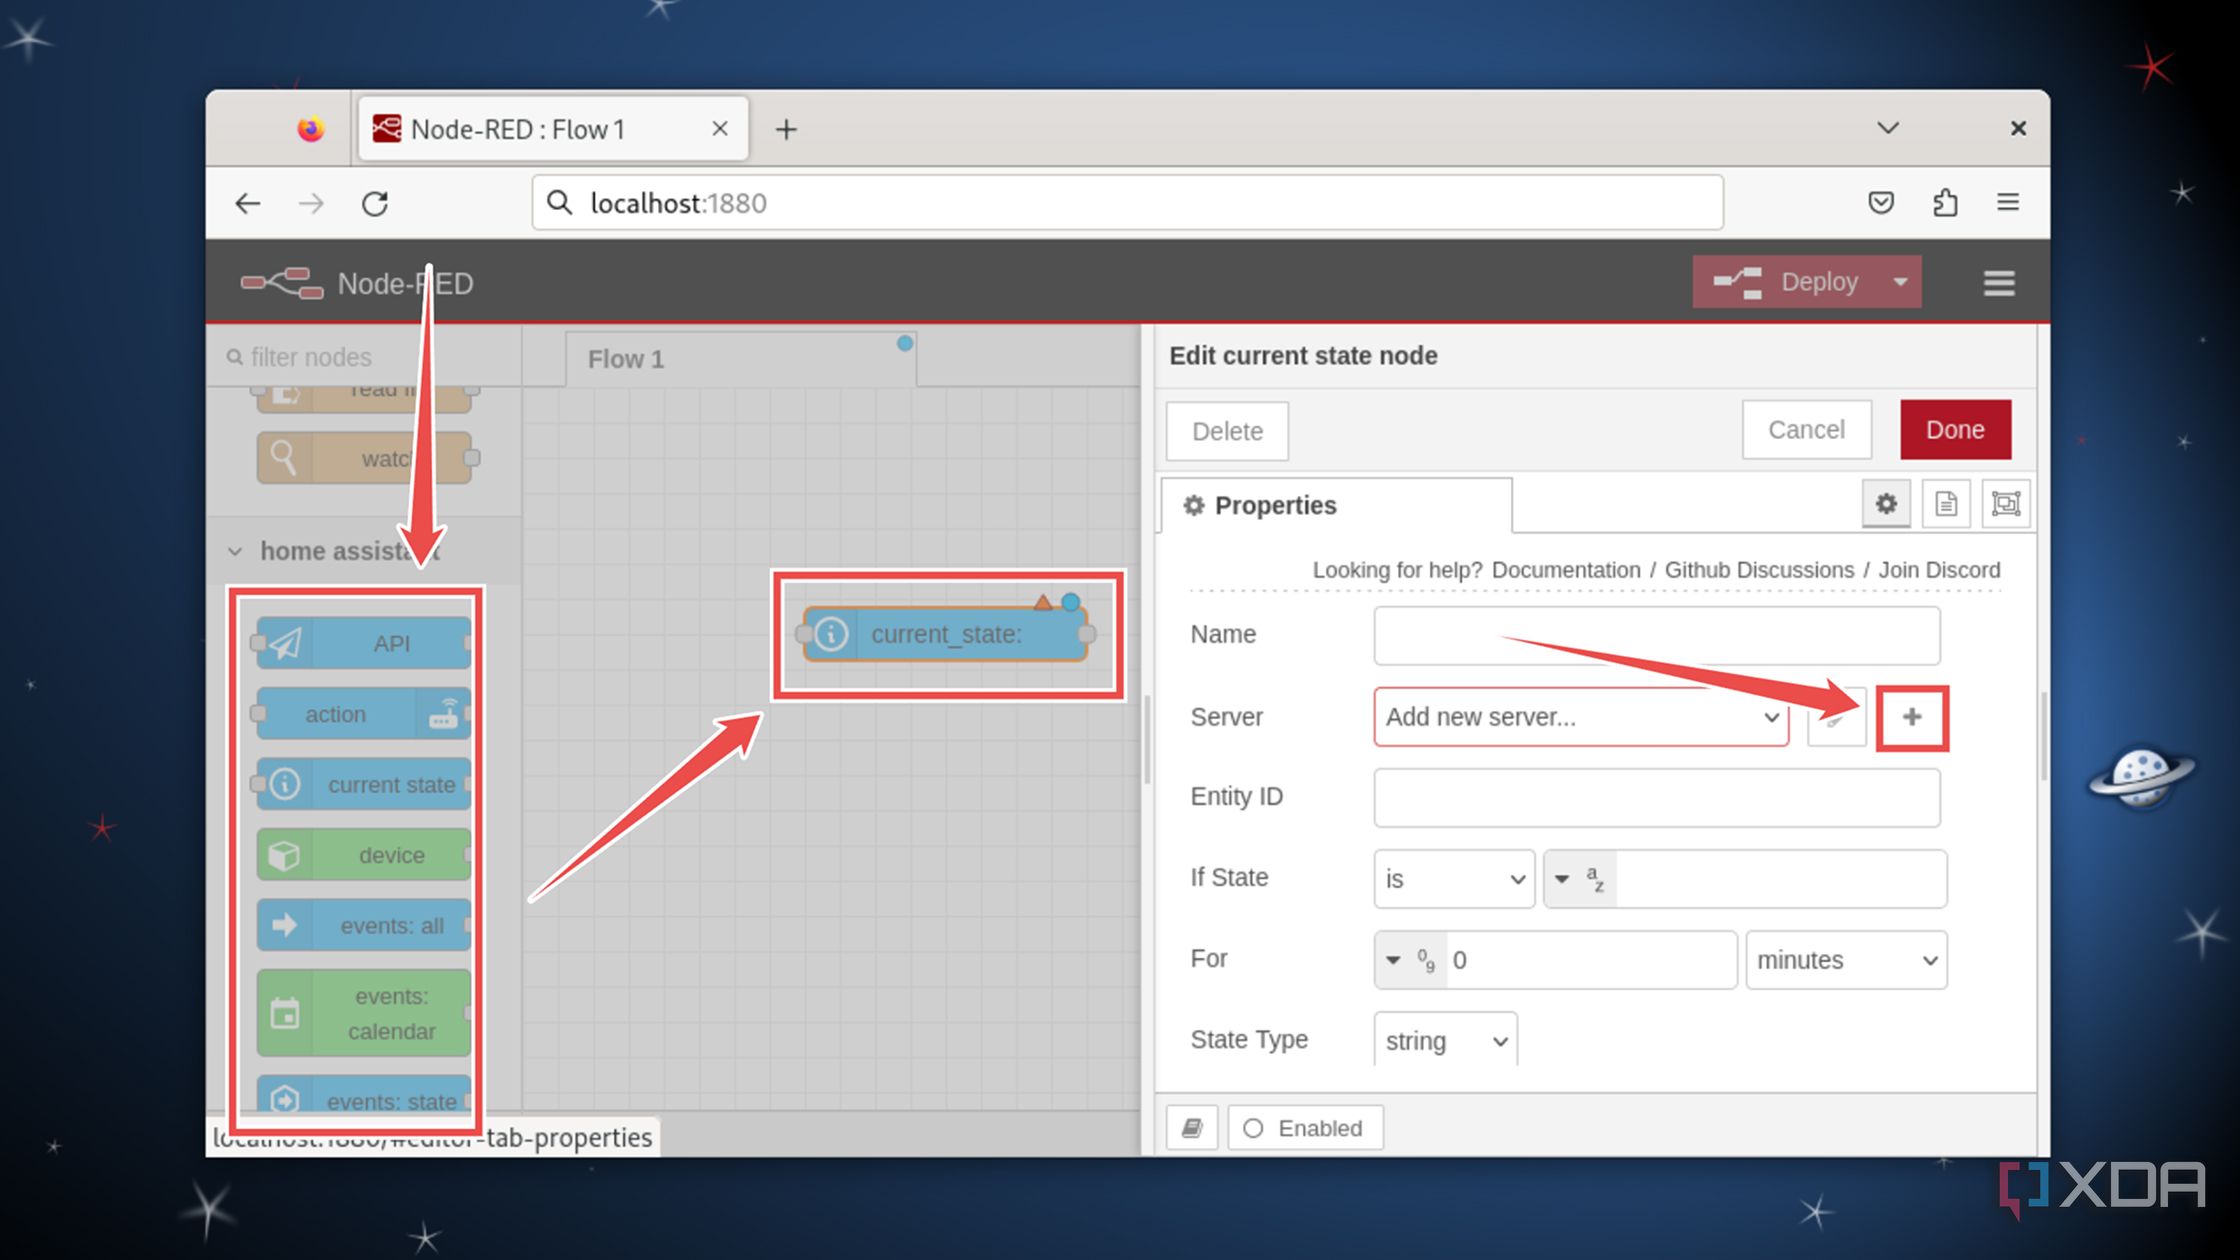
Once the template has finished installing, drag a node associated with it onto the canvas before double-clicking on it and hitting Add next to the Server parameter.
- In a separate browser window, open the web UI of your Home Assistant container.
-
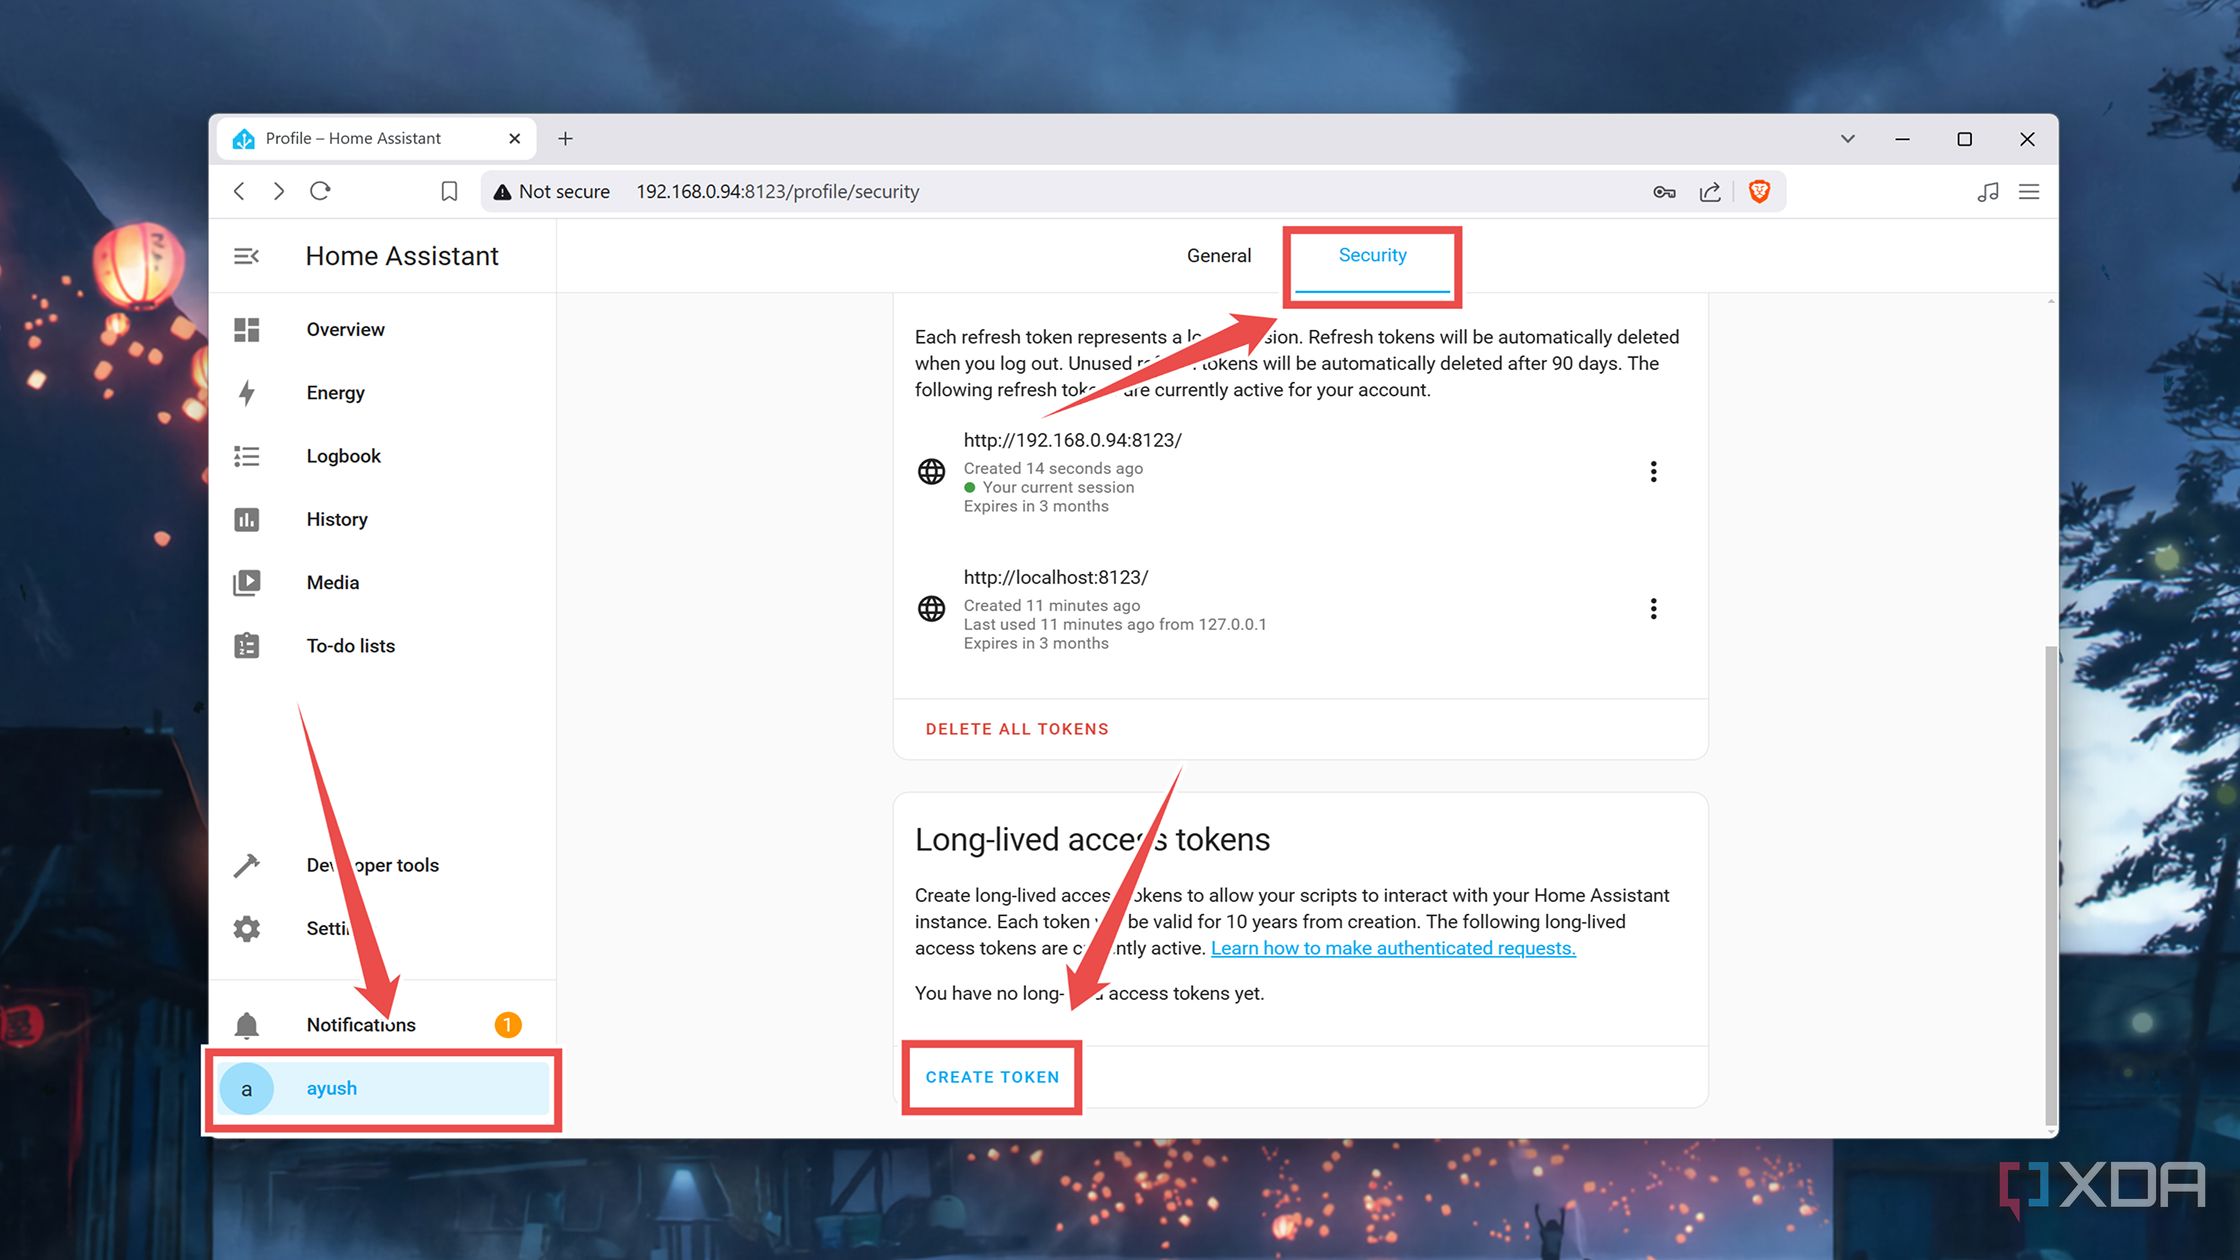
Click on the Username at the bottom of the navbar, switch to the Security tab, and click on the Create token option under Long-lived access tokens.
-
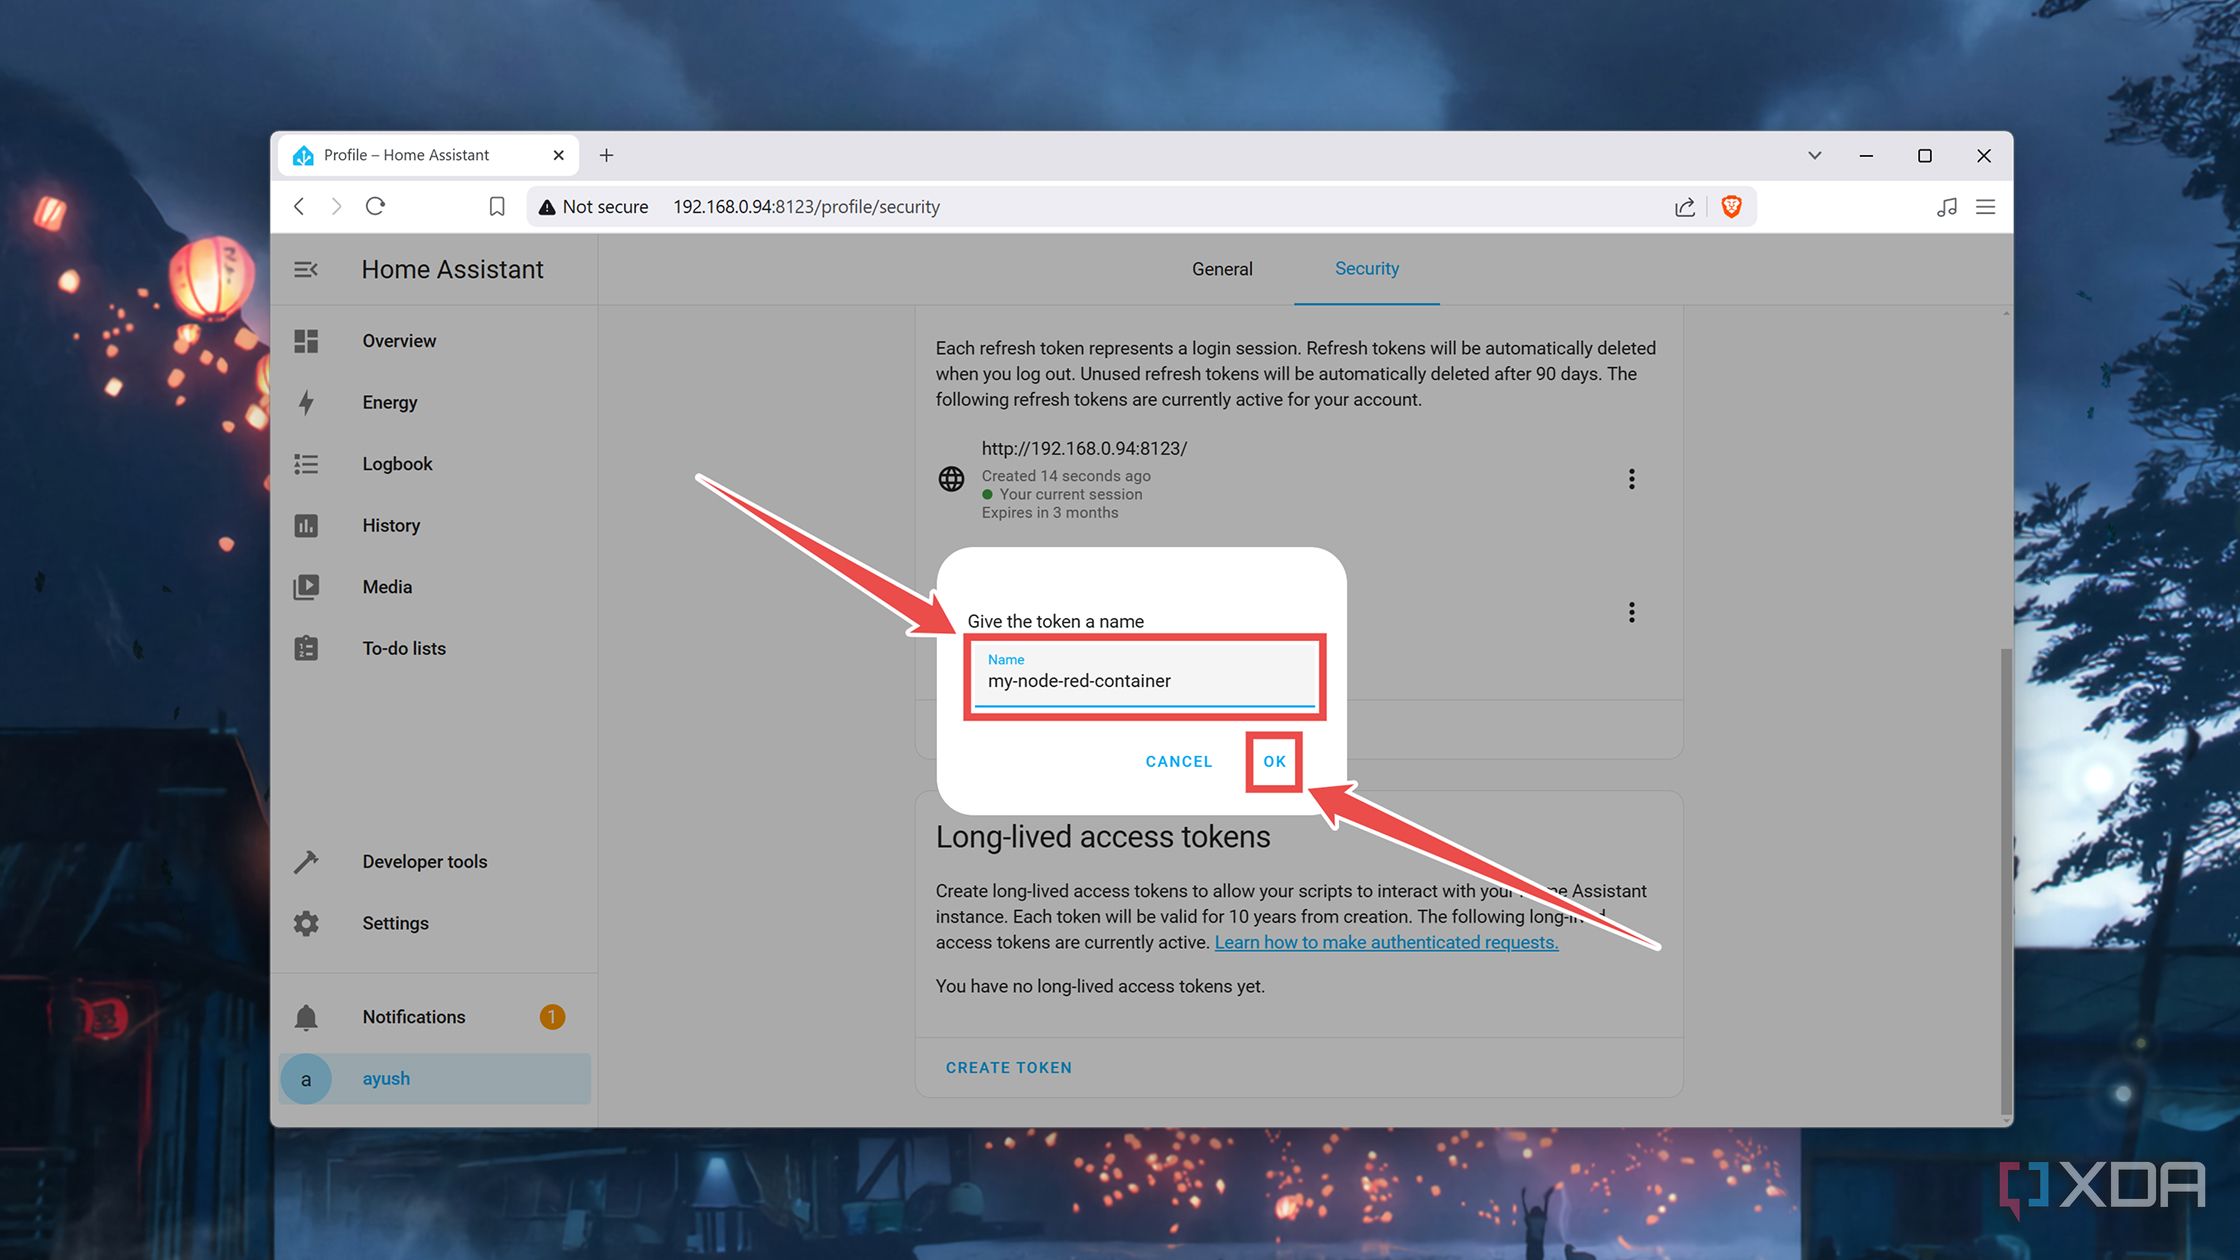
Give a Name to your token, tap OK, and copy the newly-created Access Token to your clipboard.
-
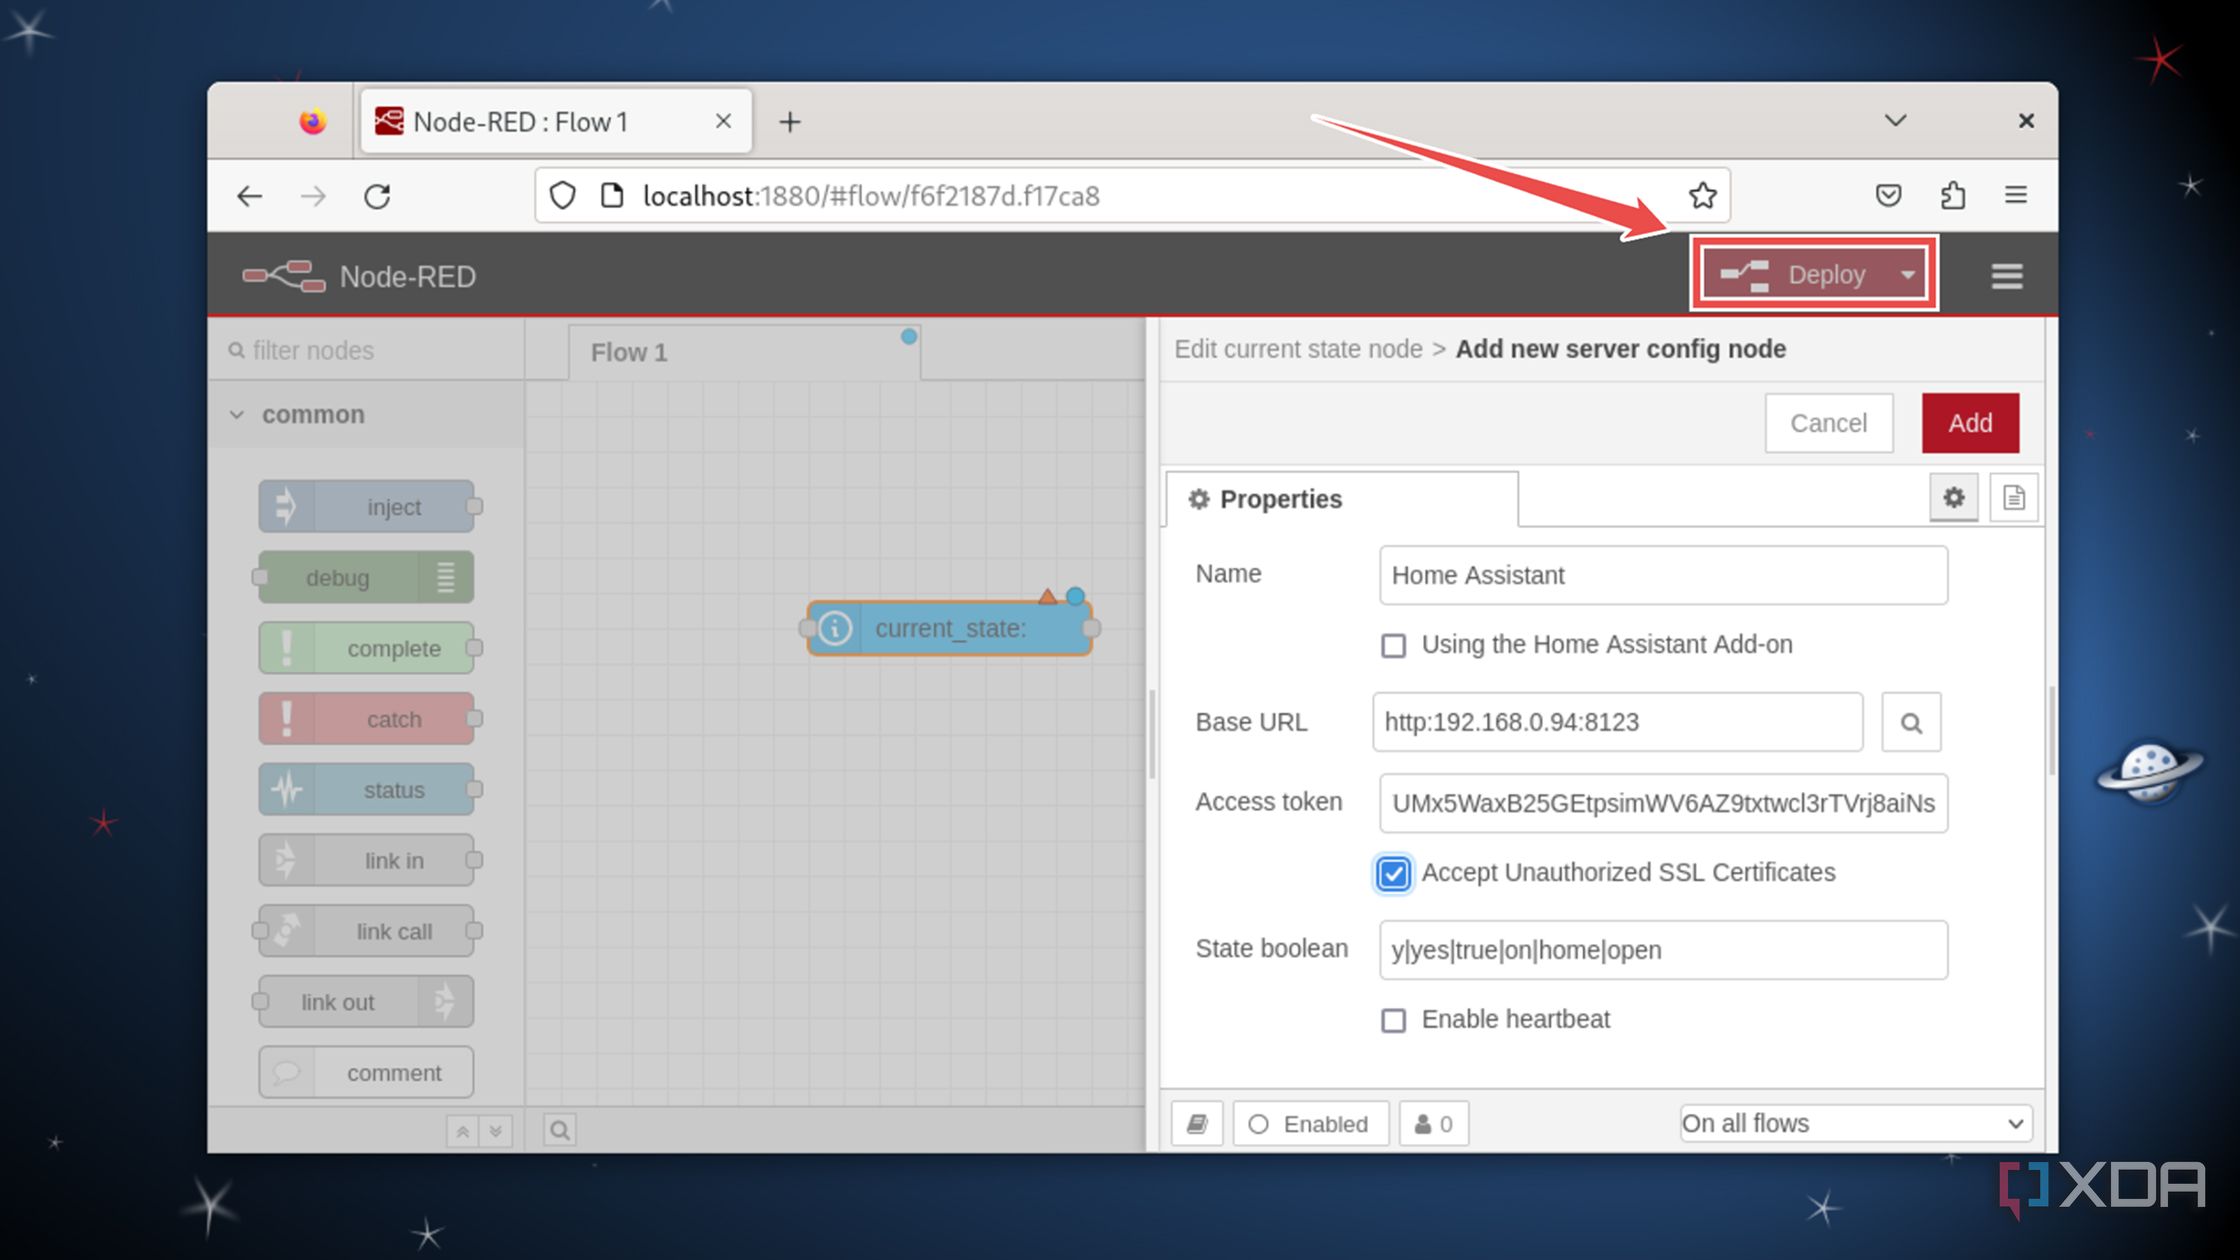
Head back to the Node-RED web UI, enter the URL of your HASS server as the Base URL, paste the Access Token you copied earlier into its respective field, and press Add.
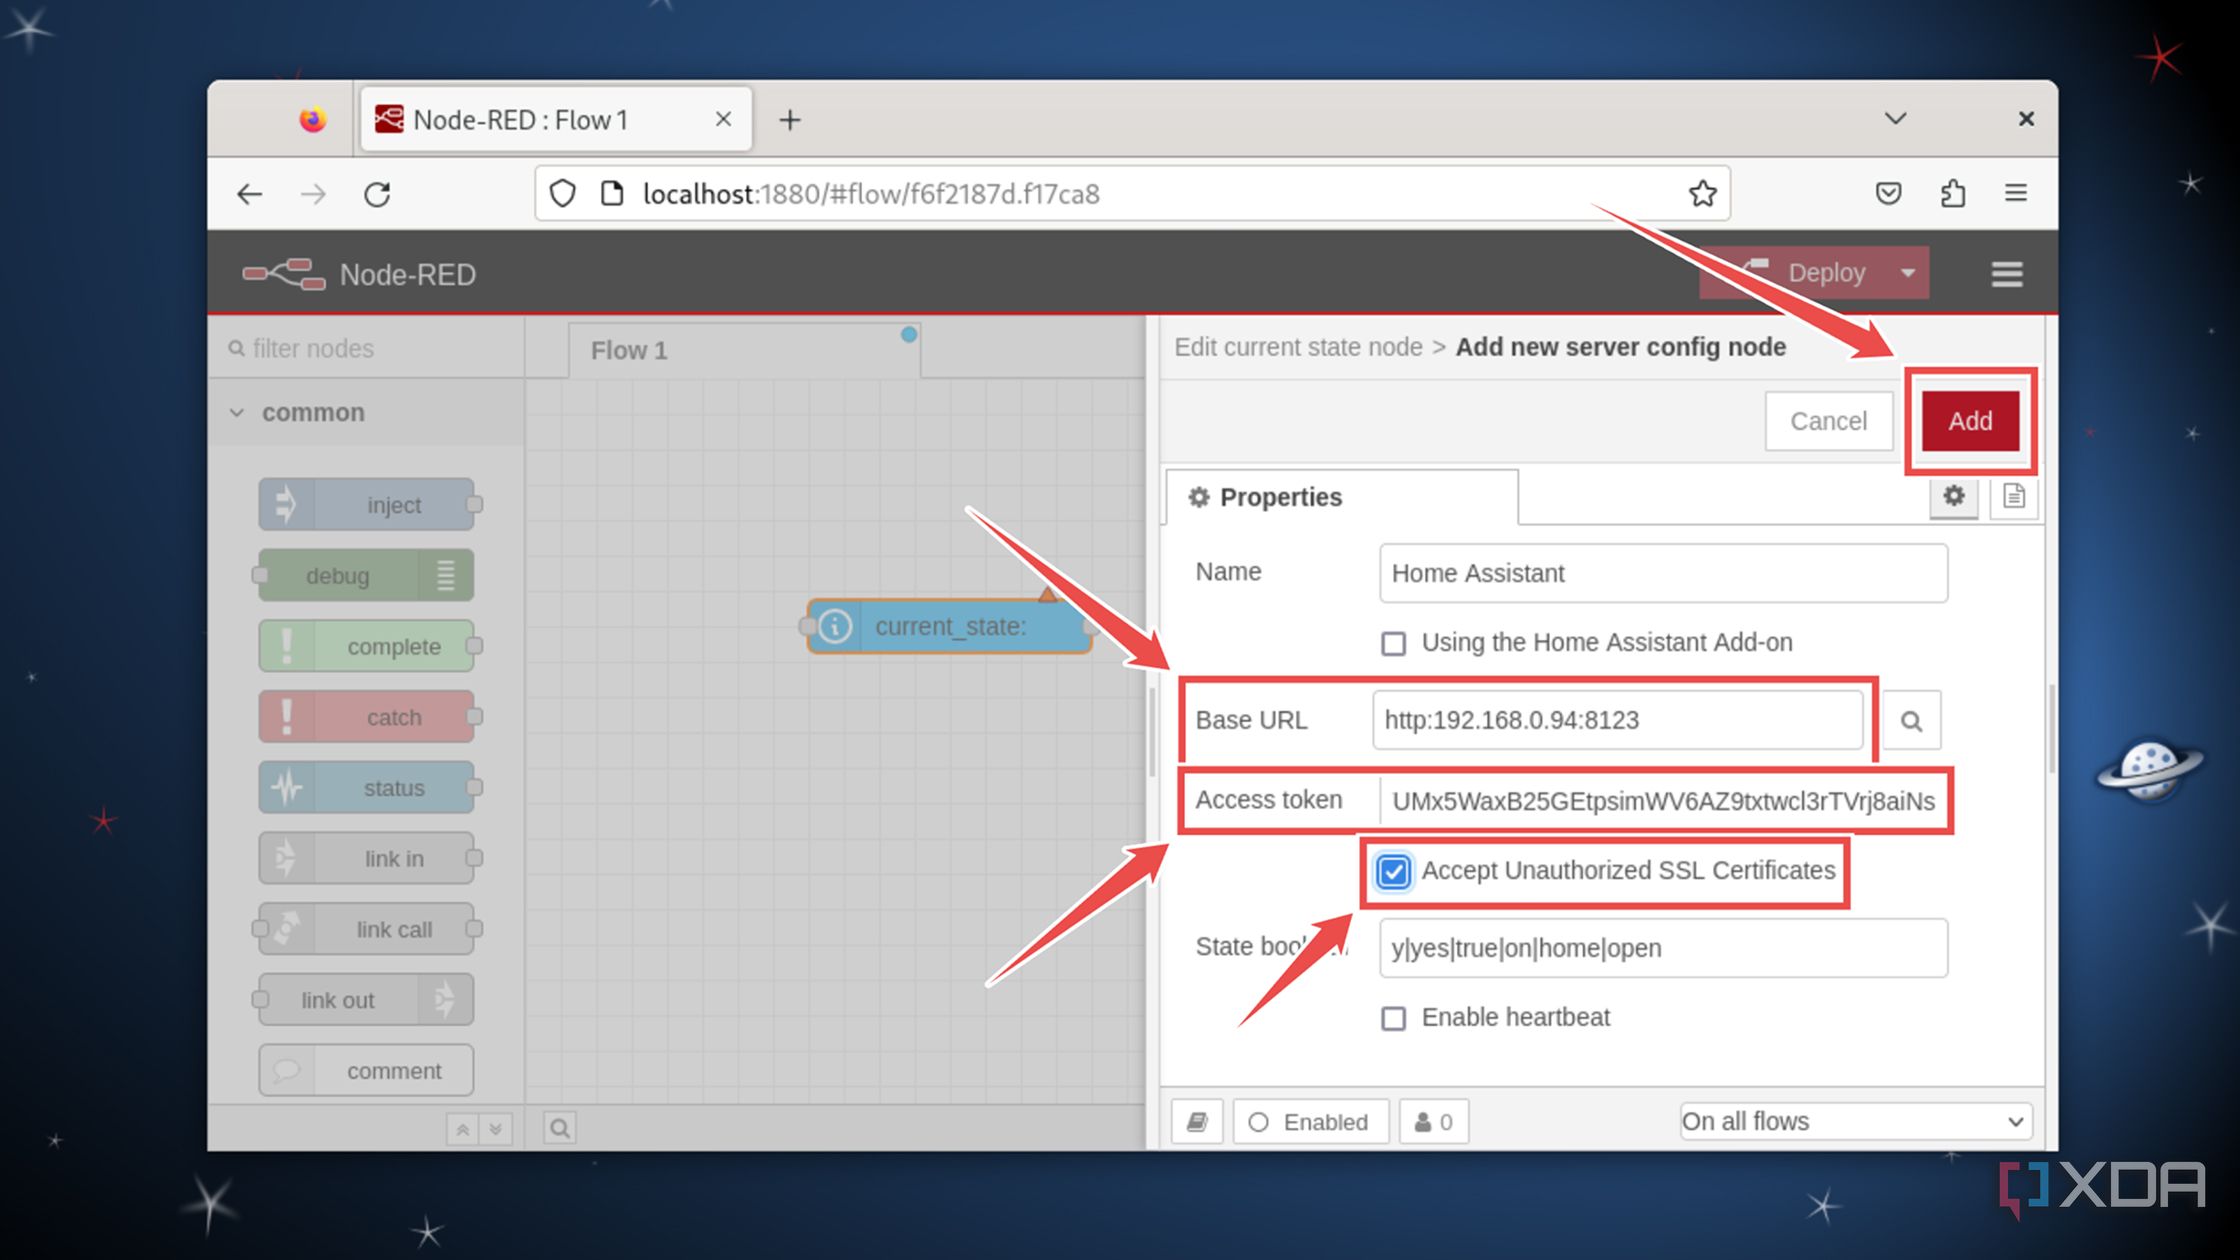
If your Home Assistant server doesn’t have proper SSL certifications, check the Accept Unauthorized SSL Certificates option.
-
Hit the Deploy button and wait for Node-RED to finish applying the changes.


Configuring Node-RED for your smart home gadgets
Regardless of the method you’ve used to set up Node-RED, its functionality and UI will be the same. If it looks too complicated, here are some pointers to help you get started with the automation tool:
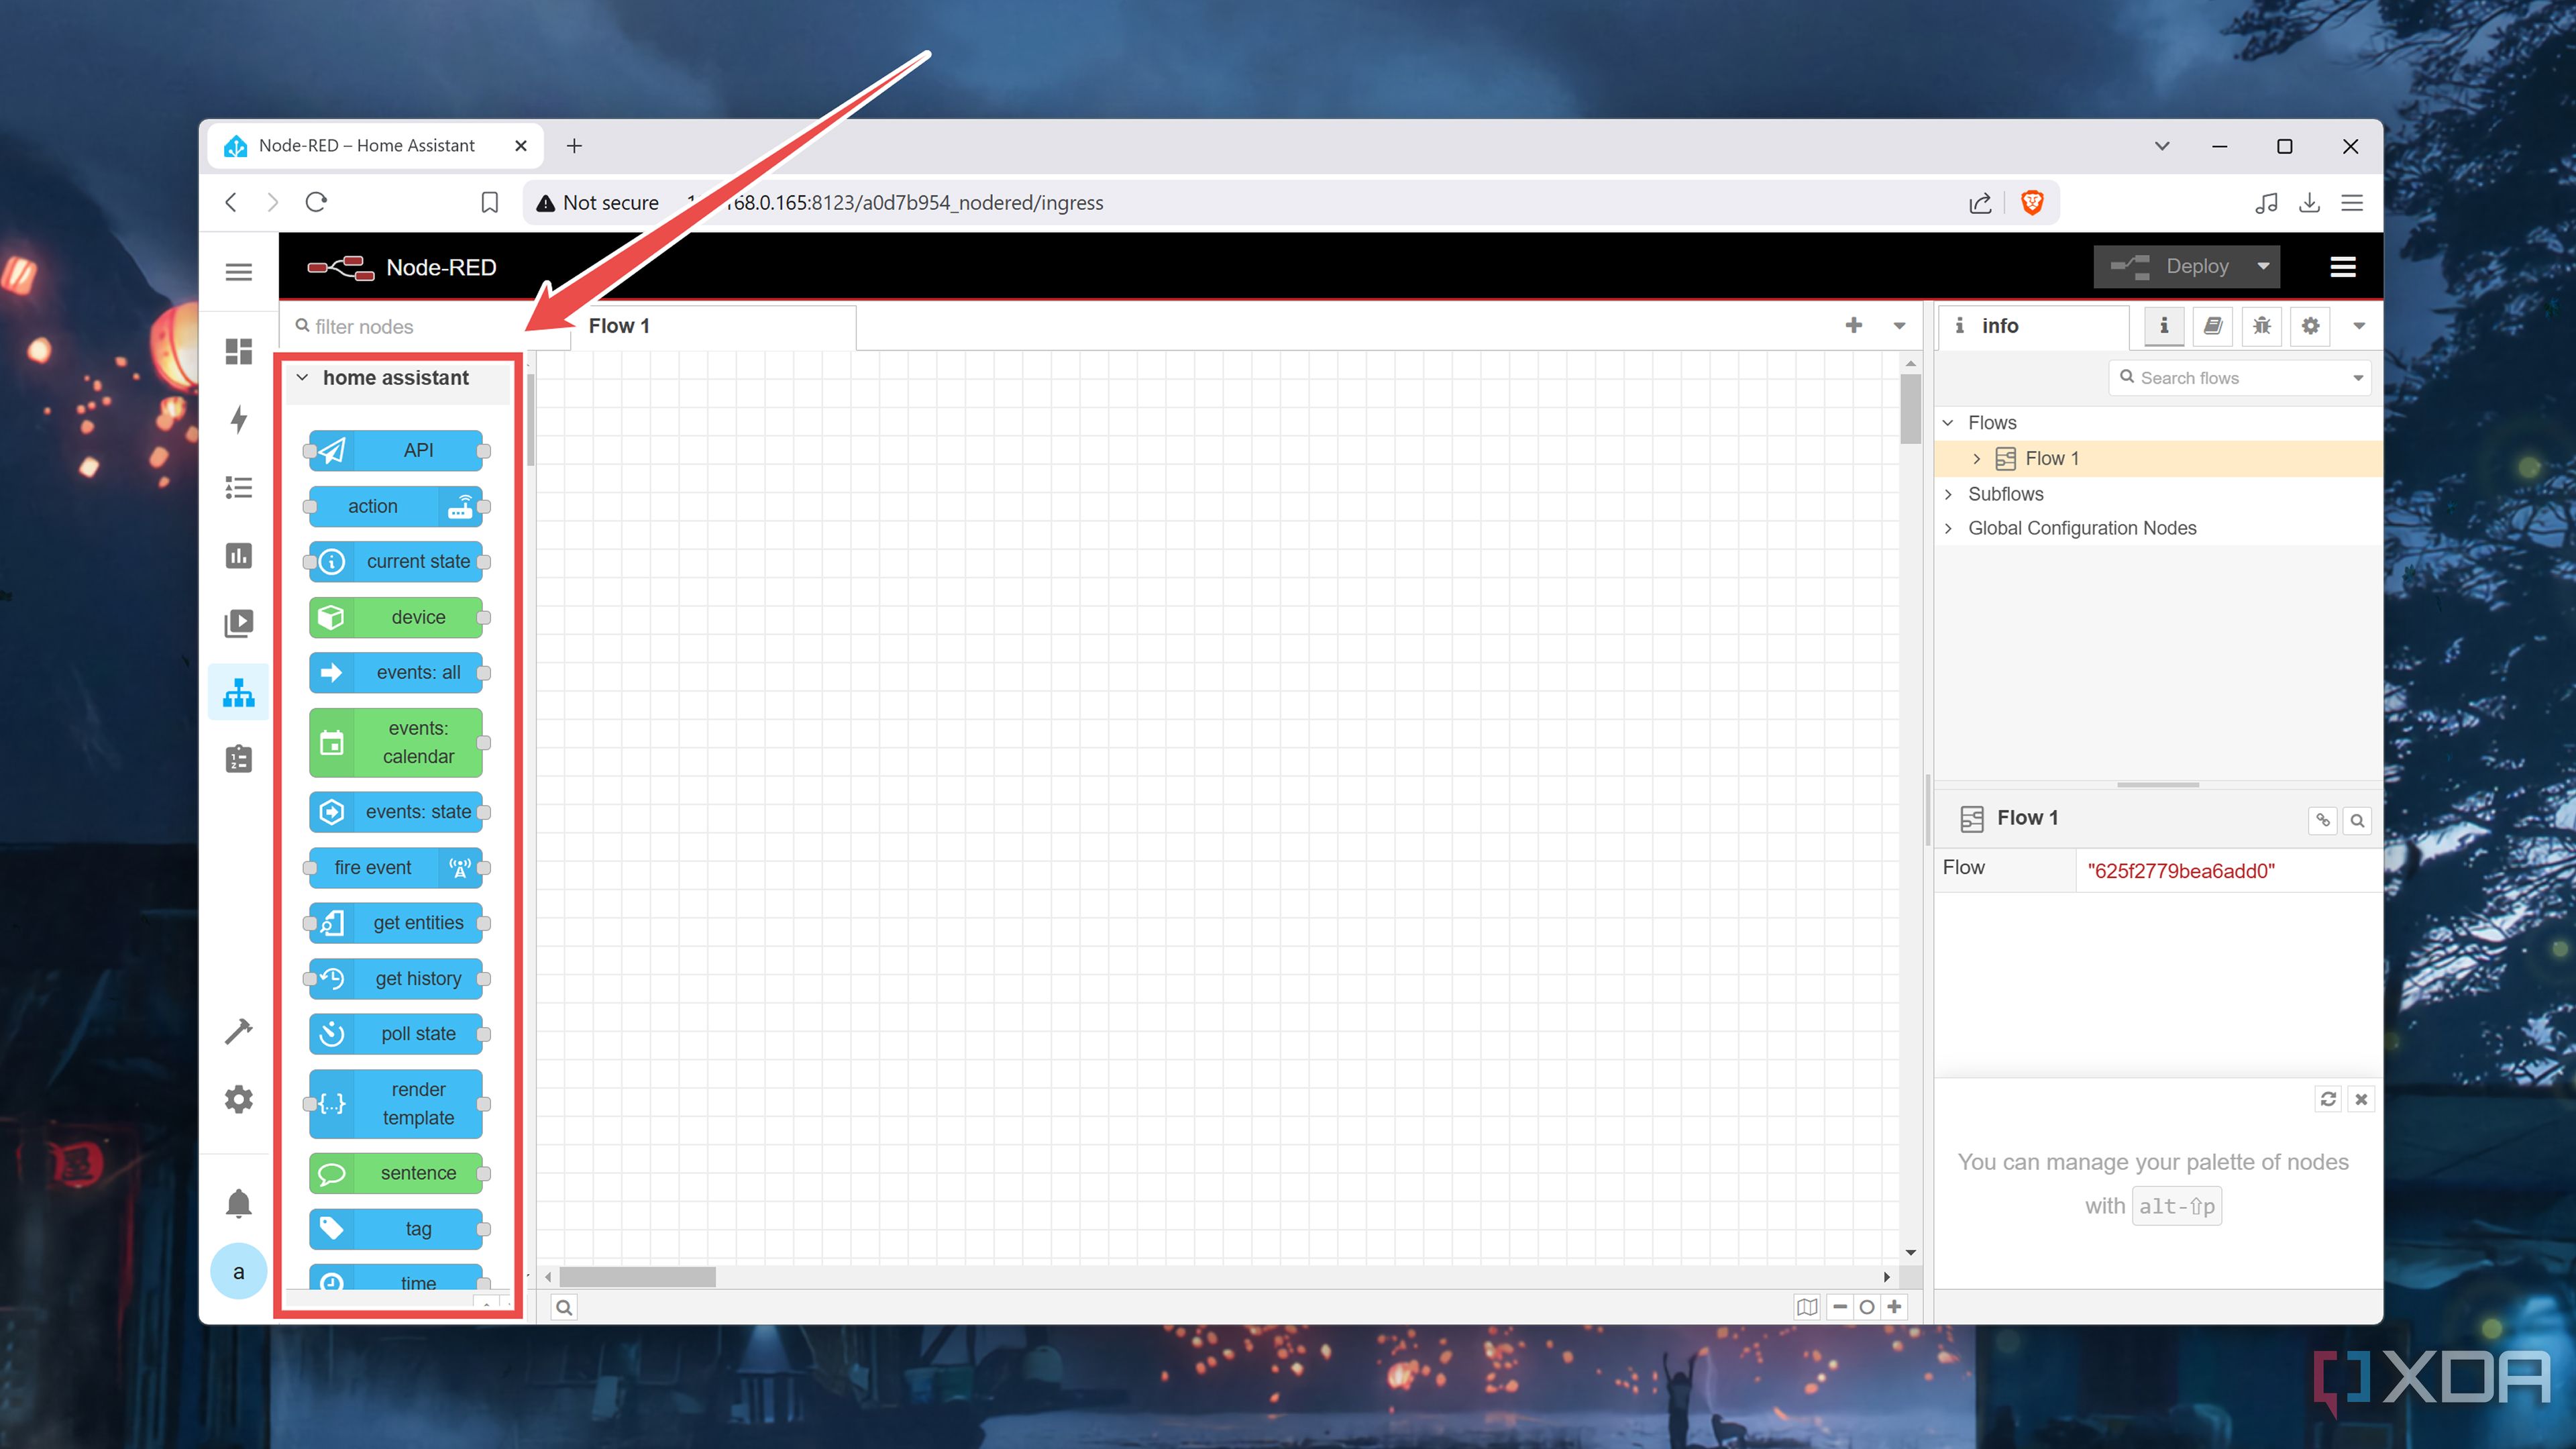
-
The left side of the Node-RED includes a variety of nodes, which use messages to communicate with each other and can perform certain actions on your HASS devices. As such, they’re the bread-and-butter of Node-RED automation.
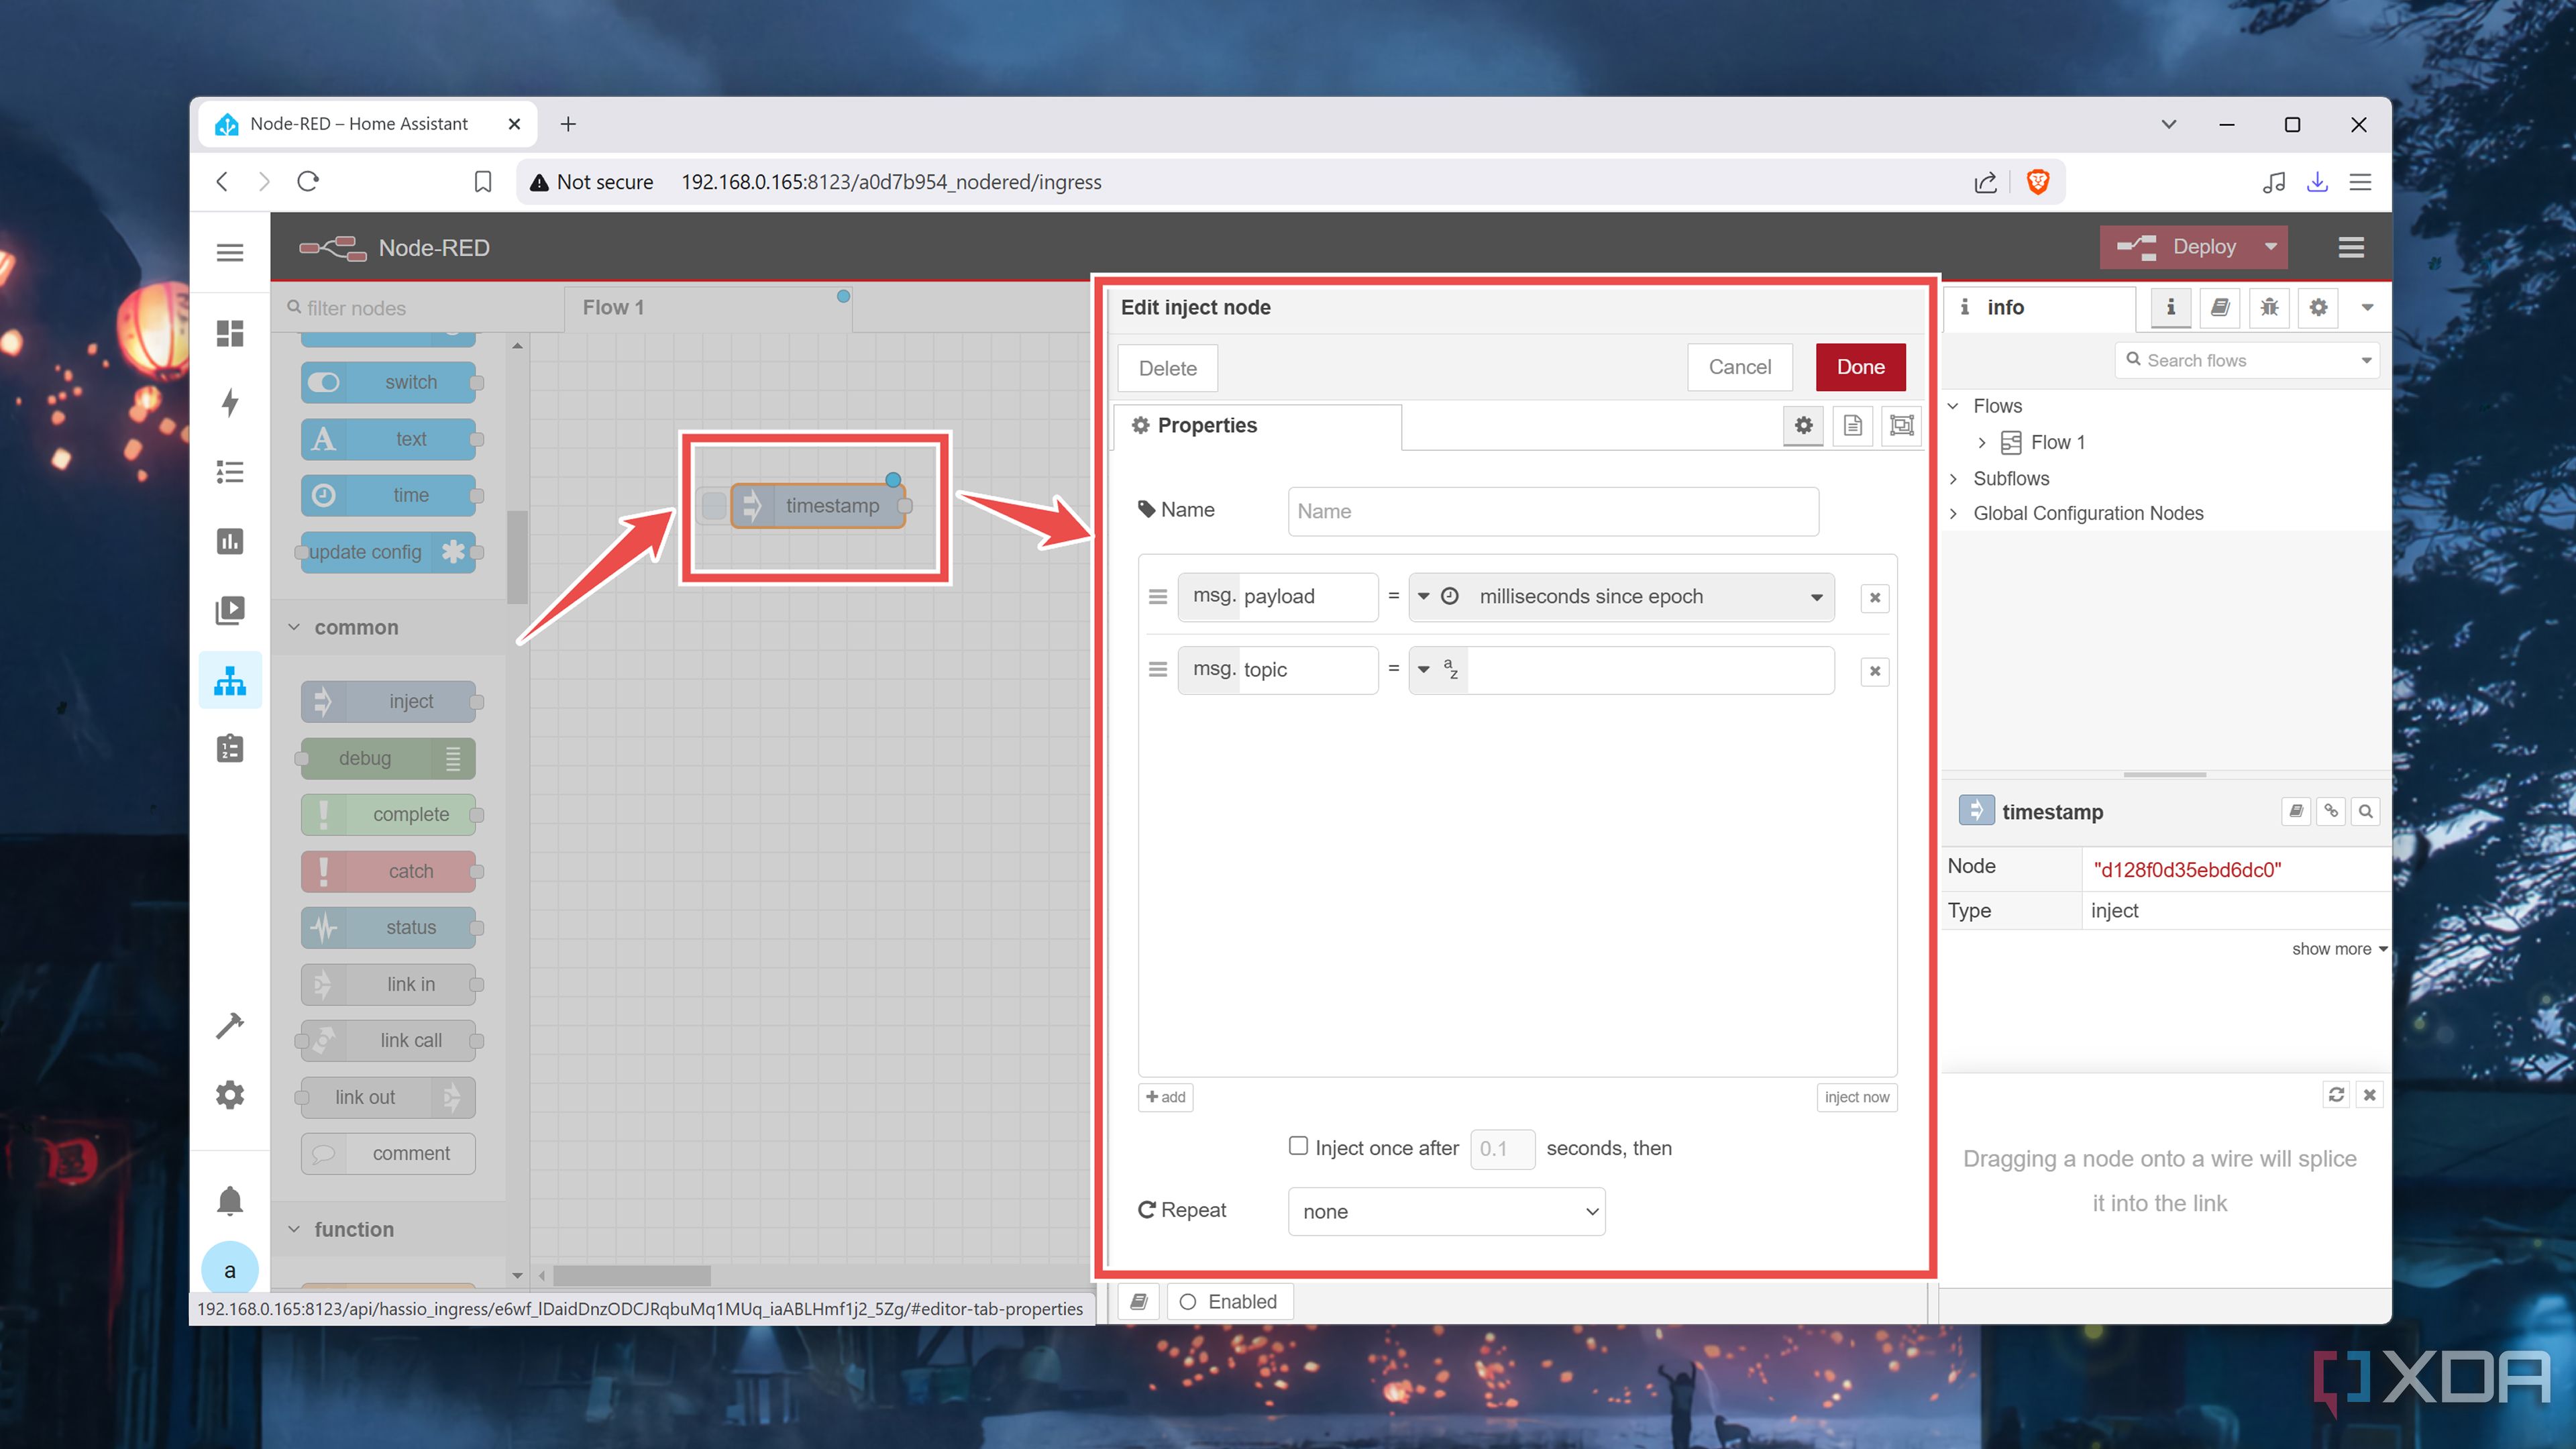
-
To use a node, you’ll have to drag it onto the canvas. For instance, you can use the Inject node to pass a message to other nodes, and double-clicking it will reveal a couple of parameters.
-
On its own, most nodes aren’t all that useful. But by chaining multiple nodes, you can create flows comprising if-else conditions to automate your Home Assistant gadgets.
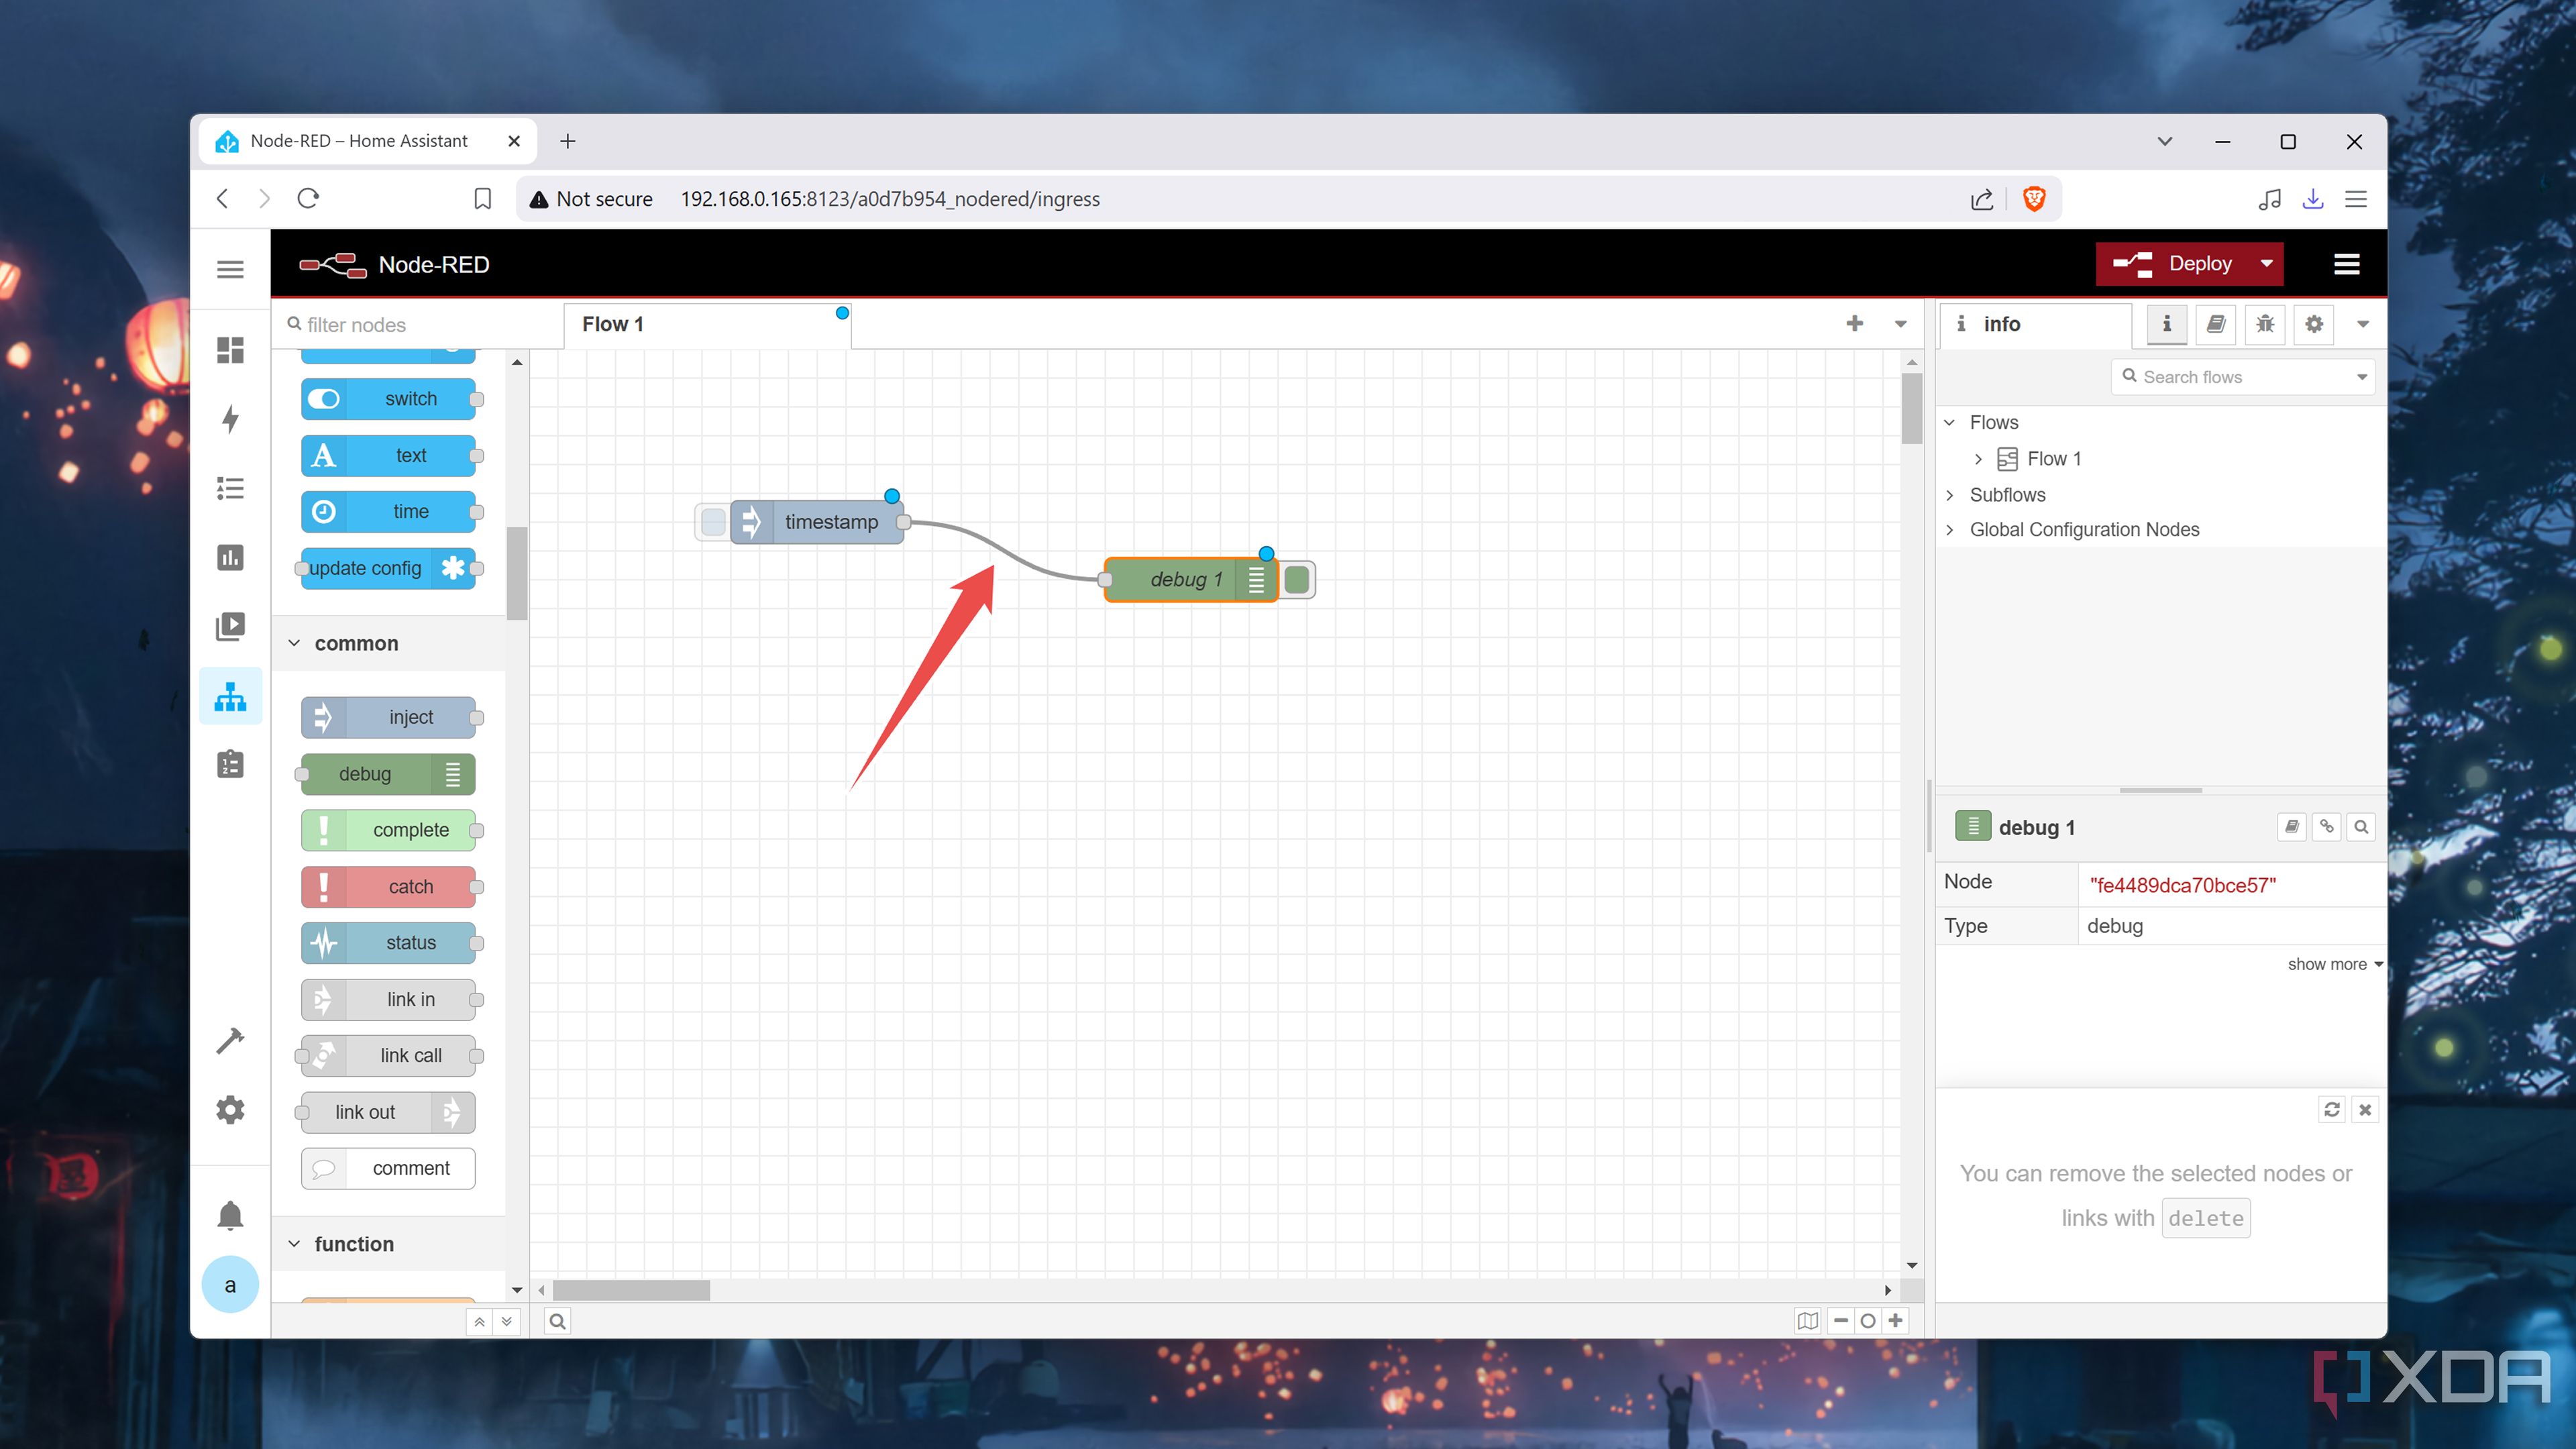
-
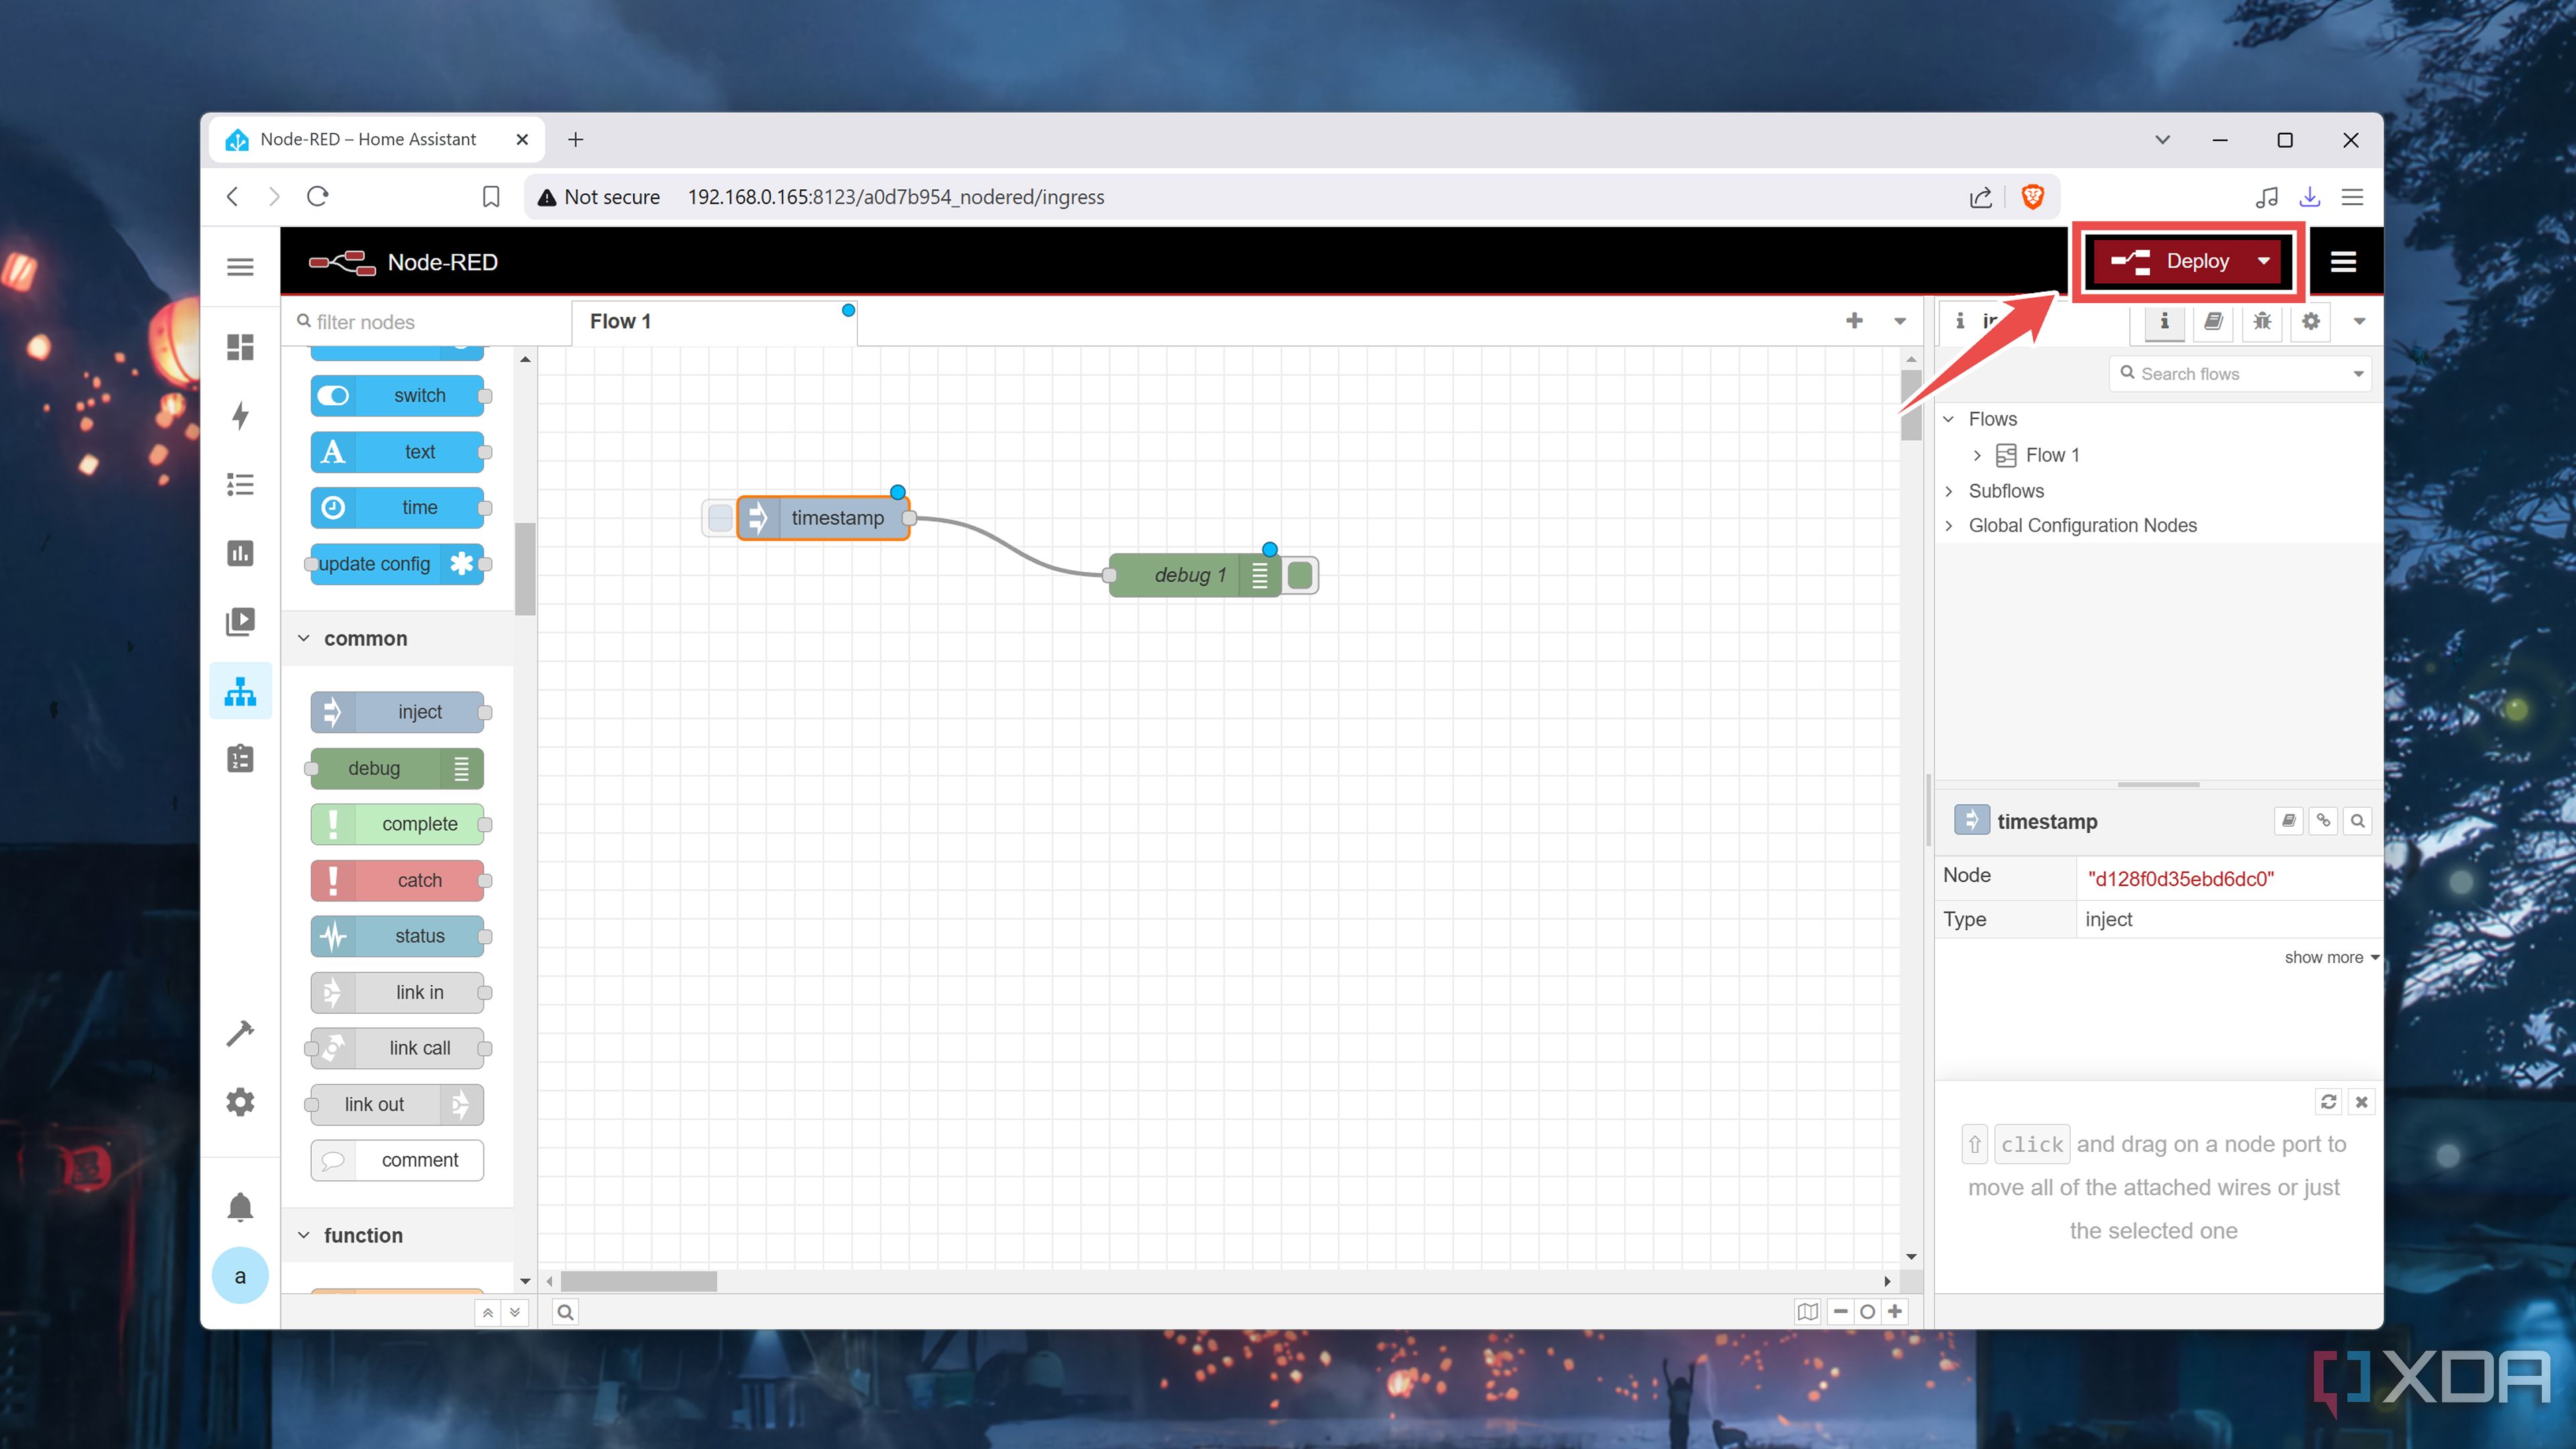
Once you’re done editing the node, be sure to click Deploy to execute the Node-RED flows.


Take home automation to the next level with Node-RED
With that, you can test different node combinations to your heart’s content. Hovering your cursor over a node gives a succinct description of its functionality, and you can always consult Node-RED’s rich documentation to learn about different flow libraries and node templates.
While it may seem like a complicated tool, there’s no shortage of projects you can build with Node-RED and Home Assistant. From automating your thermostat using data from SBC-powered weather stations to securing your home with RFID locks, the sky’s the limit when it comes to Node-RED projects.

Related
I use Terraform to automatically provision VMs on Proxmox – here’s how
While it may seem rather daunting, Terraform is an amazing automation tool for provisioning virtual machines on your home lab
#NodeRED #Home #Assistant #ultimate #smart #home
source: https://www.xda-developers.com/how-i-use-node-red-and-home-assistant-together/

