

Let’s say you’ve finally caved into the desire to build your own Network-Attached Storage server and bought the hardware necessary for the endeavor. The next course of action is to pick the perfect operating system that can fulfill your storage needs. While you can technically build a makeshift file-sharing server using Windows 11, dedicated NAS operating systems are better when it comes to privacy, resource utilization, and above all, storage provisions.
TrueNAS Scale is my top recommendation for anyone planning to put together a storage server. But if you’re worried about the complexity of the setup procedure, then read on. This guide will walk you through the entire process of installing TrueNAS Scale on your new NAS.
Related
TrueNAS Scale vs TrueNAS Core: Which OS is the best for your NAS?
Despite belonging to iXsystem’s TrueNAS lineup of operating systems, there are plenty of differences that set Scale apart from Core
What you’ll need
Like most Linux distros, TrueNAS Scale has fairly modest system requirements. iXSystems, the company behind the TrueNAS lineup, cites an x86 processor with two cores and 8GBs of memory as the minimum requirement. Having previously configured TrueNAS Scale on the Intel N100-powered Aiffro K100 and Radxa X4, I can confirm that you don’t need a top-of-the-line CPU for TrueNAS Scale.
That said, you’ll need a flash drive with at least 32GB of free space to create a bootable USB drive. The OS also requires a minimum of two storage drives: one where you’d install TrueNAS Scale (preferably an SSD) and another for the storage array.
Creating a bootable drive for TrueNAS Scale
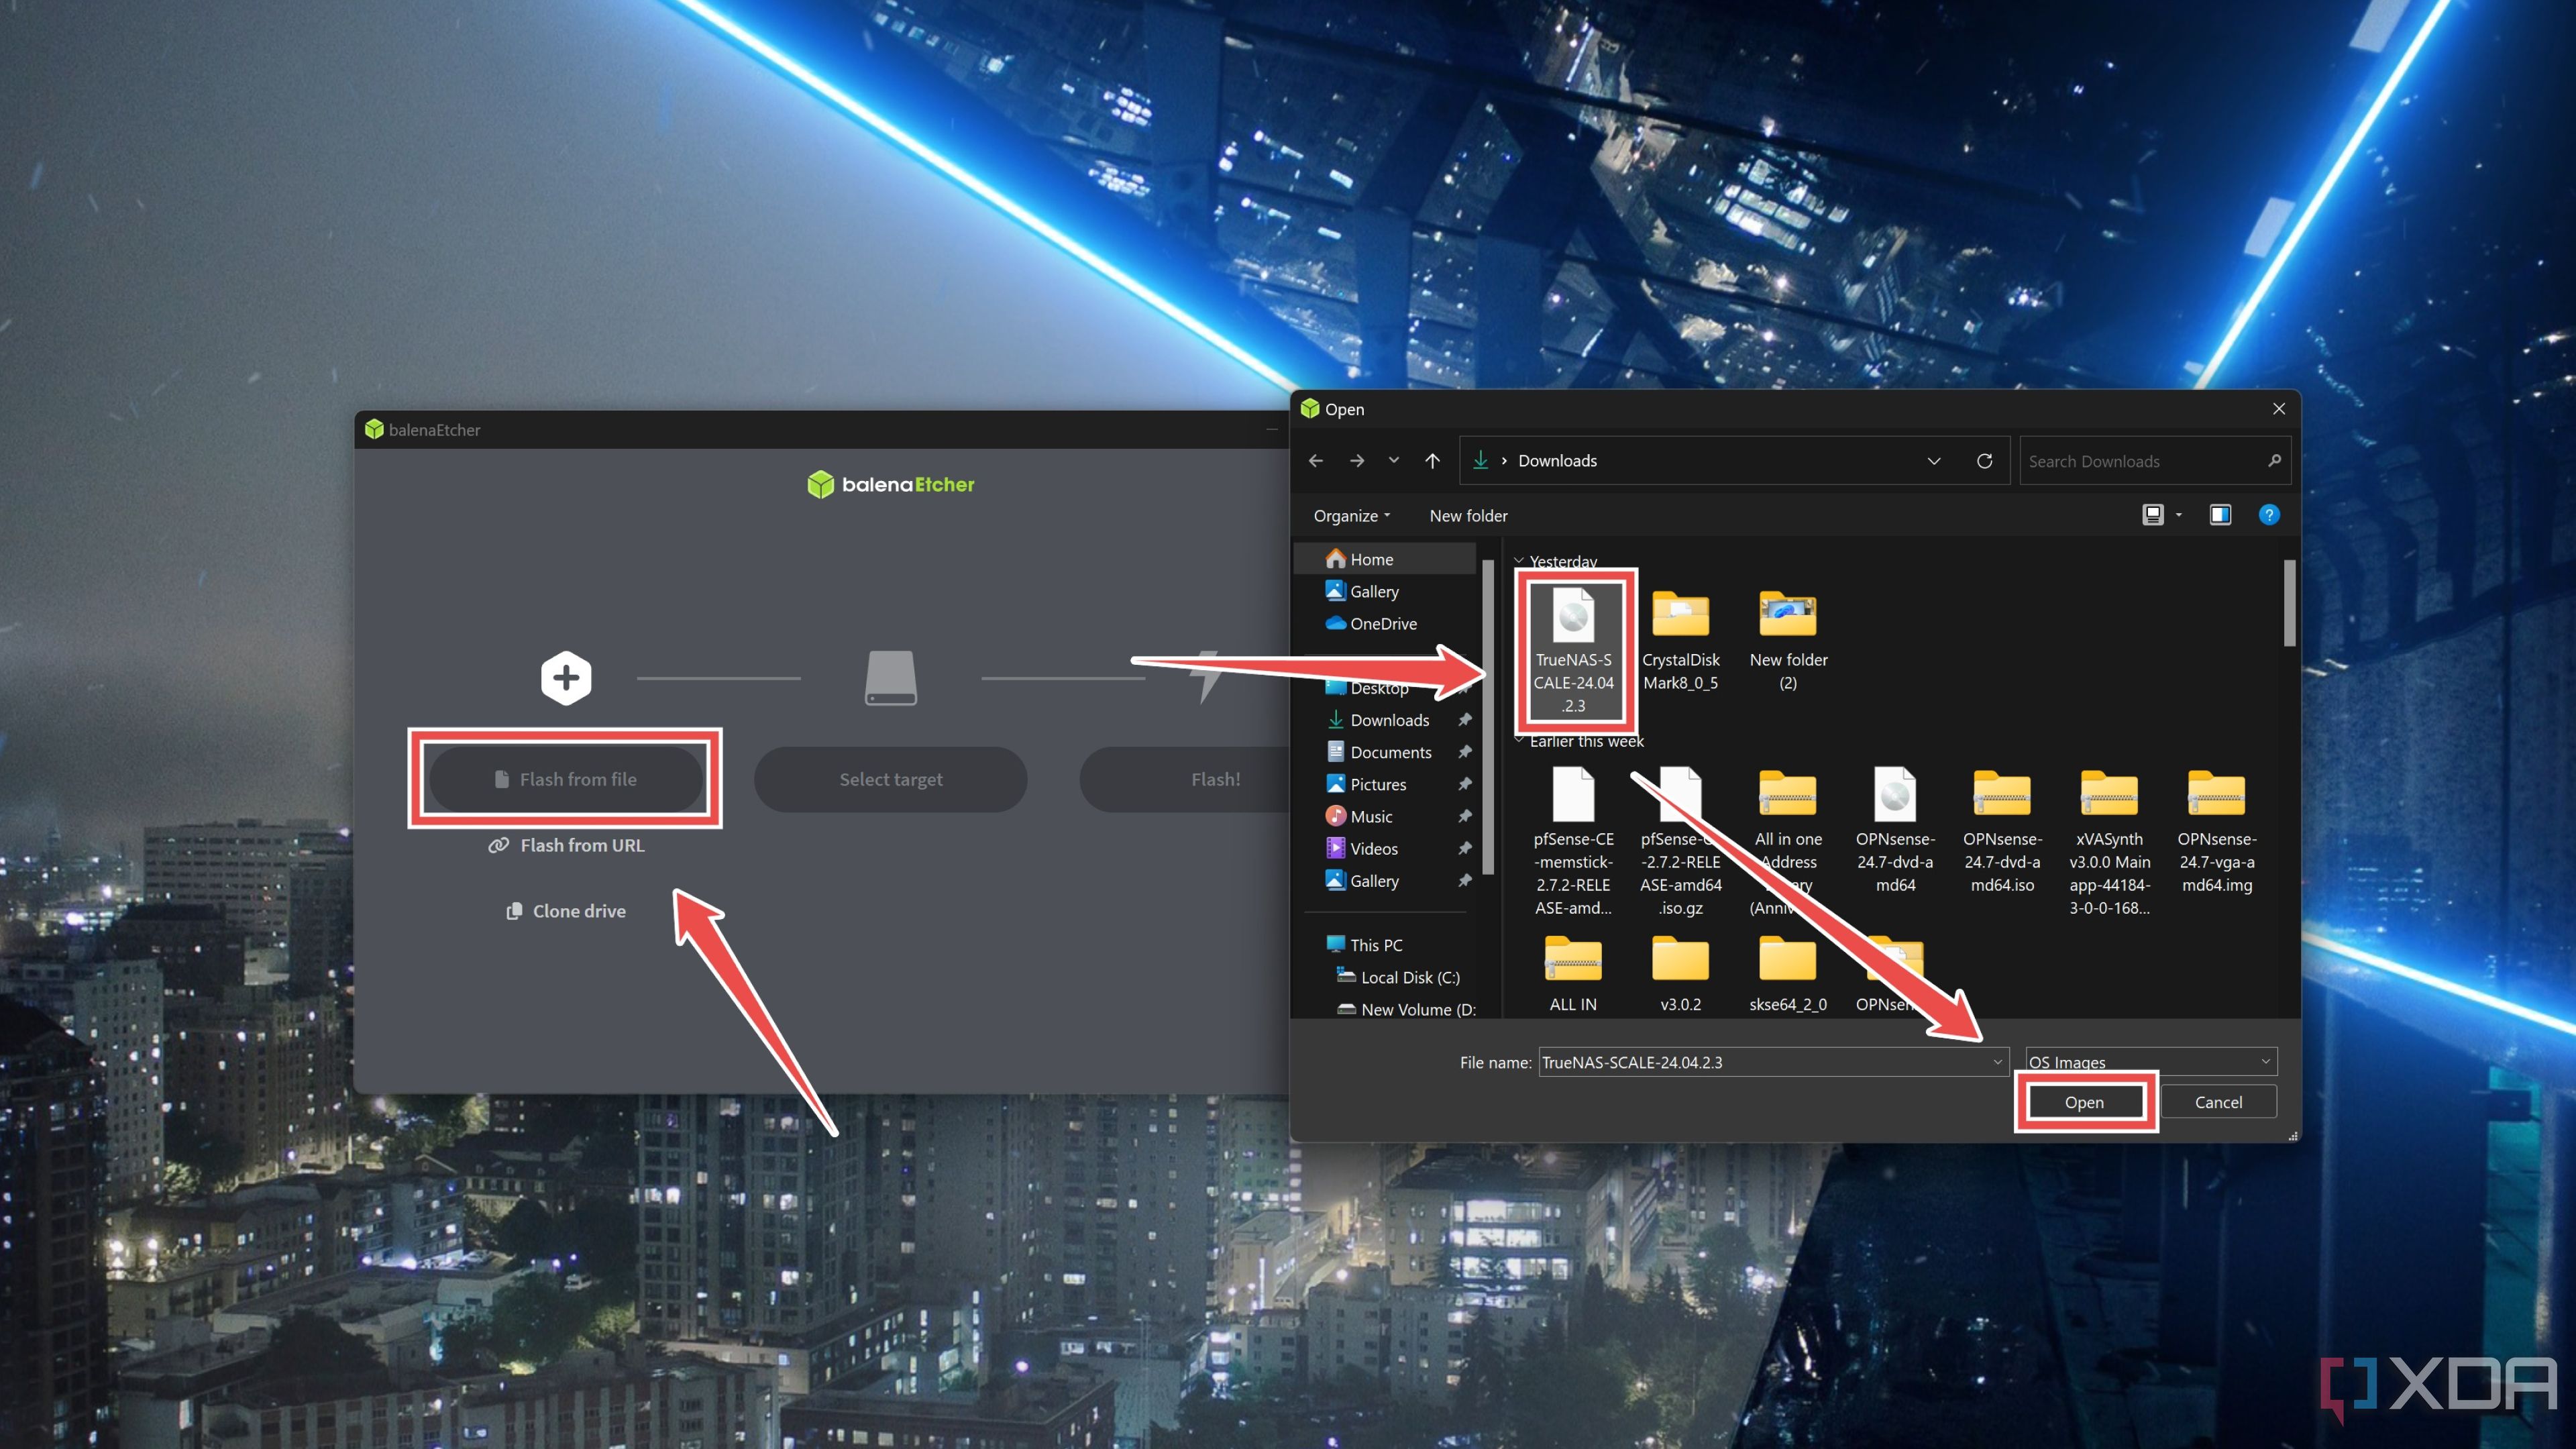
The first step in the TrueNAS Scale installation procedure involves flashing the operating system’s ISO files onto a USB drive. We’ll keep things simple by using Balena Etcher for this guide, but you’re free to pick Rufus and other USB formatting utilities.
- Navigate to TrueNAS’ website and download the latest ISO file for TrueNAS Scale.
- Download the setup.exe file for Balena Etcher from the official website and use it to install the tool on your PC.
- Once it’s installed, run Balena Etcher with administrator privileges.
- Click on Flash from file and pick the TrueNAS Scale ISO file you grabbed earlier.
- Hit Select target and choose the USB drive you’re planning to use as the bootable drive.
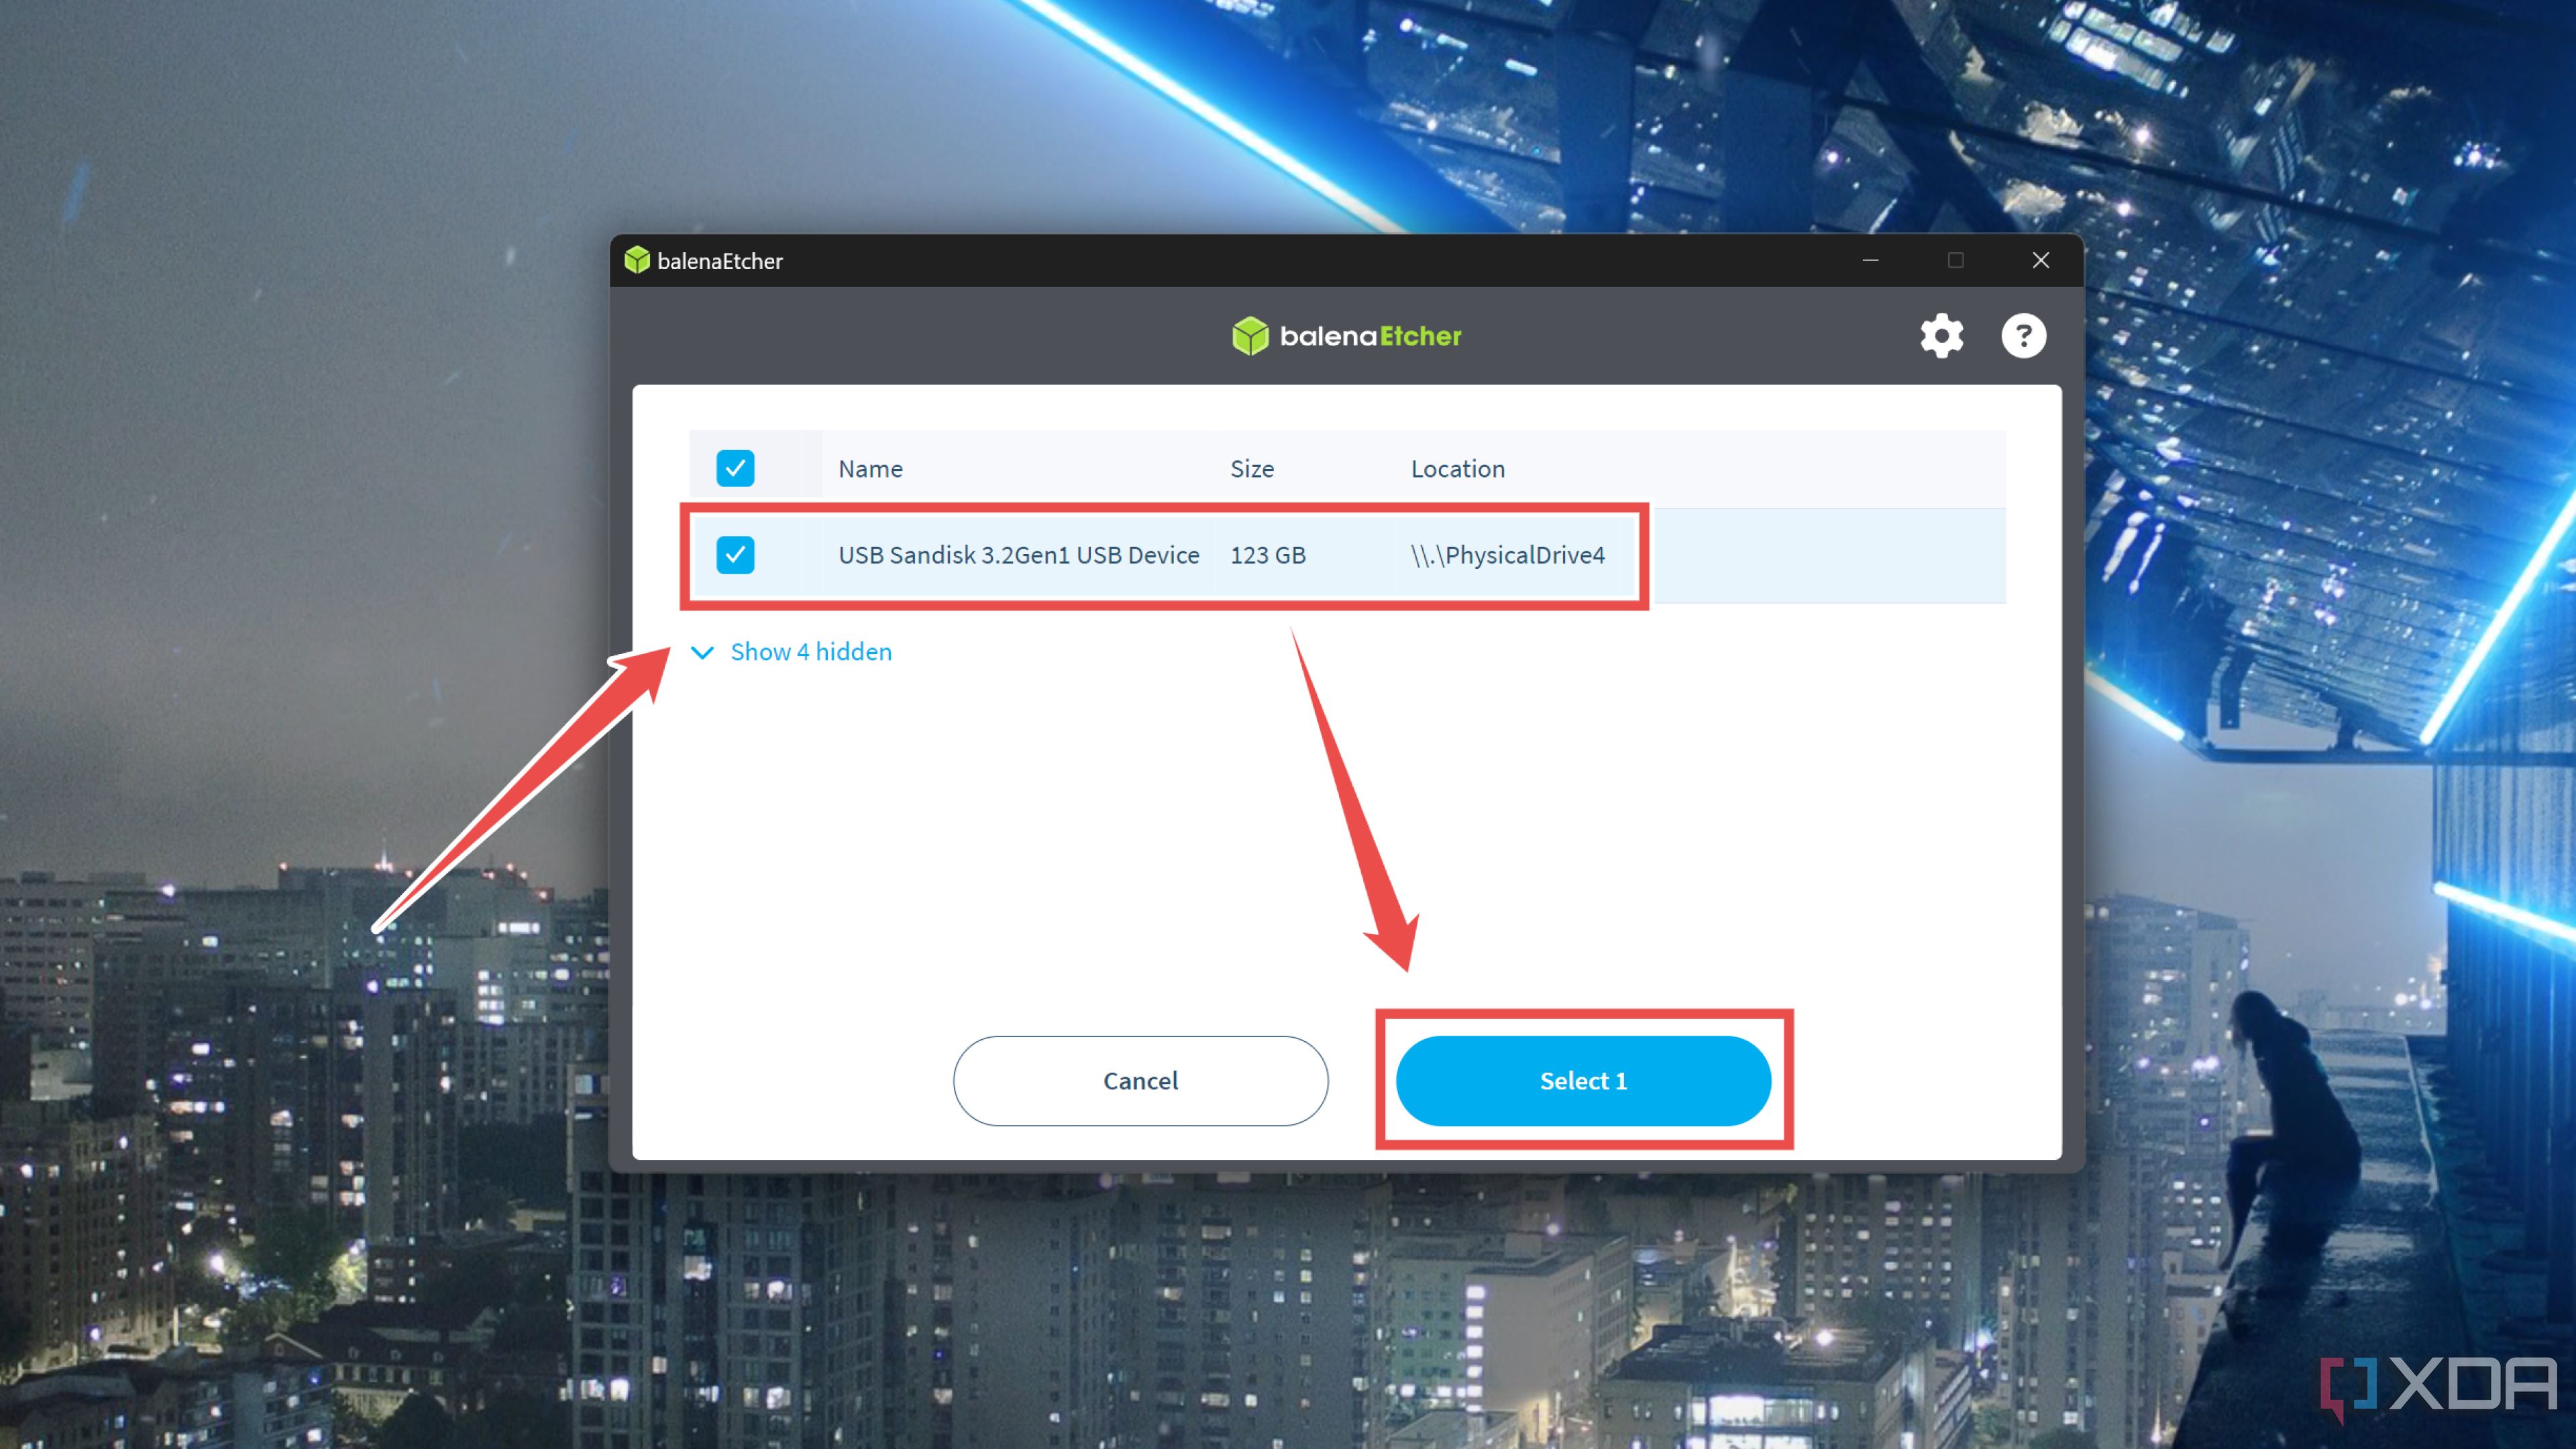
- Press Flash and wait for Balena Etcher to finish writing the OS images onto the flash drive.


Modifying the boot options in your NAS’ BIOS
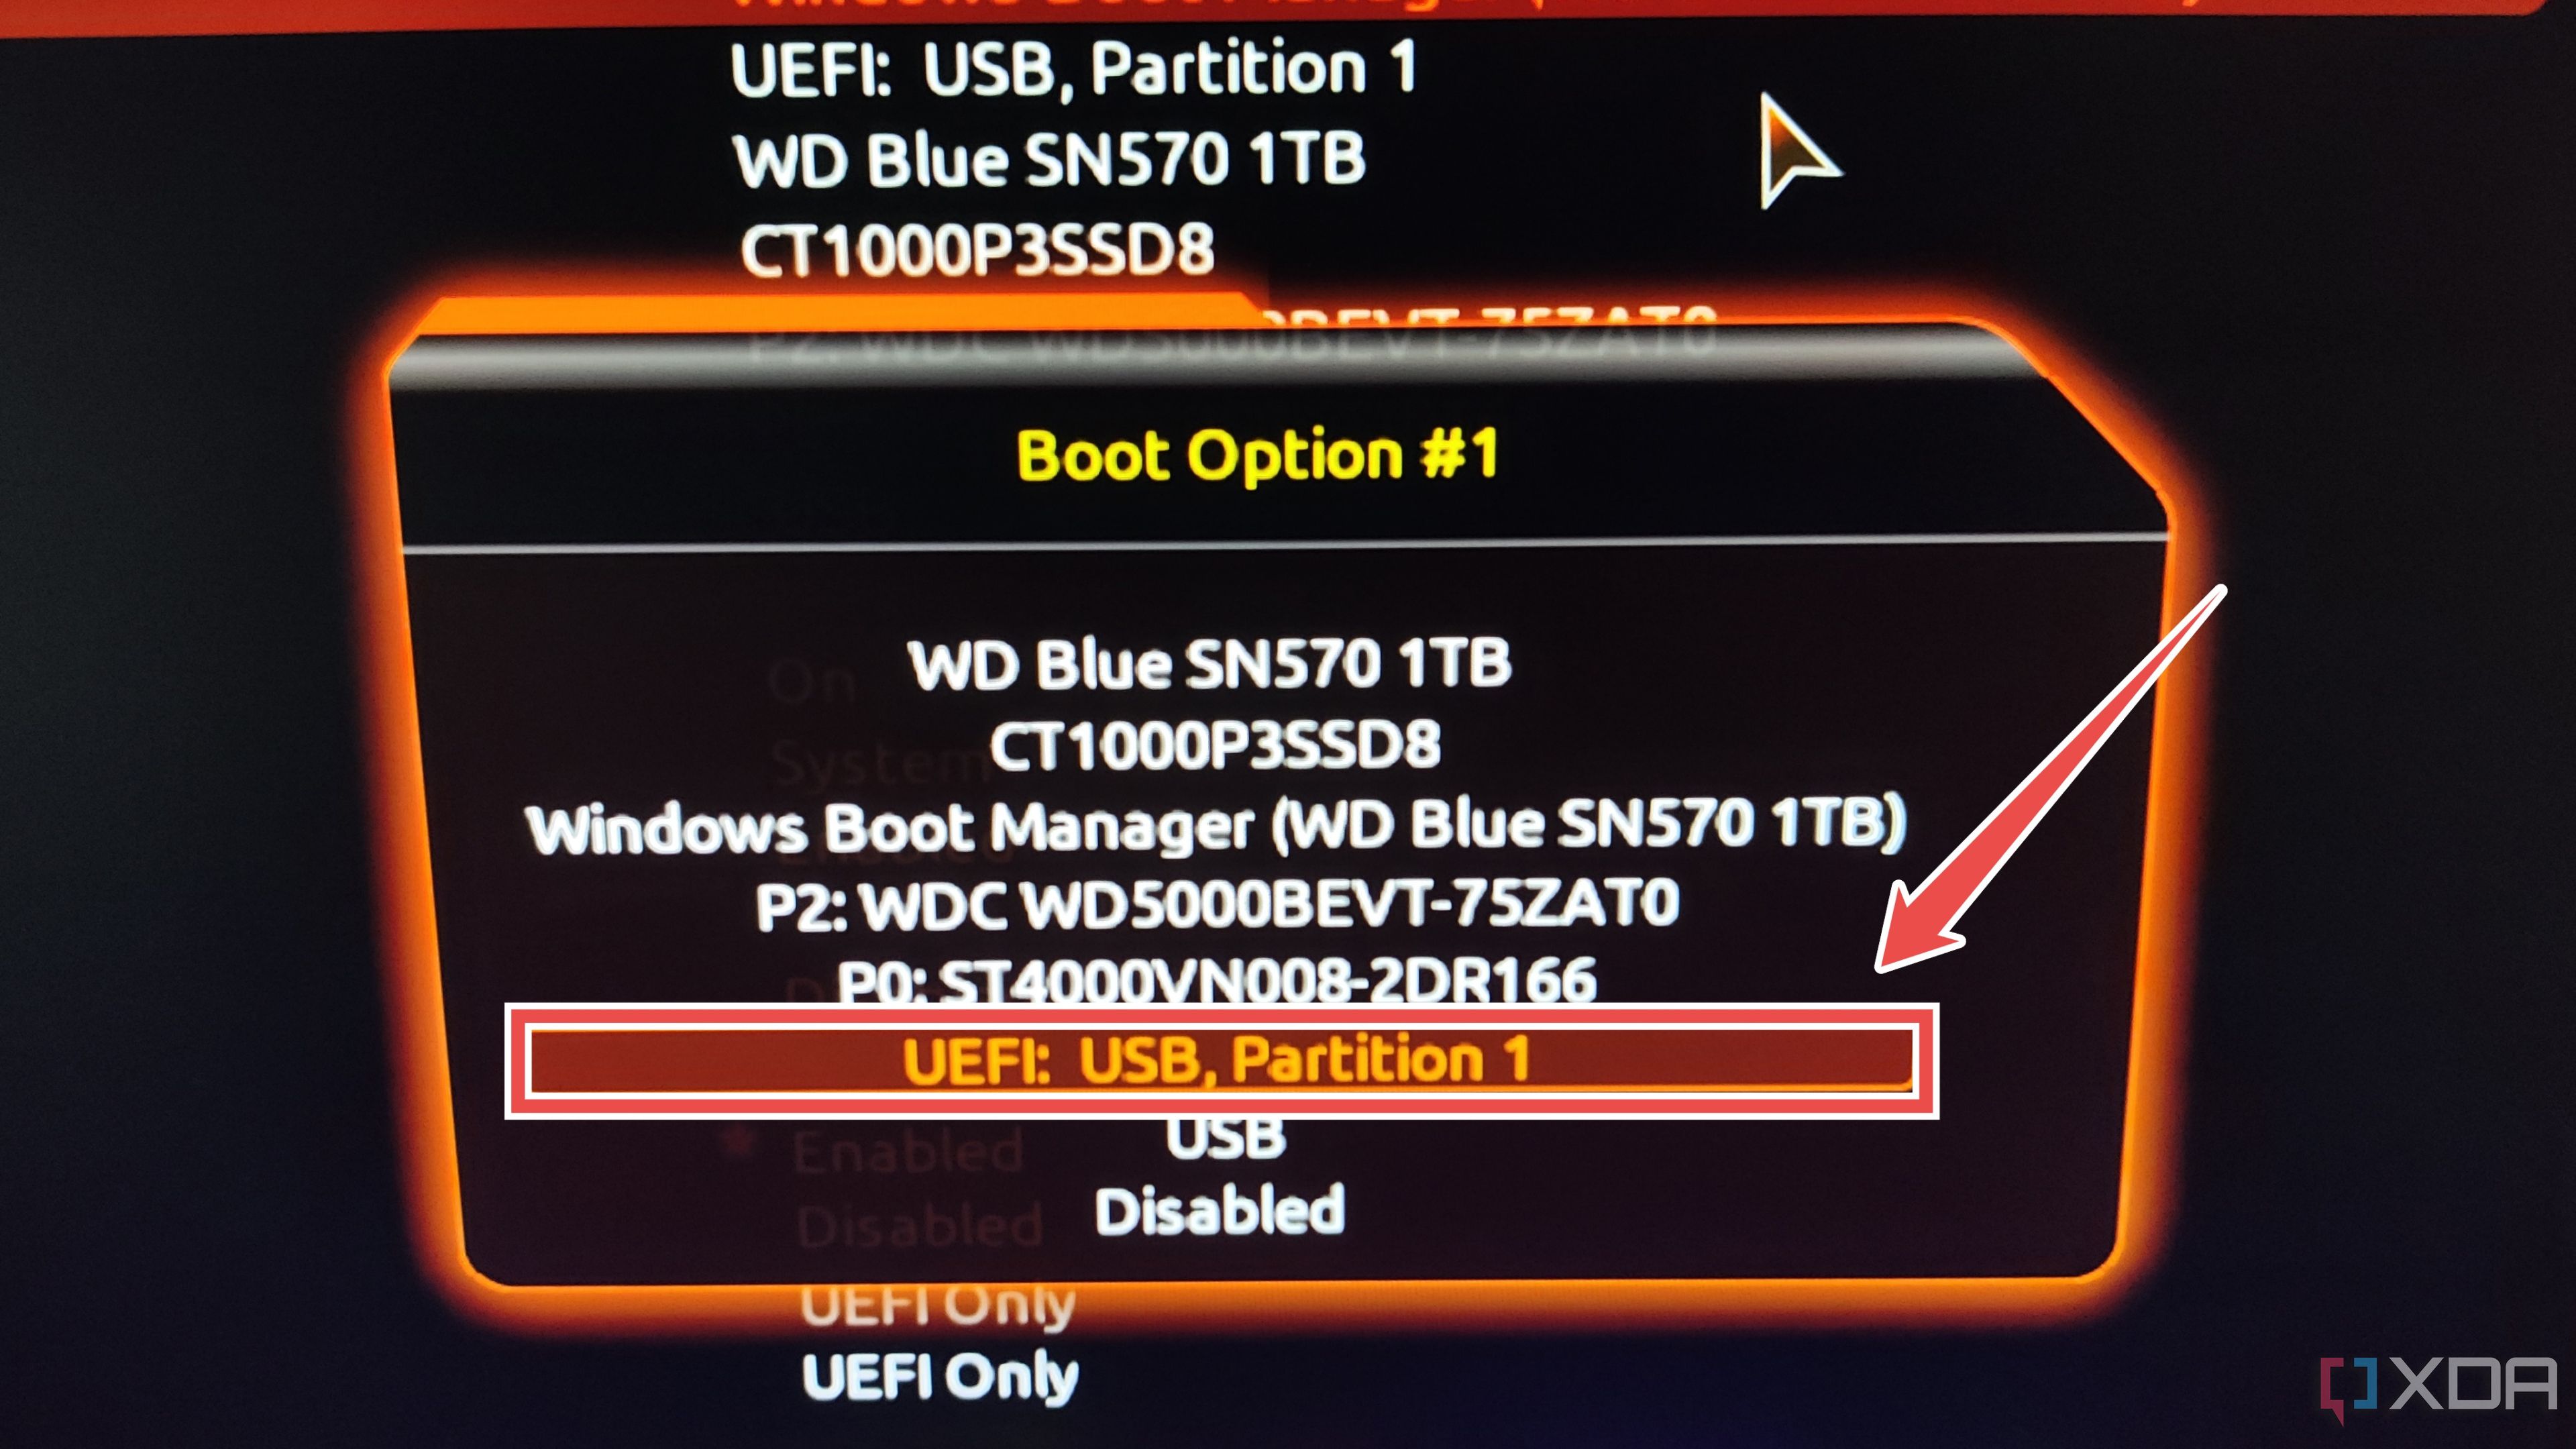
Now that you’ve successfully flashed the USB drive, you’ll want to switch the BIOS options in your DIY NAS’ motherboard to use said drive as the boot device.
- Connect your bootable drive and a keyboard to your NAS before powering it on.
- Mash the Delete key as the NAS boots up.
- Enter the Boot settings and make sure the USB drive appears as Boot Option #1.
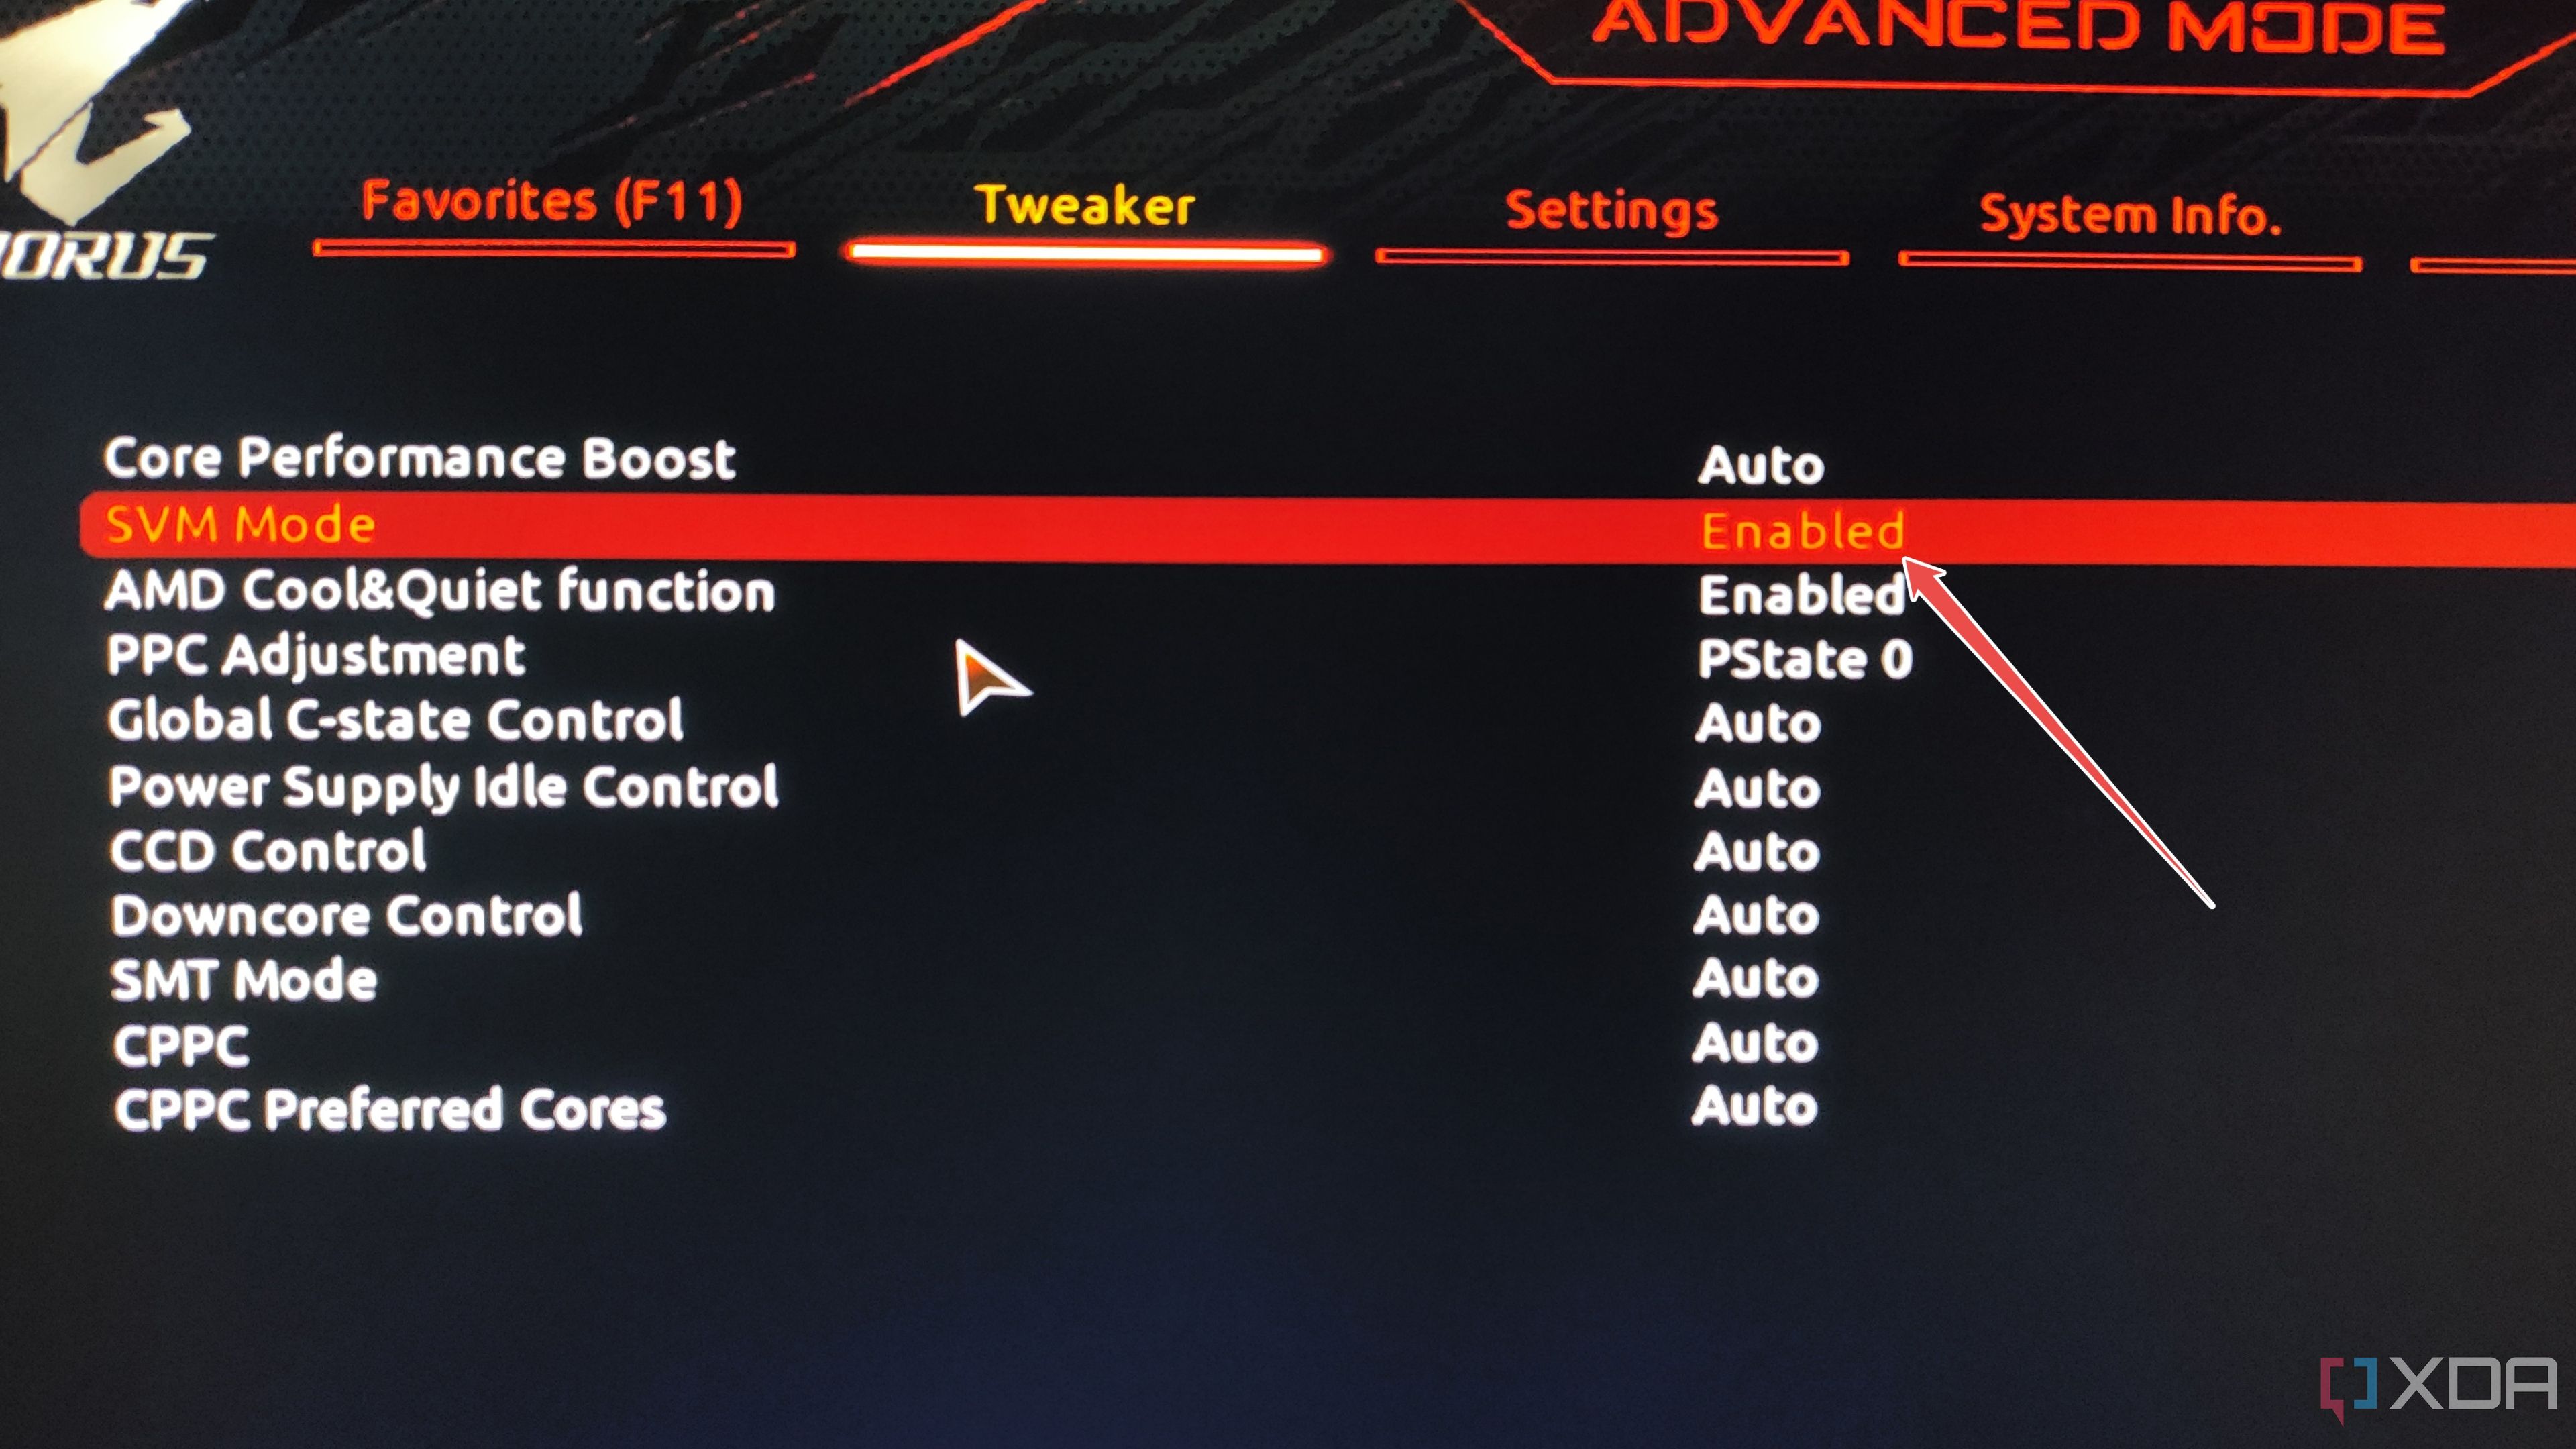
- (Optional) While you’re still inside the BIOS, you can enable SVM/VT-x/AMD-V/Virtualization inside the Advanced CPU Settings or the Tweaker tab.
- Save the changes you’ve made before exiting the BIOS.


Installing TrueNAS Scale
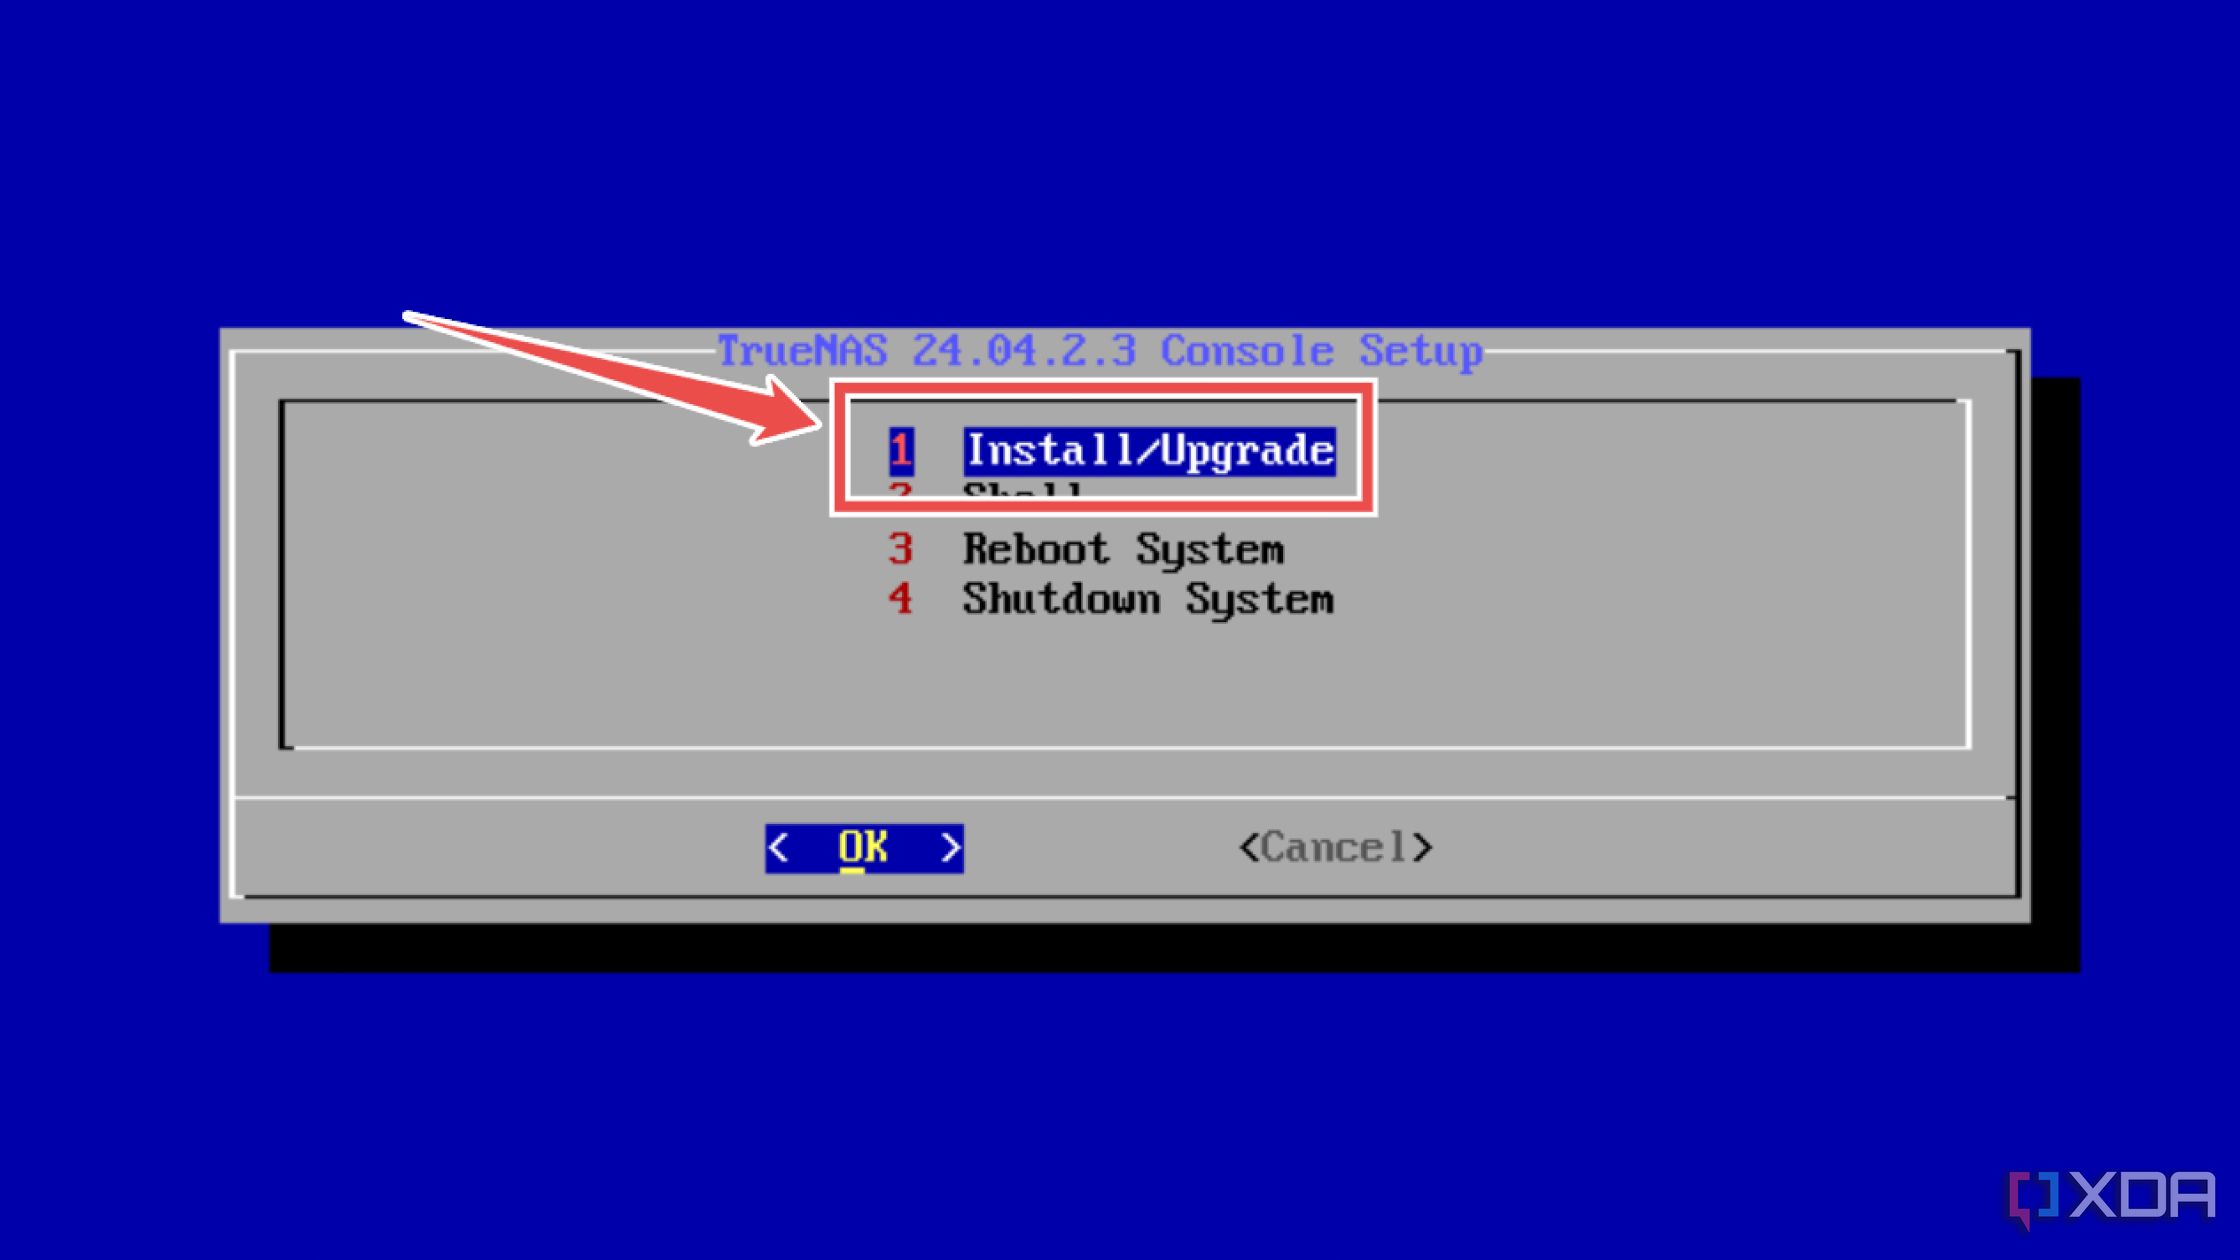
Once your NAS restarts, you’ll be greeted with the TrueNAS Scale console setup wizard.
- Select Install/Upgrade on the main TrueNAS Scale screen and hit the Enter key.
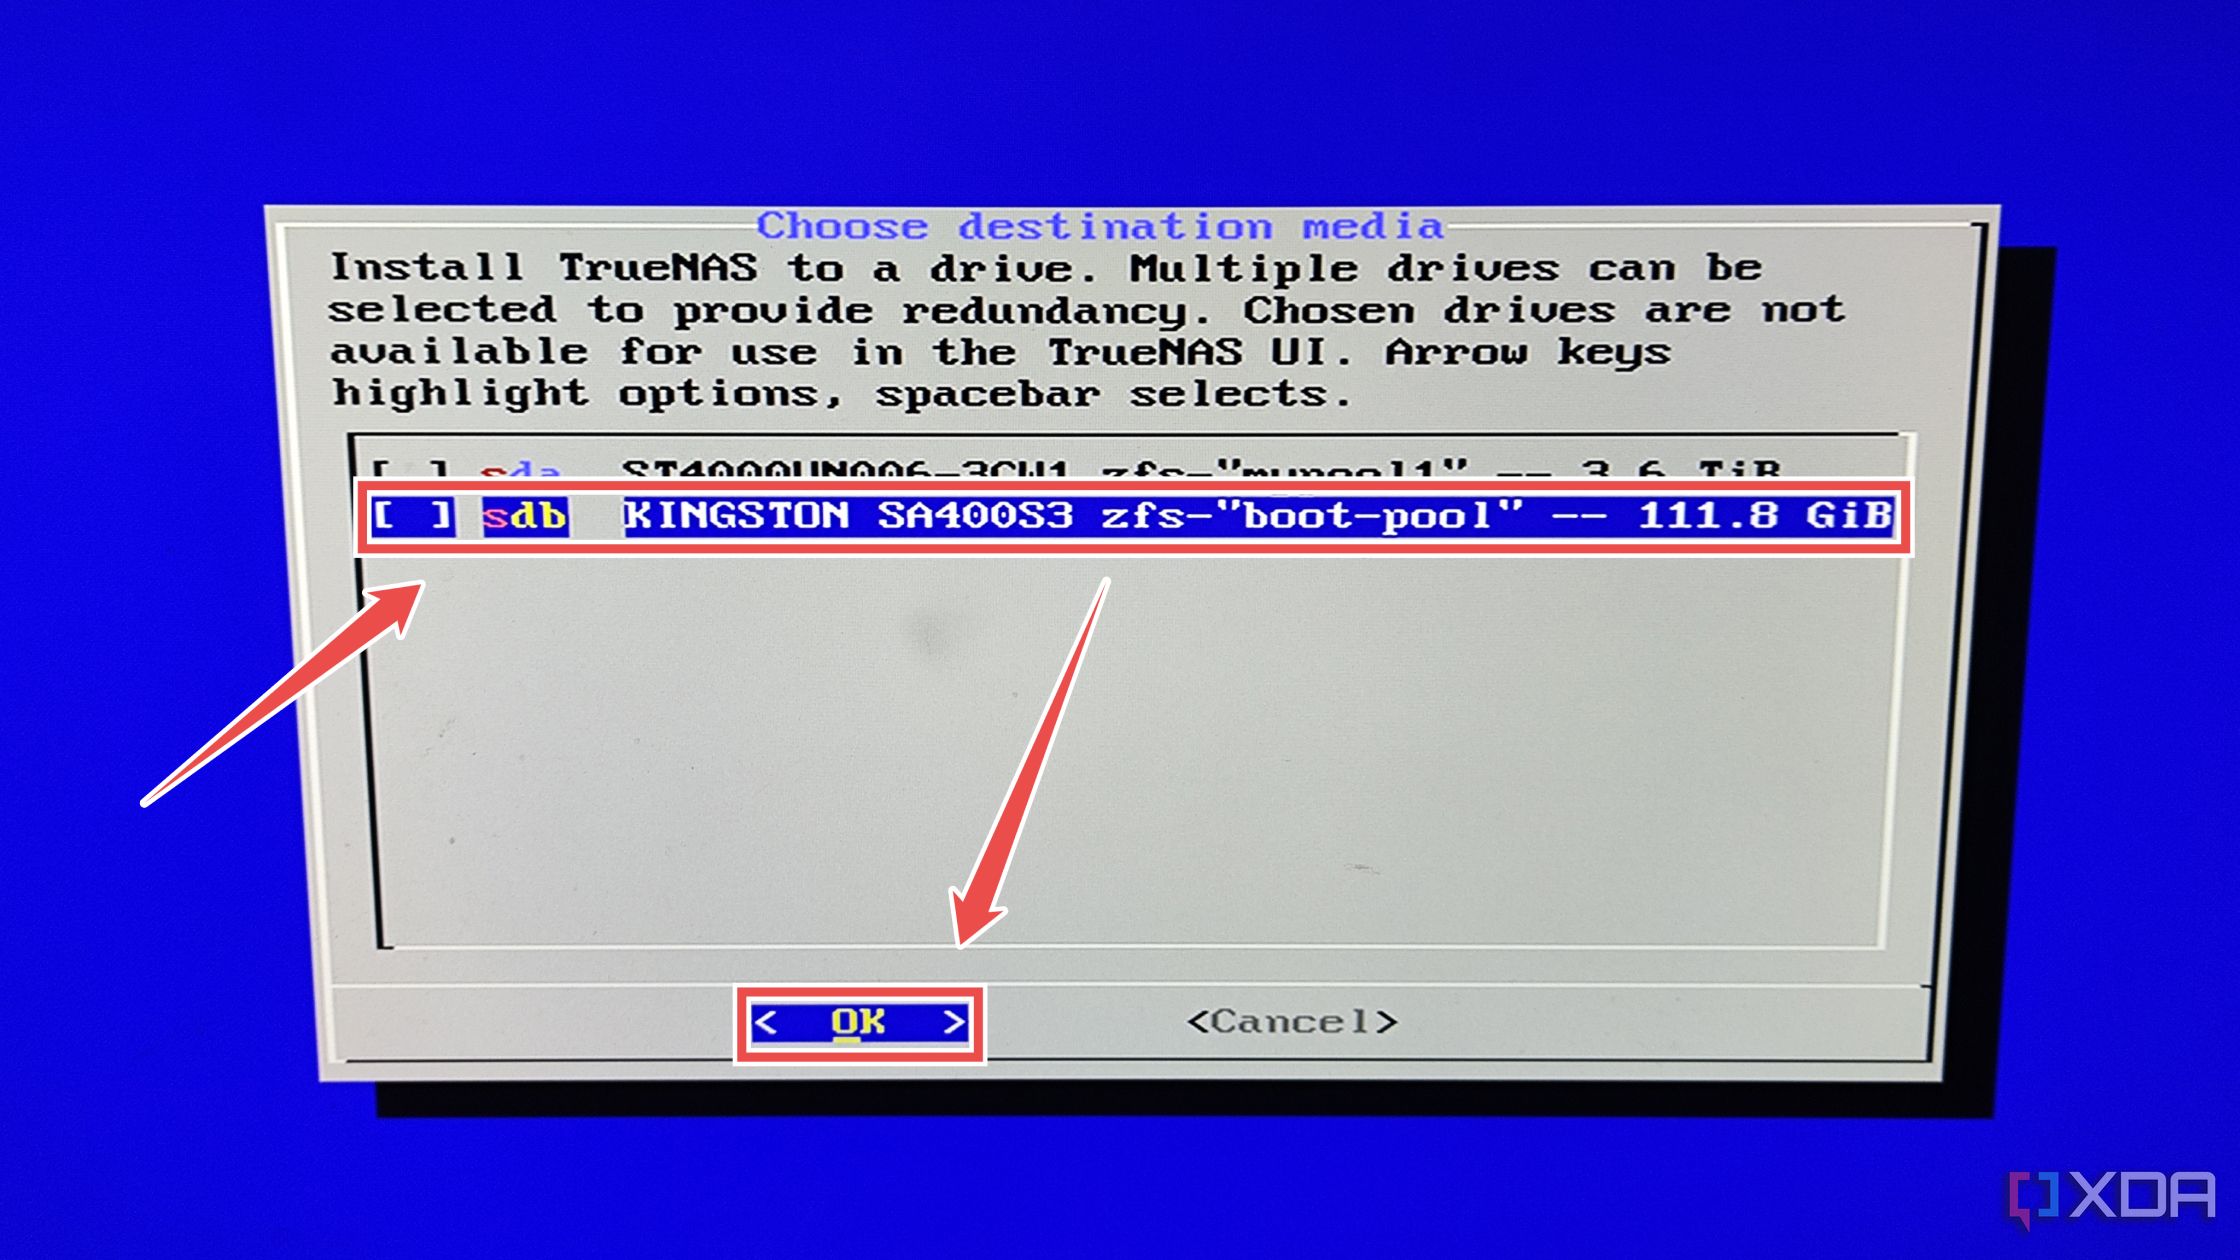
- Use Spacebar to select the boot drive for TrueNAS Scale and press Yes when TrueNAS Scale asks for confirmation.
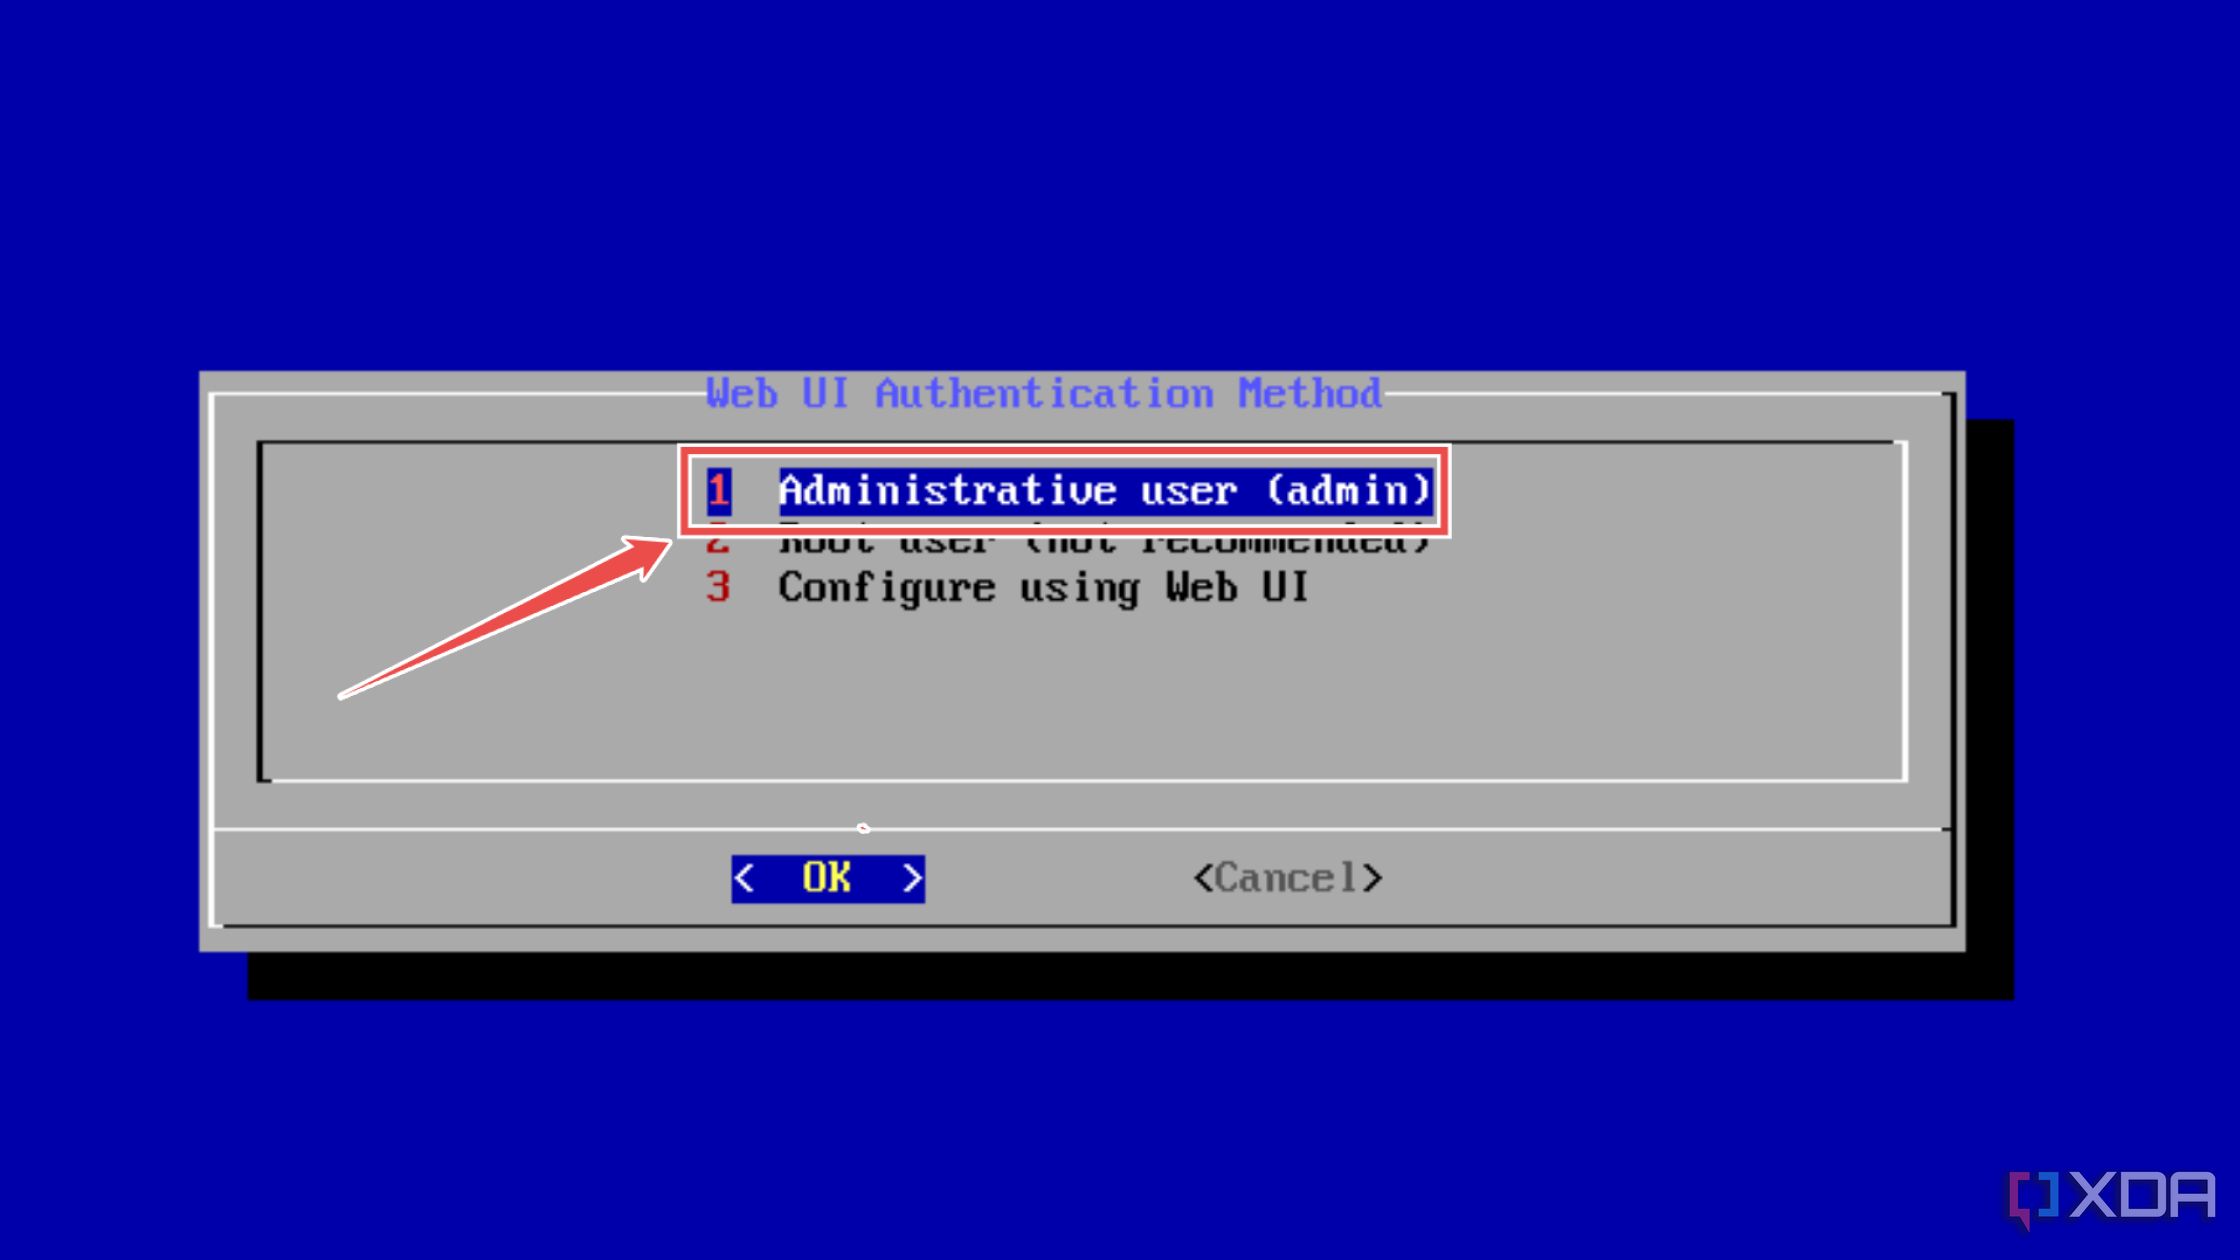
- Choose Administrative user (admin) as the Web UI Authentication method.
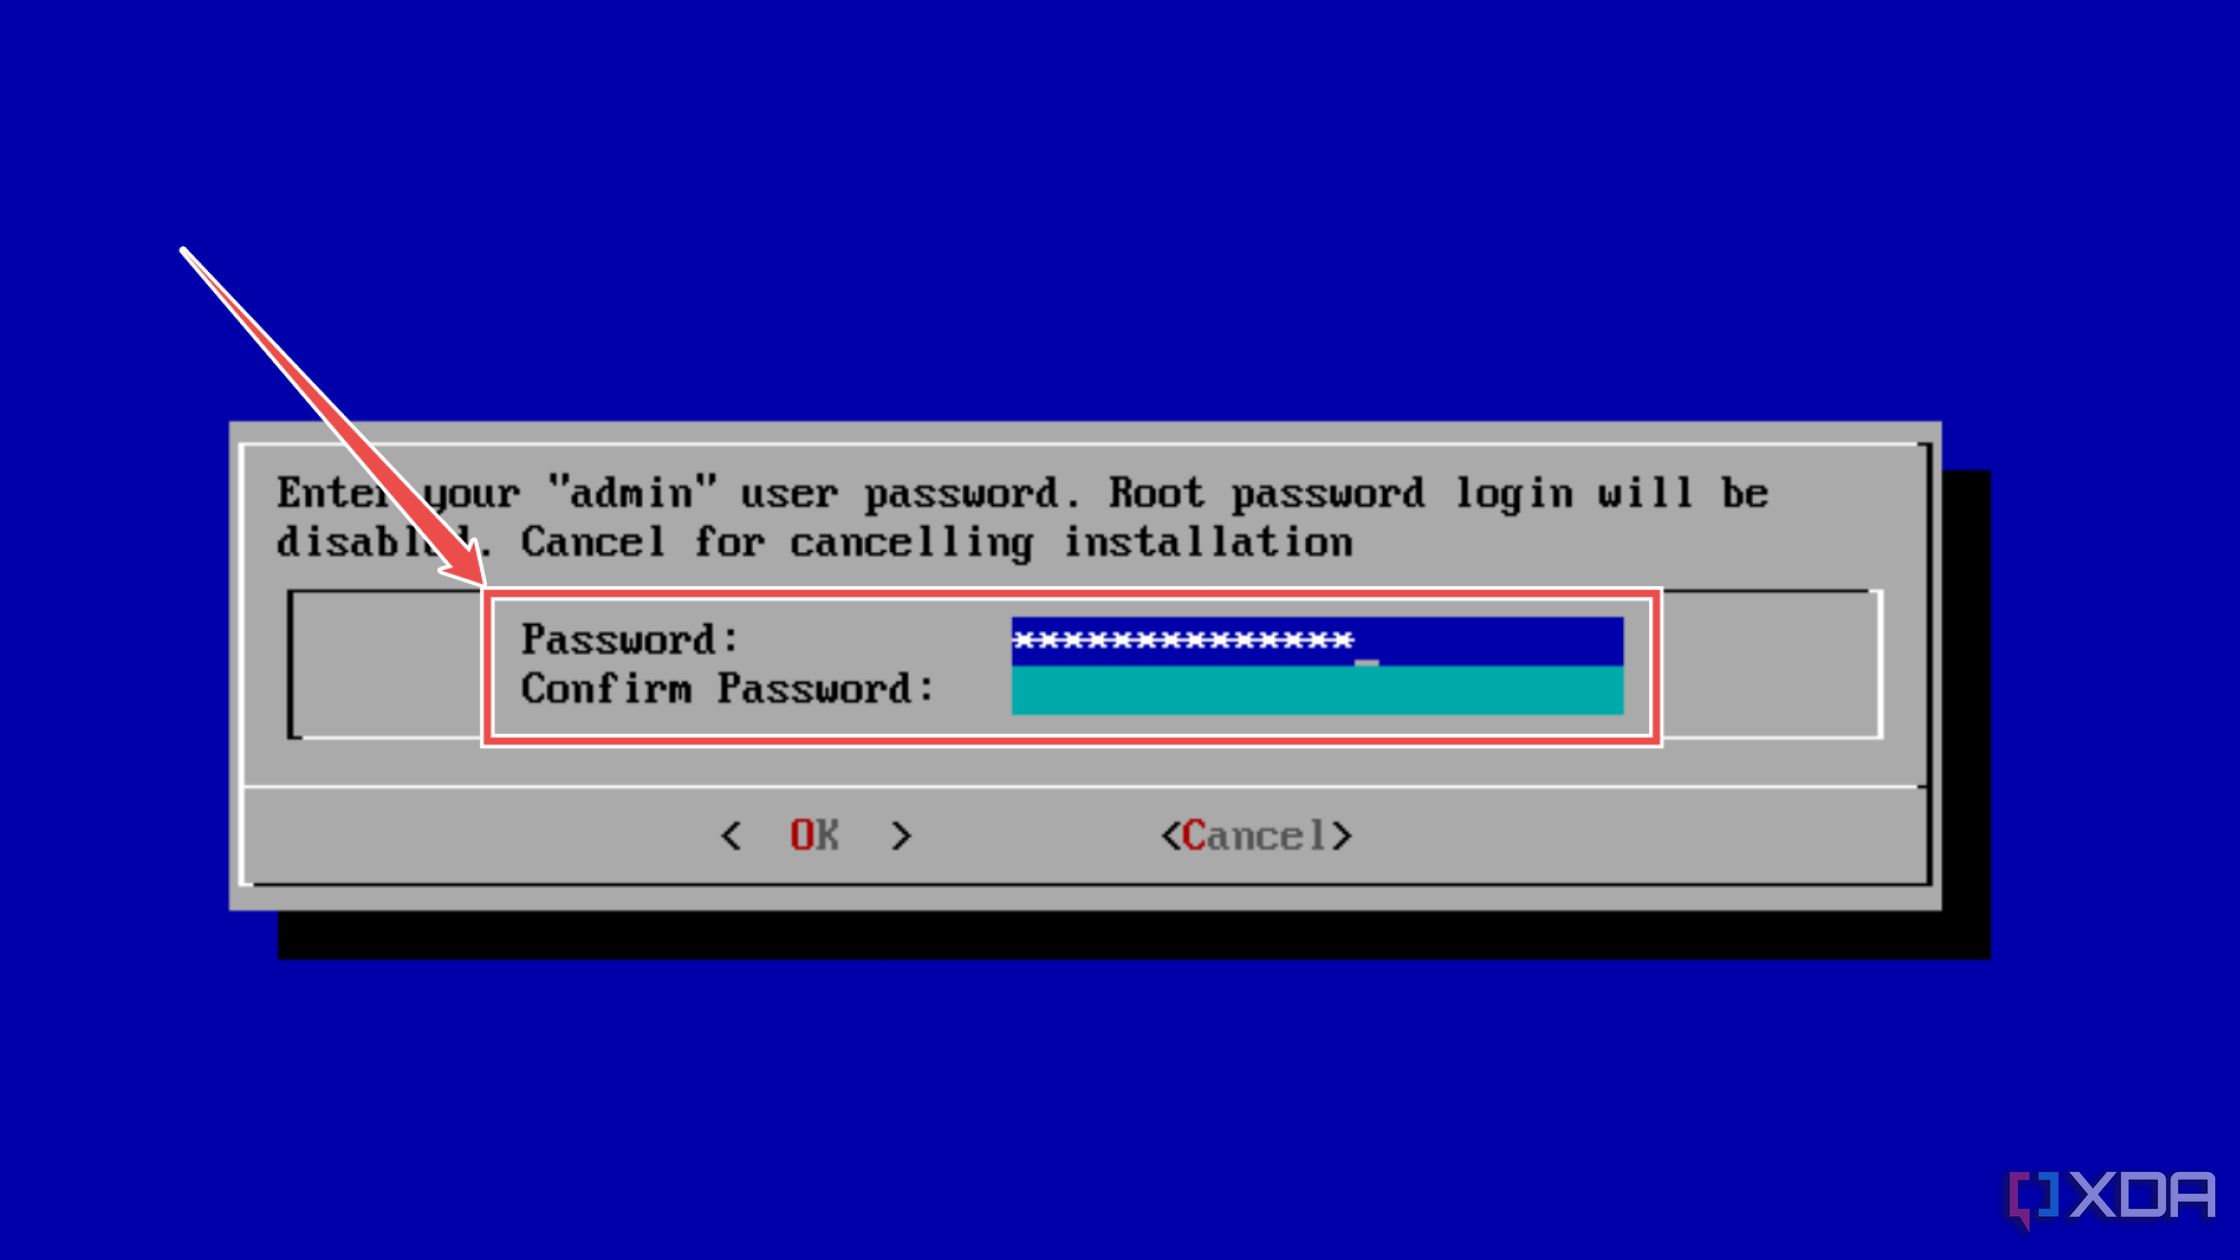
- Enter the Password for the admin user.
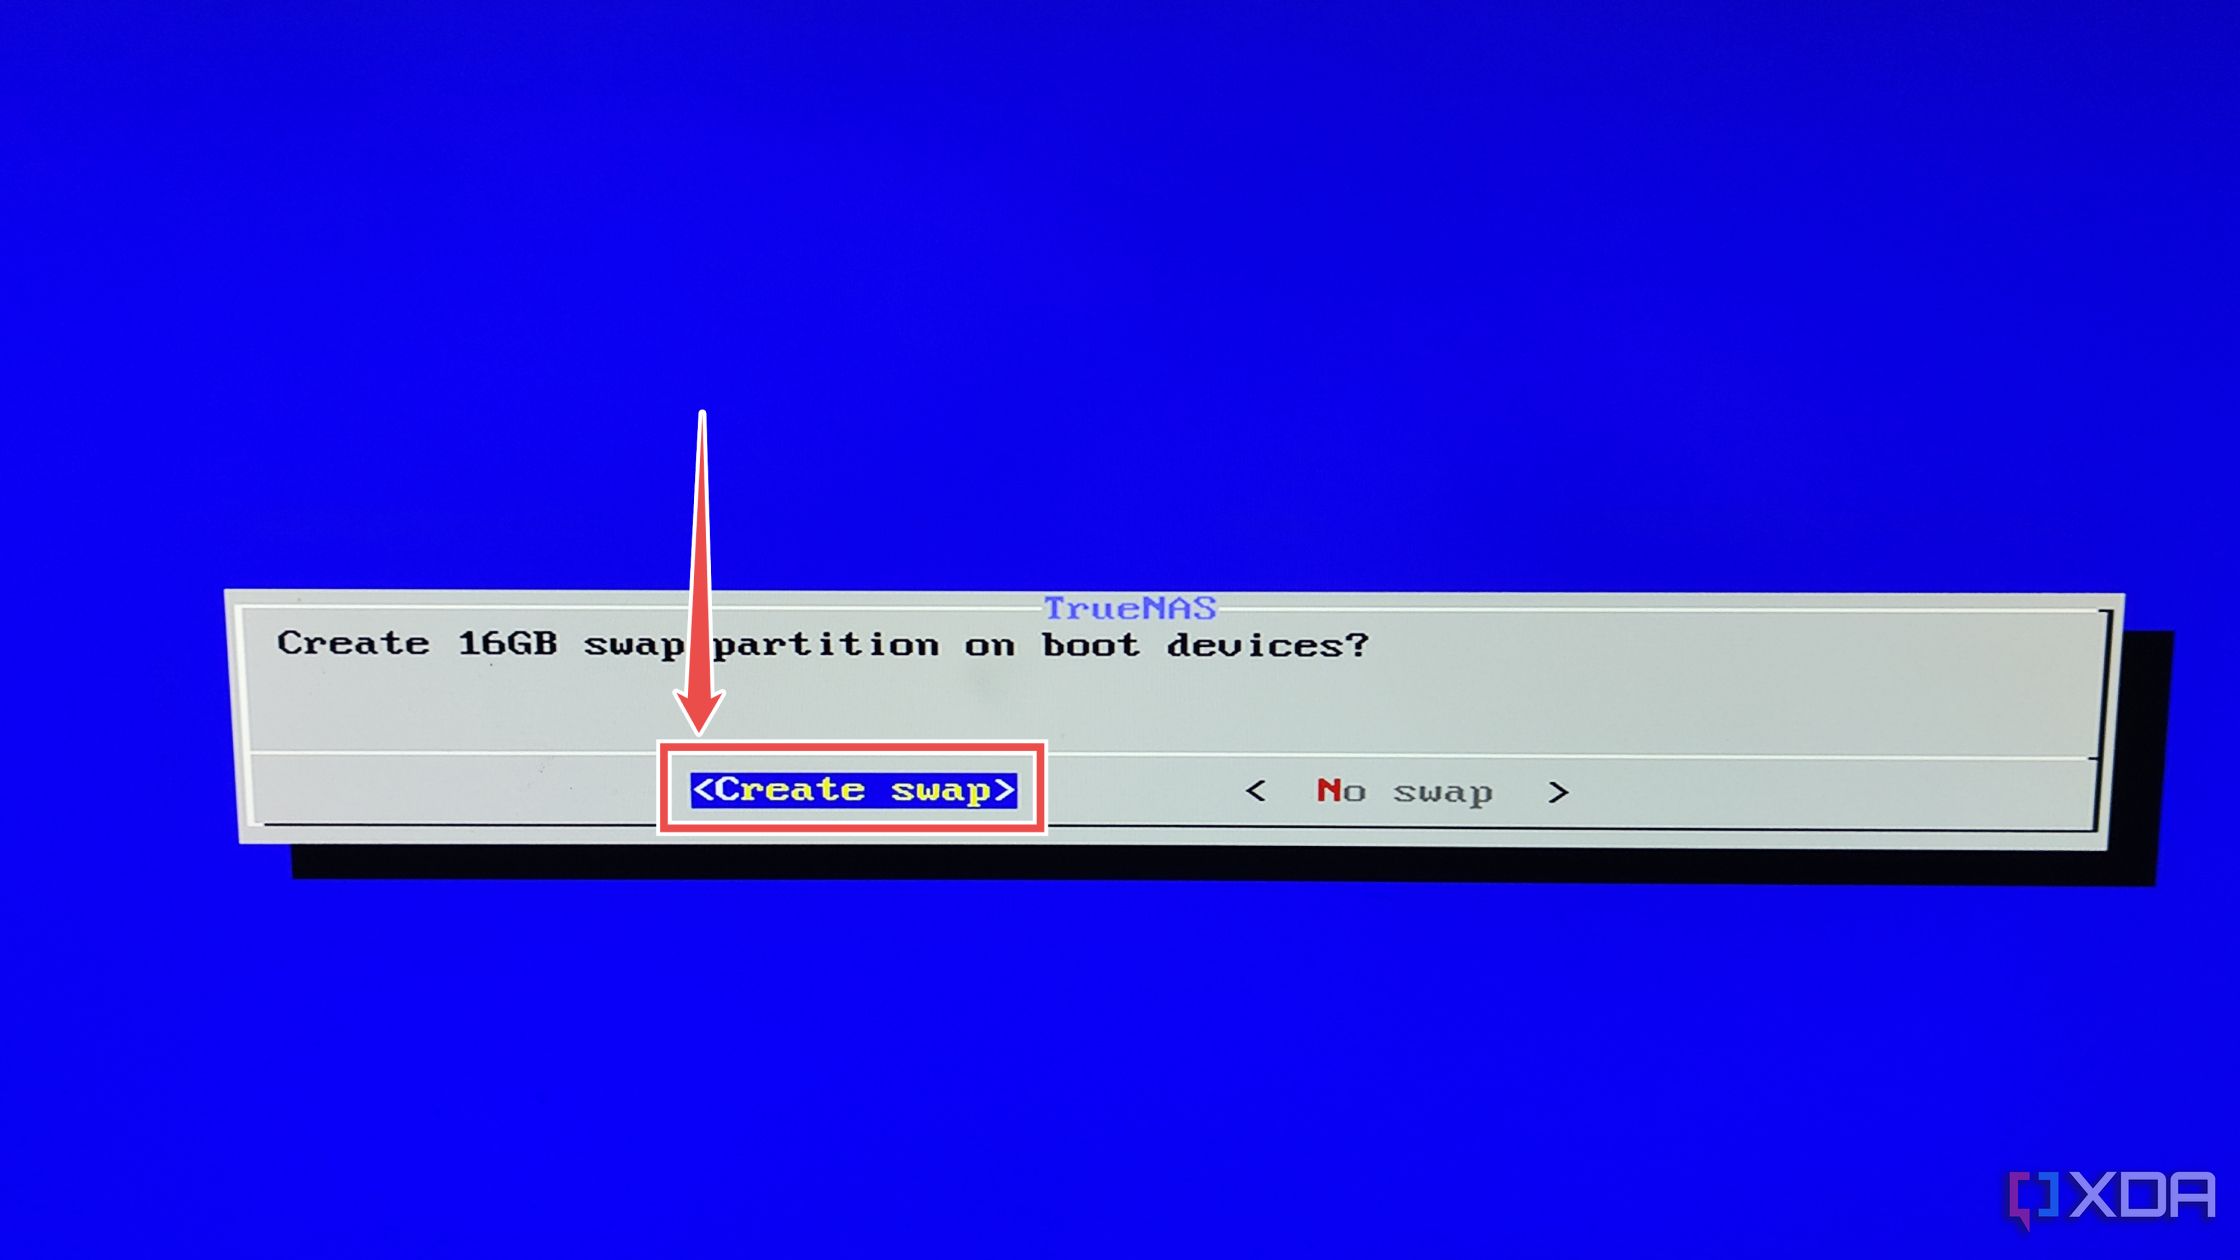
- Tap Create Swap when TrueNAS Scale asks you to create a 16GB swap partition.
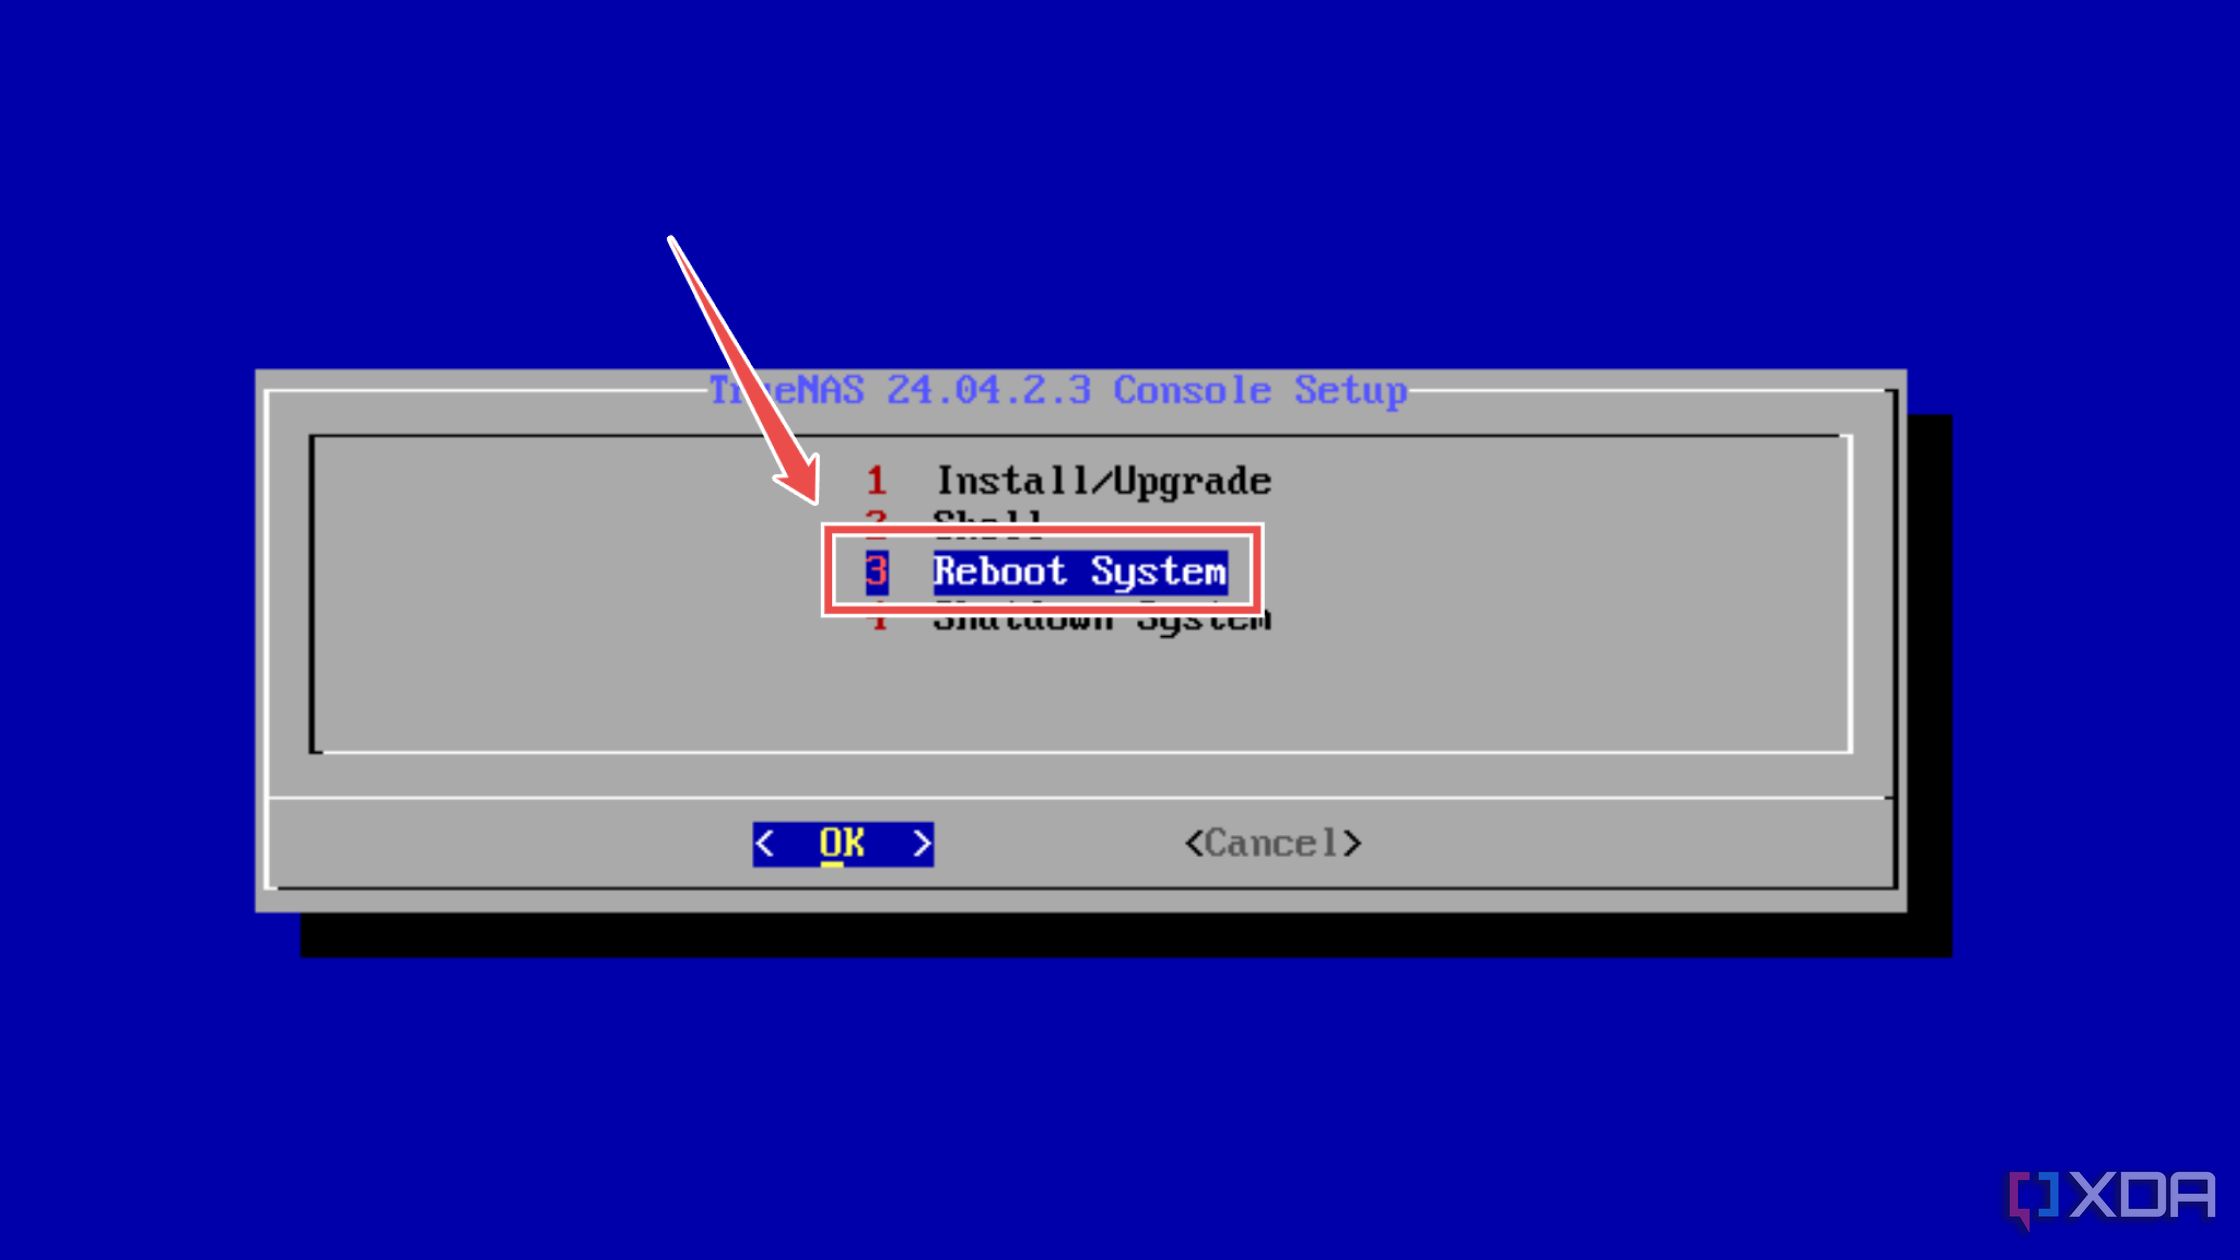
- After the setup is complete, hit Reboot System and unplug your bootable drive from the NAS.


Accessing the web UI and creating a dataset
After the restart, your NAS will boot into TrueNAS Scale’s command-line interface. However, we’ll utilize the menu-riddled web UI for the rest of the procedure.
- Note the IP address mentioned in the TrueNAS Scale CLI.
- Switch to your PC and enter this address into the Search bar of your favorite web browser.
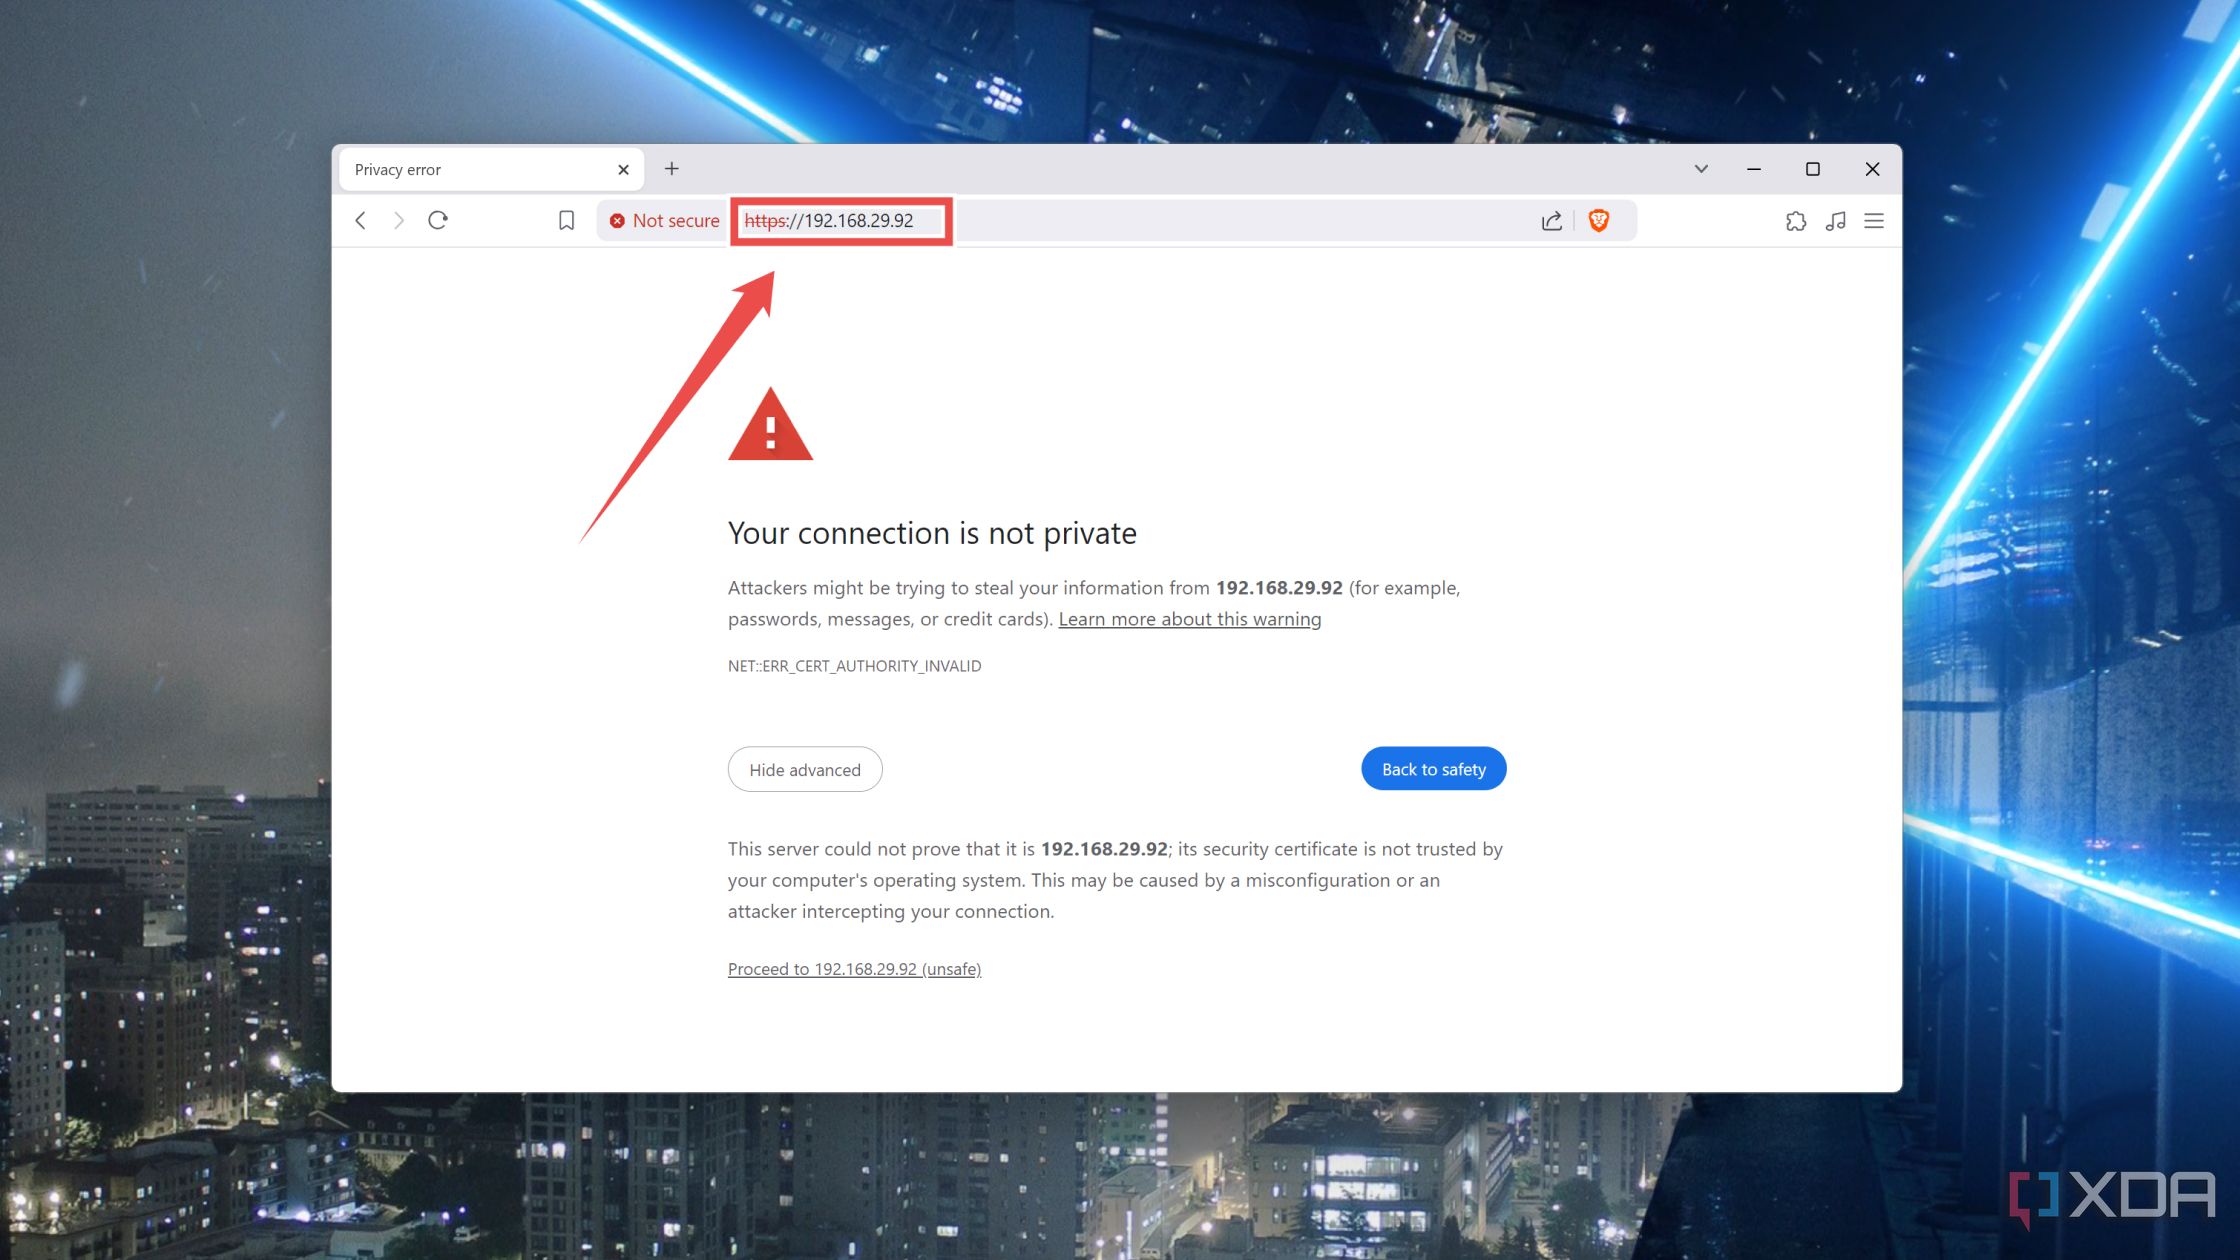
- When your browser cautions you about security, hit the Advanced button and choose the Proceed to IP_Address (unsafe) option.

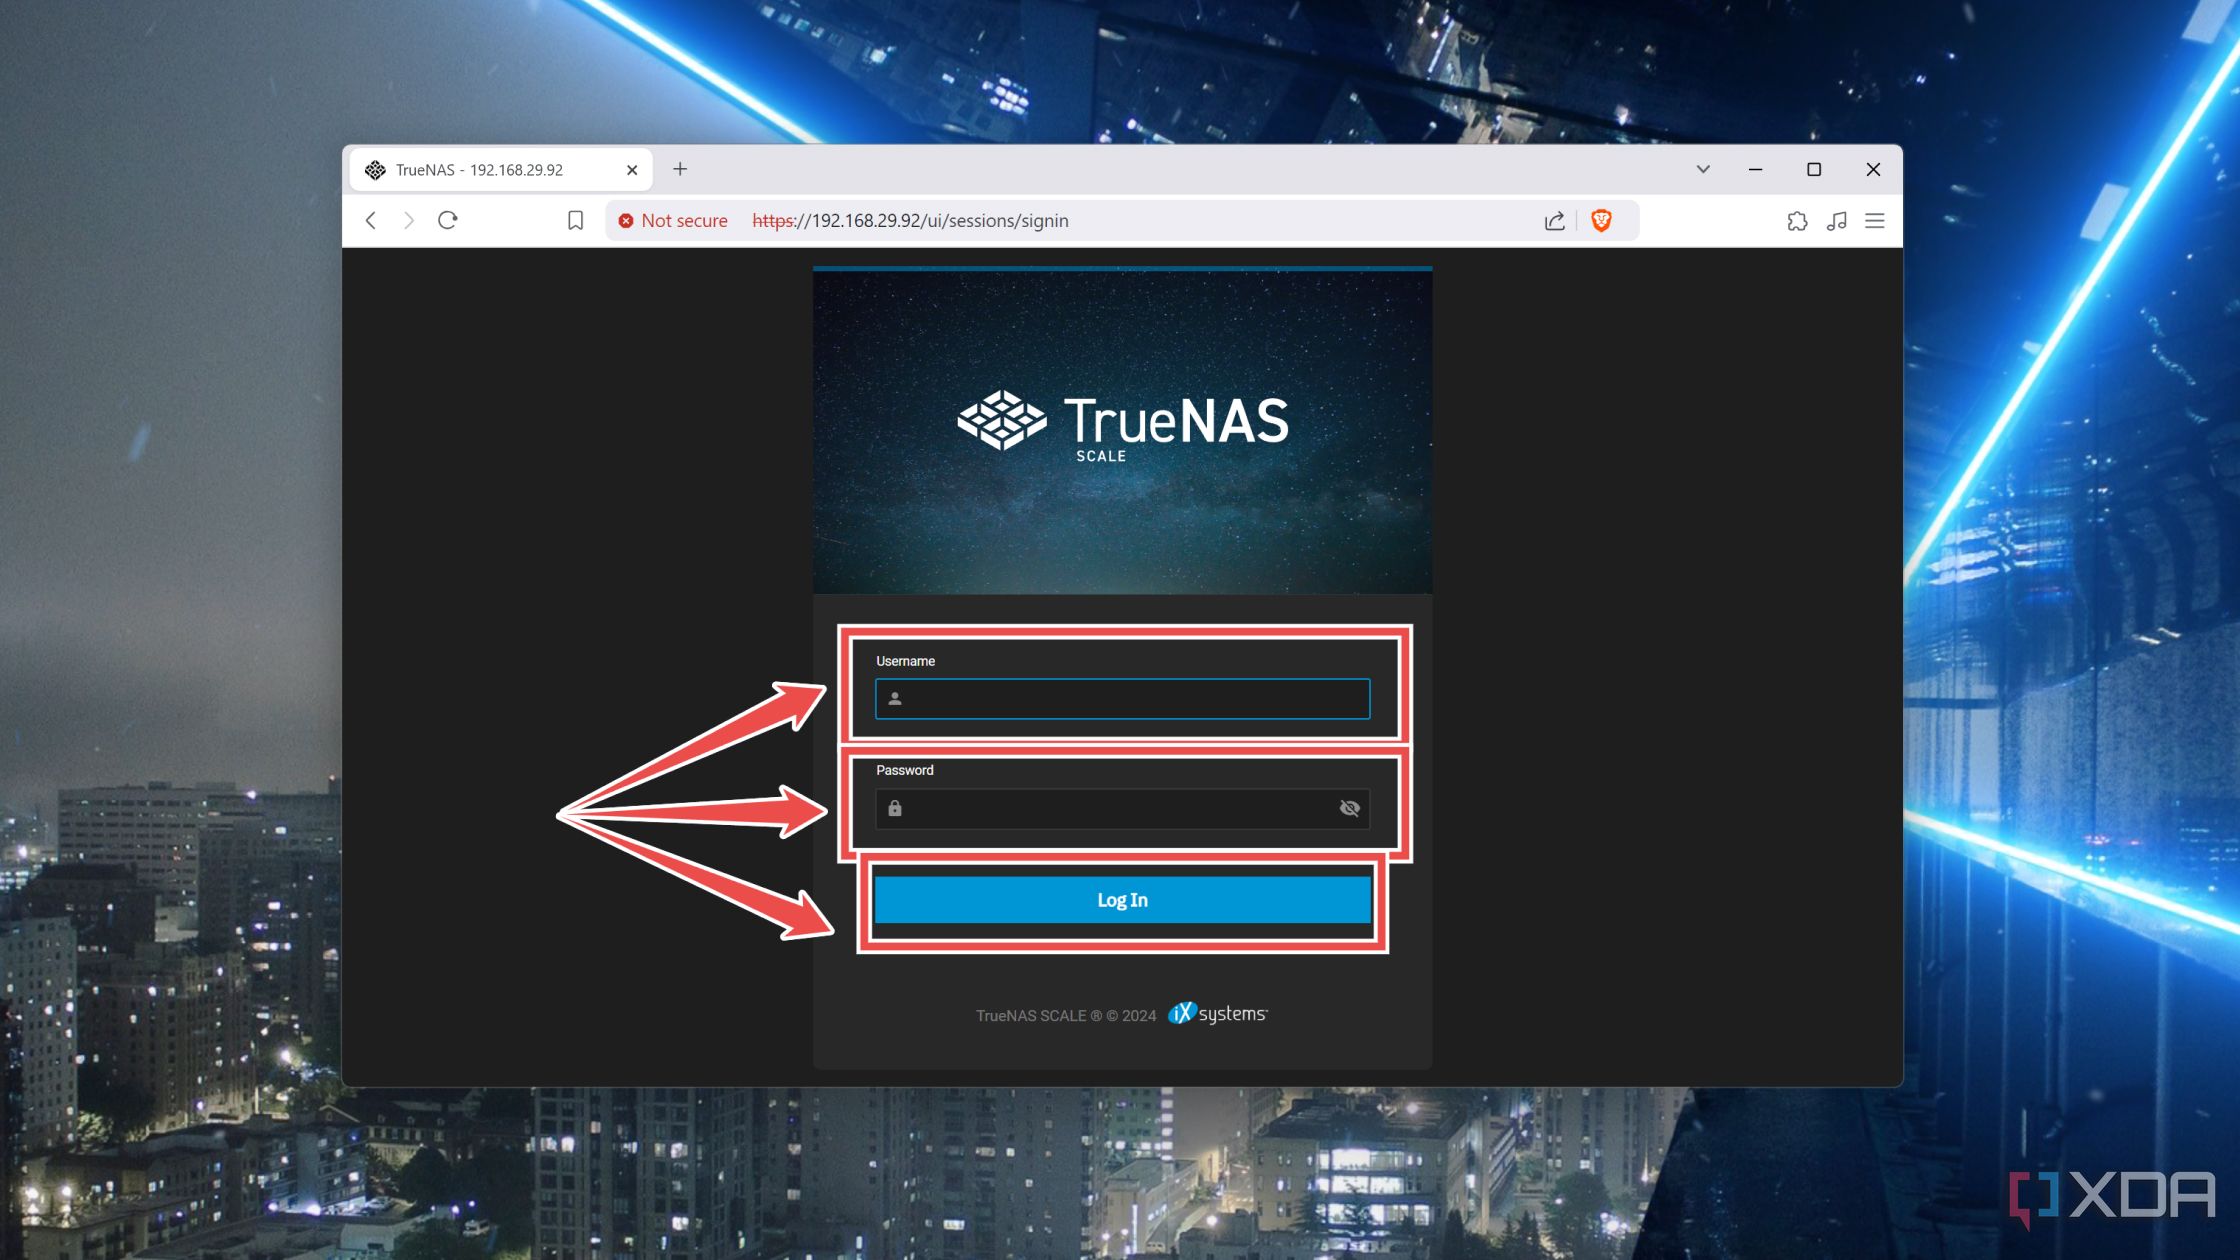
- Enter admin as the Username followed by the Password you’d set earlier.
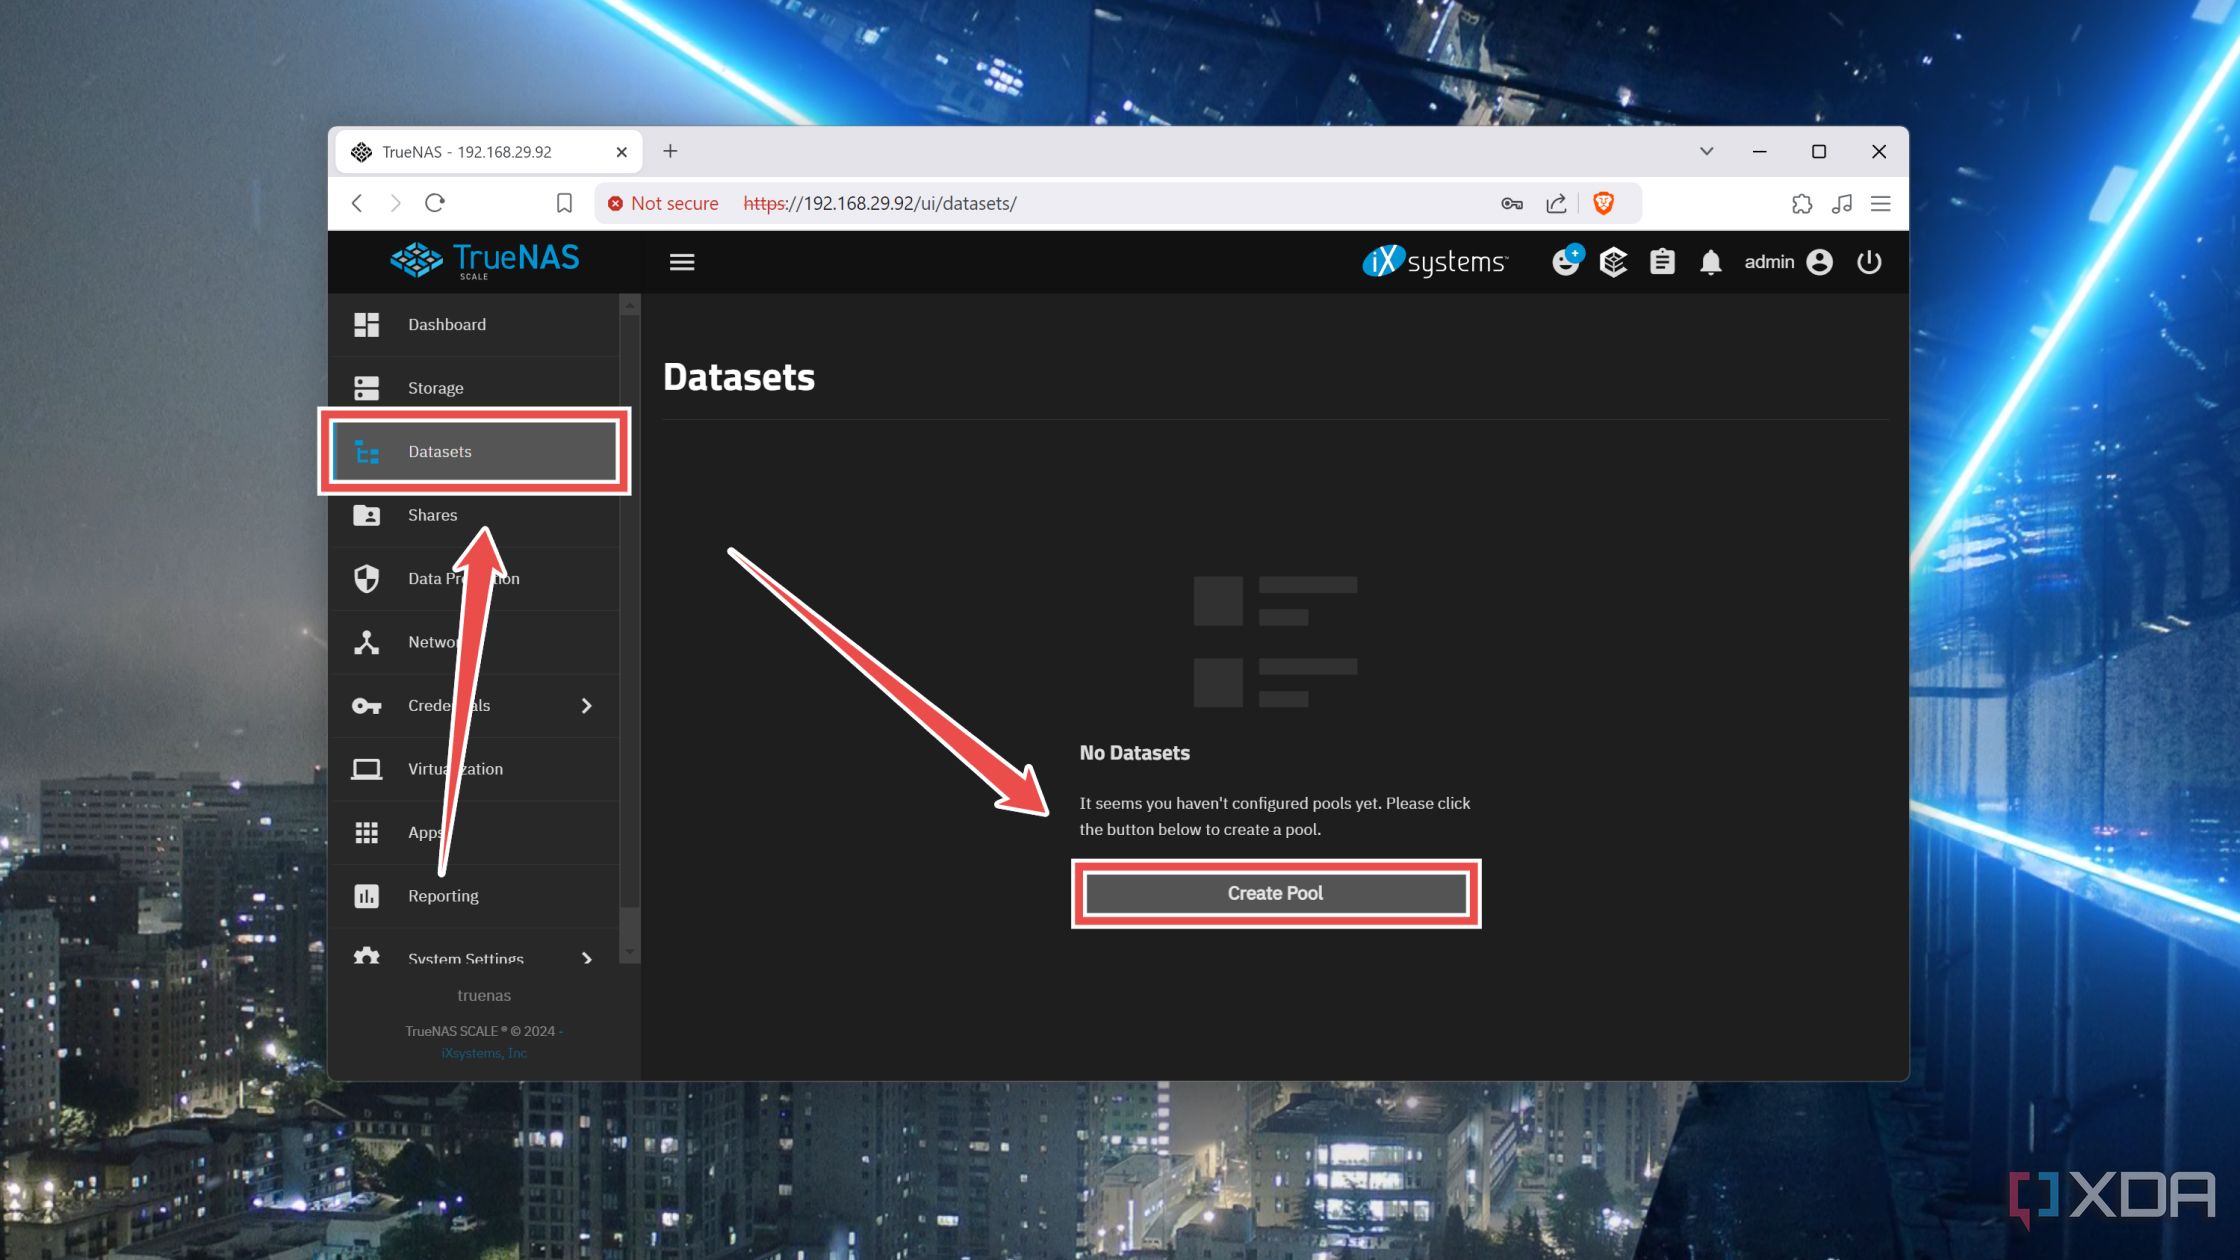
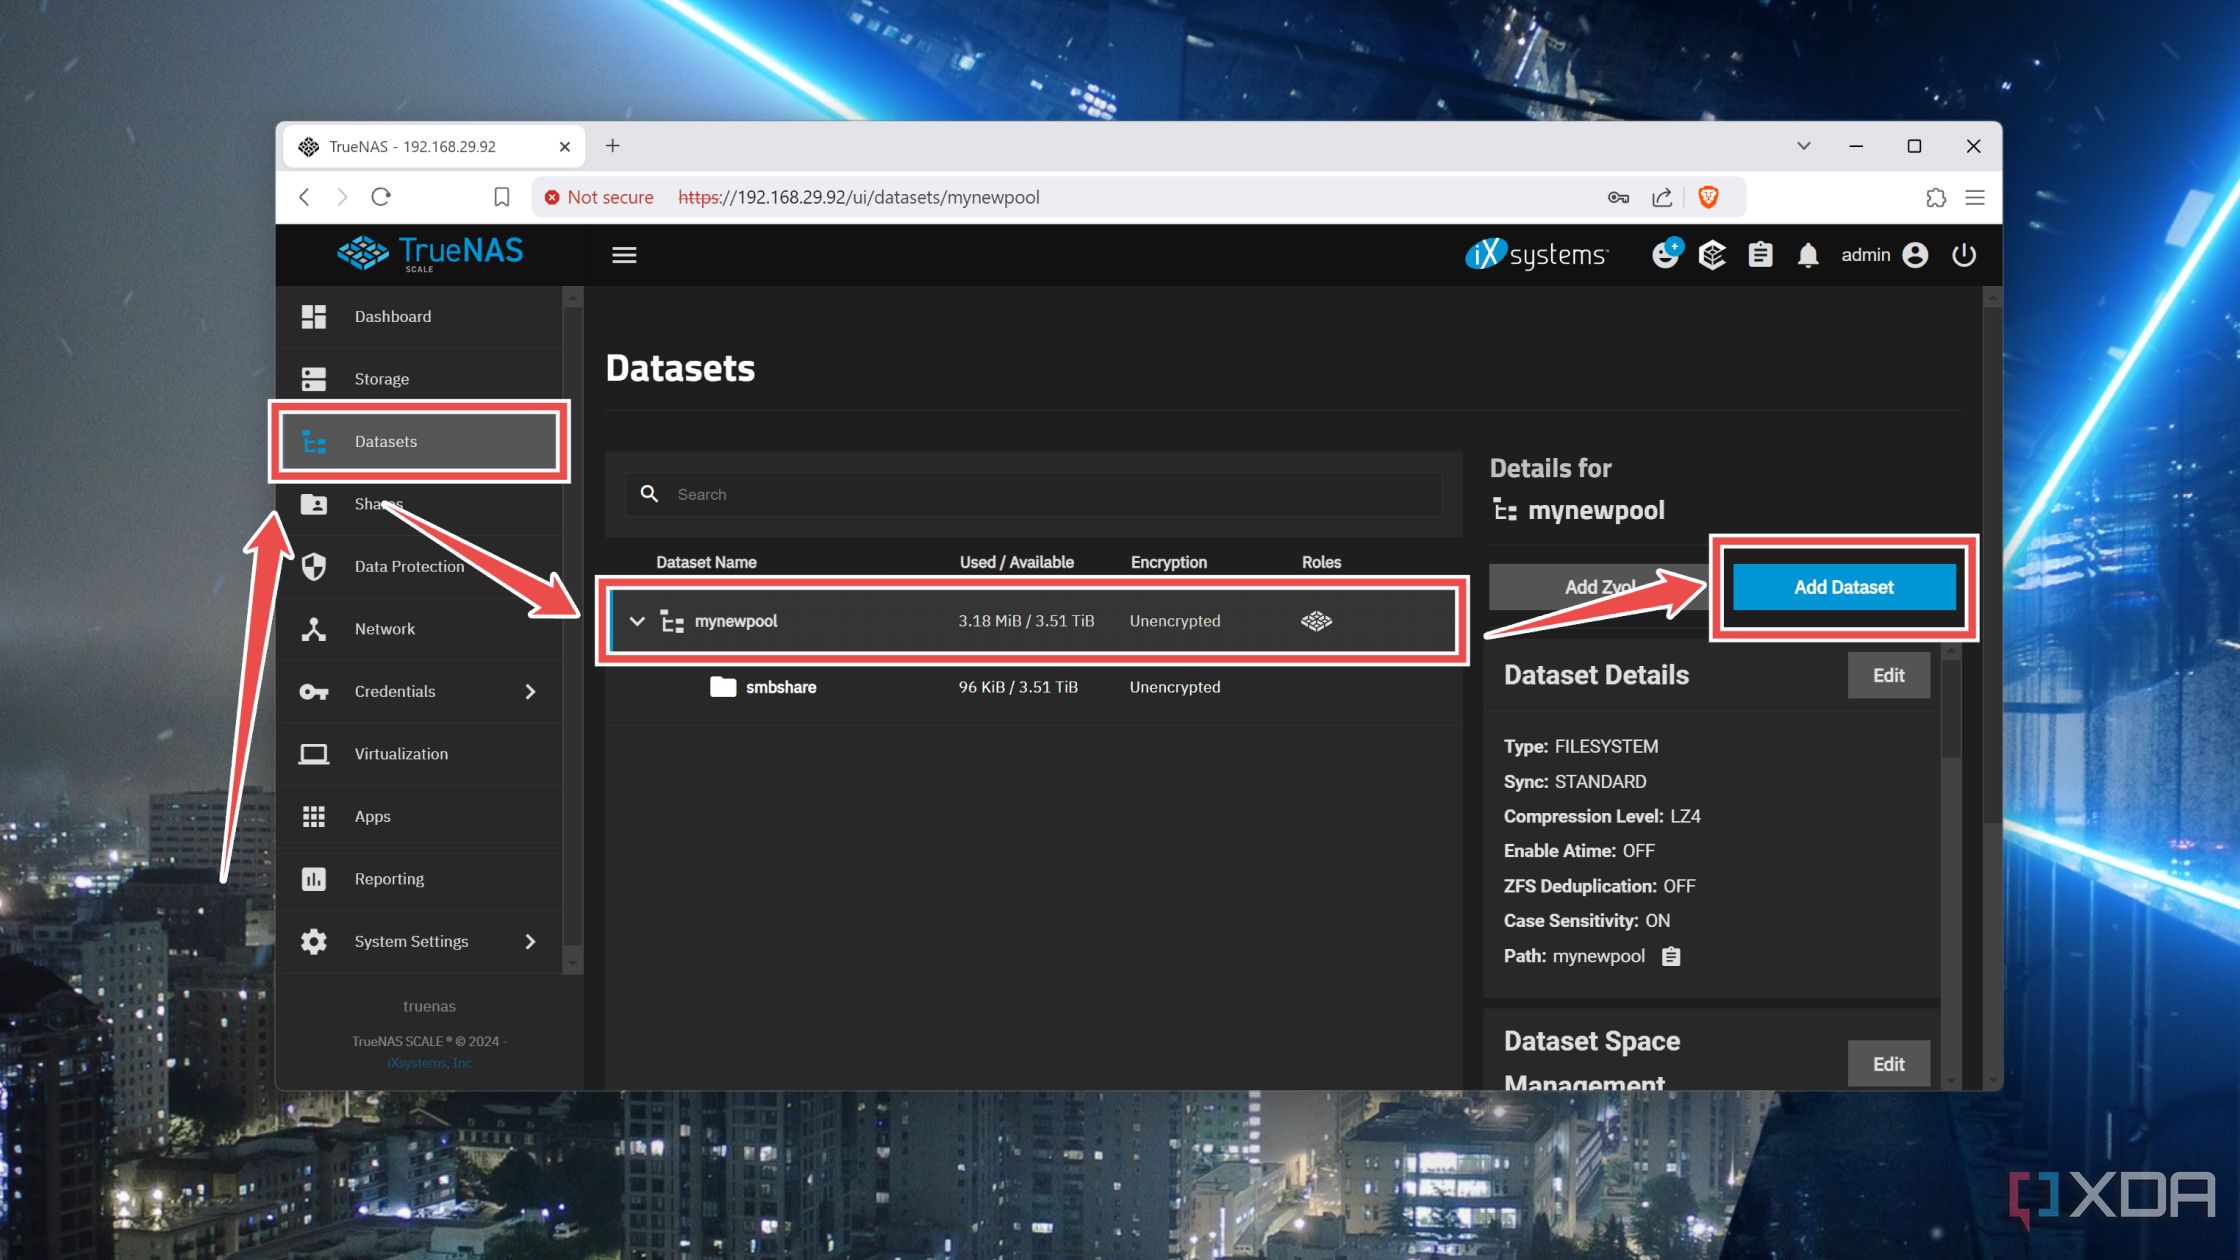
- Head to the Datasets tab and tap the Create Pool option.


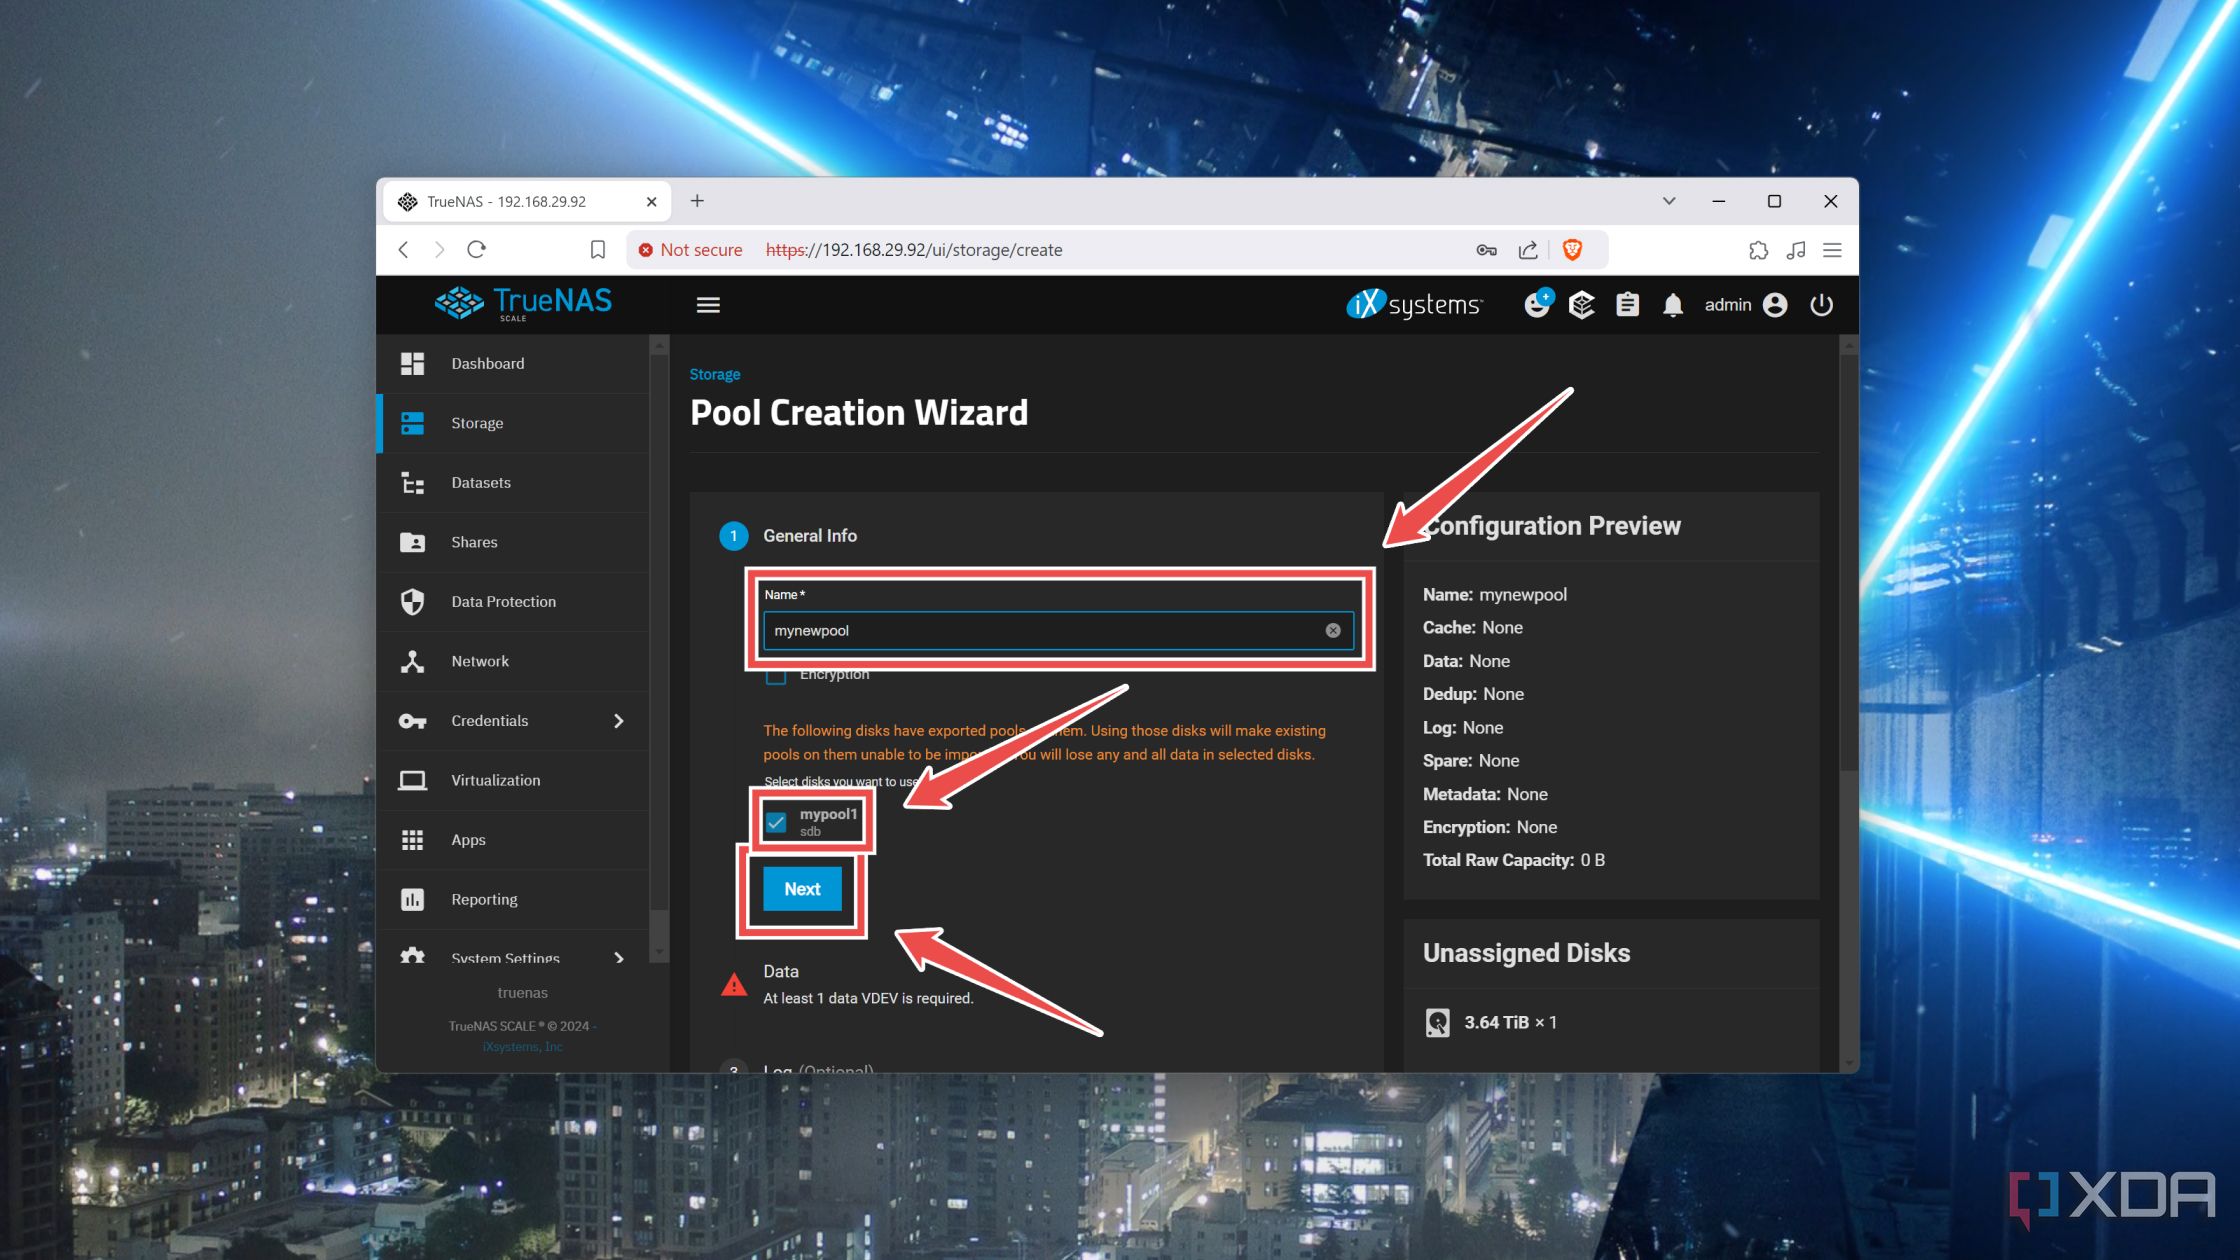
- Enter a Name for the pool, choose the Disk you’d like to add to it, and tap Next.
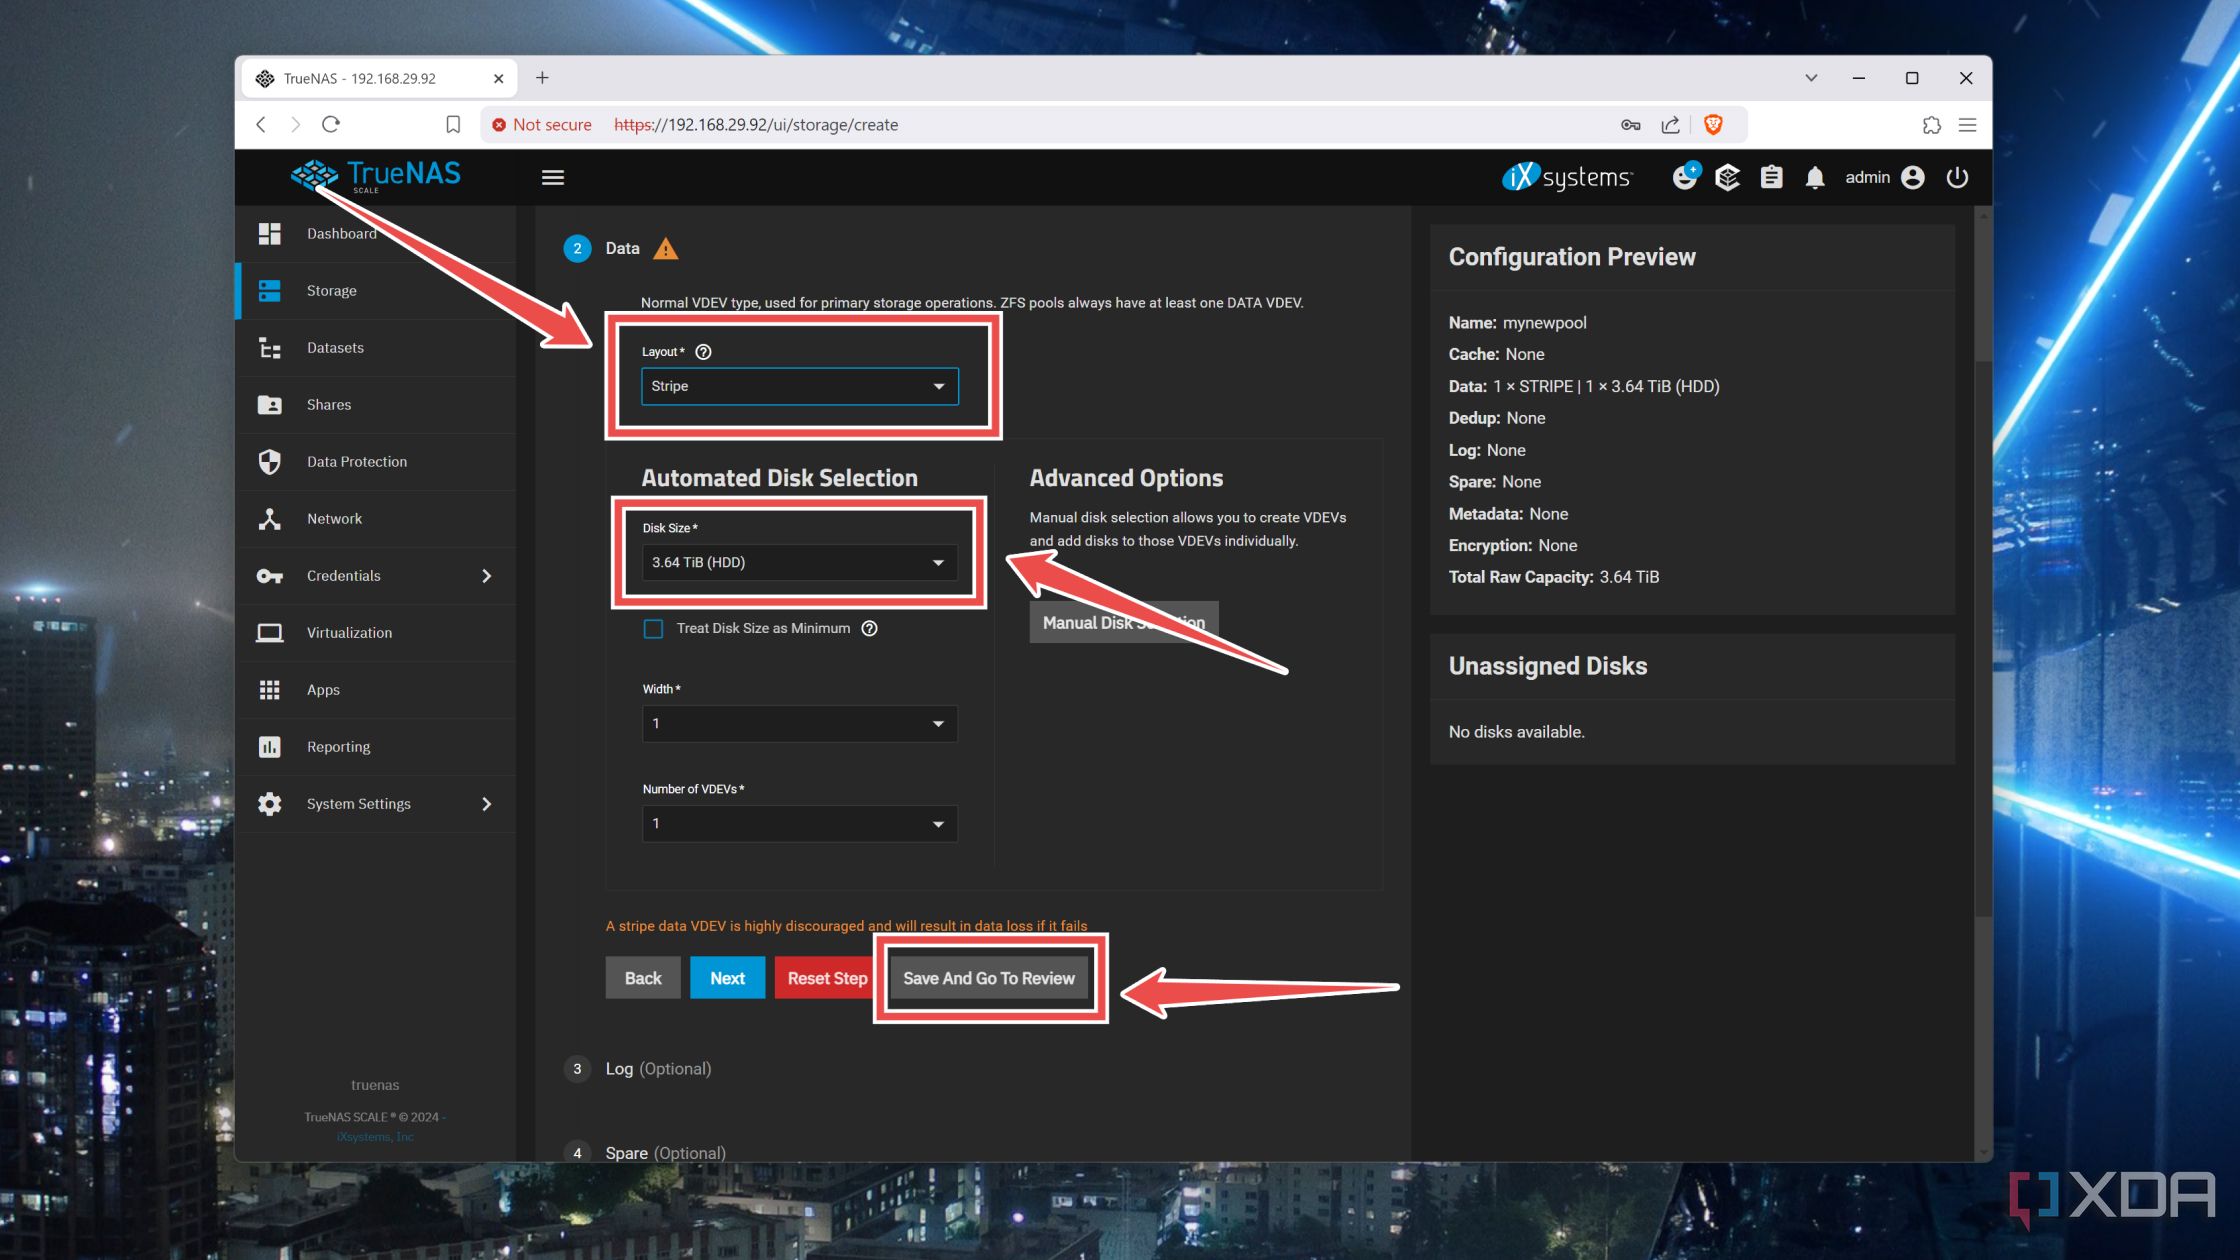
- Choose the Layout that best suits your setup and pick the Disk Size before clicking on Save & Go To Review.
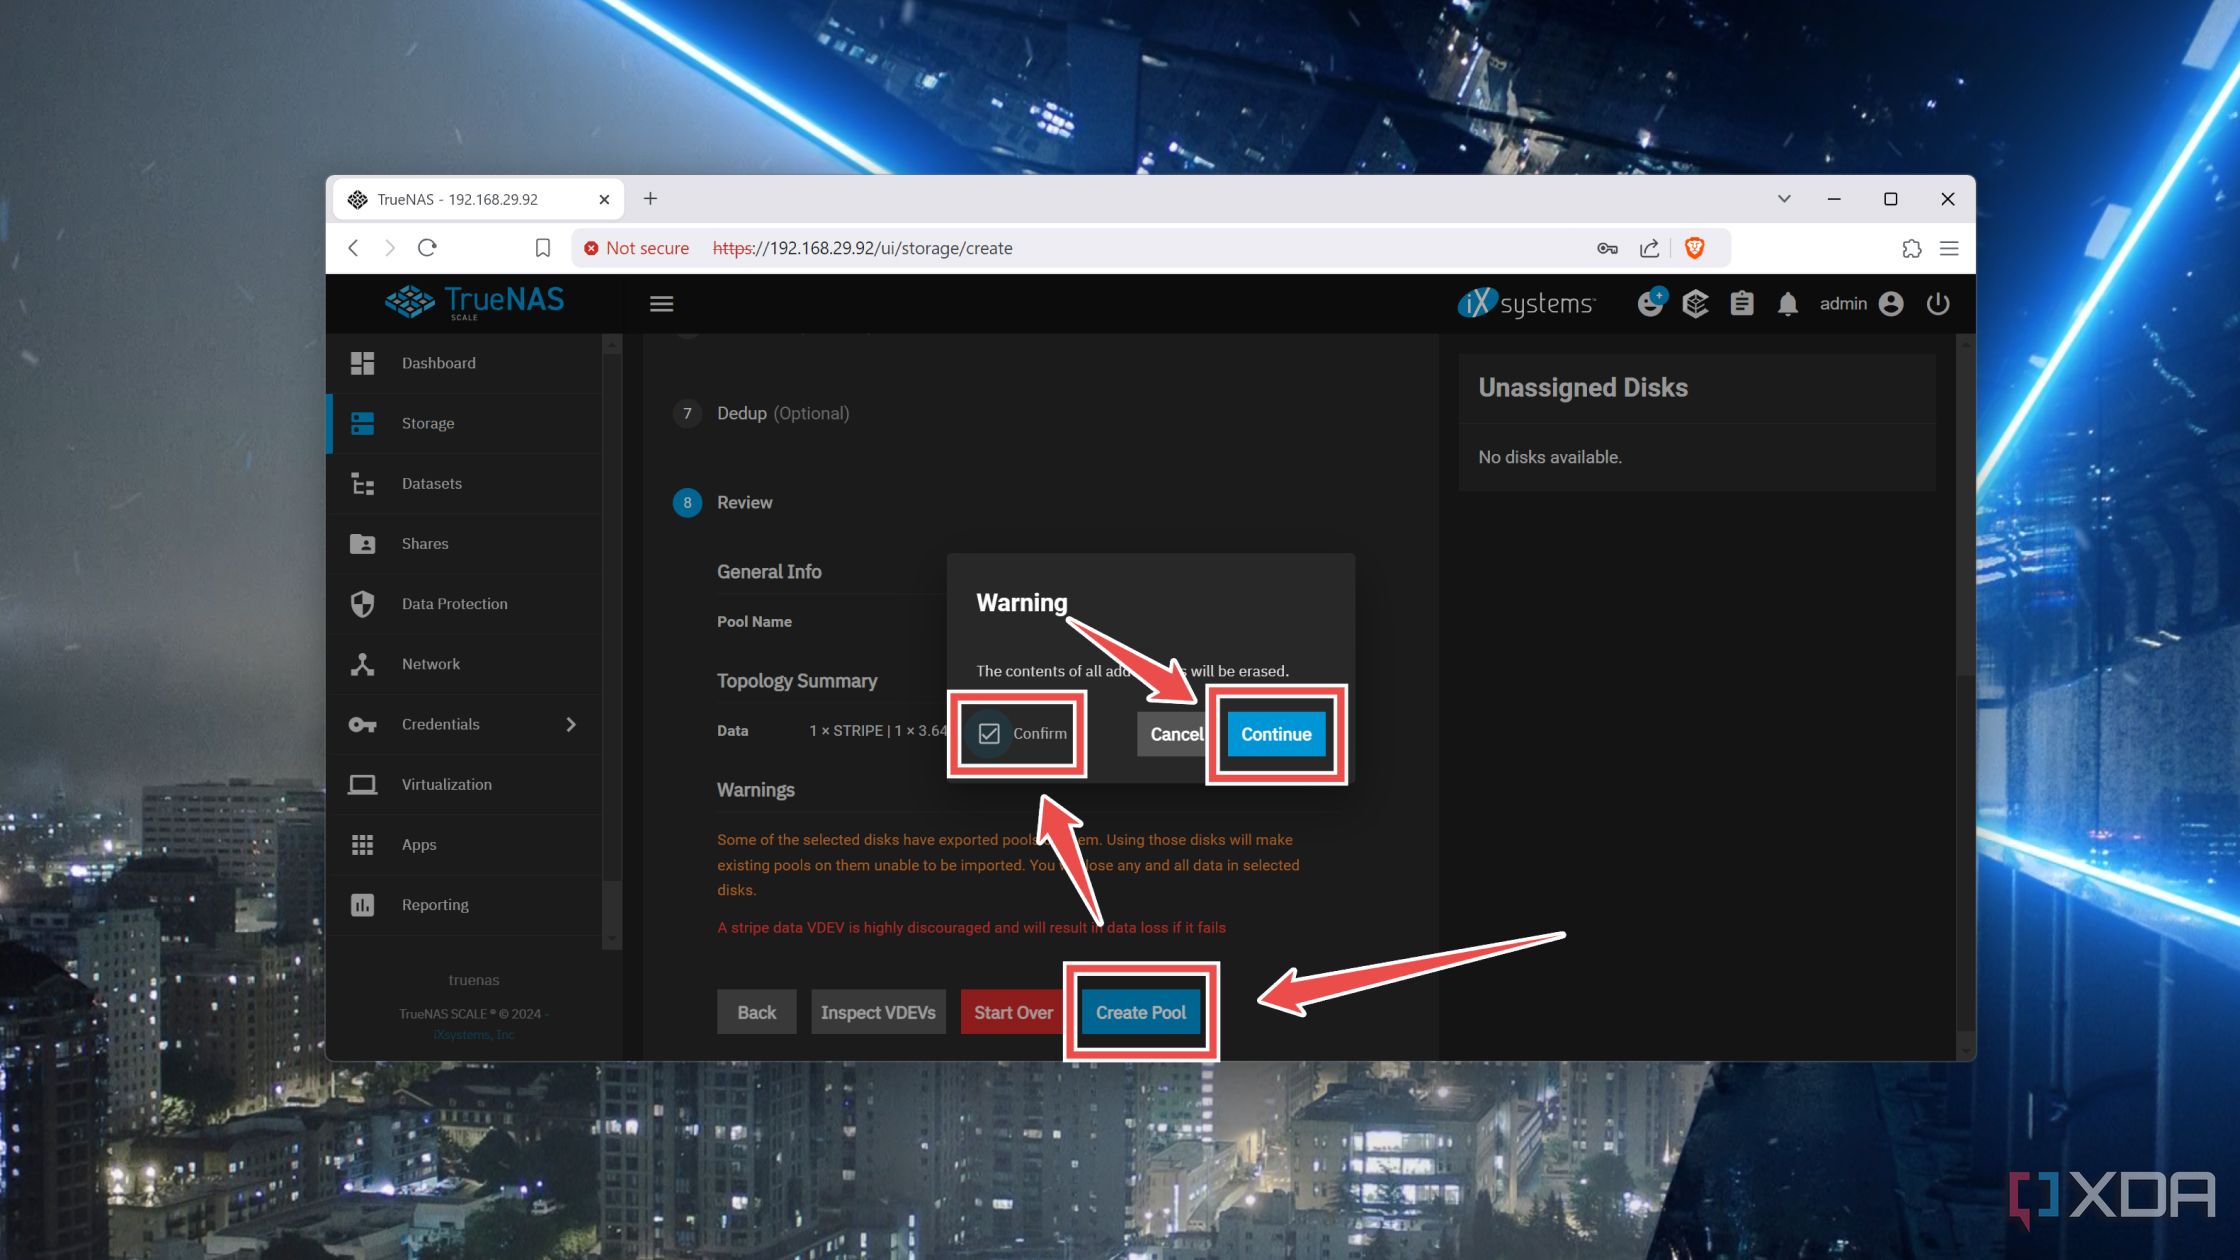
- Press the Create Pool button, tap the Confirm checkbox, and hit Continue.
- Click on the Add Dataset option for the Storage Pool you just created.
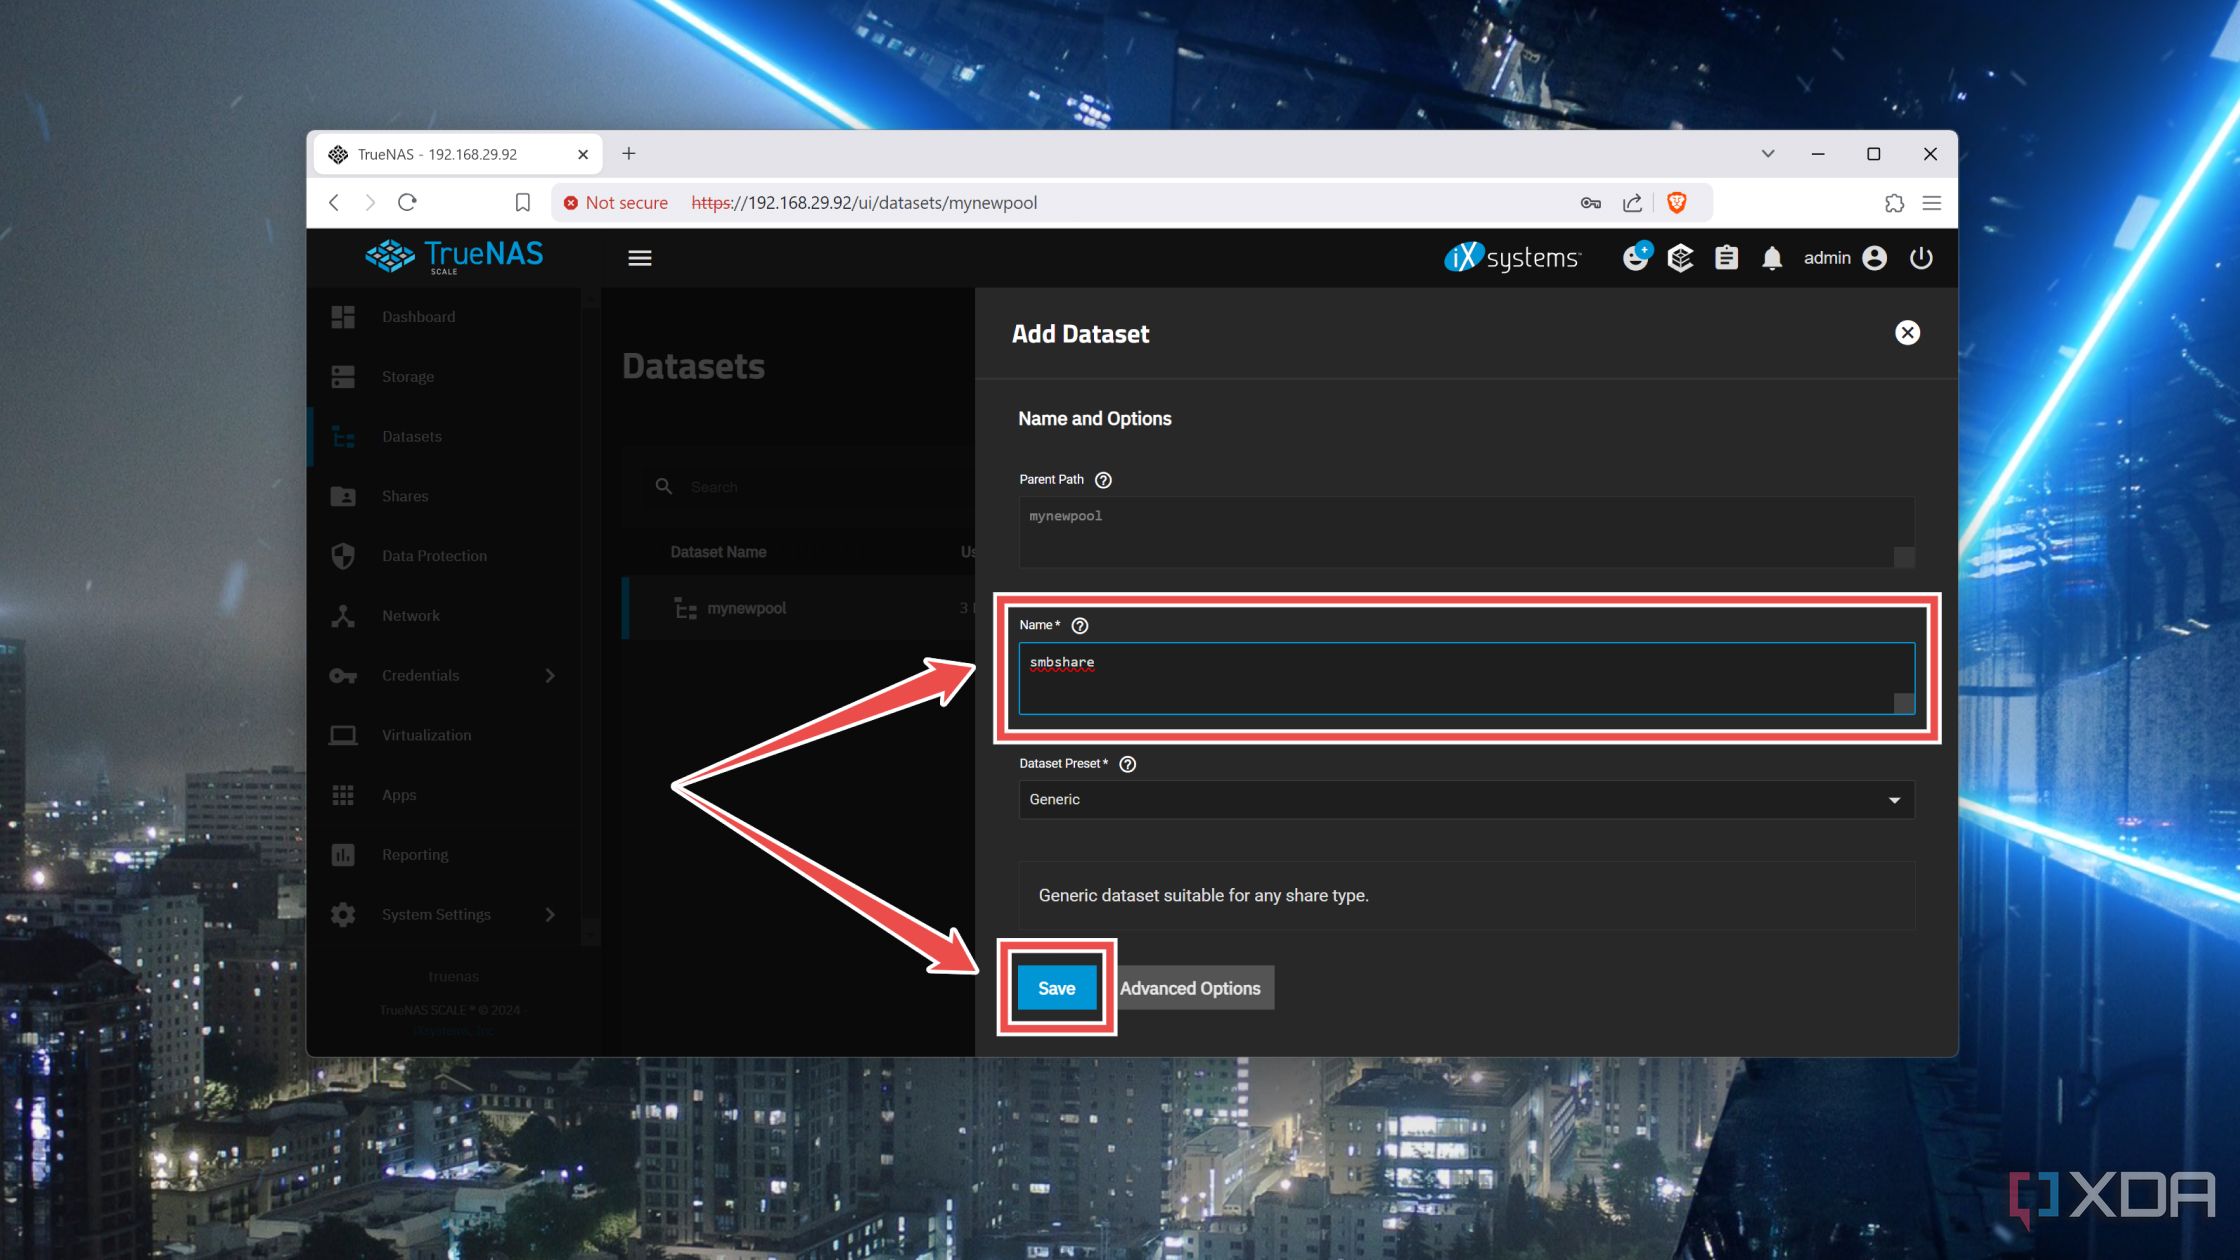
- Enter a Name for the dataset and hit the Save button while leaving every other setting unchanged.


Sharing the NAS with your PC
With that, you’ve successfully created a storage pool using your drives. But if you want to access it from your devices, you’ll need to configure a sharing protocol. We’ll go SMB because it’s fairly easy to set up and works on most devices.
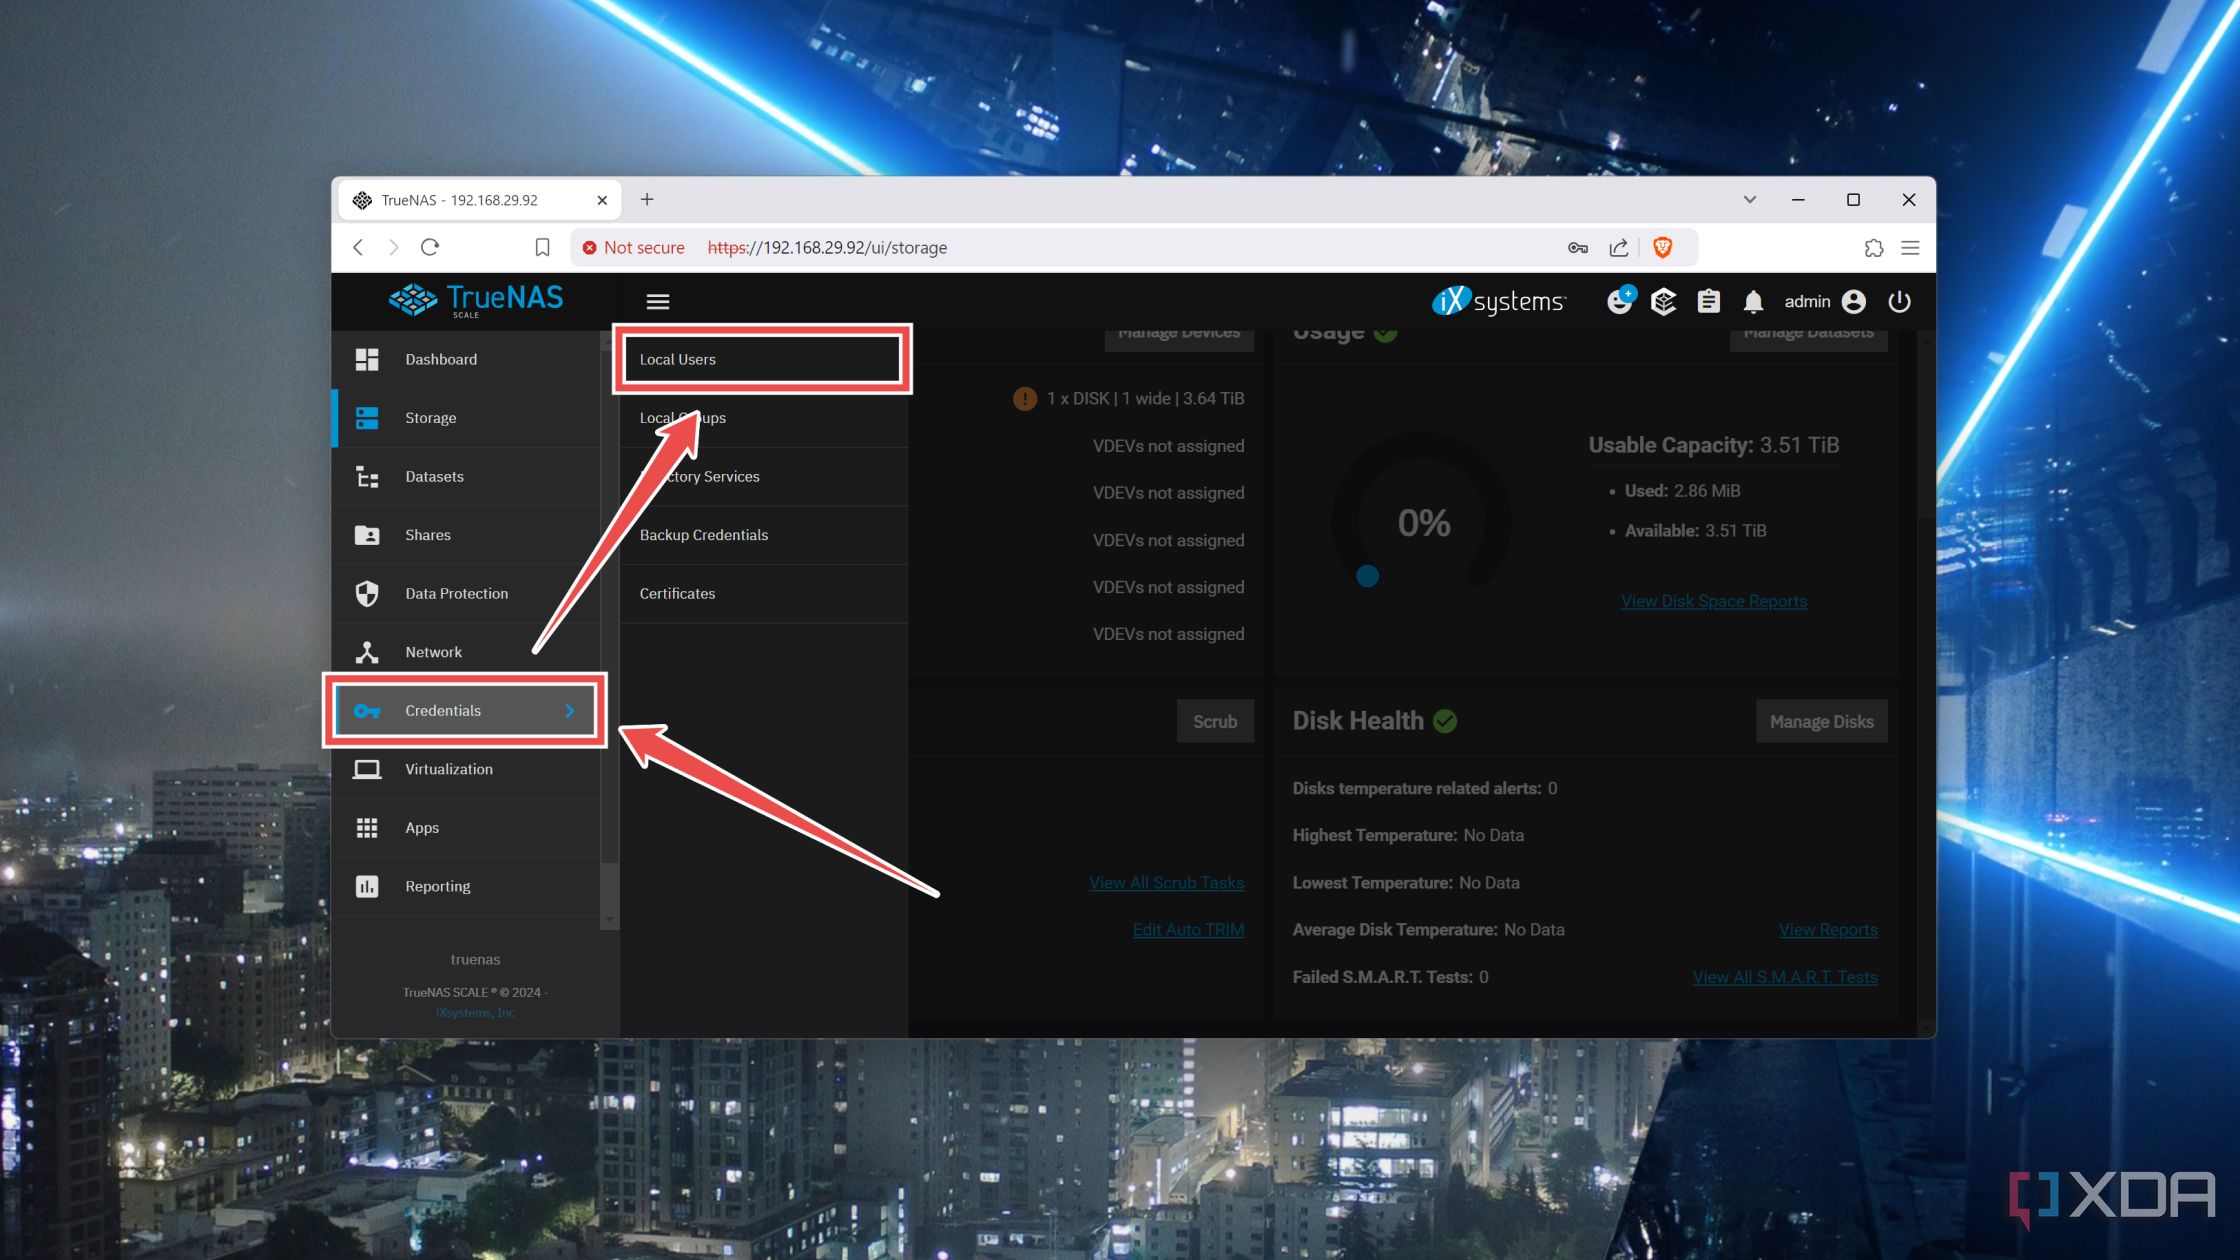
- Click on Credentials and select Users from the sub-menu.
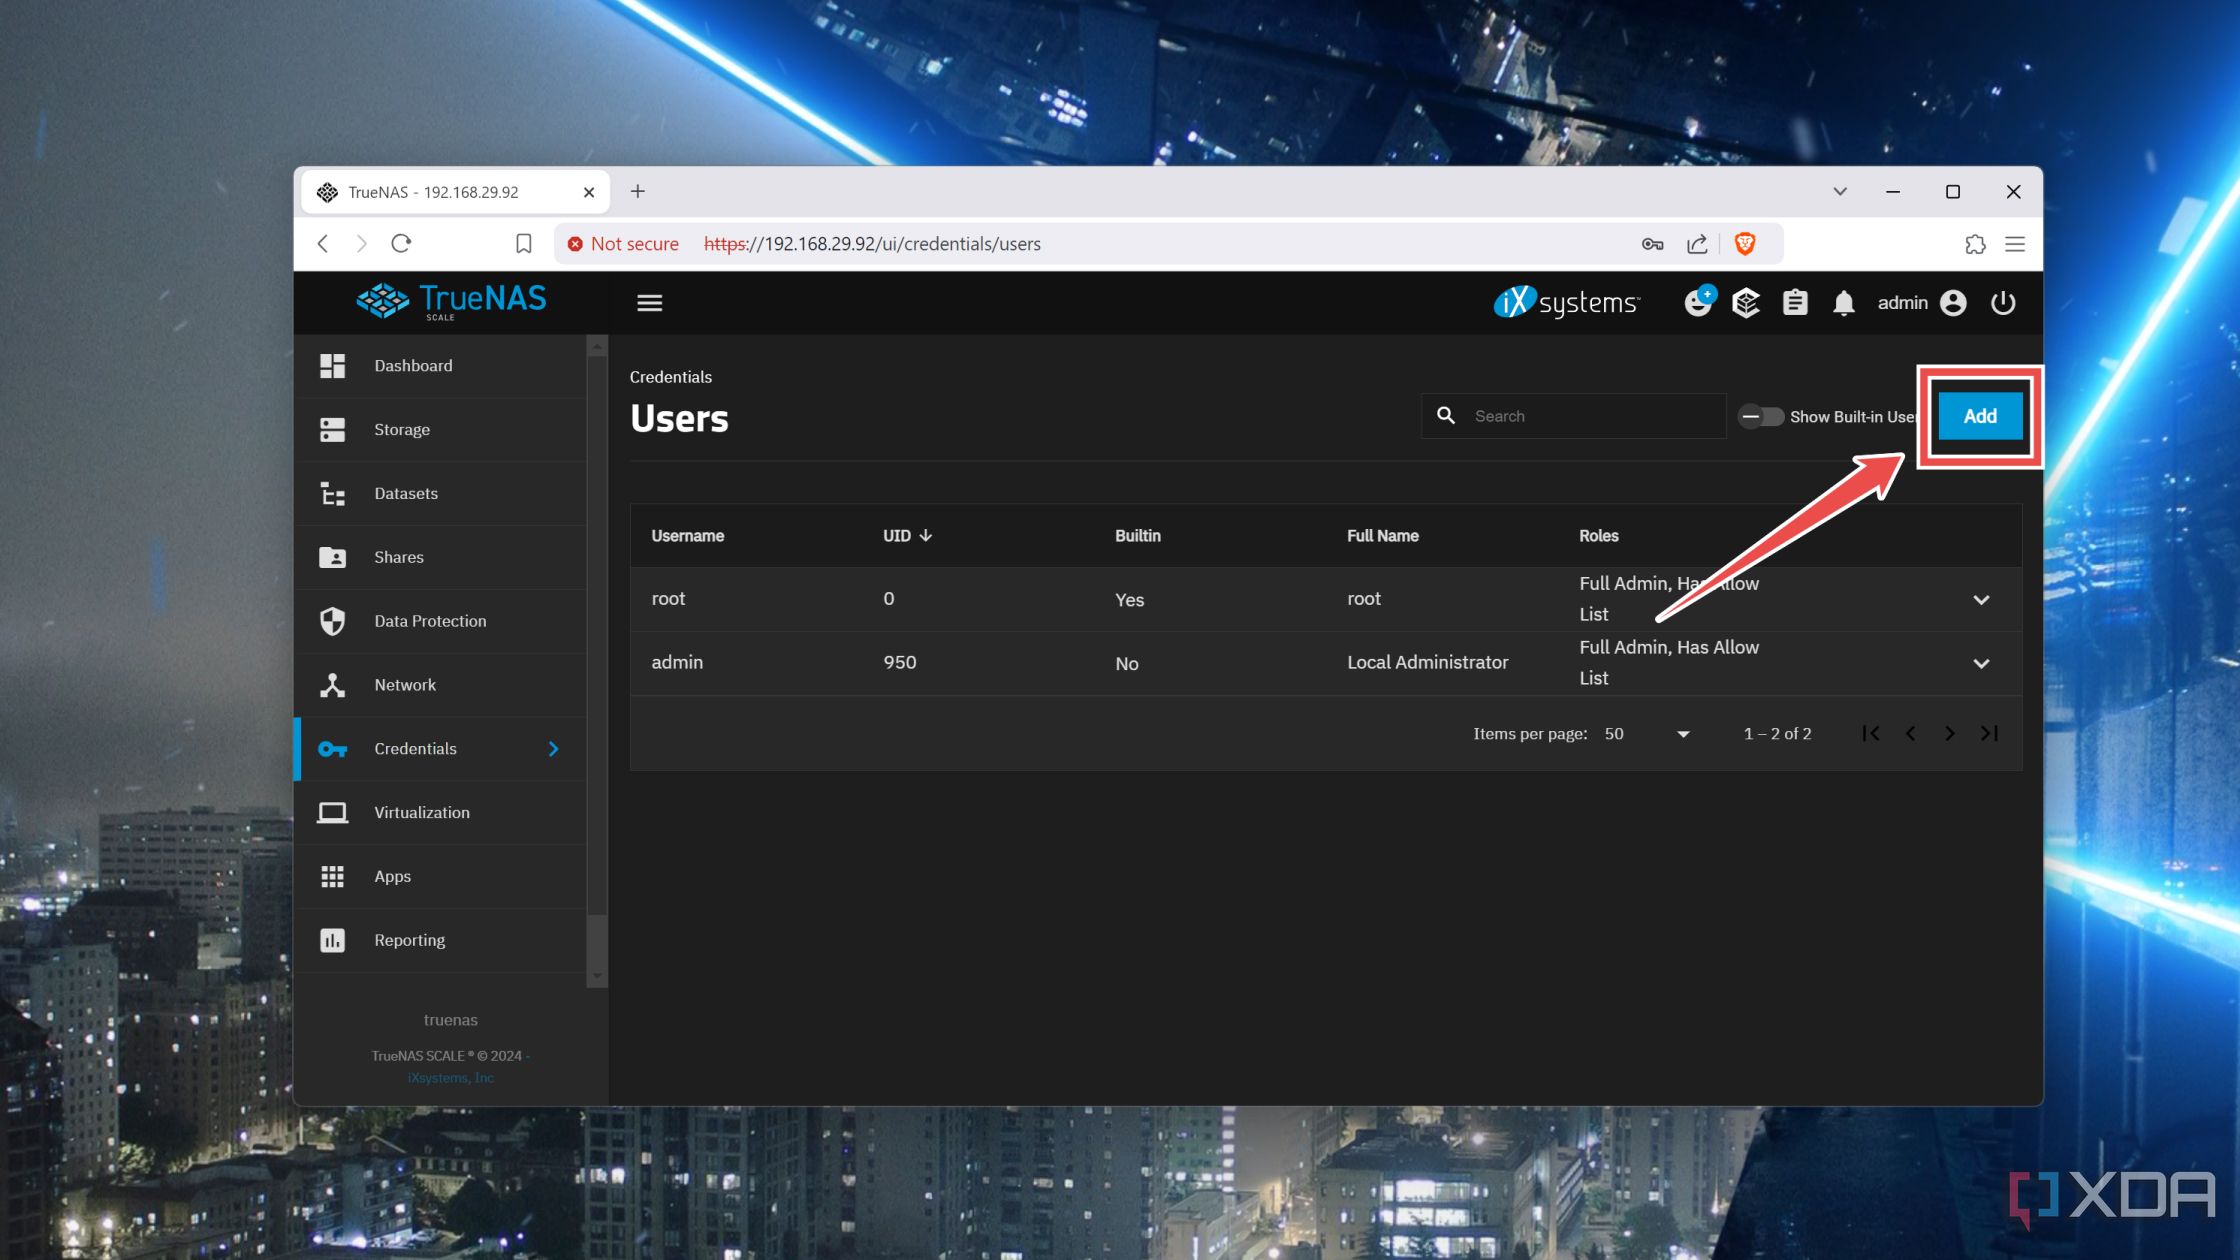
- Press the Add button.
- Enter the Full name, Username, and Password for the User.
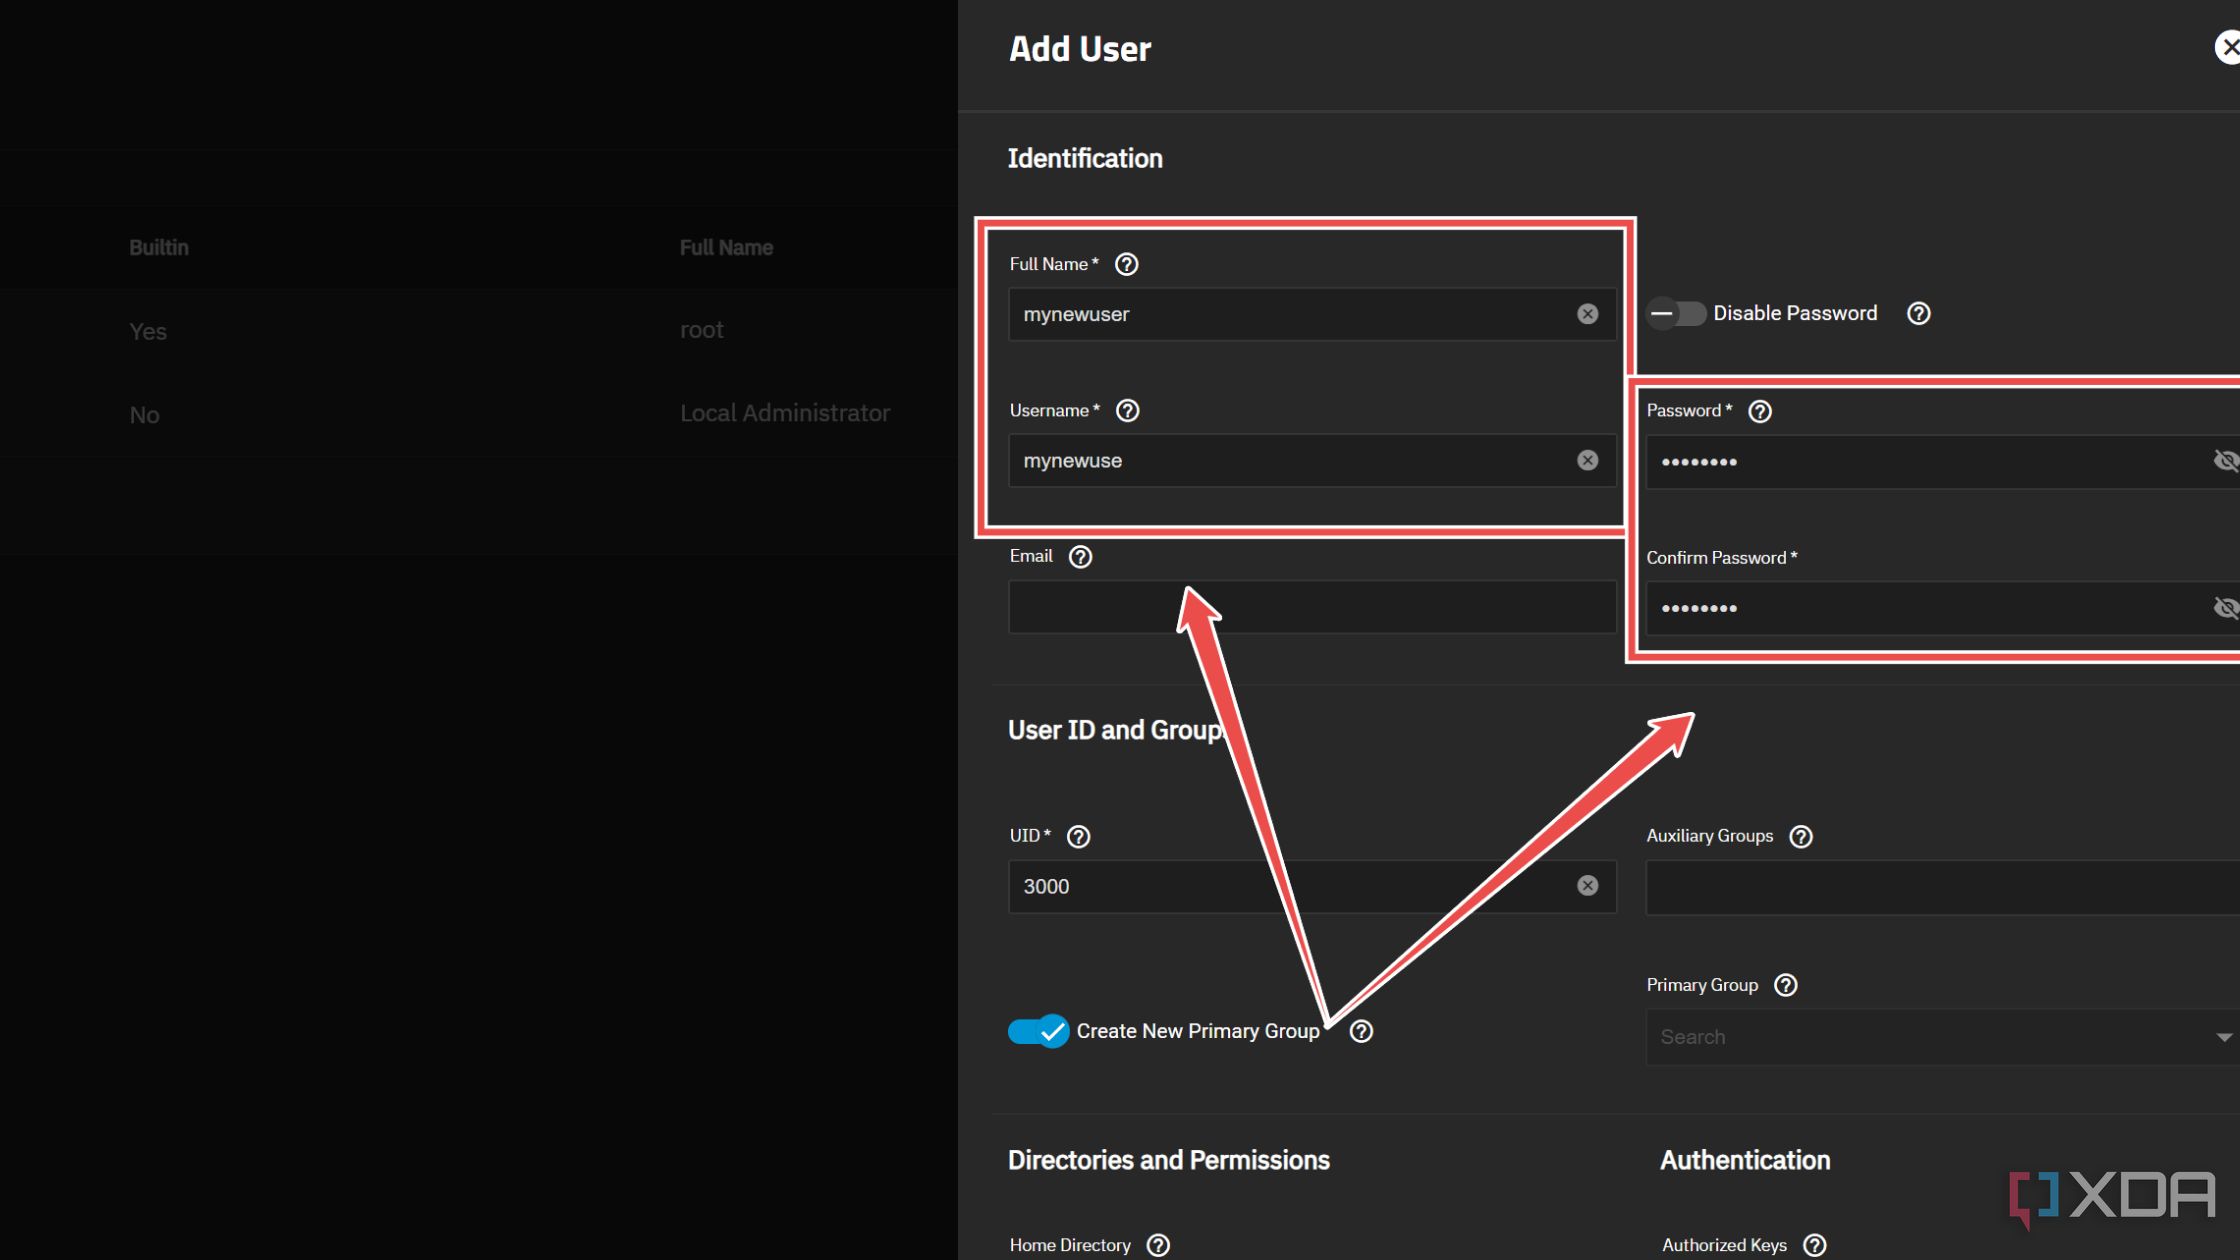
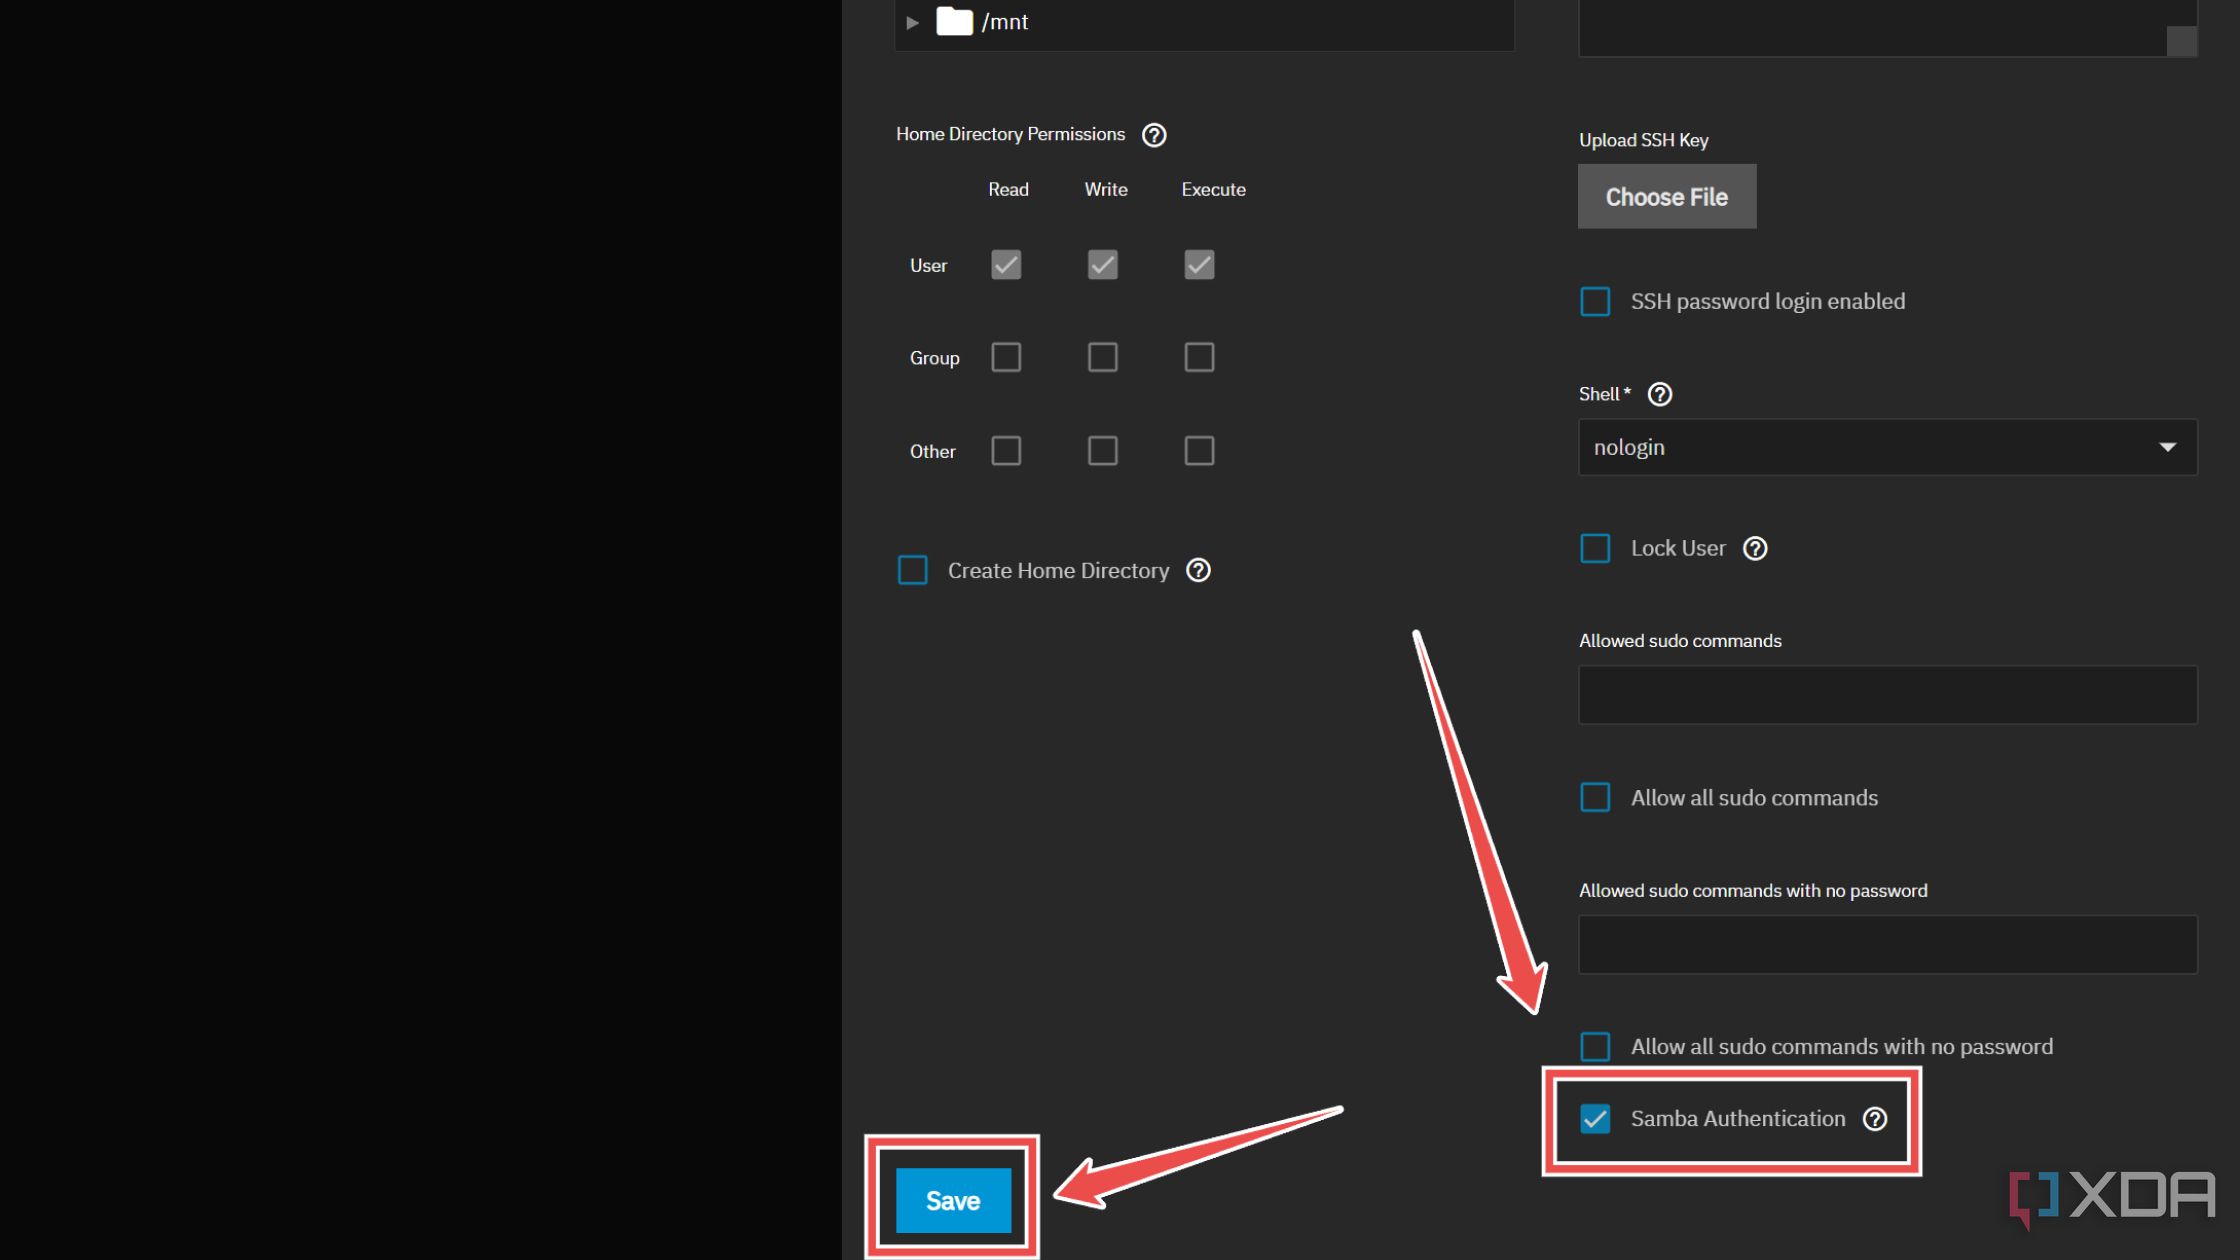
- Enable the checkbox next to Samba Authentication and hit Save.
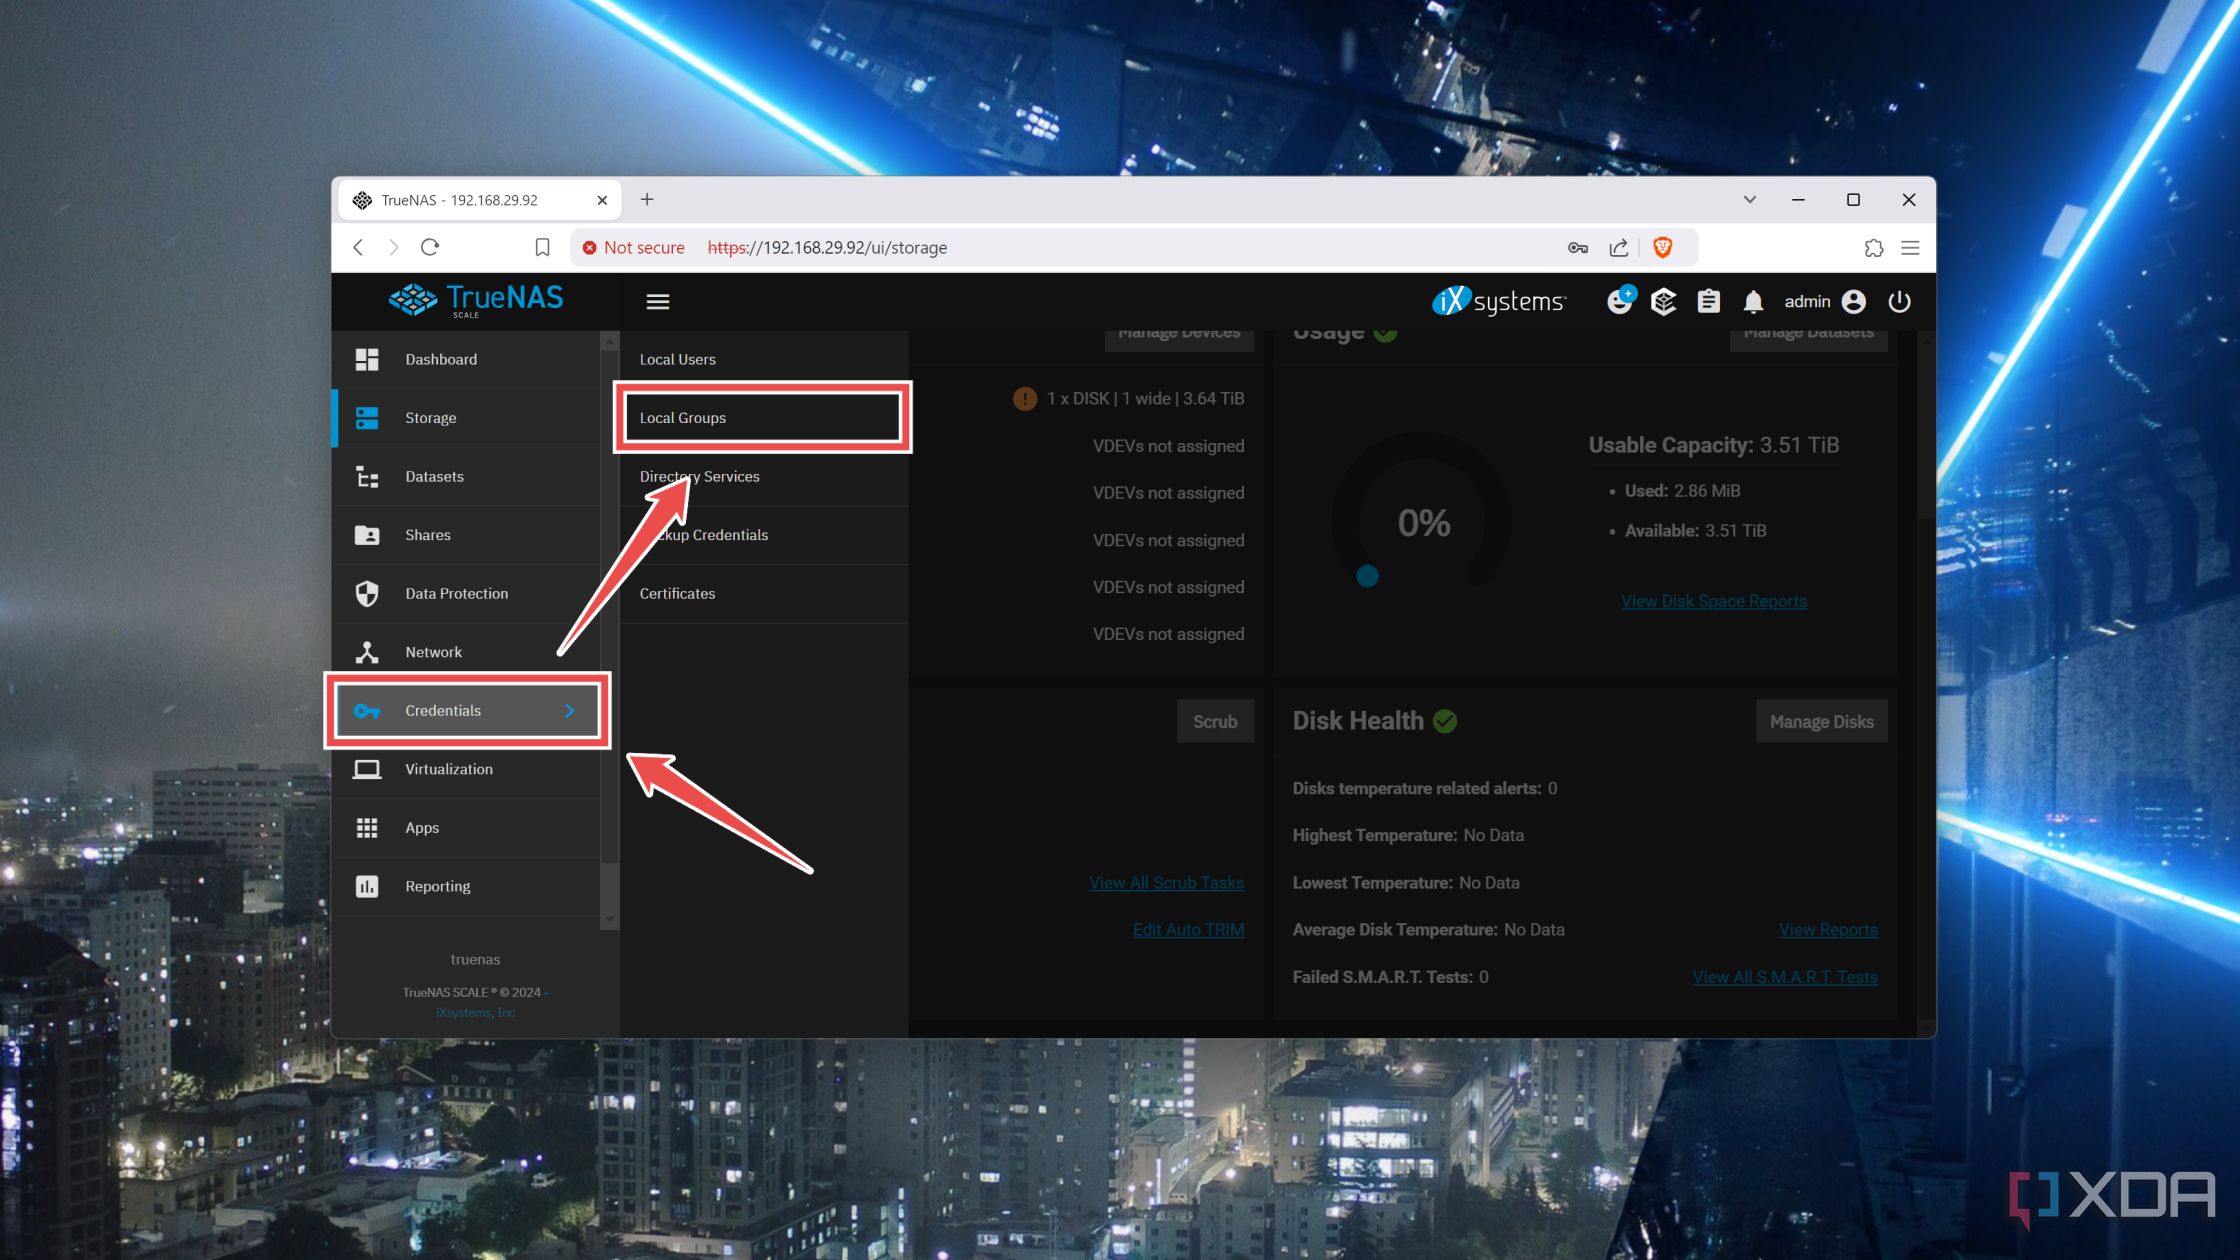
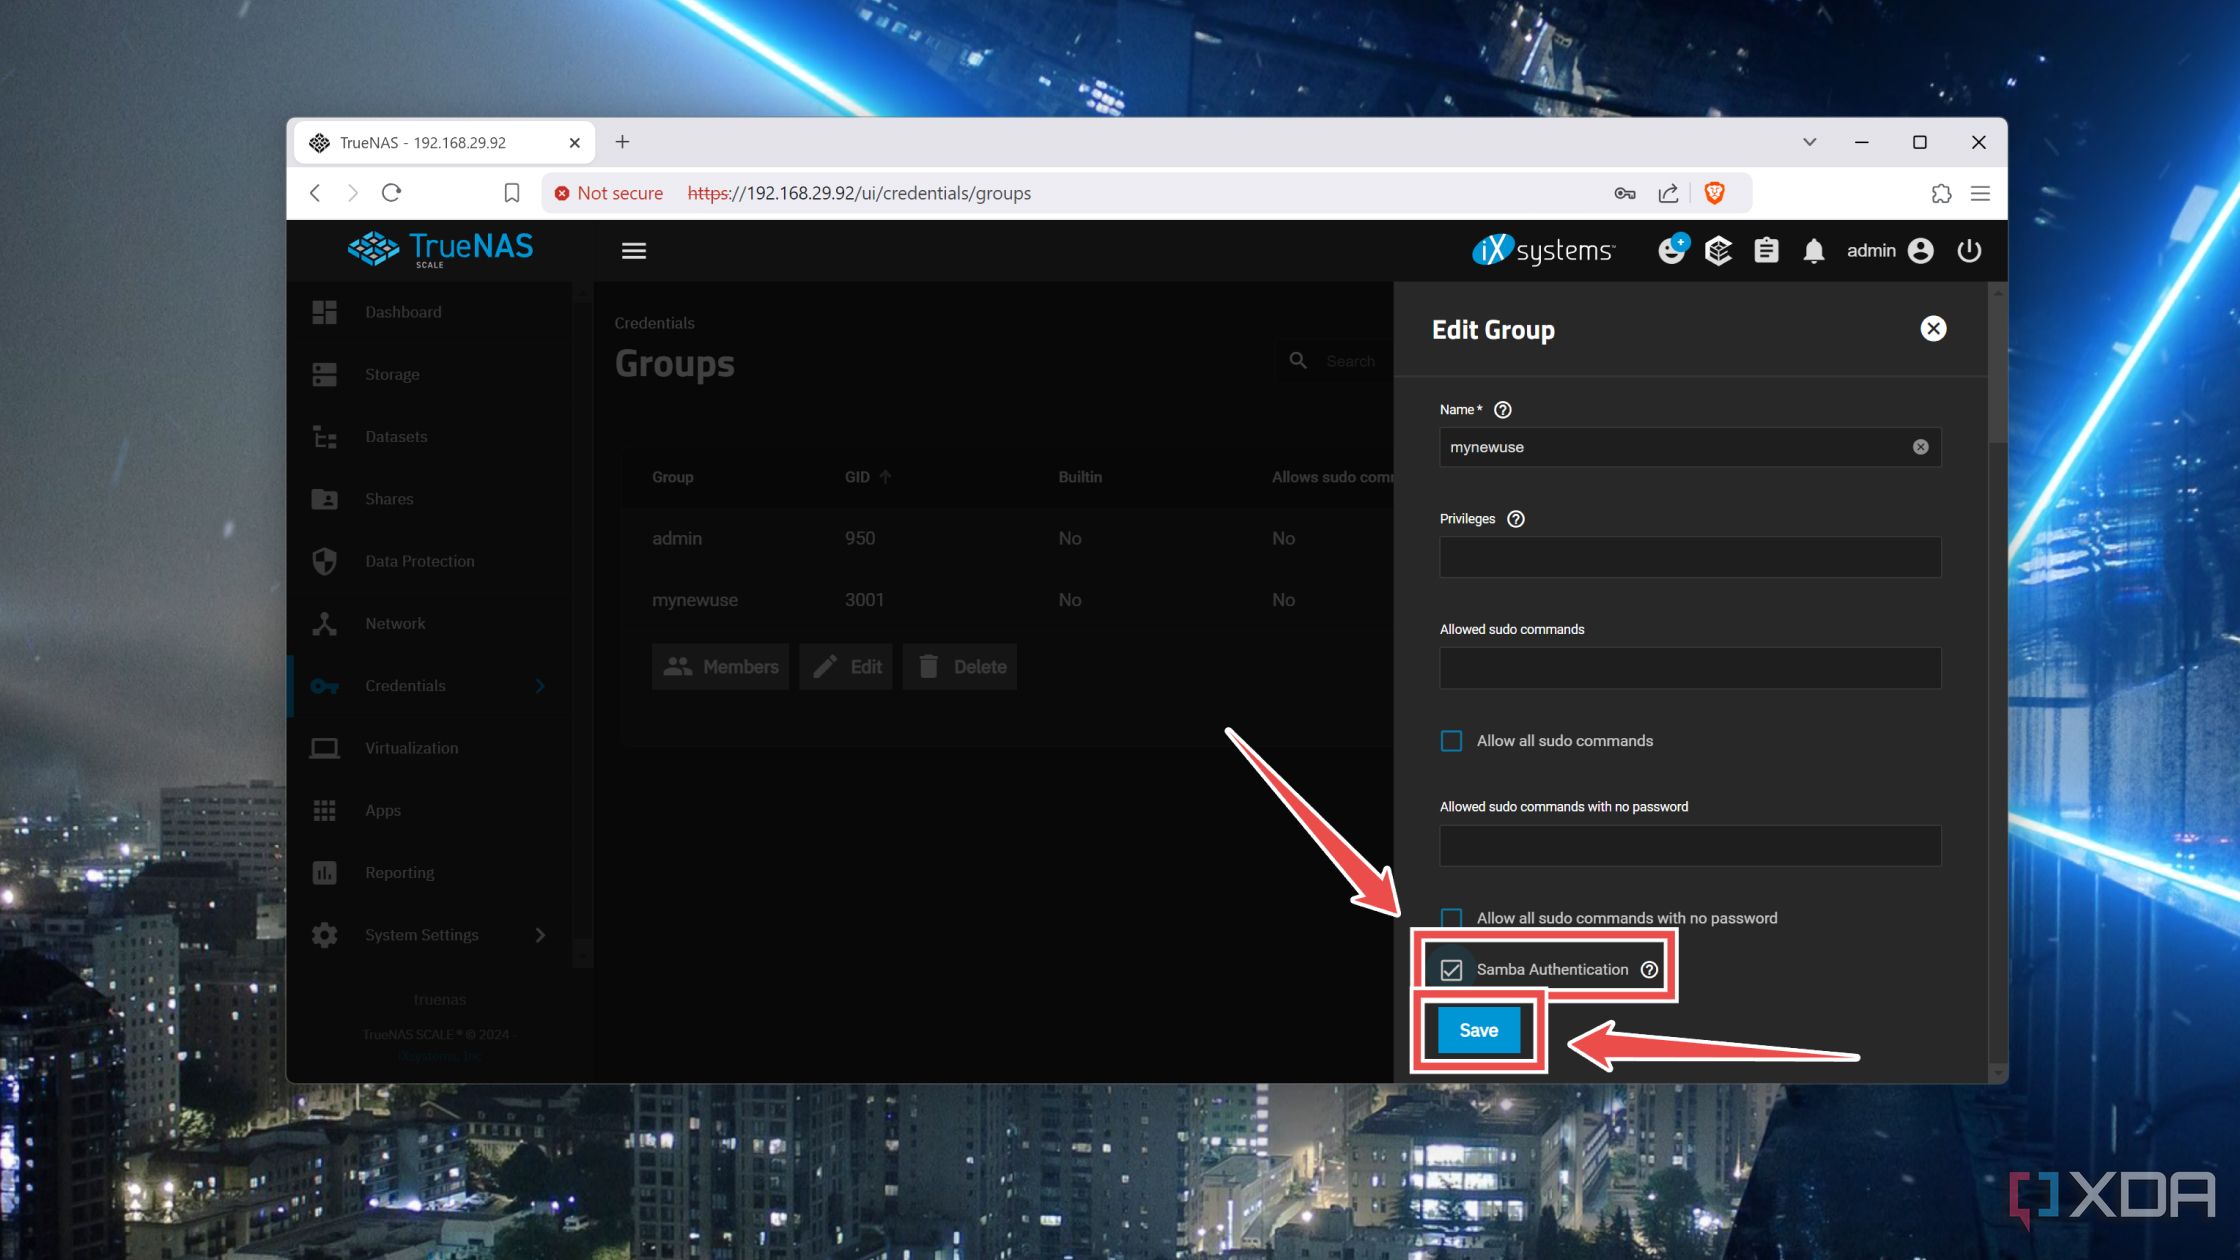
- Switch to the Groups sub-menu from the Credentials tab.


- Click on the drop-down arrow next to the (automatically-created) Group for your new User and tap Edit.
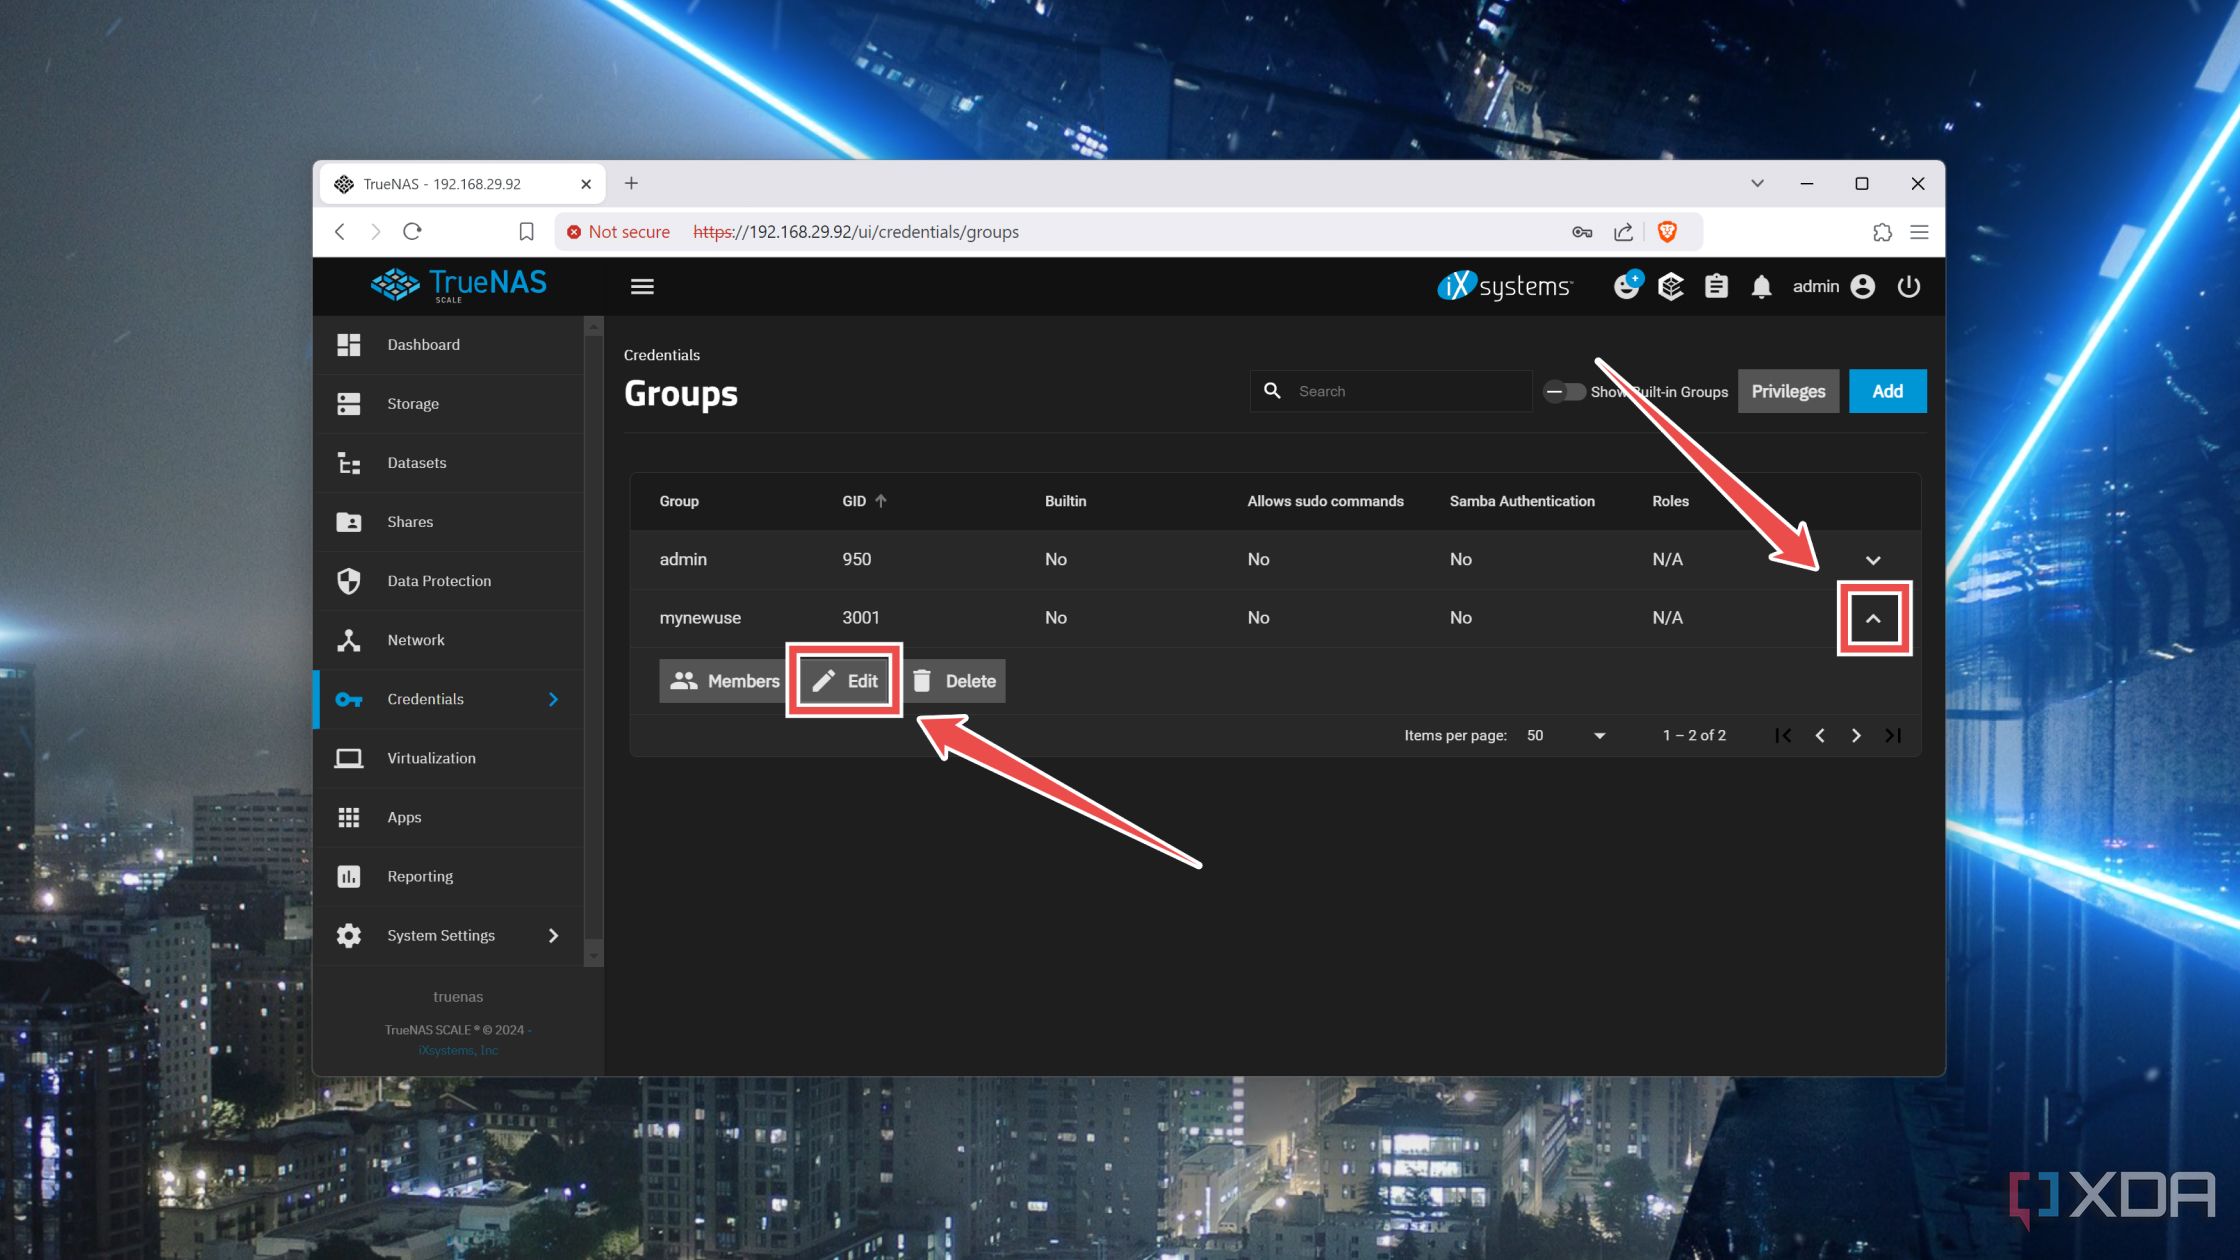
- Once again, check the Samba Authentication checkbox and tap Save.
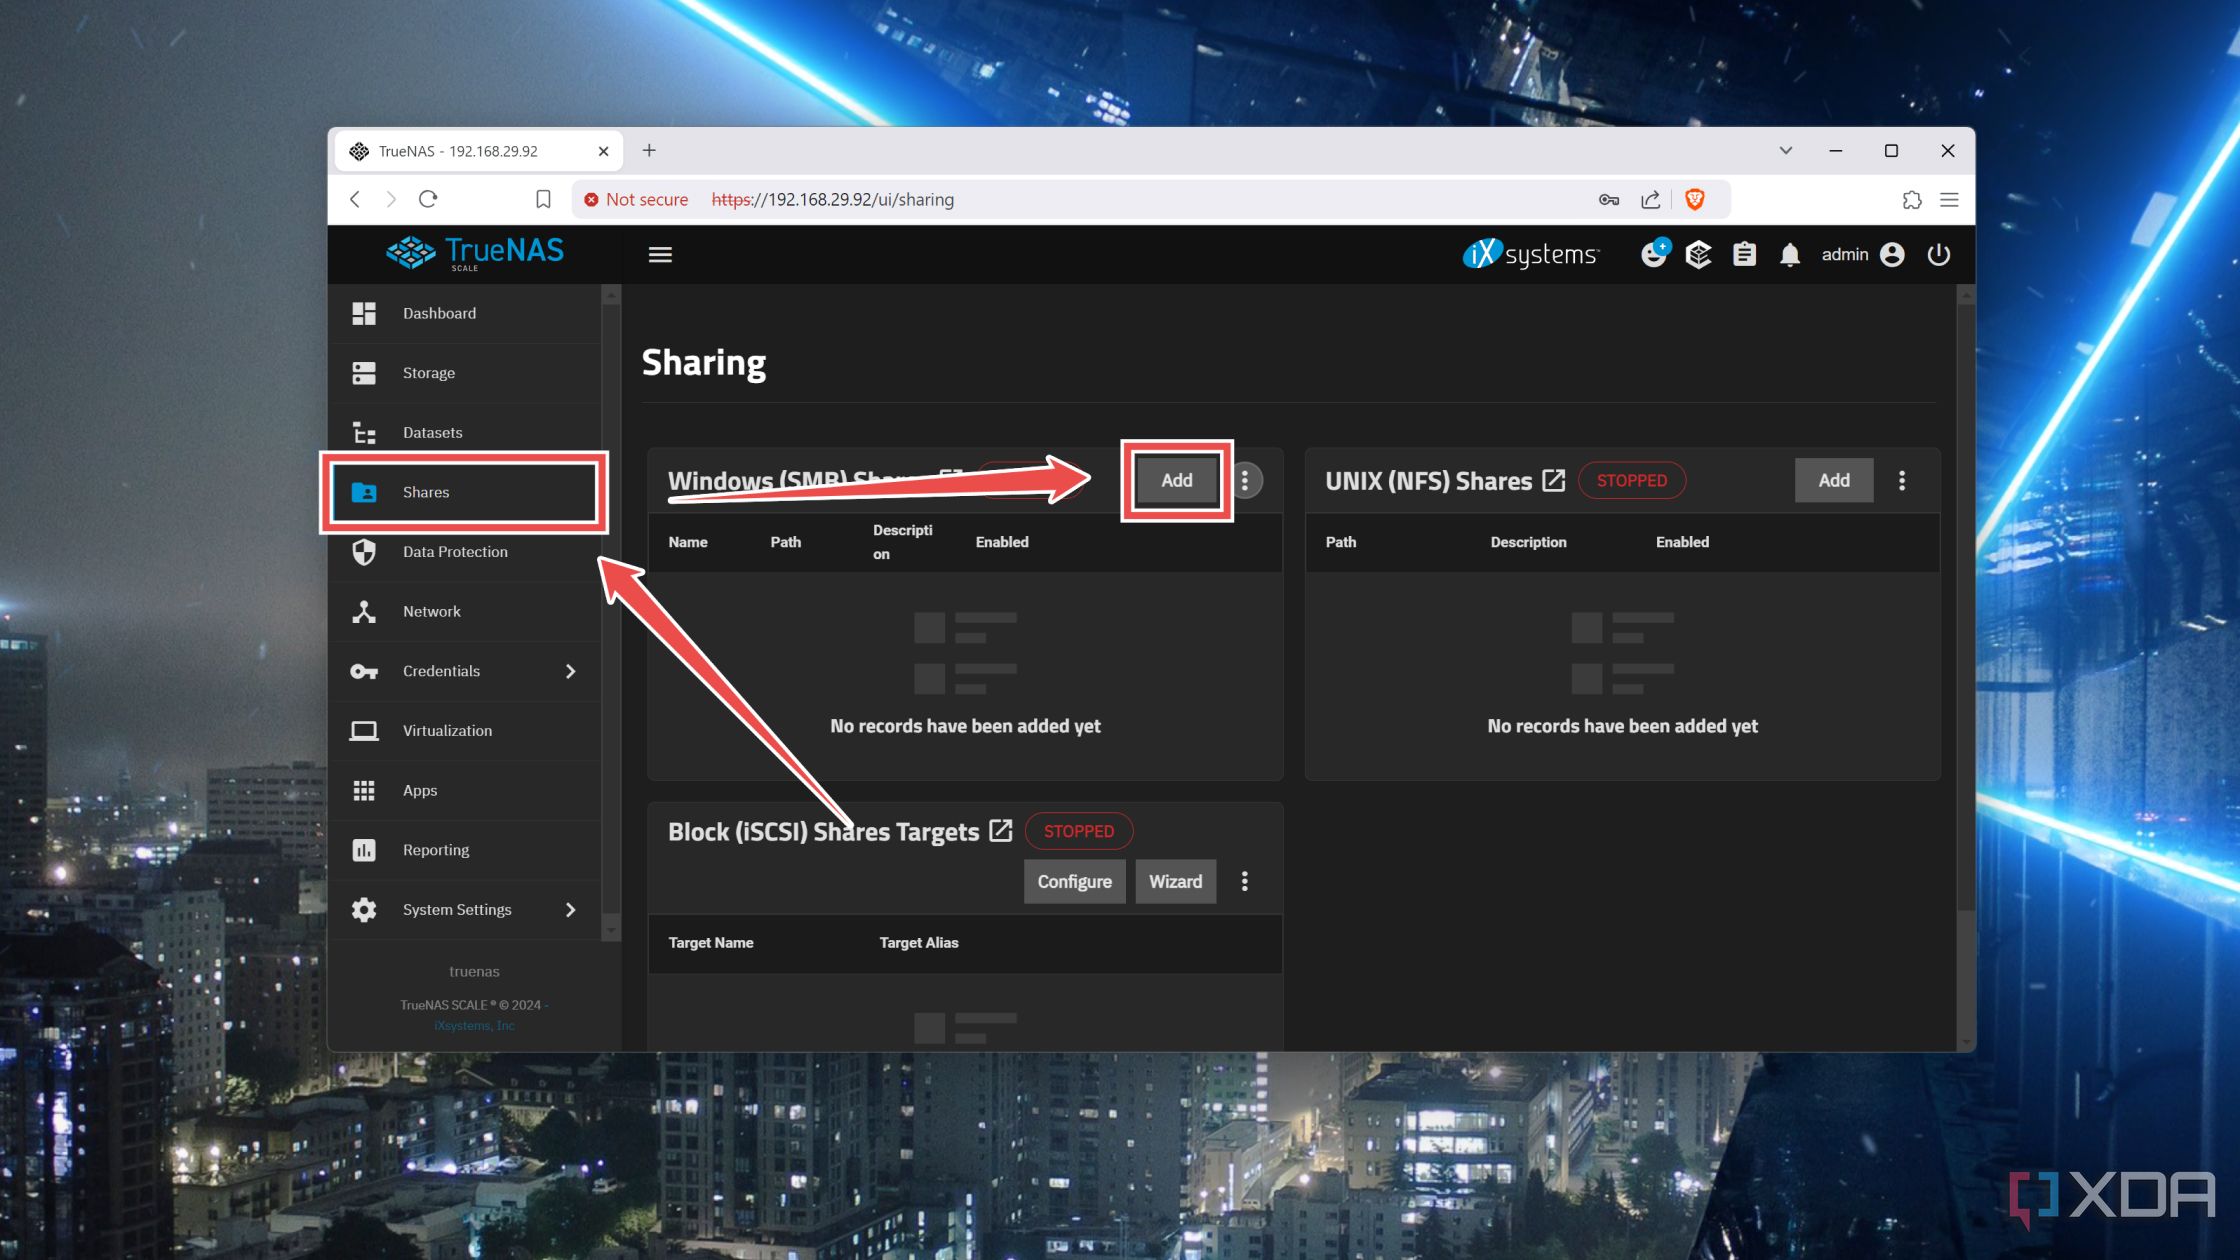
- Navigate to the Shares tab and press Add next to the Windows (SMB) Shares header.
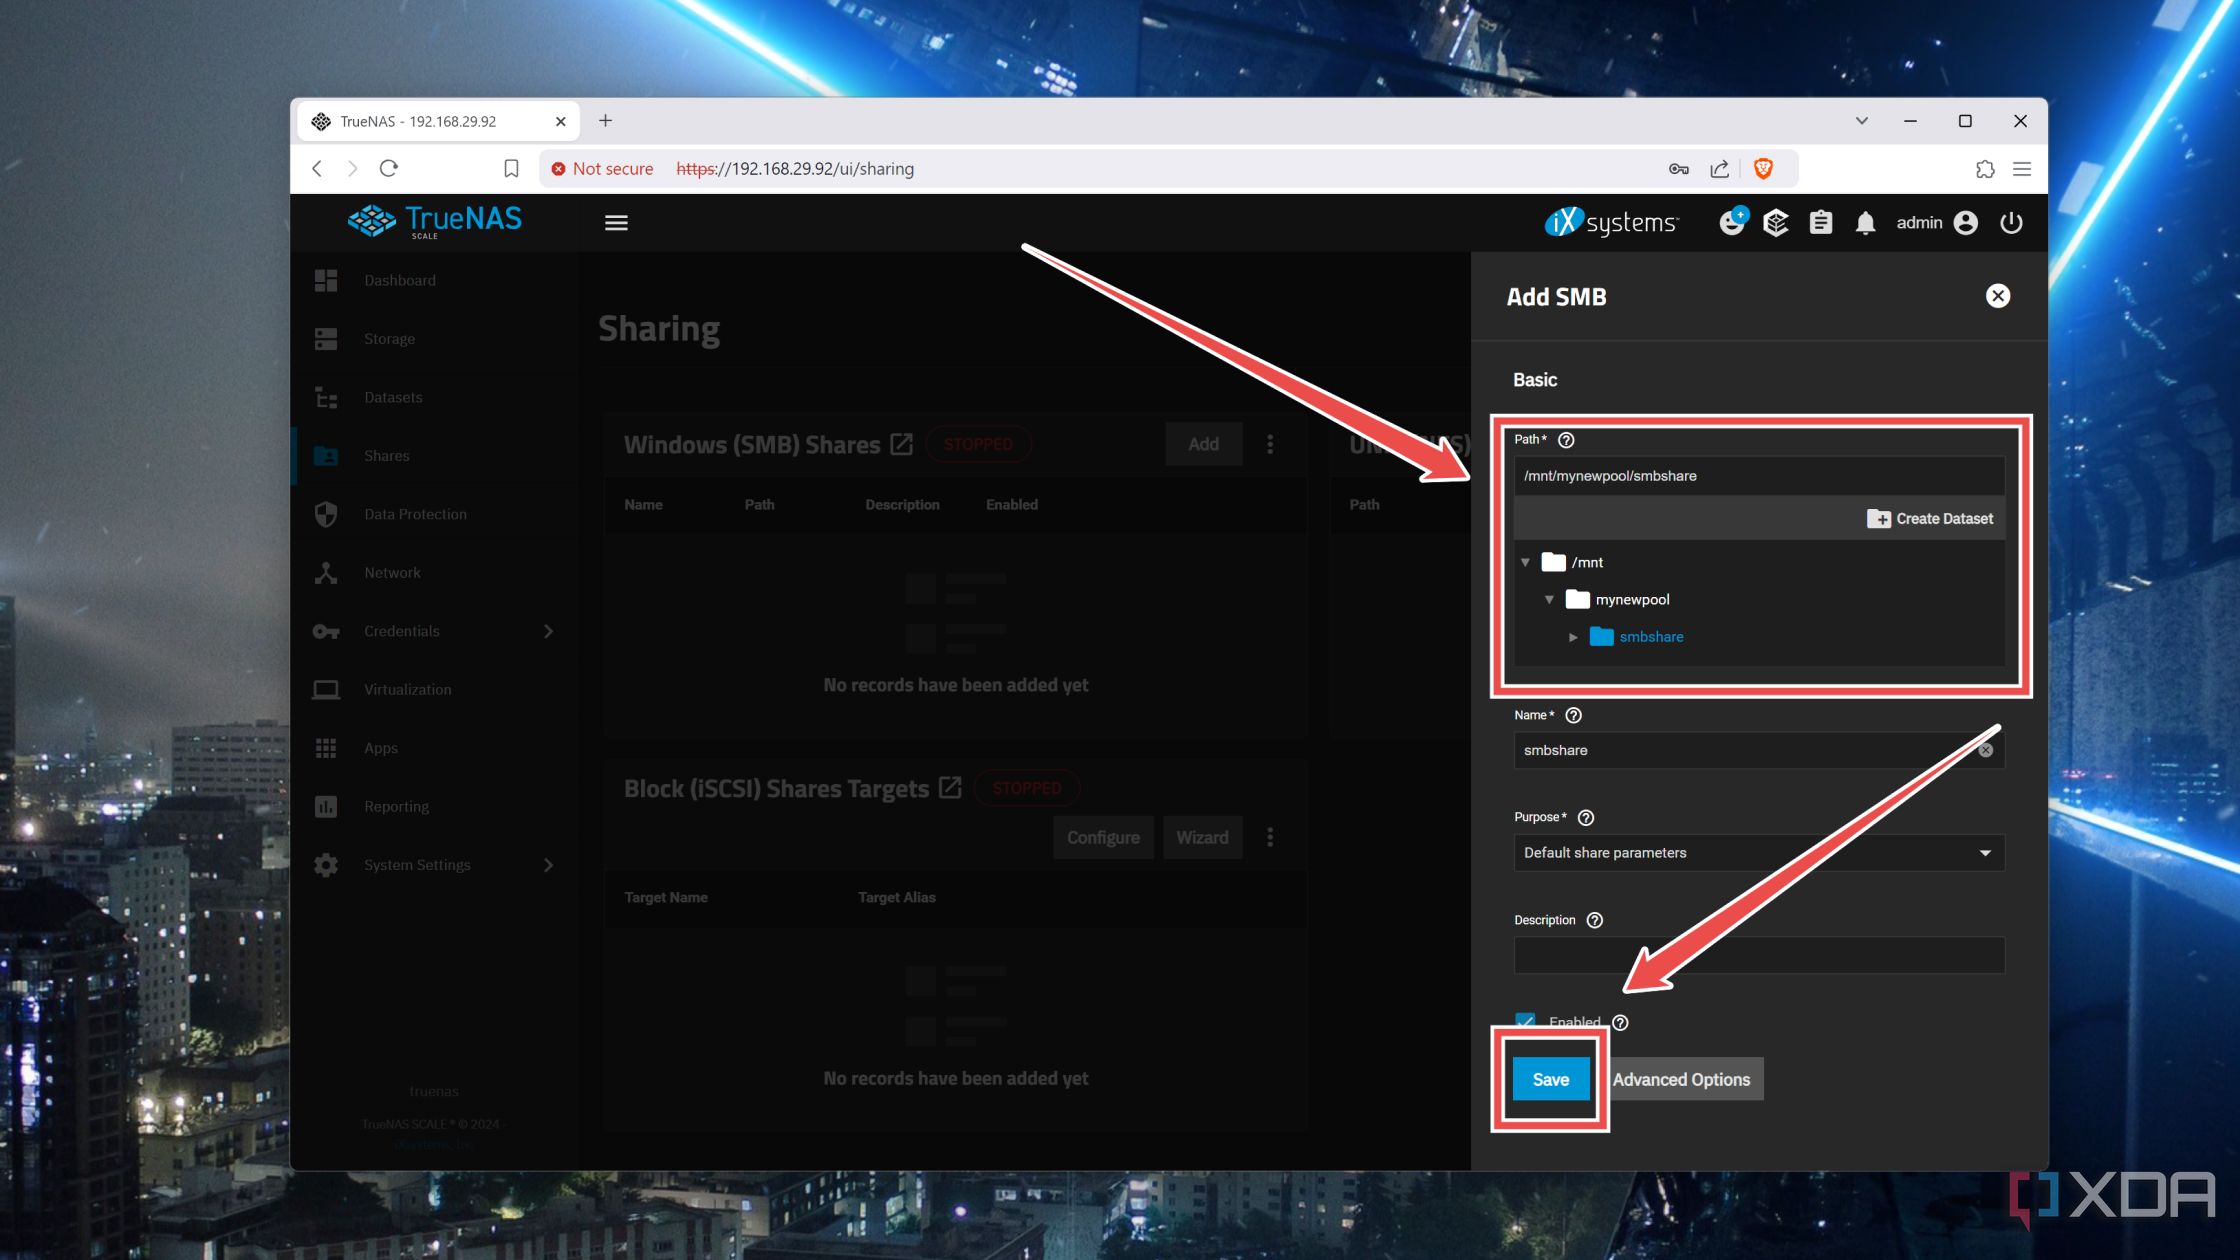
- Select the Path to the dataset you created earlier before clicking on the Save button.
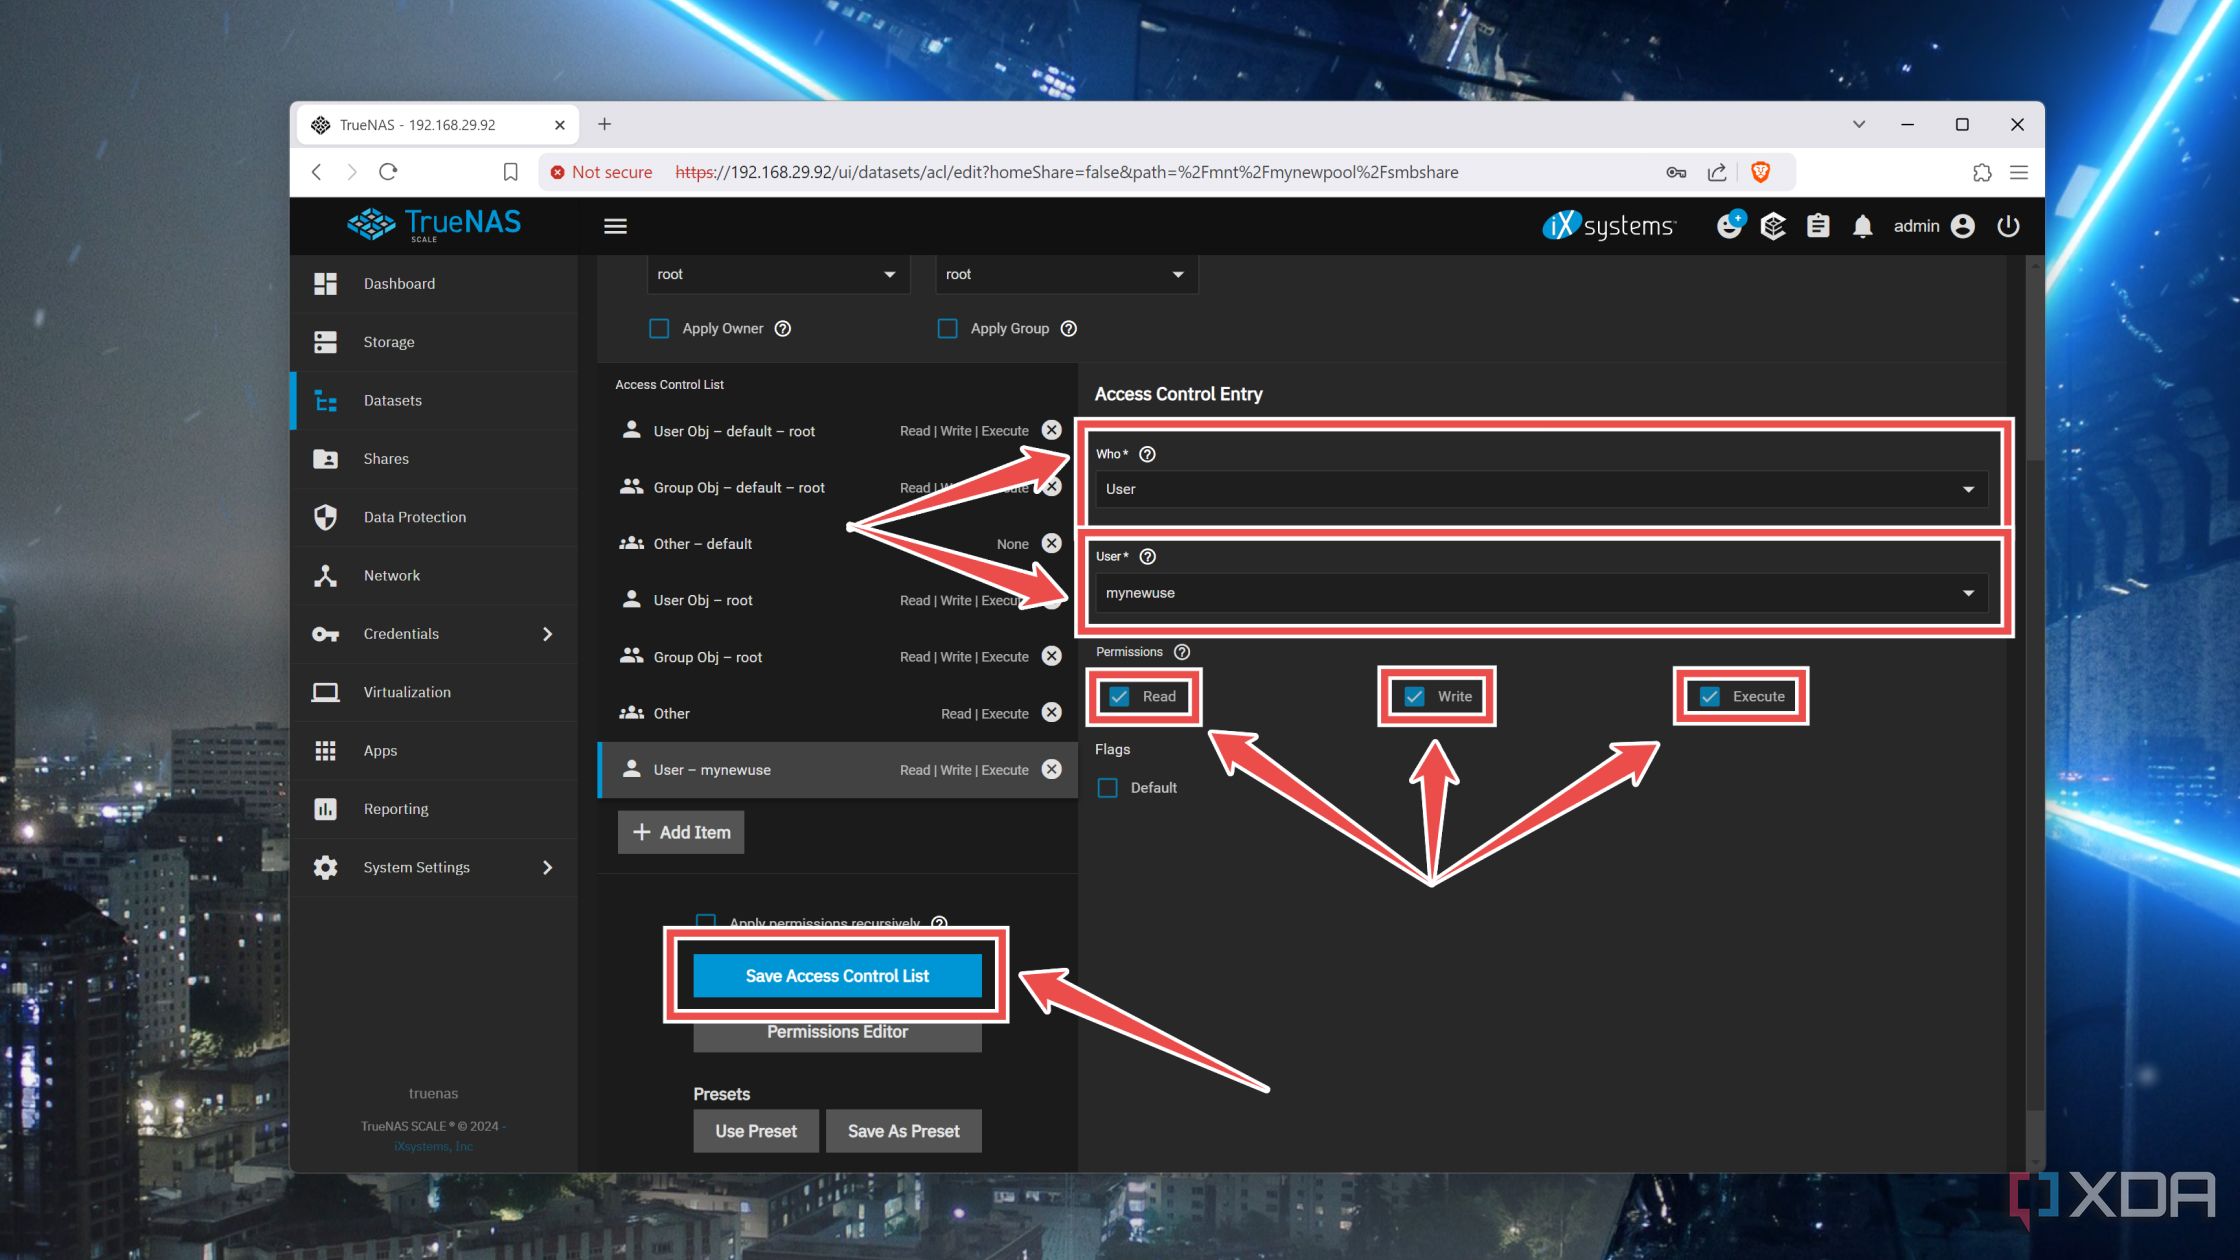
- Agree to configure the ACL permissions and tap on Add Item at the bottom of the Access Control List header.
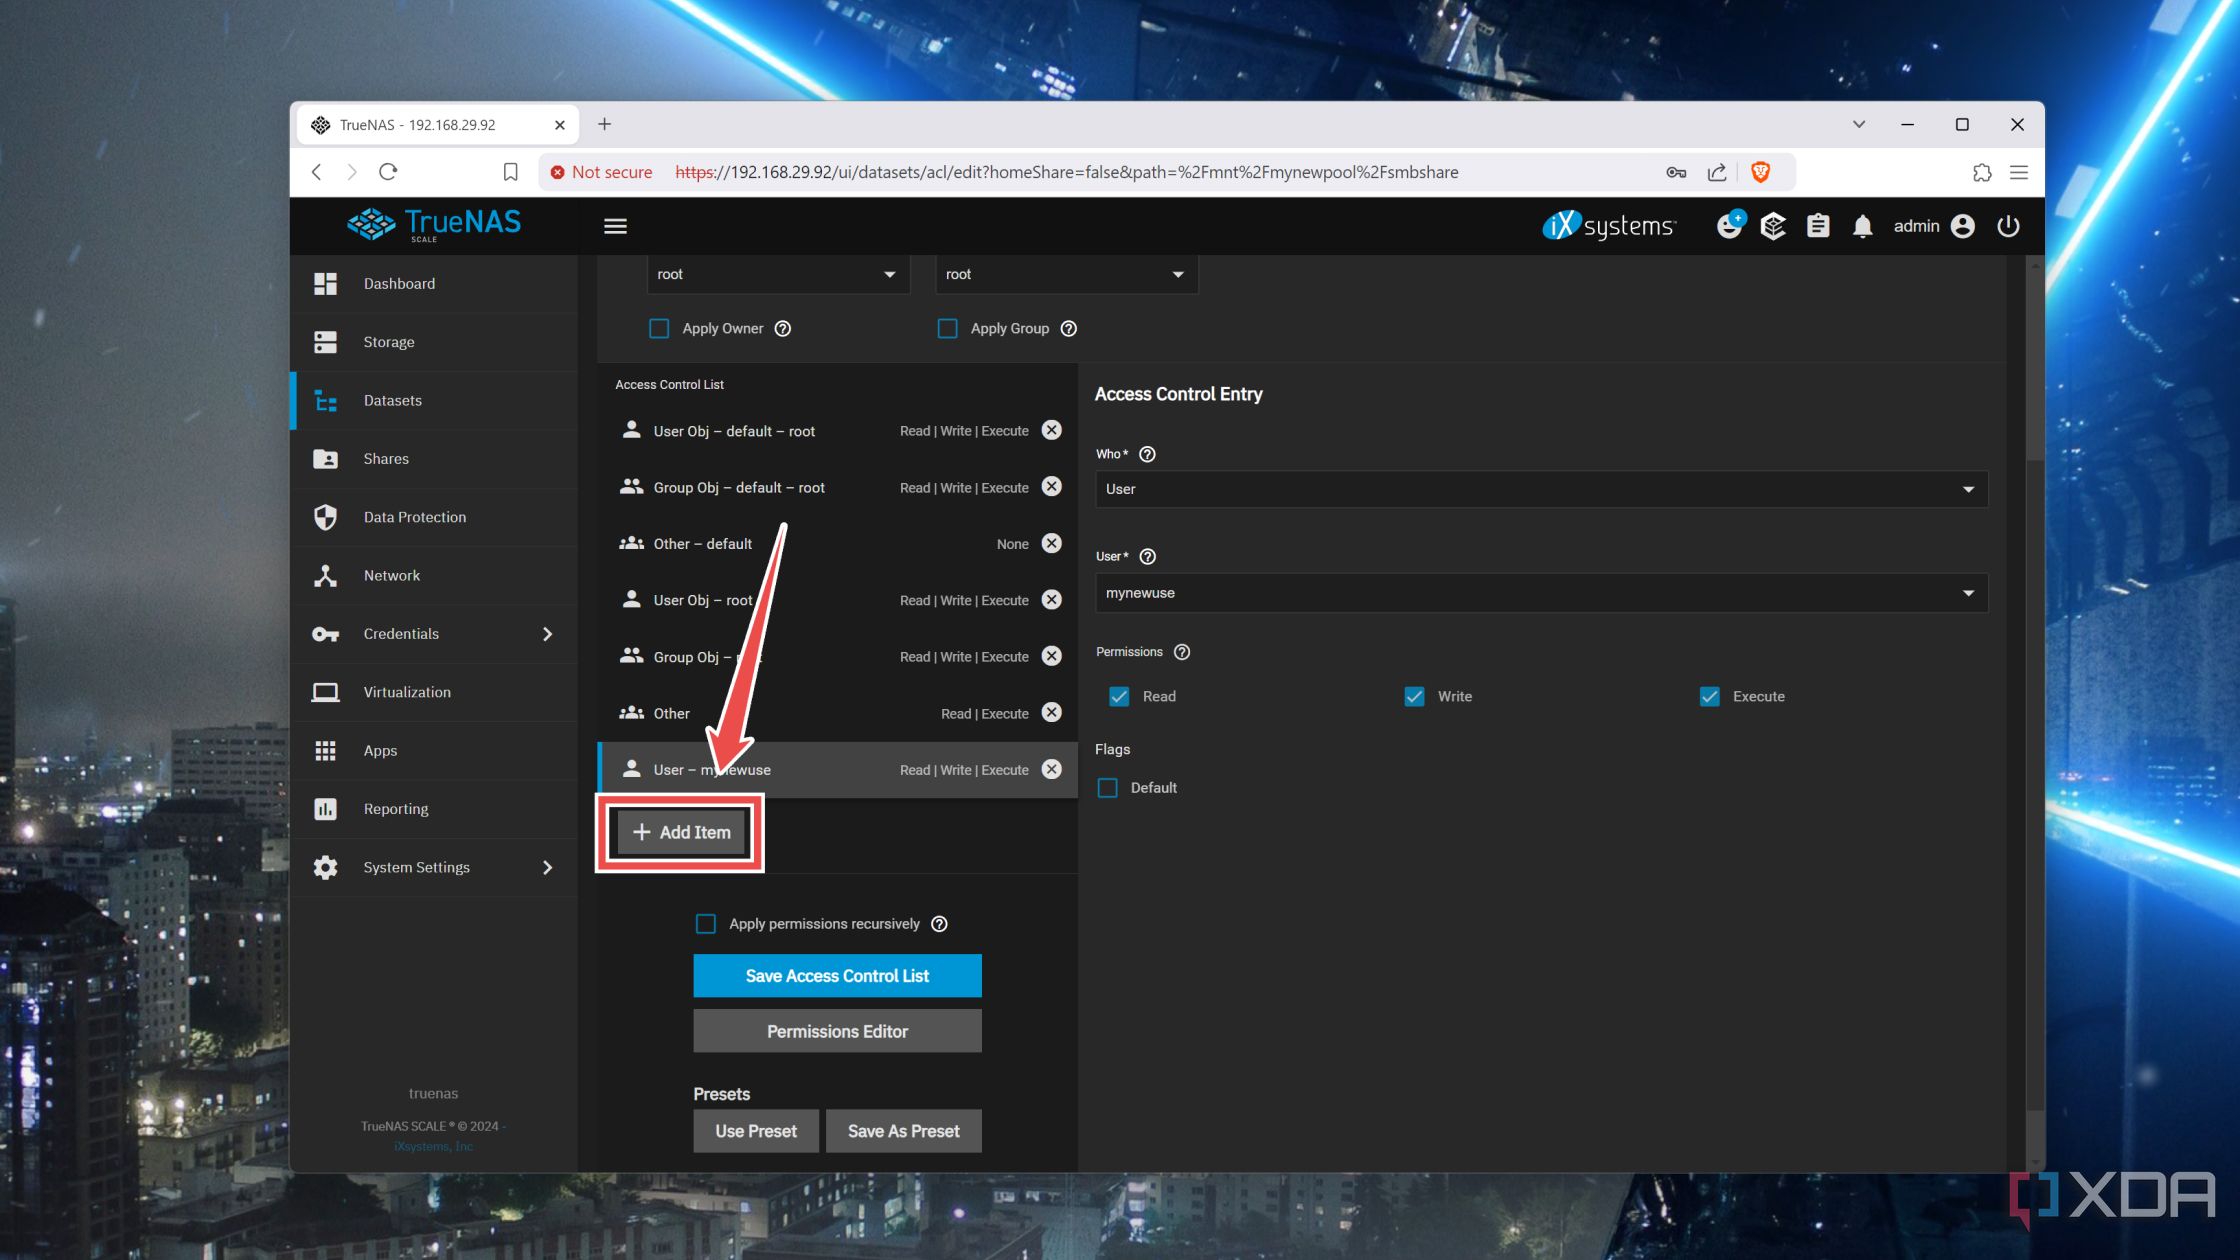
- Set User under the Who option, pick your newly created user under the User setting, and enable the checkboxes next to Read, Write, and Execute before hitting the Save Access Control List option.
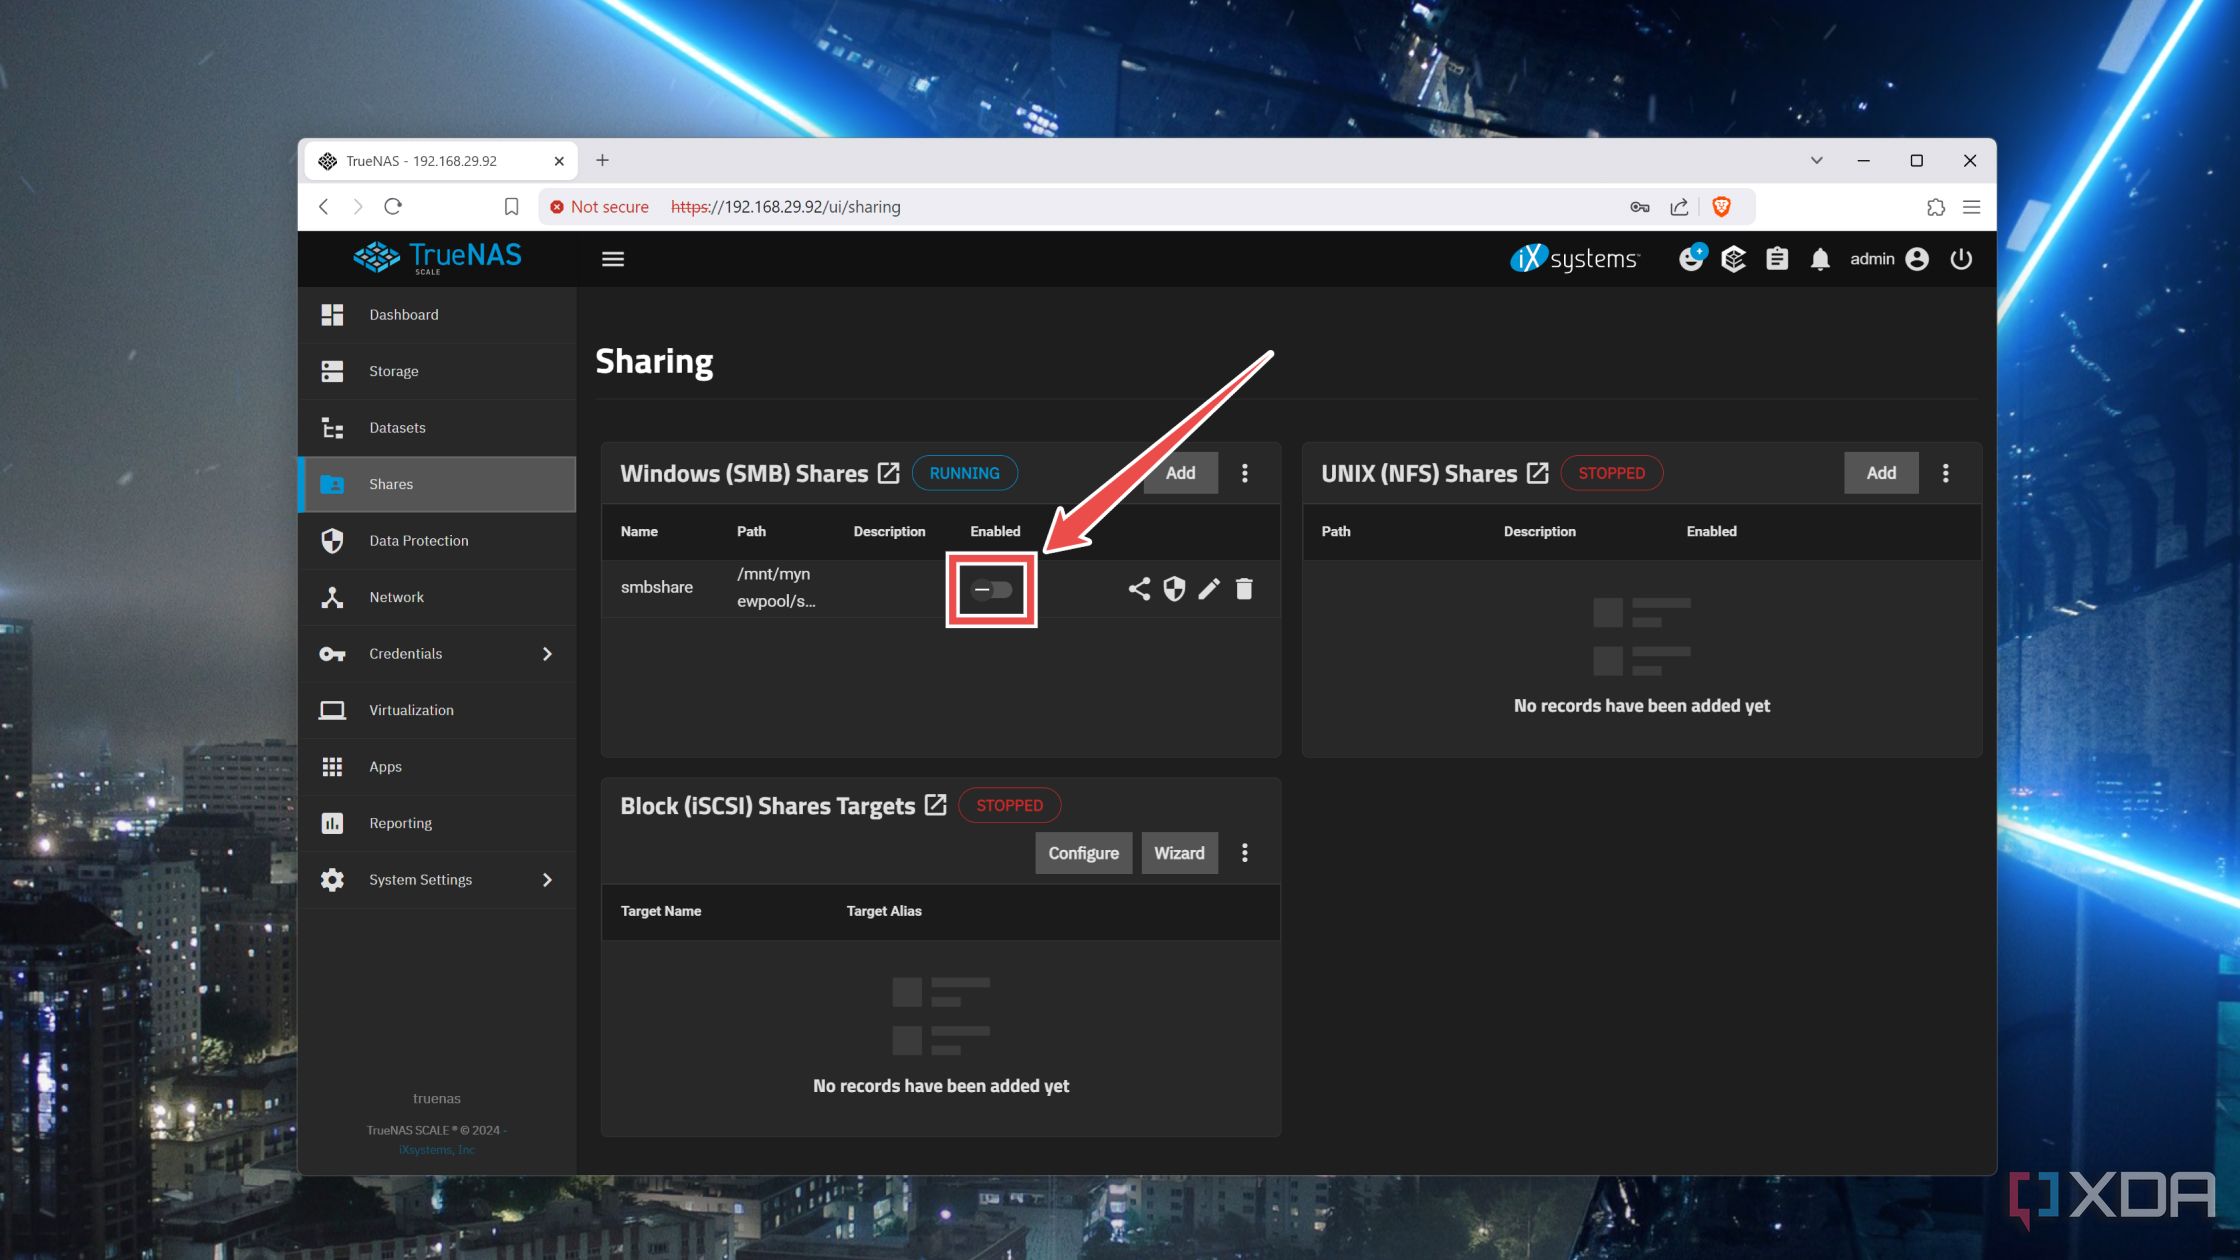
- Back at the Shares tab, toggle the checkbox for the SMB share you created earlier.
- Open File Explorer on your PC and type the IP address of the NAS into the Address Bar.
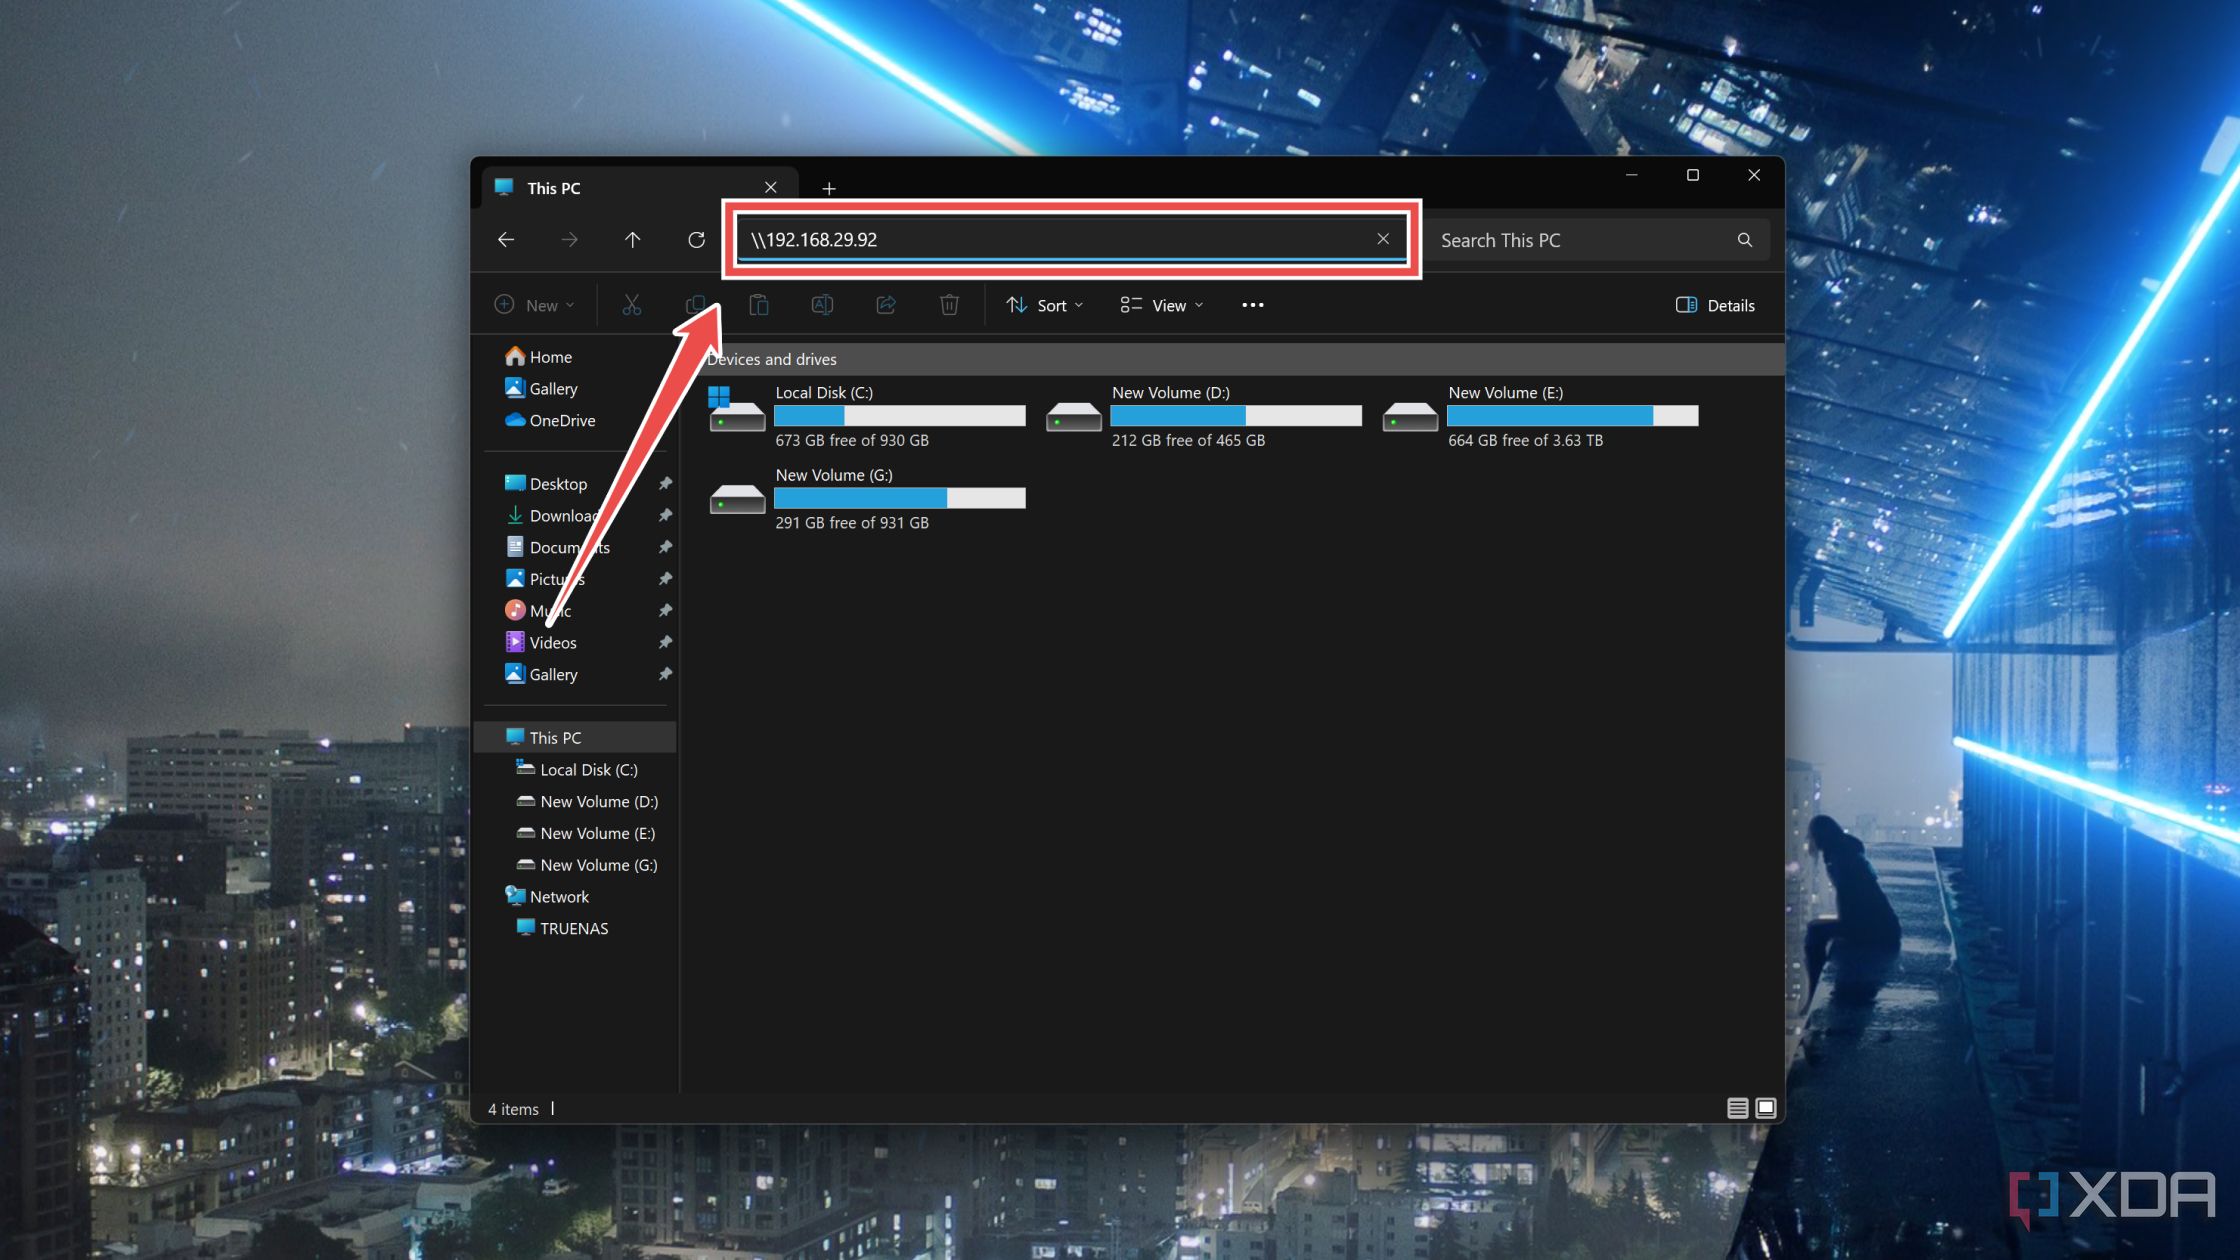
- Finally, enter your Username and Password to gain access to the SMB Share.


Building your dream storage server using TrueNAS Scale
Assuming you followed all the steps properly, the TrueNAS Scale server should be up and running, and you’ll be able to access the SMB share without any issues. Alternatively, you might want to try out the iSCSI protocol if you want to map the NAS drive as a local disk instead of a network drive.
Of course, there’s a lot you can do with your NAS besides using it as a storage server. Since TrueNAS Scale has robust virtualization provisions, you deploy containers and virtual machines to host your favorite apps and services on top of your NAS!

Related
5 reasons why I prefer TrueNAS Scale over Unraid
Unraid is a solid operating system for DIY NAS setups, but I still belong to the TrueNAS Scale faction
#Heres #build #NAS #TrueNAS #Scale
source: https://www.xda-developers.com/build-your-own-nas-using-truenas-scale/

