

Virtual machines and containers are perfect for those who enjoy experimenting with different operating systems and self-hosting services on local hardware. While you could run VirtualBox or VMware Workstation Pro/Fusion Pro on your daily driver, bare metal hypervisors are better for advanced virtualization workloads.
If you have a spare PC lying around, you can leverage Proxmox to turn it into a dedicated home lab. In this detailed guide, we’ll explain everything you need to know about Proxmox.
Related
5 incredible things you can do with Proxmox
Some of these projects are easy to pull off, while others require a lot of blood, sweat, and tears
What’s Proxmox?
In the simplest terms, Proxmox is a virtualization platform that allows you to set up virtual machines and containers on your PC. Unlike VirtualBox and other Type-2 hypervisors, Proxmox leverages the Kernel Virtual Machine (KVM) module of Linux, meaning you’ll need to install it directly on the host system, rather than download it on top of an existing OS. While experts may argue about the exact classification, you can think of Proxmox as a Type-1 hypervisor wrapped in a neat Debian distro, which provides better performance and a myriad of virtualization features than its Type-2 rivals.
What’s more, Proxmox also supports Linux Containers (LXC). For the uninitiated, containers can be thought of as simplified, toned-down versions of virtual machines. Instead of replicating an entire OS, containers only include the bare minimum code and an OS environment to run a specific application. This makes them a lot faster, smaller, and more flexible than their VM counterparts.
Creating a bootable USB drive
Now that you know the basics of Proxmox, it’s time to begin the installation procedure. The first step involves writing Proxmox’s ISO file onto an external USB drive with the help of a flashing utility, like Rufus.
- Download the portable version of Rufus from the official link.
- Head to Proxmox’s website and download its latest ISO file.
- Run Rufus as an admin and choose your USB drive as the Device.
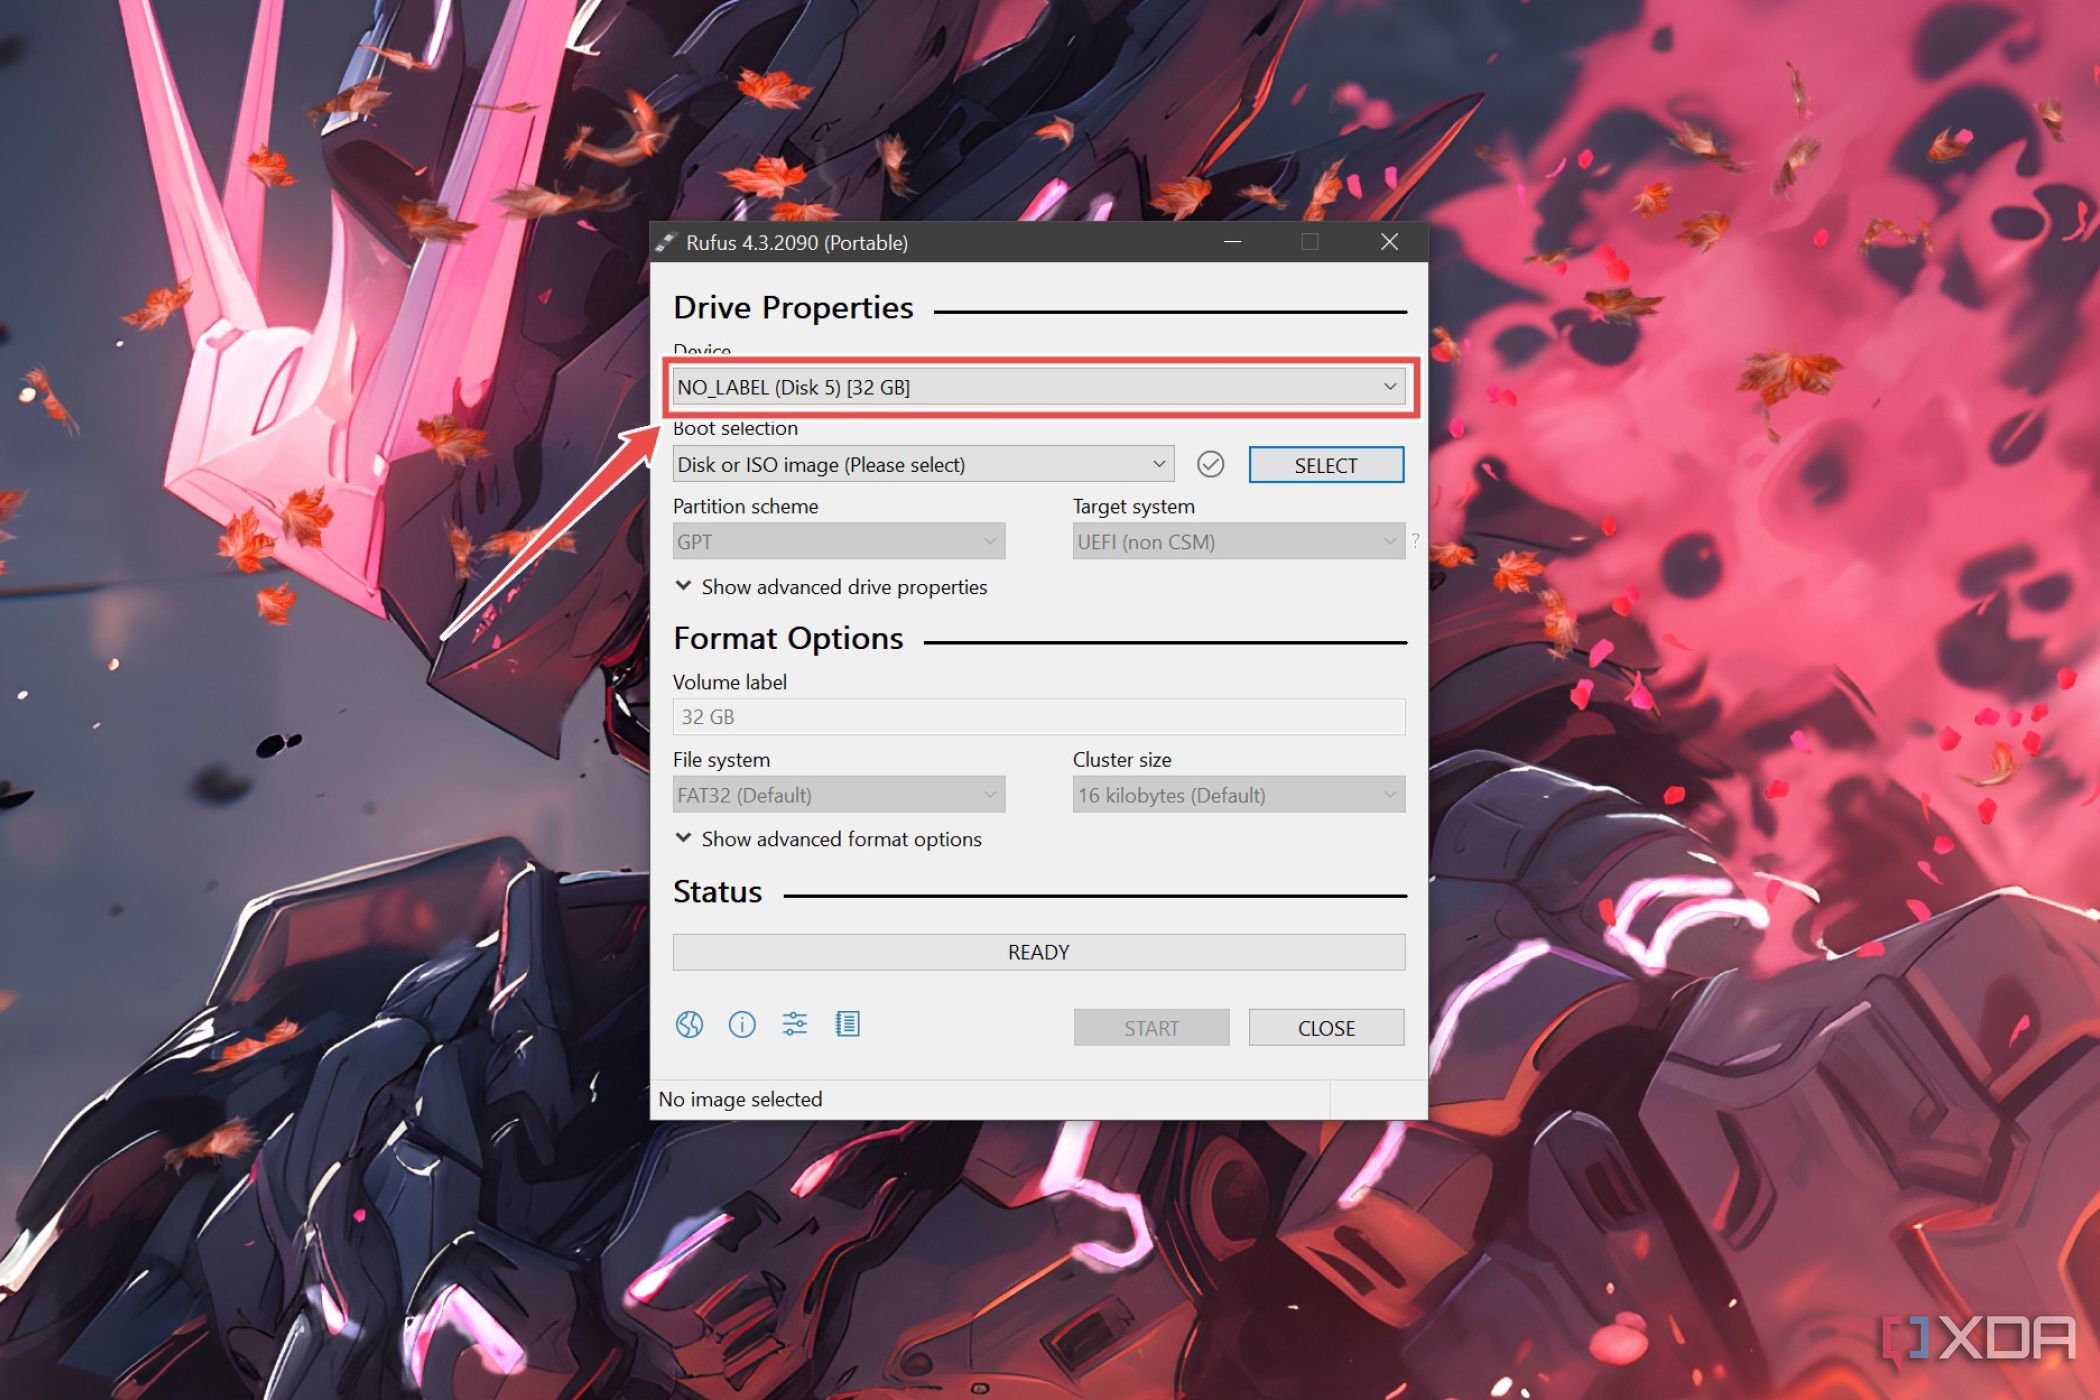
- Click on the Select button under boot selection, pick the Proxmox ISO you downloaded earlier, and tap Open.
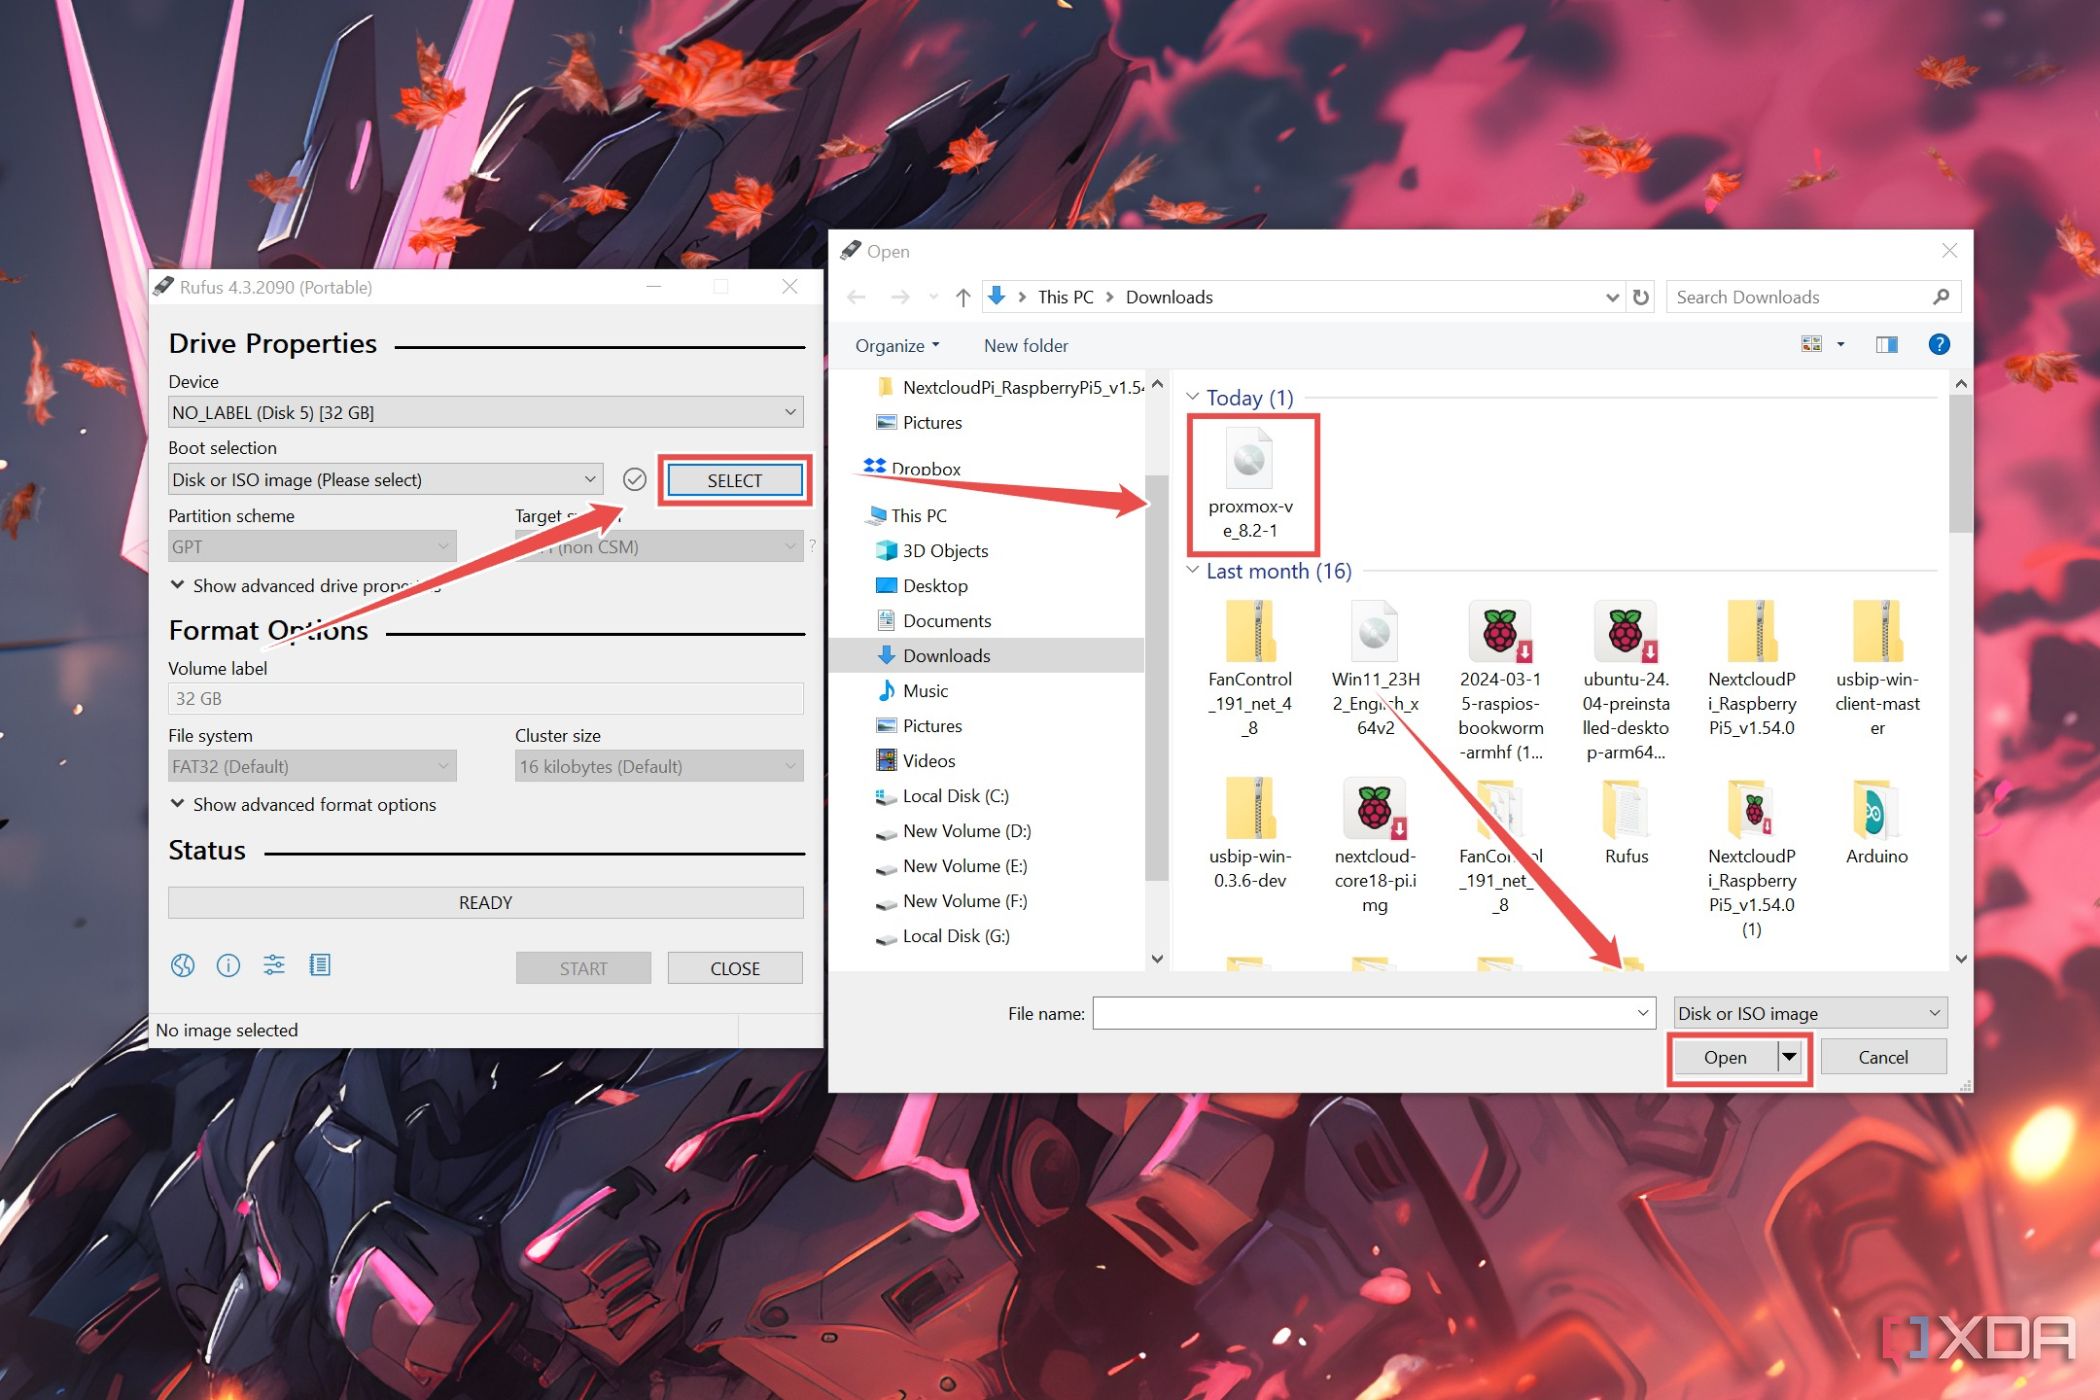
- Press Start and wait for Rufus to write the Proxmox files on your USB drive.


Changing the boot priority in the BIOS
Once Rufus is done creating the bootable USB drive, you can unplug it from your system and insert it into the spare PC. But before you can install Proxmox, you’ll need to modify the boot order in the BIOS to ensure your PC uses the newly flashed USB drive to launch into the Proxmox installer wizard.
- Power on your PC and mash the Del key as it boots up to enter the BIOS menu.
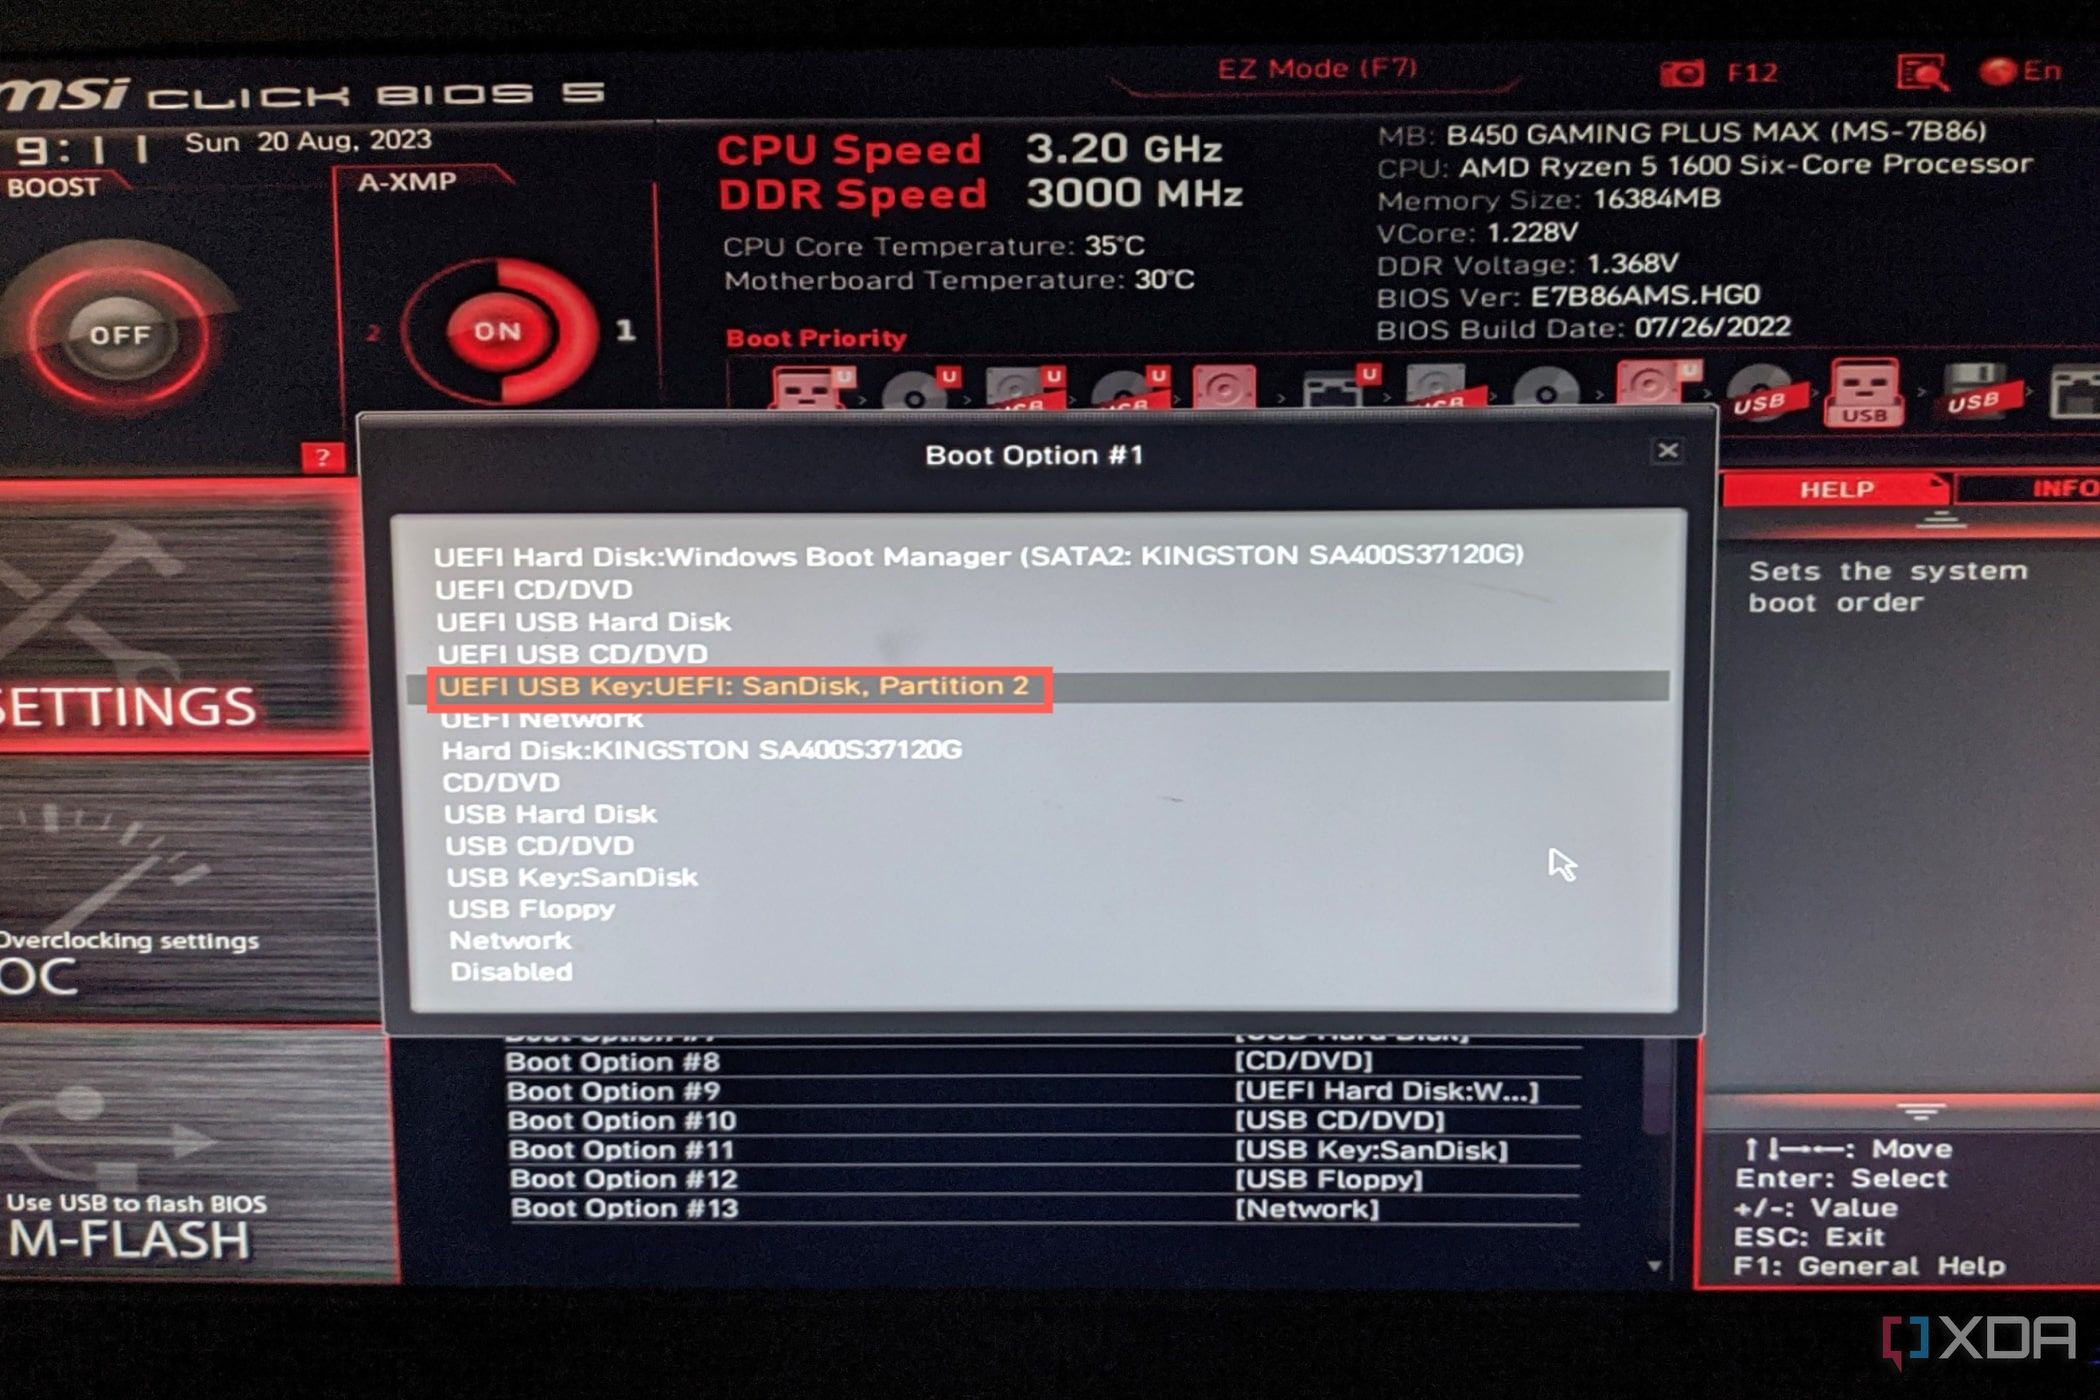
- Navigate to the Advanced Settings section and select the Boot Priority/Boot Order option.
- Ensure that the USB drive is selected as Boot Option #1.
- Exit the BIOS after saving the changes made to the boot settings.


Installing Proxmox
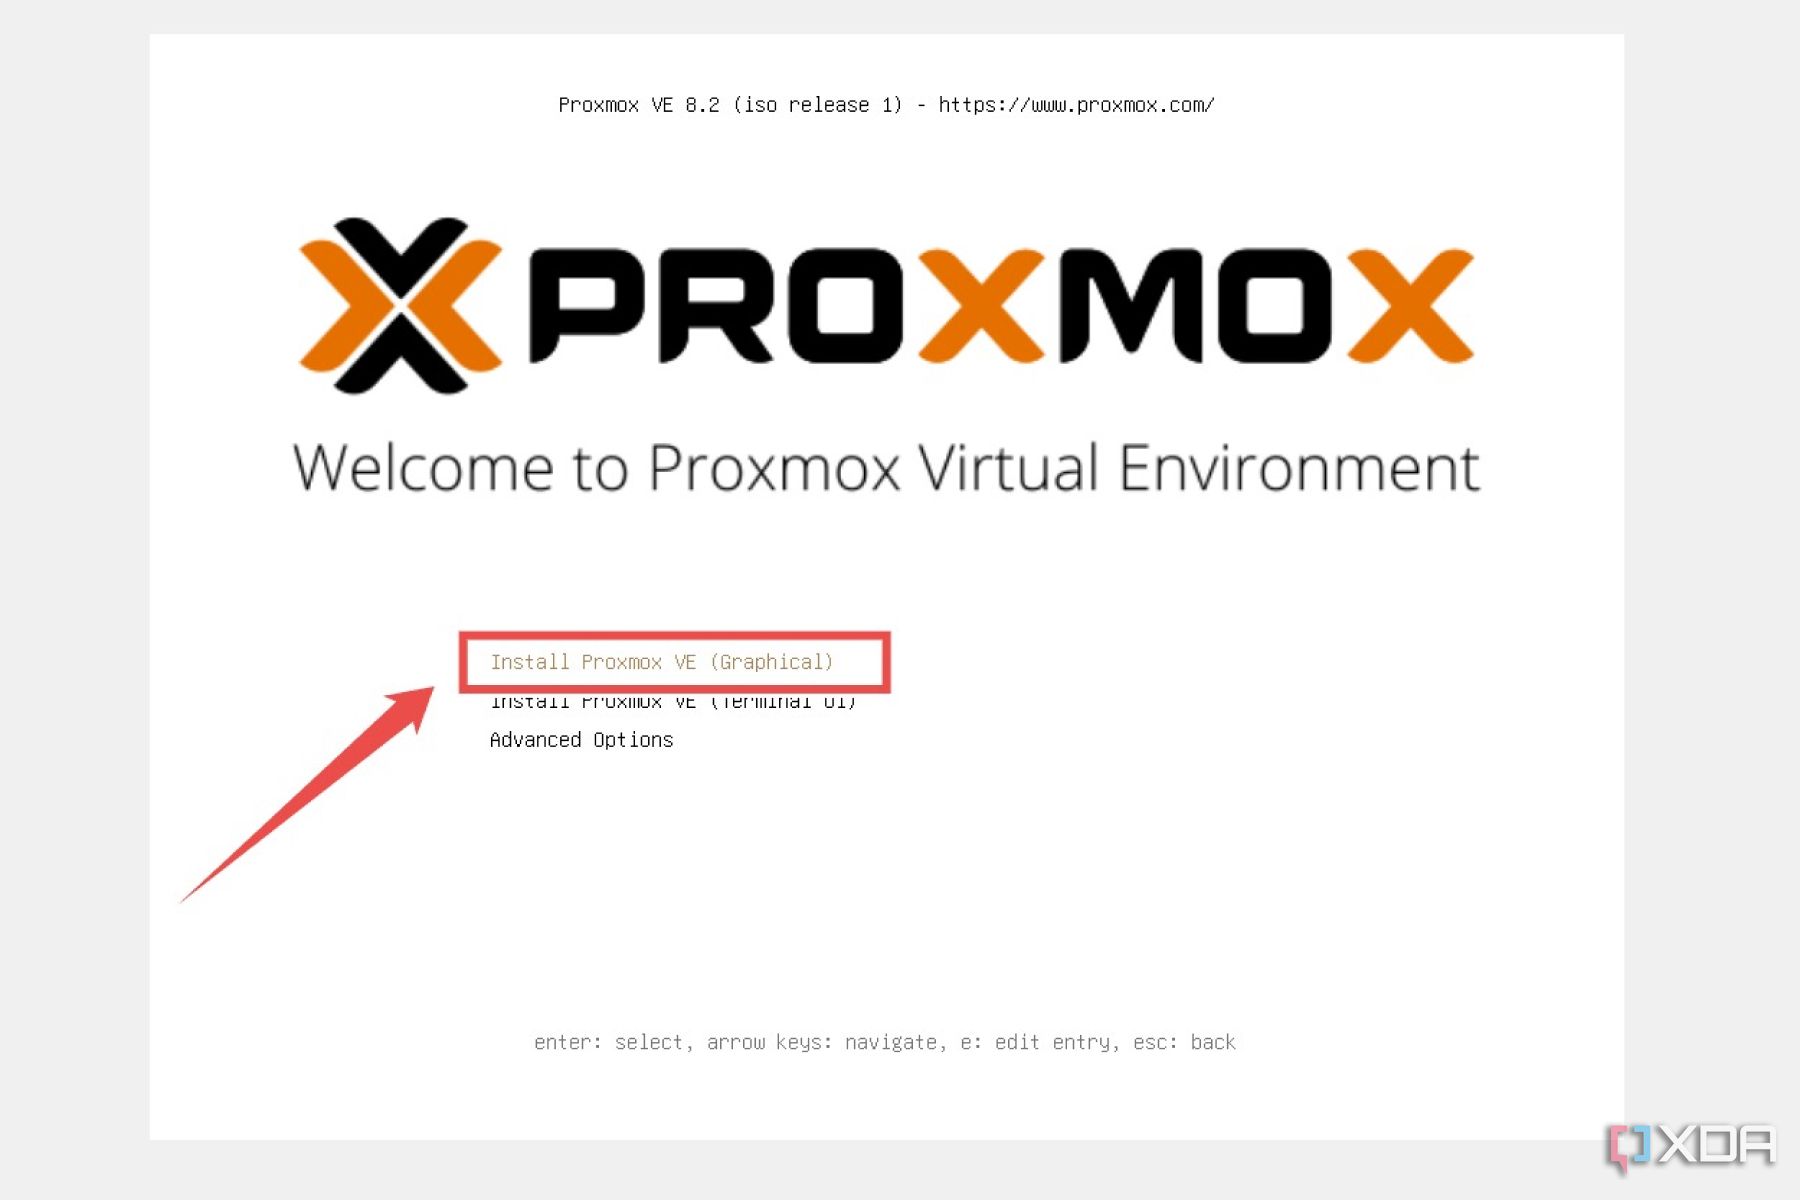
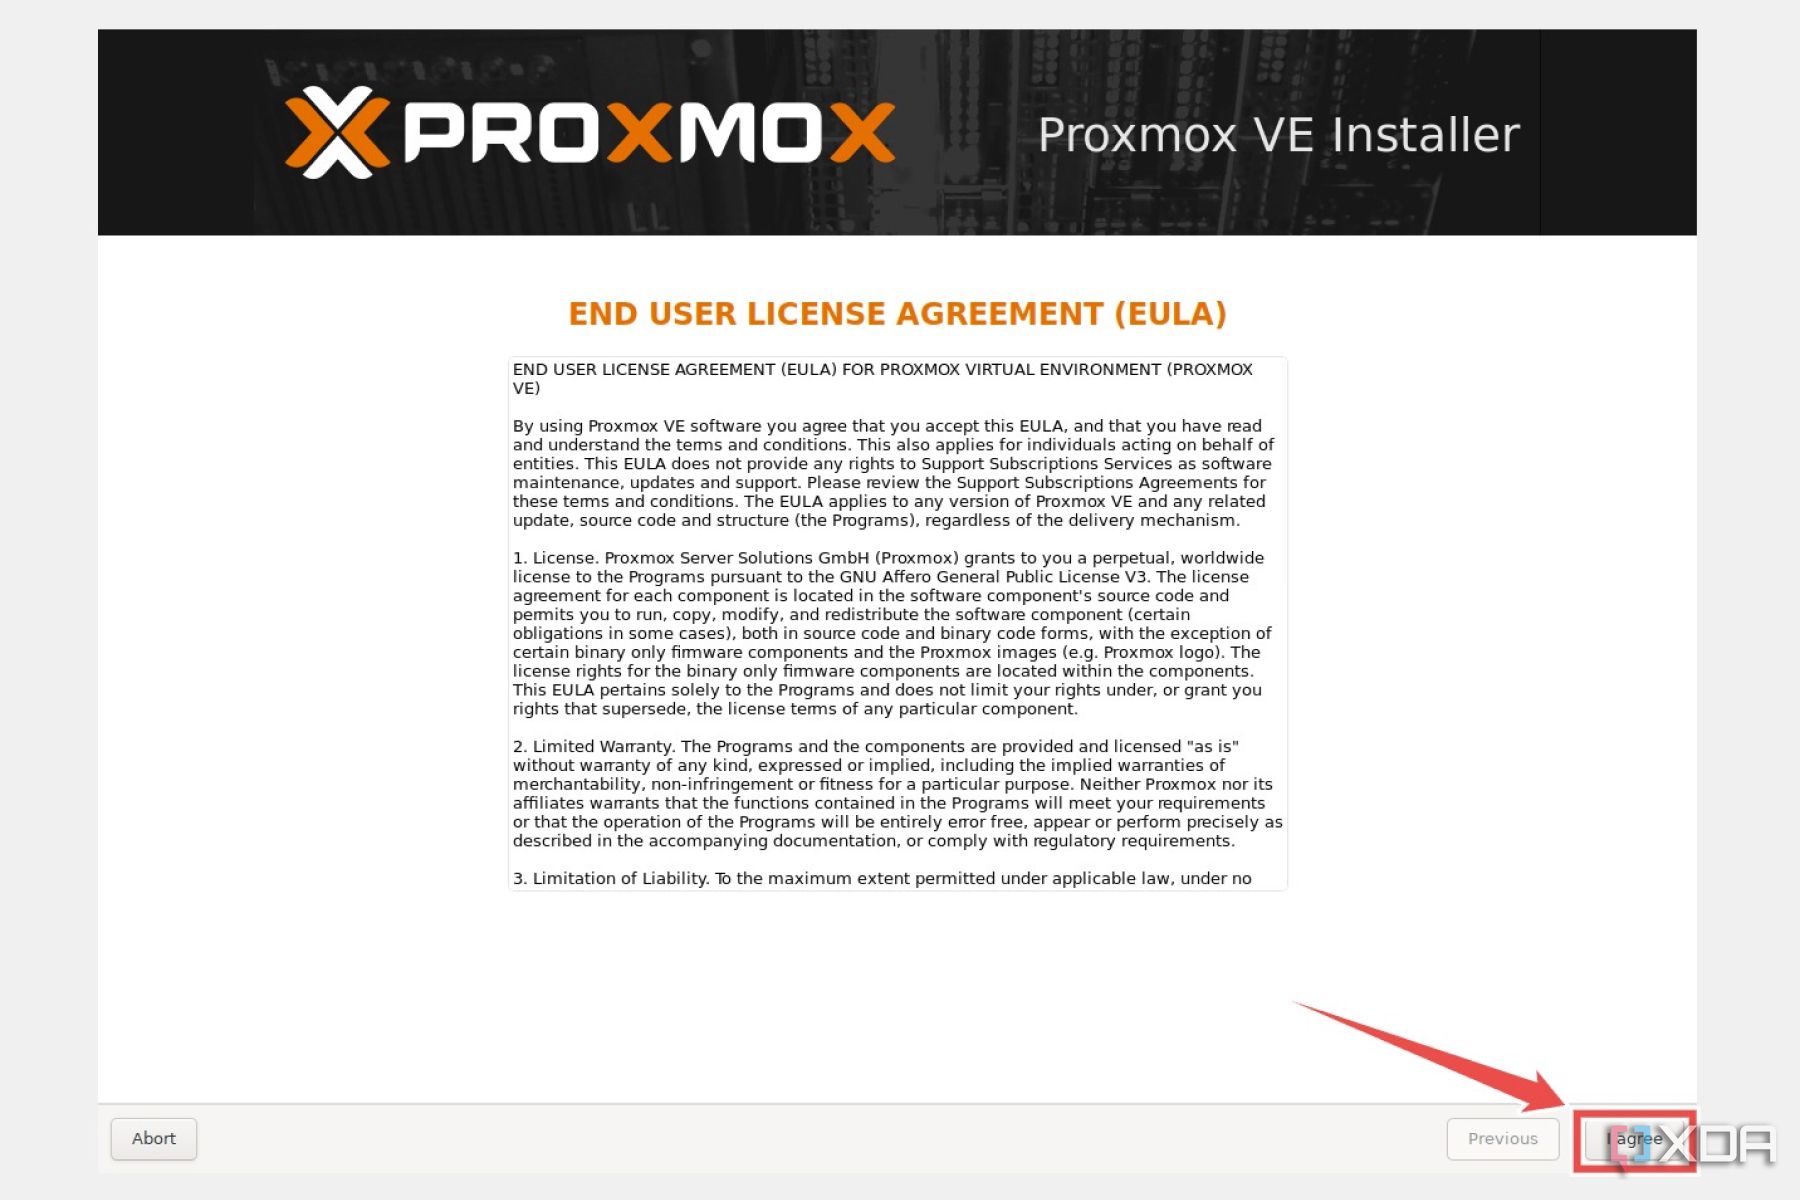
When the PC reboots, you’ll be greeted with the installation screen for Proxmox.
- Select Install Proxmox VE (Graphical).
- Hit I agree when Proxmox displays the EULA terms.
- Choose your Storage drive and click Next.
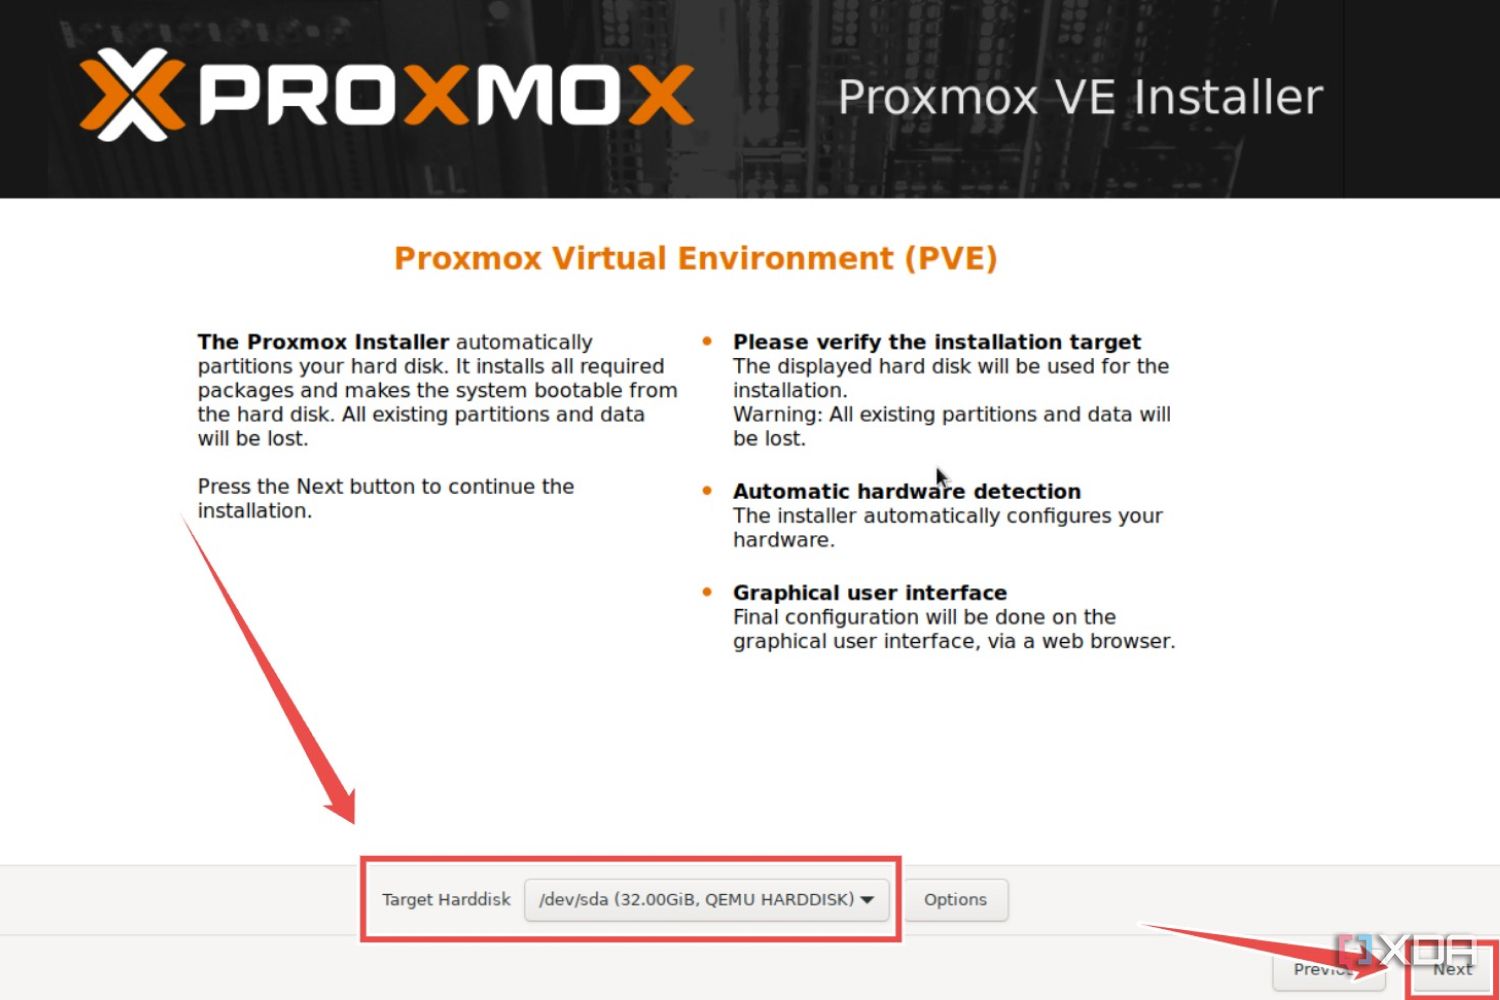
Be sure to hit Next after each step from here on out.
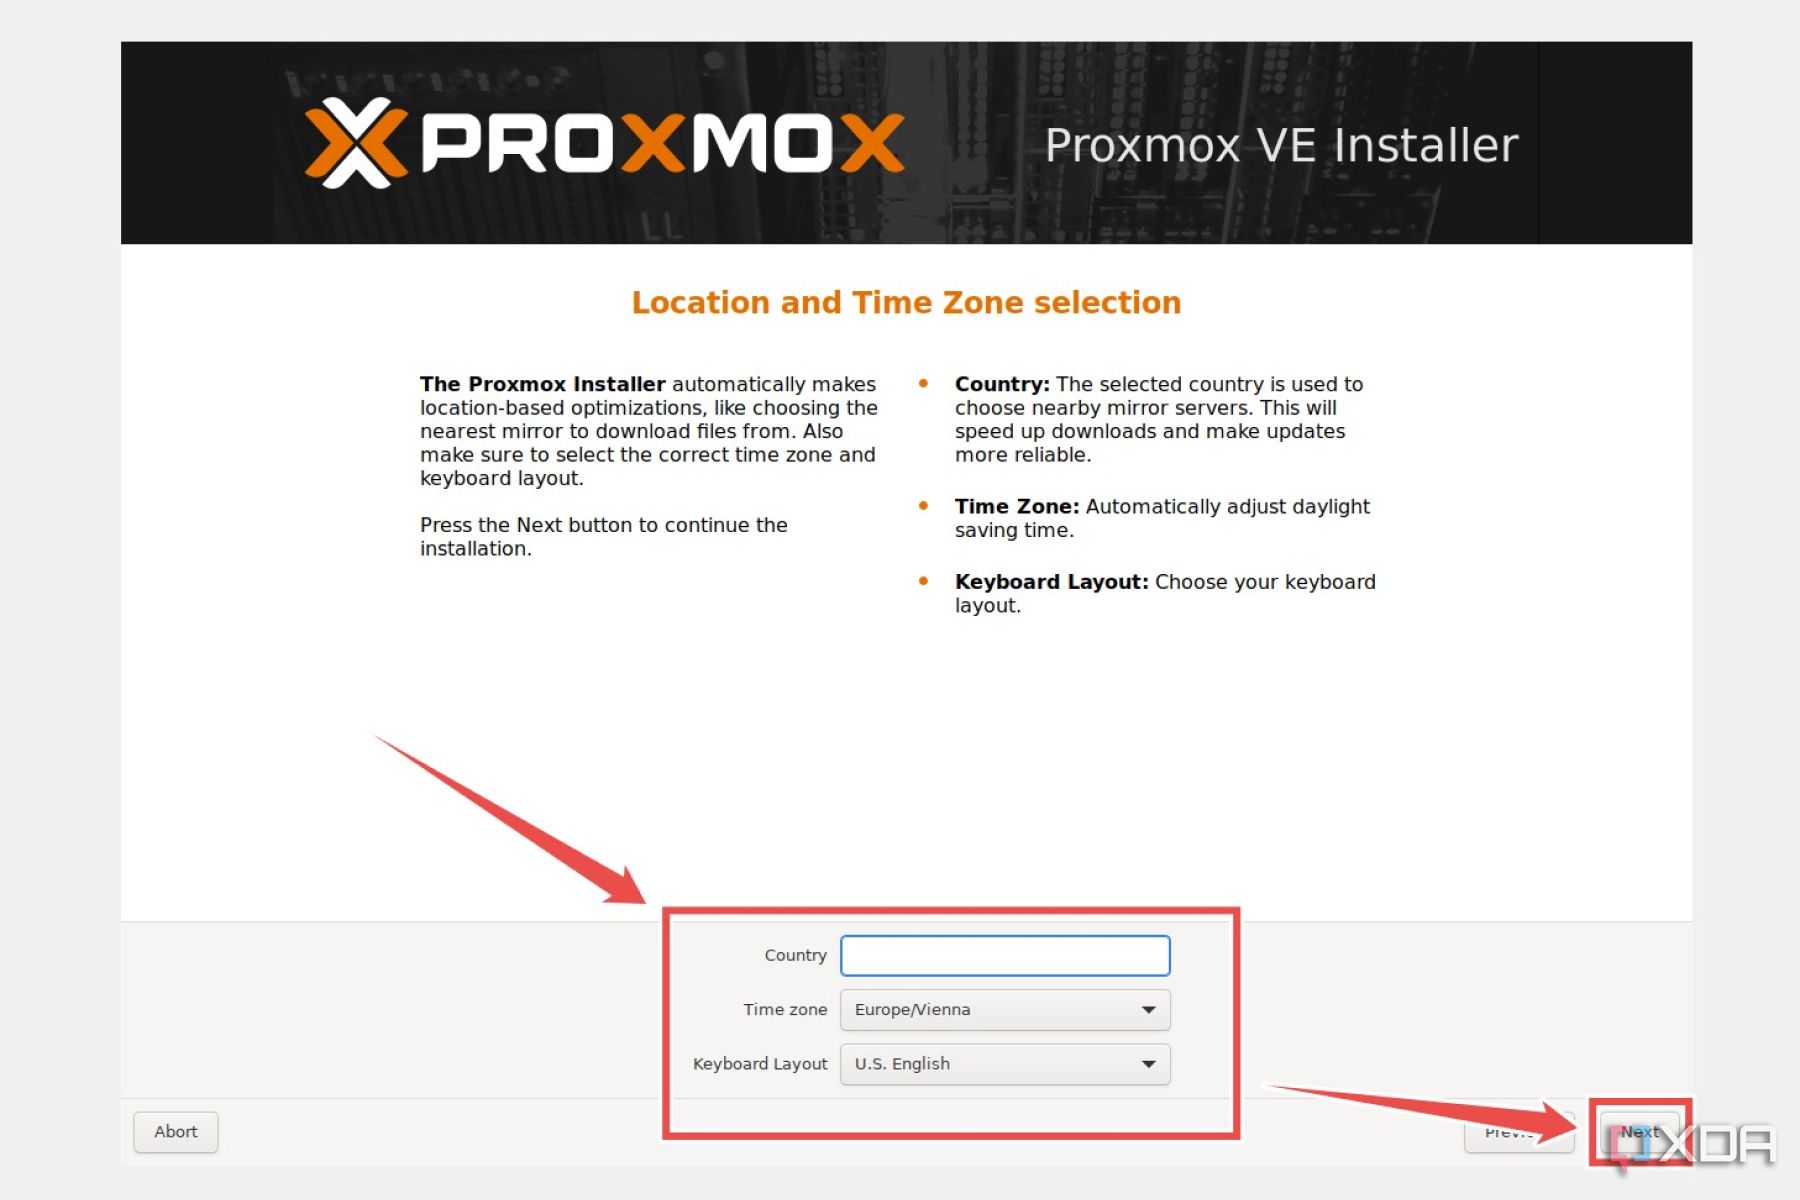
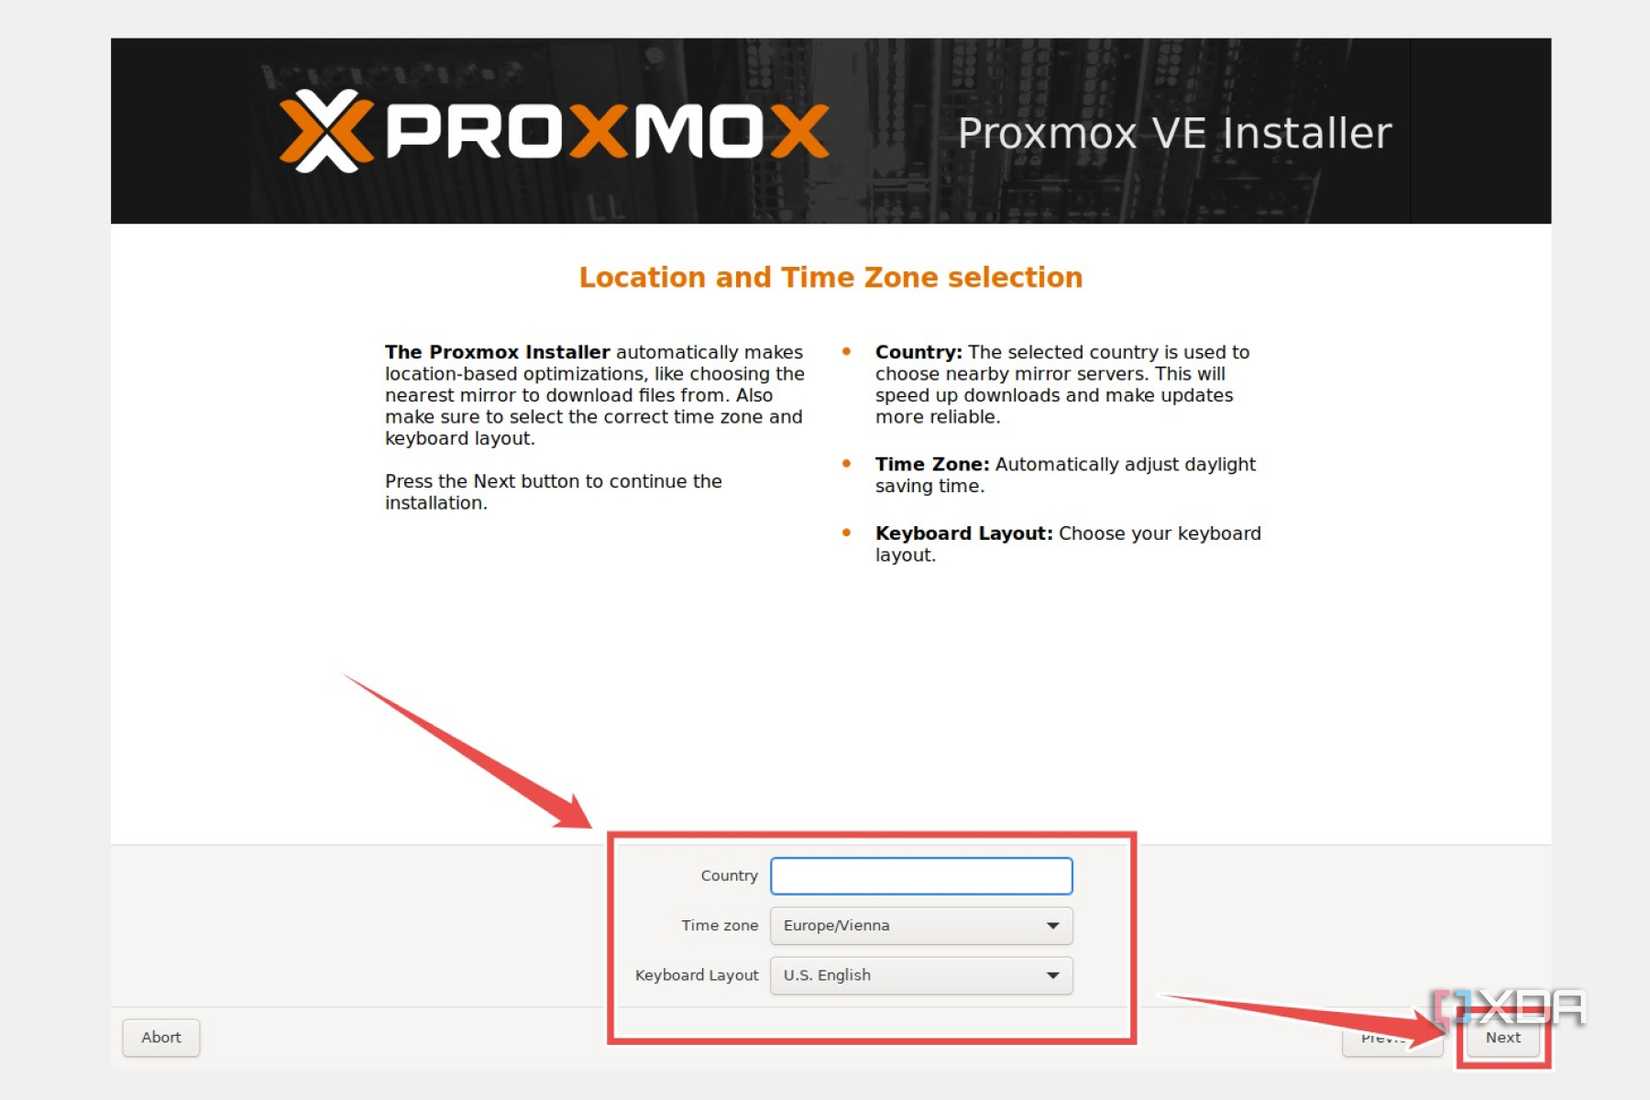
- Pick your Country, Time-zone, and Keyboard layout settings.
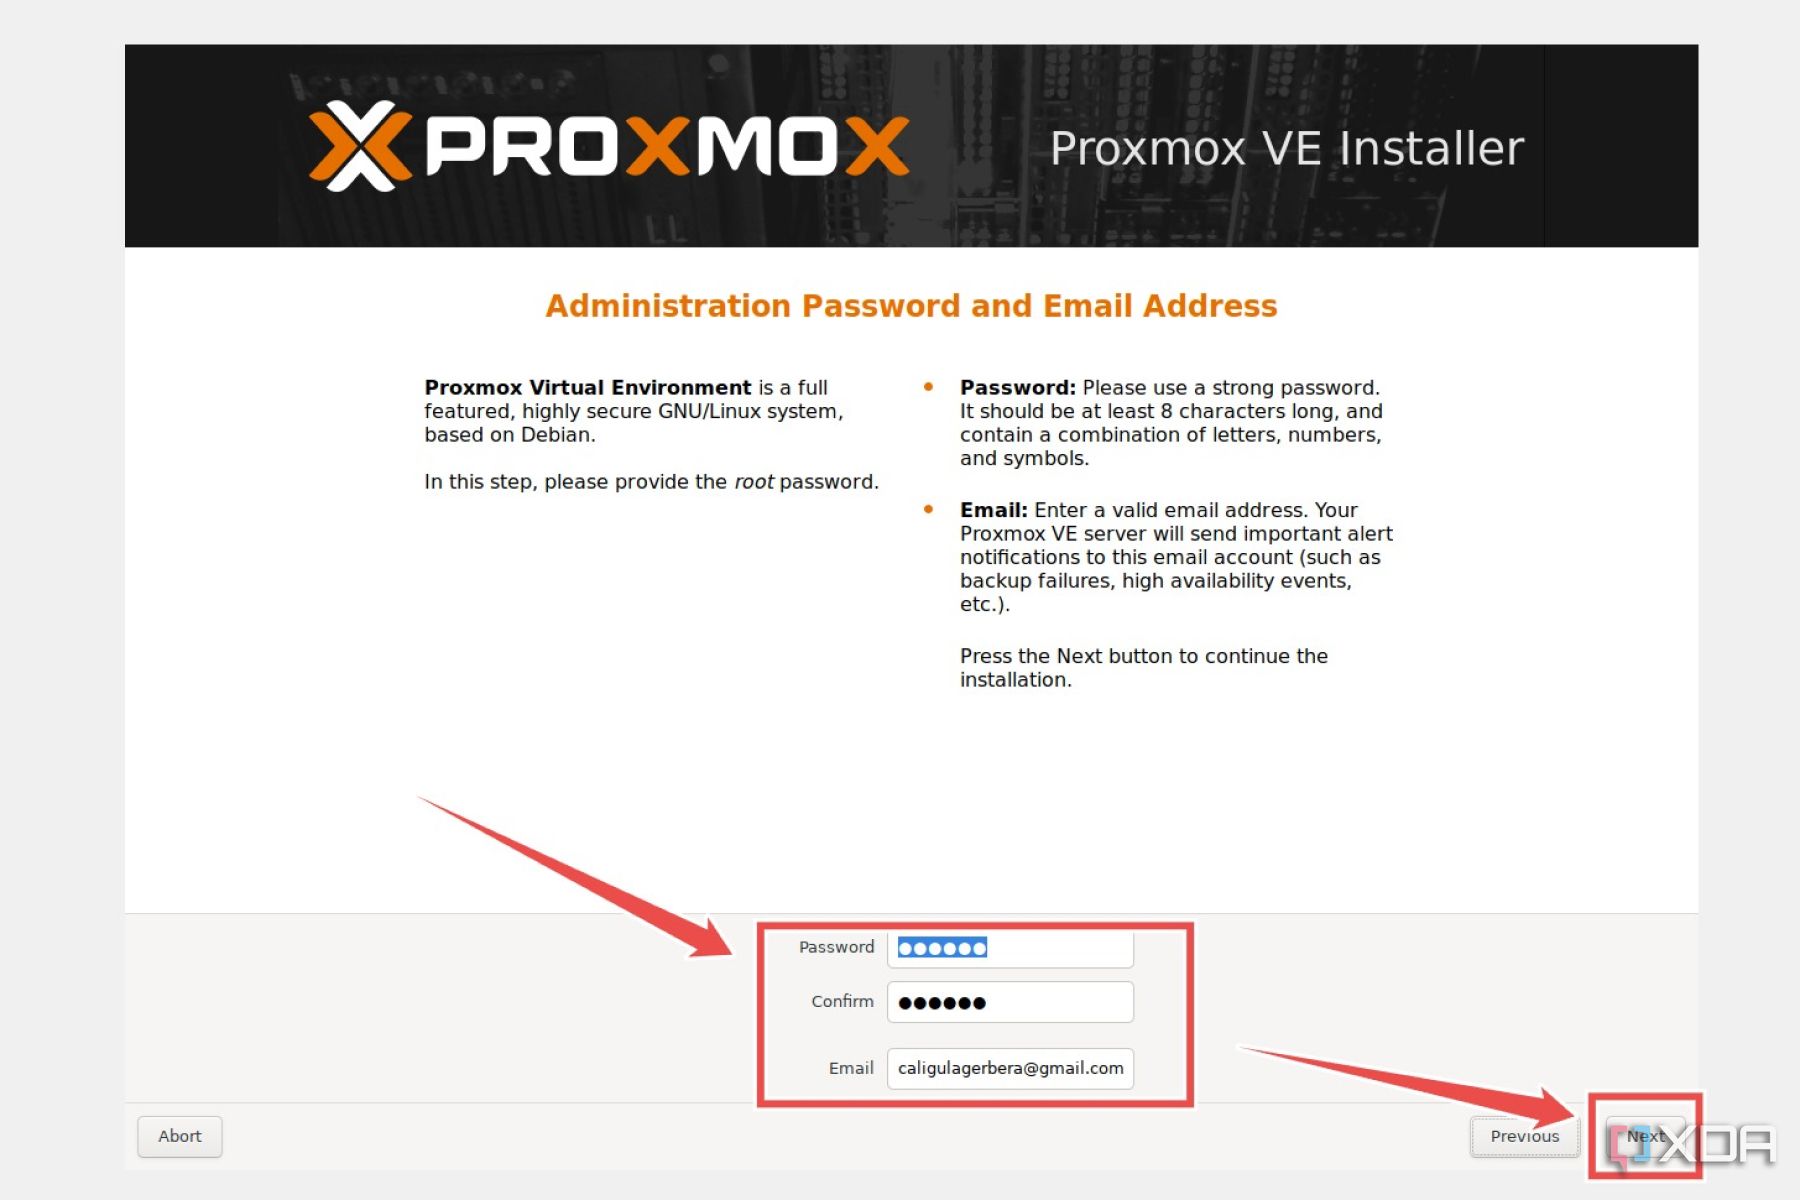
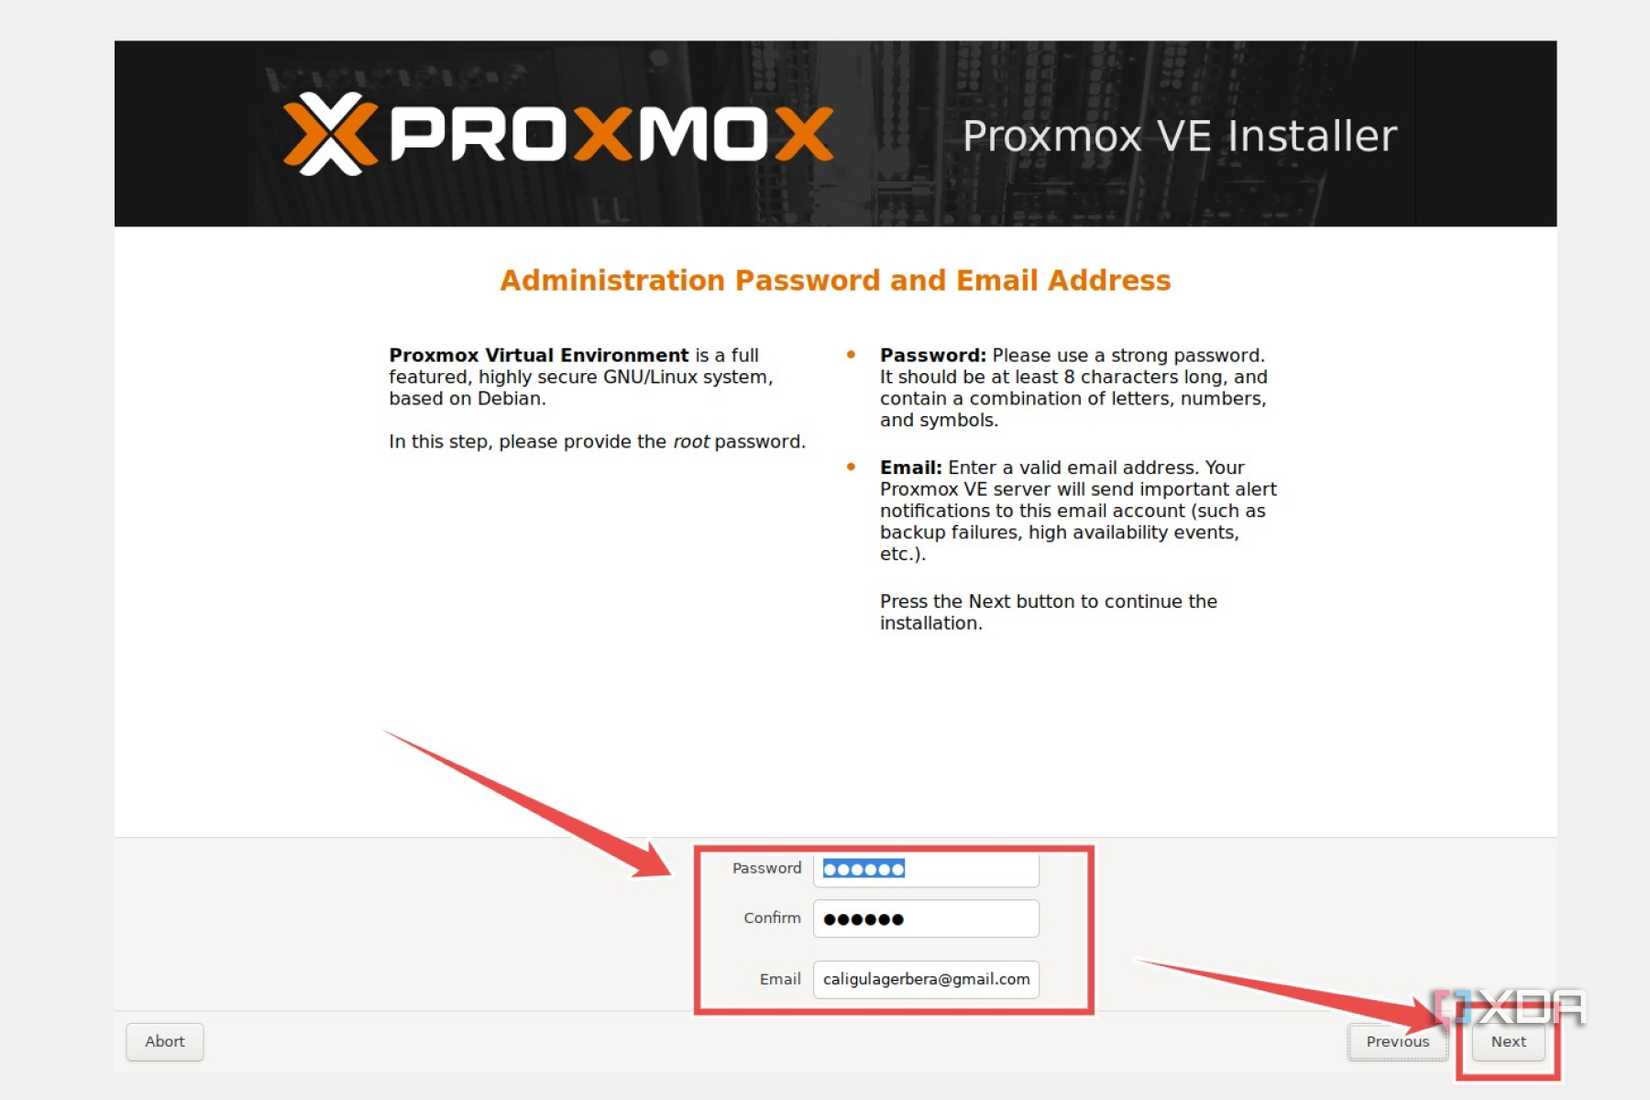
- Enter a suitable password alongside your email address.
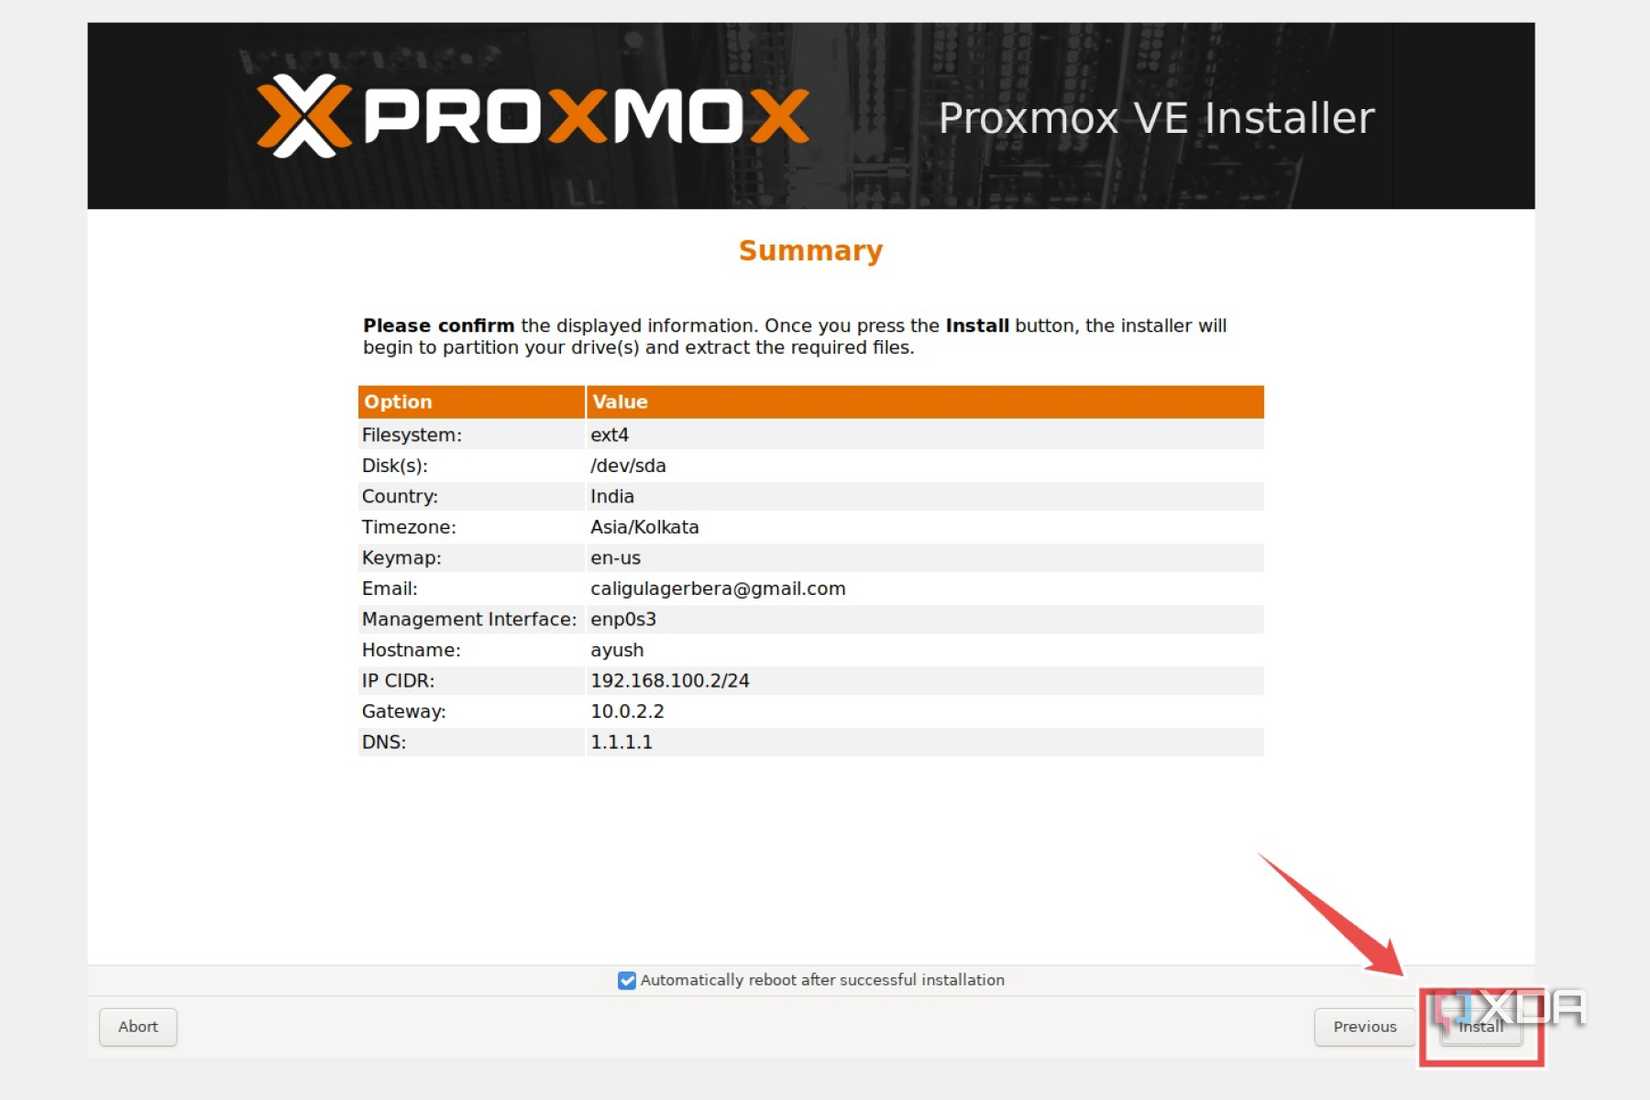
- Type the Hostname (FQDN) for your Proxmox server and leave the other settings be.
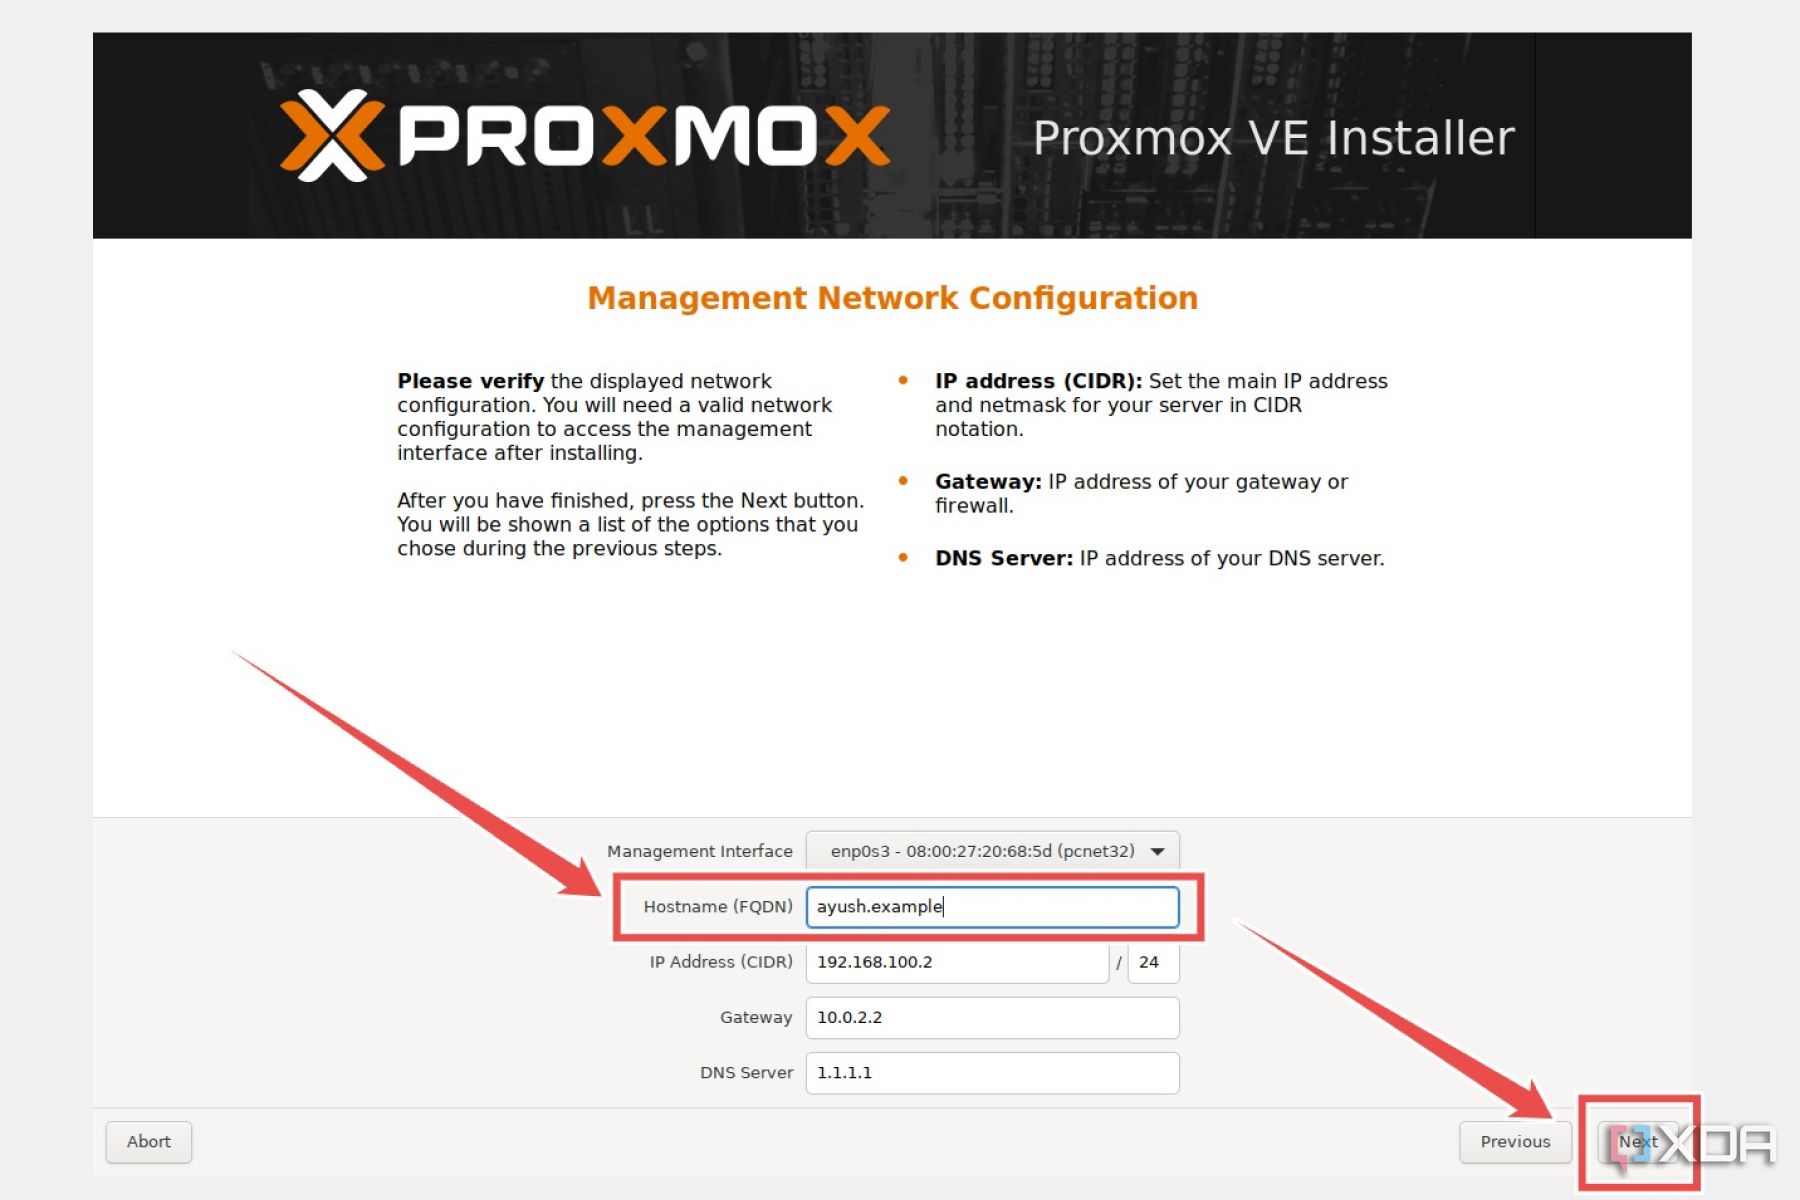
If you have more than one networking device (like a WLAN card and a LAN interface) active during installation, make sure you pick the correct device under the Management Interface option.
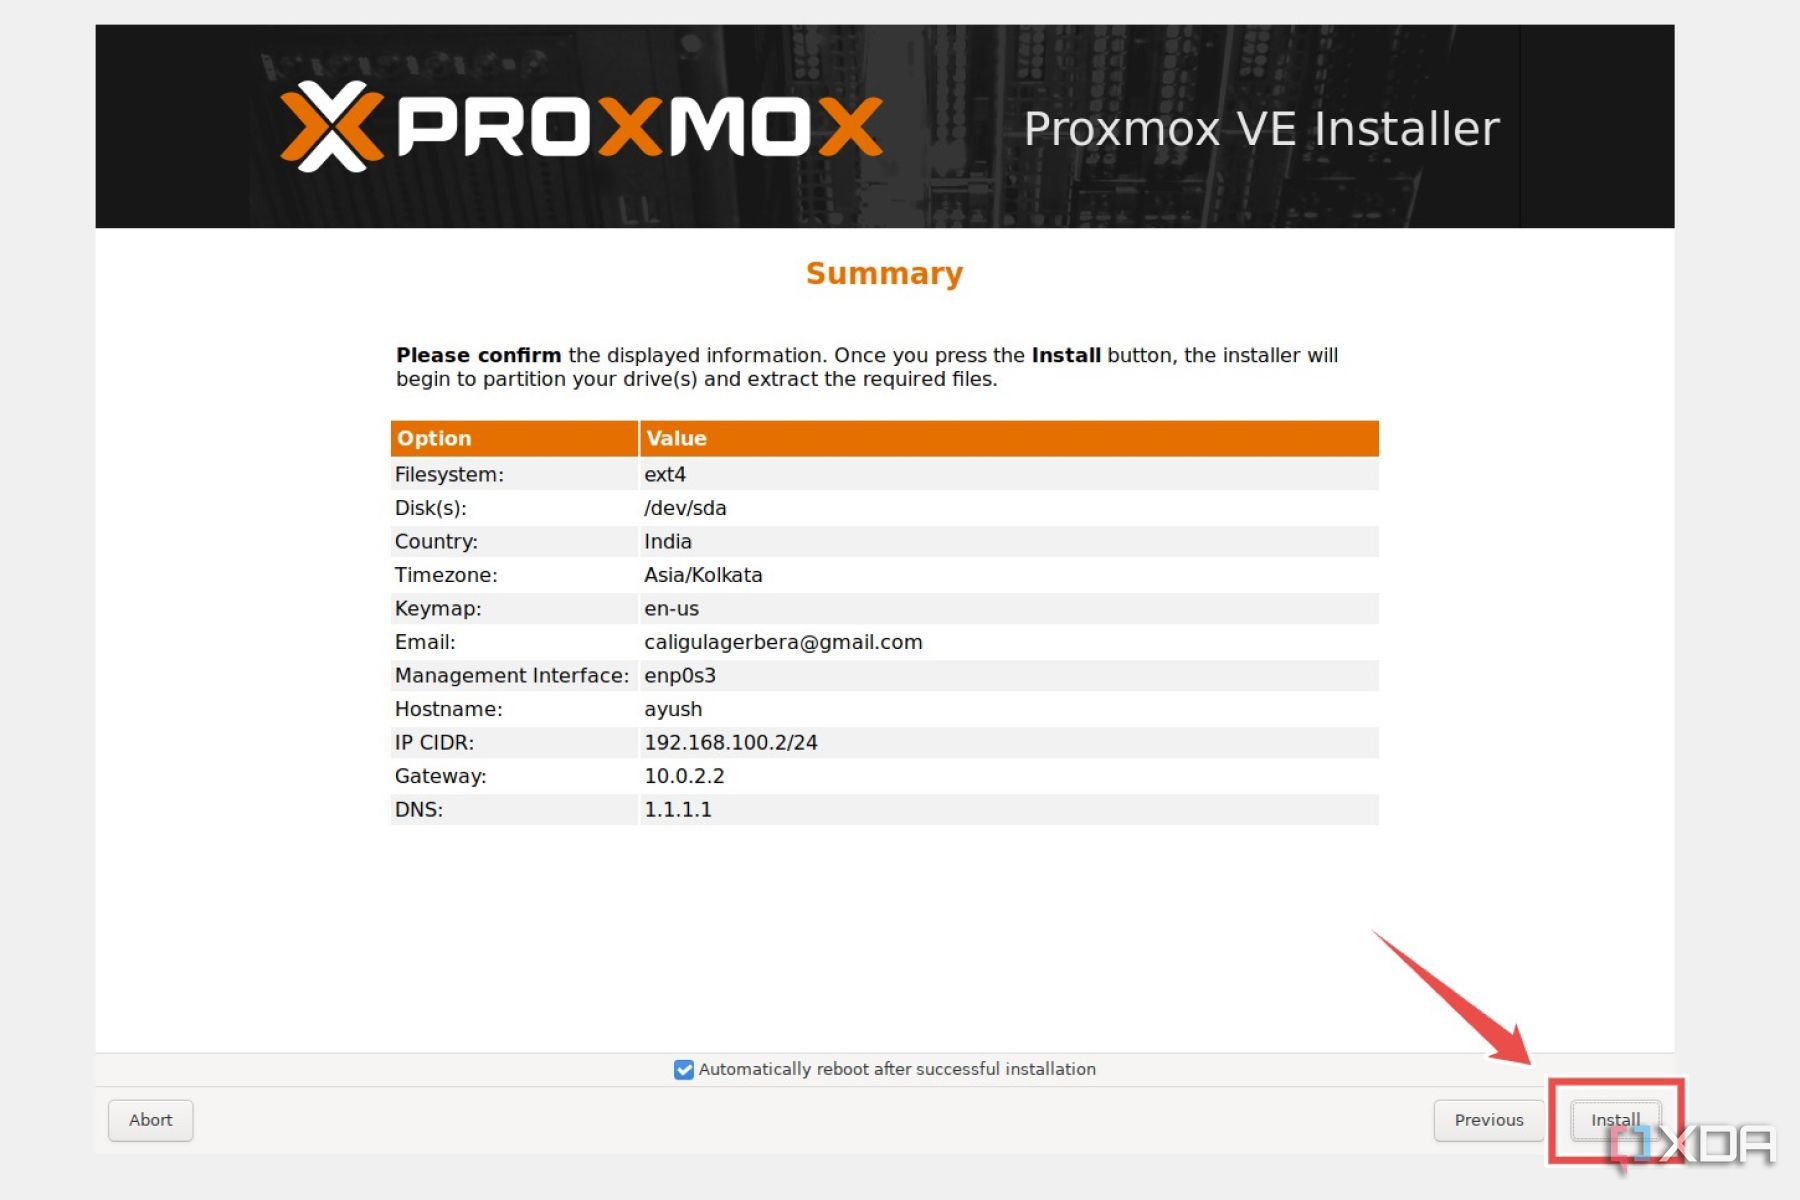
- Double-check everything on the Summary page and press Install.


Launching the Proxmox web UI
Once Proxmox has finished installing, your PC will reboot into the newly-installed OS. Now’s the time to switch to your other system and access the Proxmox web UI.
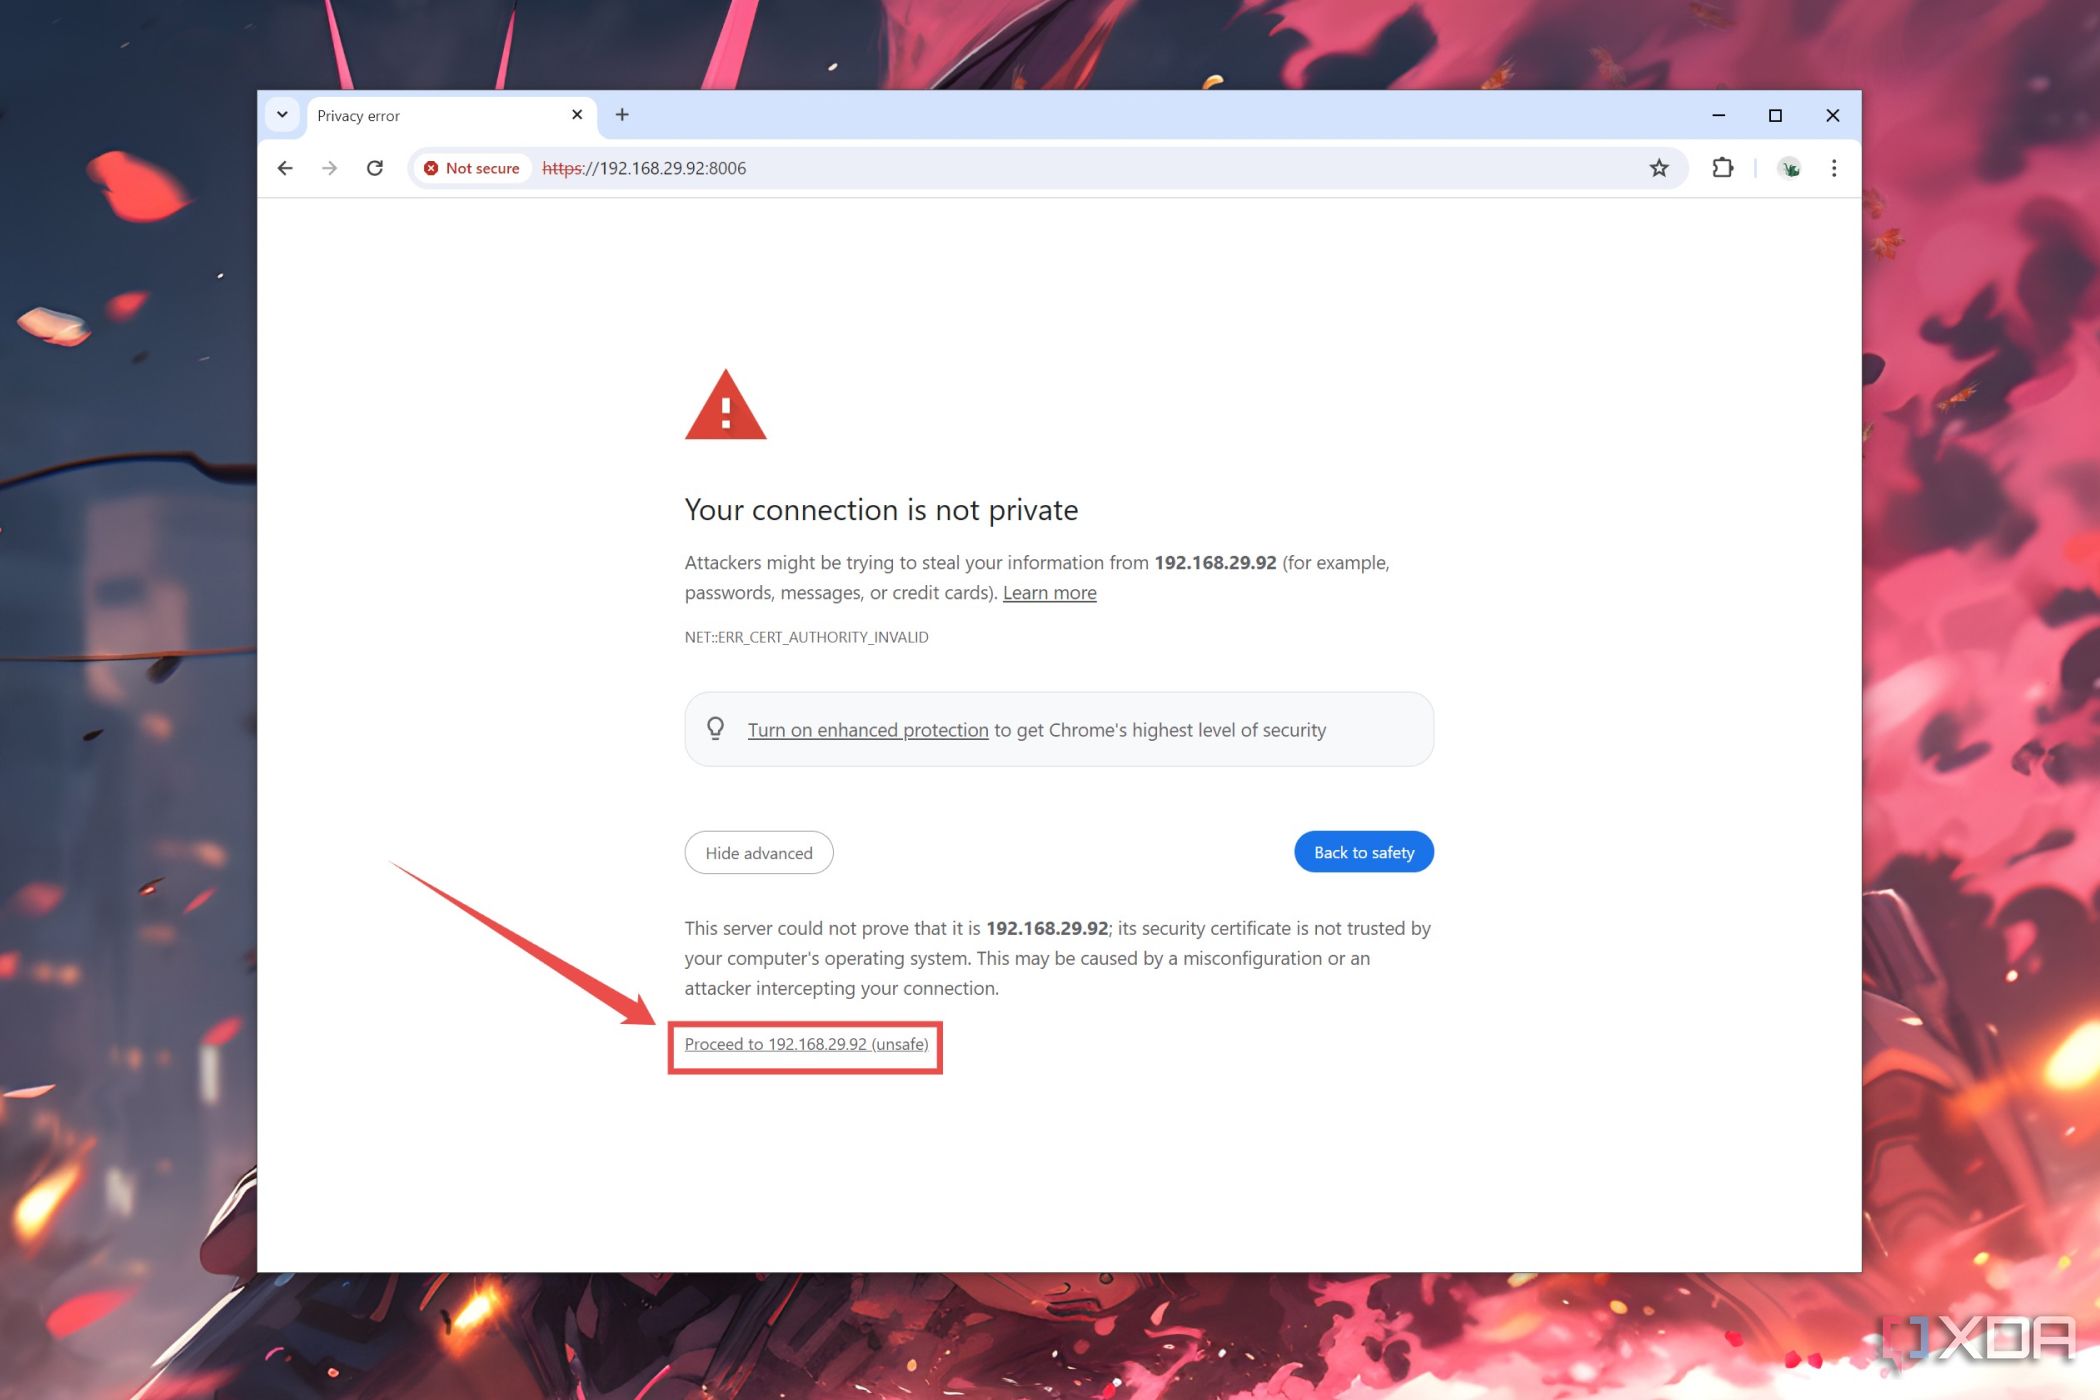
- Launch your favorite web browser and type the IP address of your spare PC followed by a : (colon) and port number 8006 into the Address Bar.
If you’re having trouble finding the IP address of your Proxmox server, you can use a network scanner like Nmap or Fing.
- Agree to proceed to the URL when your web browser cautions you about the connection not being private.
- Enter root as the Username and type the Password you set in the installation wizard before clicking on the Log in button.
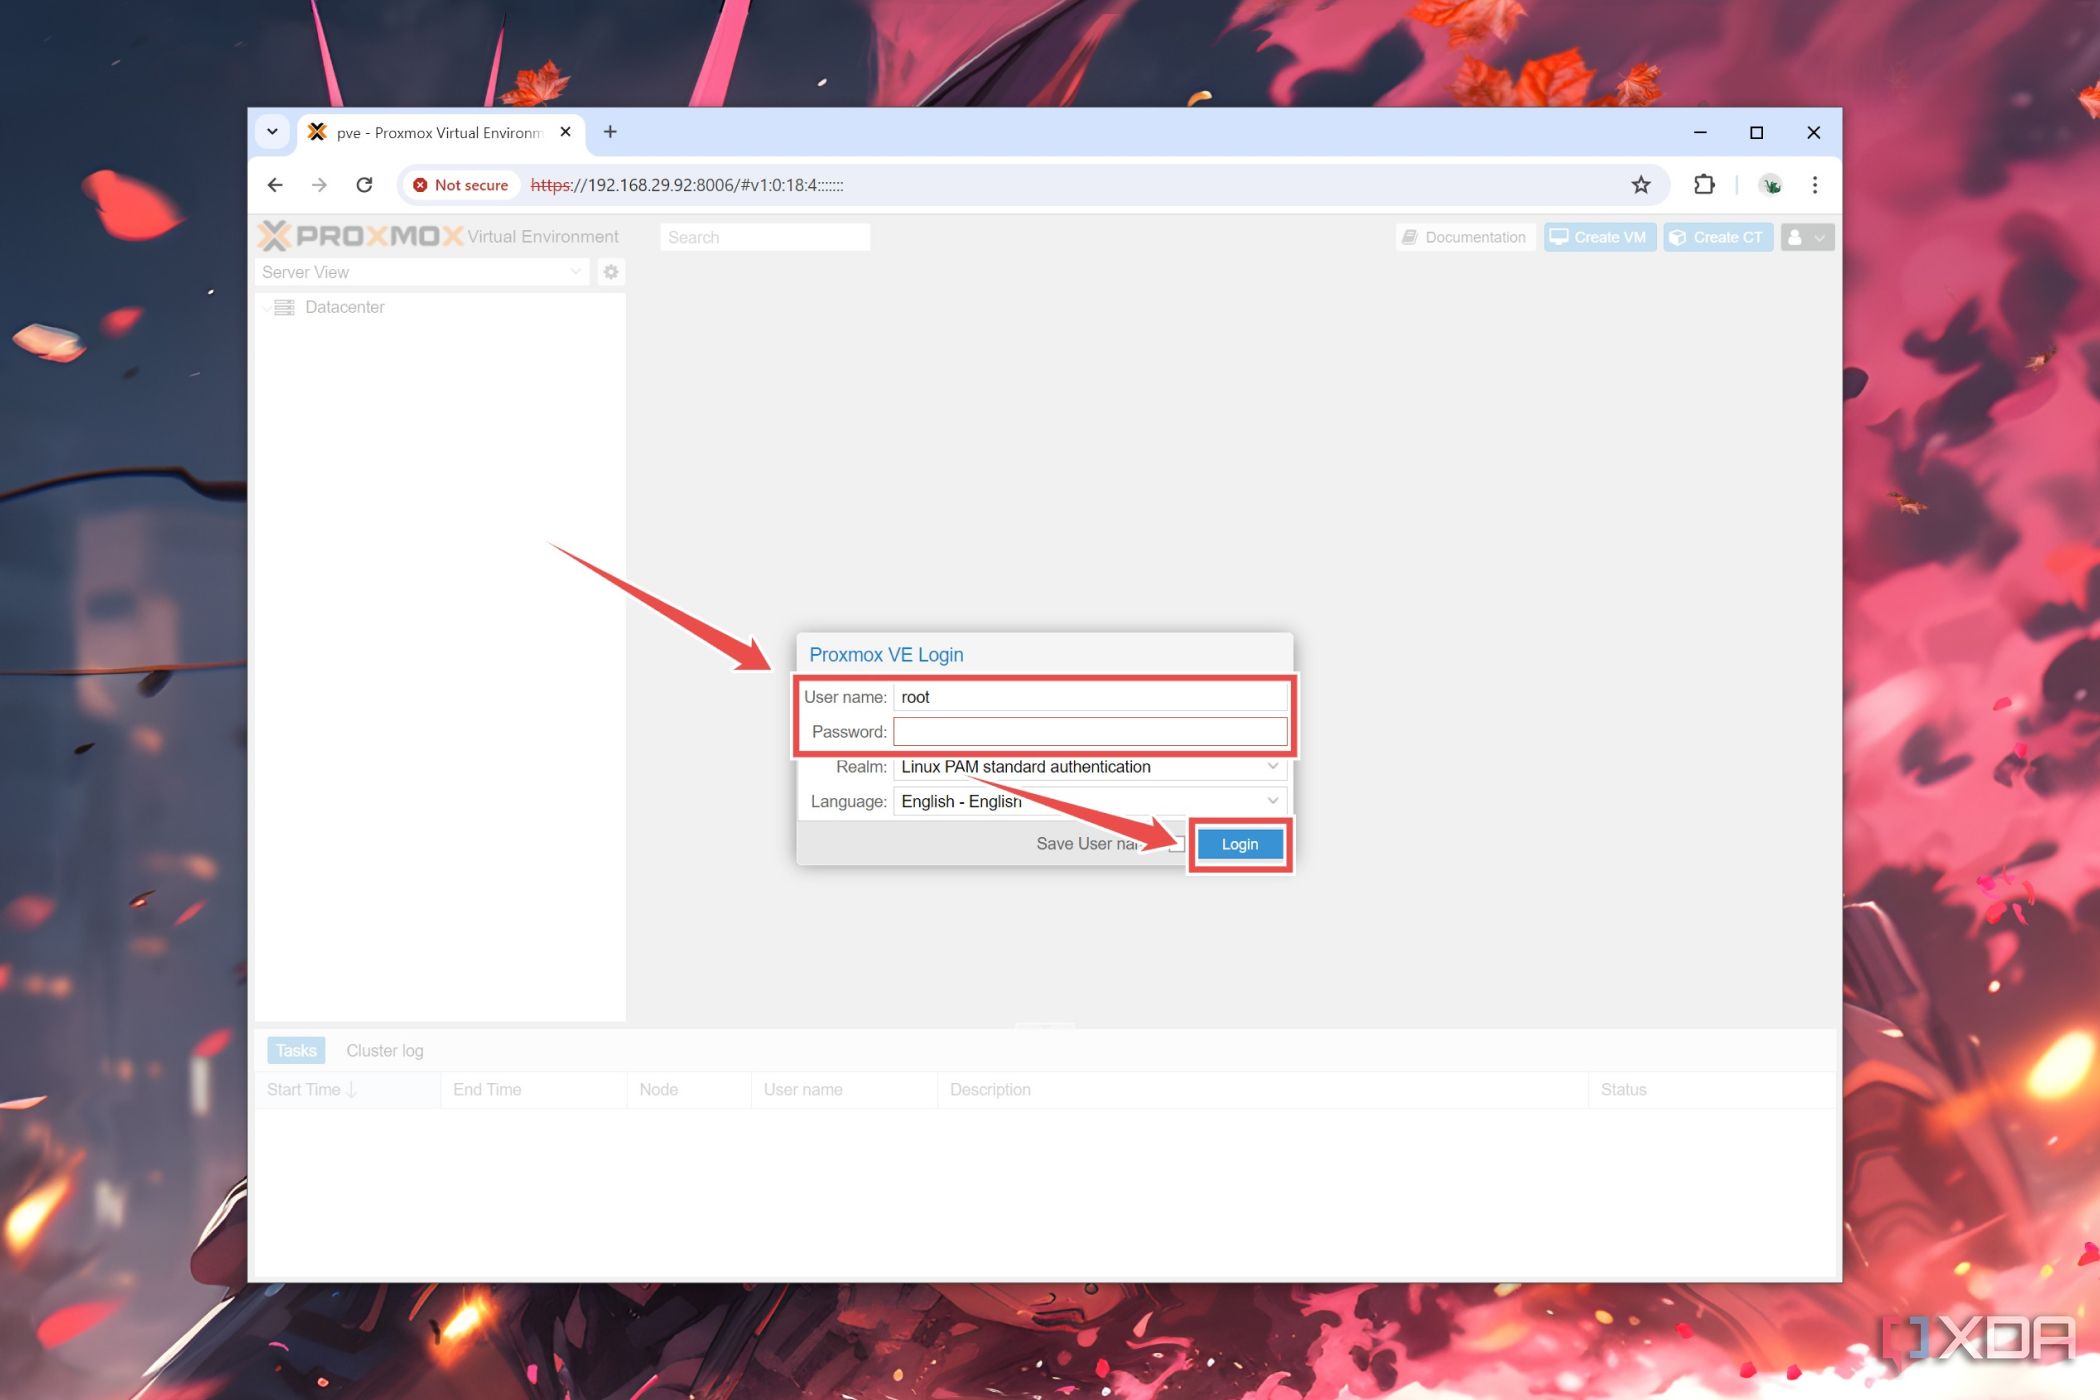


Assuming you followed all the steps properly, the Proxmox Dashboard will appear on your web browser.
Creating virtual machines in Proxmox
Setting up virtual machines inside your Proxmox server may sound a little intimidating if you’re only familiar with Type-2 hypervisors. But you’ll be surprised at how easy it is to create your VMs in Proxmox.
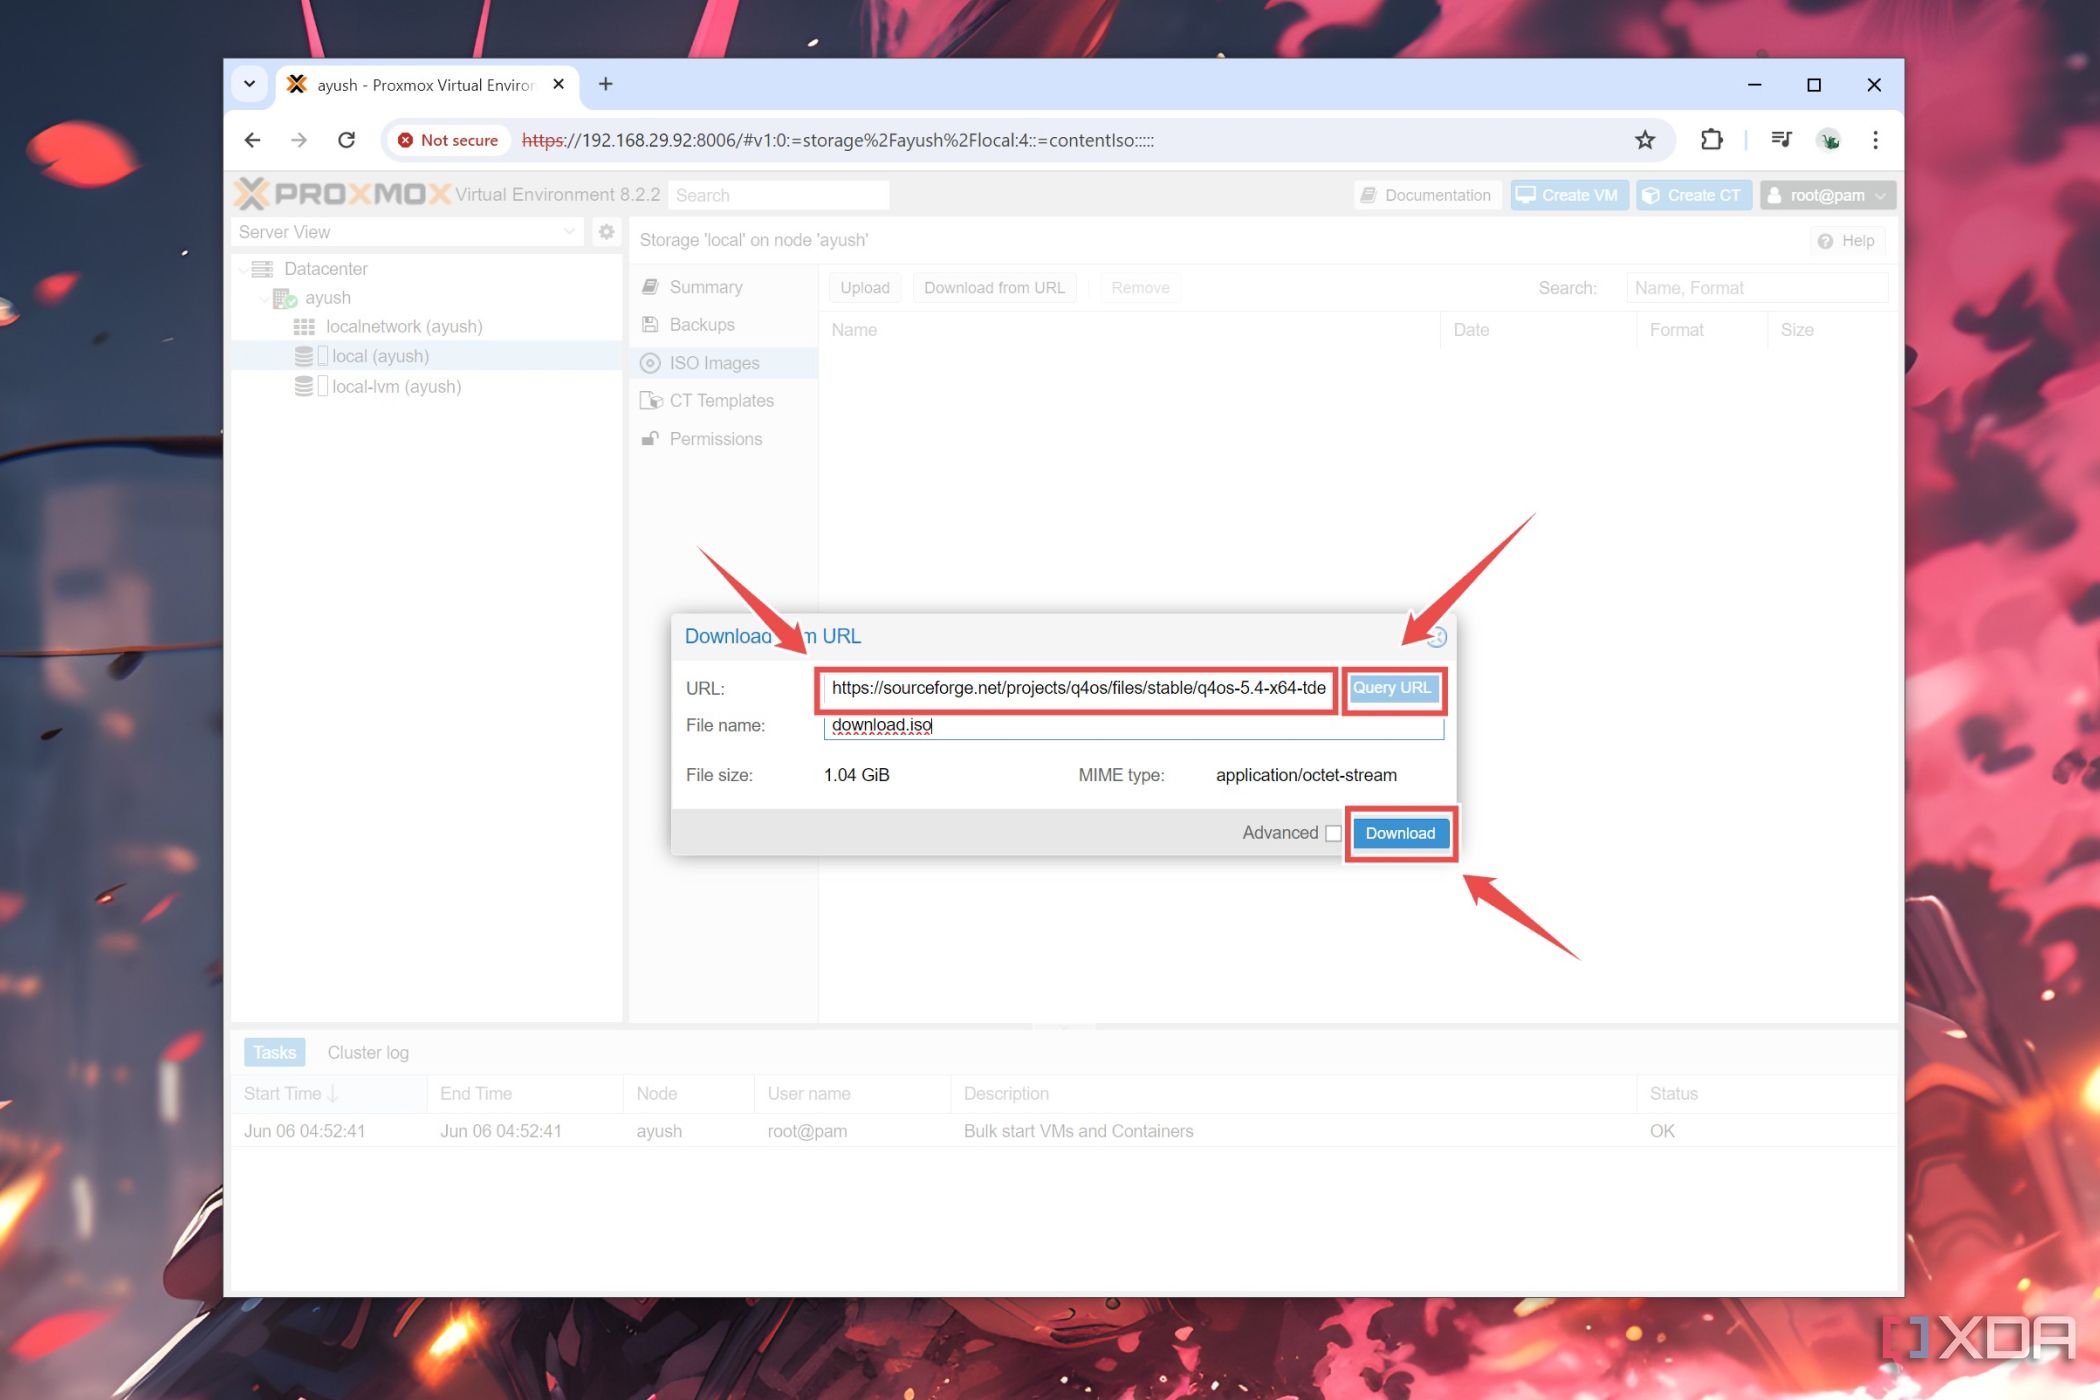
- Click on local (user_name) storage under the primary node, select the ISO Images option, and press Download from URL.
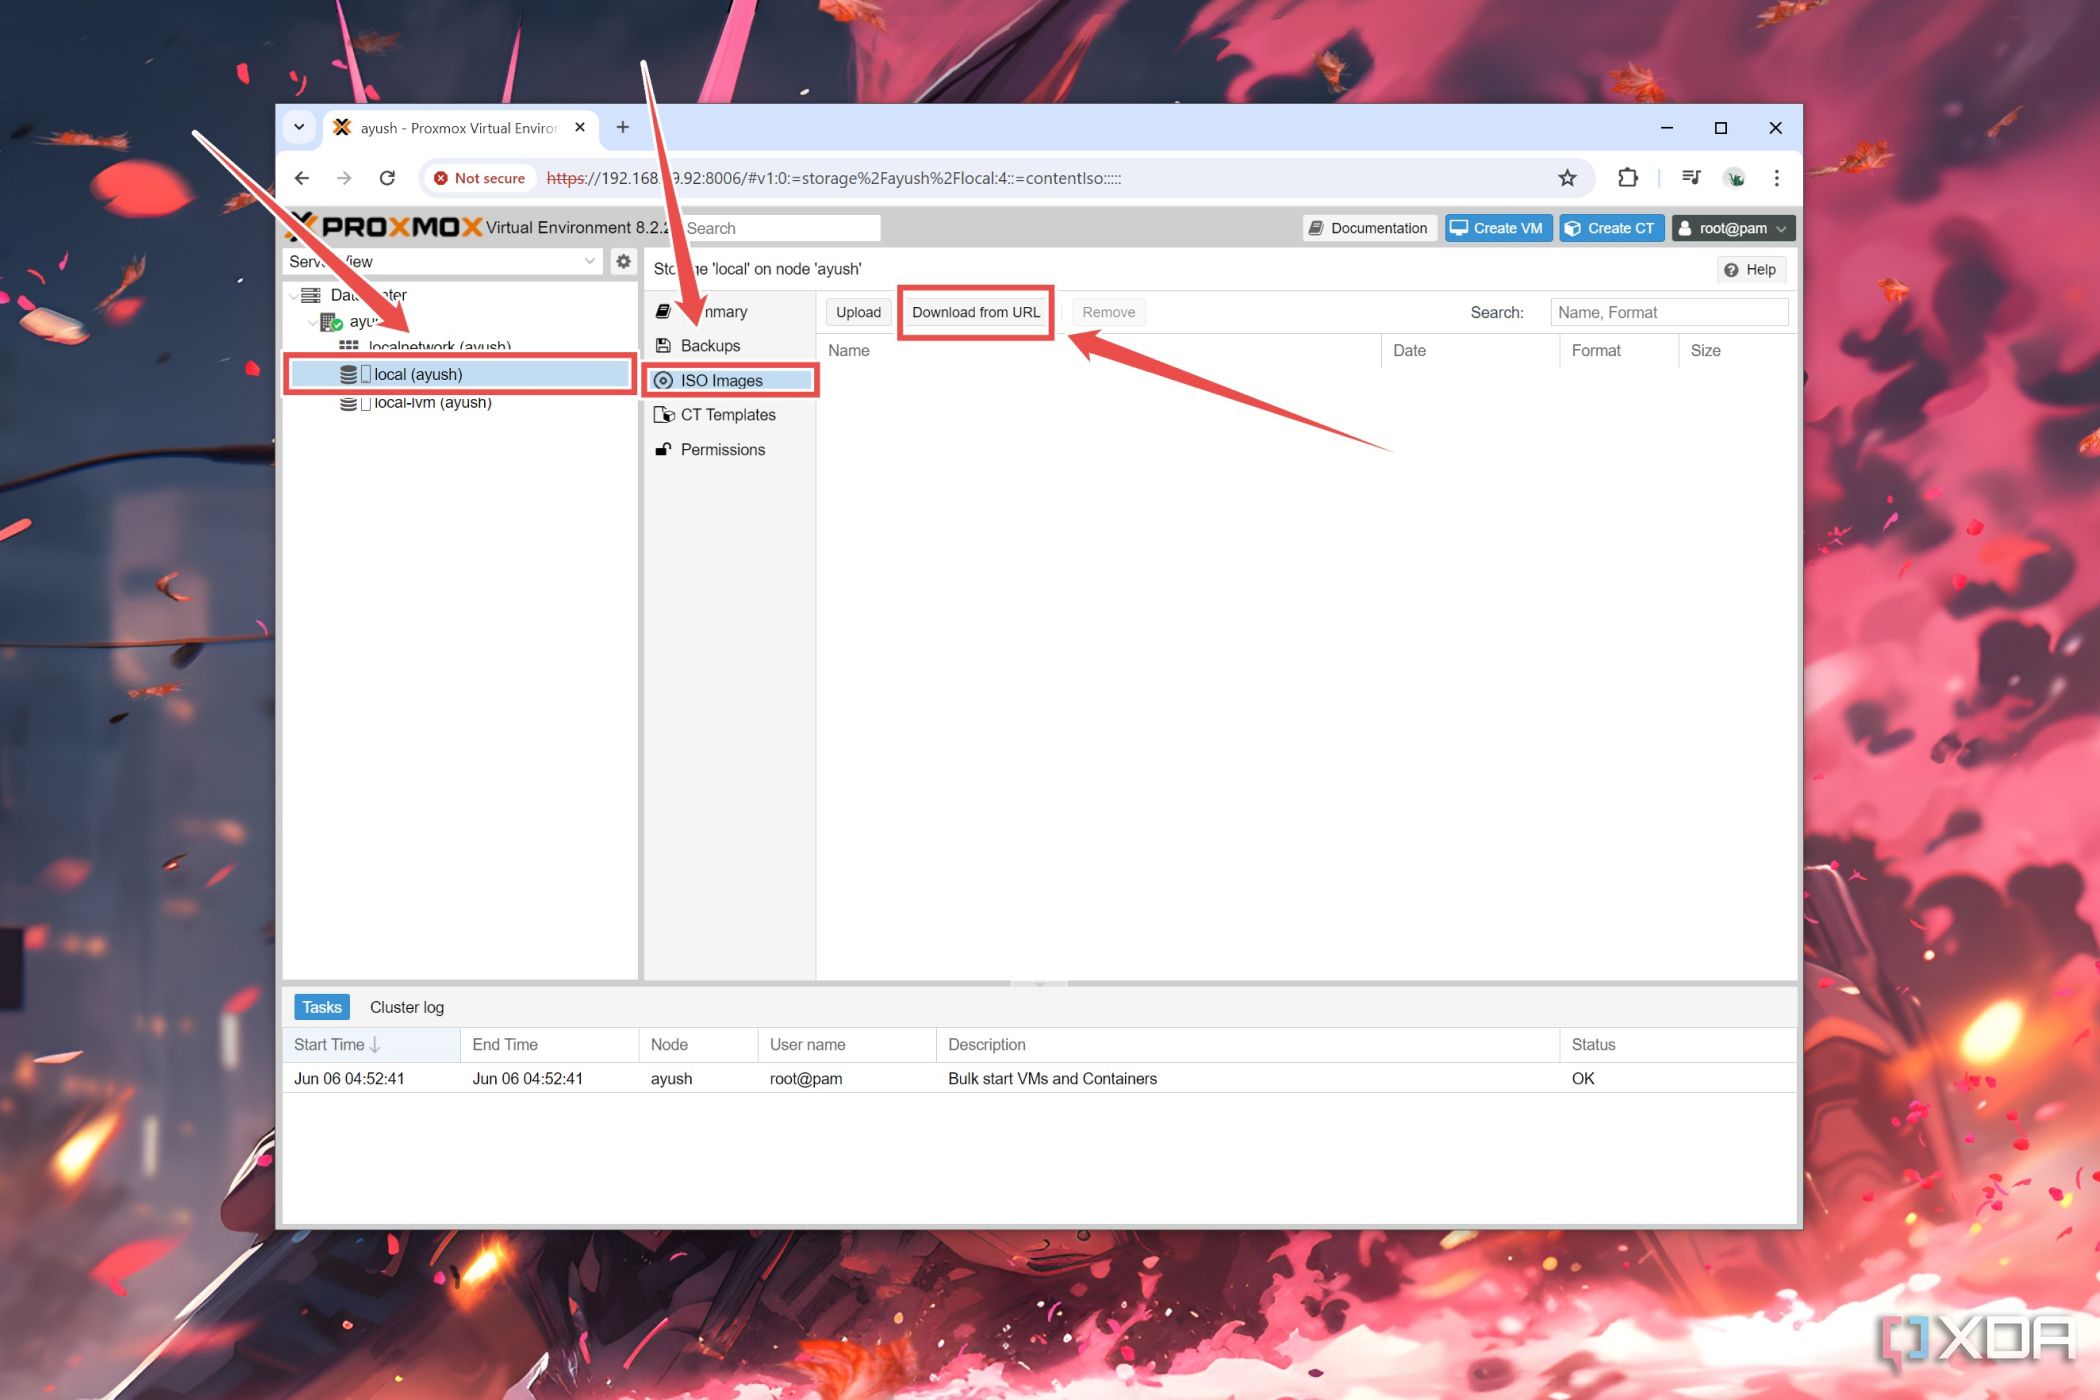
- Paste the URL of the web page containing the ISO file of the OS you wish to use with the virtual machine, hit Query, and press Download.
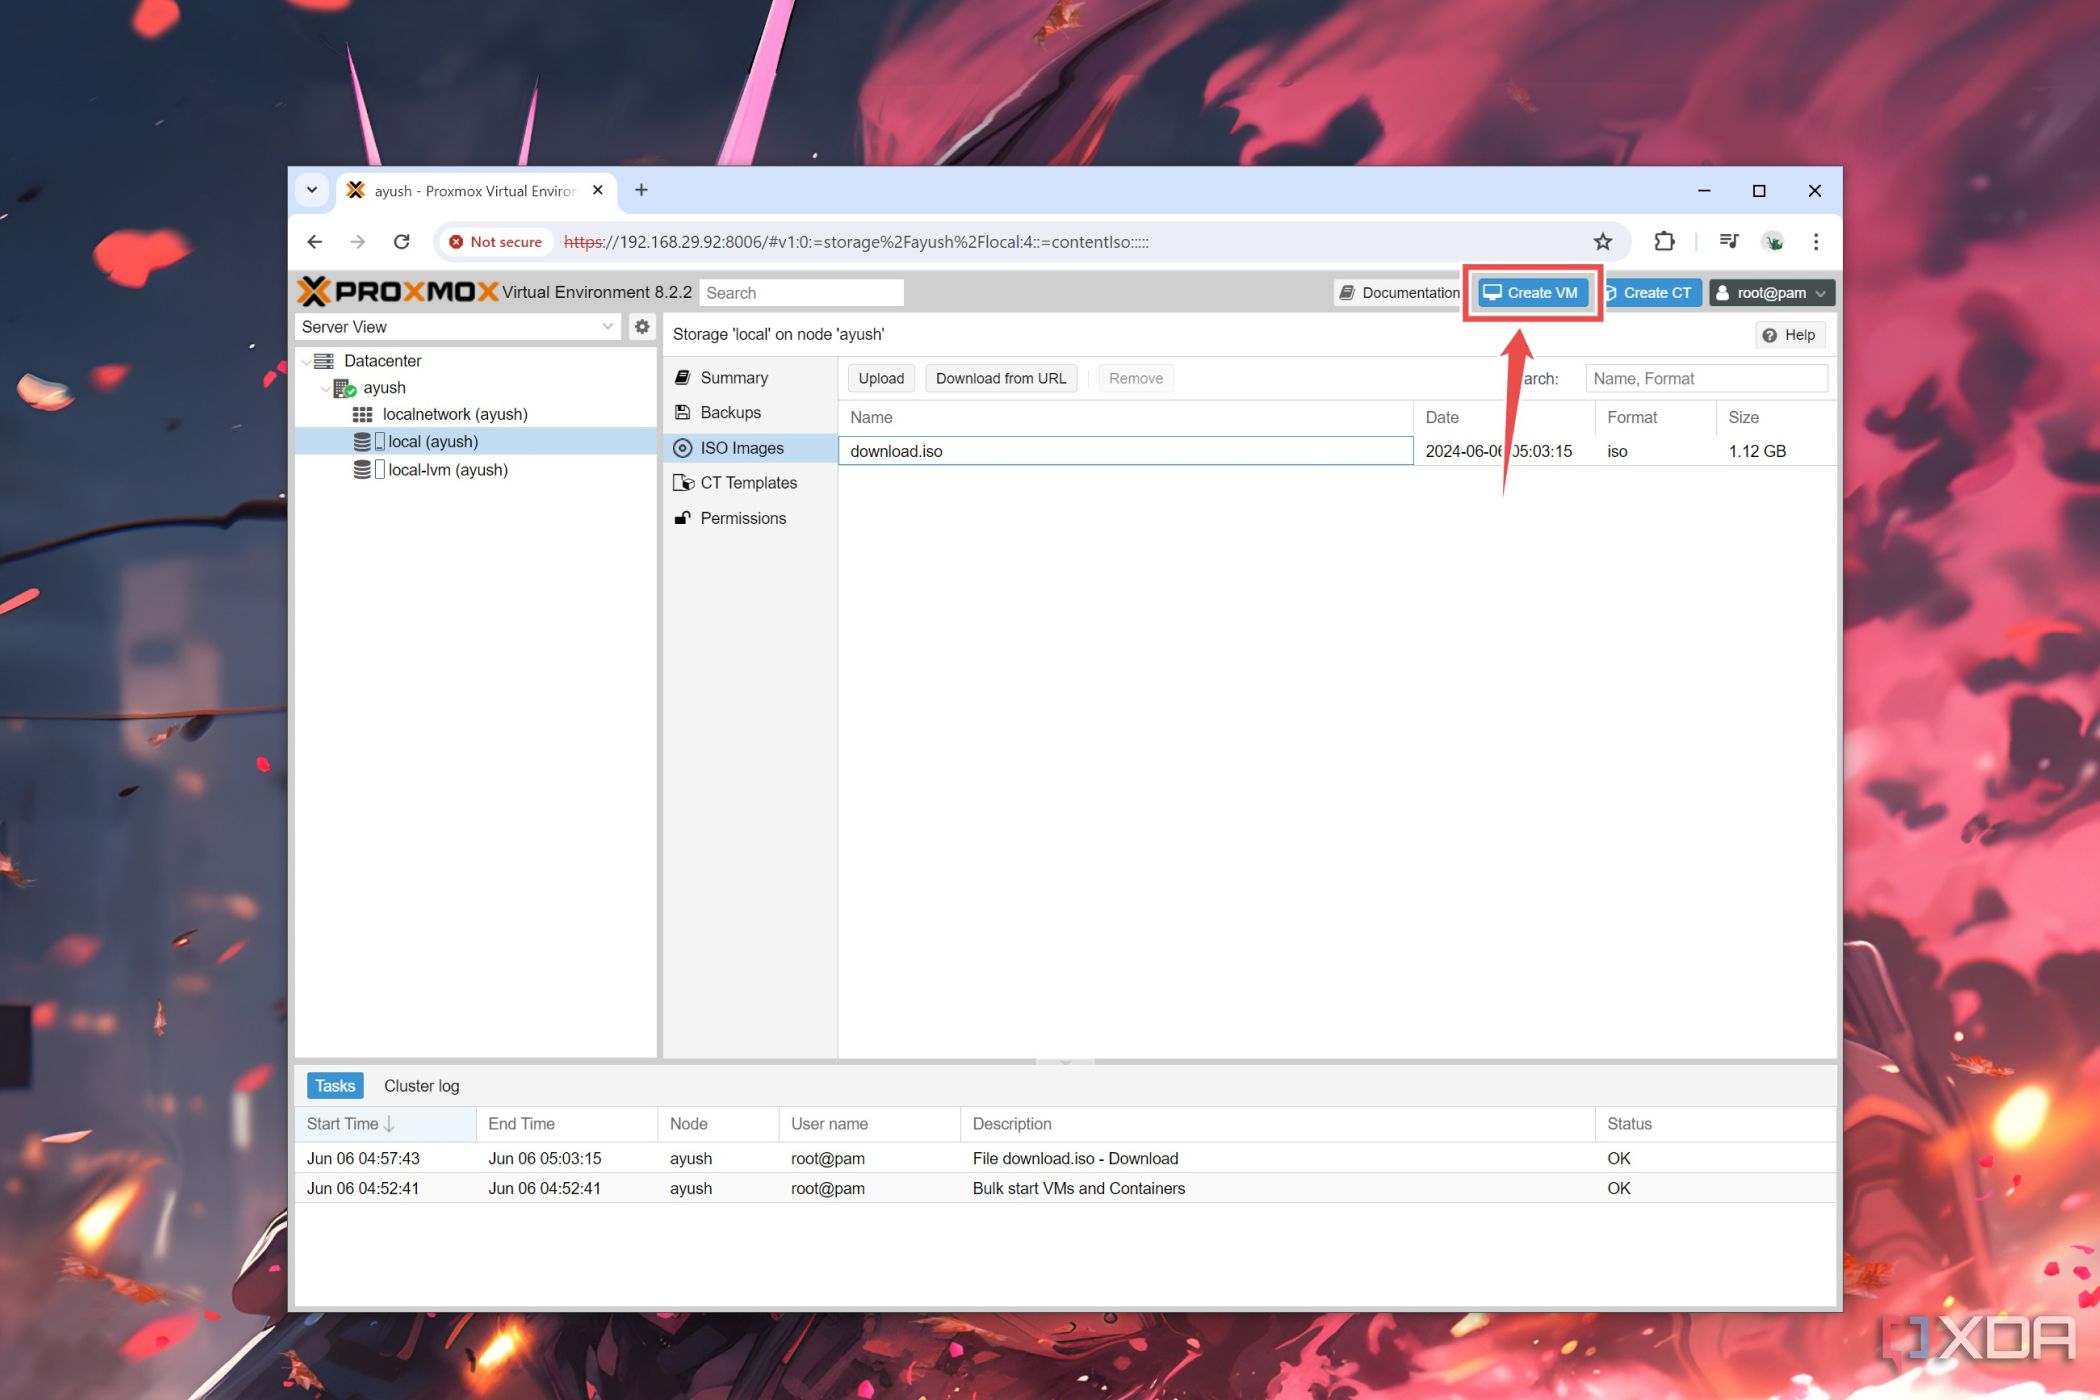
- Once the ISO file has finished downloading, click on the Create VM button.
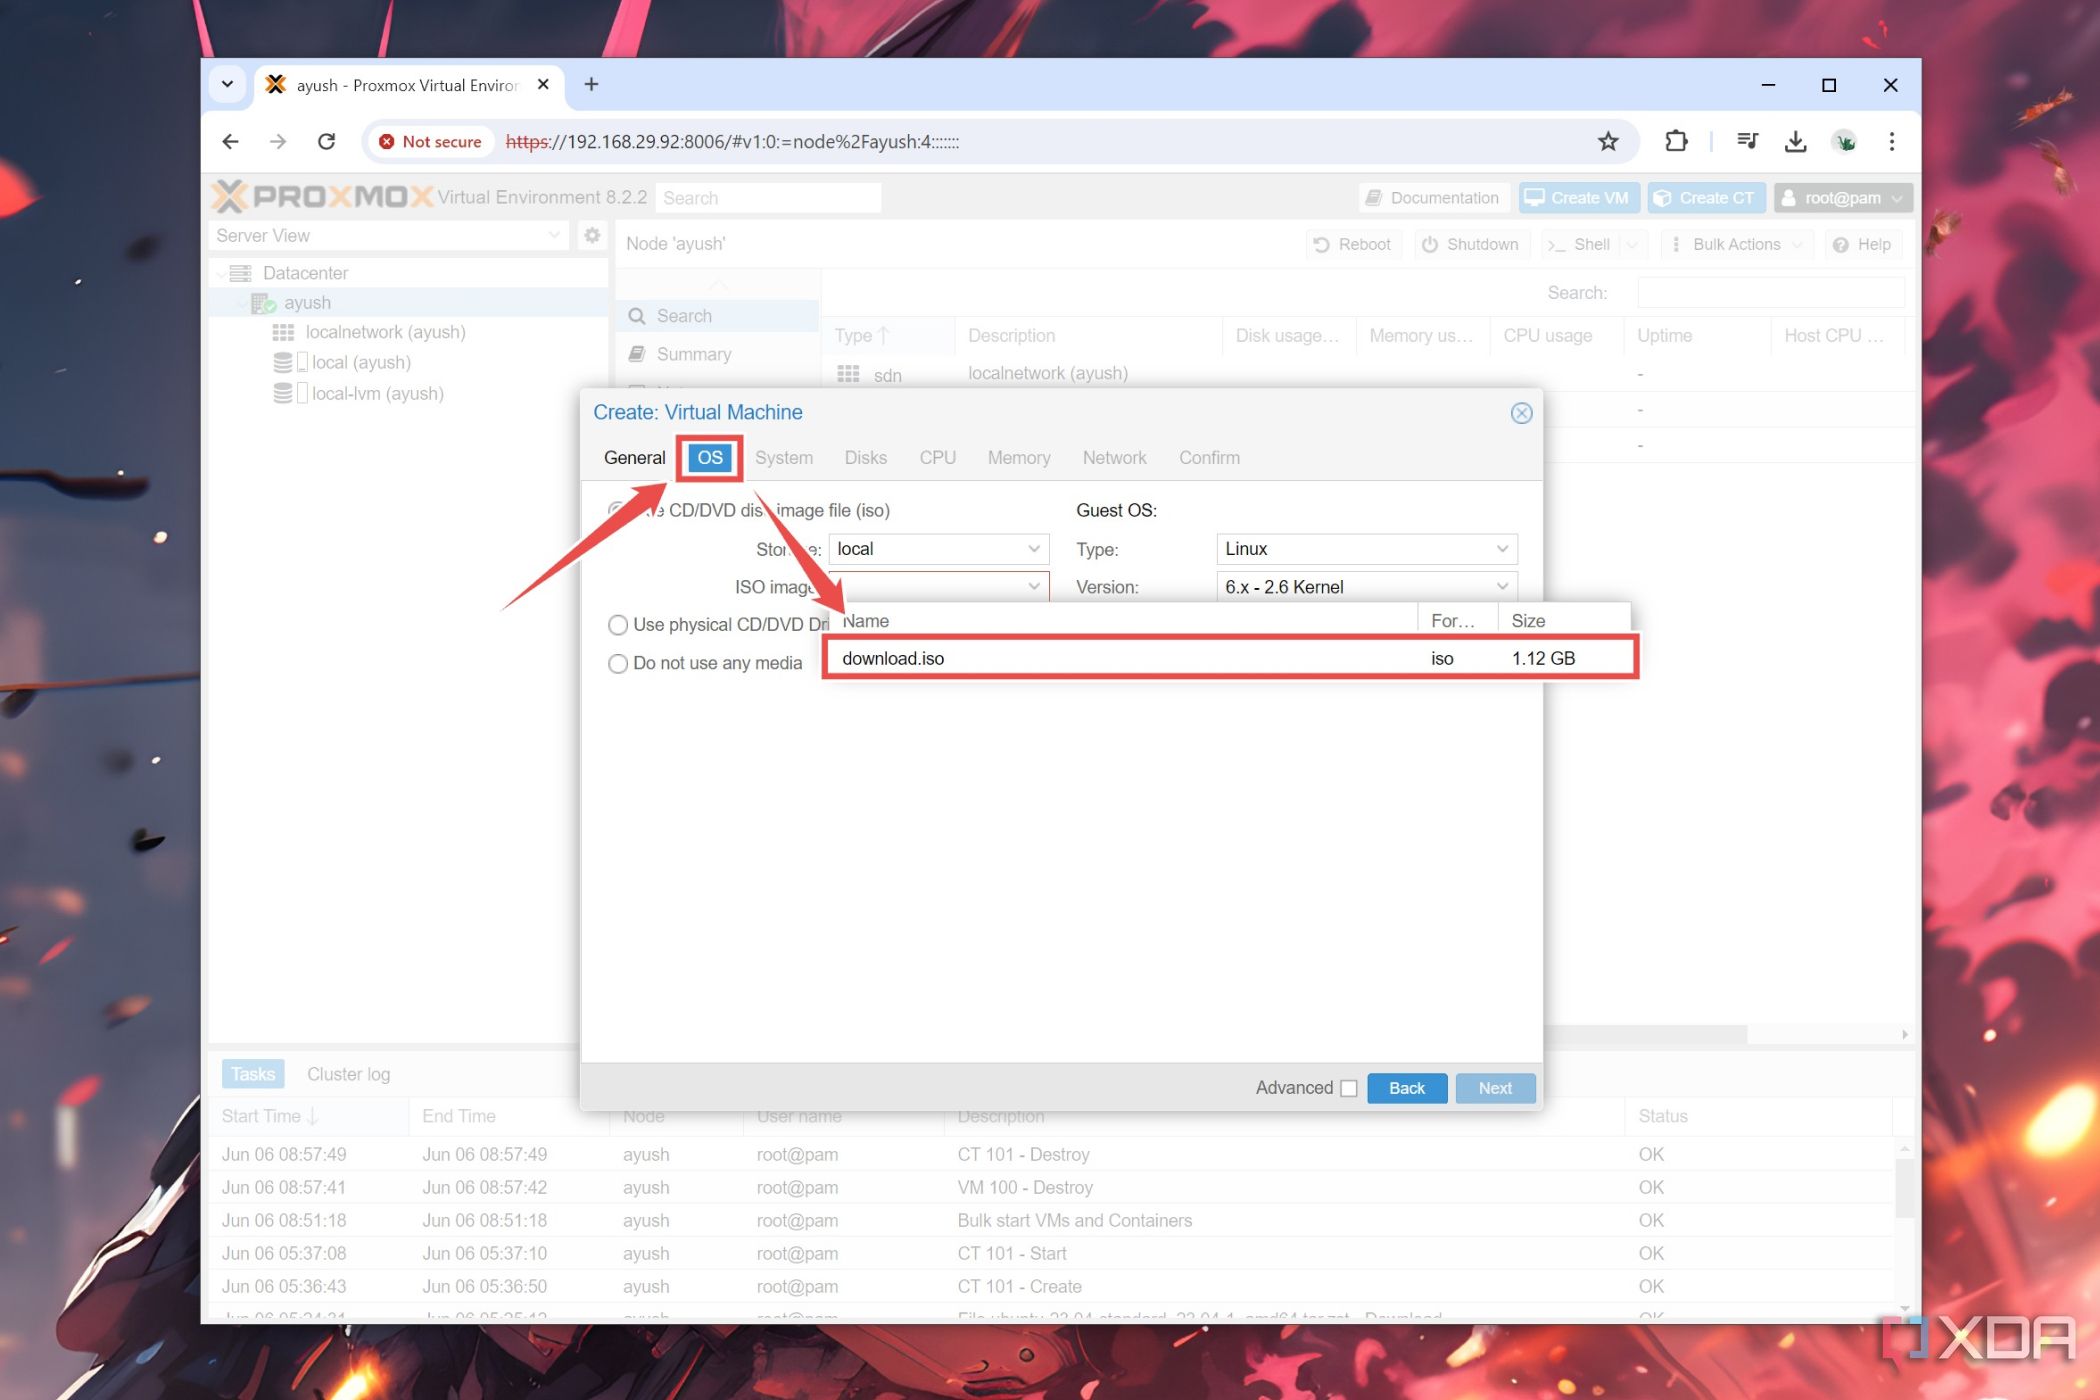
- Hit Next inside the General tab.
- Under the OS settings, choose the ISO file you downloaded earlier.


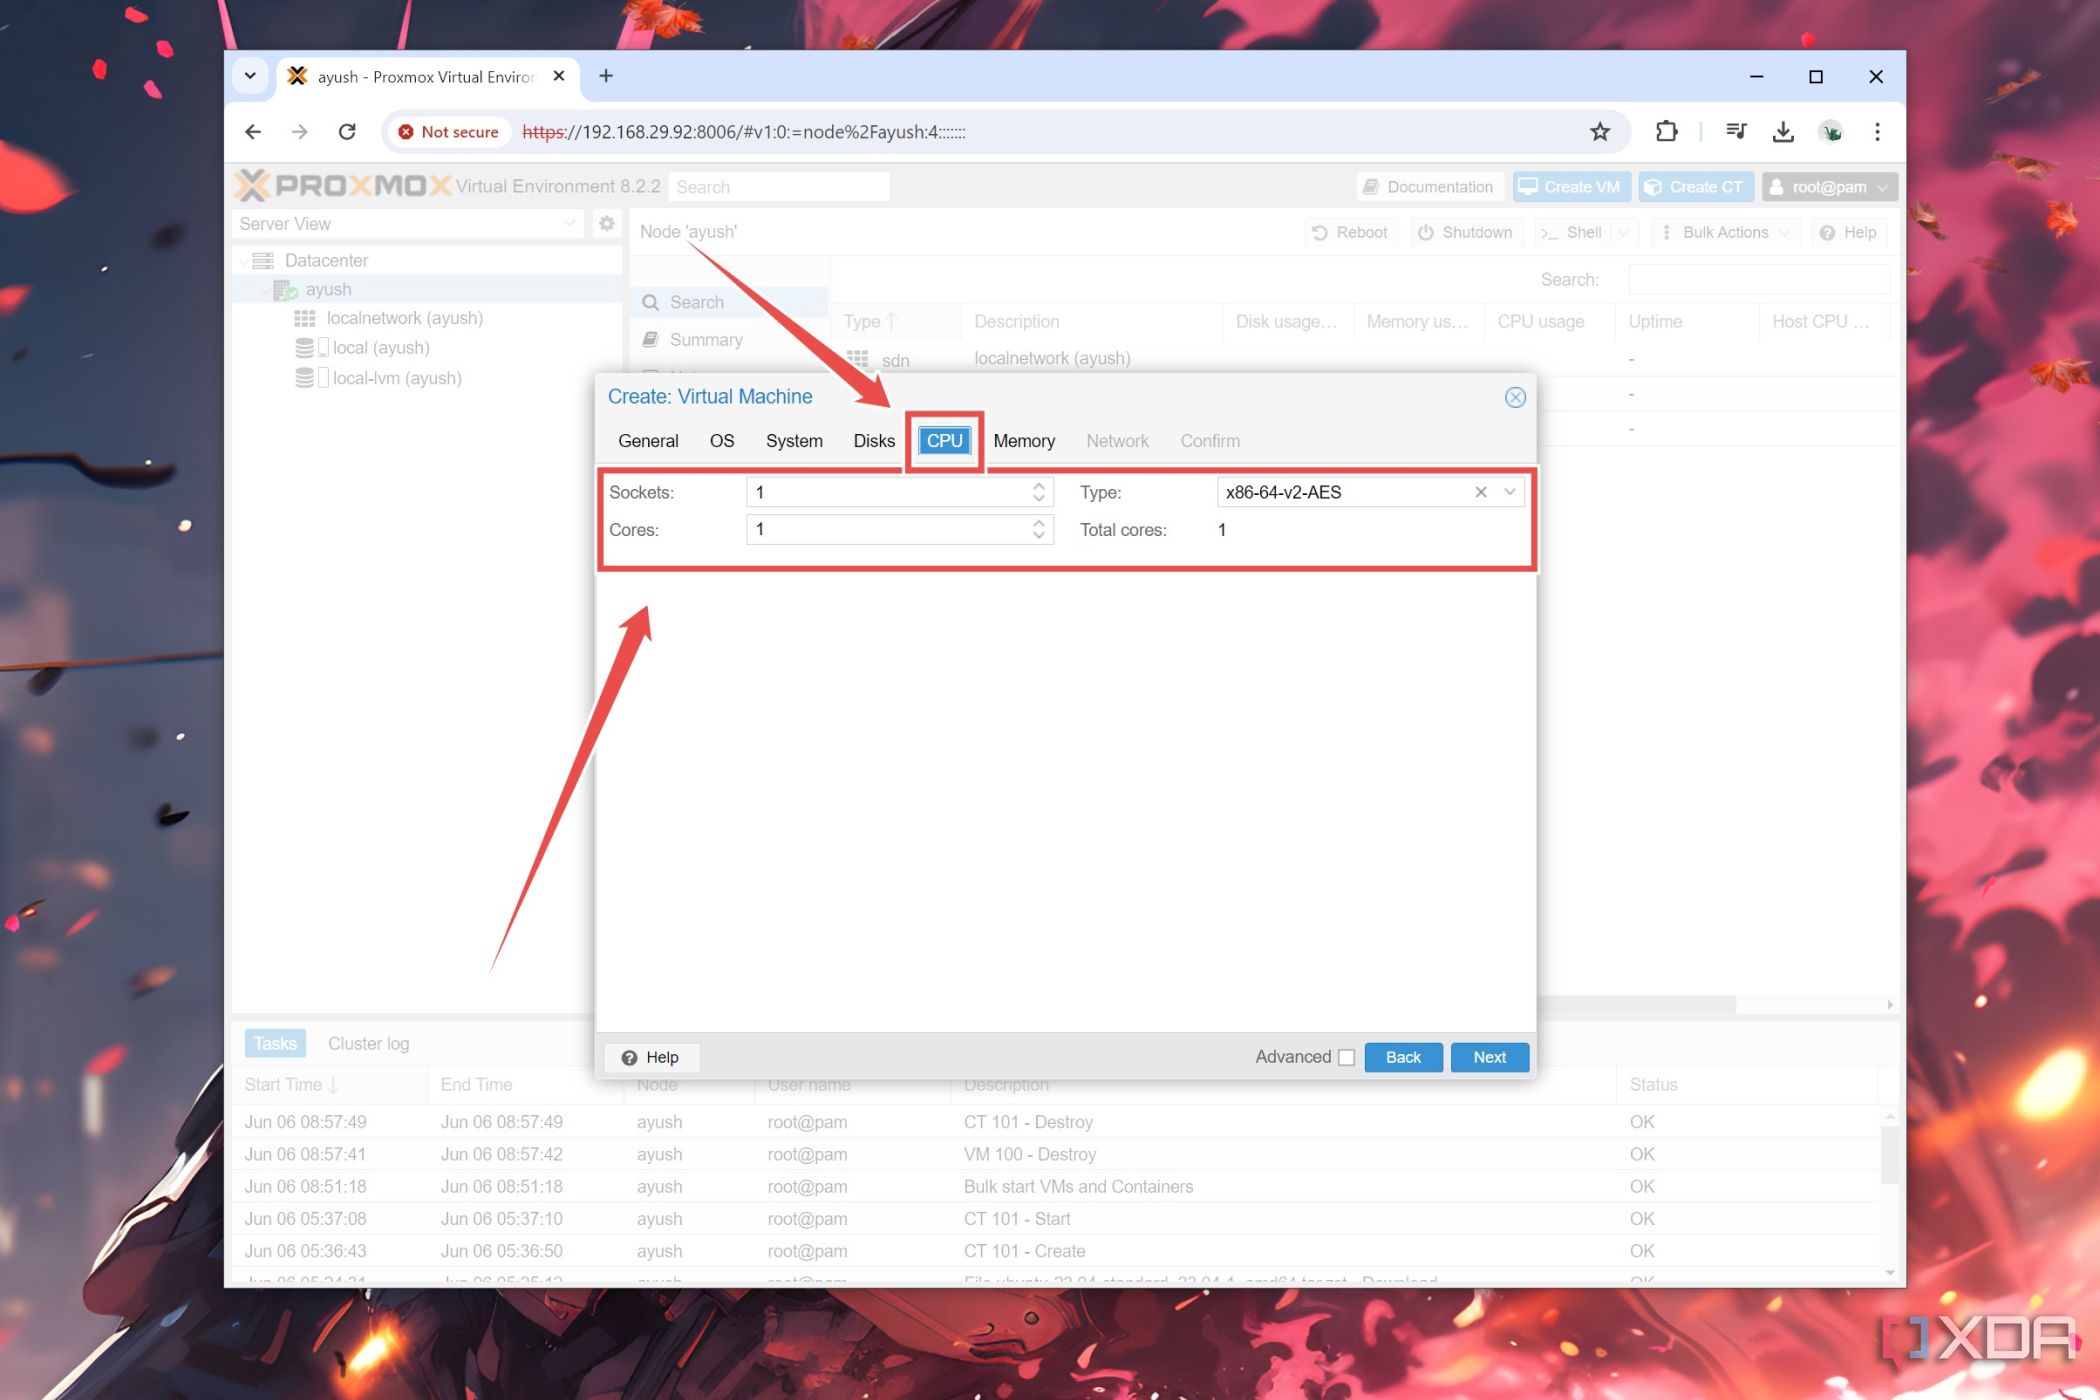
- Skip to the CPU tab and pick the number of Cores, Sockets, and other processor-related settings for the virtual machine.
- Inside the Memory section, enter the amount of RAM you wish to allocate to the VM instance.
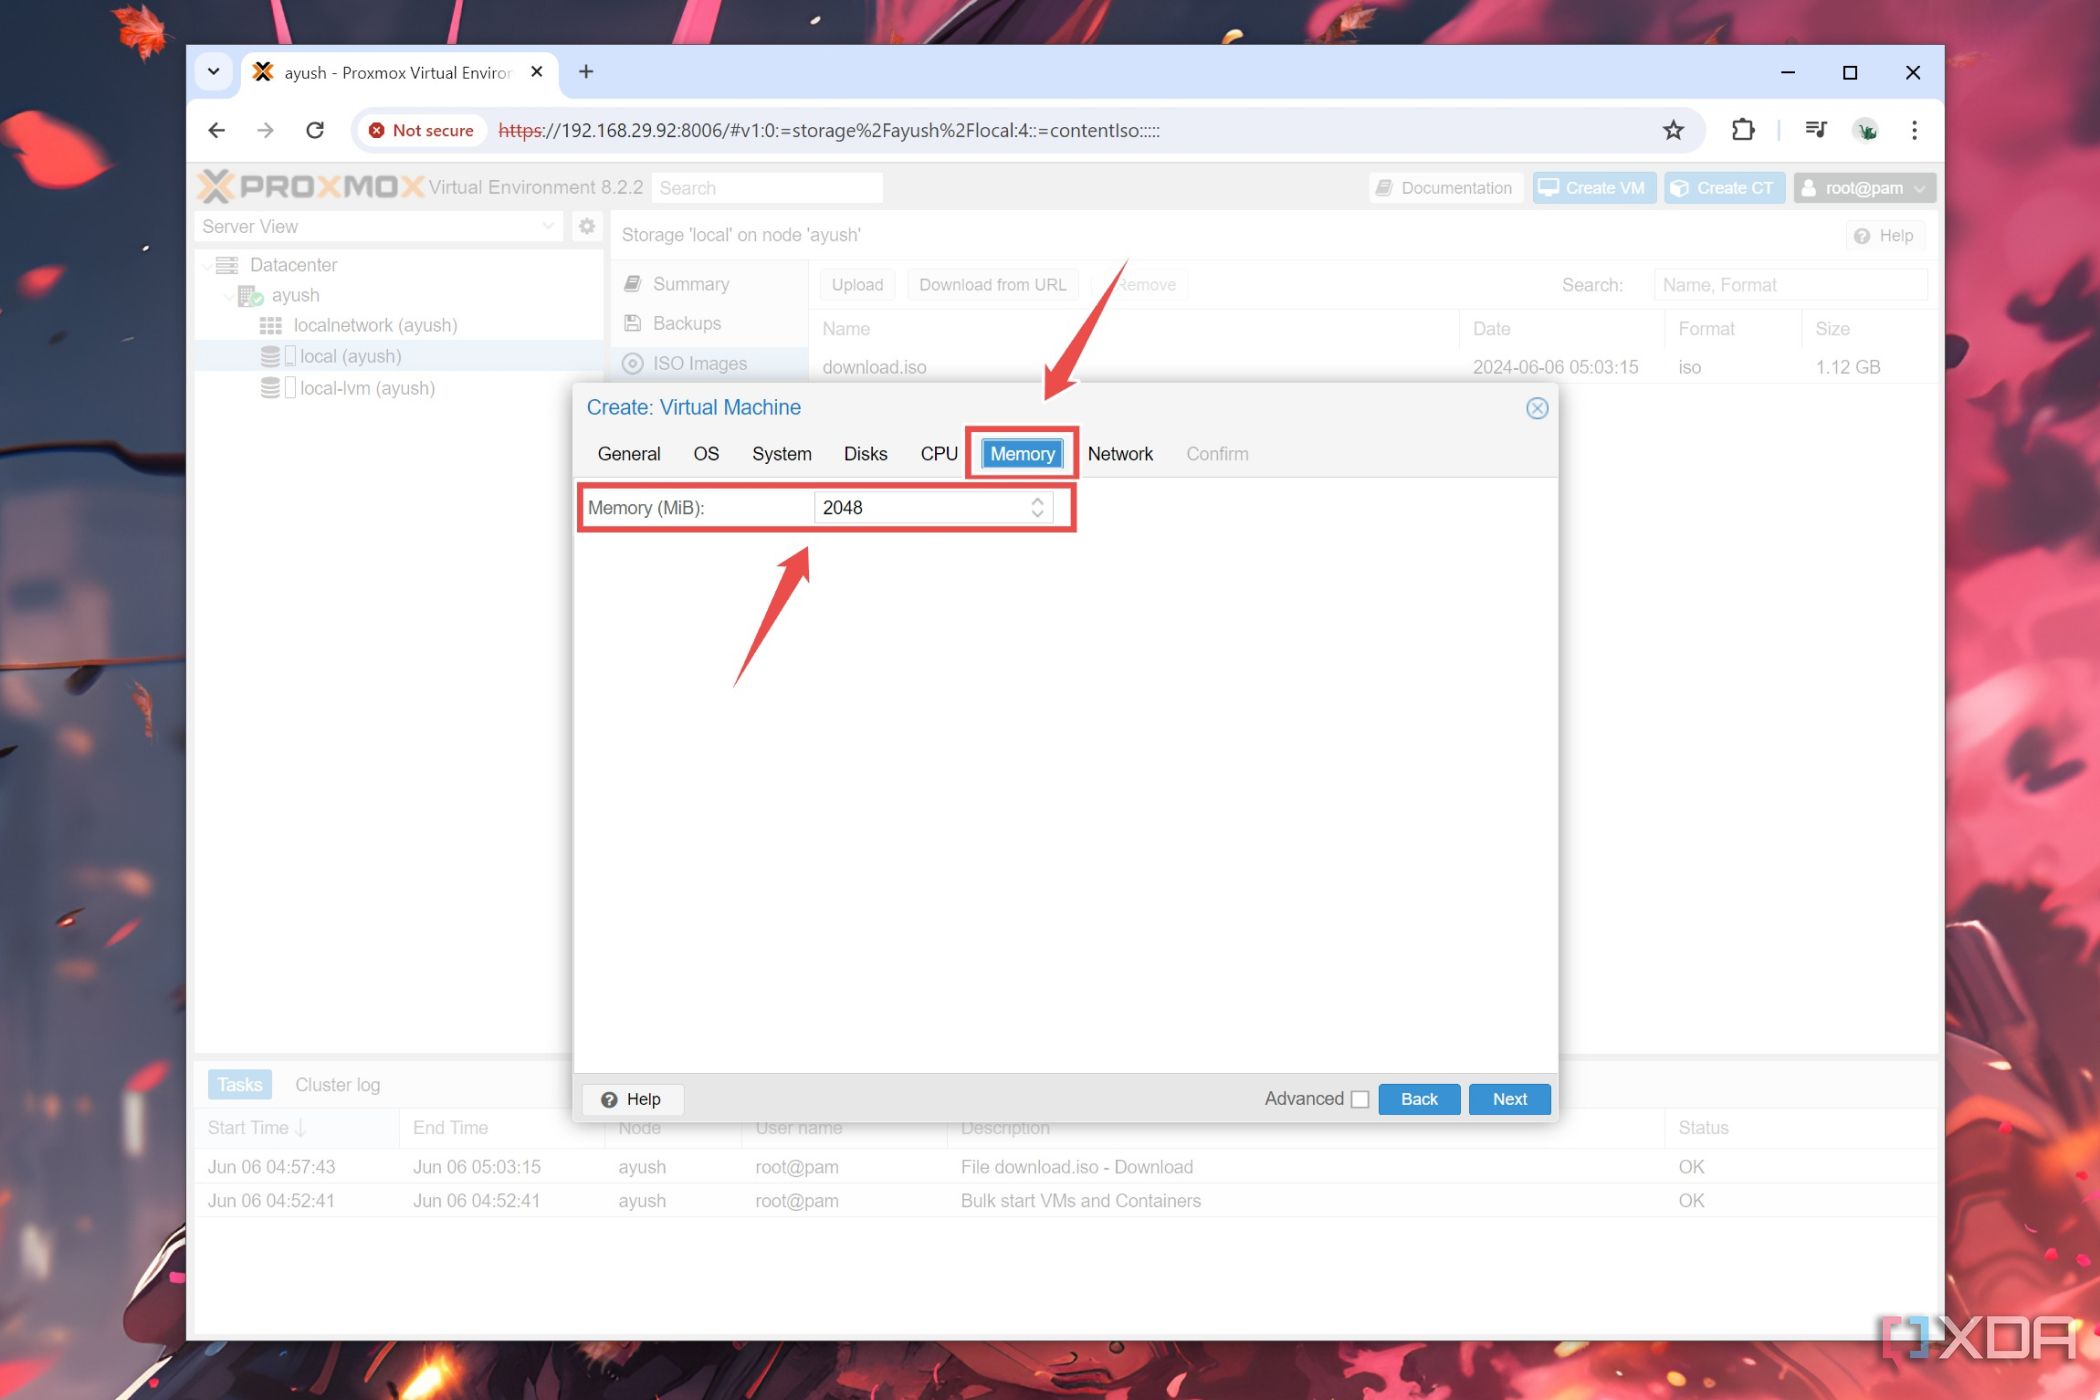
- Skip to the Confirm section and tap the Finish button.

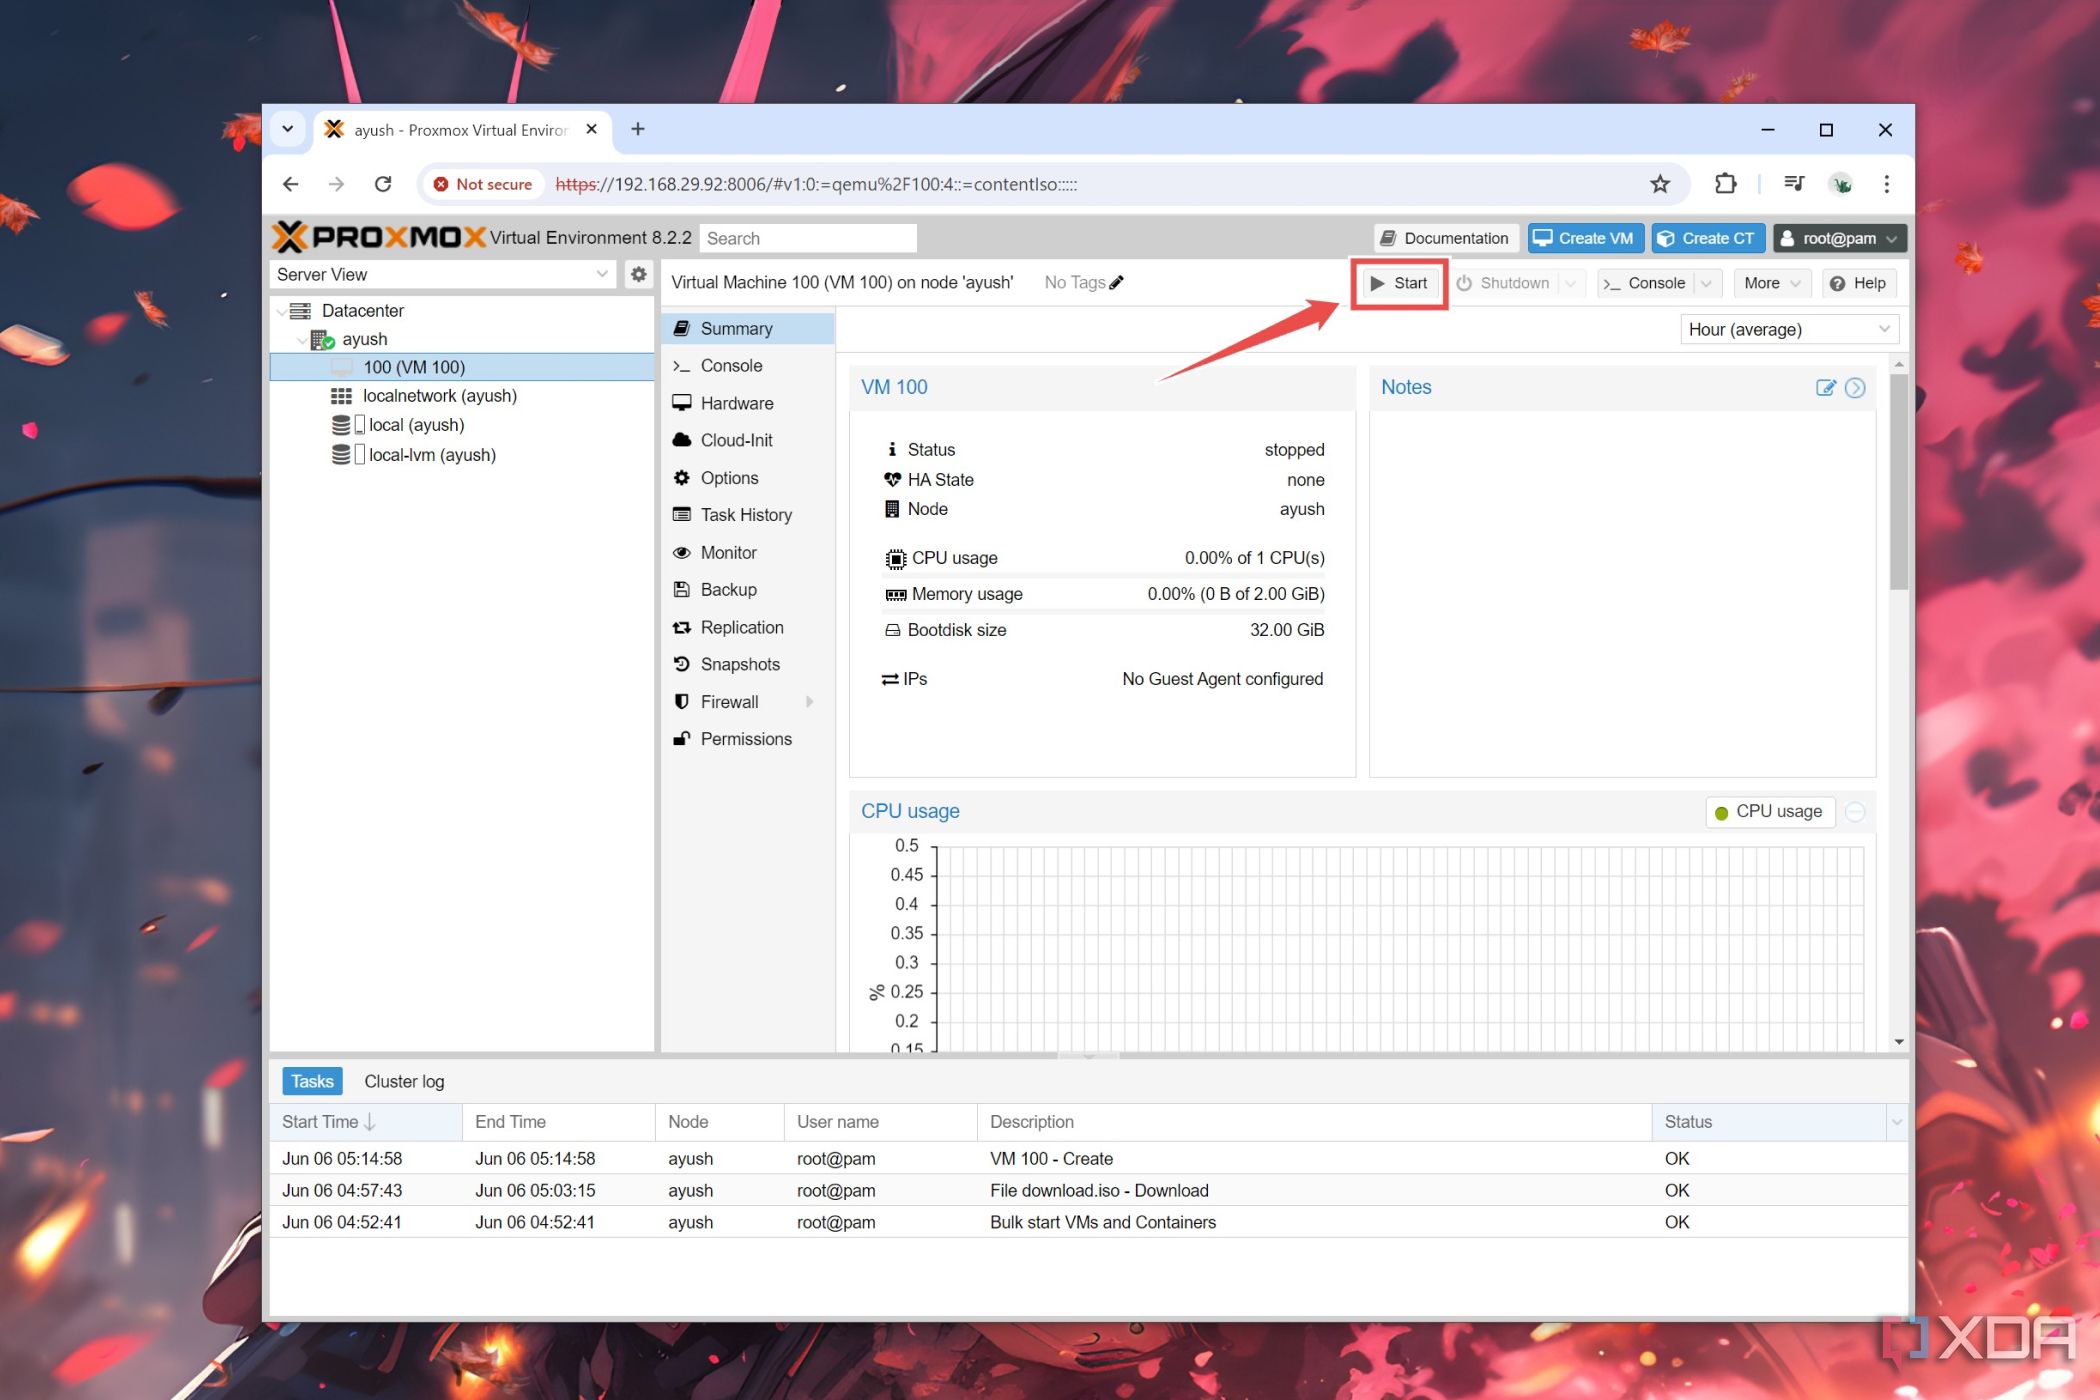
- You can boot the VM by clicking on its Name under your primary node and pressing Start.
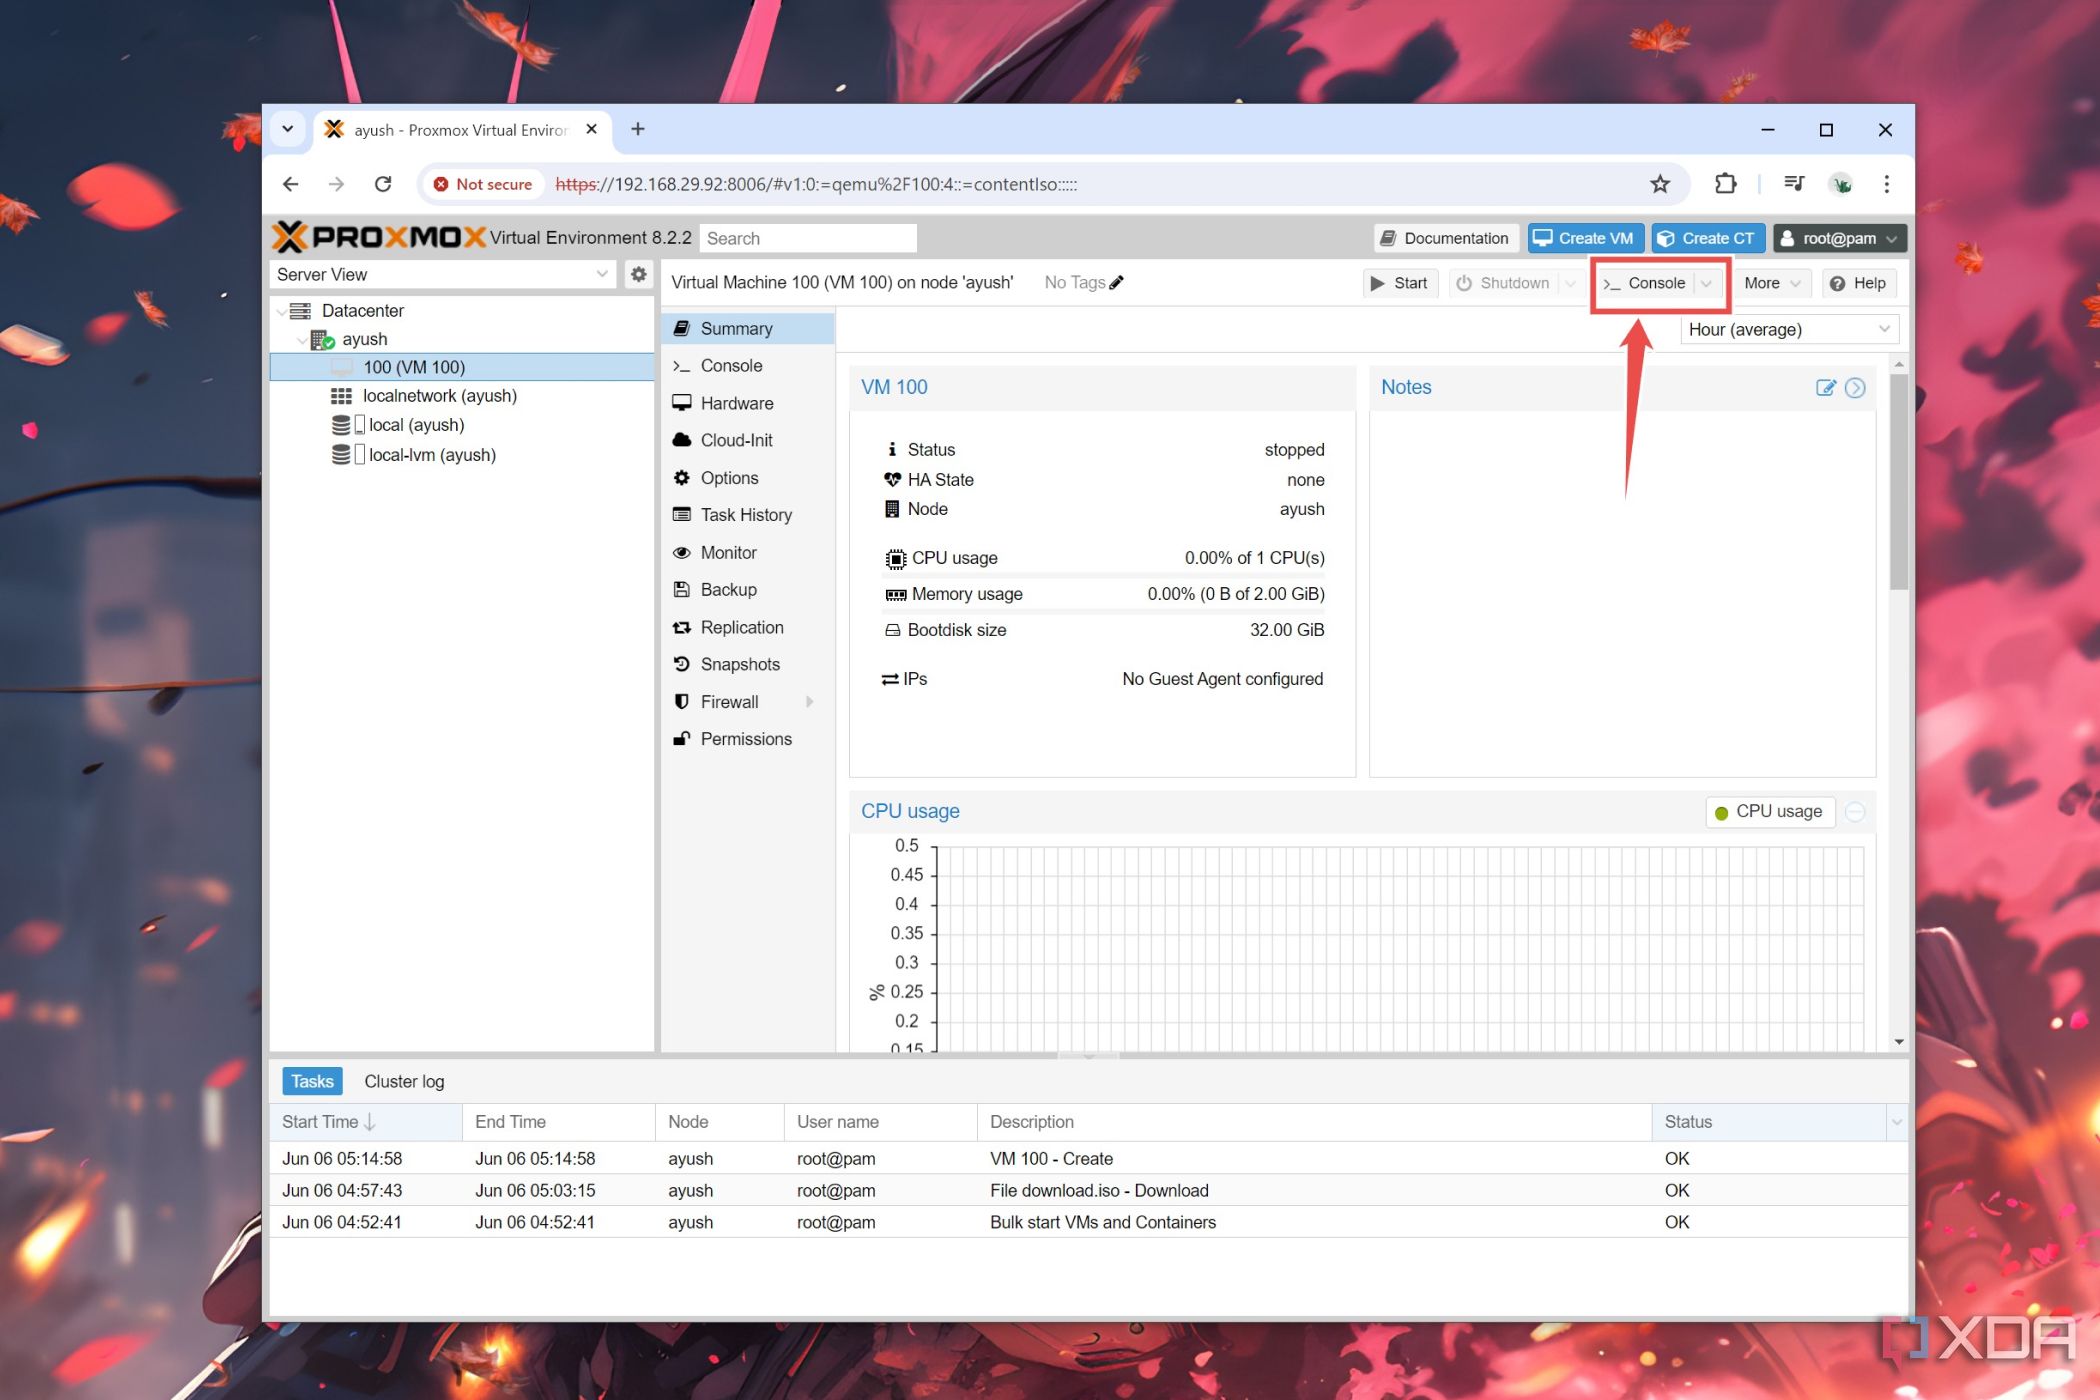
- To use the virtual machine, click on Console.


Creating containers in Proxmox
Similar to virtual machines, setting up containers on your Proxmox server is a pretty straightforward process. All you have to do is:
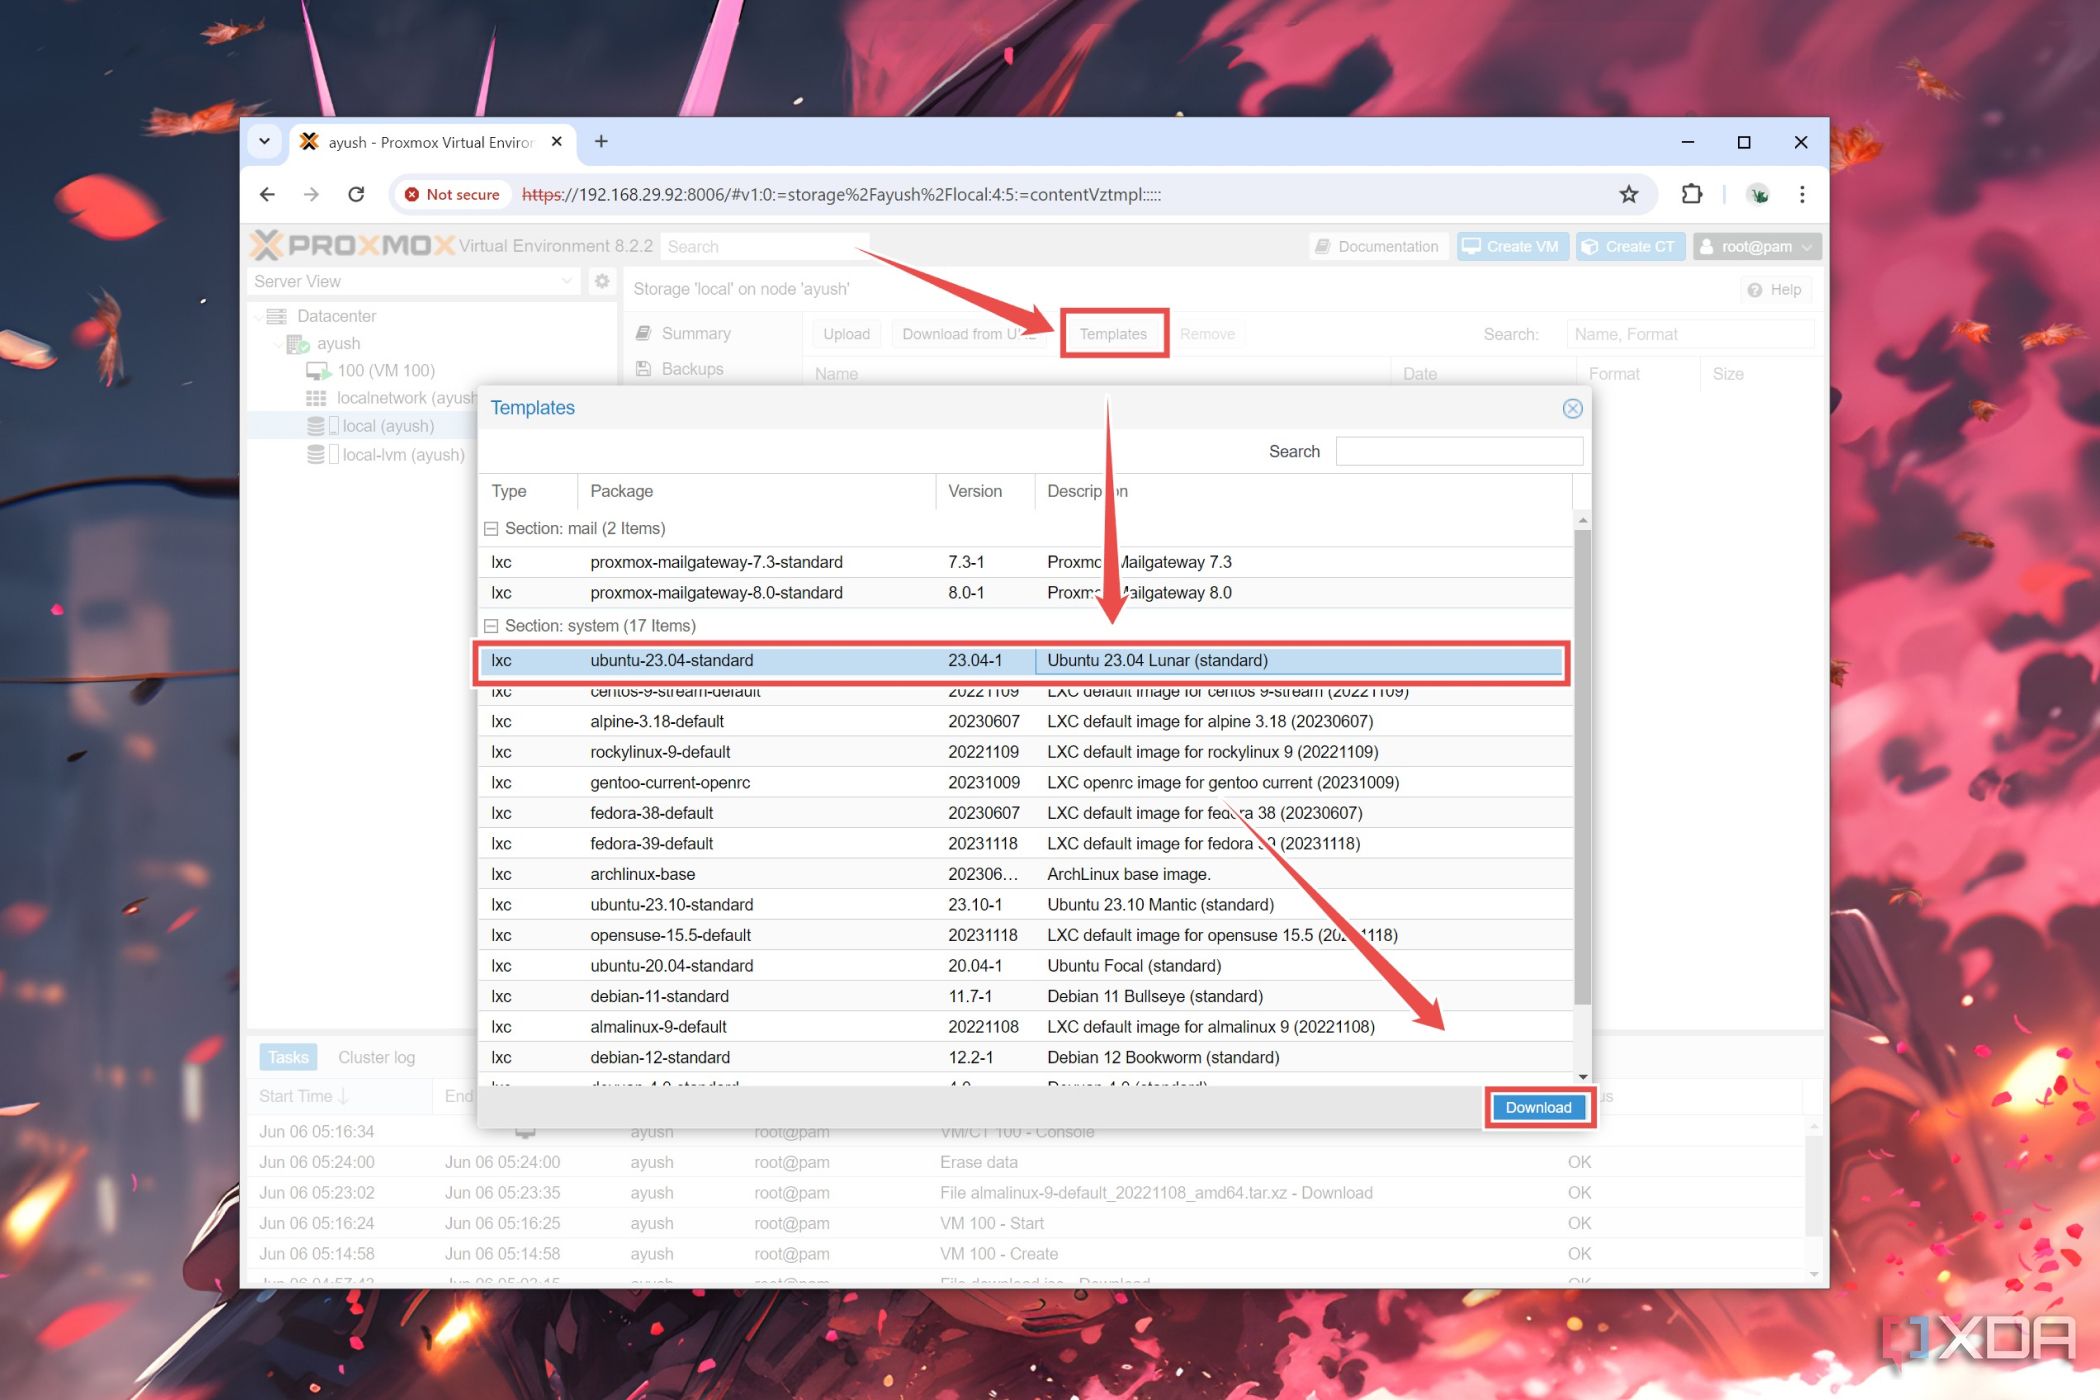
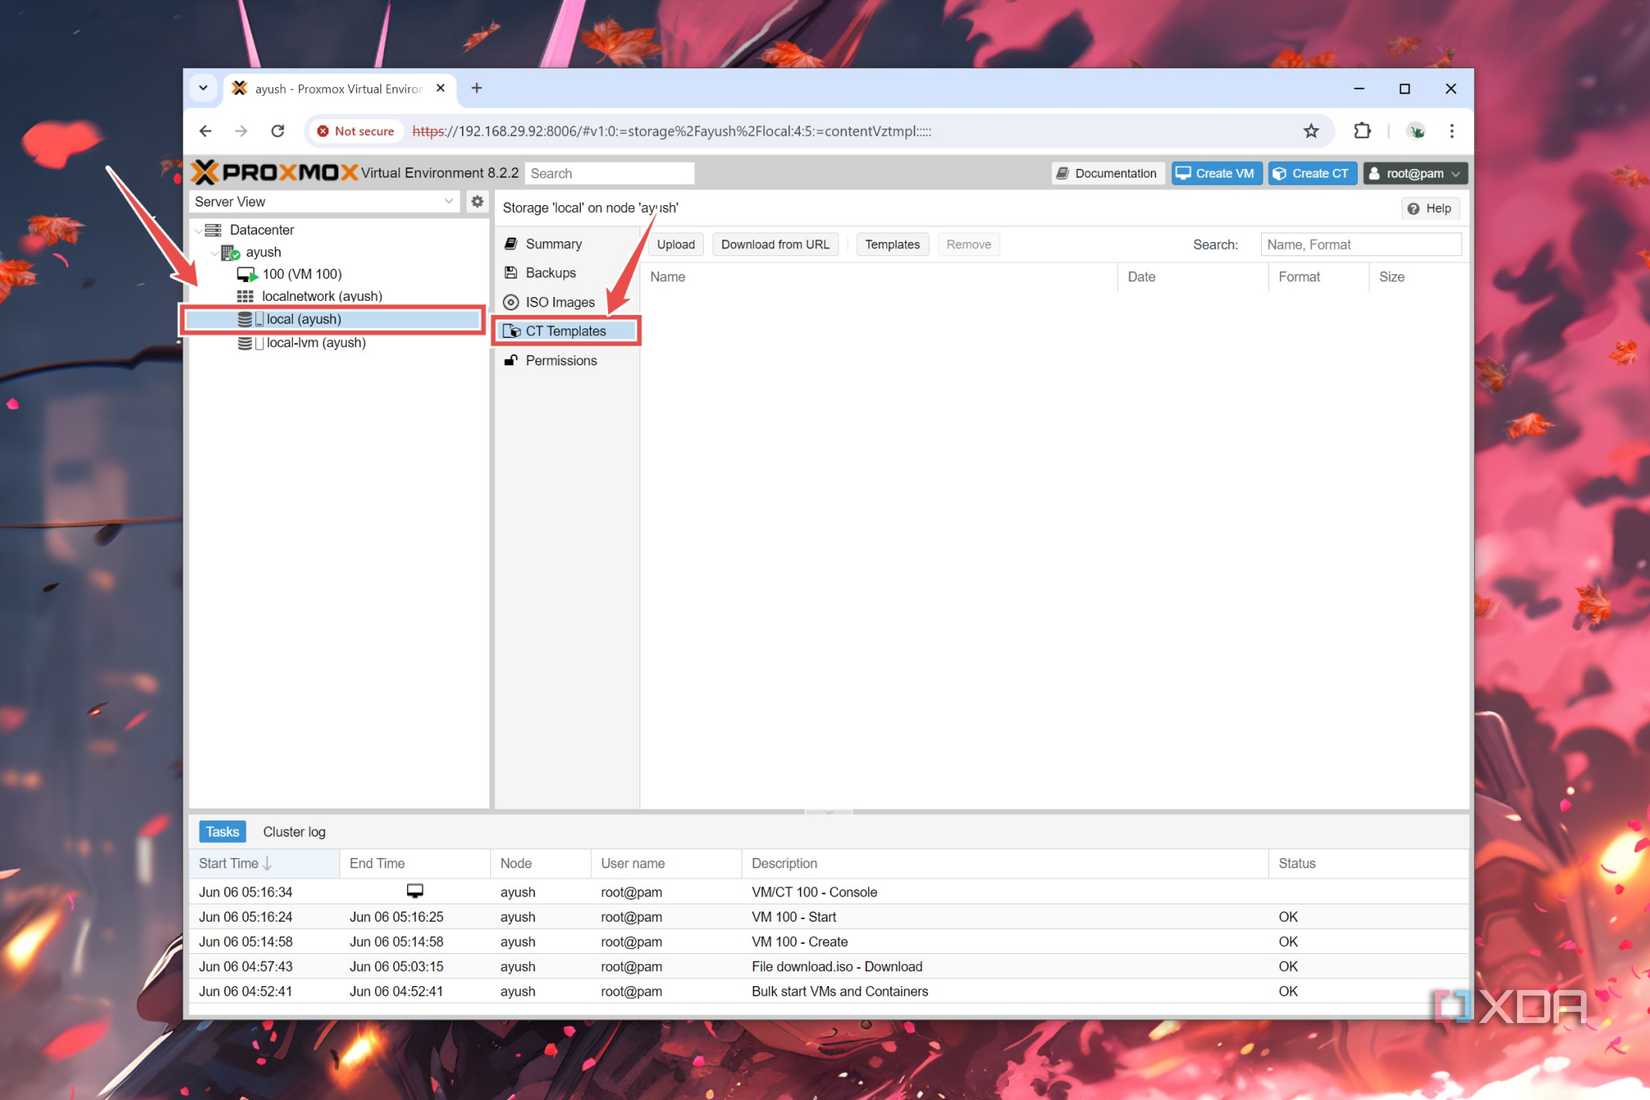
- Head back to the Local (user_name) storage pool and enter the CT Templates tab.

- Click on Templates and press Download after selecting your preferred container template.
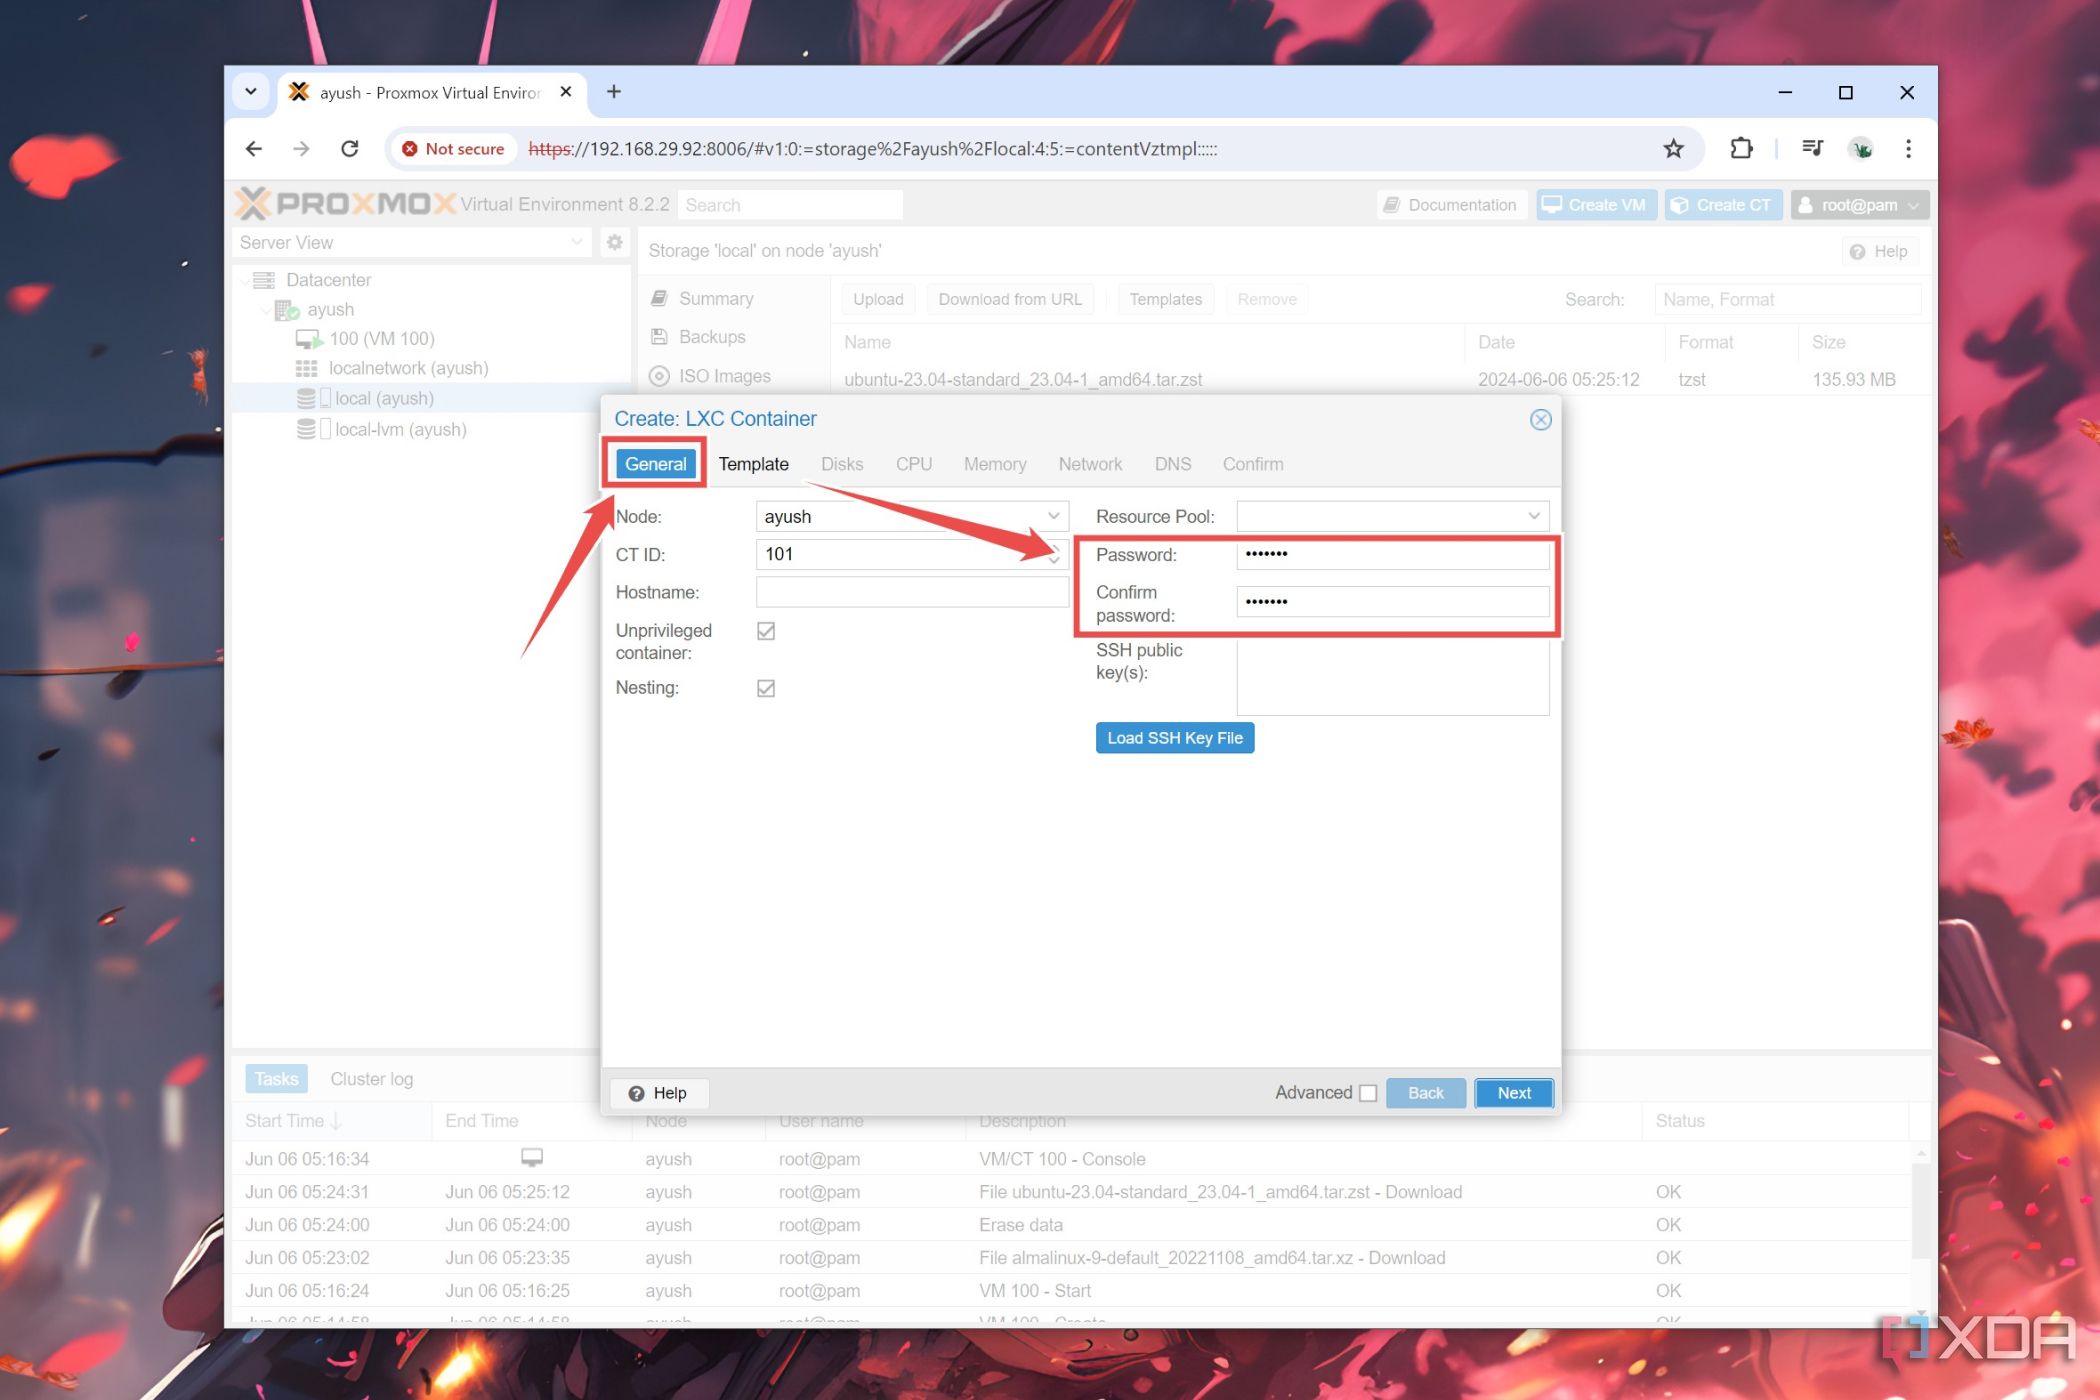
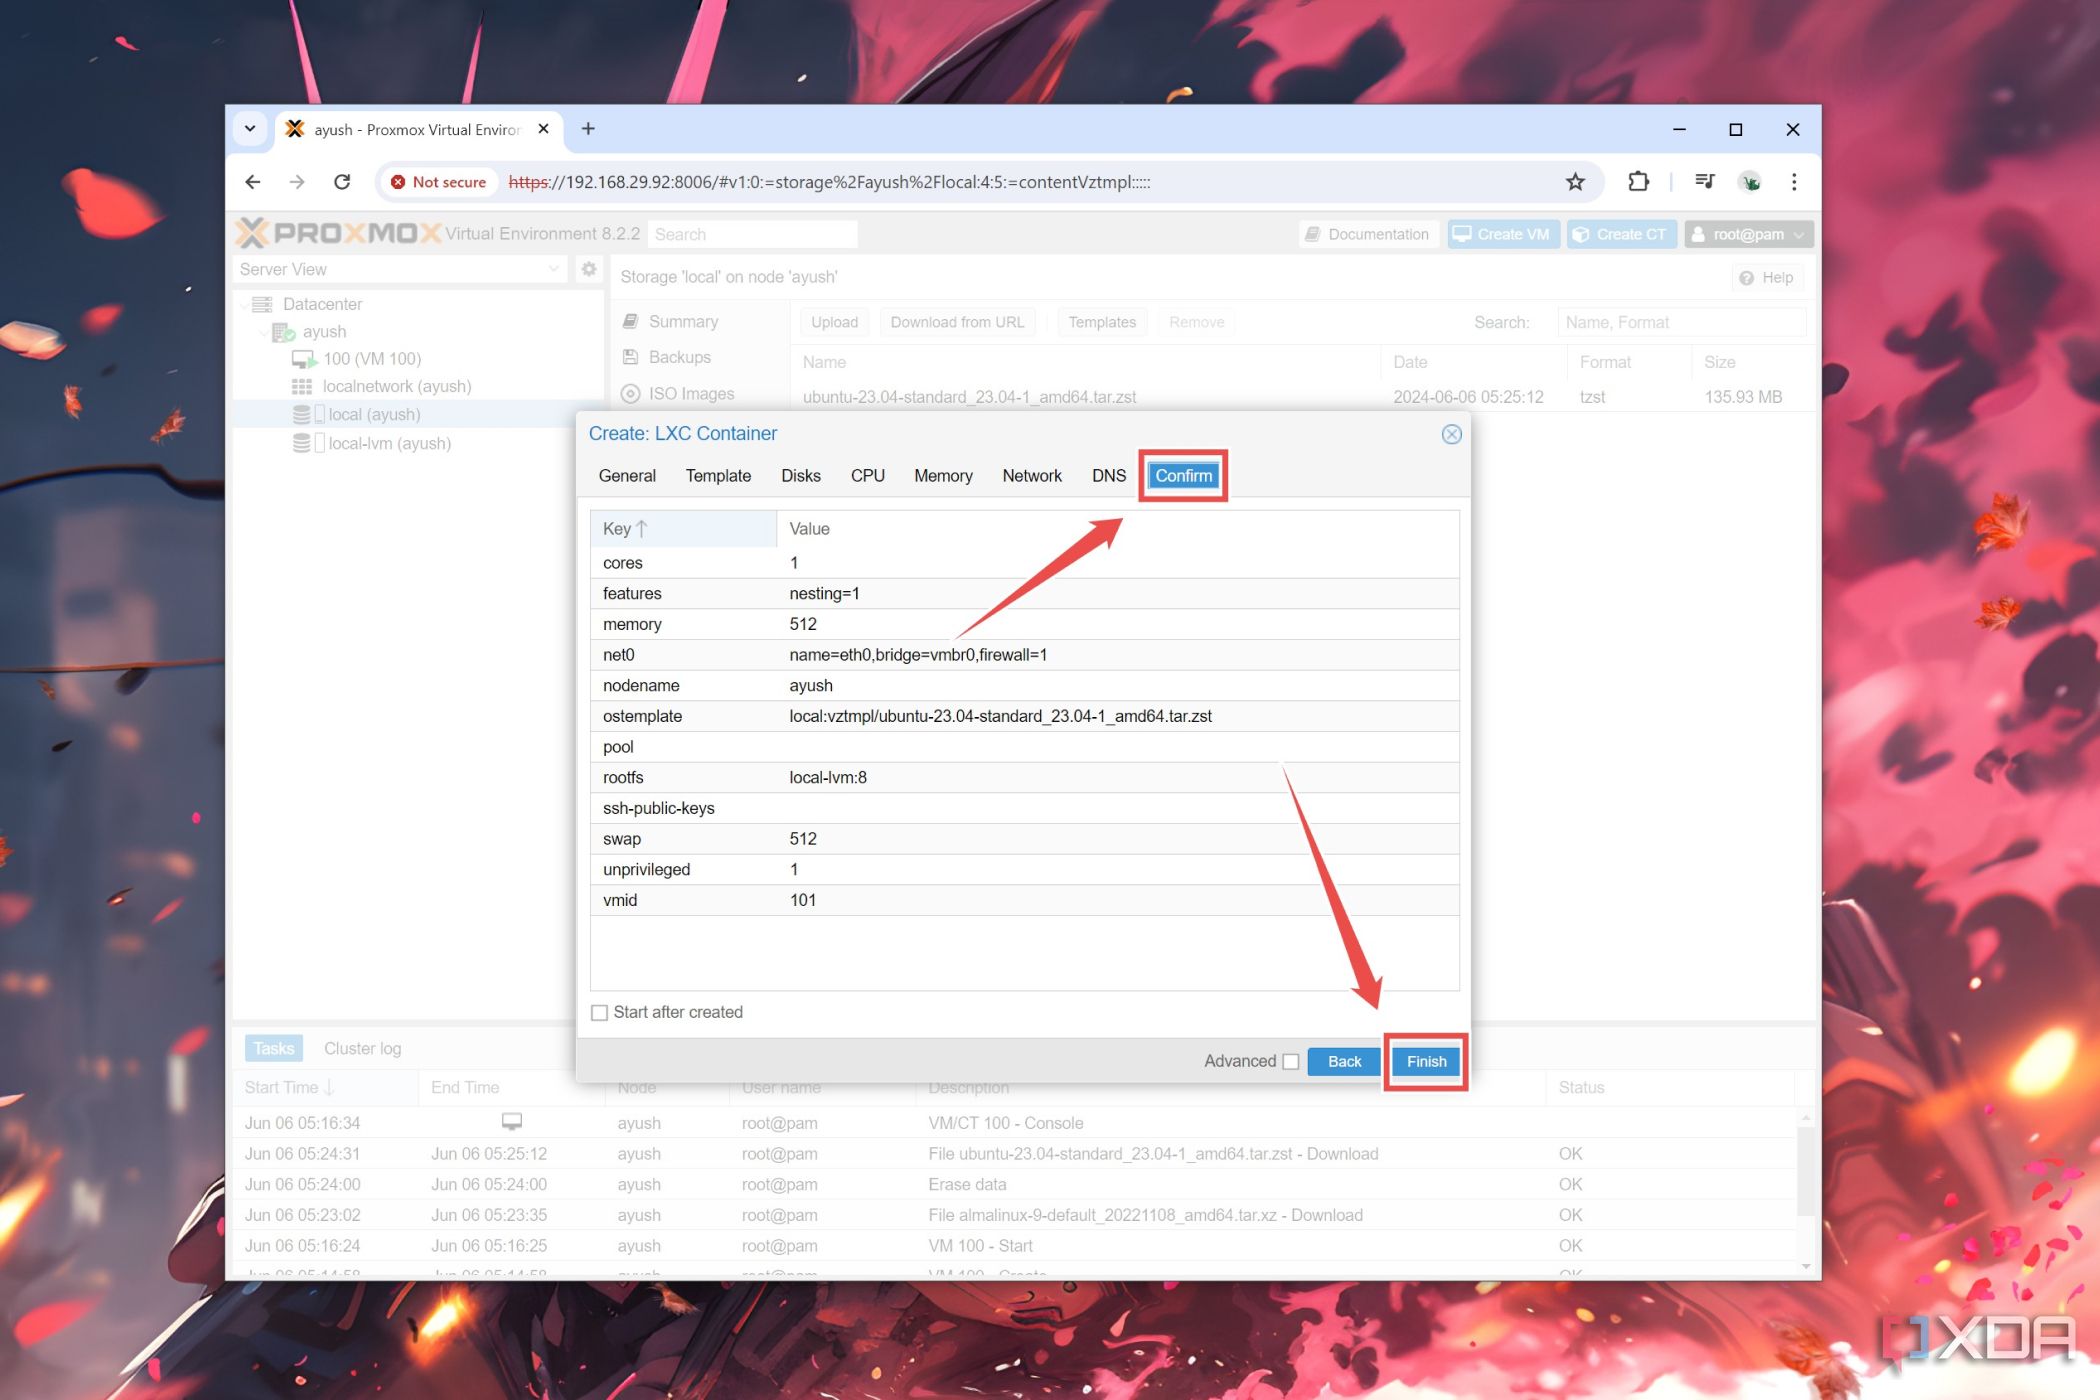
- After Proxmox has finished downloading the template, click on the Create CT button.

- Set a Password for the container in the General tab.
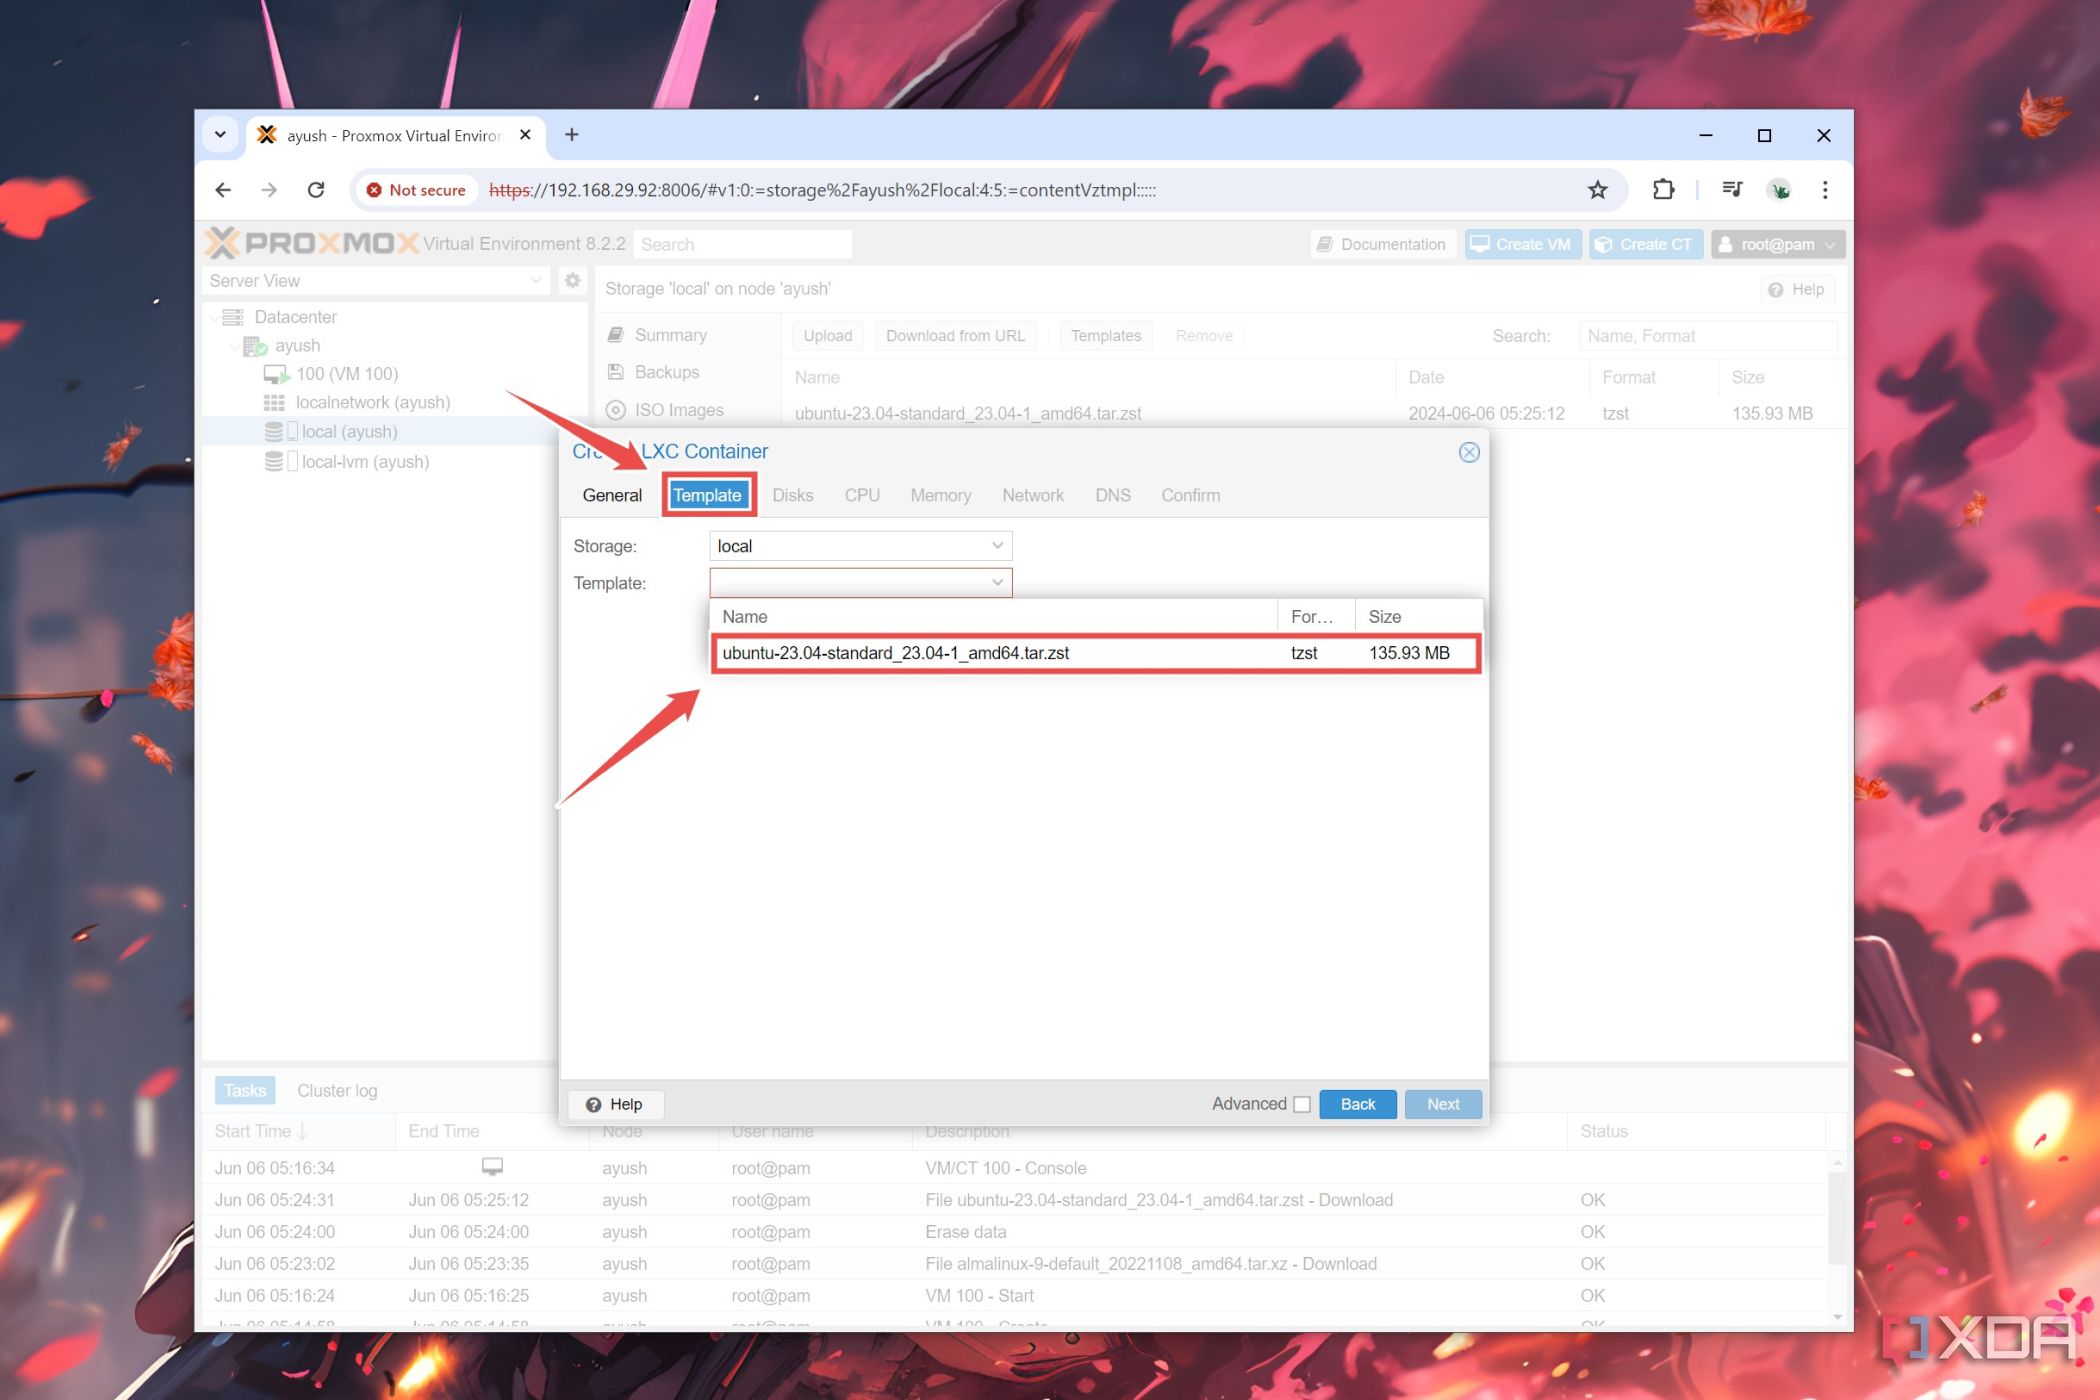
- Choose the Template’s ISO file you just downloaded inside the Template section.
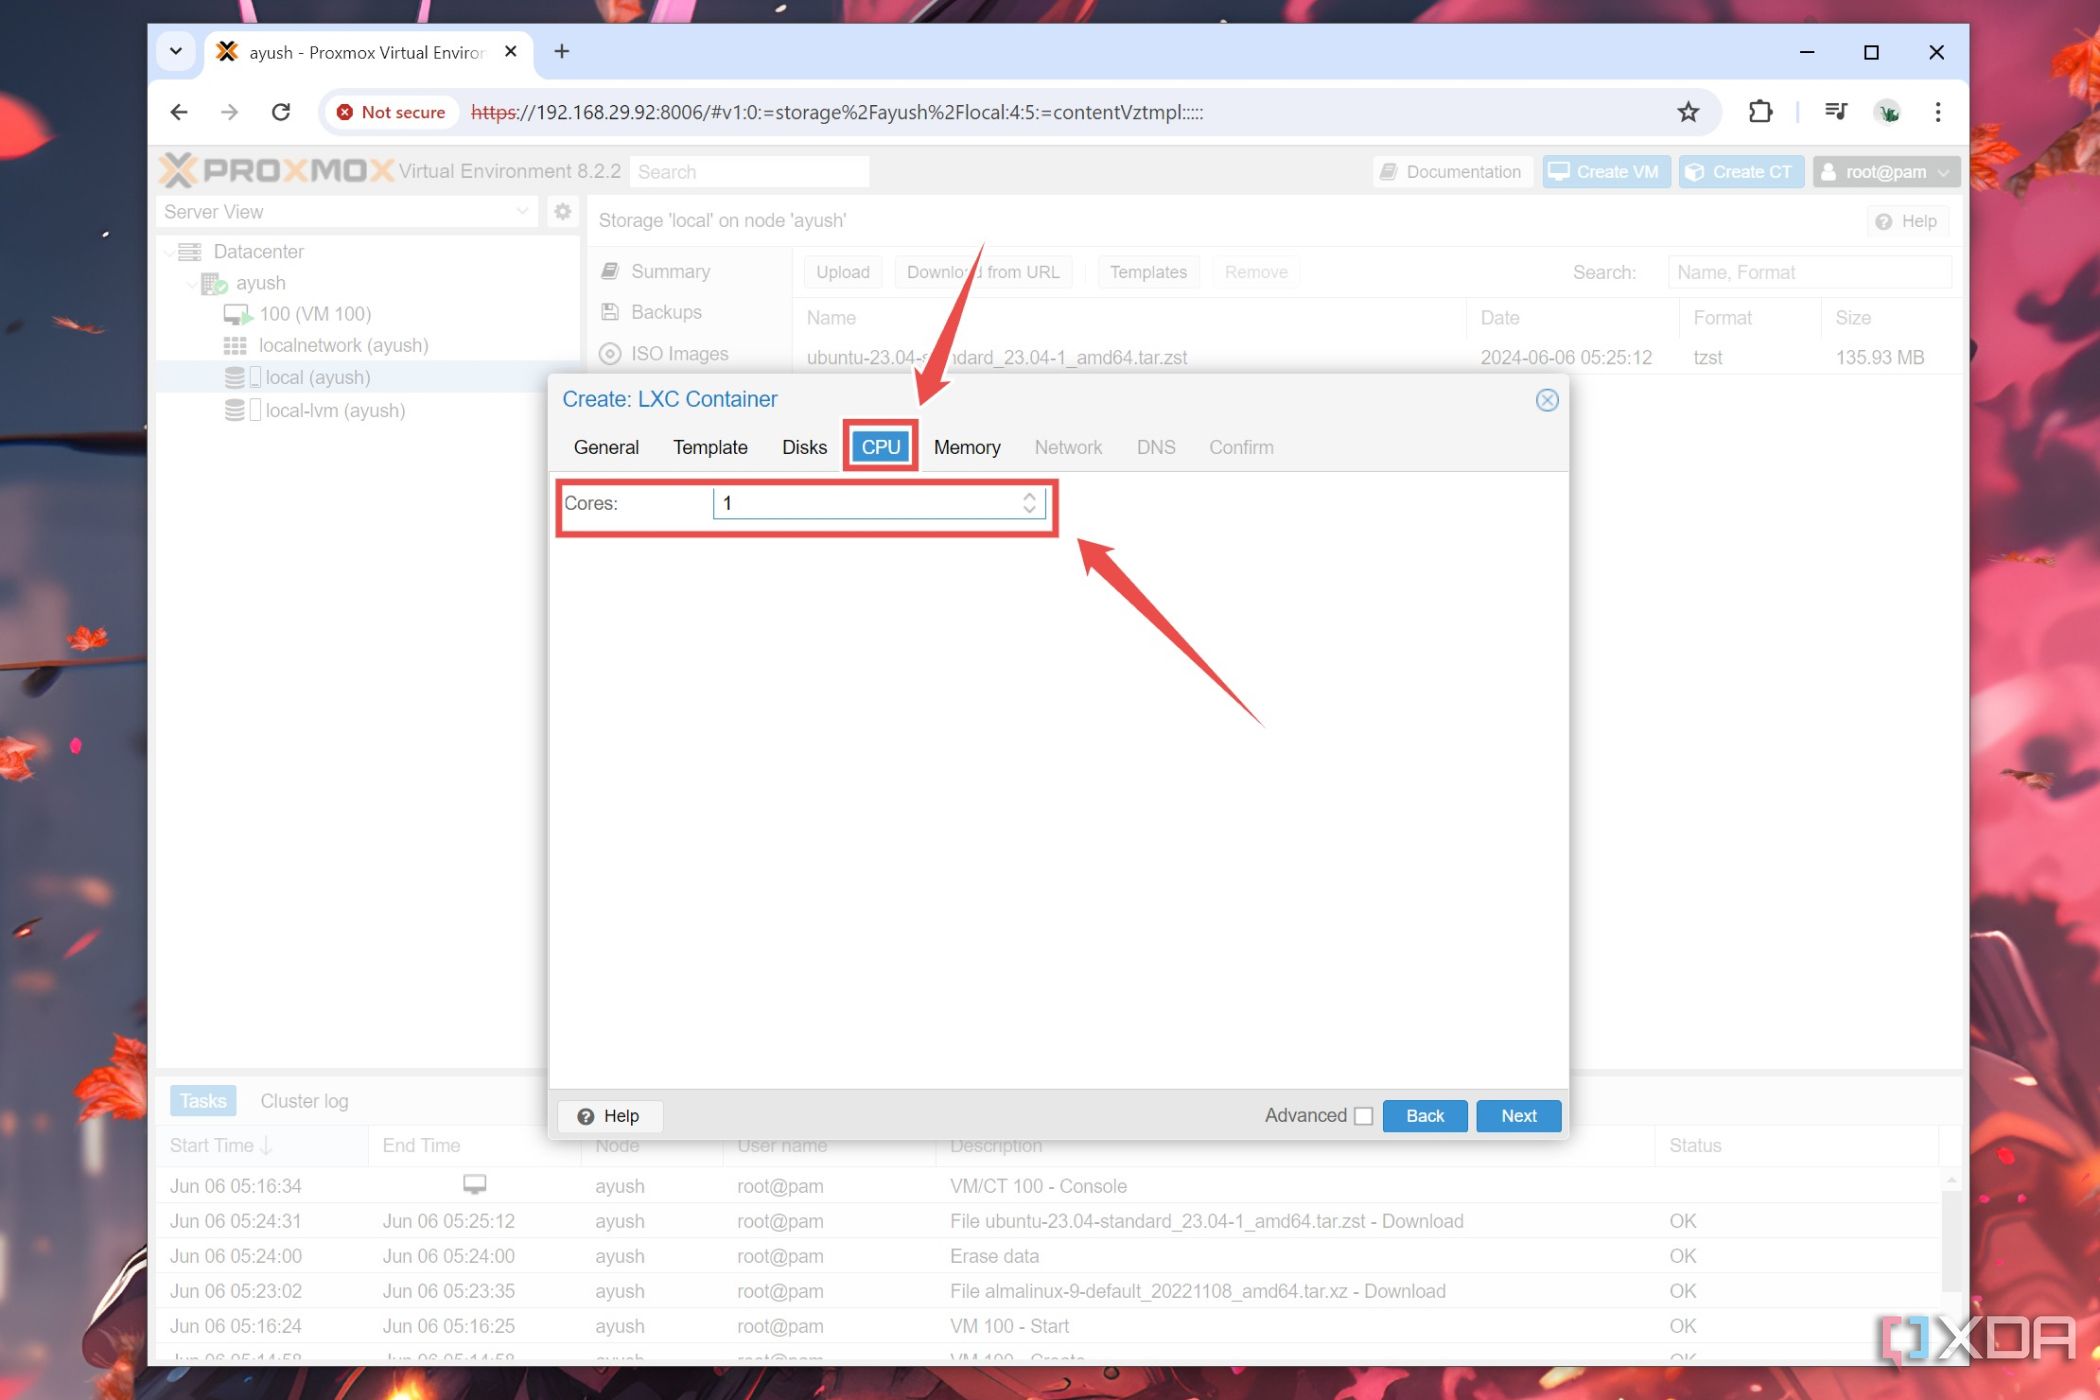
- Skip to the CPU tab and allocate the ideal number of Cores for the container.
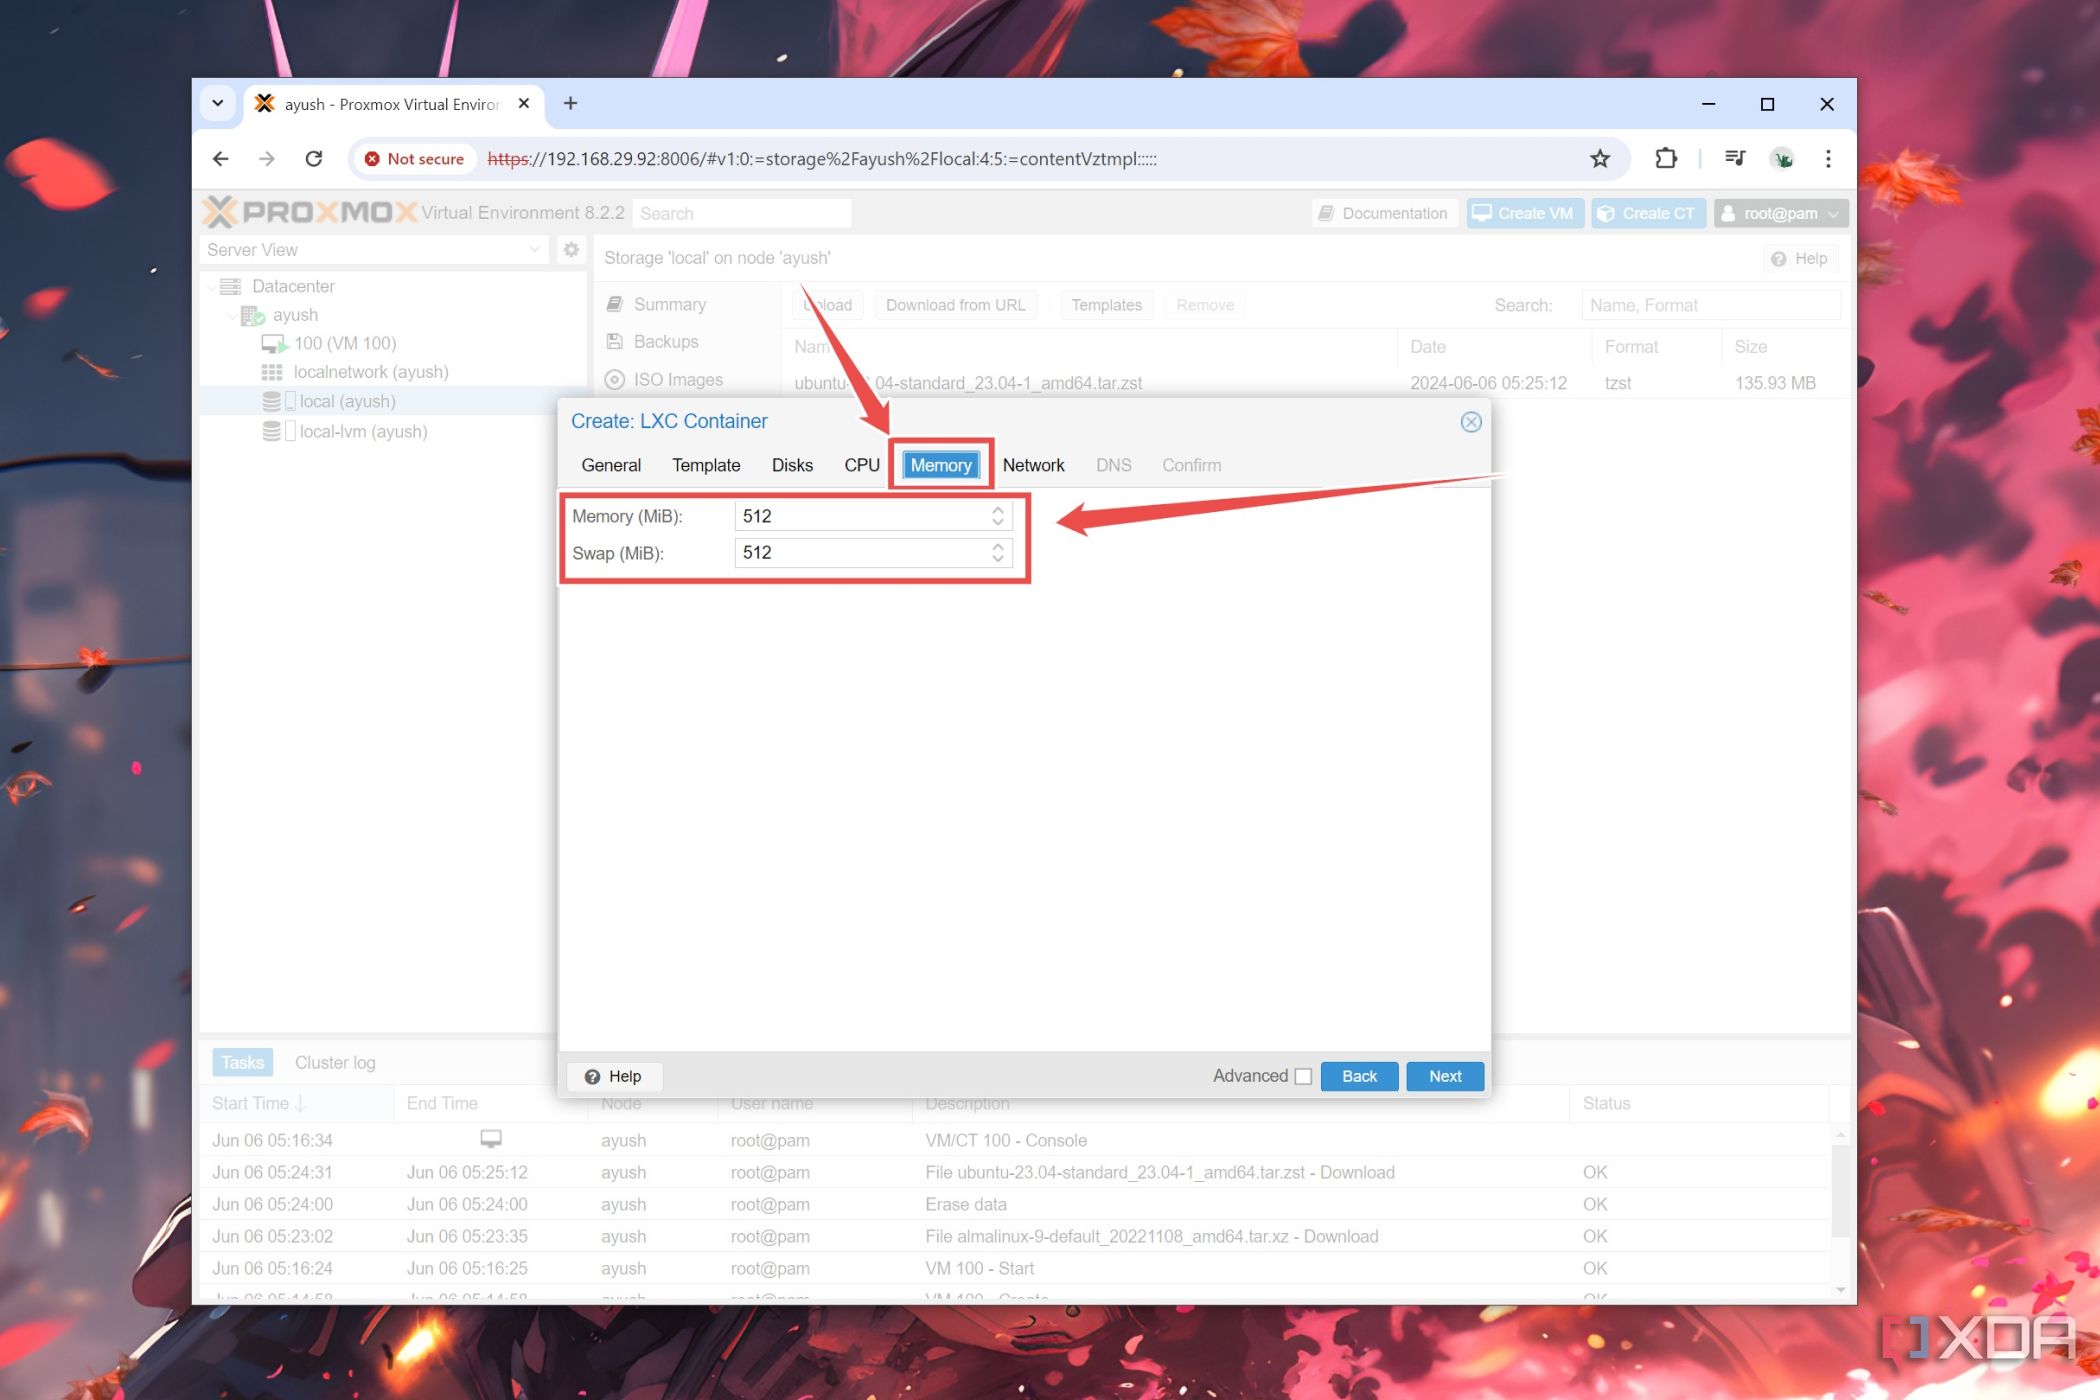
- Similarly, set the amount of RAM the container will use in the Memory section.
- Switch to the Confirm section and click on Finish.
- Like the VM instance, select the container before launching it via the Start button and accessing it with the Console.


Managing your home lab with Proxmox
When I first started using Proxmox a few weeks ago, I was blown away by how useful the platform really is. So far, I’ve been able to simultaneously access multiple VMs and containers on my aged Ryzen 5 1600 processor, a feat I considered impossible when using Type-2 hypervisors. That said, switching to an equally outdated dual-Xeon system helped, as the extra cores and memory provided even more headroom for all my self-hosted apps.
All that said, if you’re a complete beginner, then VirtualBox or VMWare Workstation Pro might be the better option. While they lack the superior performance and capabilities of a dedicated server, they’re quite simple to set up and work well for lighter workloads. For containers, you can try checking out CasaOS, which provides an easy UI for Docker-powered workloads.

Related
7 things you should do to secure your Proxmox home lab
Prevent hackers and malware from tampering with your Proxmox server by following these seven tips
#beginners #guide #setting #Proxmox
source: https://www.xda-developers.com/proxmox-guide/

