

Building your own custom router is a great addition to any home network, but an especially big upgrade if you’re a homelabber or tinkerer, allowing you more insight, control and security over your network than a traditional ISP router would allow. But having a dedicated router is a bit of a pain, and while there are some downsides to virtualizing your router (and prerequisites), it’s a great way to keep one less device lying around your apartment.
Virtualizing pfSense is fully supported, and is a great experience once set up. You’ll need a host with a lot of network interfaces, but pfSense is generally resource efficient and should run fine on most virtualized hosts.
Related
A beginner’s guide to setting up nested virtualization on Proxmox
Ever wanted to run a Proxmox VM inside your Proxmox home lab? Here’s how it’s done
What you’ll need
Multiple network interfaces

Source: Wikimedia Commons
Firstly, you’ll need a Proxmox host with at least two additional network interfaces. This can be achieved either by using a motherboard with multiple interfaces or installing a network card. Multi-interface network cards are available relatively cheaply online, and ex-enterprise cards can be very affordable on eBay or similar (though you might need to check compatibility). We wouldn’t recommend using a USB network adapter, as these can cause compatibility issues, and similarly, having a Wi-Fi card installed won’t be enough either. There are ways around this requirement, but we wouldn’t recommend them here and they could be tricky to set up.
We’ll be installing pfSense on your Proxmox host, so you’ll need enough space to download and install the ISO. pfSense isn’t a hugely heavy instance to run, but its worth taking a look at pfSense’s minimum hardware requirements. The important ones are at least:
- 1GB of system RAM
- 8GB hard drive or storage disk
Installing pfSense on Proxmox
Setting up a pfSense host is easy
Follow the steps below to download and install pfSense on your Proxmox instance. You’ll need to create a Netgate account and provide an email address to download it from the official site, but no credit card information or other details are required. The official Netgate image comes as a .gz, so it’ll be difficult to download directly to Proxmox (unless you get it from the terminal), so we’ll be downloading the image to our own device and re-uploading it via the GUI.
-
You’ll need to start by downloading a pfSense community image to your Proxmox server. We’re using the AMD64 ISO installer.
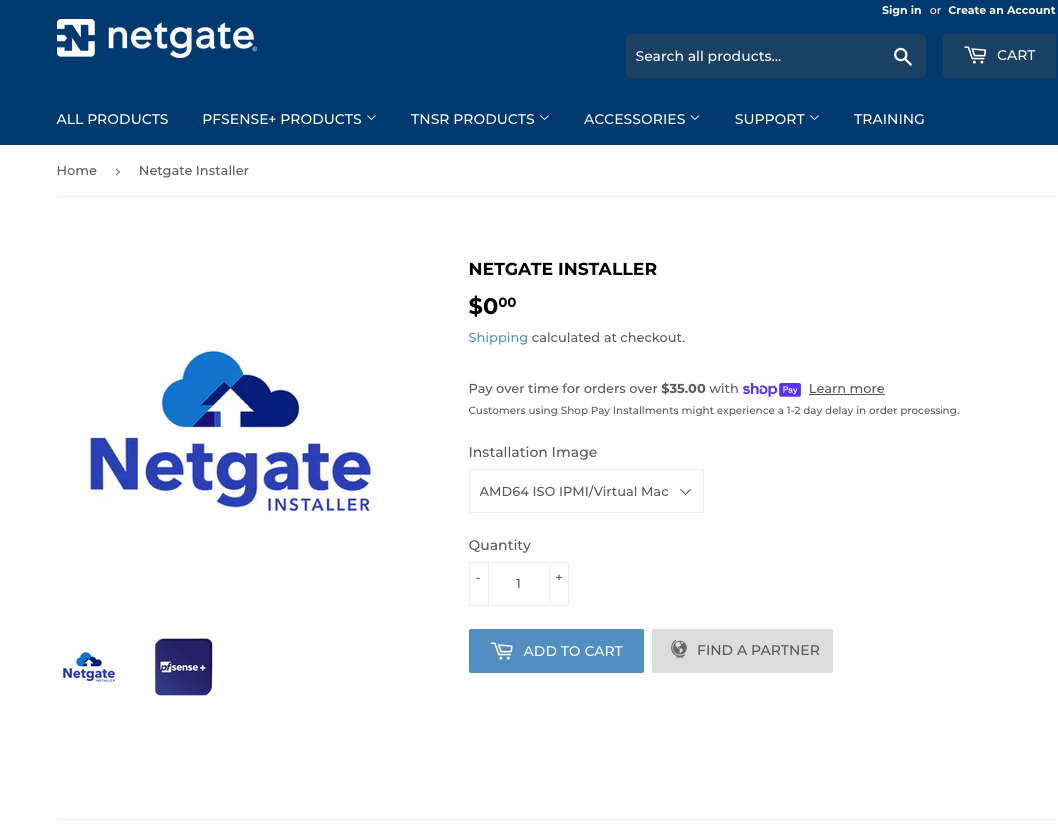
Source: Netgate
-
You’ll need to download this image and re-upload it, as it’s tied to your account credentials and is in a .gz format. Download and extract the file using the command below:
gzip -d netgate-installer-amd64.iso.gz
-
Browse to your Proxmox web GUI, and find your host’s local LVM. Browse to ISO Images and locate the Upload button to re-upload your ISO.
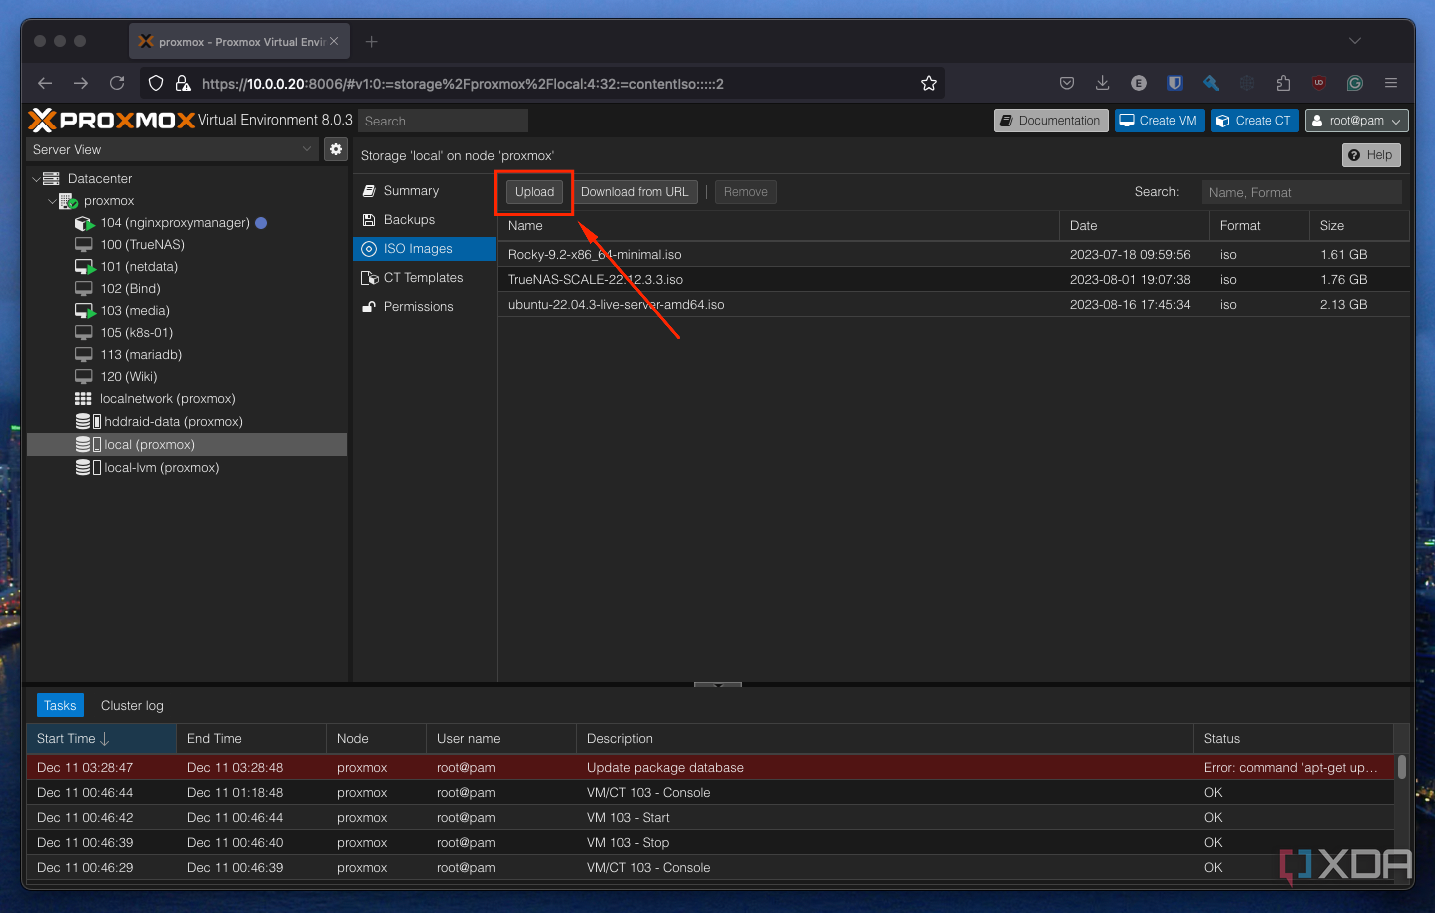
Once complete, you’ll see the “TASK OK” message in the Proxmox copy dialogue.
-
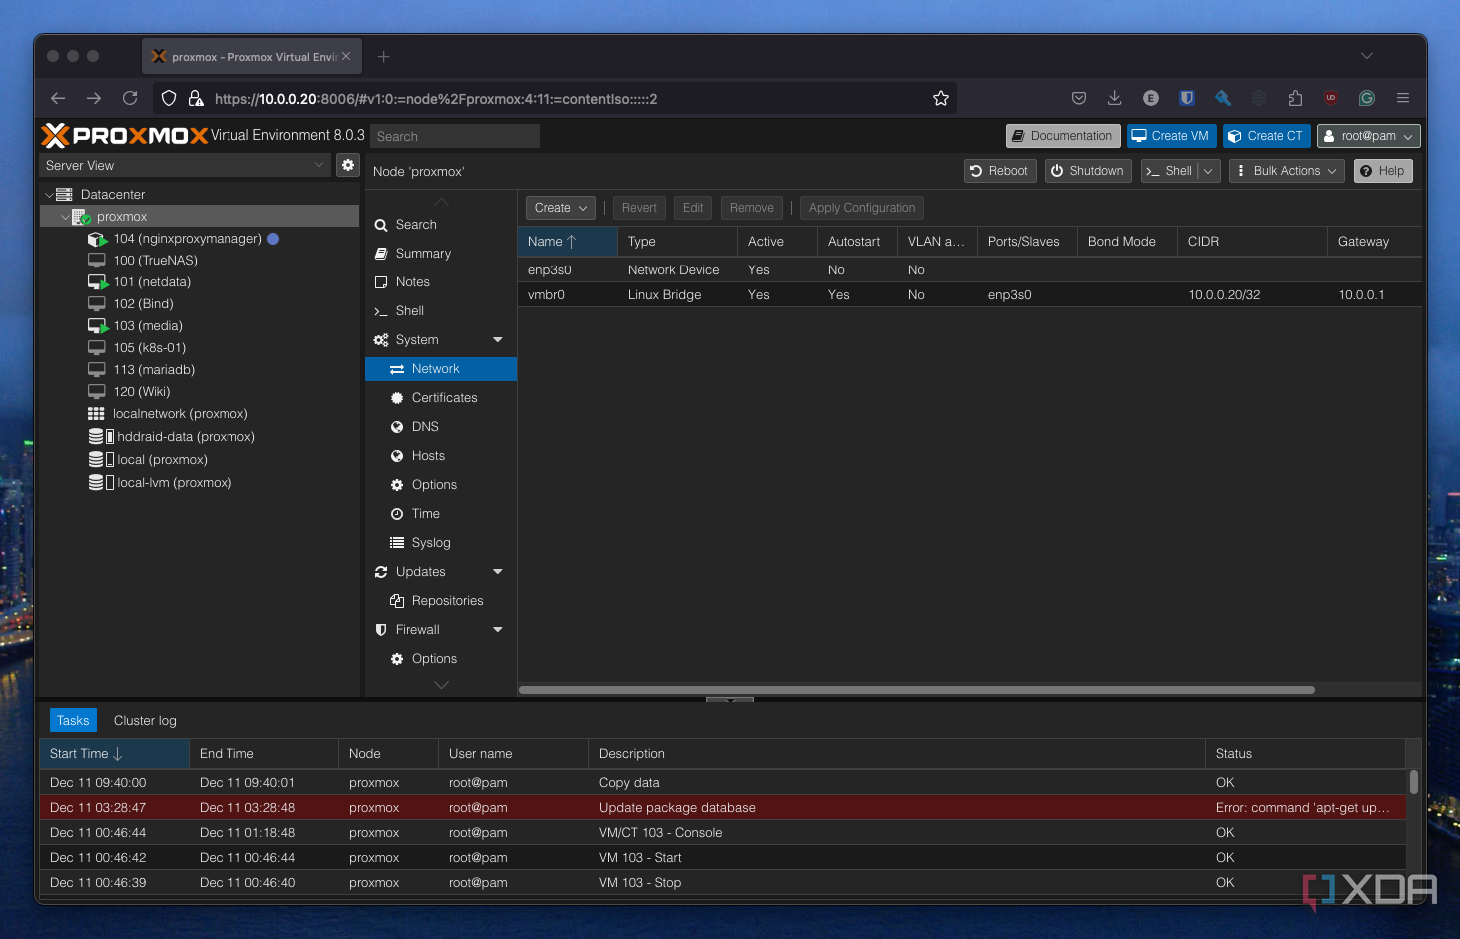
Browse to the cluster or host you intend on installing pfSense on, and find the host’s networking tab under Host > System > Network.
-
Here you’ll need to create two virtual network adapters. To do this, click Create and then Linux Bridge. In my case, my first interface is called enp3s0, and subsequent free interfaces (i.e. not configured for Proxmox management) are enp4s0 and enp5s0. Create a pair of virtual bridges.
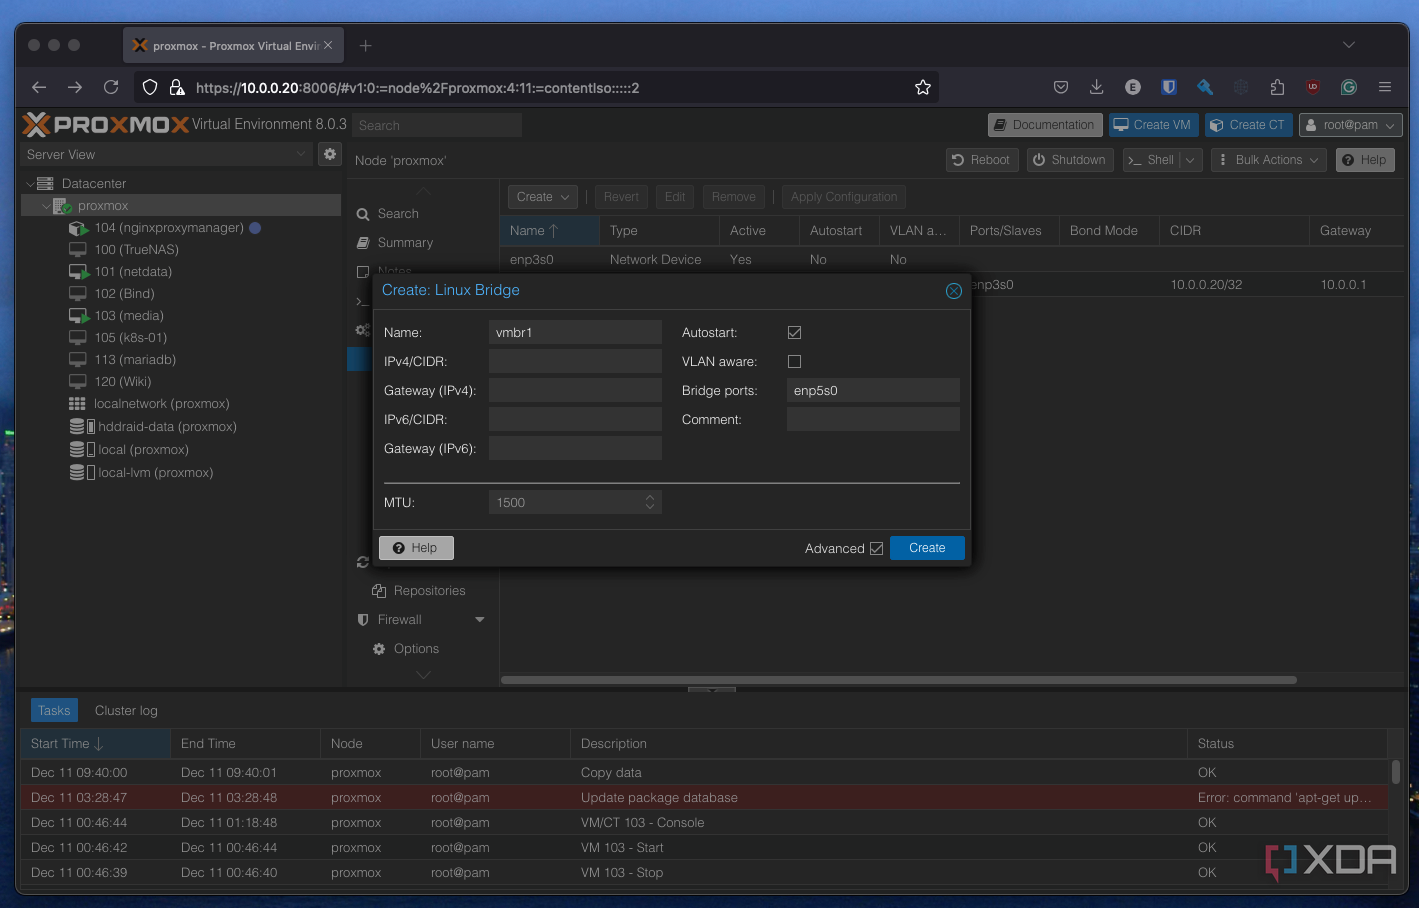
- You’ll then need to press Apply Configuration on the original screen to save your changes. This may take a moment.
-
Once you’ve created your bridges, start configuring a virtual machine as you normally would. There are some specific changes we’ll need to make, but firstly, ensure you use your uploaded pfSense ISO as the OS image.
There are a few additional changes here for optimal performance, as recommended by the pfSense official documentation on installing pfSense on Proxmox. Firstly, change your graphics card to SPICE, as this “uses less CPU when idle and supports more advanced console features than the default console.” Secondly, configure your hard disk as a VirtIO Block instead of the default SCSI. Finally, you’ll need to configure your network bridge as the first bridge you created earlier. In my case, this is vmbr0. Ensure this is set under the Network tab of the configurator.
While it’s default on most configurations, you’ll want to ensure that the AES flag is enabled under CPU > Extra CPU Flags. You may experience poor performance for things like VPNs if this is disabled.
- Once configured, confirm and create your virtual machine. Disable Start once created for now, as we’ll need to make some more changes.
-
Now that your machine is created, select your machine in the sidebar menu and browse to Hardware. You should see your first virtual interface connected to the machine.
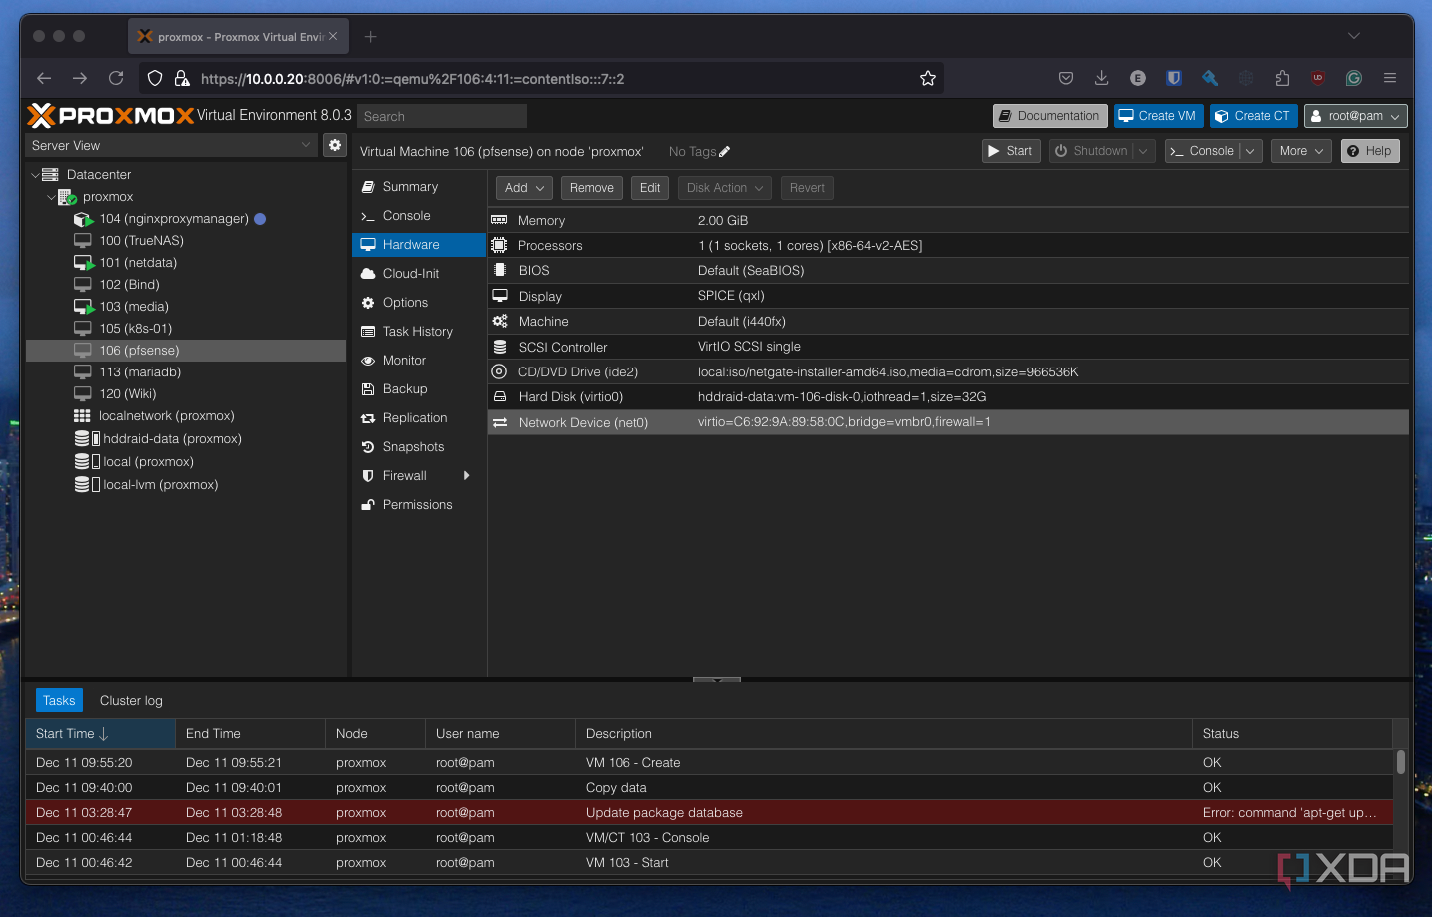
-
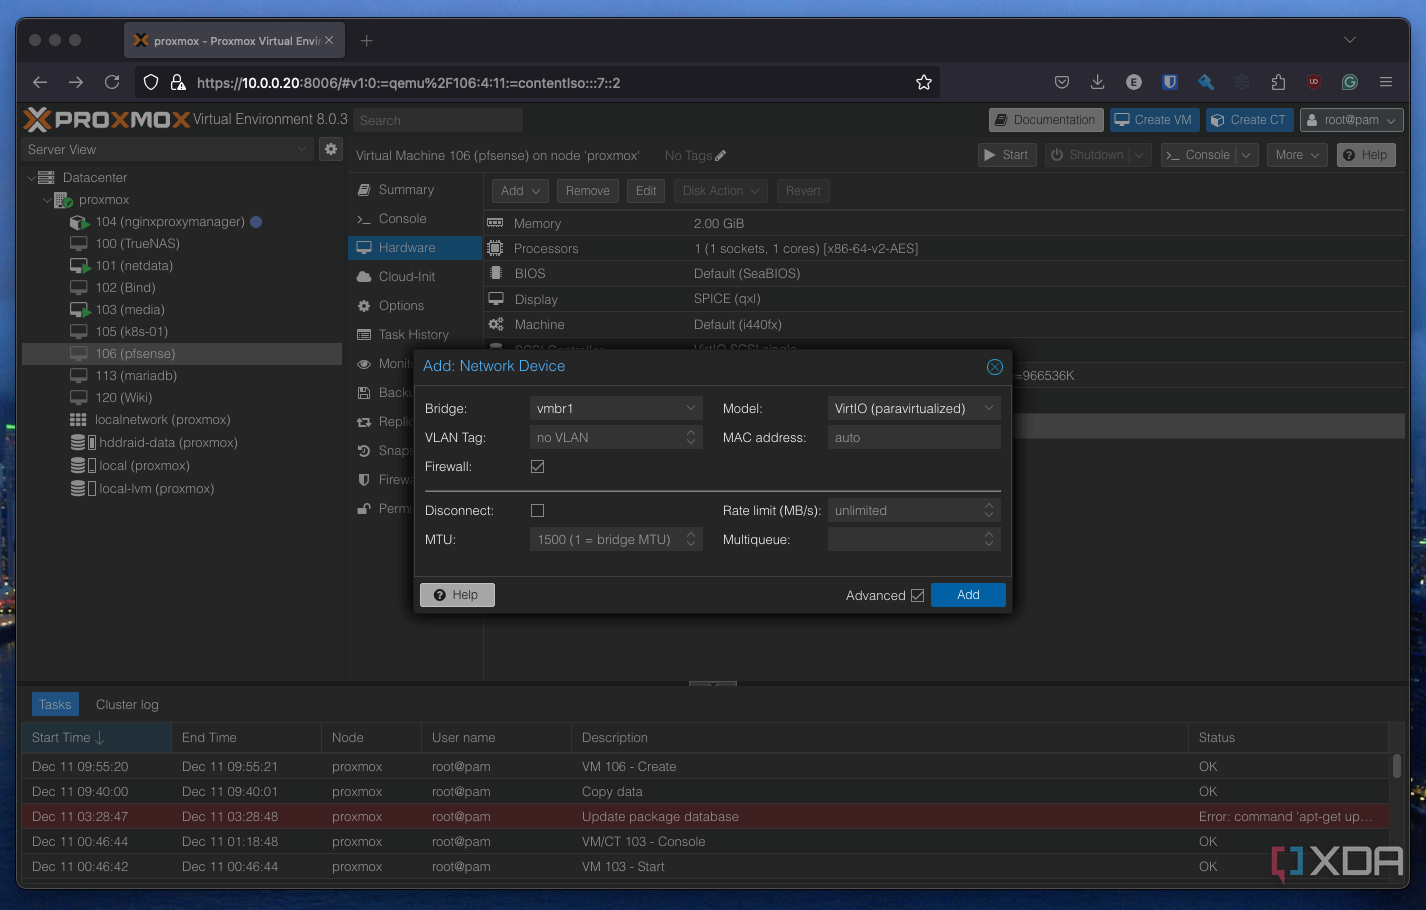
Add the second interface with Add > Network device. You’ll see a similar dialog to earlier. Select your second virtual interface (mine is vmbr1) and add that to your machine.
- Once that’s done, you’re ready to start up your machine. It should boot immediately into the pfSense installer.


Related
Do you use pfSense or OPNsense?
The firewall and router software solutions are similar in many ways but are on very different paths. pfSense started in 2006 as a fork of m0n0wall, followed by OPNsense in 2015 as a fork of pfSense. Both are powered by FreeBSD with no cost of using either software. I’ve recently deployed a pfSense router as a full-time replacement for my existing infrastructure but already I’m eyeing up OPNsense. So, which do you use and why did you end up sticking with your choice?
Configuring pfSense for virtualization
There aren’t any special caveats for a virtualized host

Most of the hard work is done when it comes to setting up pfSense for virtualization. You can now run pfSense effectively as you would on any other router or custom box. You’ll want to configure one of your interfaces for WAN and one for LAN, as you would a normal pfSense router. You’ll likely see your two interfaces labeled as vtnet0 and vtnet1, reflecting the two virtual bridges you created in Proxmox initially. Follow the normal setup procedure, connect your WAN to your modem or bridge router, and your LAN to other devices on your network (i.e. a switch), and you should see connectivity. You don’t need to connect a WAN to set up pfSense, so it might be worth leaving your original router connected until you’re all configured, then plan to migrate later.
You don’t need to connect a WAN to setup pfSense, so it might be worth leaving your original router connected until you’re all configured.
If you’re having any issues with installation, there’s a full walkthrough in the pfSense documentation.
Explore all that pfSense has to offer
Once set up, pfSense is a treasure trove of potential. You can configure everything from custom VLANs to protect your IoT devices, or a home VPN to access your services remotely from anywhere in the world, just make sure to avoid some of our rookie mistakes when setting up your pfSense instance.
#virtualize #router #firewall #heres
source: https://www.xda-developers.com/you-can-virtualize-your-router-and-firewall-heres-how/

