

Ever wanted to add a subtle depth effect to the subjects in your photos? You’re not alone. Although smartphones with telephoto lenses let you do just that with ease nowadays, photos taken with the main and ultrawide cameras still can’t reproduce shallow depth of field very well. That’s exactly when photo-editing apps like Adobe Photoshop come in handy.
Photoshop has many hidden features that help you add a nice bokeh effect to your images within a few minutes. You can use it to blur unwanted objects in the background to make your subject stand out. I’ll show you exactly how to do that below, even if you’re a beginner.
Related
10 hidden features every Photoshop user needs to know
Level up your image-editing skills with these 10 lesser-known Photoshop features
Adding a bokeh effect by blurring the background in Photoshop
First and foremost, you need Adobe Photoshop installed on your computer. Keep in mind that it’s not free, but you can take advantage of a 7-day trial if you’re not ready to spend your money upfront. And if you like it, you can get an Adobe Creative Cloud Photography plan for under $140 for the first year, which also gives you access to Lightroom.
Once the software is installed, open the image you want to edit in Photoshop and follow the steps below:
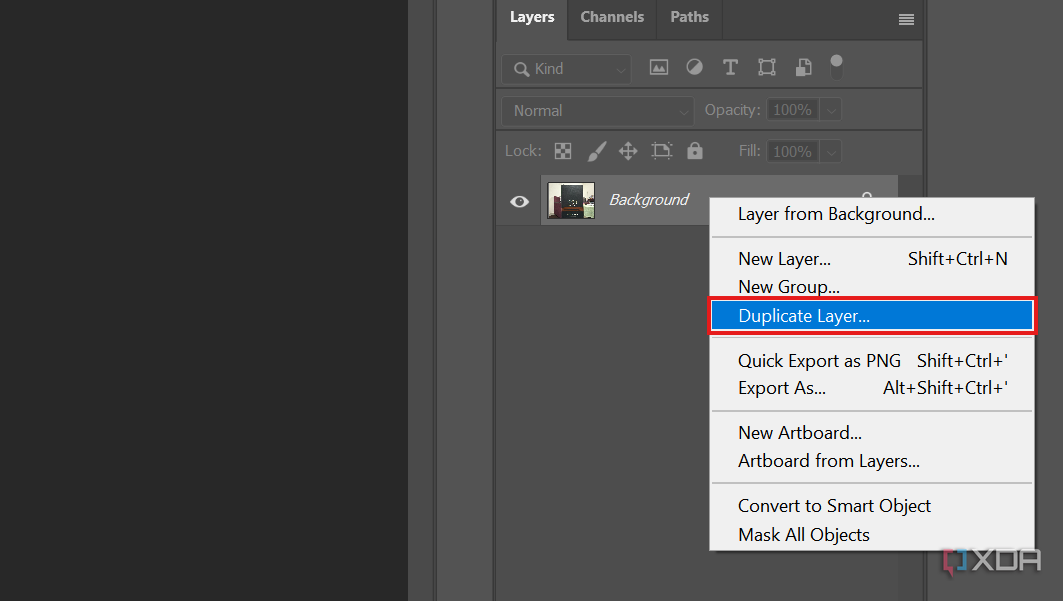
- After the image loads, locate the Layers tab in the bottom-right section of the app’s window and move your cursor to the Background layer nested under it.
-
Right-click on it and choose Duplicate Layer. A Duplicate Layer pop-up will appear. Leave its name untouched and click OK.
-
A Background Copy layer should now appear in the Layers tab in the bottom-right section of the window. Make sure it’s selected (if it isn’t already). Then, look at the toolbar on the left and find the selection tools as indicated in the screenshot below.
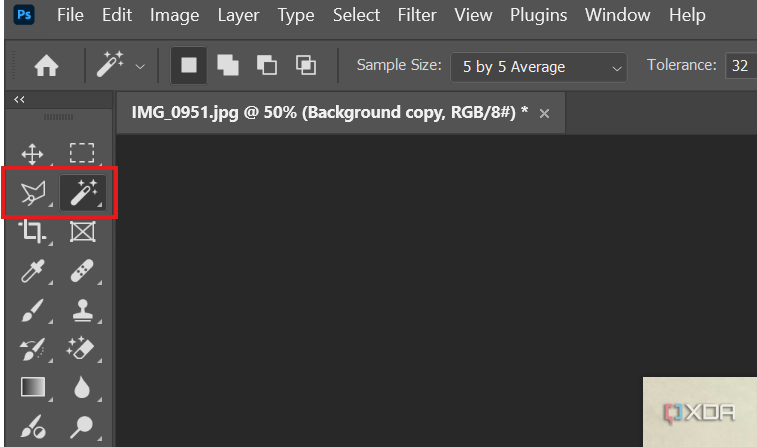
- Use any of Photoshop’s selection tools to cut out the subject in your image. Since my subject is a rectangular packaging box, I used the Polygonal Lasso Tool for selection. Click and drag the cursor and select the edges and corners of your subject appropriately.
- If you’re not happy with the selection, press Ctrl + Z to undo or hit the Esc key.
-
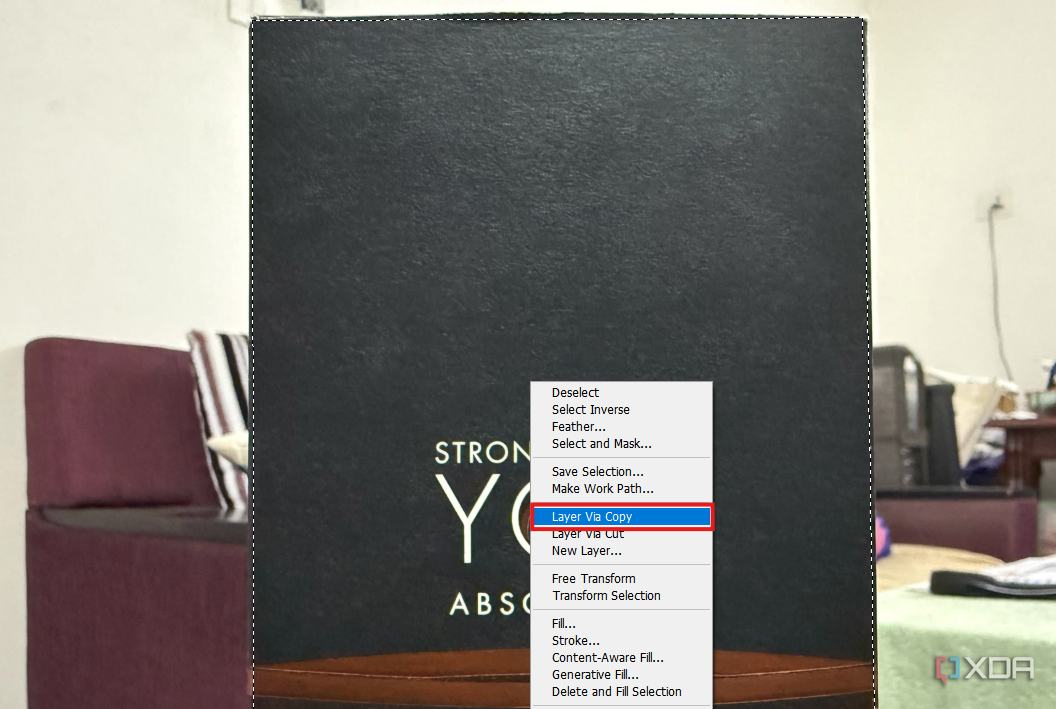
Next, right-click on the selected subject and click Layer via Copy from the context menu. This will add another layer called Layer 1 to the Layers tab in the bottom-right corner.
-
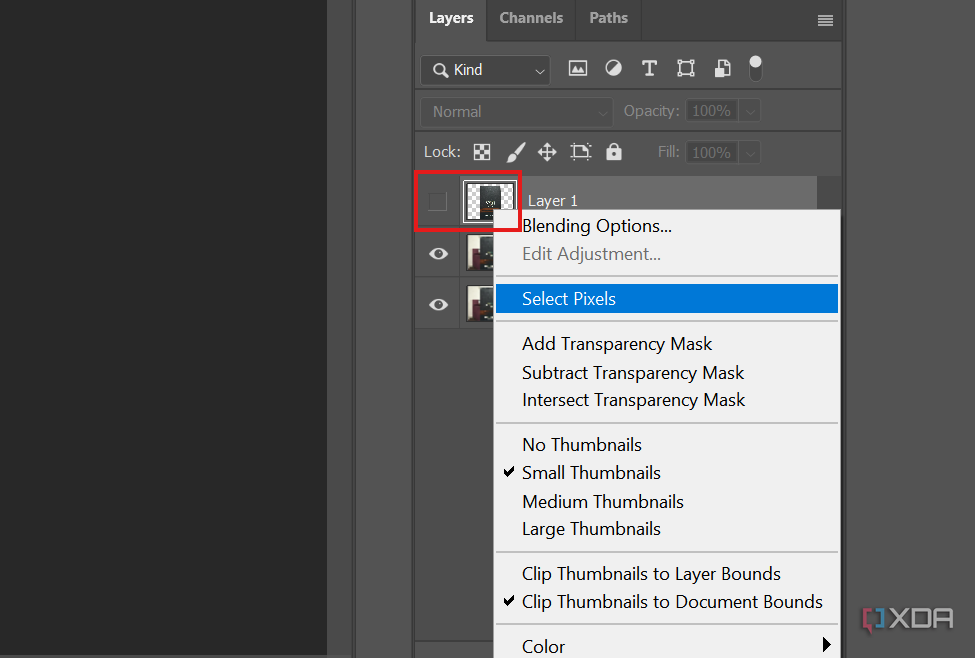
Click the Eye icon next to Layer 1 and right-click on the thumbnail. Then, choose Select Pixels from the context menu.
- Next, select the Background Copy layer and move the cursor to Photoshop’s menu bar.
-
Go to Select -> Modify -> Expand and choose the number of pixels you want the selected area to expand by.
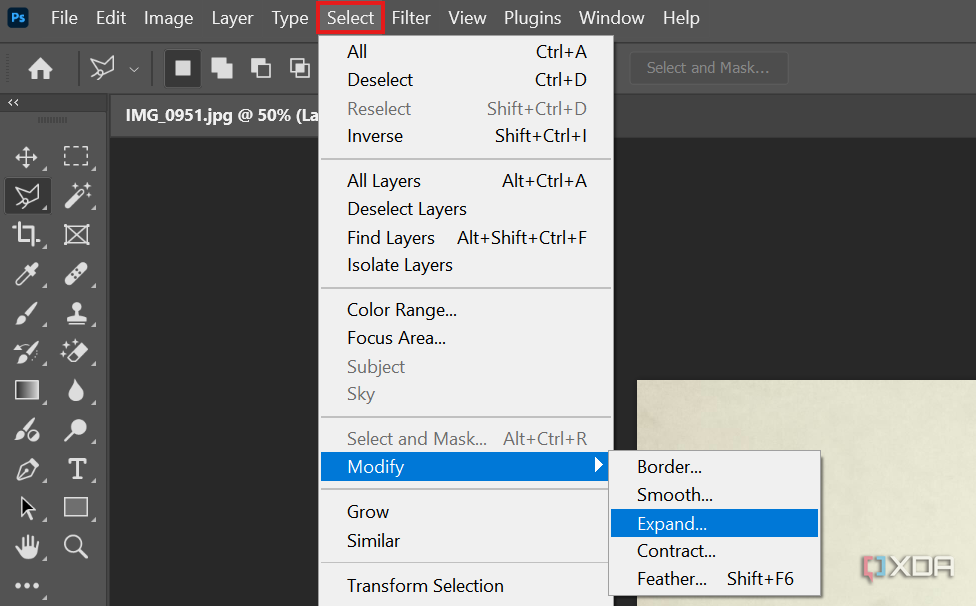
Anywhere from 5 to 10 is a decent value if your selection is spot-on for the most part.
- Click OK.
-
Click Edit from the menu bar and choose Content-Aware Fill from the dropdown menu. Everything outside your selection will be highlighted in green.
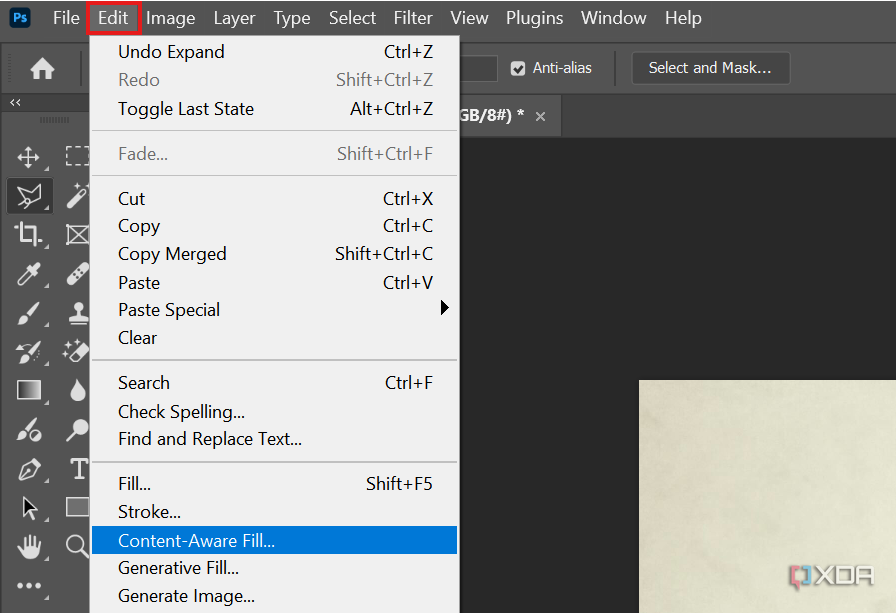
- Click OK in the bottom-right corner of Photoshop’s window to proceed.
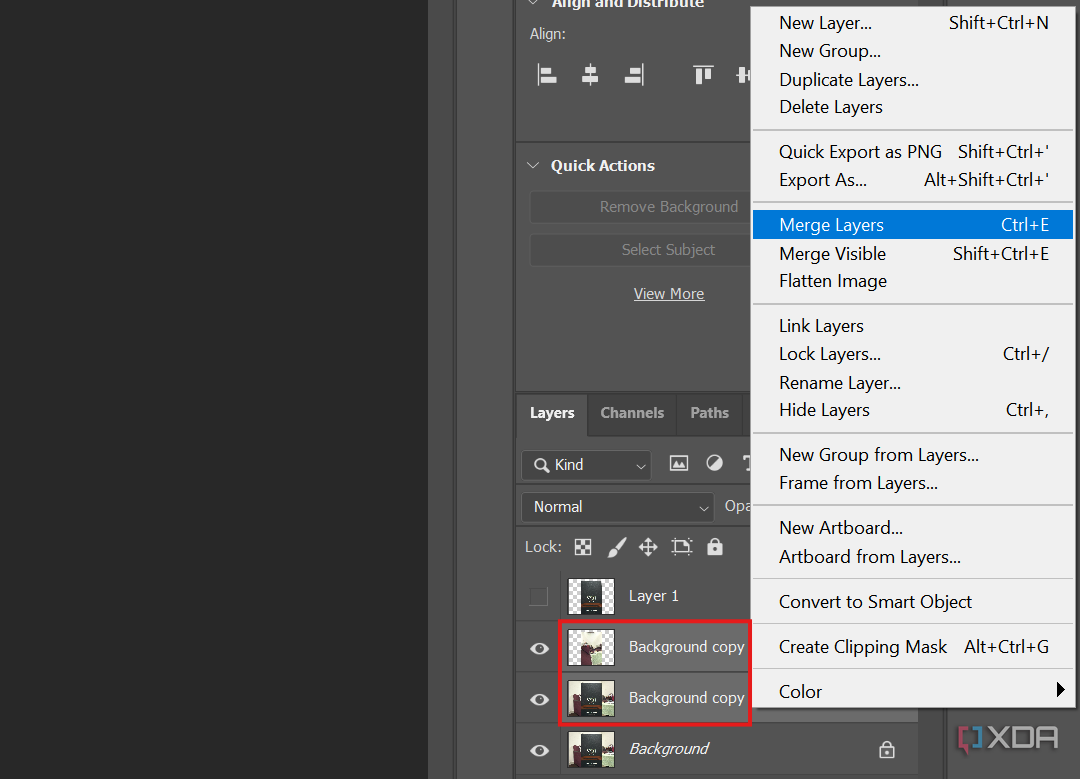
- At this point, you’ve gone through the trickiest parts. Now, select both the Background Copy layers under the Layers tab by clicking while holding down the Ctrl key.
-
Right-click and choose Merge Layers from the context menu.
-
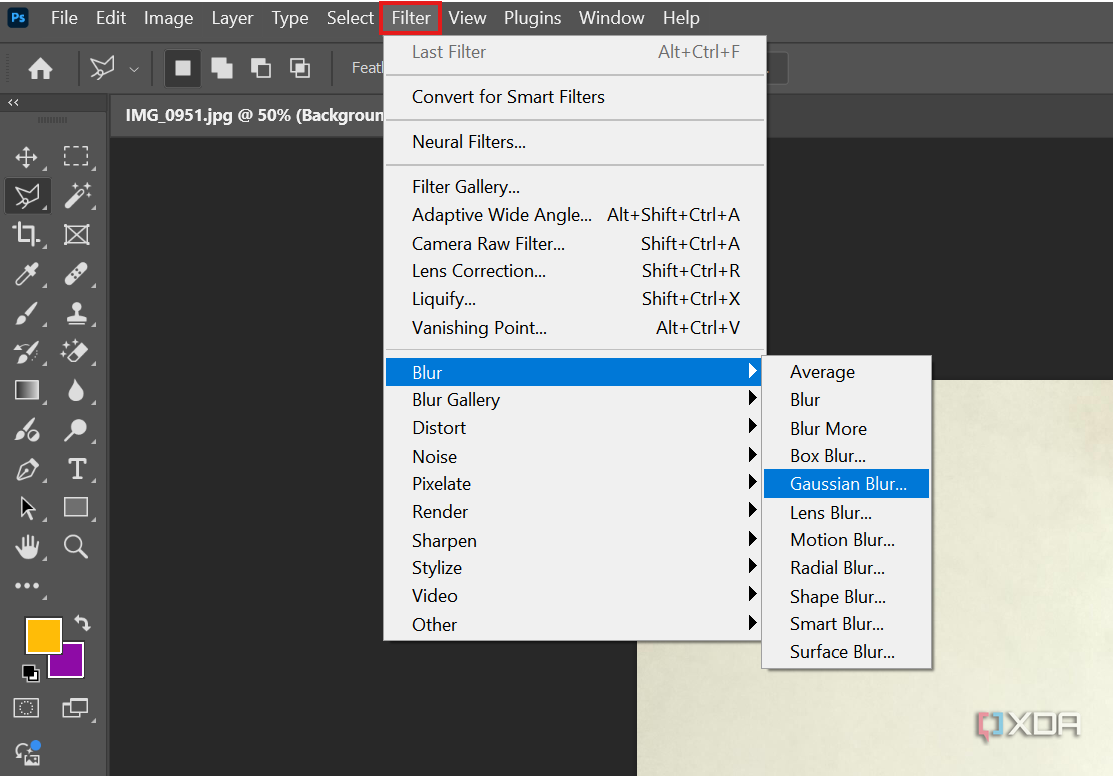
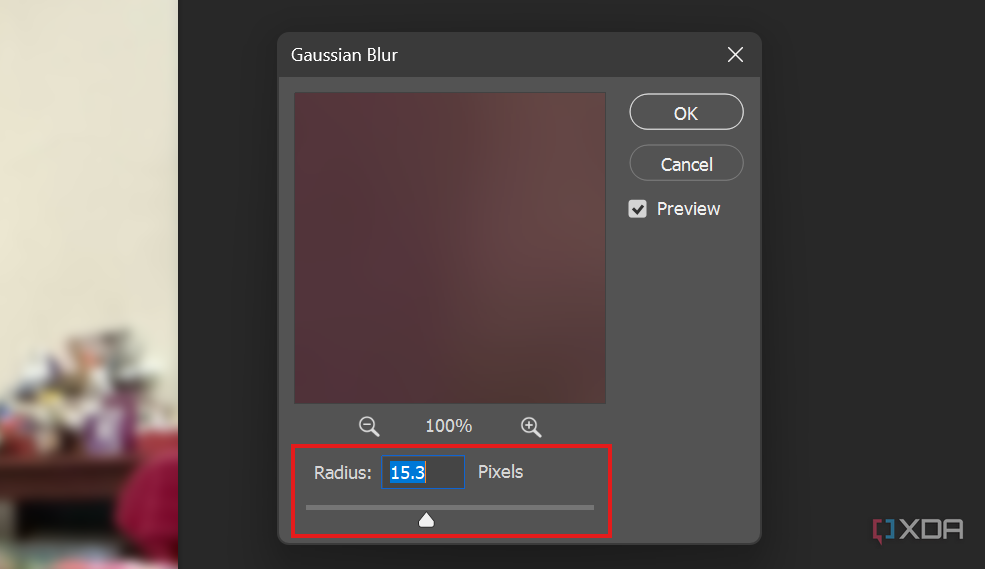
Click Deselect in the pop-up below your image and then go to Filter -> Blur -> Gaussian Blur from the menu bar. You don’t have to use Gaussian Blur; feel free to experiment with other blur effects too.
-
Drag the Radius slider in the pop-up window right or left to increase or decrease the bokeh effect. When you’re done, click OK.
-
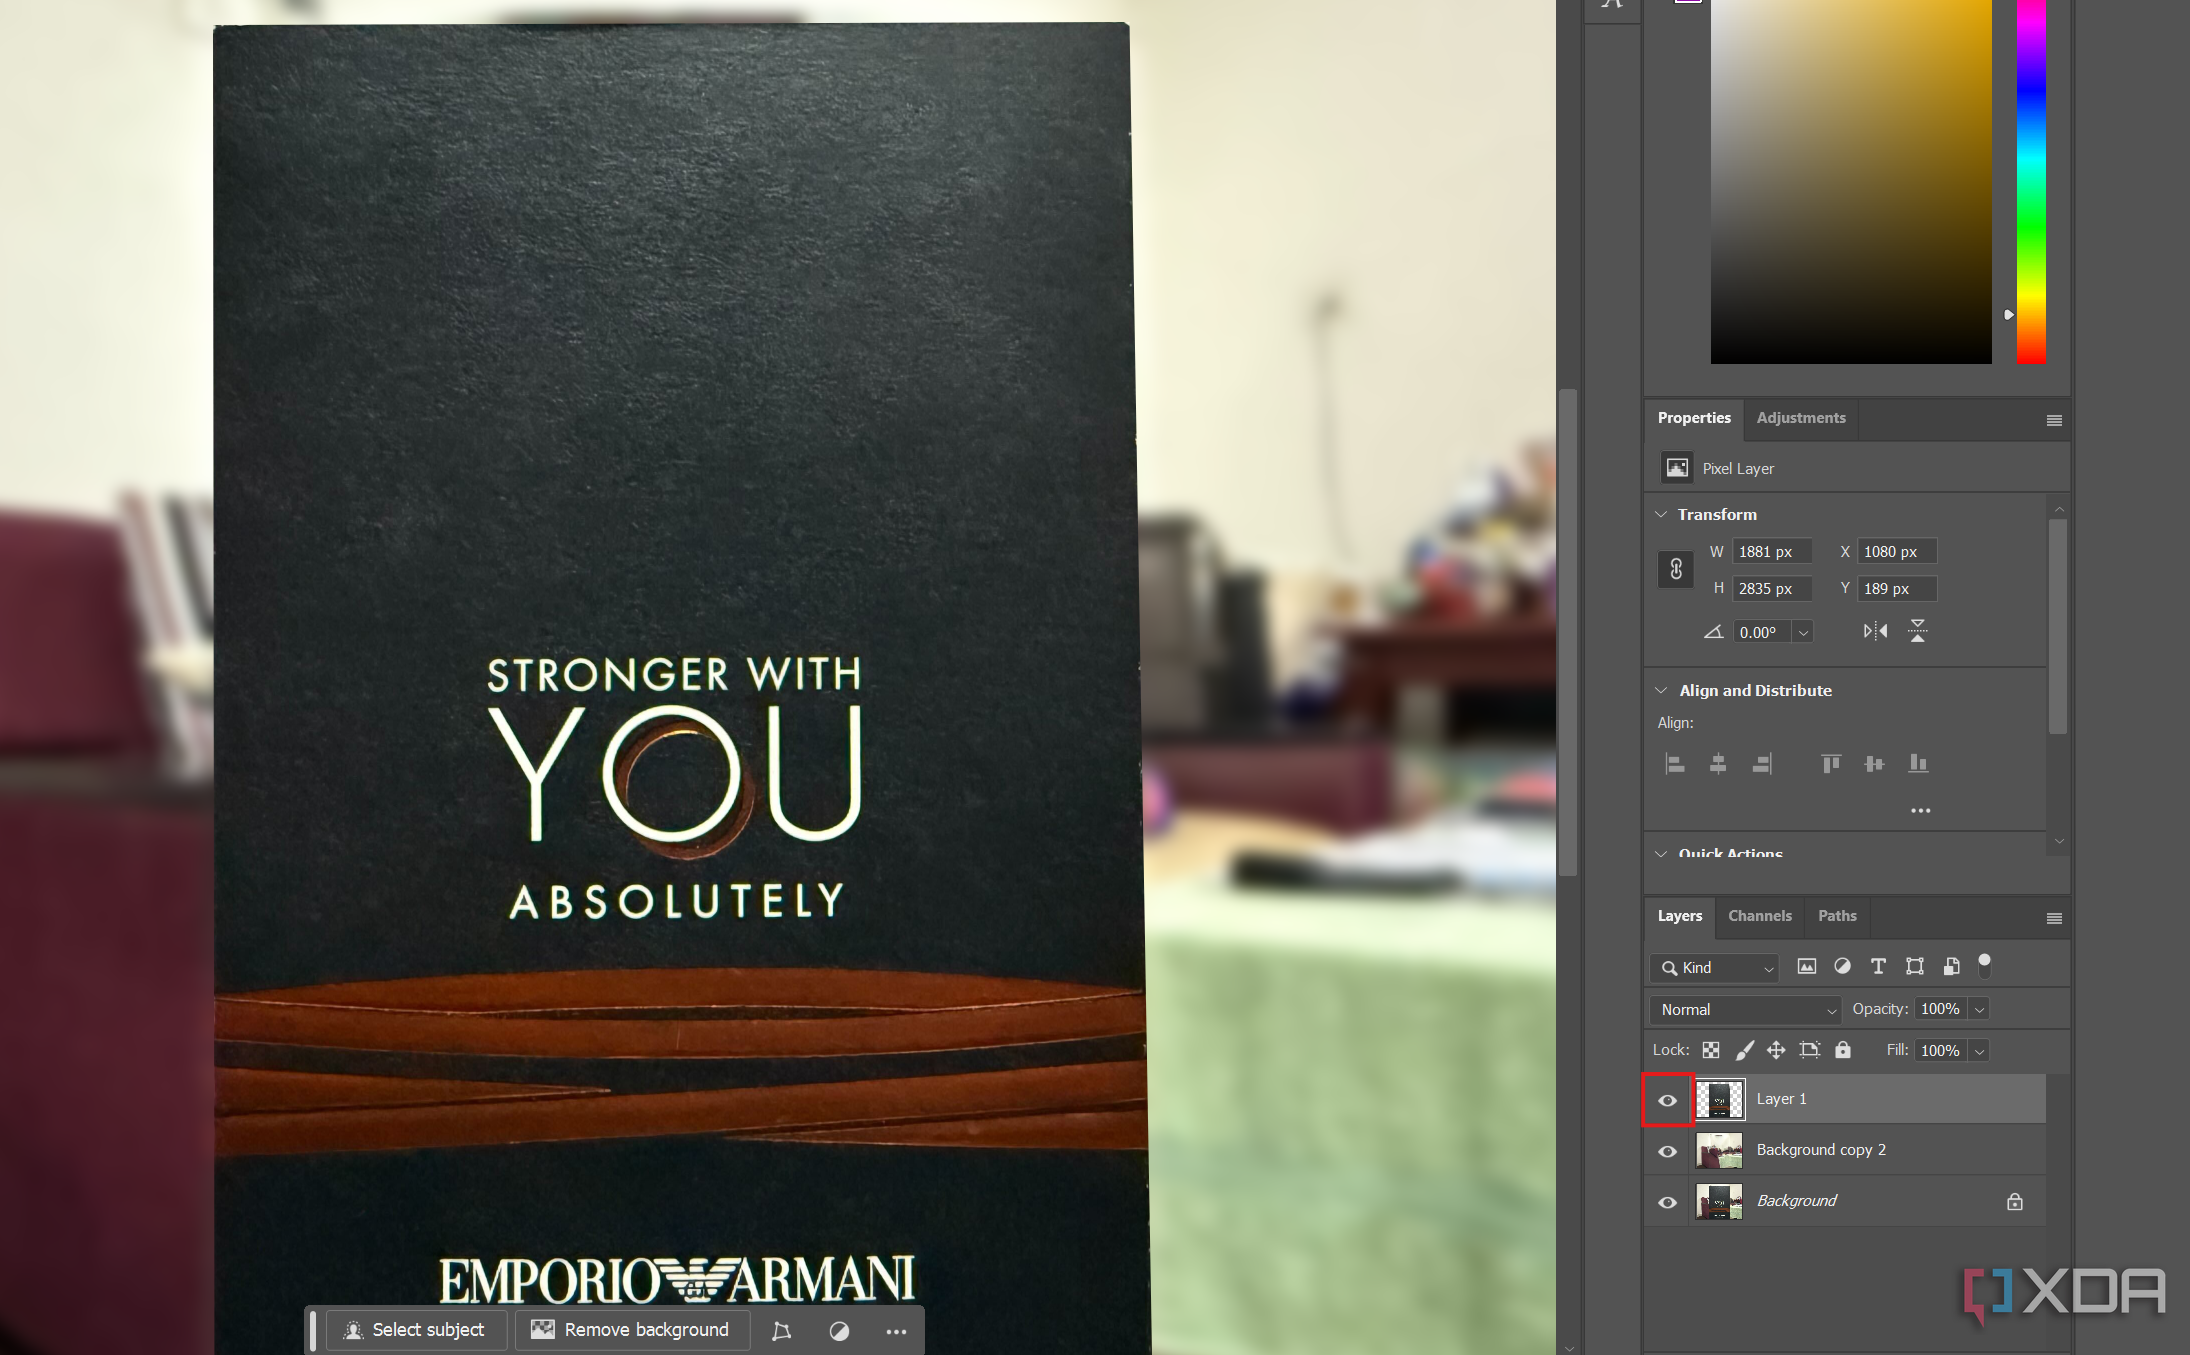
For the last step, toggle on Layer 1’s visibility, i.e., make sure it has the eye icon next to it to make your subject visible in the image for the final result.


That’s it. All you need to do now is save your image by clicking File -> Save a Copy. Then, choose your desired format and location and click Save from the File Explorer window.
Blur unwanted objects in the background with ease
From now on, whether you take a photo in your messy bedroom or in a crowded environment, you can use Photoshop to keep your subject in focus with the various blur filters available. Once you get the hang of using layers and selection tools, you should be able to do this within a few minutes.
Blurring the background is just one of the many things you can do with Adobe Photoshop without even taking AI features into account. So, if you’re using it for the first time, take advantage of the free trial to learn the basics and see if it’s worth your hard-earned money. And if you’re already familiar with the software, there are still several things you’ll need to brush up on in Photoshop.
Adobe Photoshop
Photoshop is not just for blurring the backgrounds in your pictures. It’s a full-fledged photo editor. Whether you want to apply artistic effects, remove unwanted objects, or retouch your pictures to make them pop, Photoshop is the one app you can always rely on.
#blur #background #Adobe #Photoshop
source: https://www.xda-developers.com/how-to-blur-background-photoshop/

