

Whether it’s a time-lapse camera, Python-based crowd analyzer, or full-fledged drones, modern Raspberry Pi boards pair well with projects involving camera modules. NVR setups, in particular, benefit from the small form factor and low energy consumption of these miniature boards, especially if you’re planning to put together a surveillance system for your surroundings. Once you arm your Raspberry Pi with Frigate’s terrific NVR provisions, you can even turn it into a wildlife monitoring setup.
Related
Getting a camera working on Raspberry Pi 5 is easy; here’s how it’s done
Since the Raspberry Pi 5 features new four-lane MIPI ports, you’ll need to follow a different strategy when connecting a camera module to the SBC
What you’ll need for this project
The Raspberry Pi will be the centerpiece of the project, and I recommend grabbing one of the newer mainline boards if you want to capture footage at high resolution. Since you’ll be recording videos, you’ll need high-capacity storage drives that are faster and more reliable than mere microSD cards. External SSDs/HDDs are more than enough for the wildlife camera, though you can also use a SATA HAT to interface internal HDDs to your Raspberry Pi. To keep things simple, I recommend going with IP cameras, but you can also set up RTSP streams for your USB webcams and Raspberry Pi camera modules.
On the software front, we’ll go with a containerized instance of Frigate as the NVR utility. I’ve used Raspberry Pi OS in this tutorial, but you’re free to choose CLI distros if you want to minimize the performance overhead from the underlying operating system. Finally, you’ll need Docker or Podman pre-installed on your OS, and we’ve got detailed guides for both in case you encounter trouble when setting them up.
Deploying a Frigate container
Once you’ve assembled all the components and configured the OS and containerization platform, it’s time to host a Frigate server on your Raspberry Pi. To do so,
- Open the terminal included in your Linux distro.
-
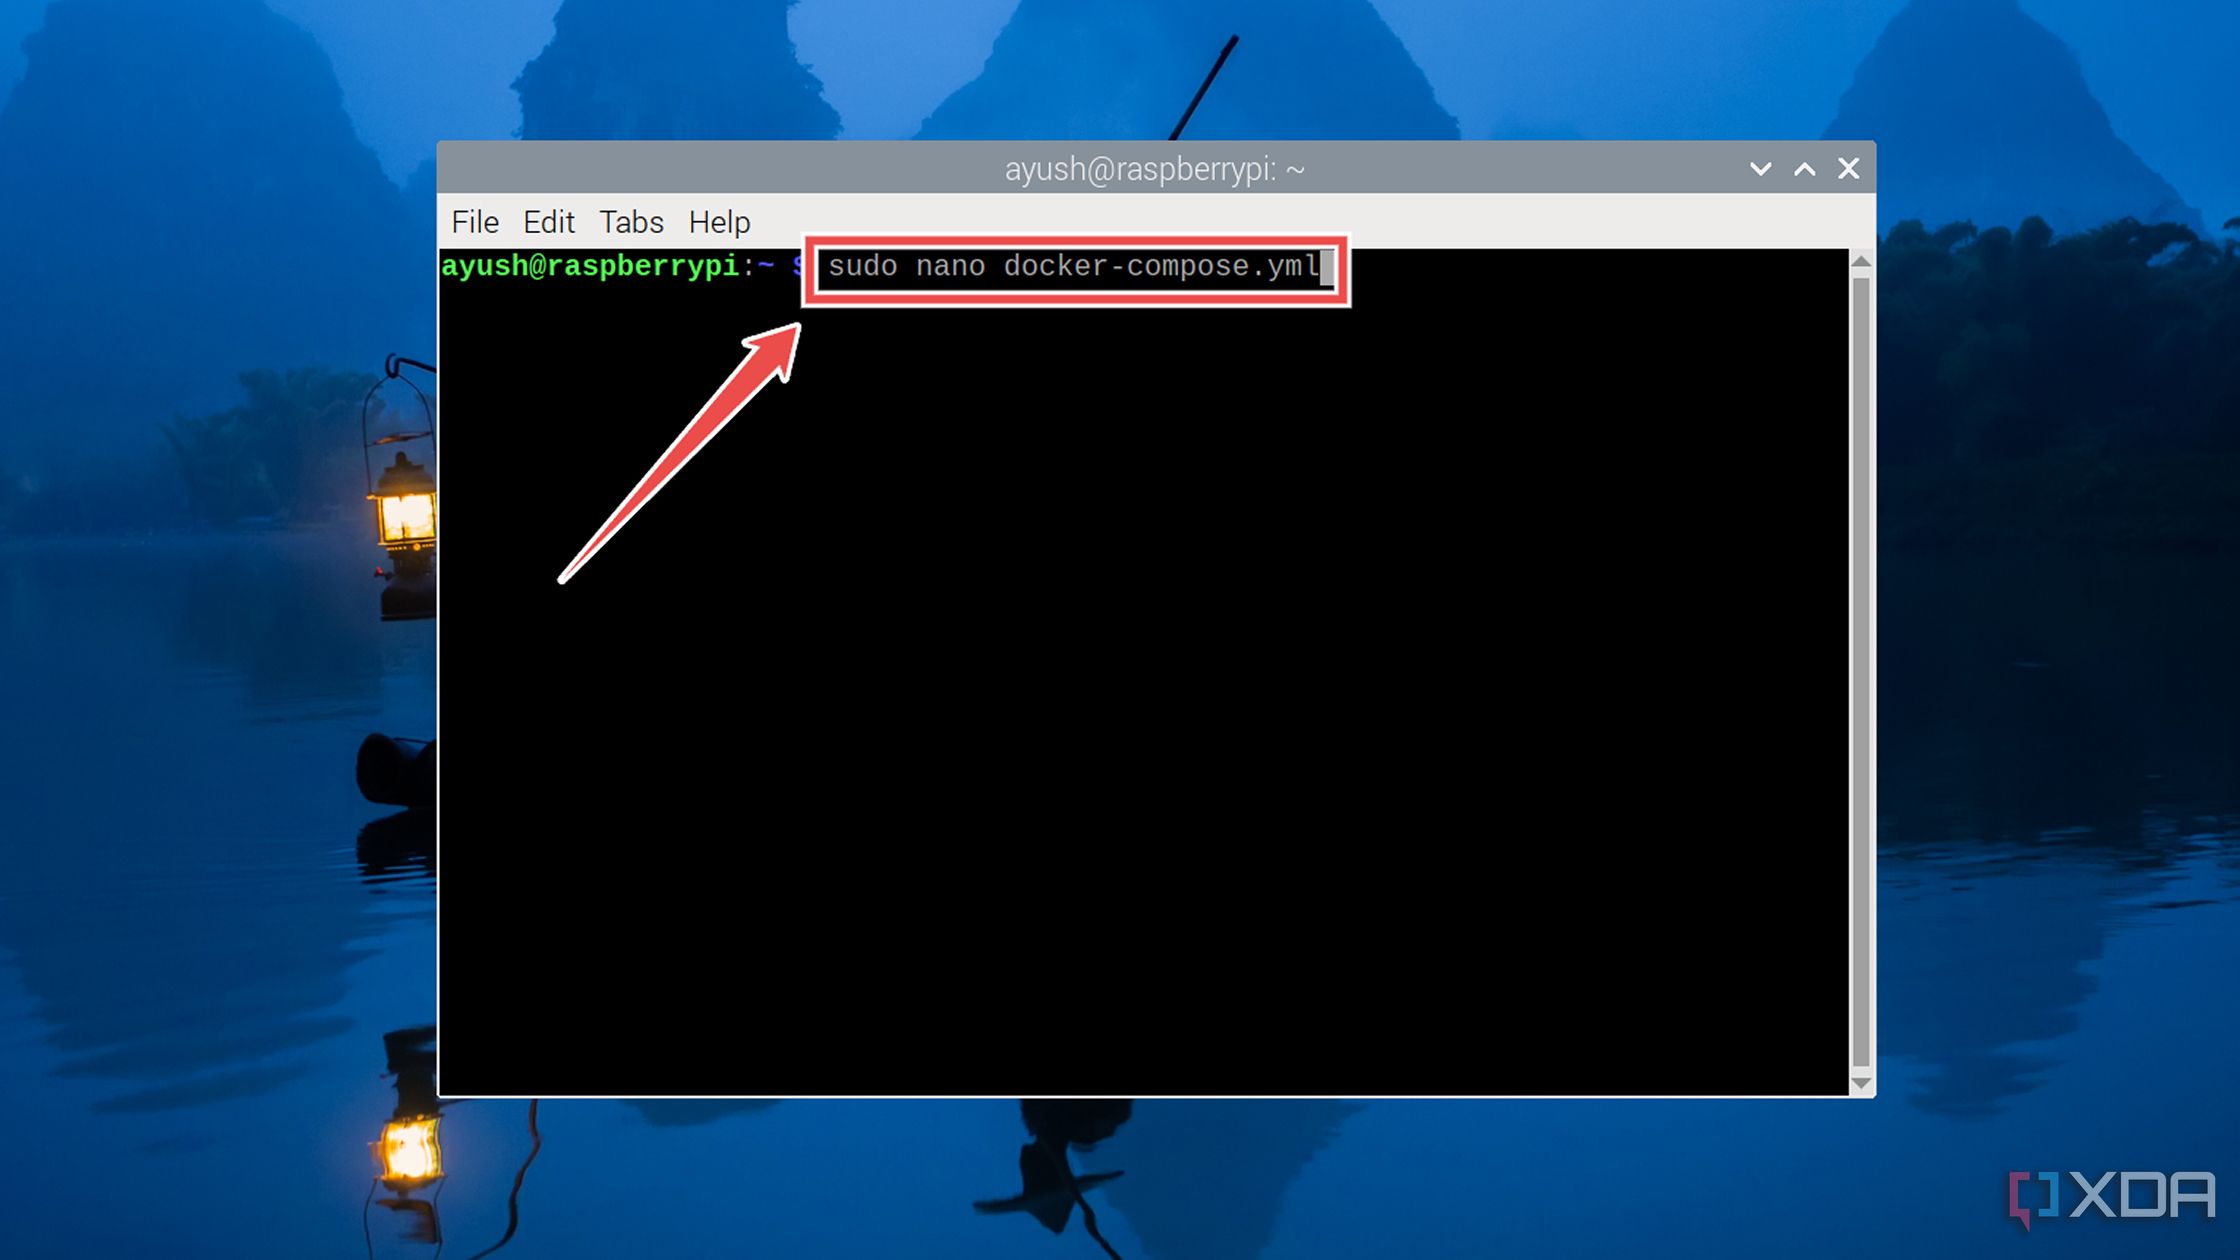
Use the nano text editor to create a new document called docker-compose.yml.
sudo nano docker-compose.yml
-
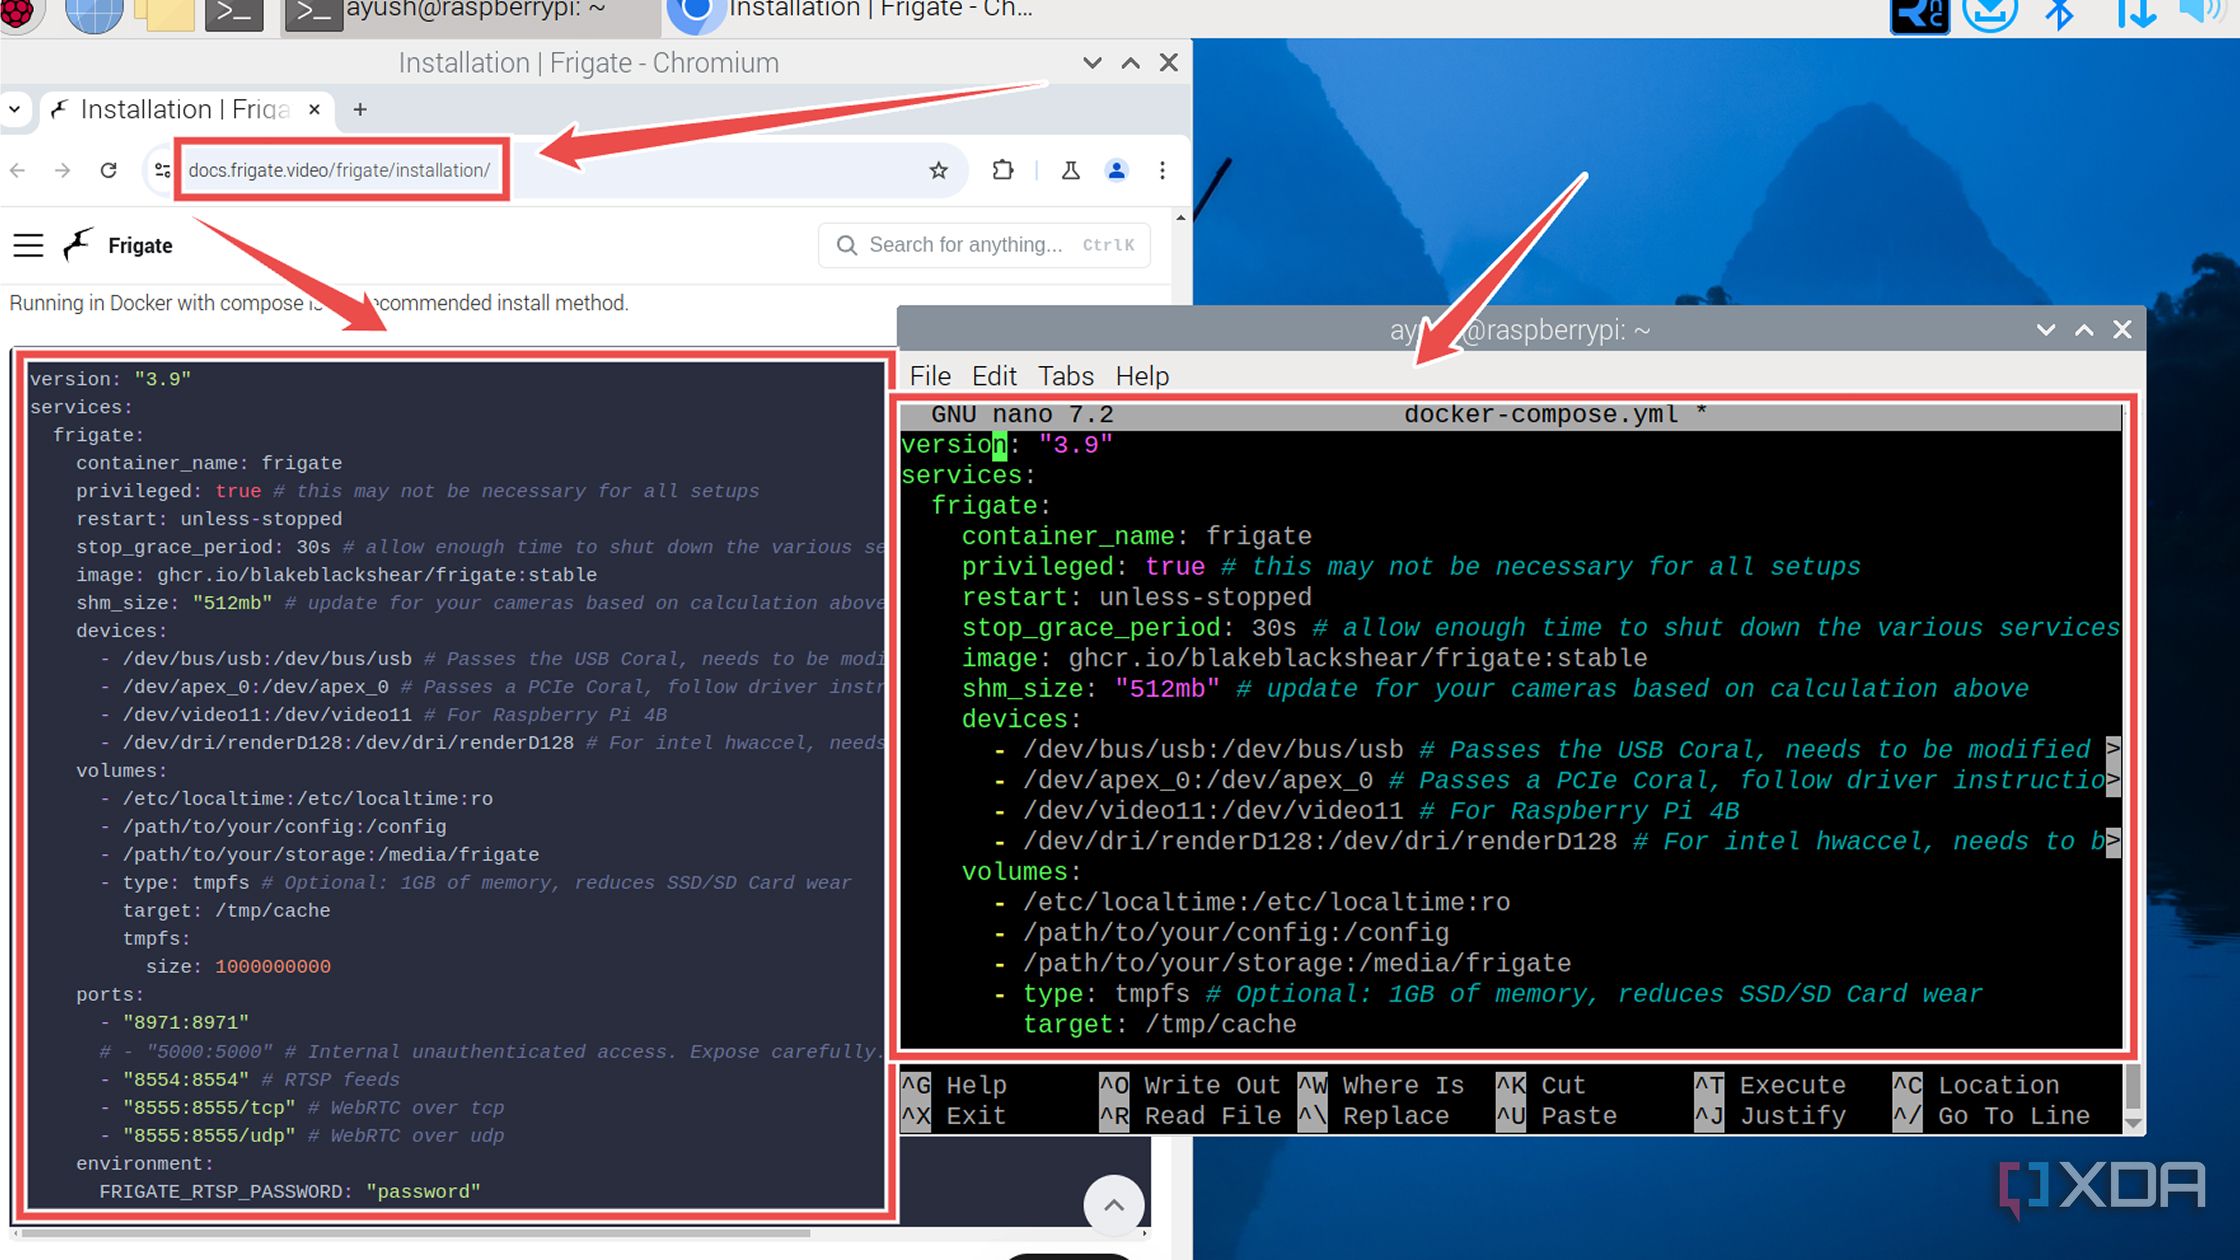
Head to the Frigate docs and copy the code from the Docker section into the docker-compose.yml file.
-
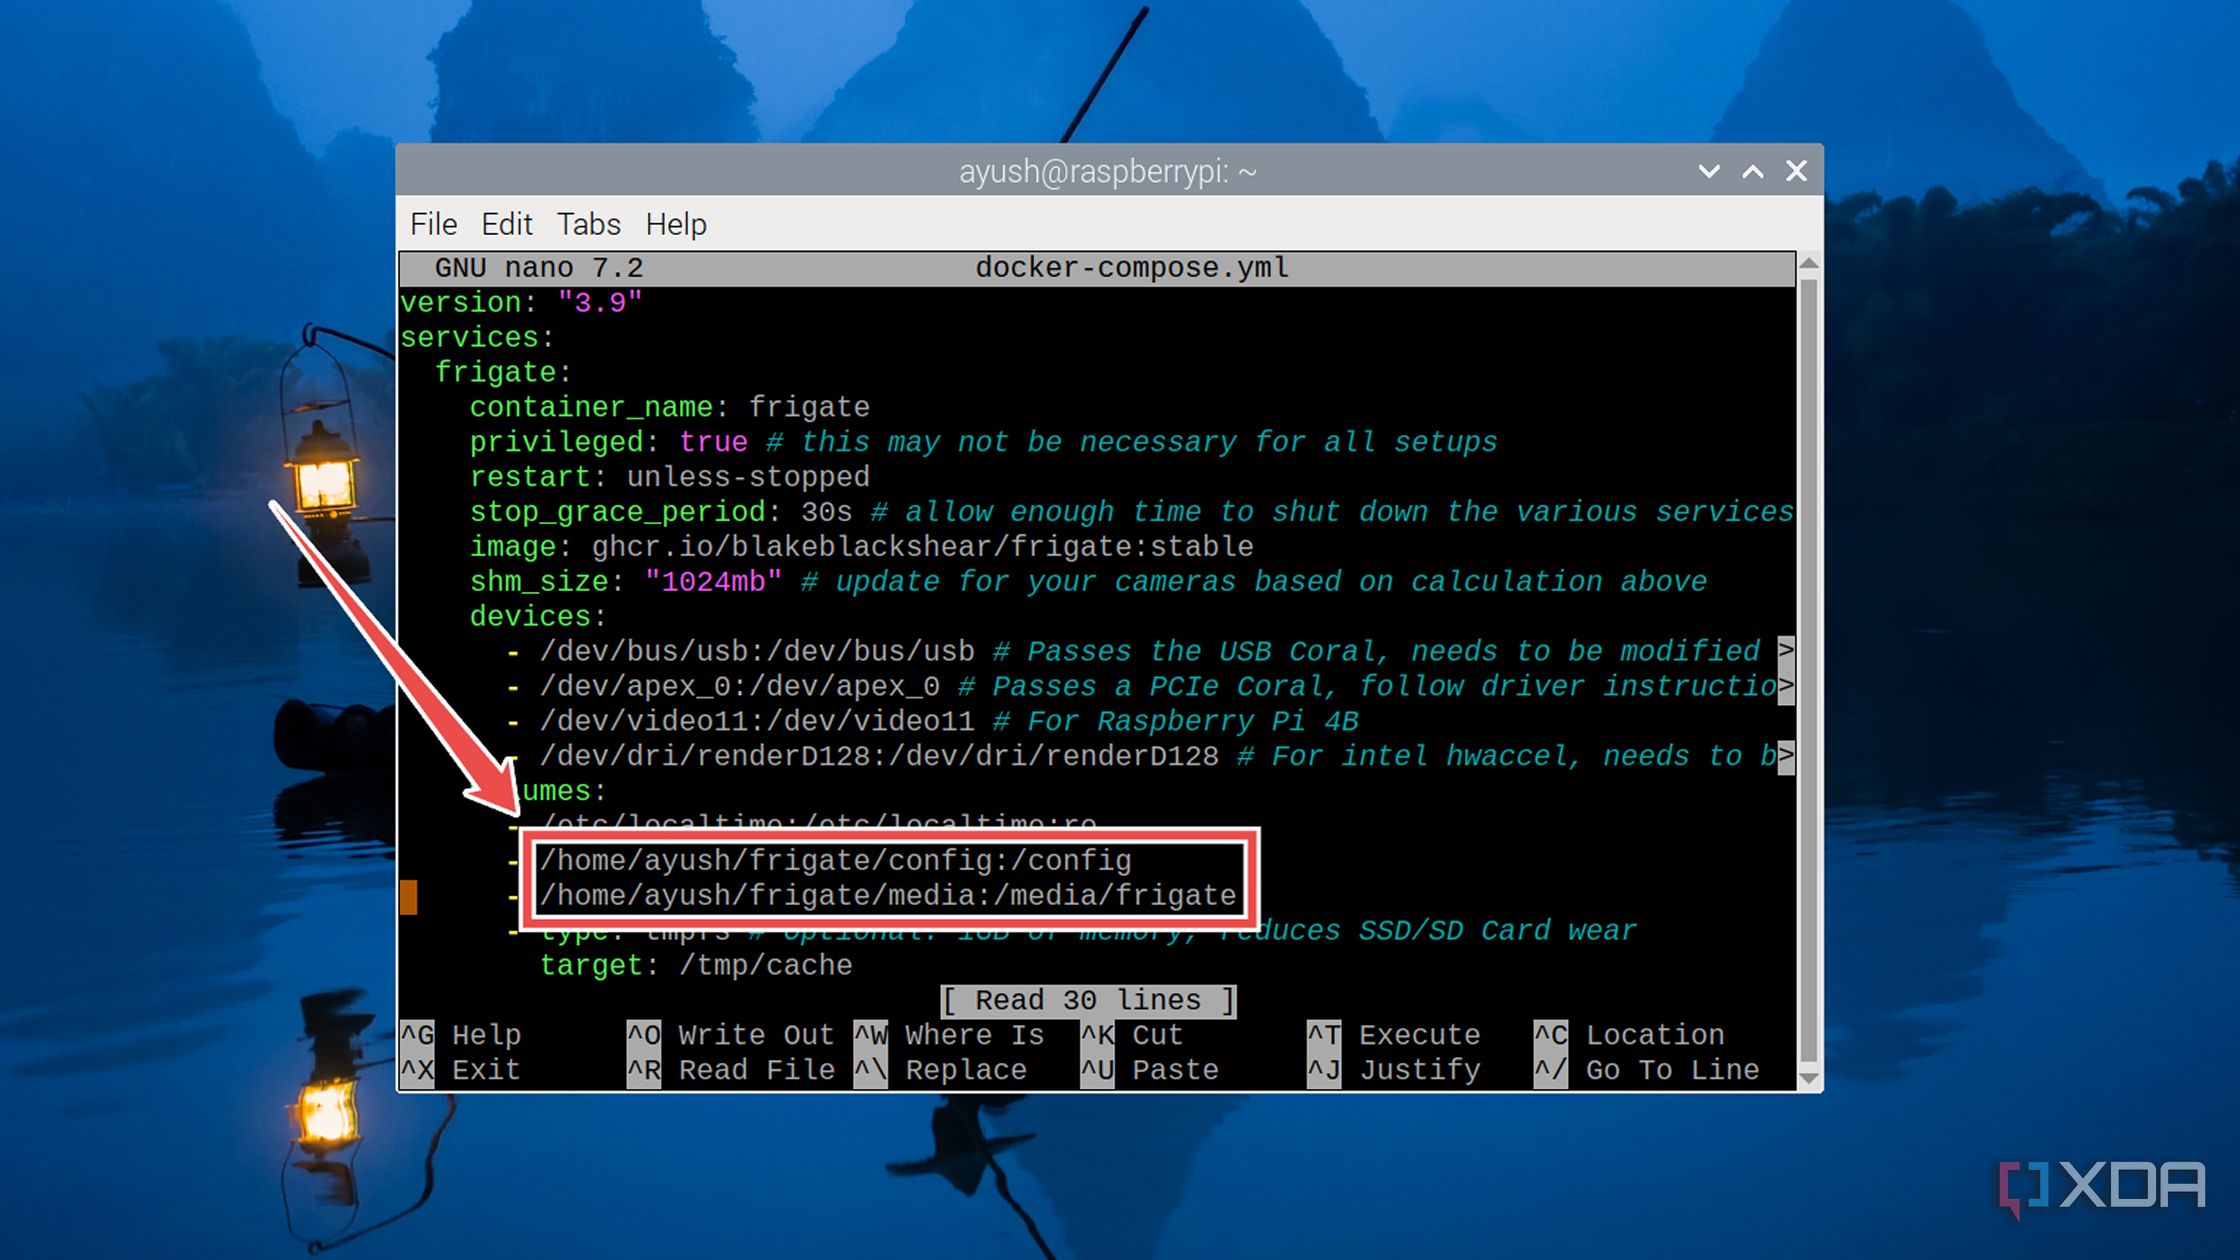
Modify the path variables of the config and media folders to actual directories on your Raspberry Pi.
-
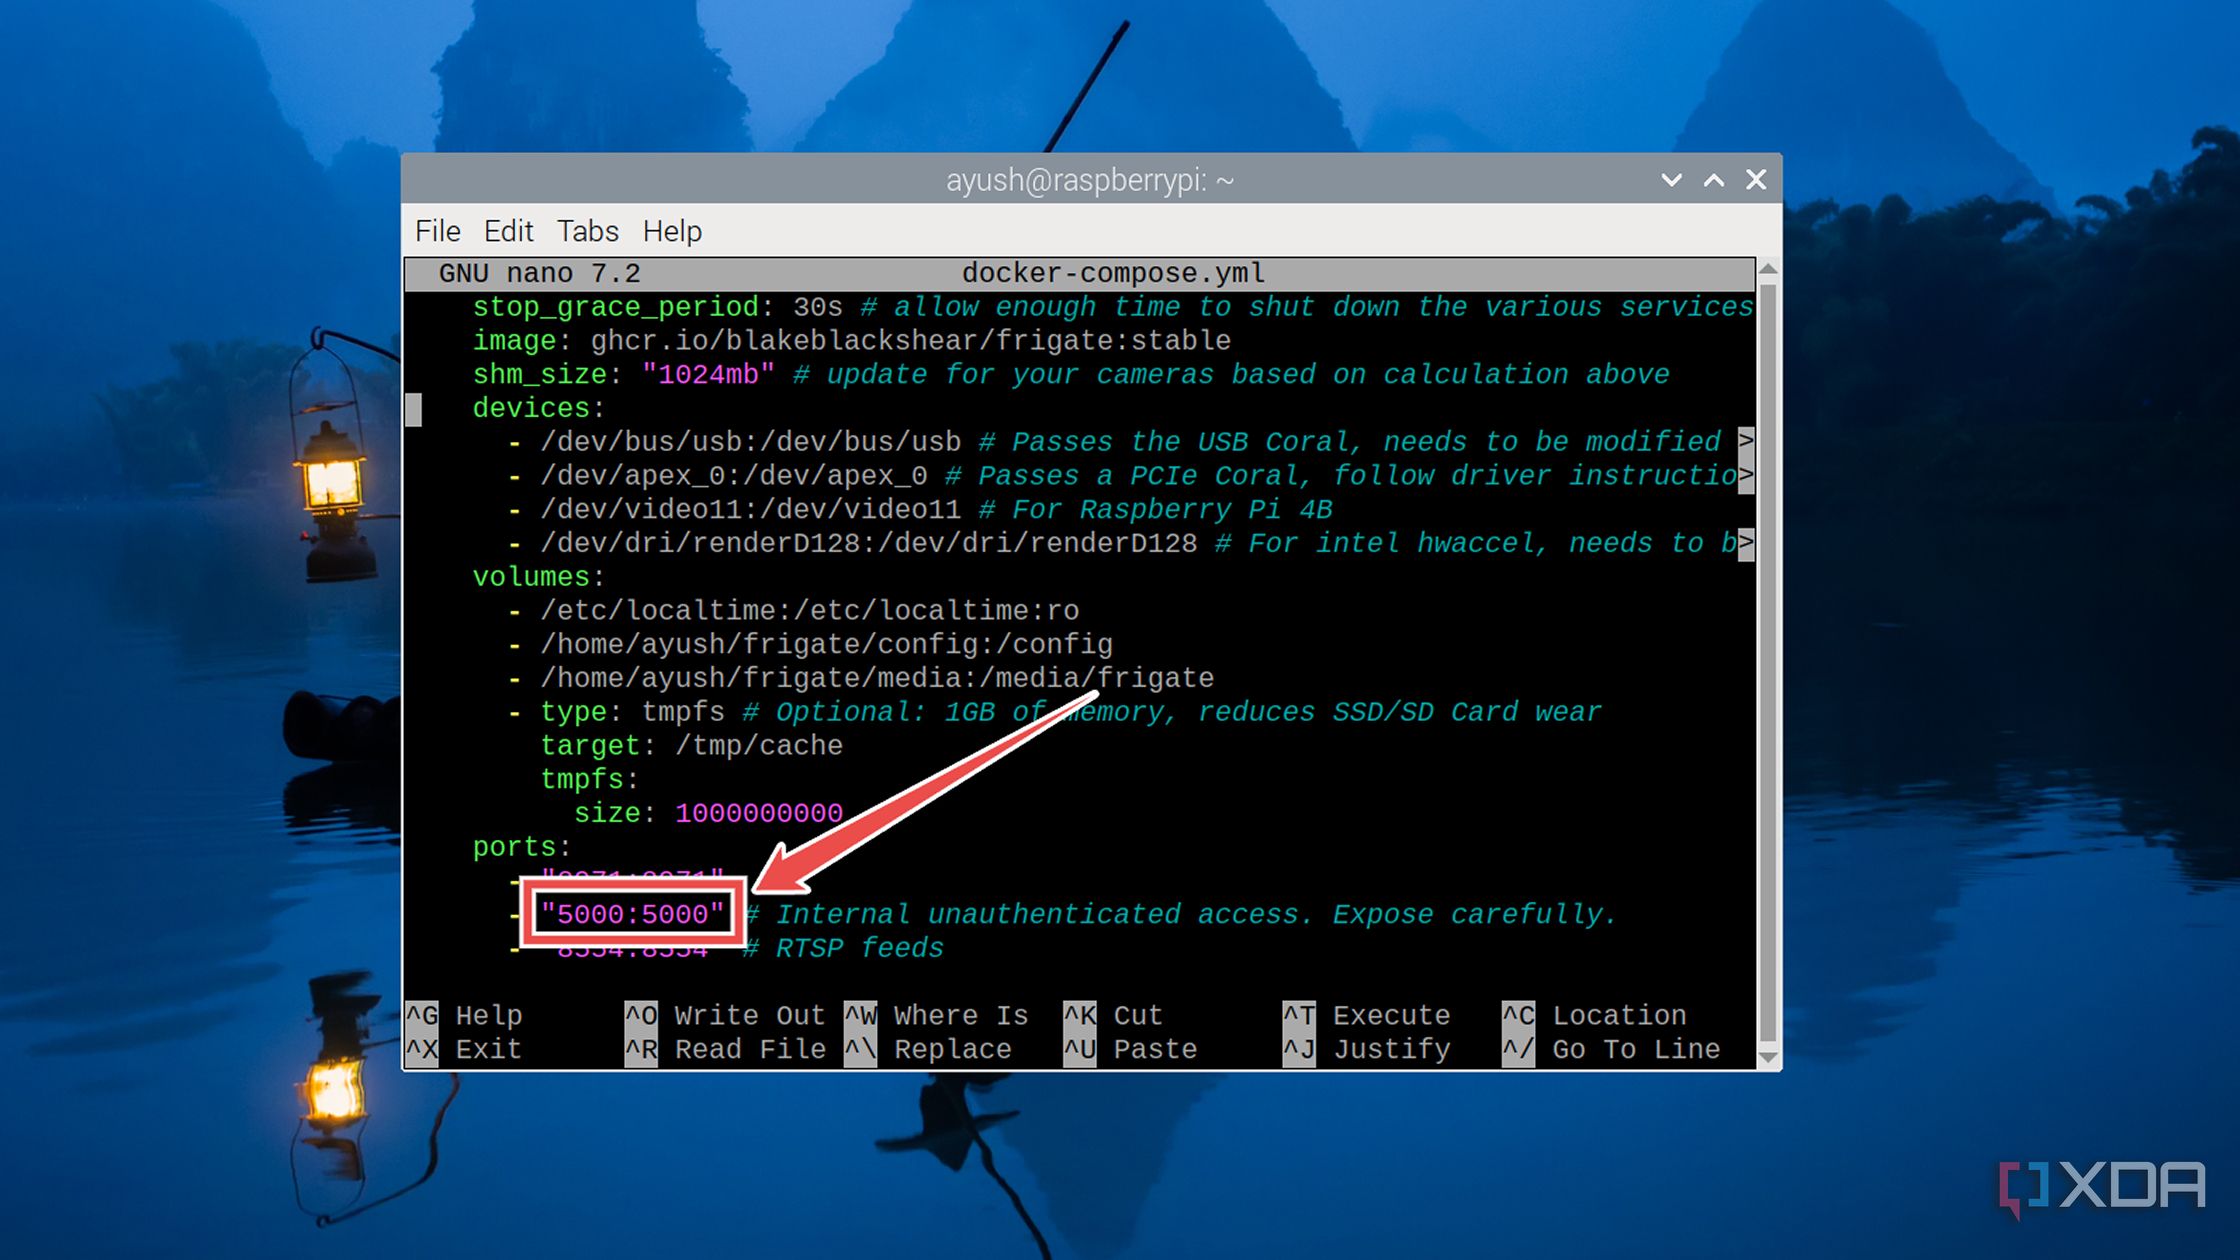
(Optional) Remove the # next to the 5000:5000 variable under the port section to make it easy for you to log into the Frigate UI later.
- Press Ctrl+X, followed by the Y, and Enter keys to save and exit the config file.
-
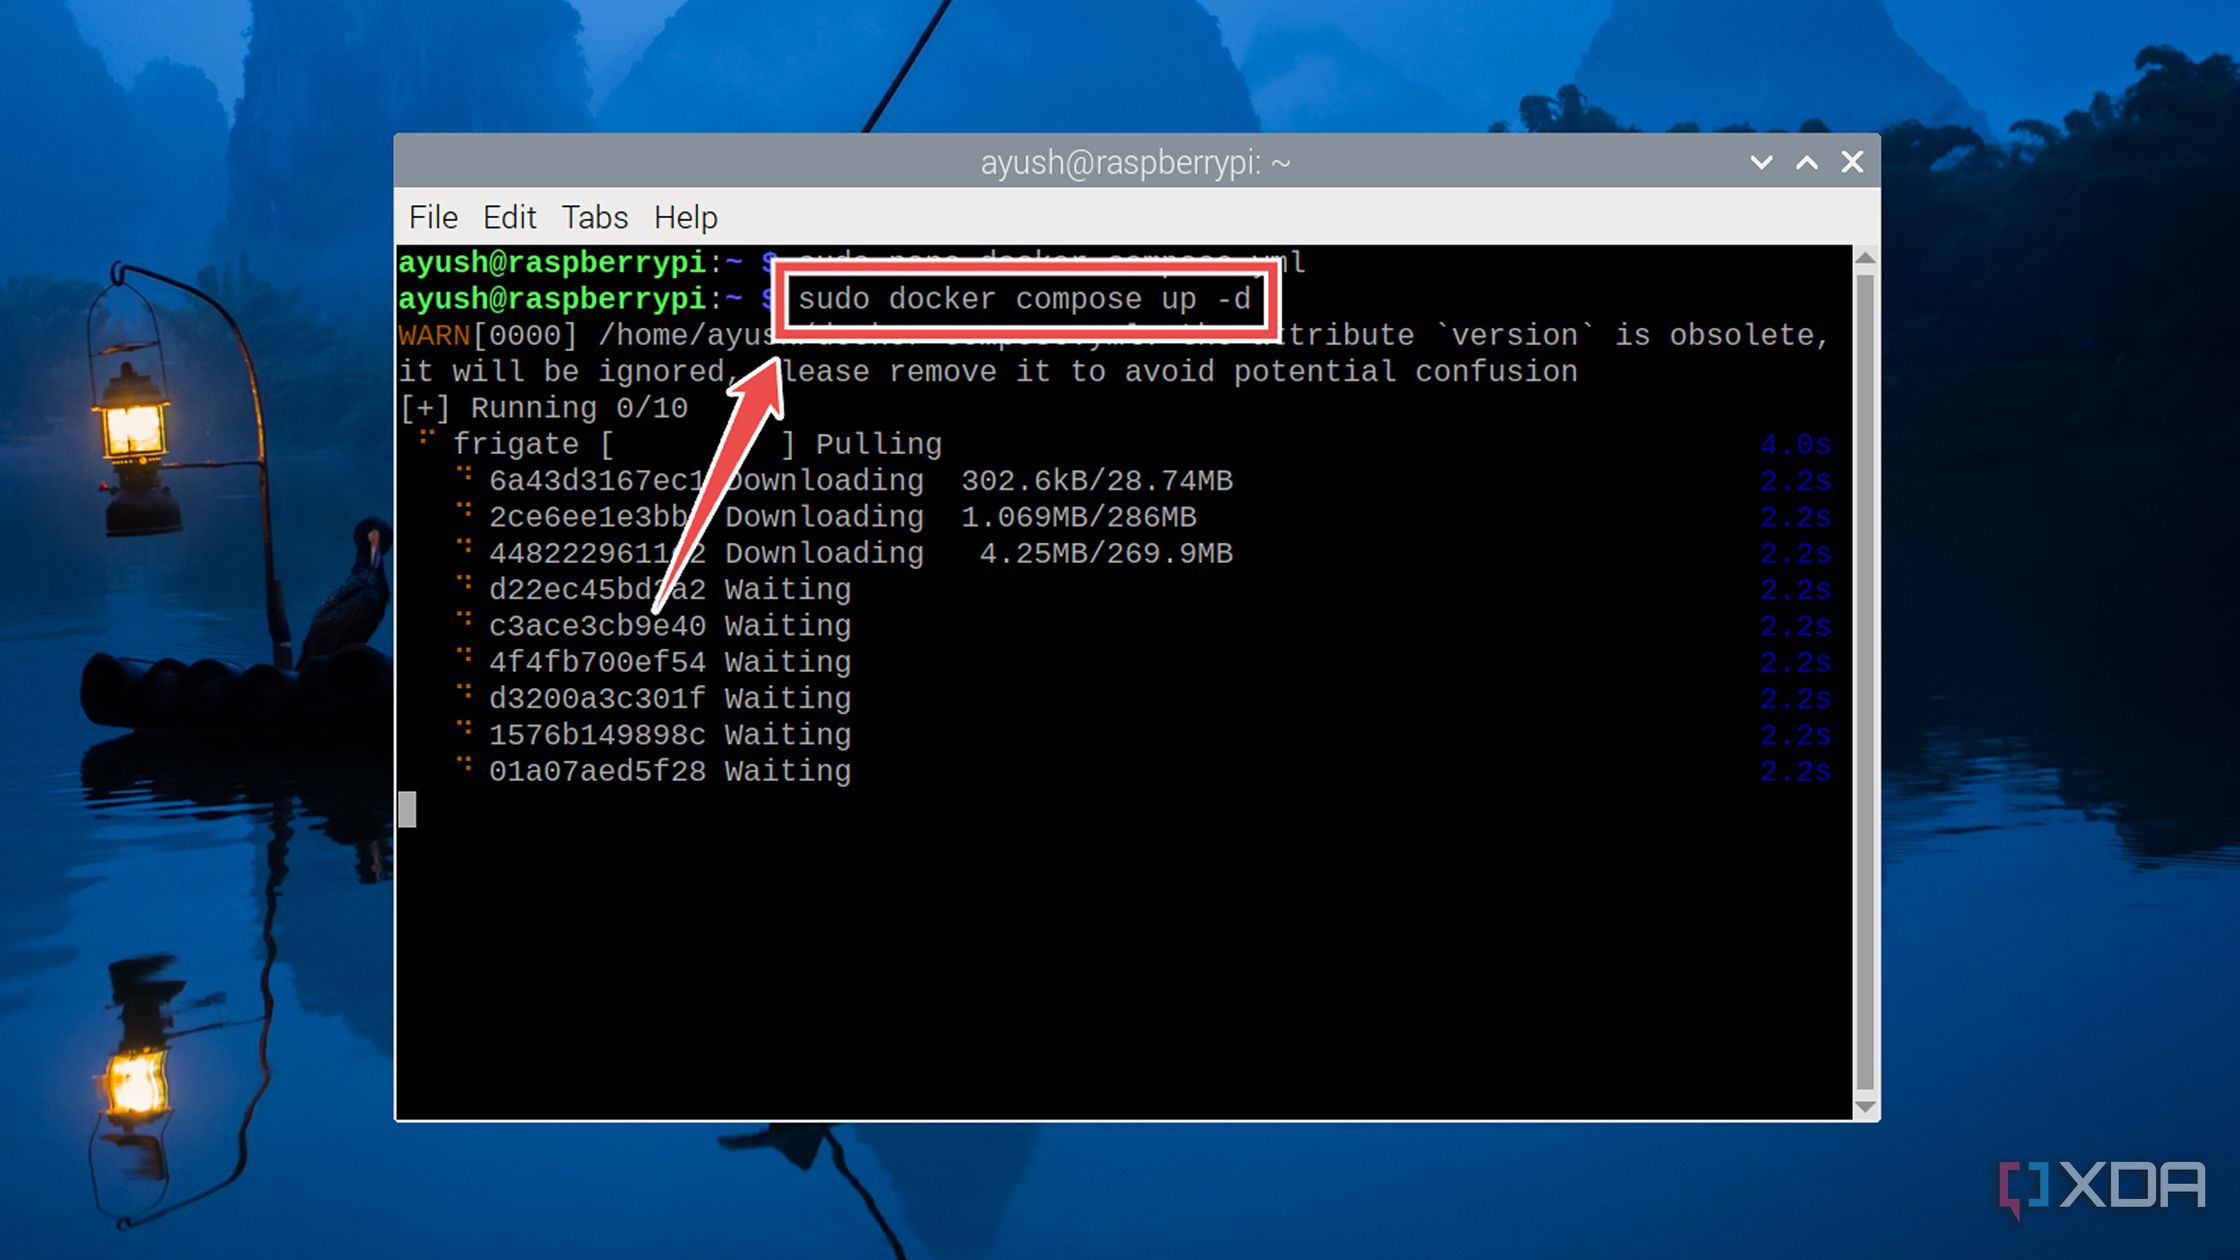
Execute the docker compose up command and wait for Docker to whip out its container:
sudo docker compose up -d


Accessing the Frigate web UI
With the Frigate server up and running, you’ll have to configure the rest of the settings inside its web interface. Assuming you’ve enabled the unsecured port 5000 inside the docker-compose.yml file,
- Type http:// followed by the IP address of your Raspberry Pi, a colon (:), and port 5000 into a web browser.
-
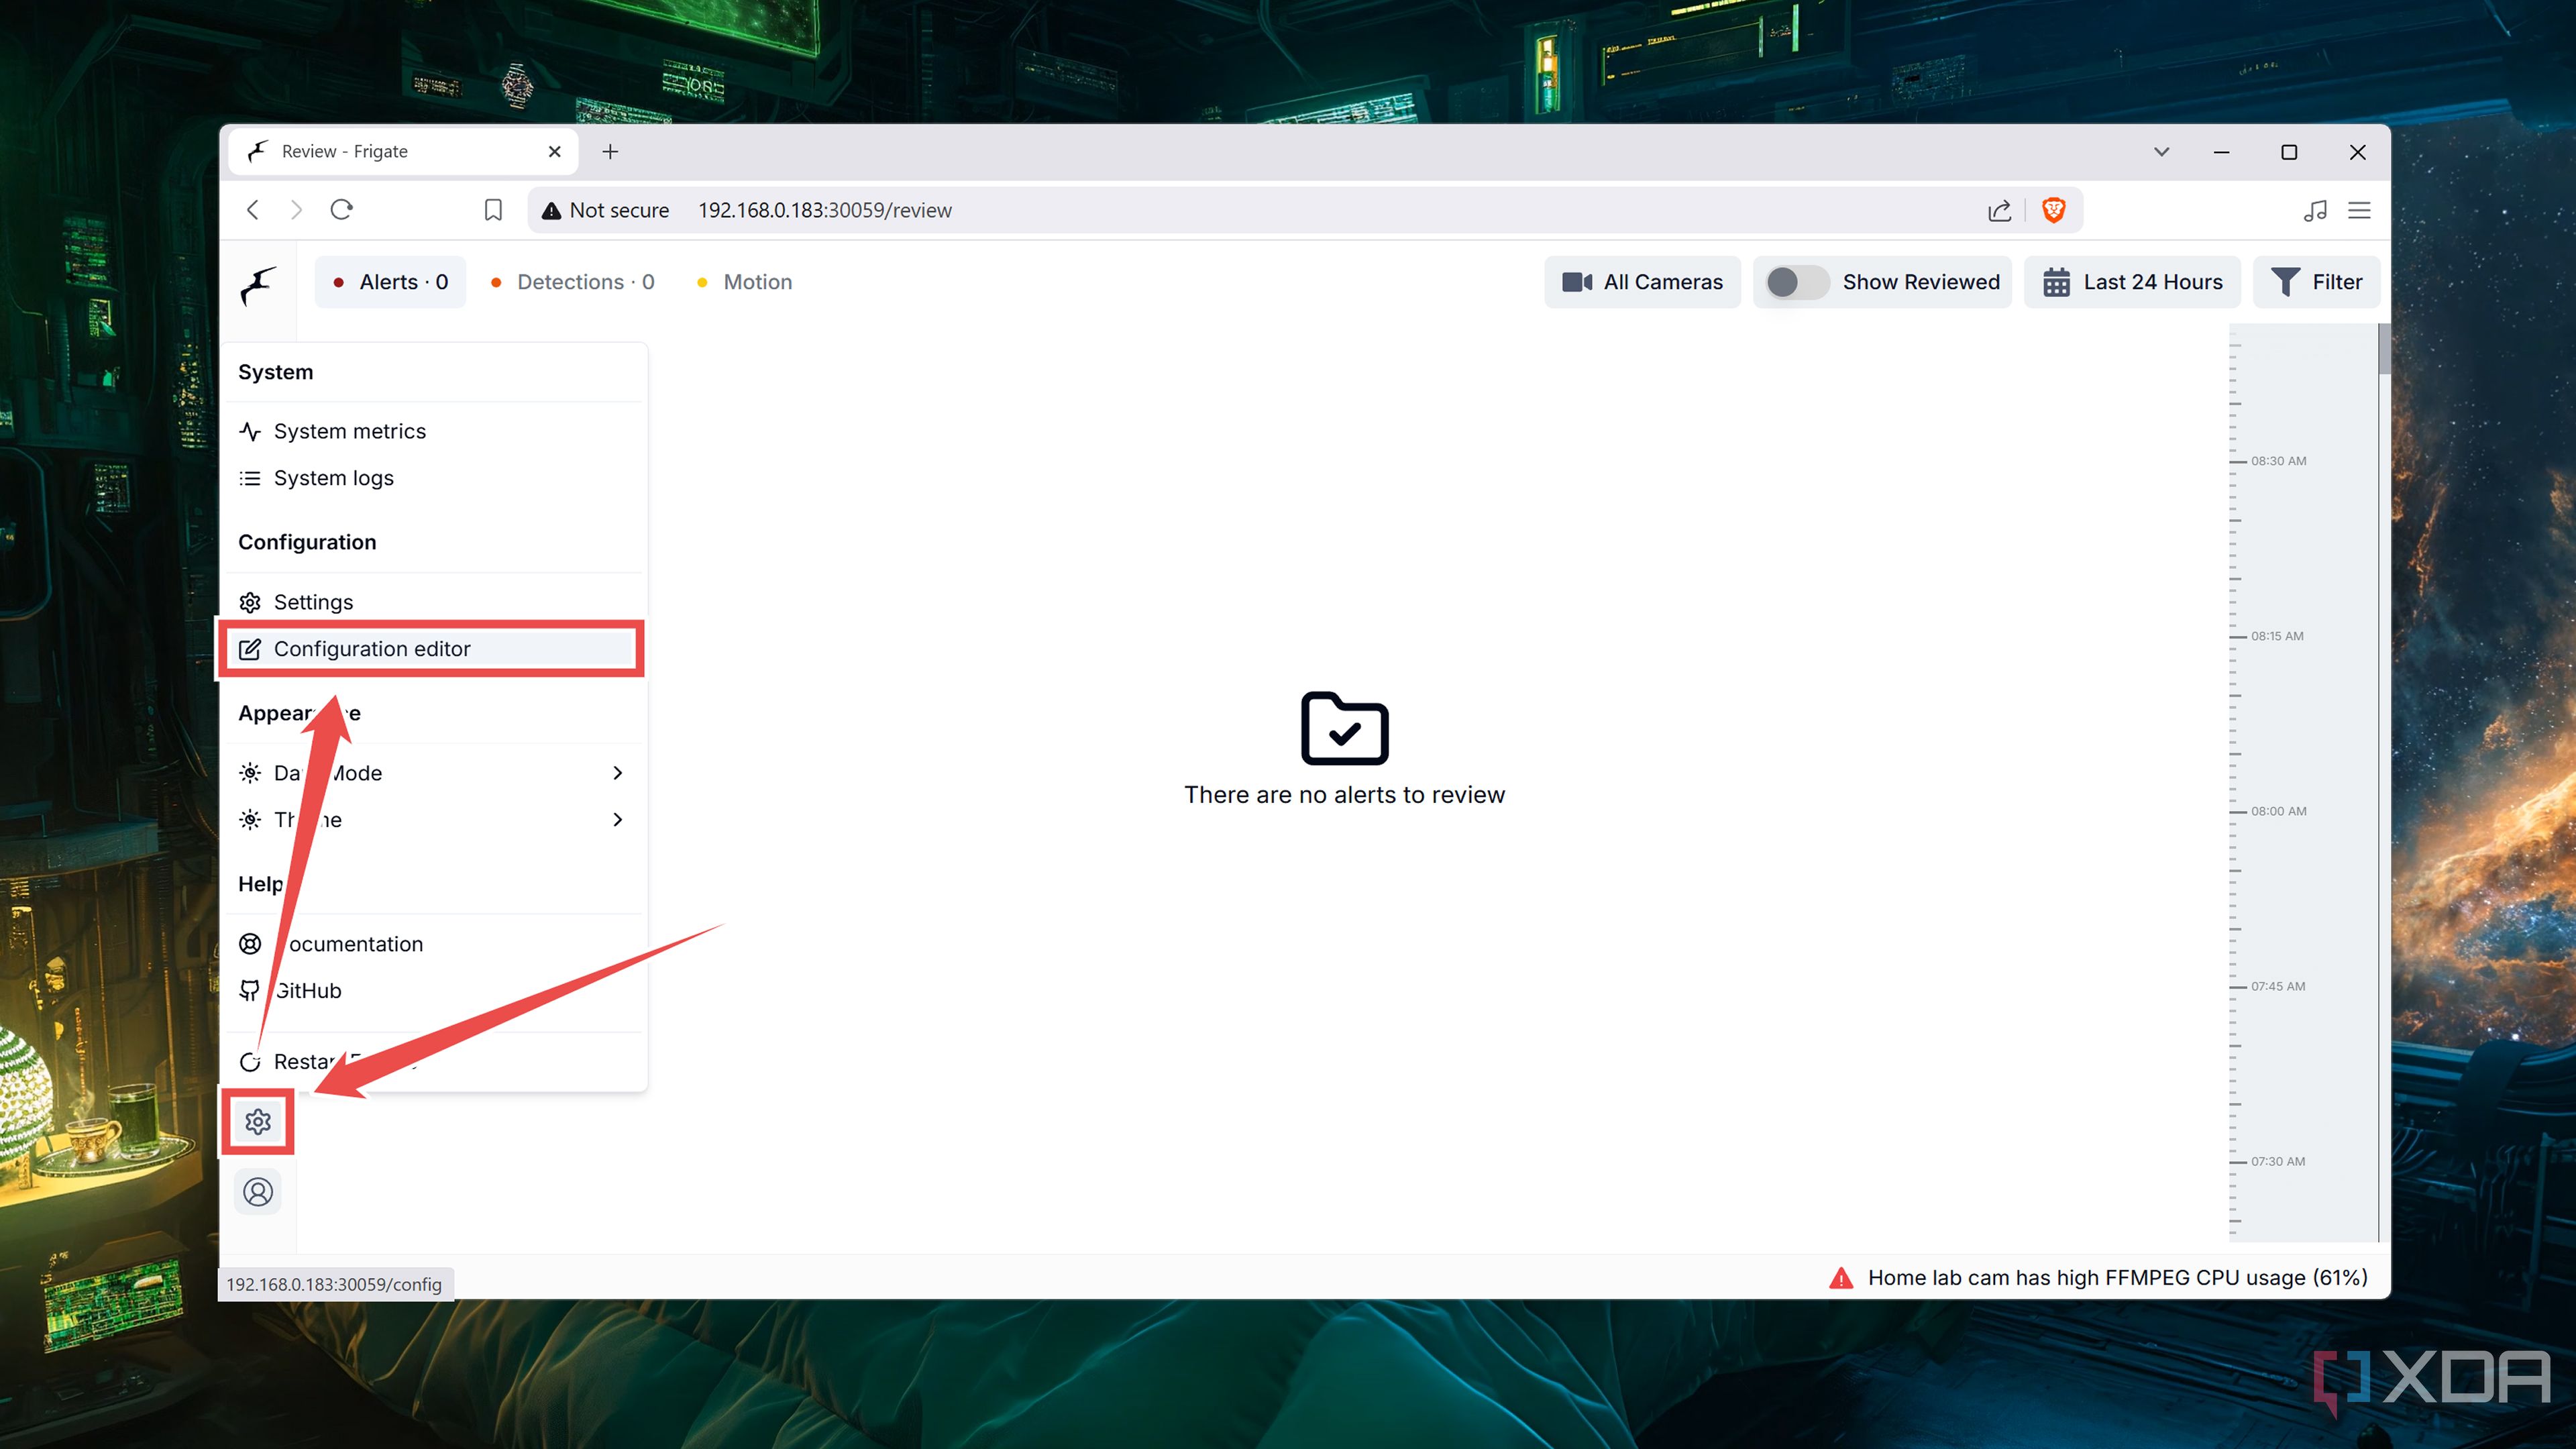
Press the cog icon and choose Configuration Editor.
-
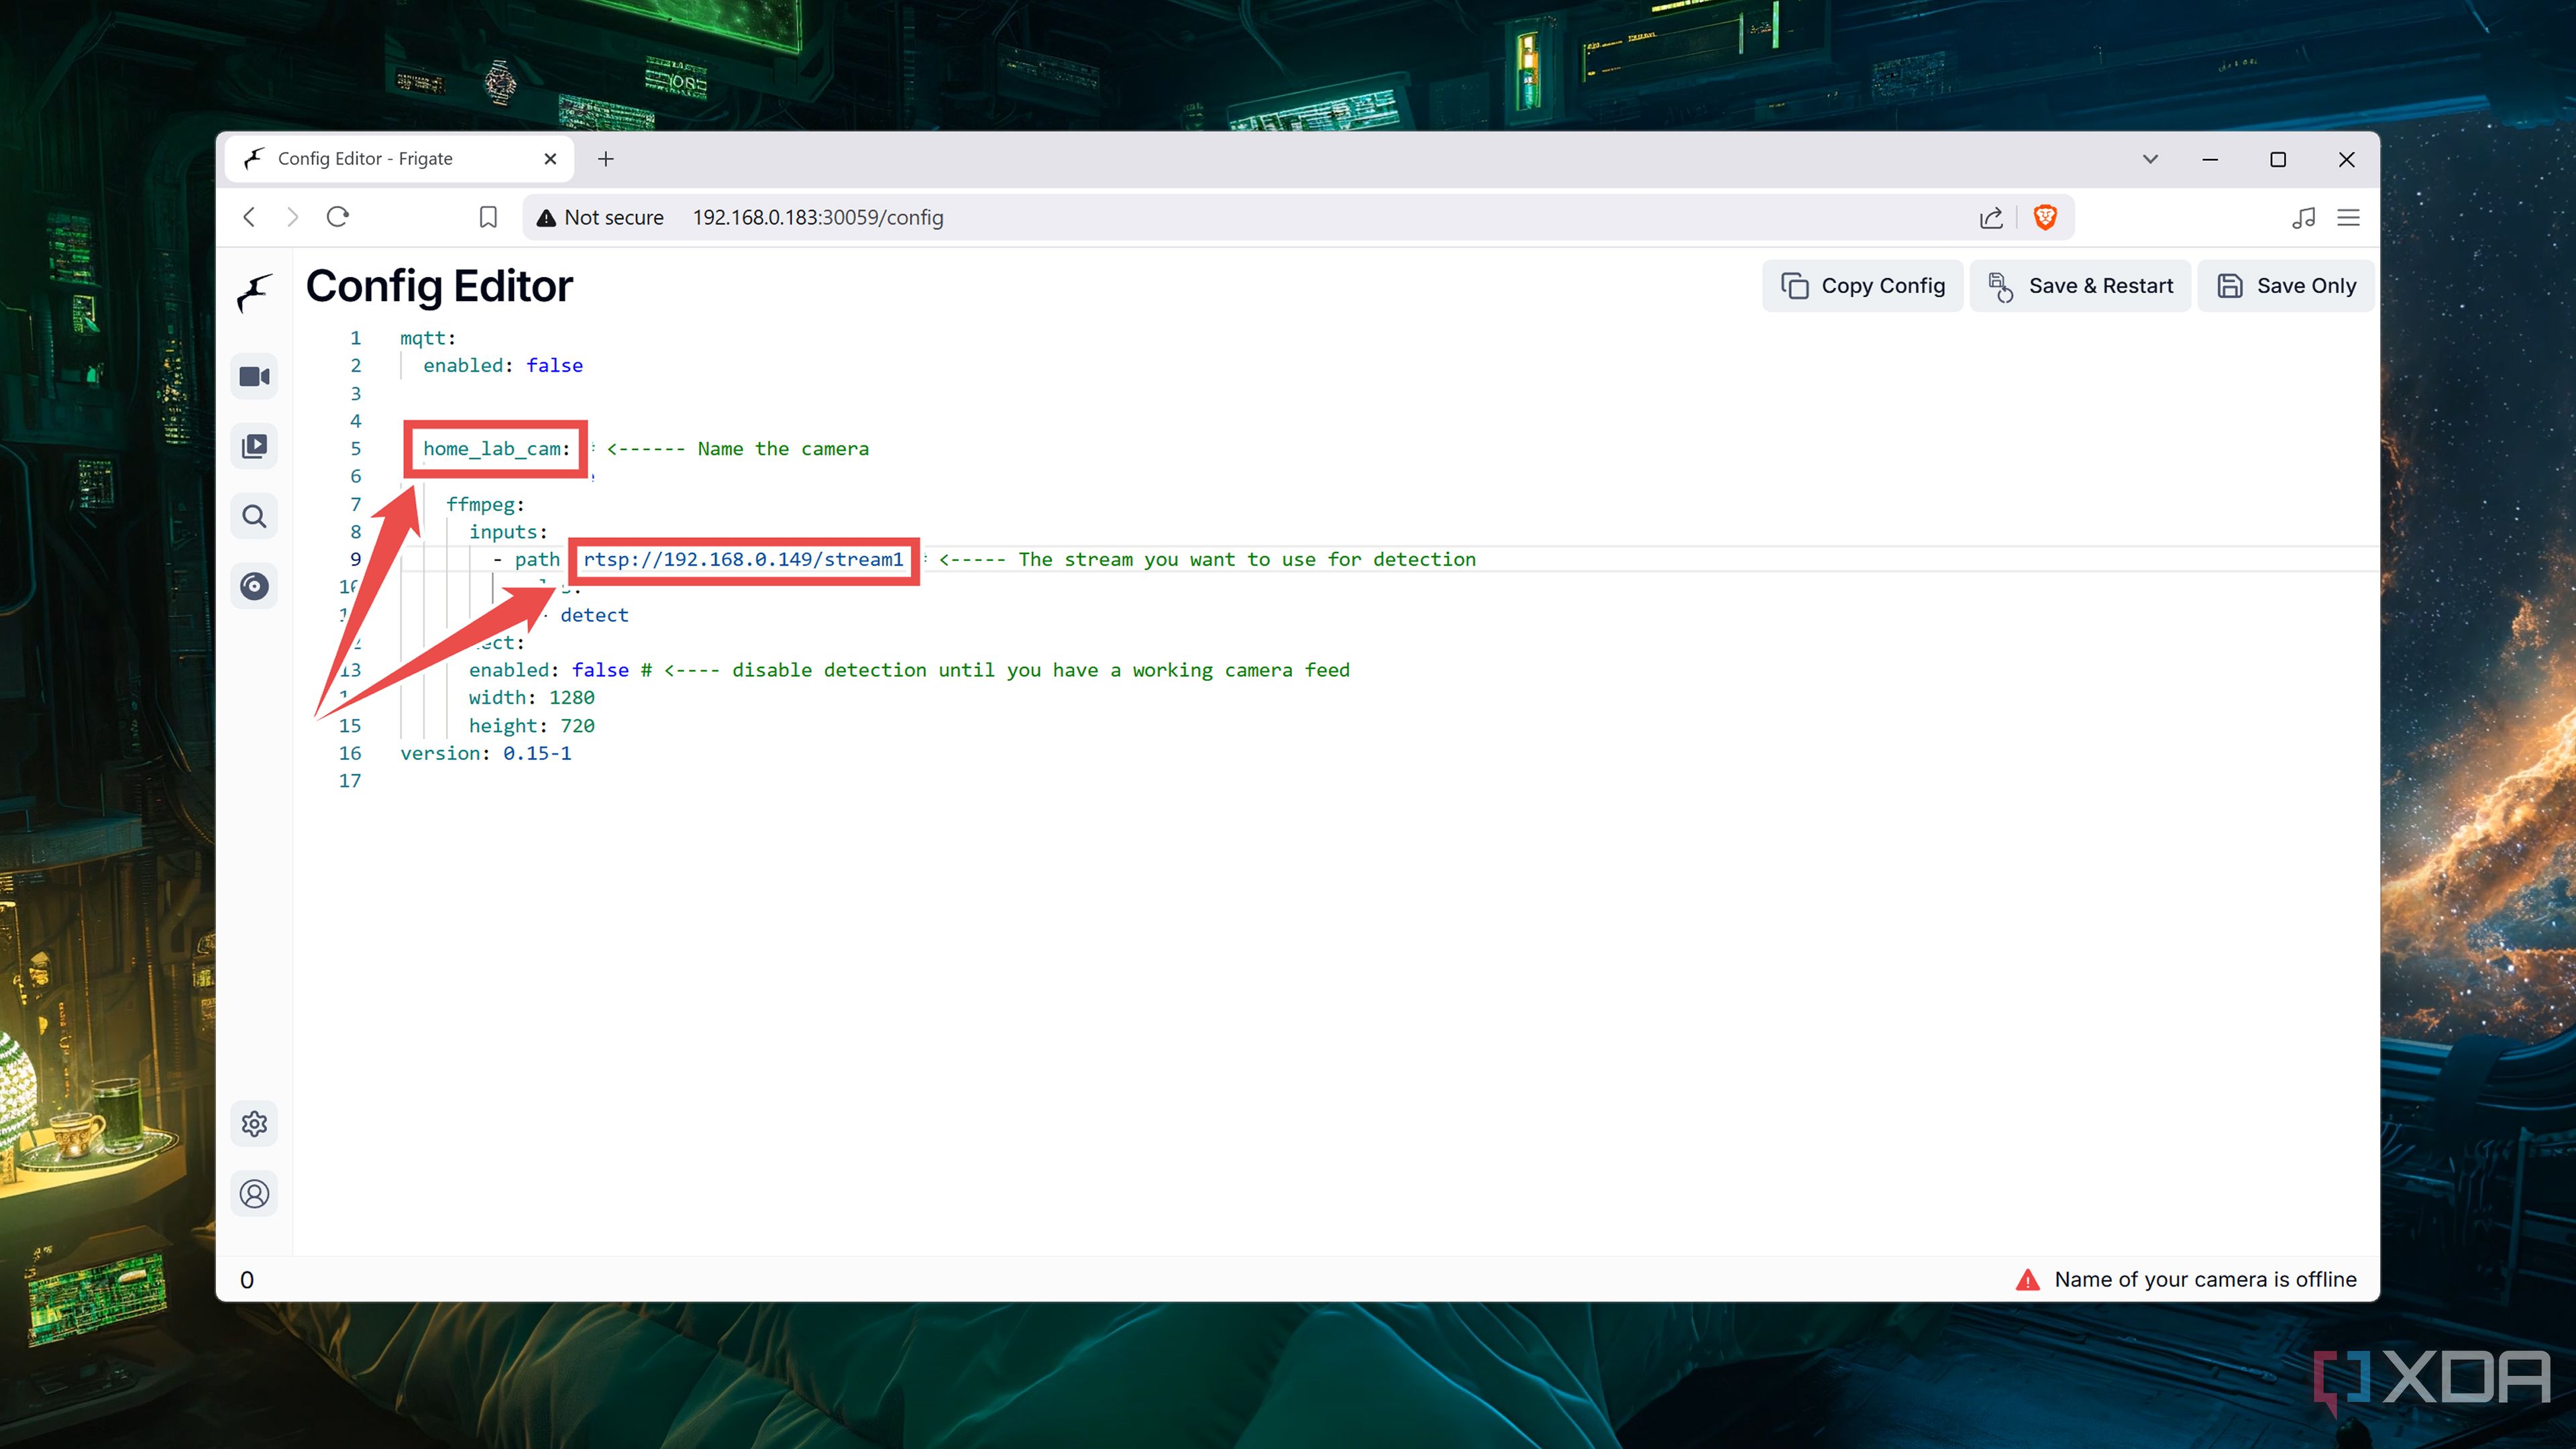
Replace the Name_of_your_camera variable with the name of your IP camera before adding its RTSP address as the path.
-
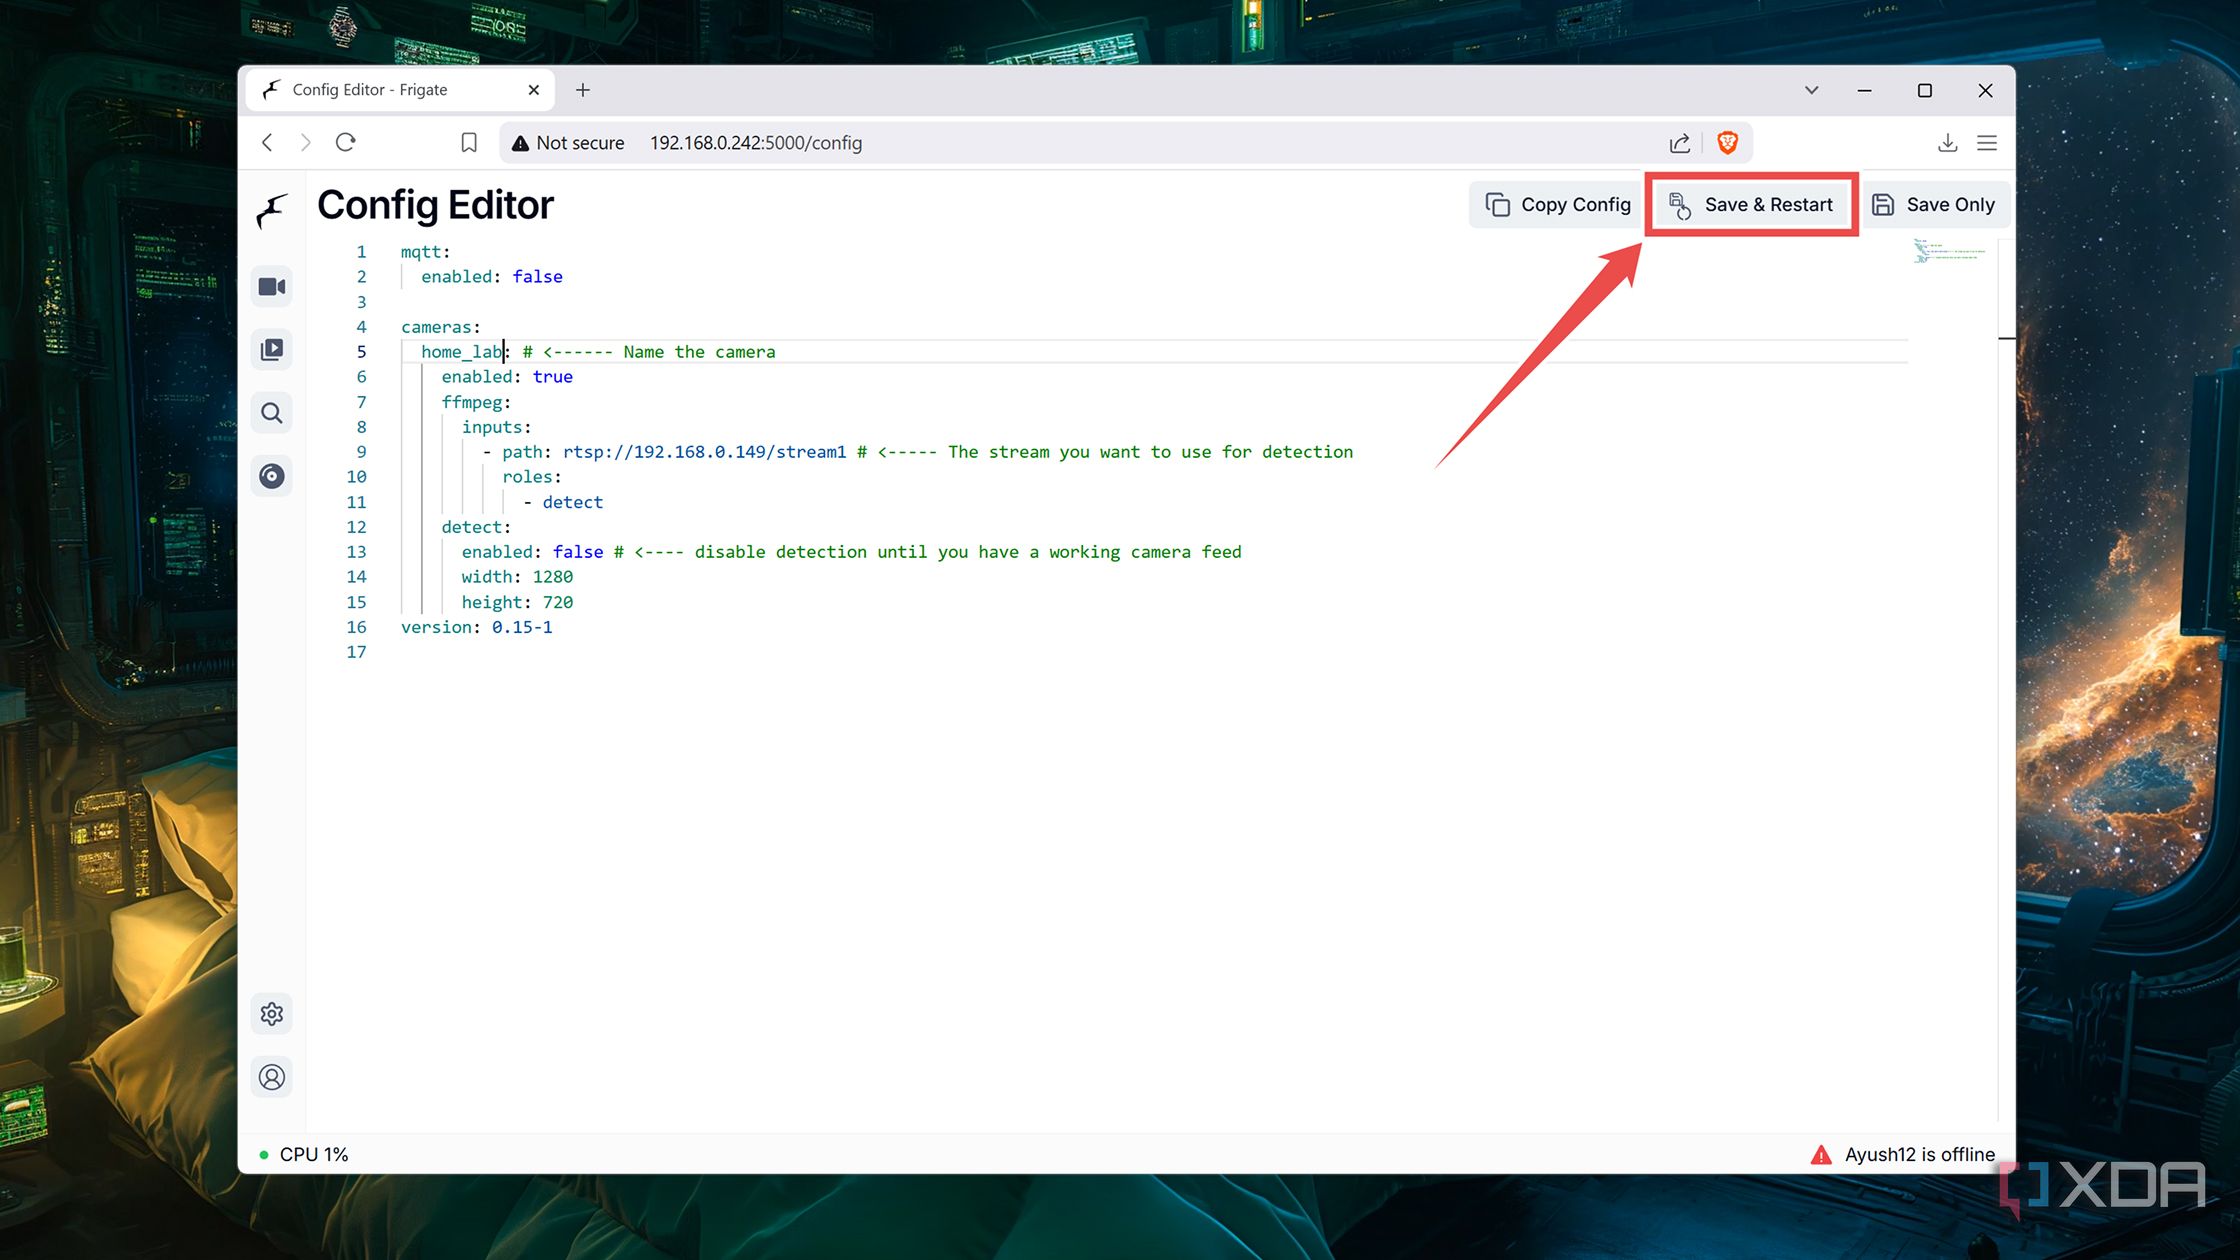
Remember to Save & Restart your Frigate container.
-
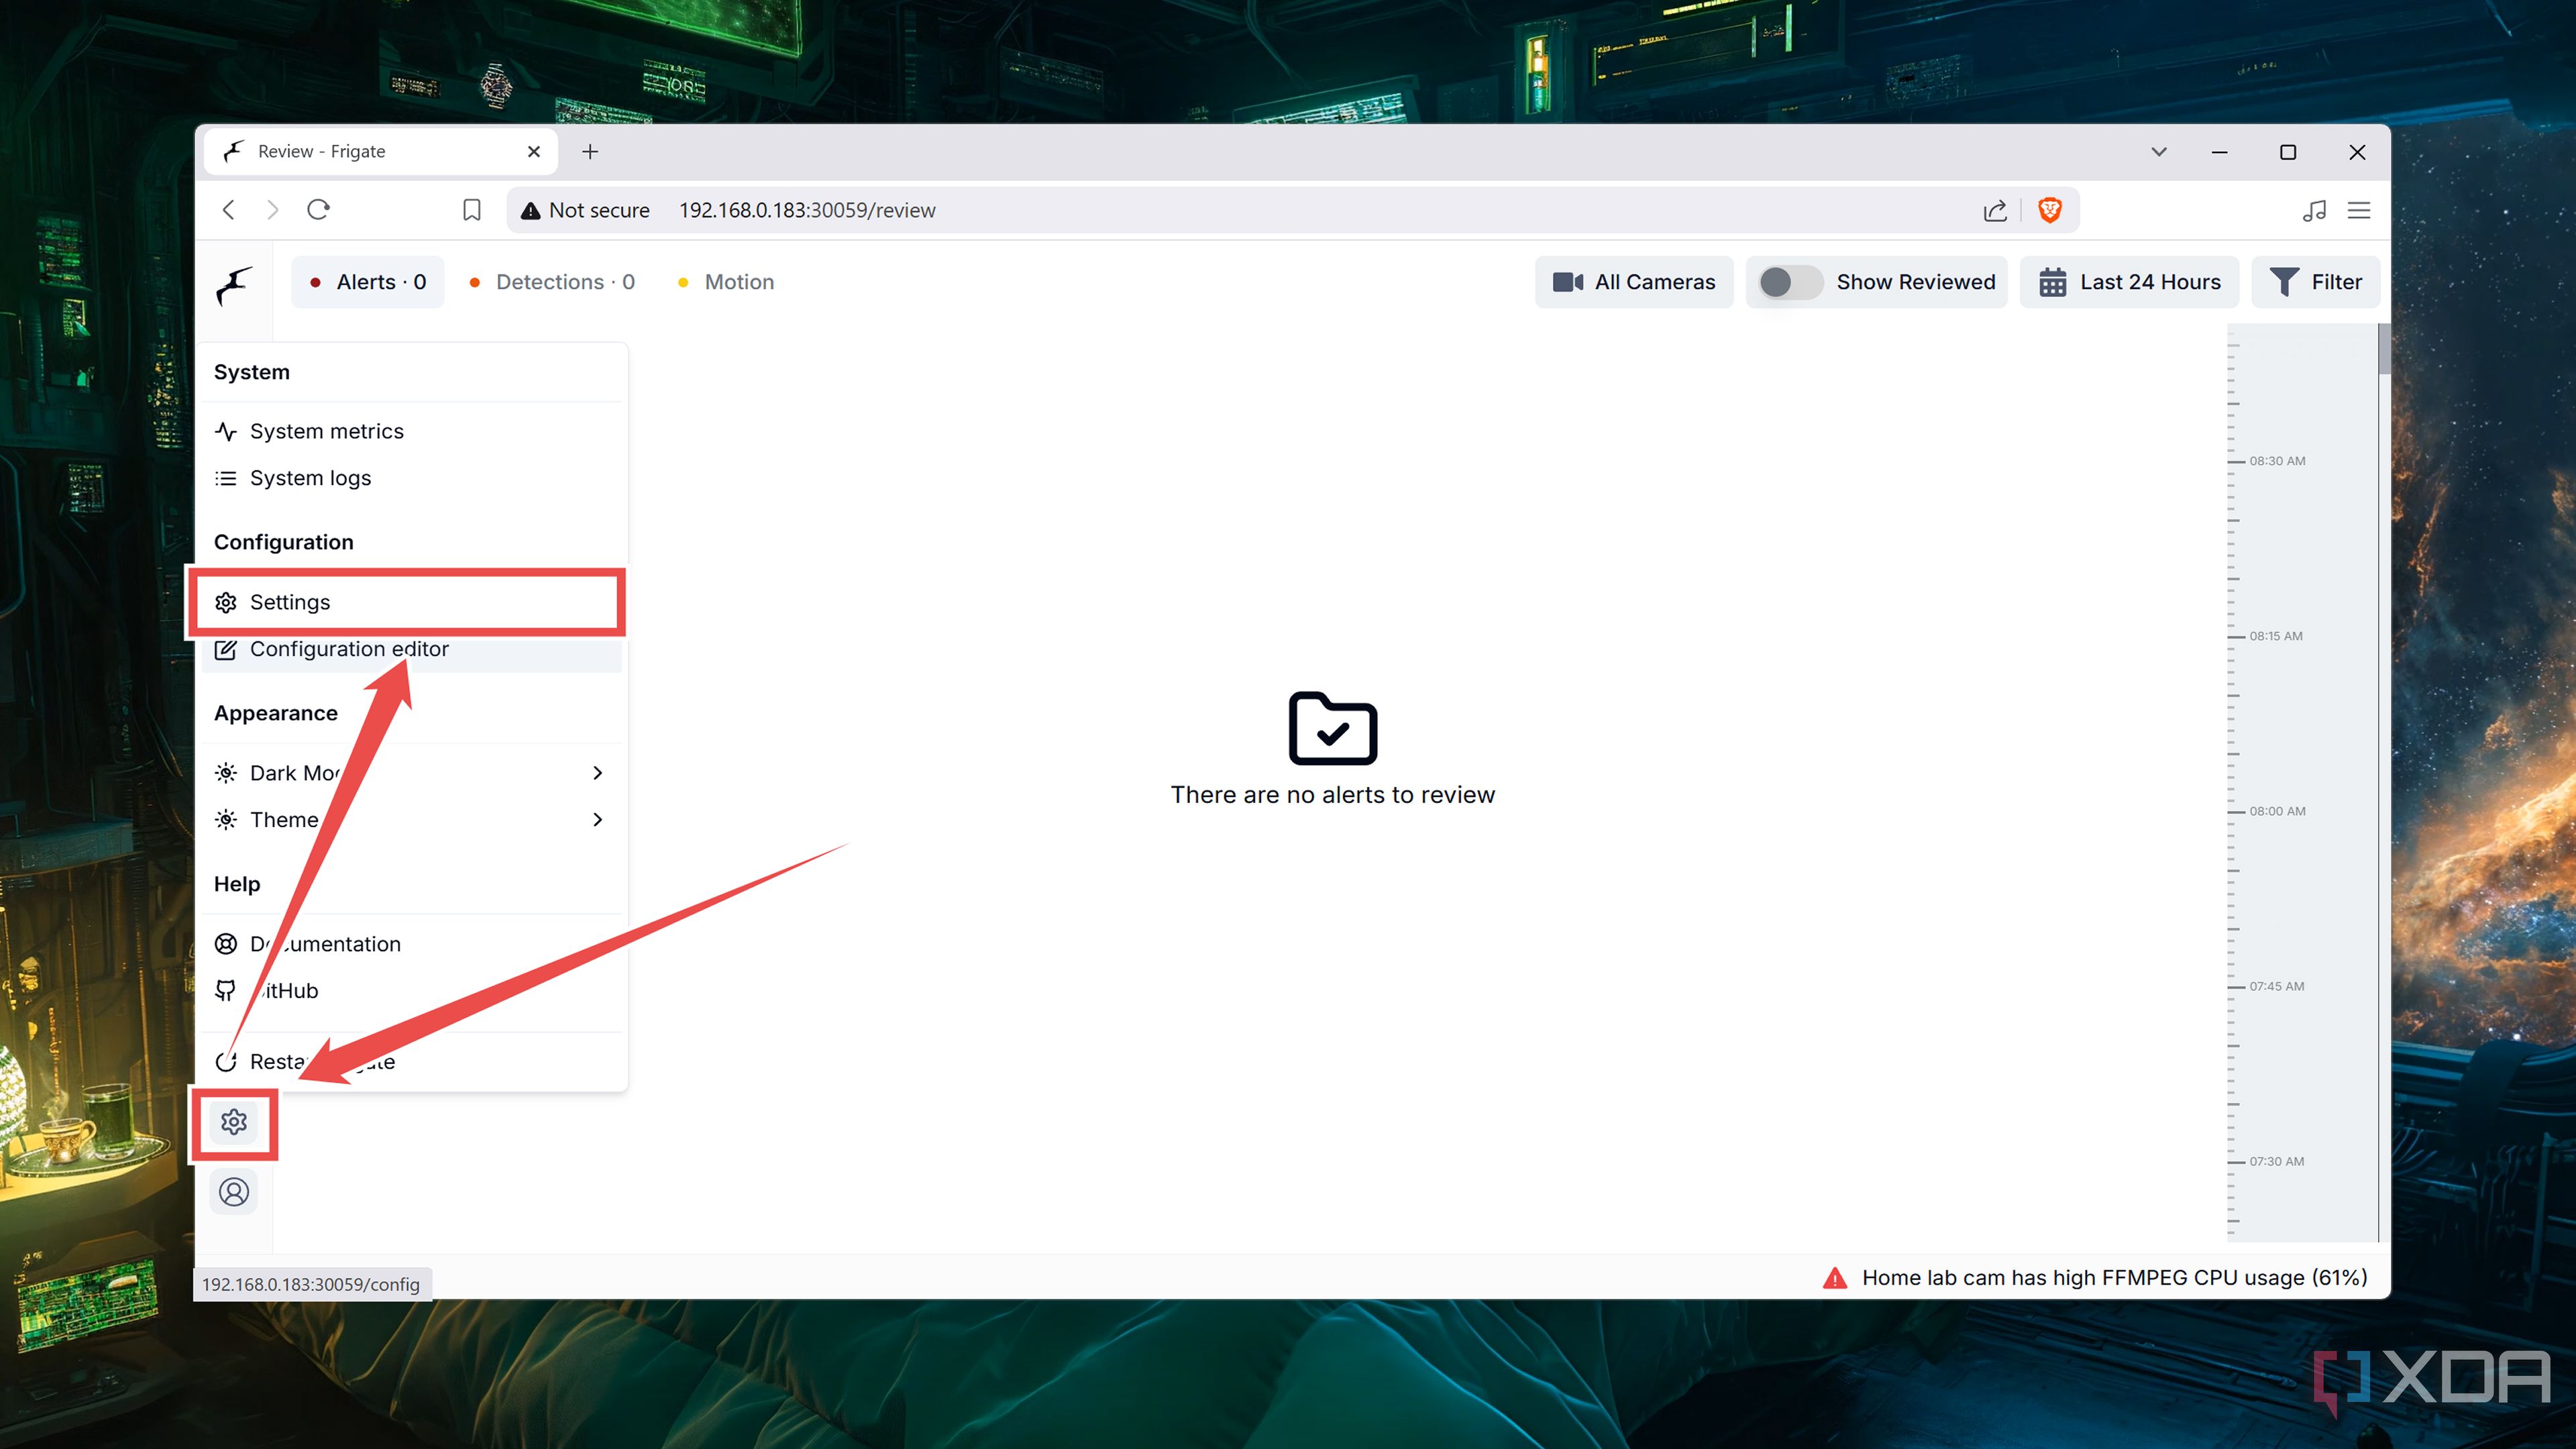
When the container restarts with the new config, click on the cog icon and pick Settings.
-
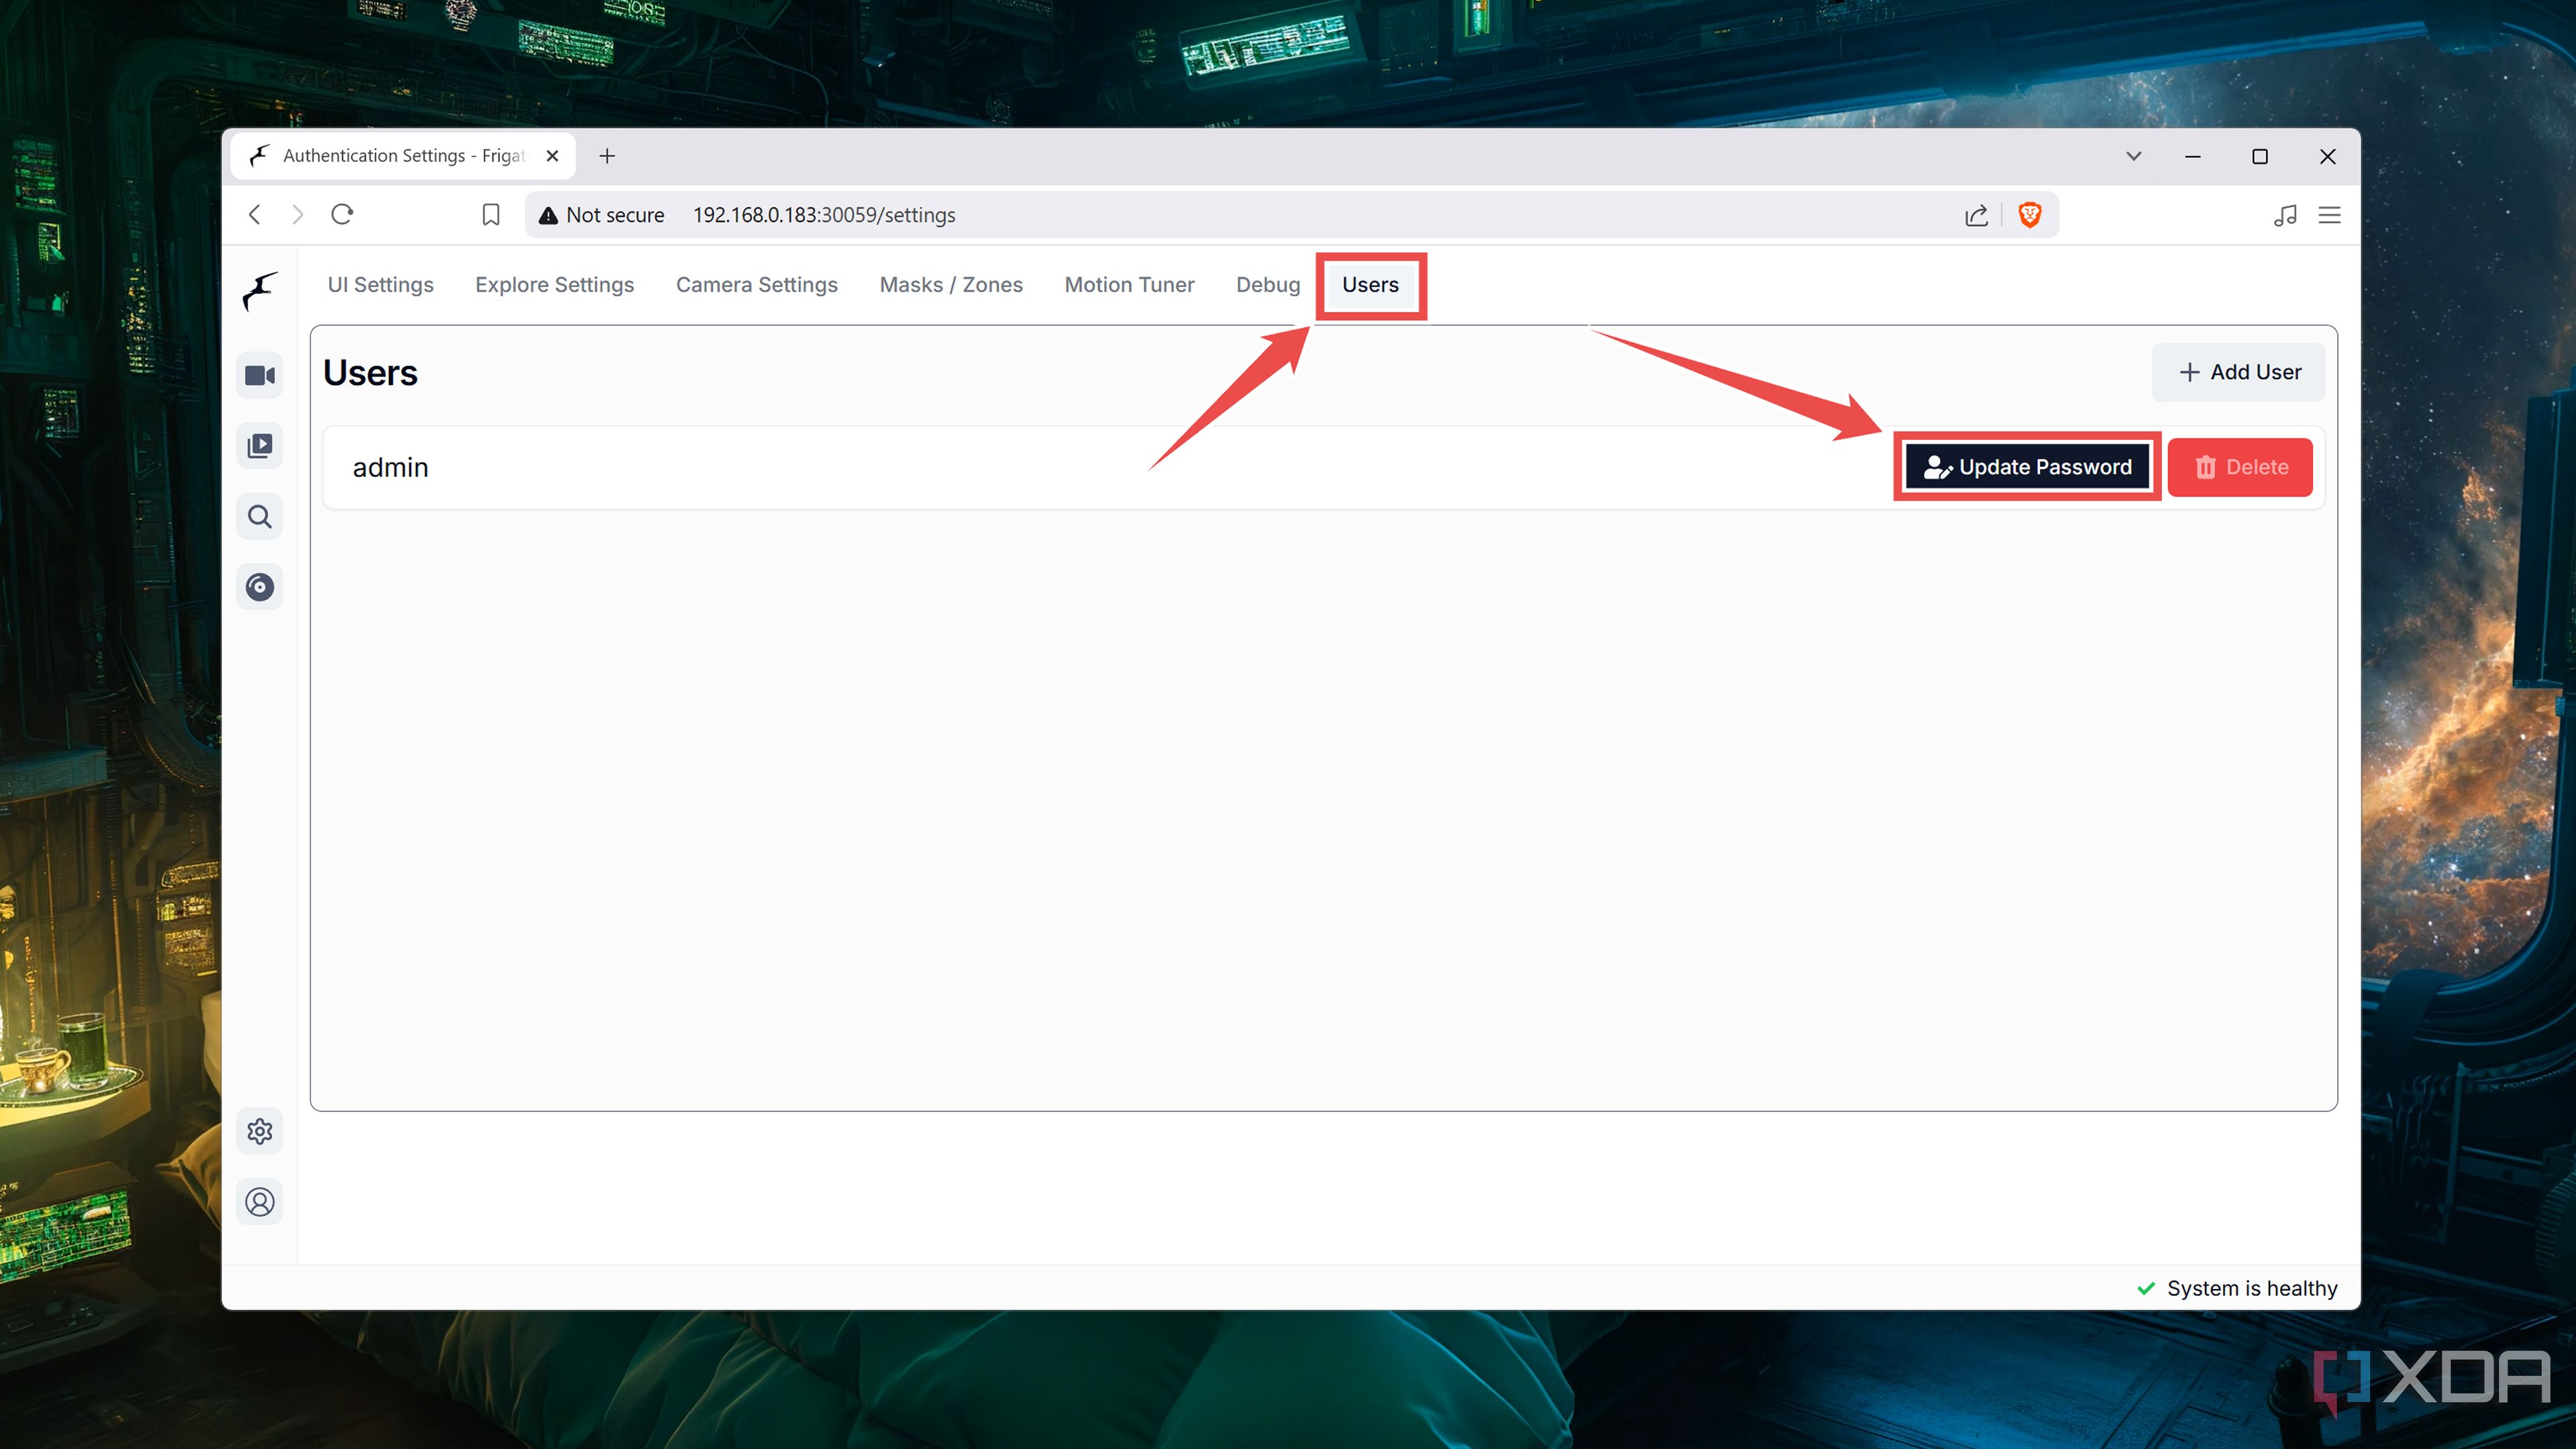
Switch to the Users tab and hit Update Password.
-
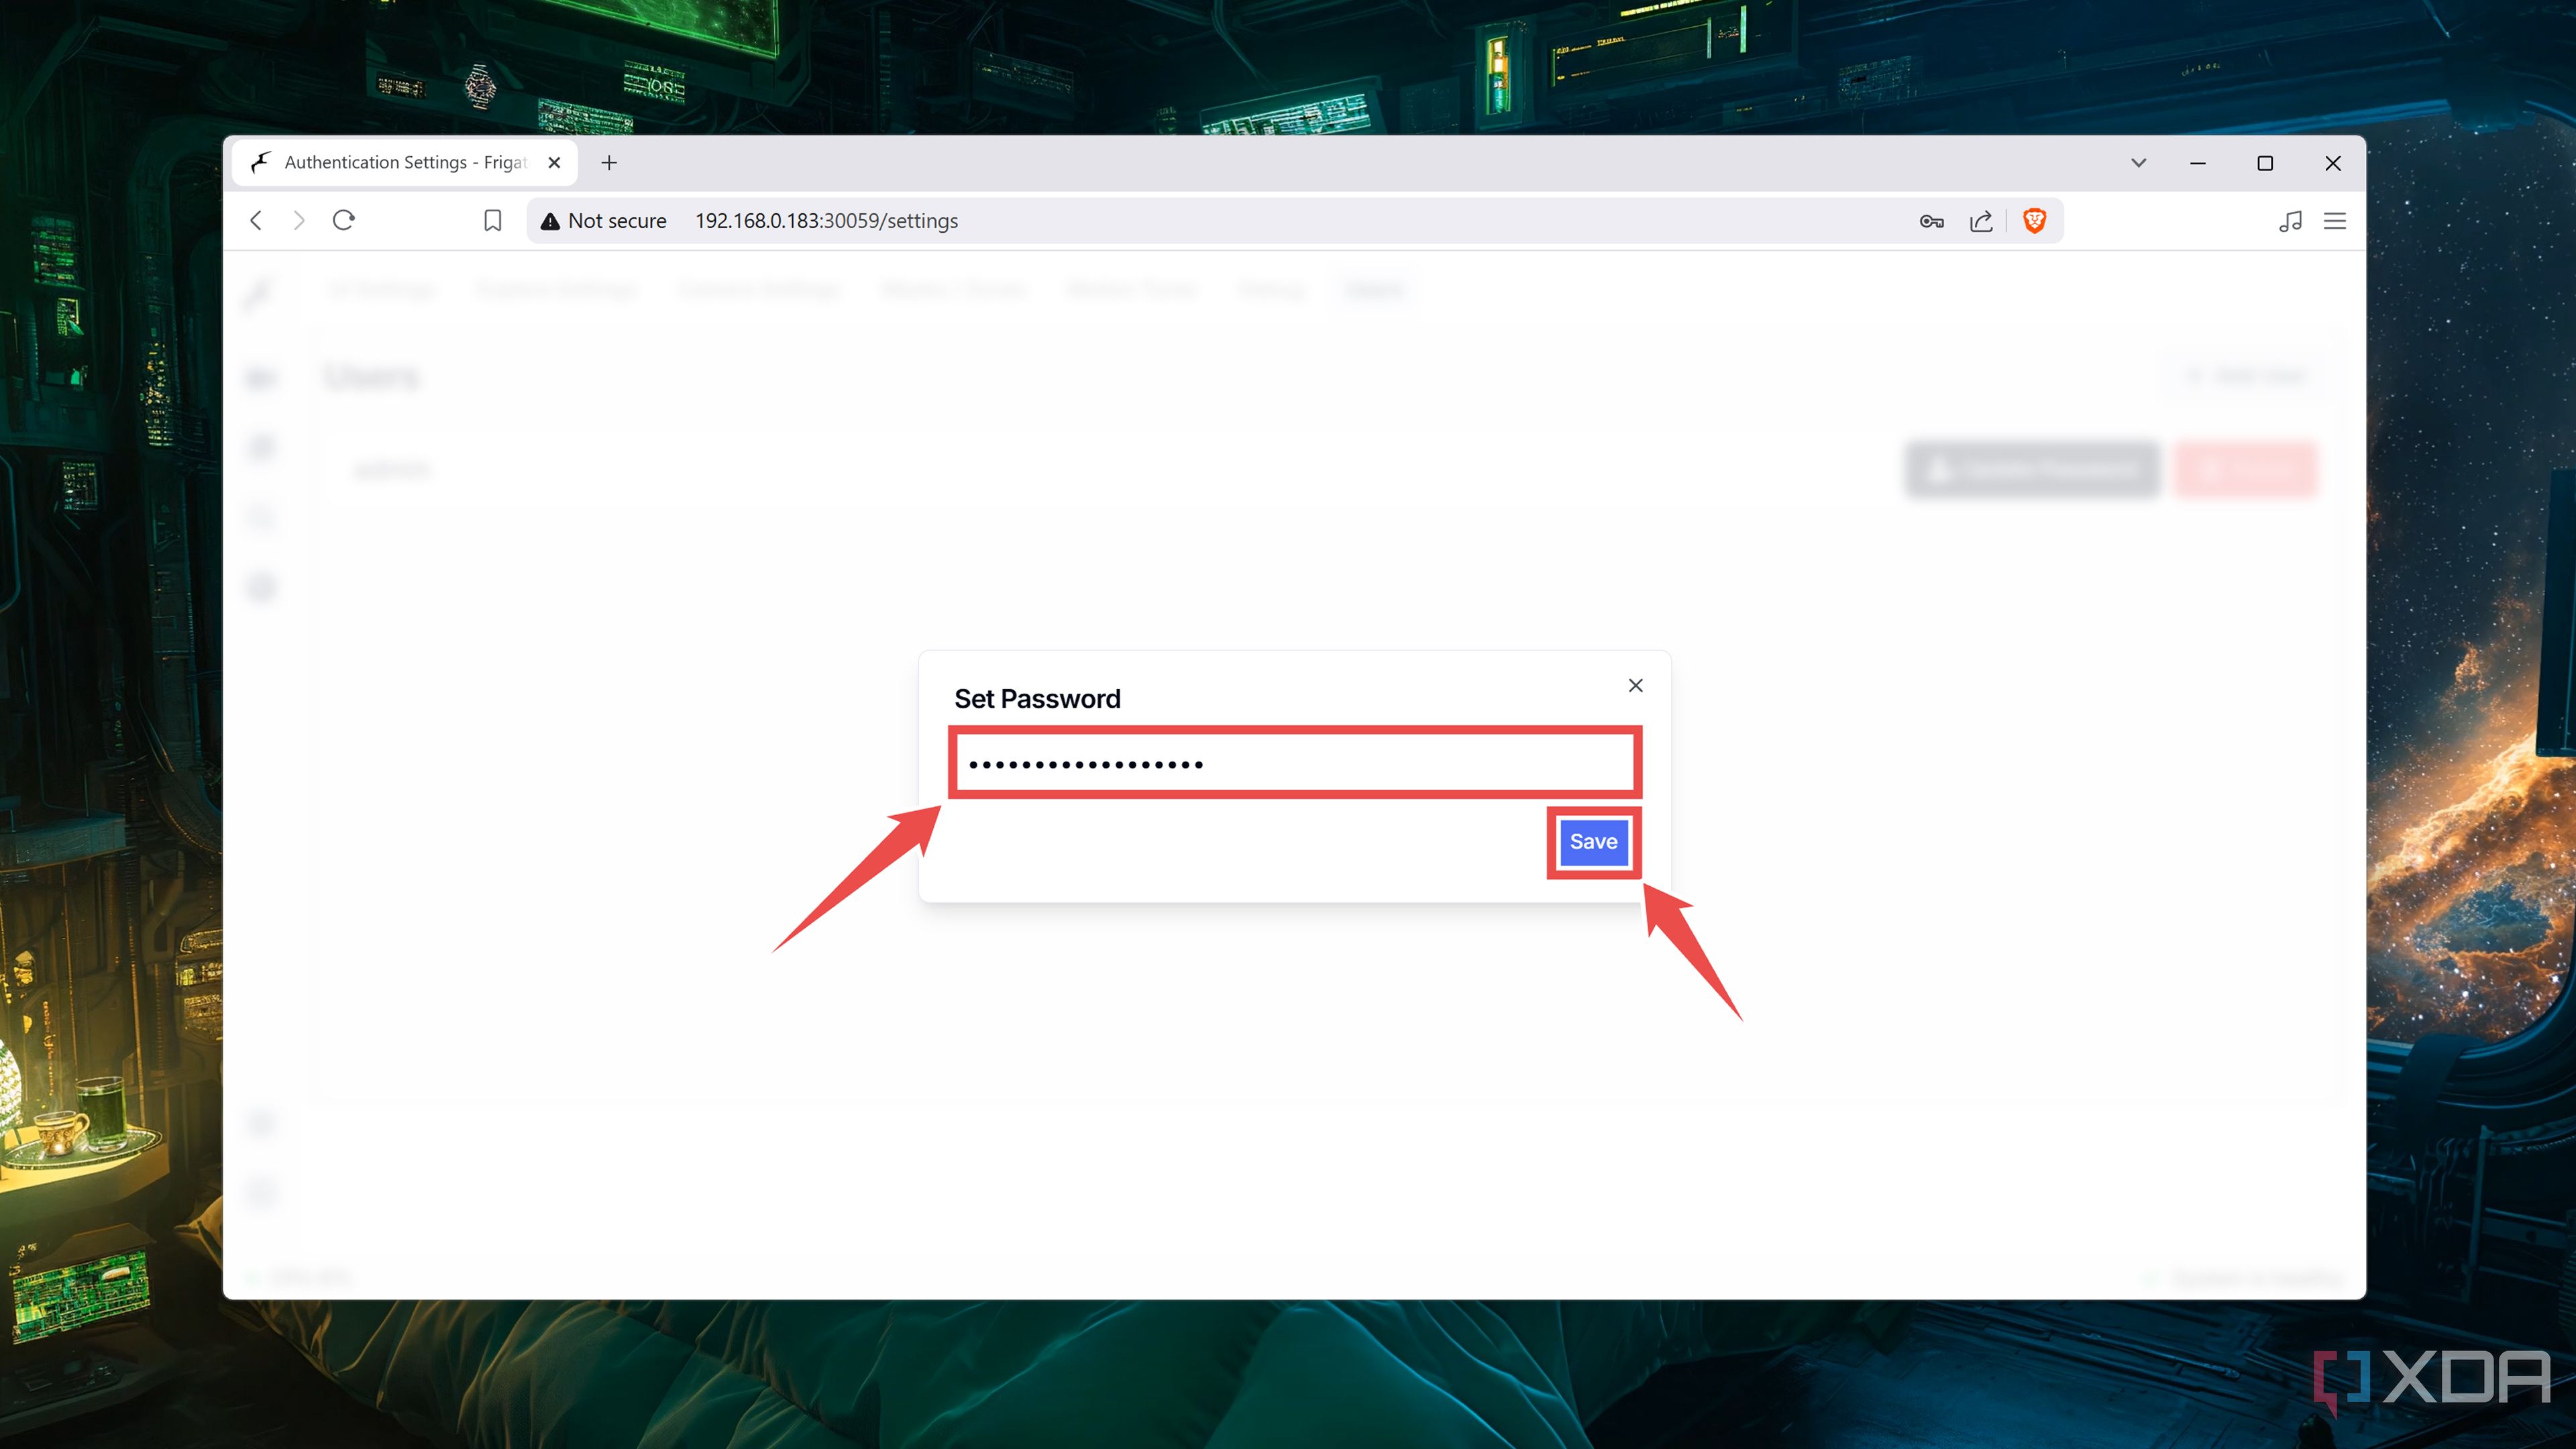
Enter a strong password and tap Save.
-
Head back to the terminal and open the docker-compose.yml file with the nano editor.
sudo nano docker-compose.yml
- Add a # before the 5000:5000 port, save the file, and run the docker compose up command once again to redeploy the container.
-
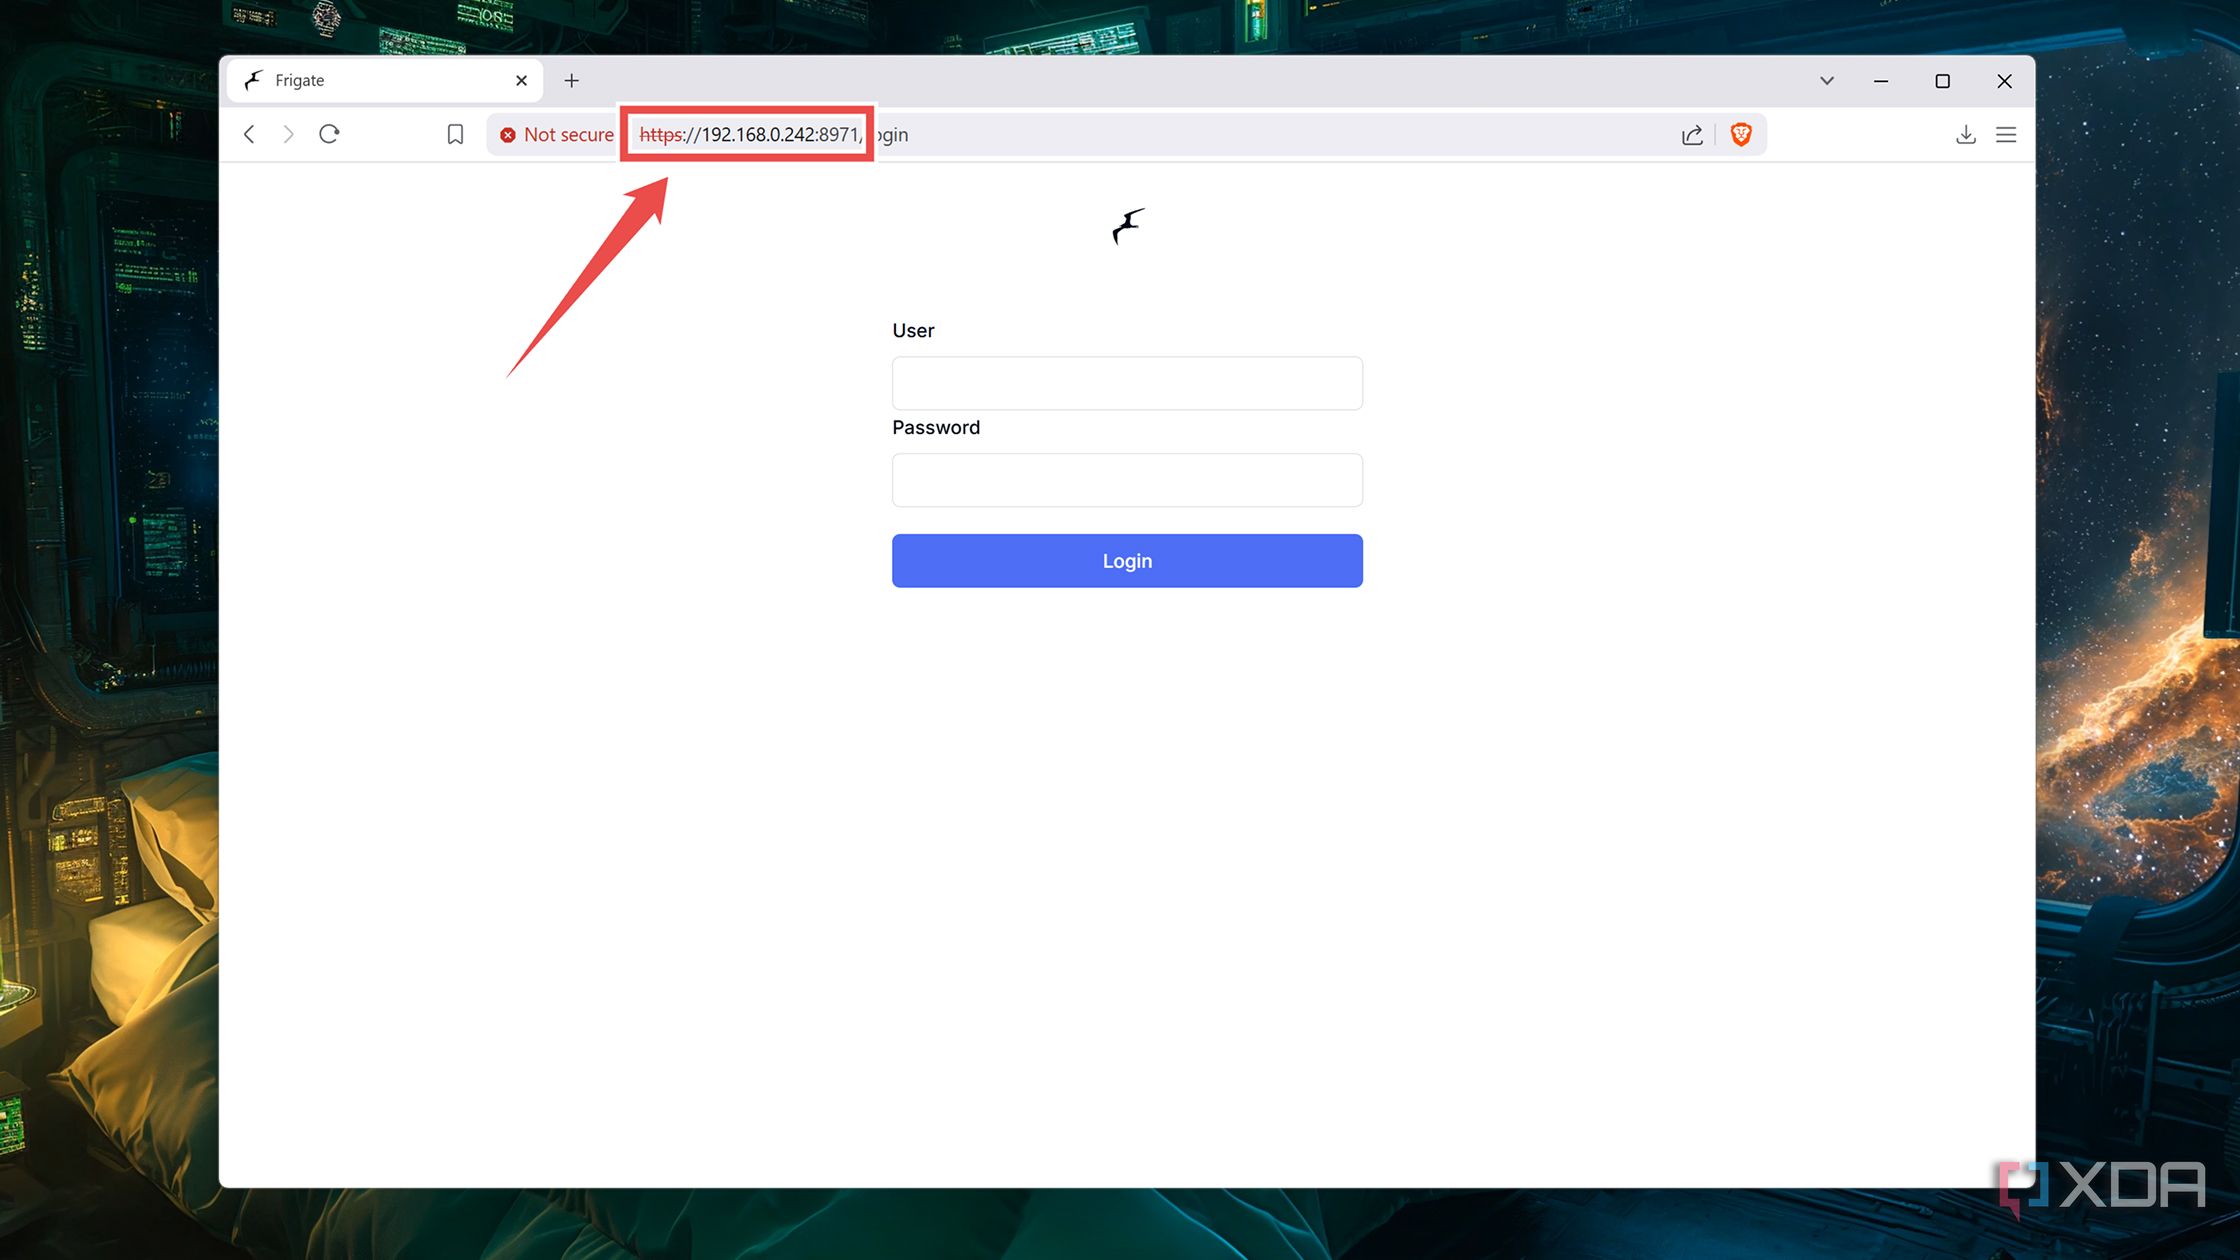
You can now access the secured Frigate container by replacing http:// with https:// and the port 5000 with 8971.


Build a powerful wildlife surveillance system with Frigate and Raspberry Pi
Provided you’ve used a newer Raspberry Pi model that isn’t lacking on the memory front, your wildlife camera will work without running into performance issues. If you’re a proud owner of a Raspberry Pi AI Kit, you can add it under the devices section of the config file to leverage its solid tracking capabilities in your NVR setup.

Related
I use these 5 tools to turn my Raspberry Pi into a self-hosting behemoth
Even a Raspberry Pi can become a containerization war machine with the right set of apps
#wildlife #camera #Raspberry
source: https://www.xda-developers.com/i-made-a-wildlife-camera-with-a-raspberry-pi/

