

Over the last couple of years, audiobooks and podcasts have exploded in popularity. Whether you want to hear some words of wisdom on your commute or just prefer the convenience of narrated literature, there are thousands of unique creations from every genre imaginable that can cater to your needs.
But if you’ve got a voracious appetite for audio-based media, you can find yourself with an unorganized digital library spread across multiple devices and platforms. Thankfully, you can leverage the self-hosted Audiobookshelf service to organize your collection of audiobooks and podcasts.
Related
3 services I will never self-host on my NAS
Despite running all sorts of wacky experiments on my storage storage, I lack the courage to self-host these services
2 Setting up Audiobookshelf
One of the best aspects of self-hosting your own services is the sheer number of options to configure said apps. For example, Proxmox users can utilize the Audiobookshelf initialization script on the community-managed VE-Helper Scripts repository to get the app up and running.
- Select the Shell tab on your preferred Proxmox node.
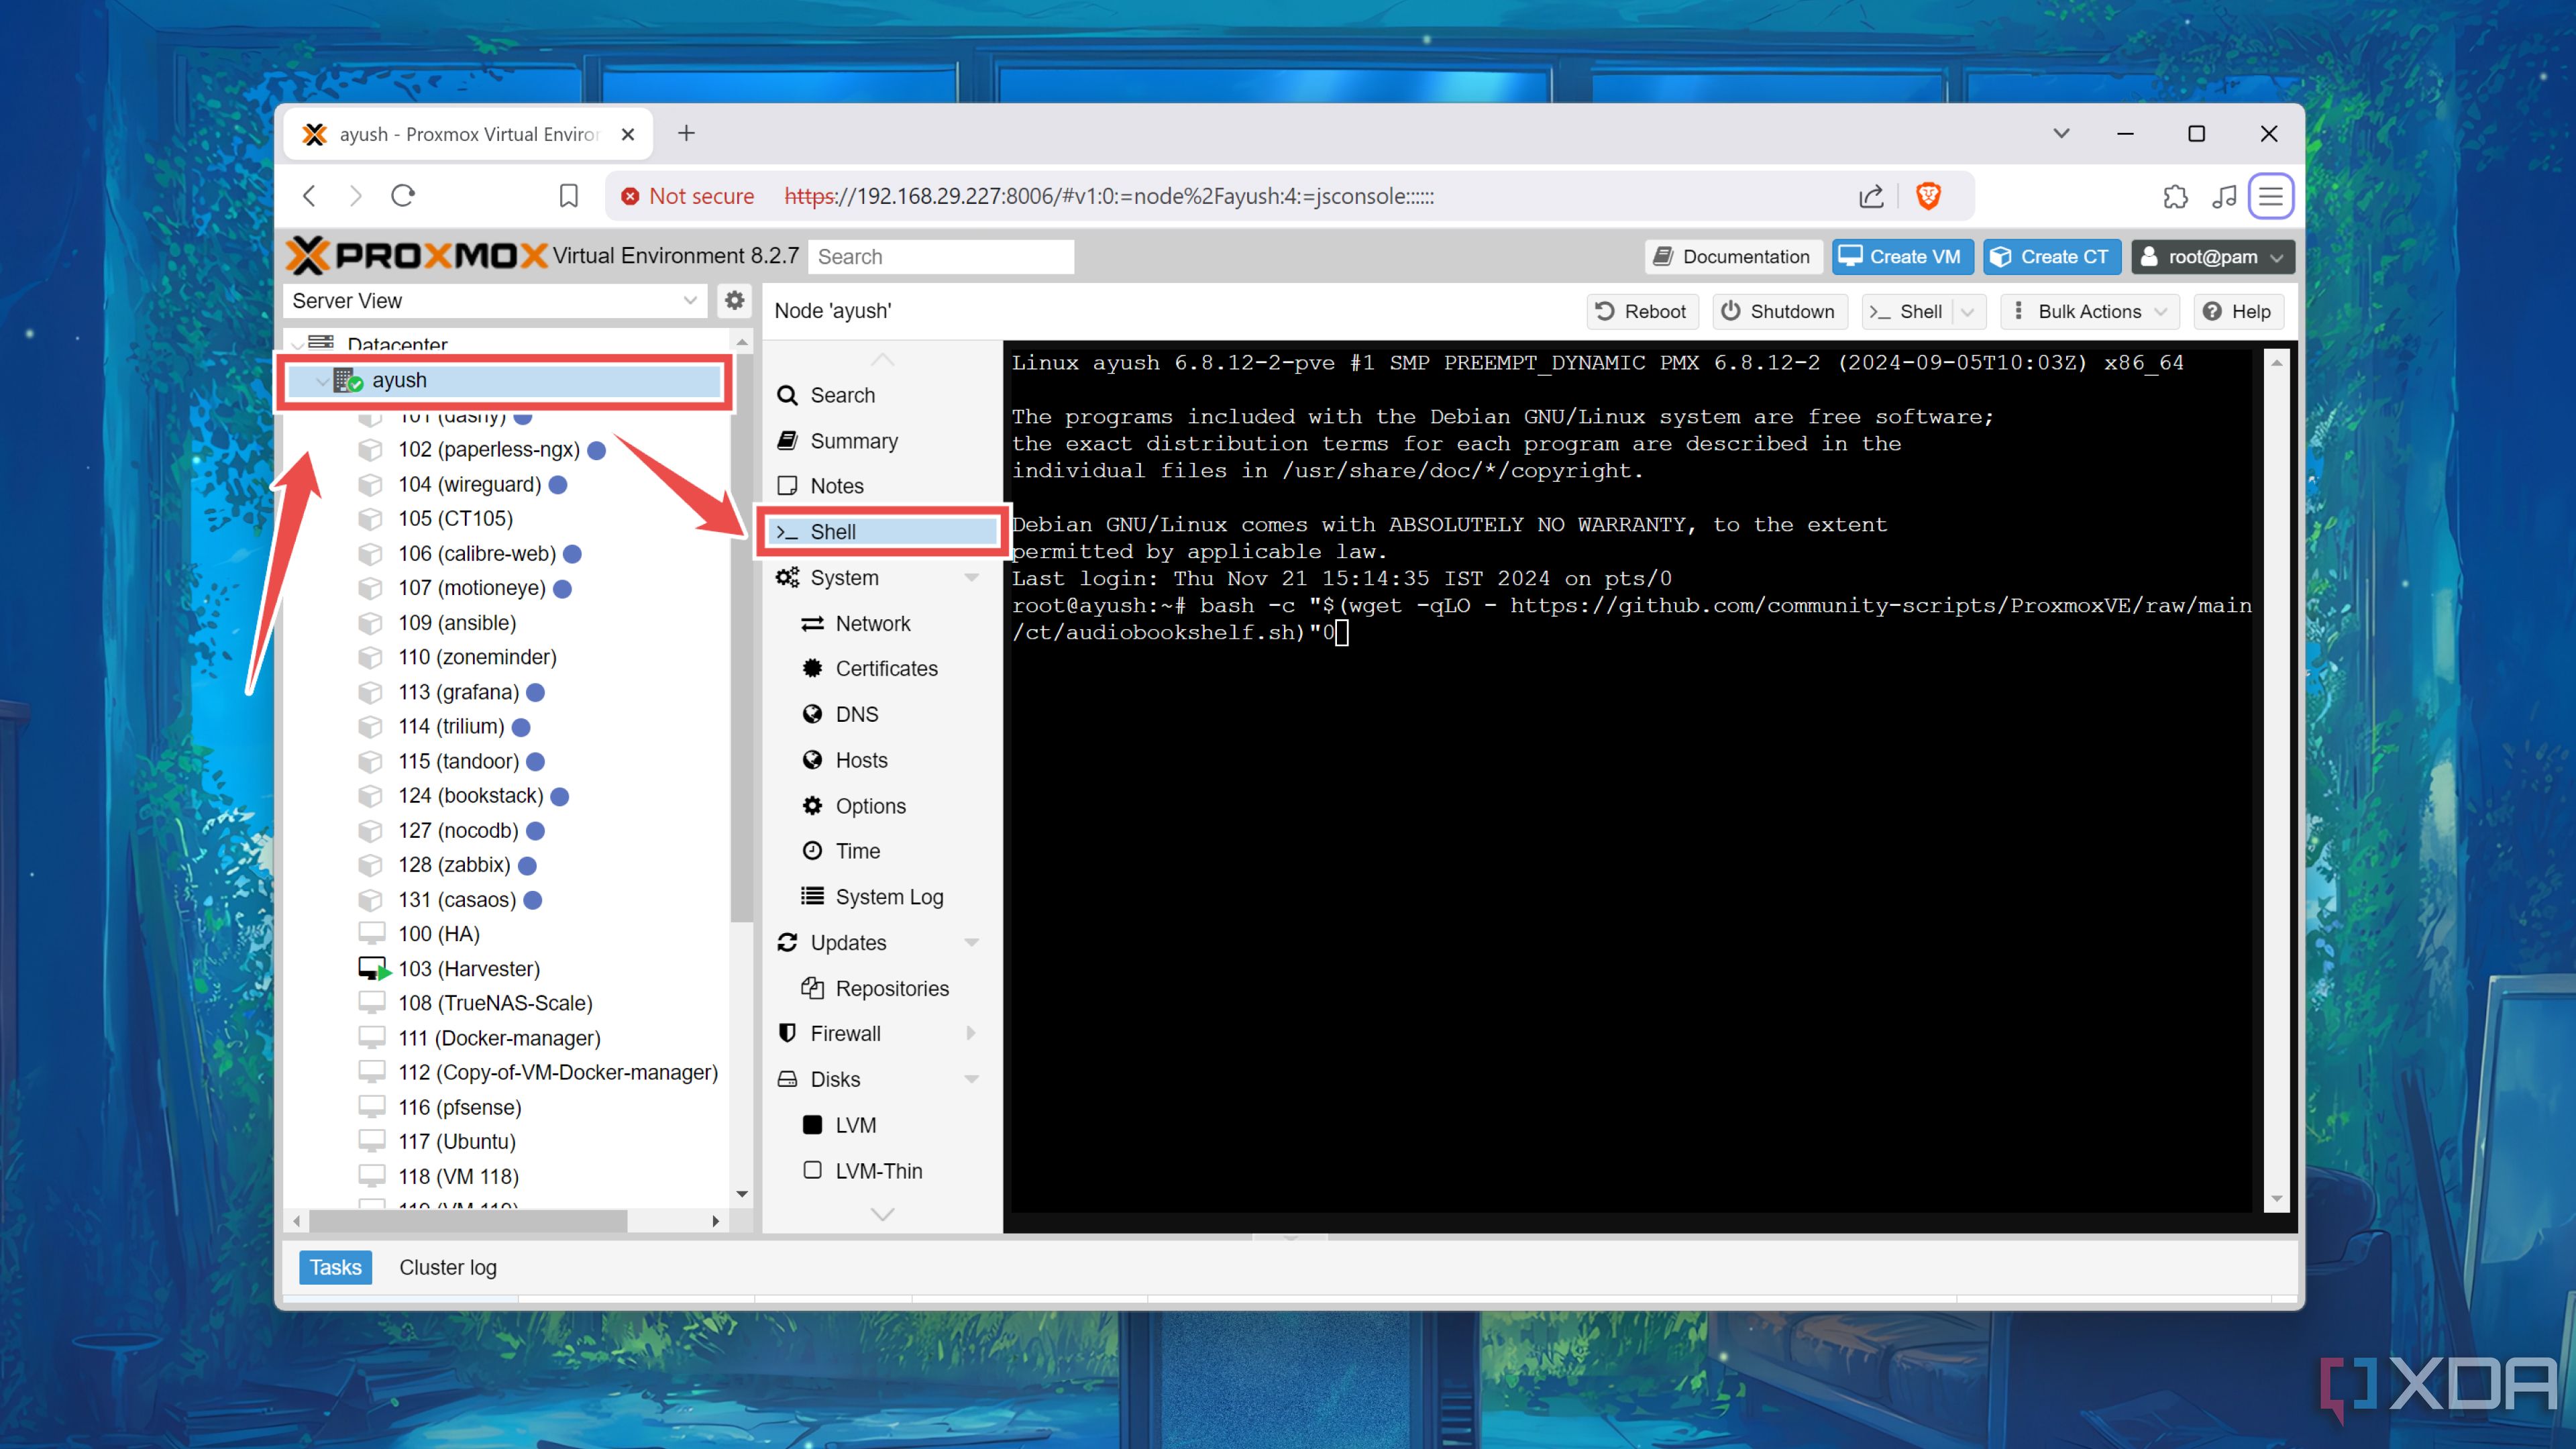
- Paste the following command into the terminal interface and hit the Enter key.
bash -c "$(wget -qLO - https://github.com/community-scripts/ProxmoxVE/raw/main/ct/audiobookshelf.sh)"
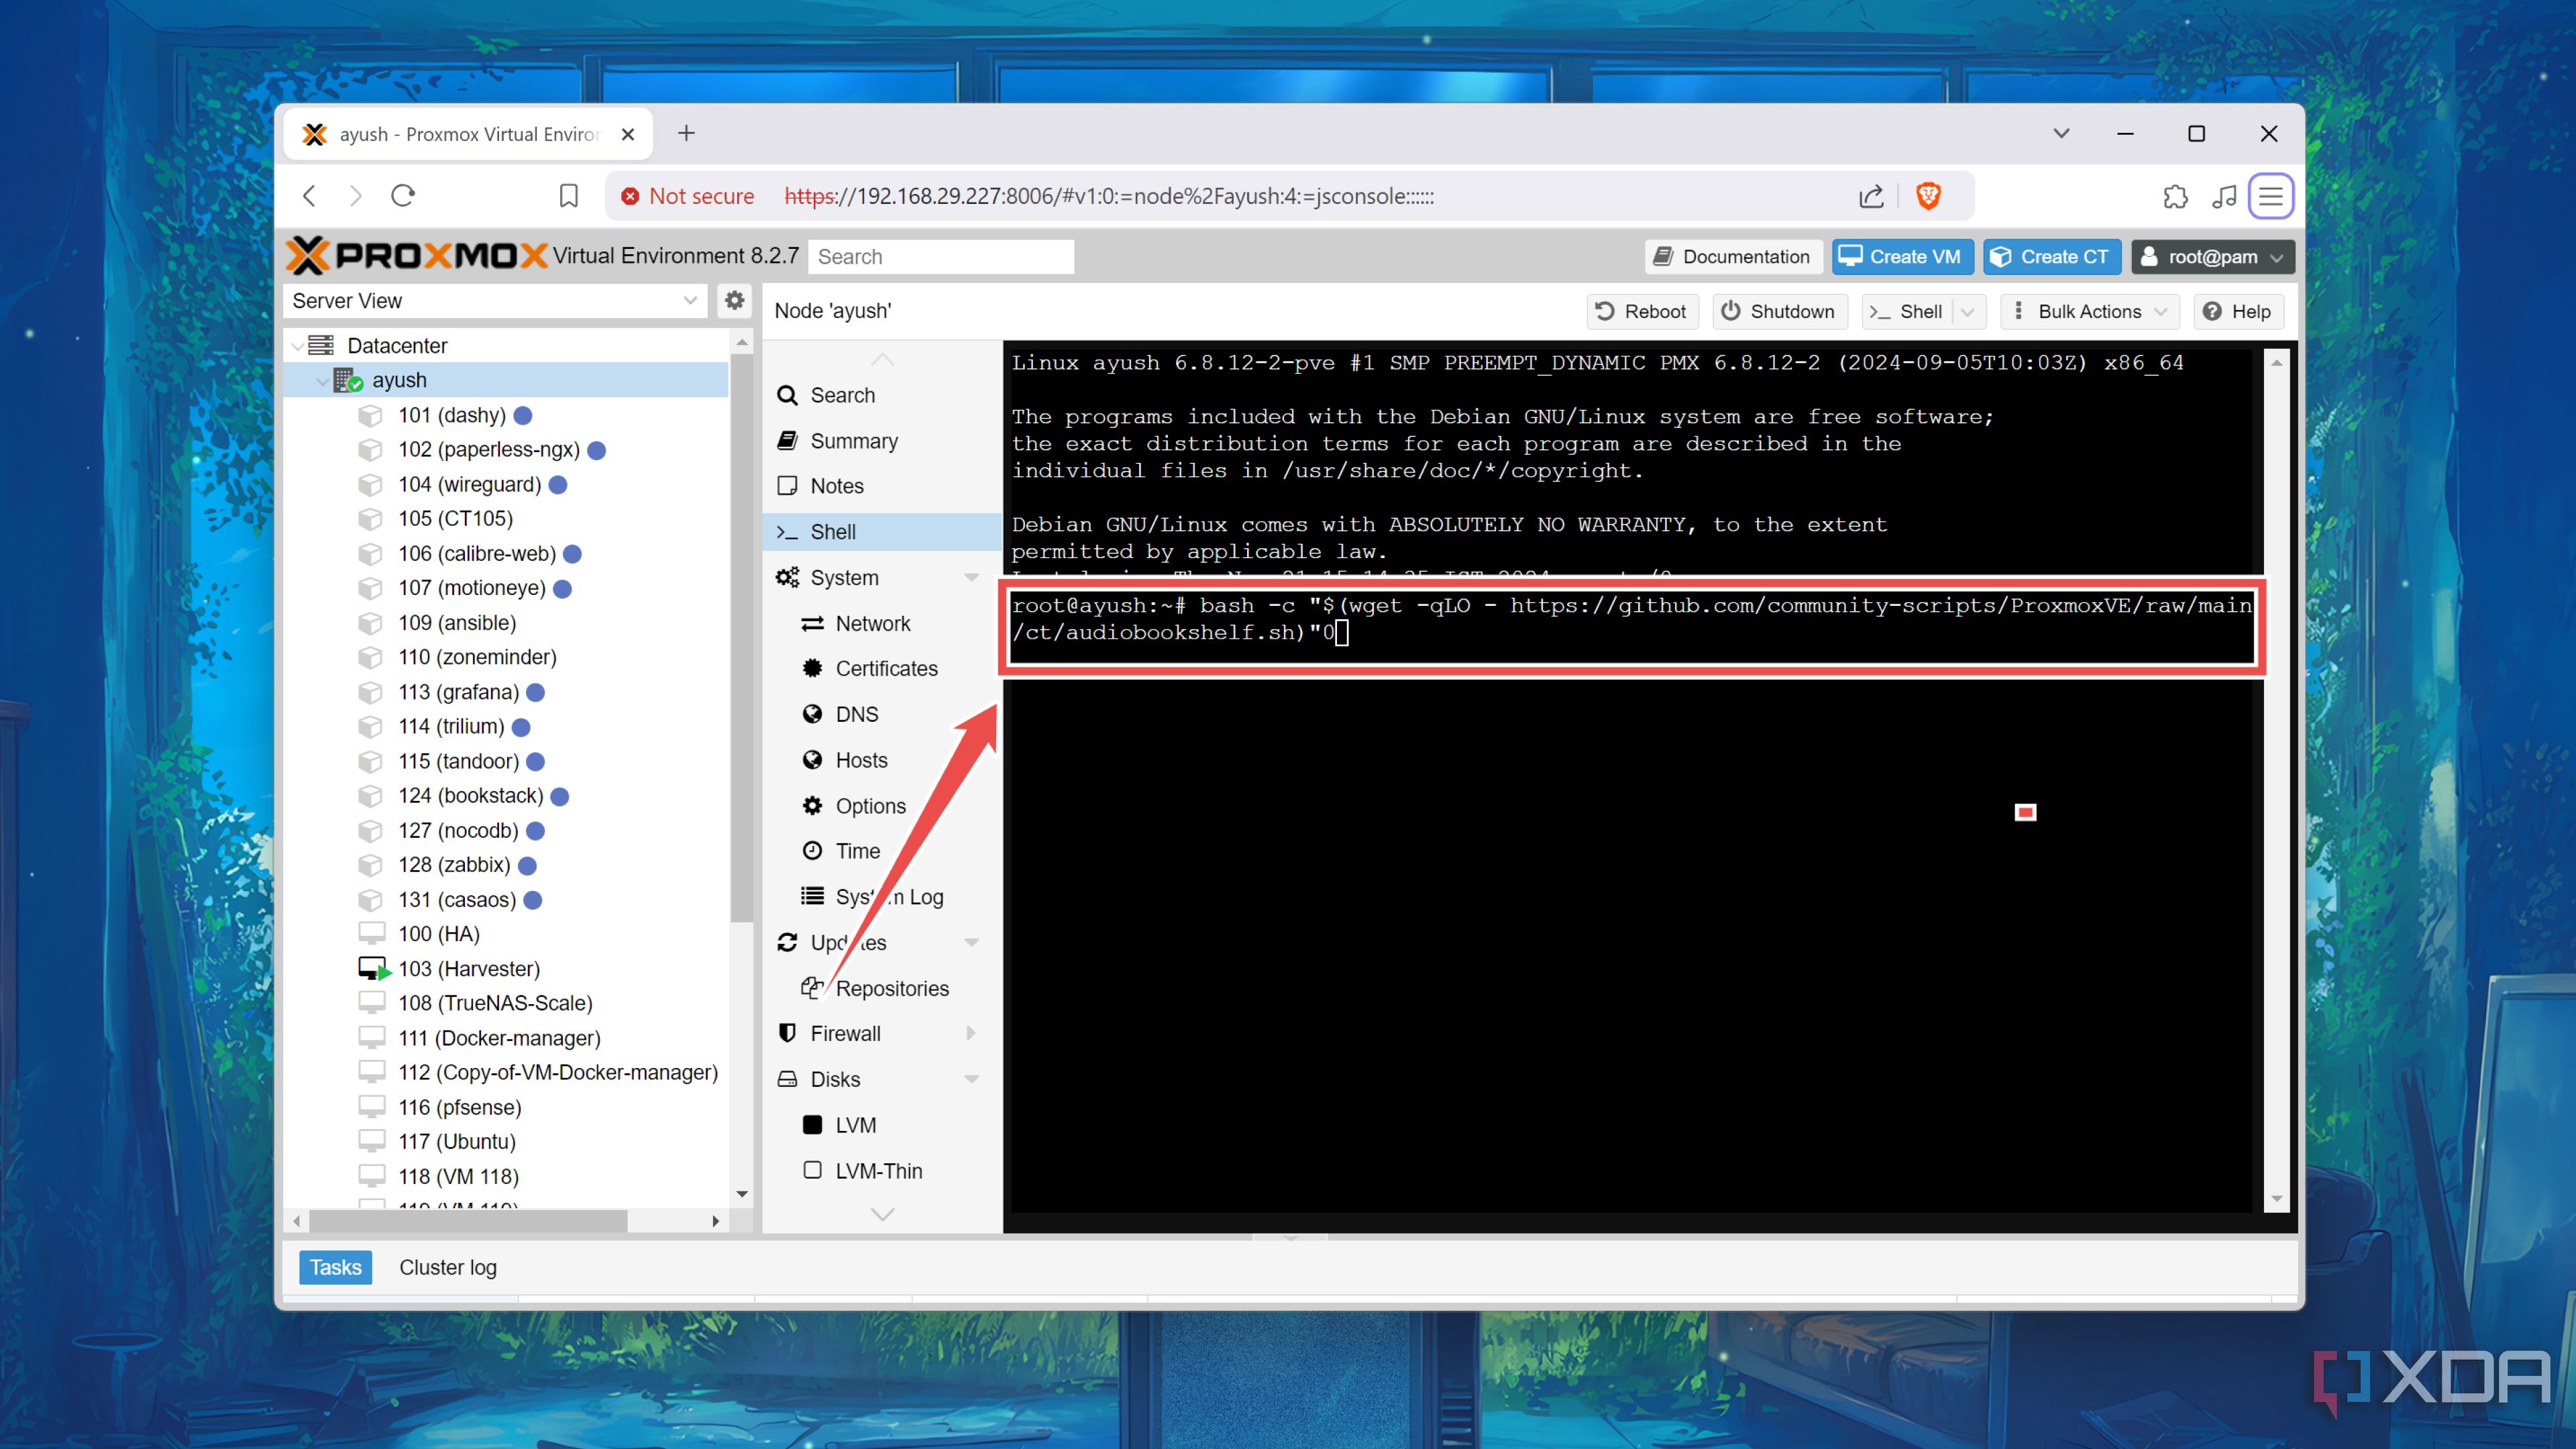
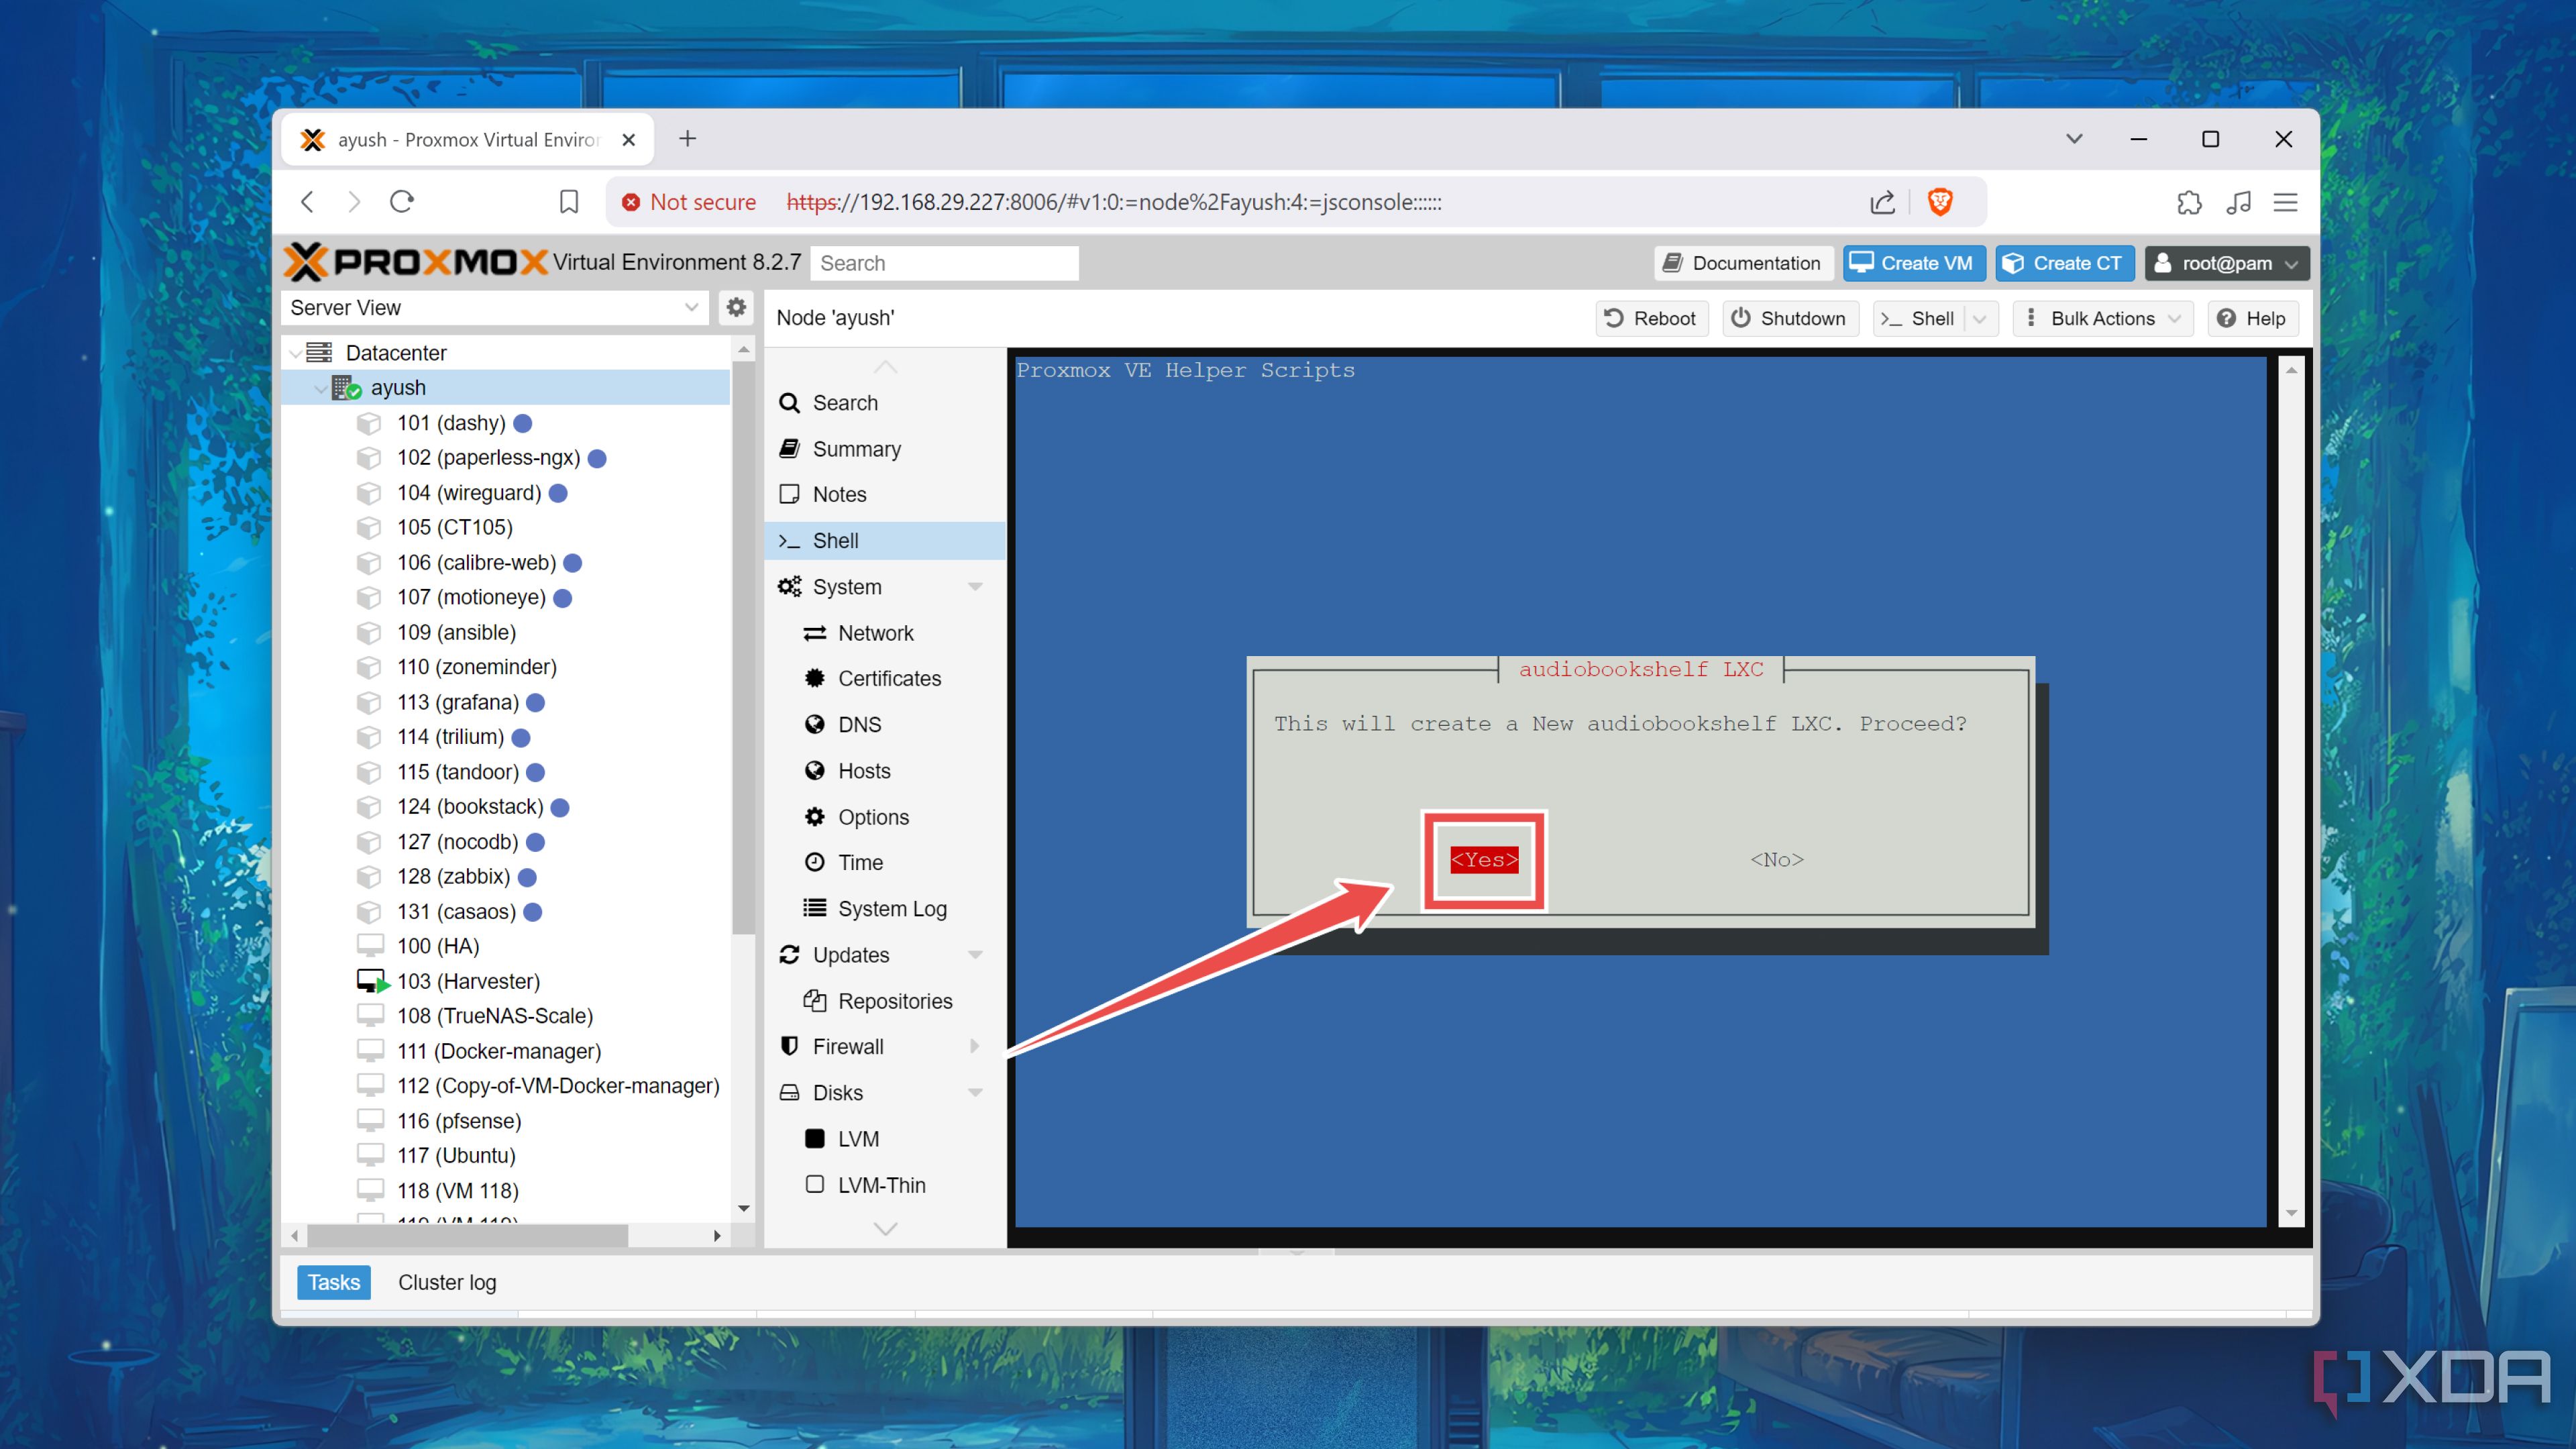
- Hit Yes twice and wait for the script to create the Audiobookshelf LXC container.
- Paste the IP address from the terminal into your favorite browser to access the Audiobookshelf UI.


Alternatively, you can deploy Audiobookshelf inside a Docker container if you’re on a Linux distro. Assuming you’ve already installed Docker Engine, you can follow these steps to run the Audiobookshelf container:
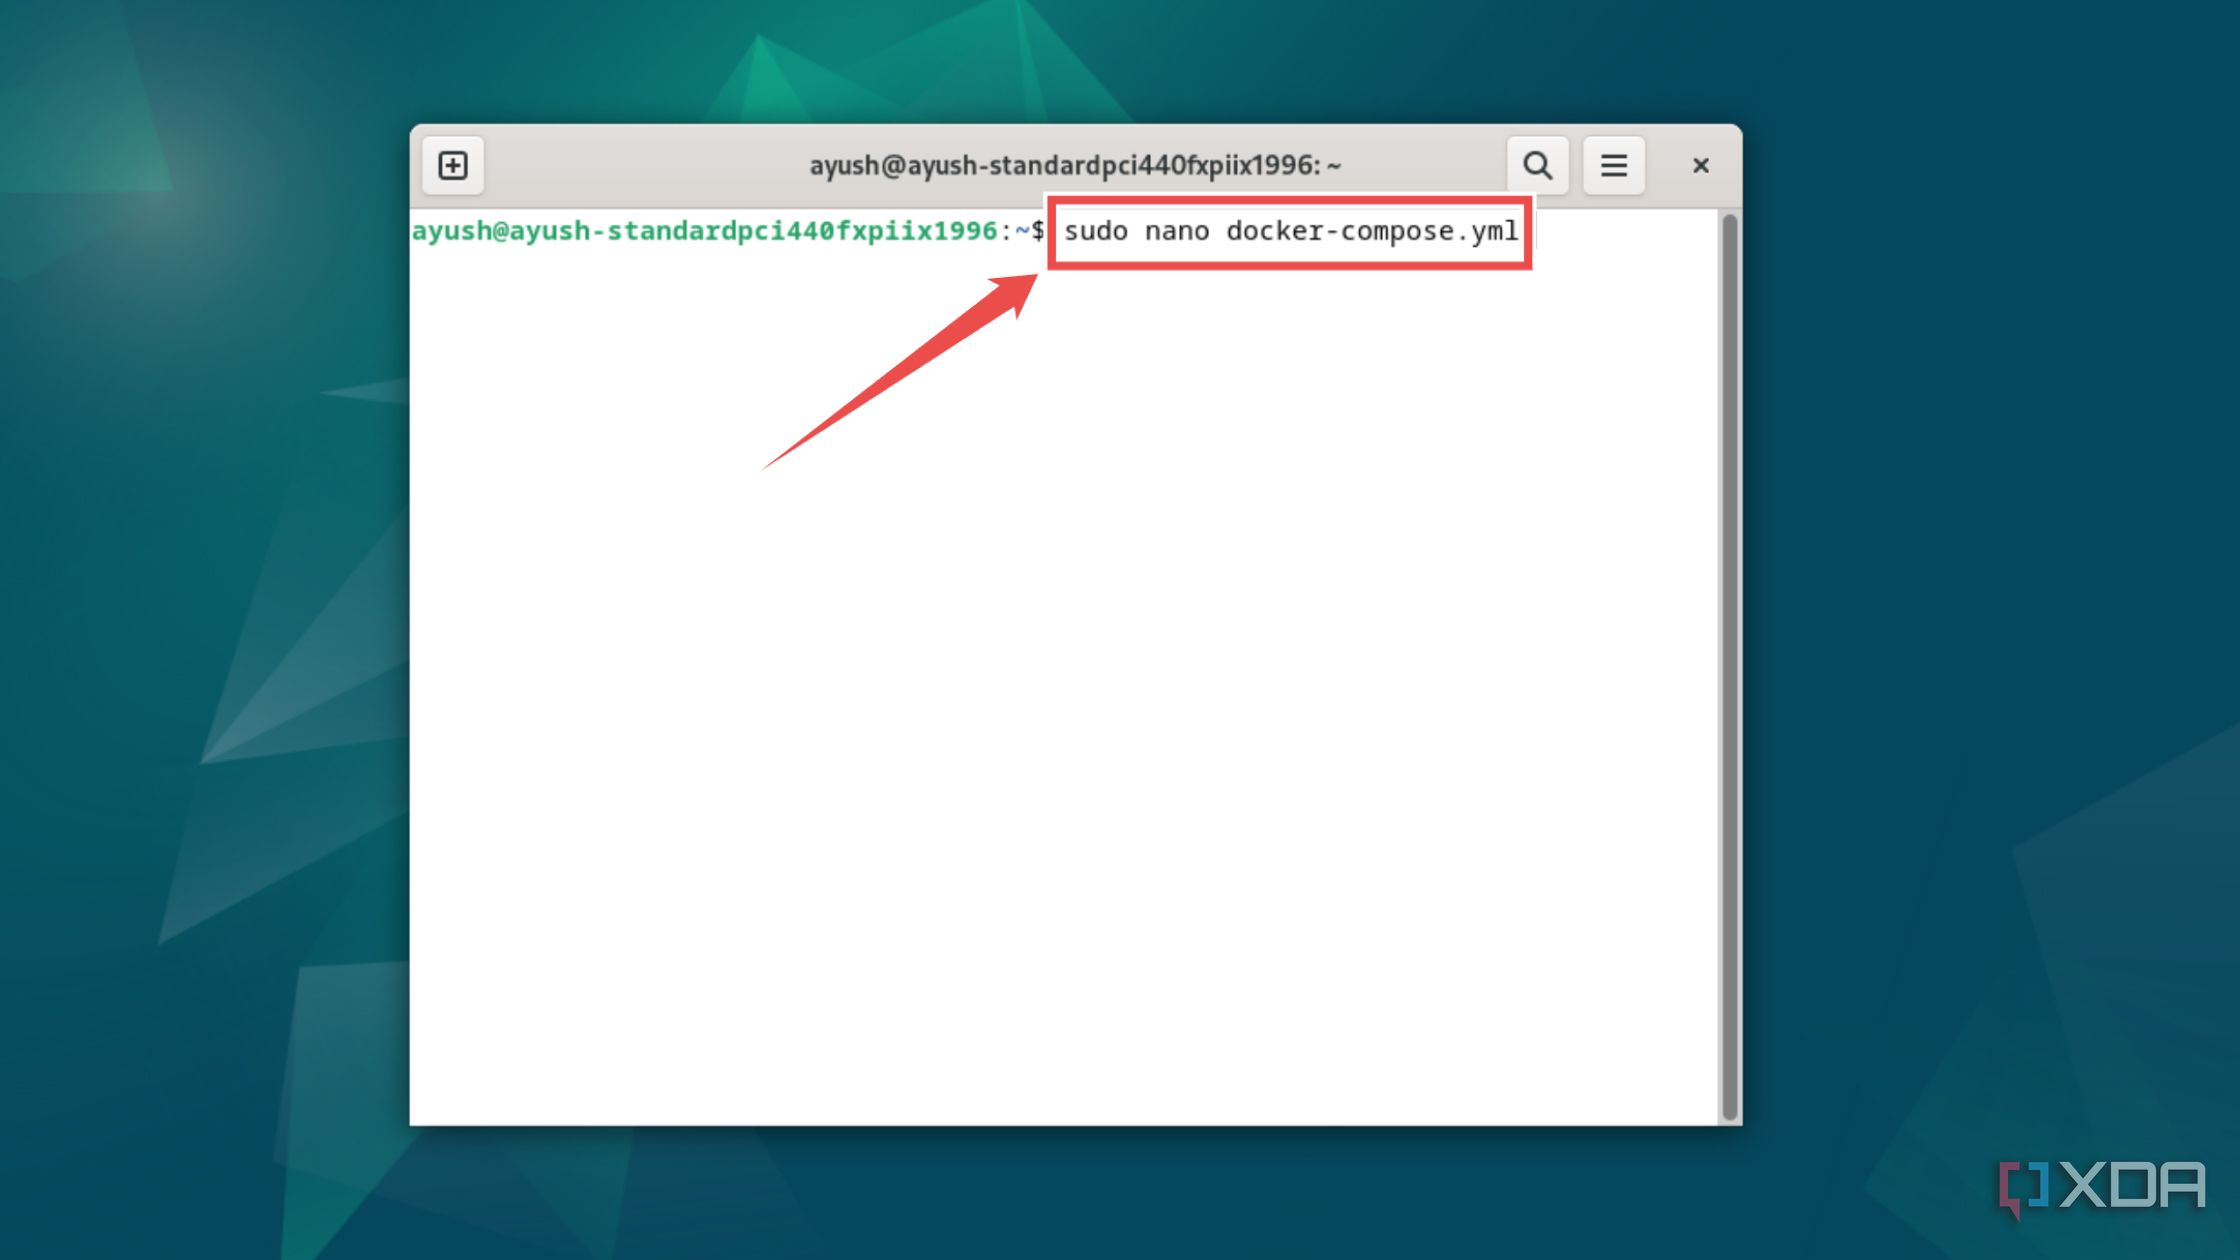
- Launch the terminal app.
- Execute this command to create a new docker-compose.yml file using the nano editor
sudo nano docker-compose.yml
- Paste the code under the Docker Compose section of the official Audiobookshelf setup page.
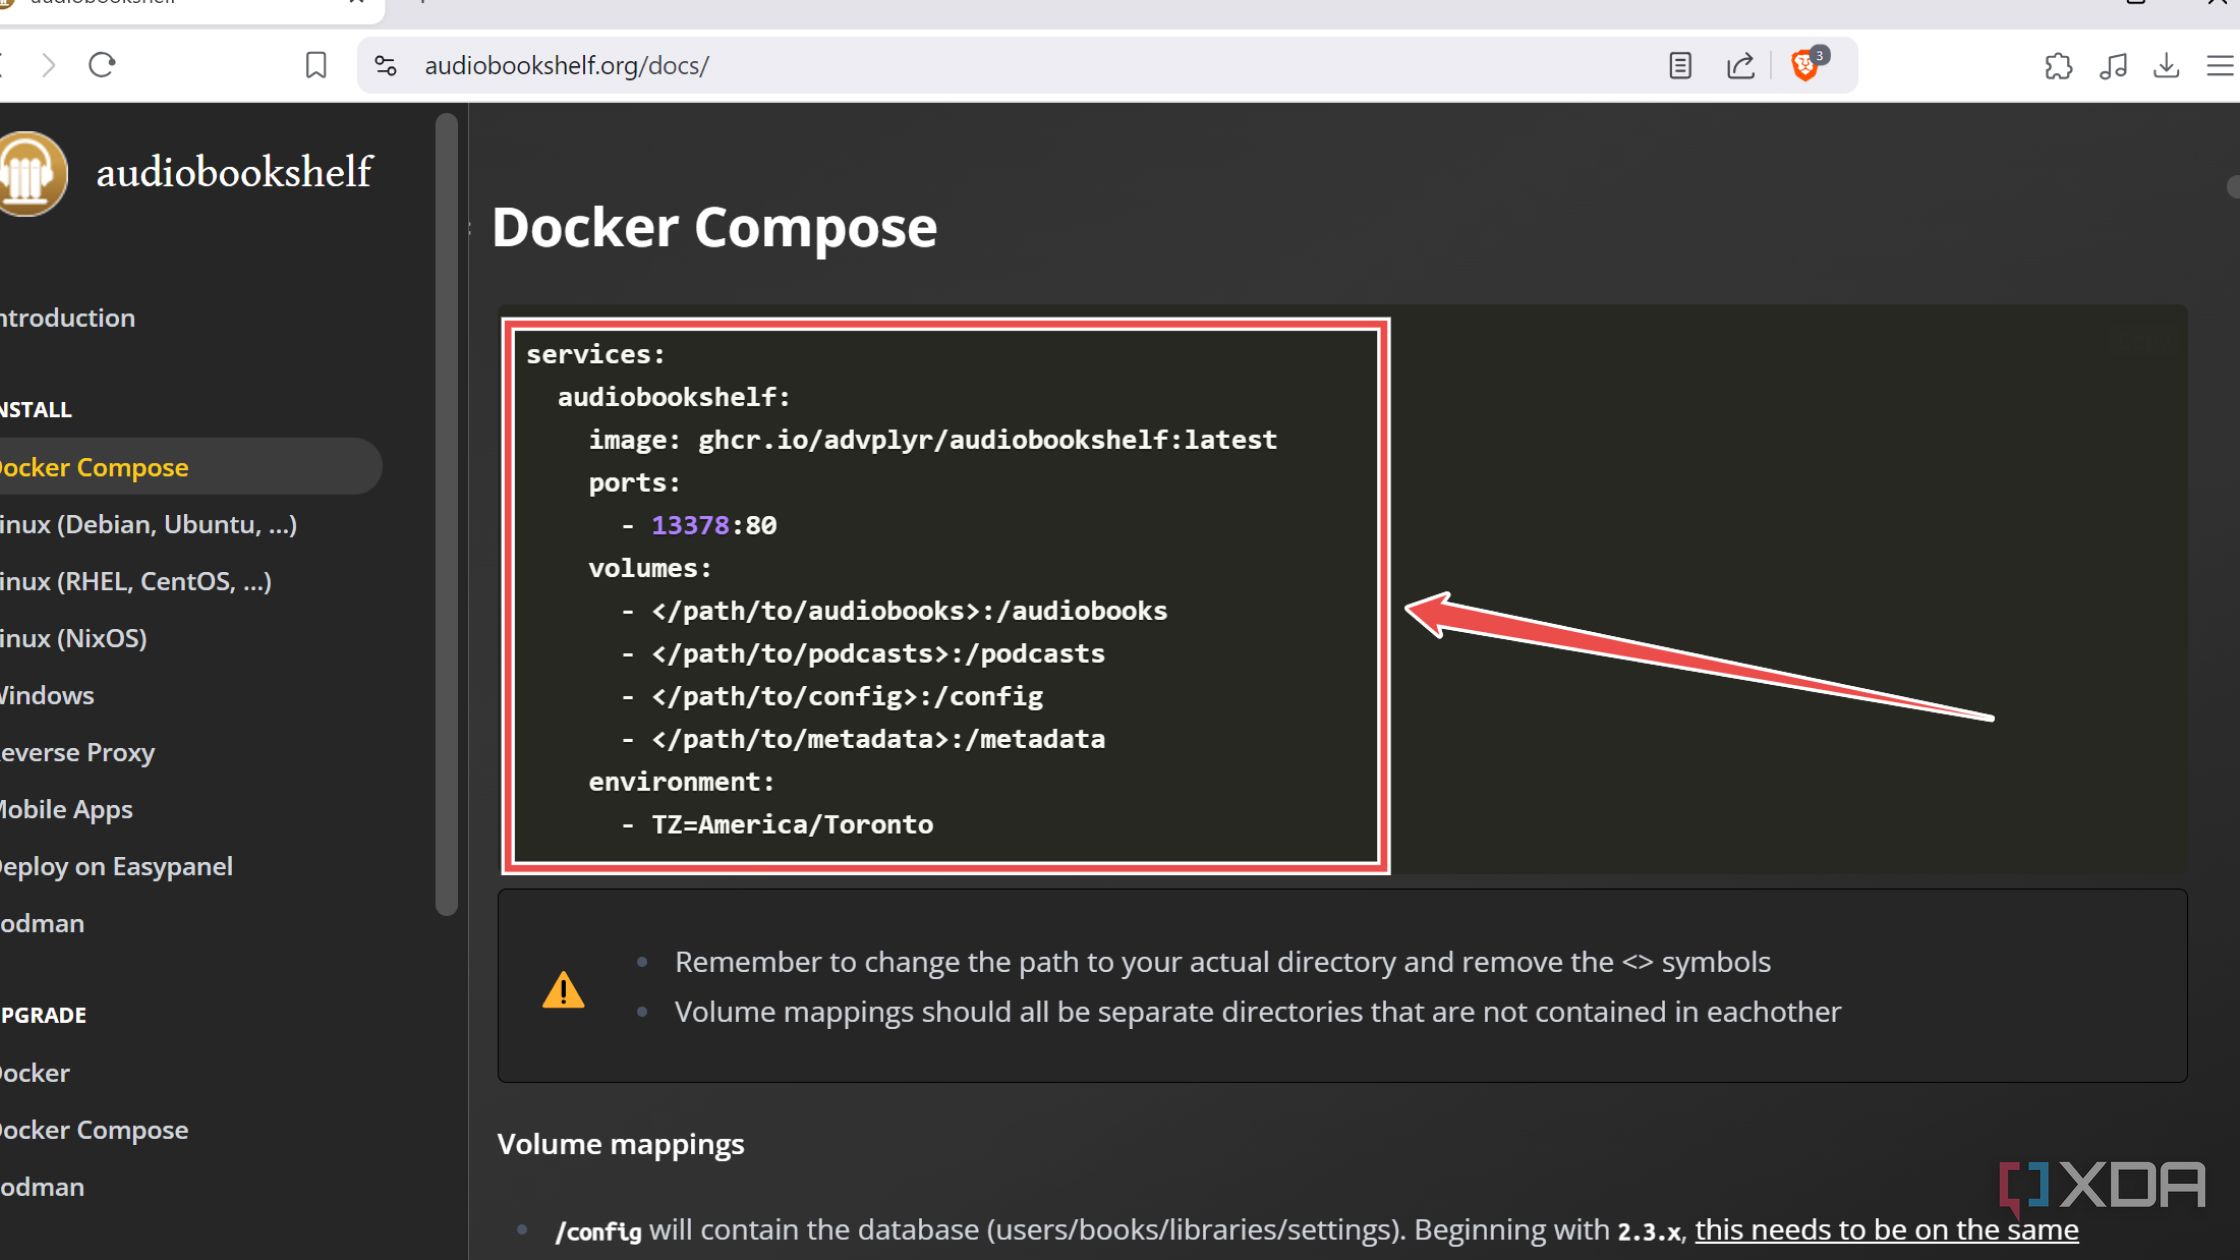
- Replace the
fields next to audiobooks, podcast, config, and metadata folders with their actual locations on your system. 
- Press Ctrl+X followed by Y and Enter to save and exit the docker-compose.yml file.
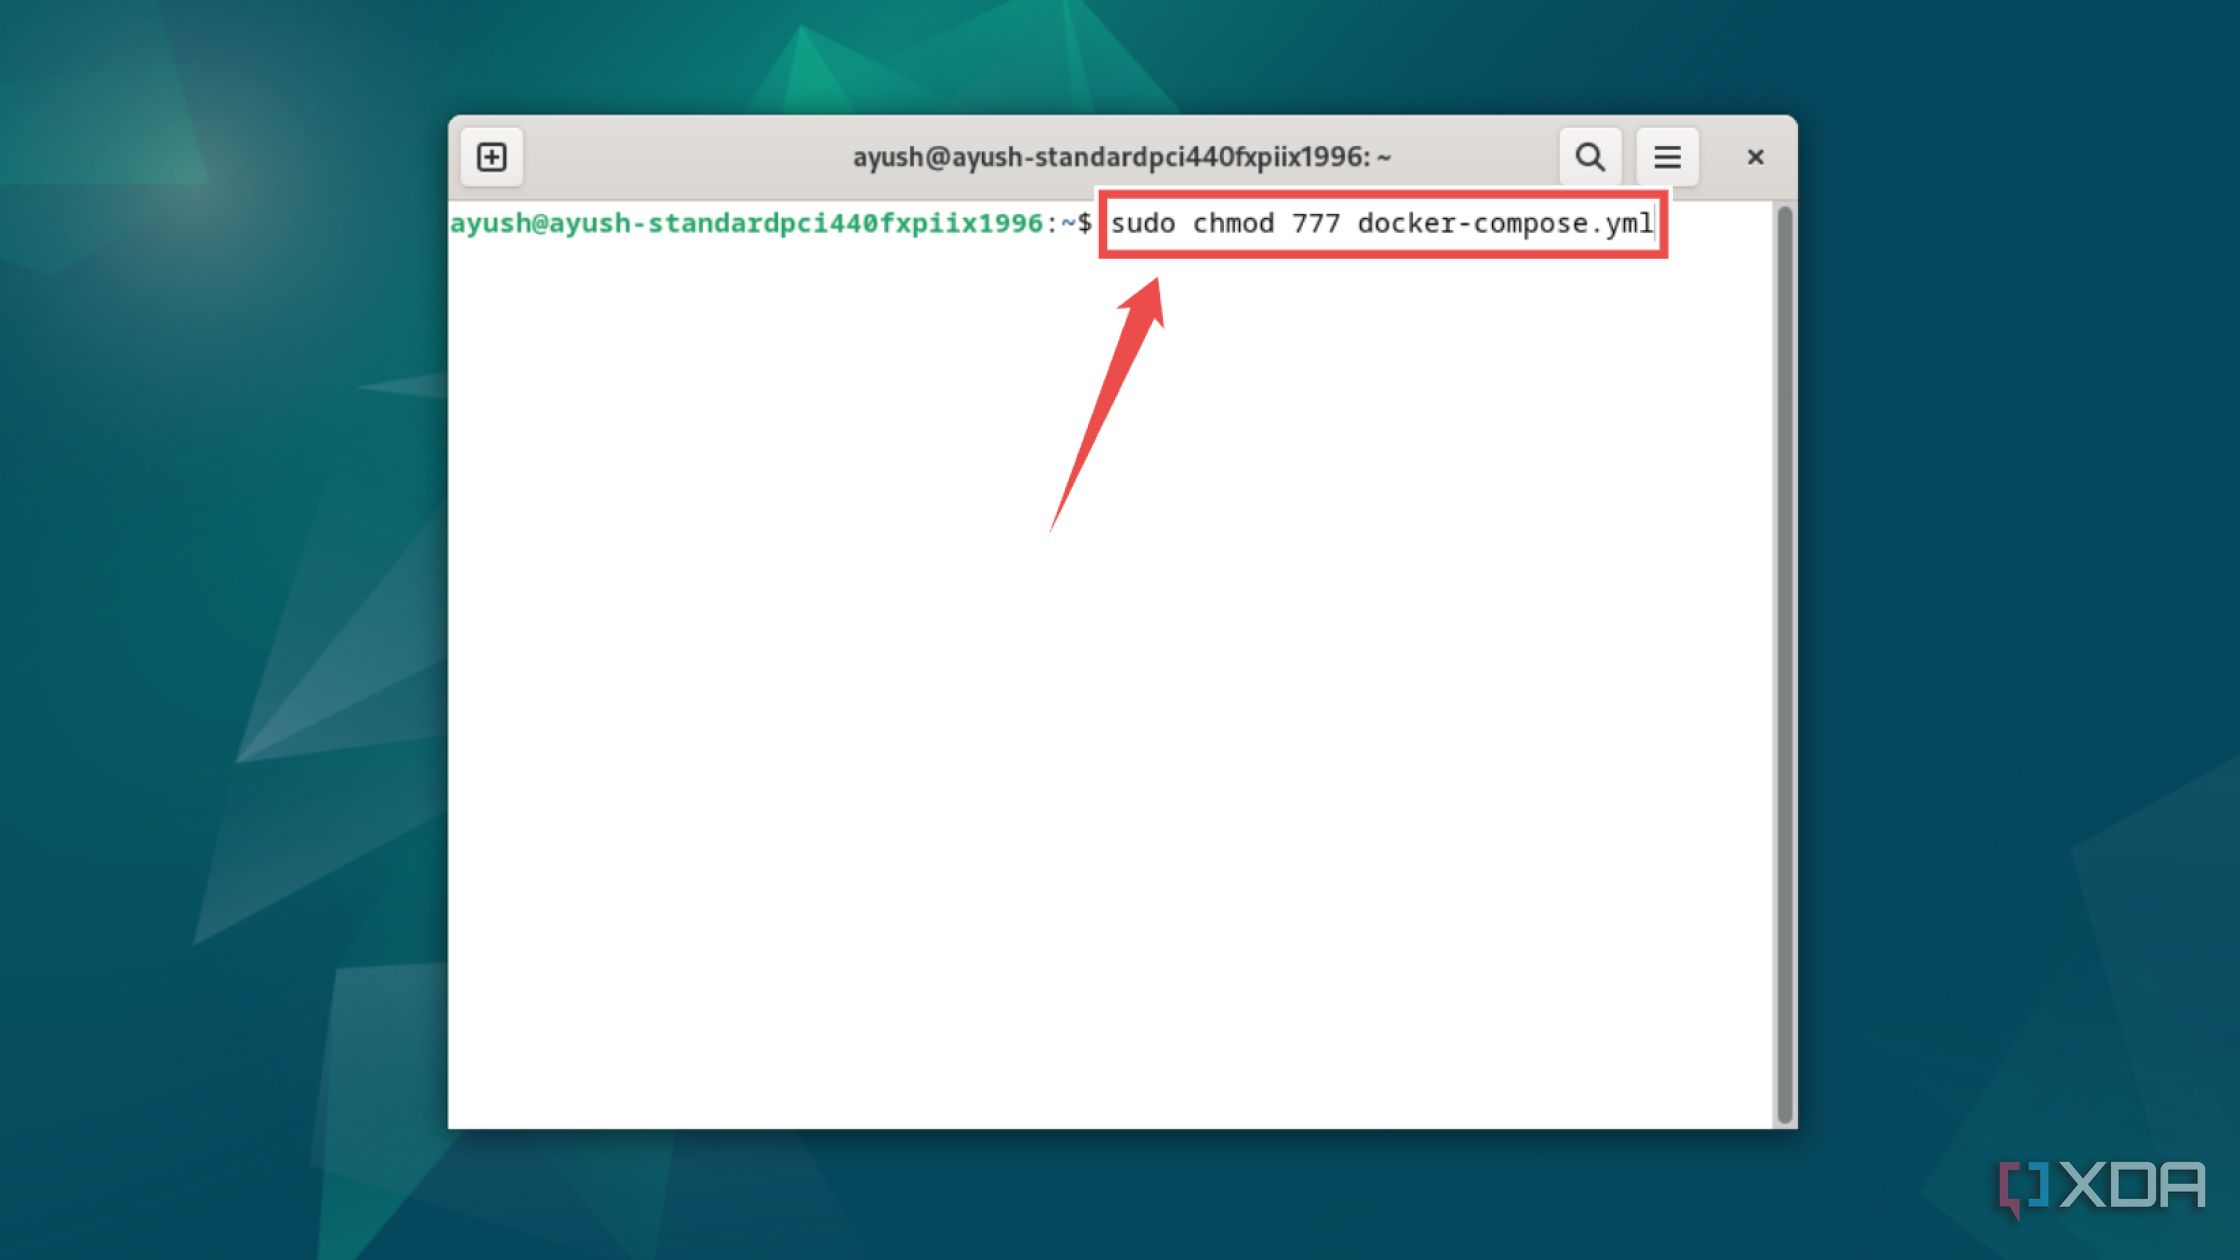
- Use the chmod utility to grant read/write permissions to this file:
sudo chmod 777 docker-compose.yml
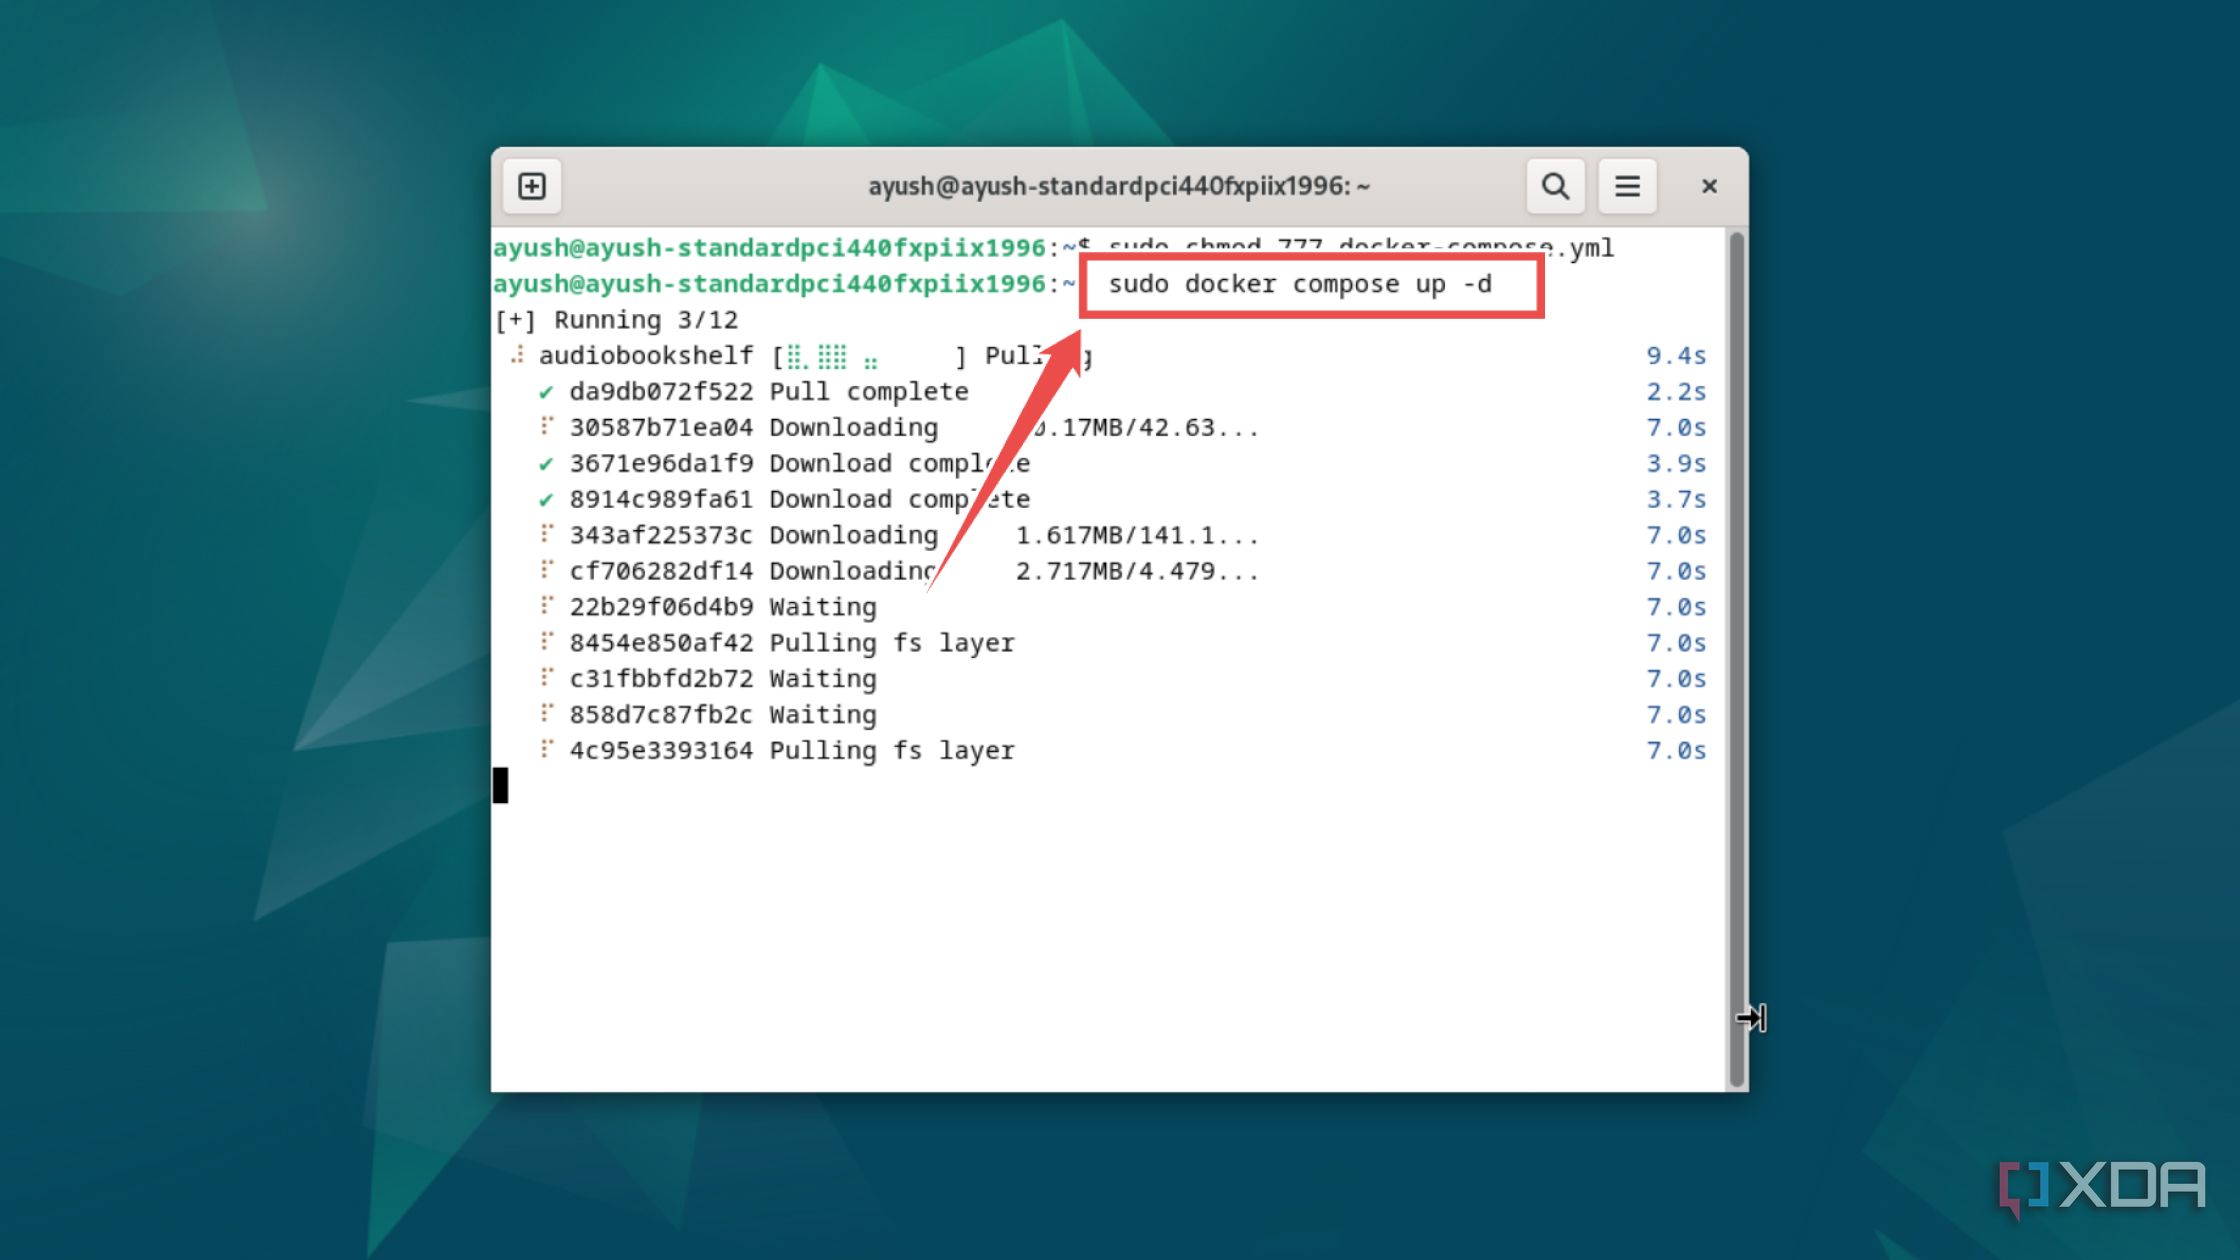
- Run the docker compose command to deploy the container.
sudo docker compose up -d
- Type localhost followed by a colon (:) and the port number 13378 into your preferred browser to access the Audiobookshelf web UI.
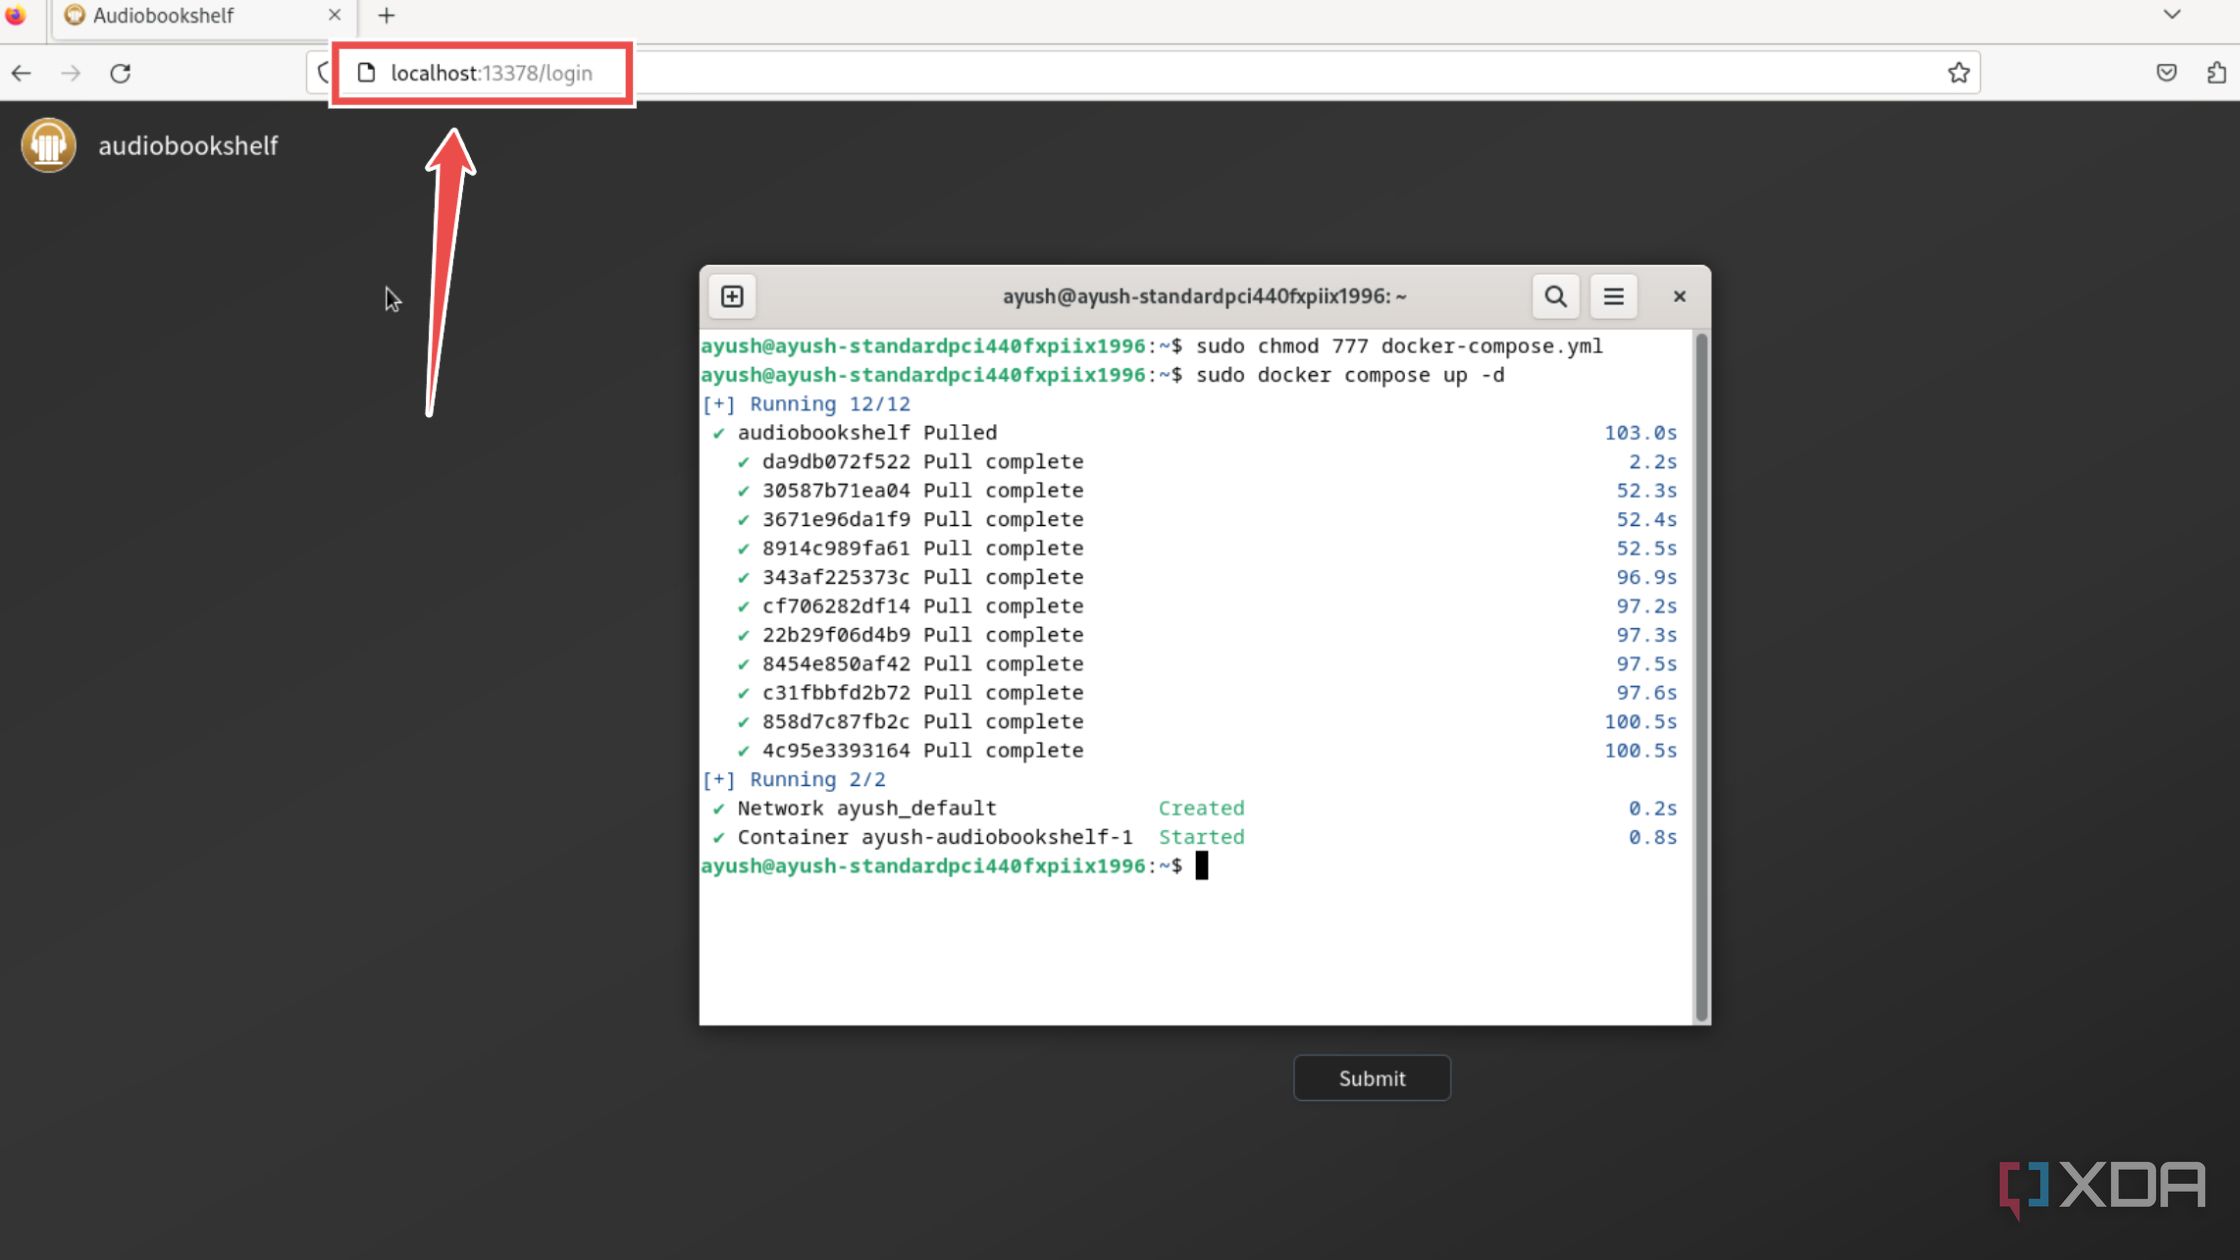
Alternatively, you can type the IPv4 address of the Linux machine instead of localhost if you’re attempting to log into your Audiobookshelf library from another system.


1 Configuring the web UI
With the Audiobookshelf instance up and running, it’s time to access the web UI and build your podcast and audiobook collection. The procedure to do so is largely the same, regardless of the method you used to set up Audiobookshelf,
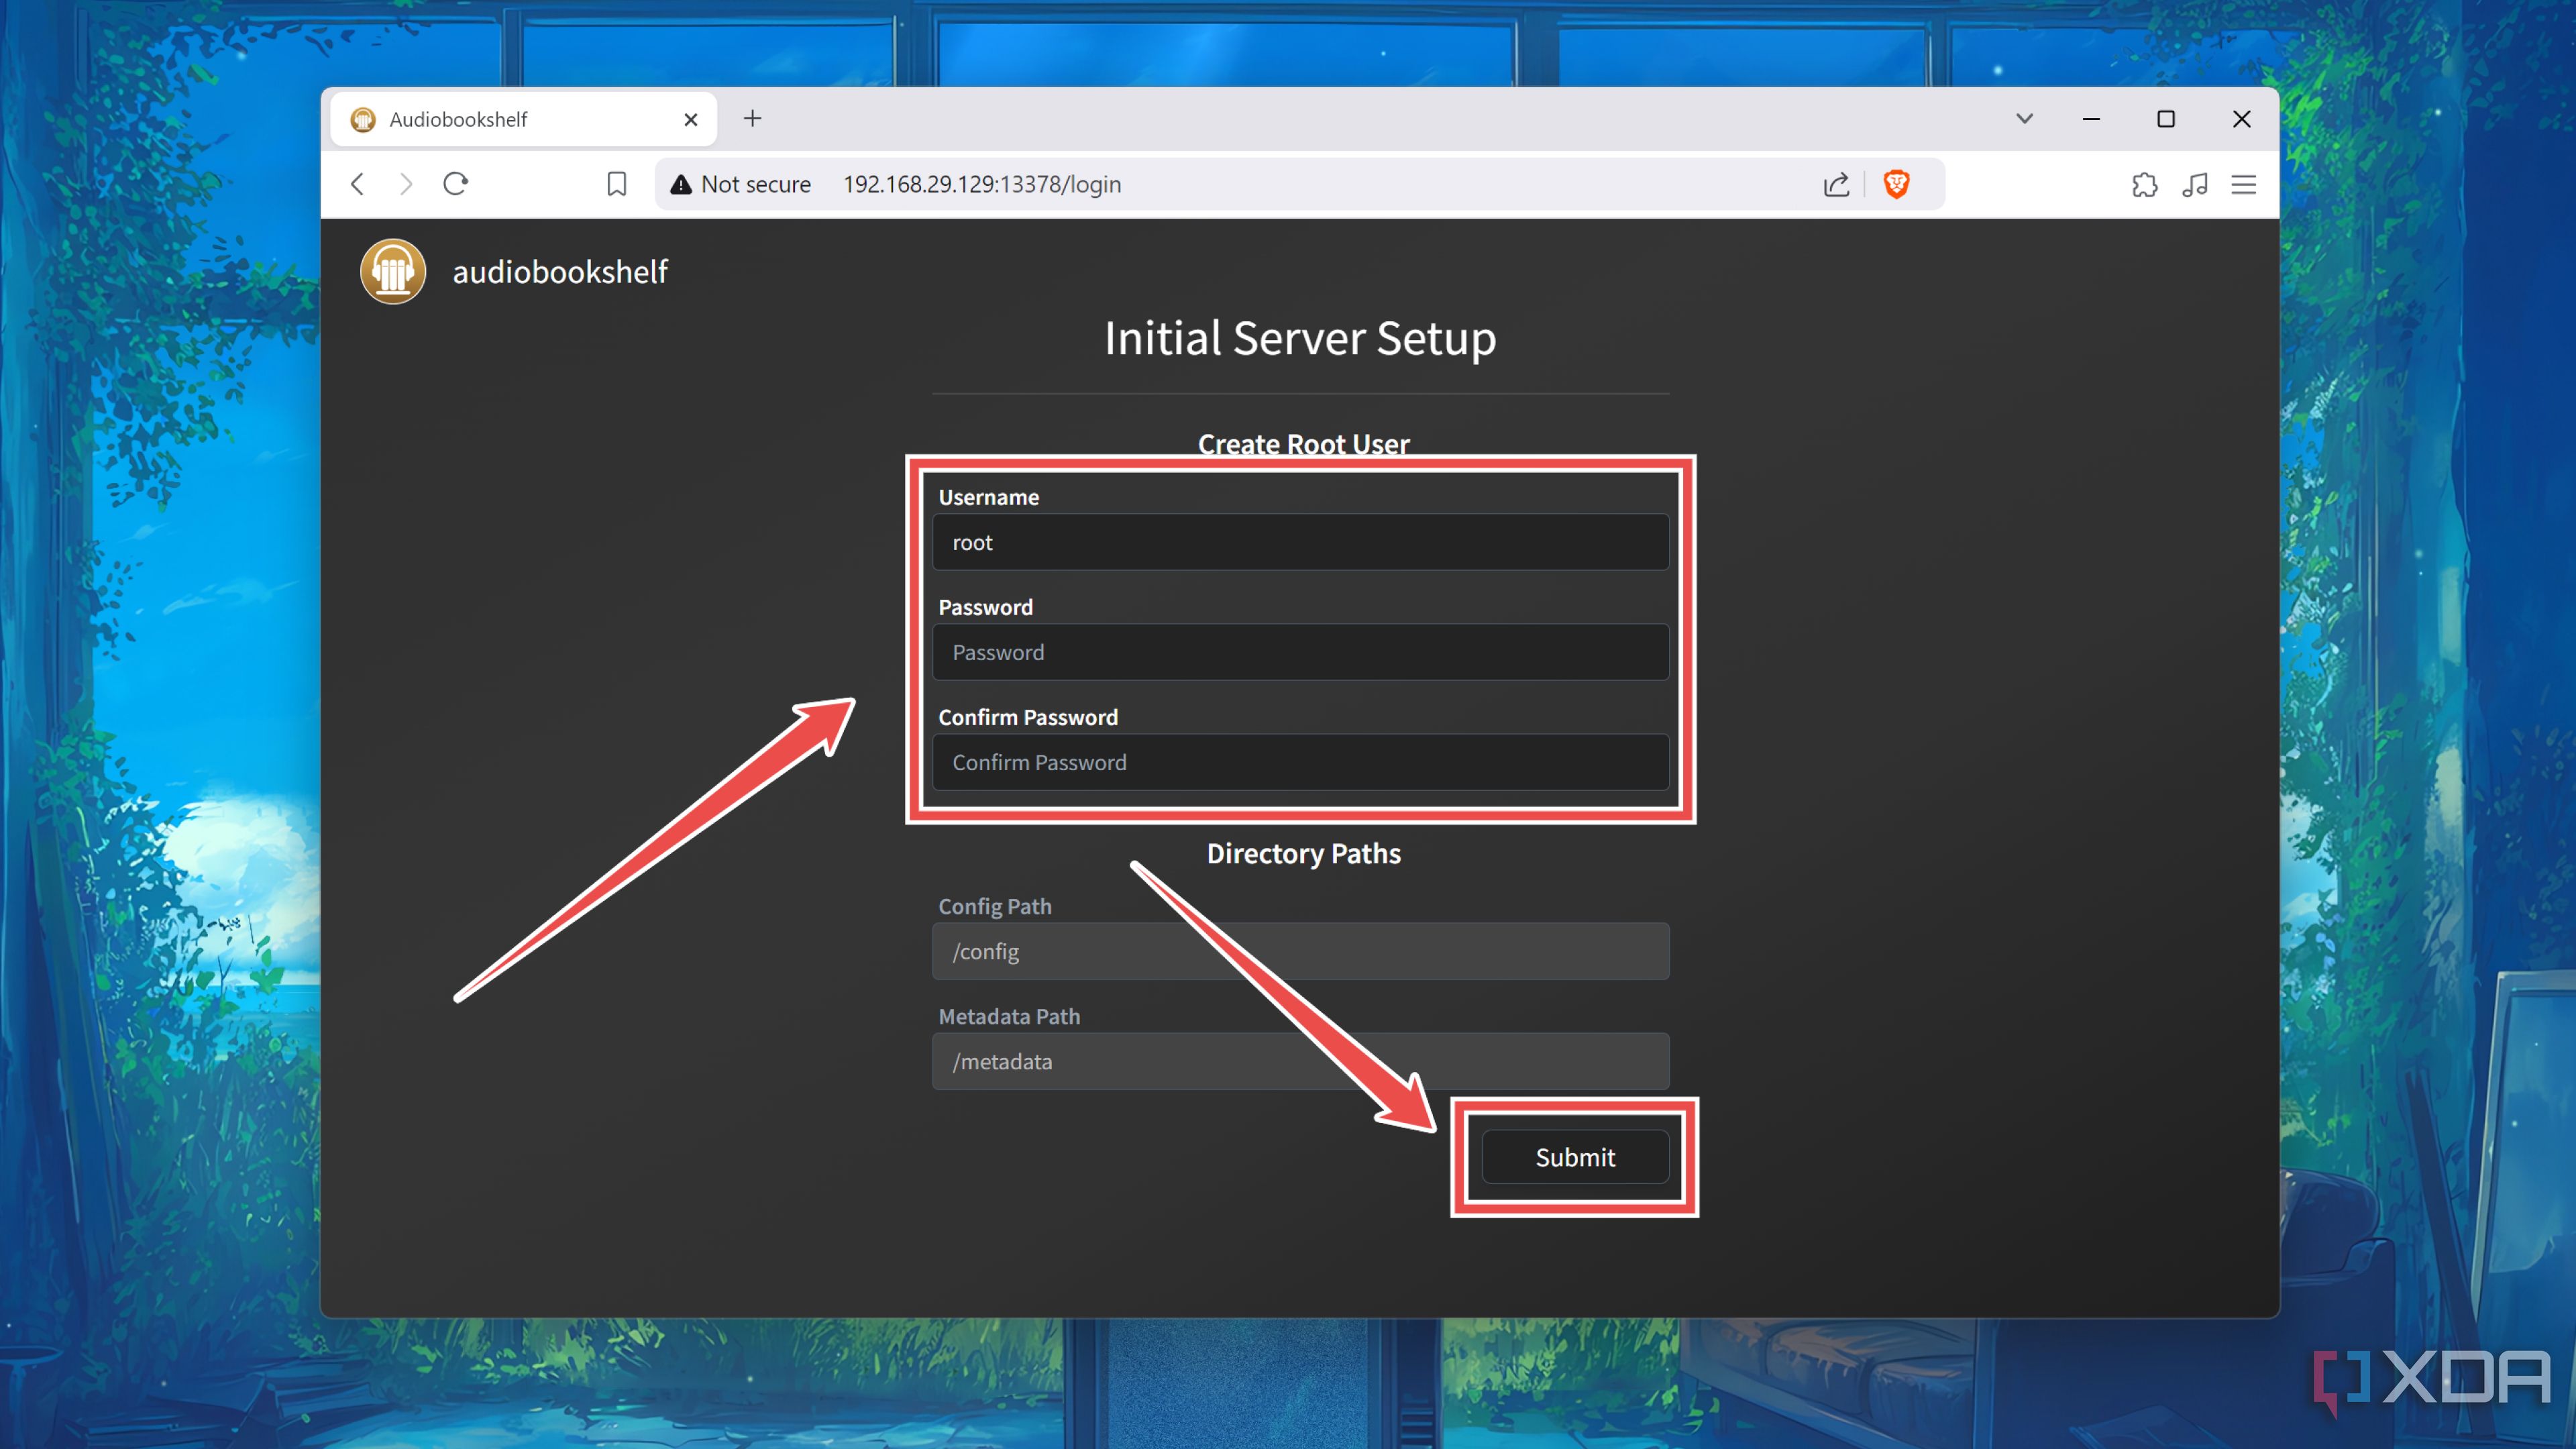
- Under the Initial Server Setup screen, enter the Username and Password you wish to use with Audiobookshelf.
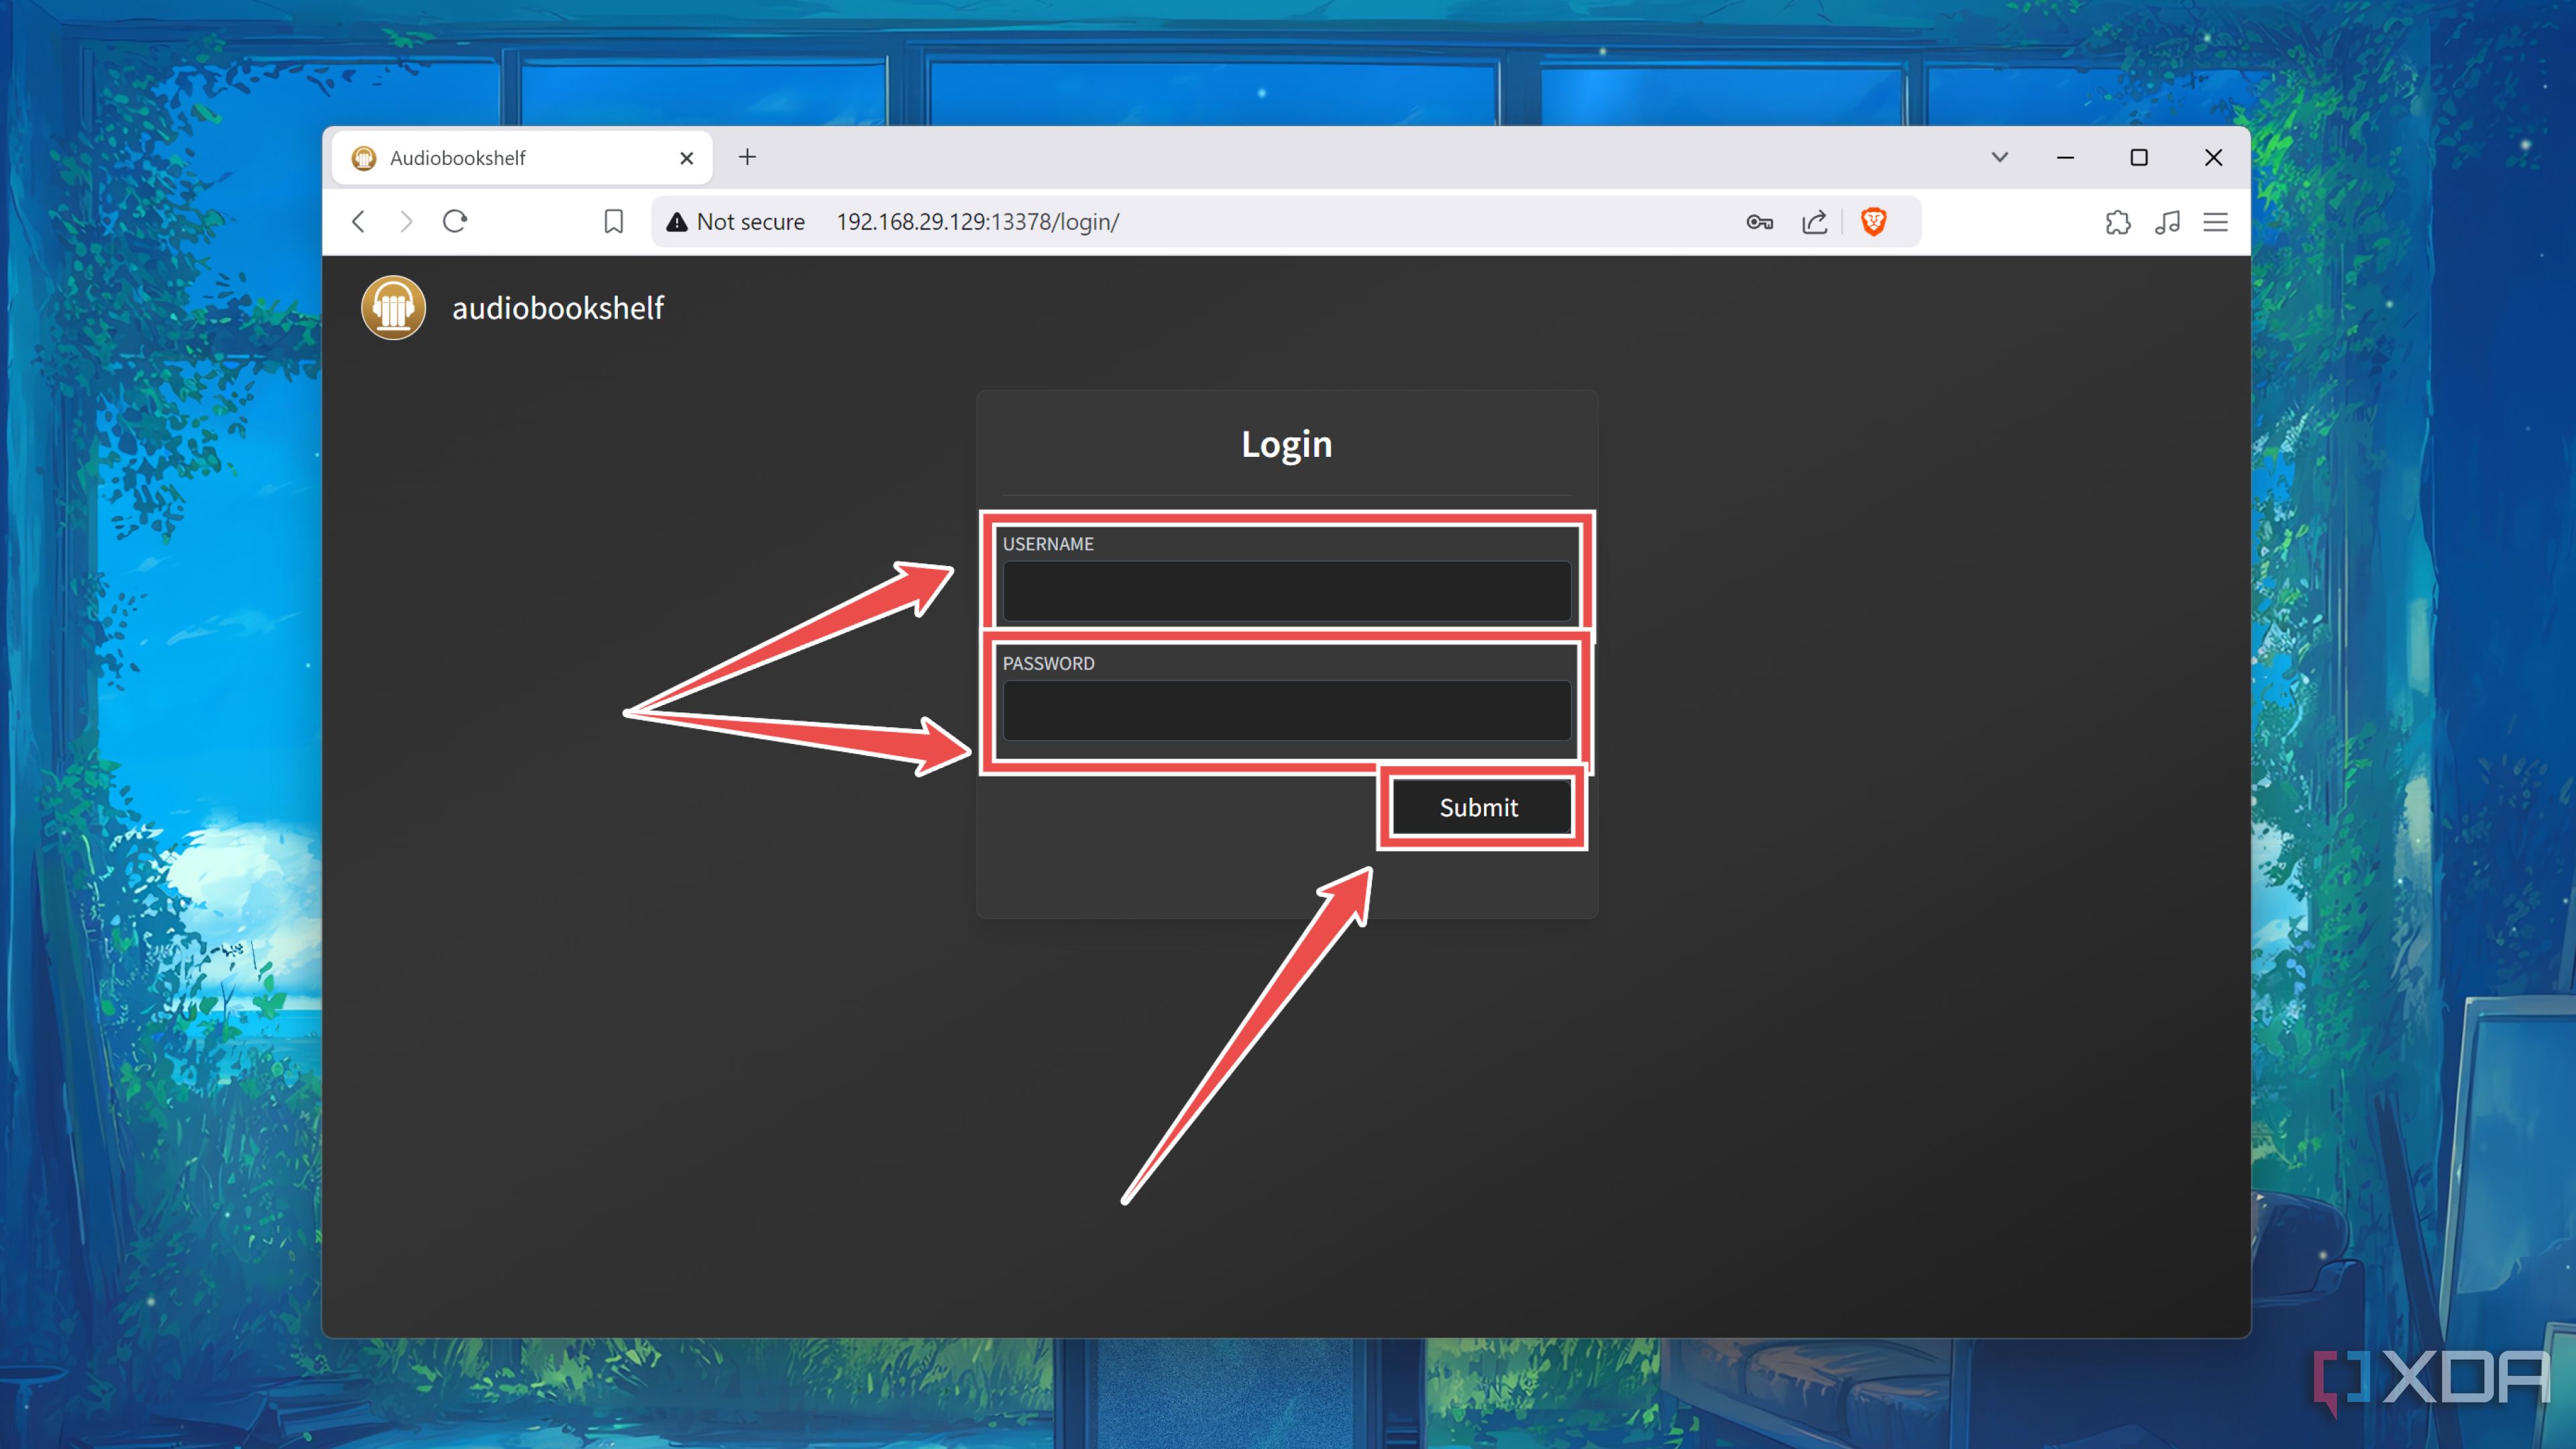
- Log into the container’s web UI using the Username and Password you chose in the previous step.
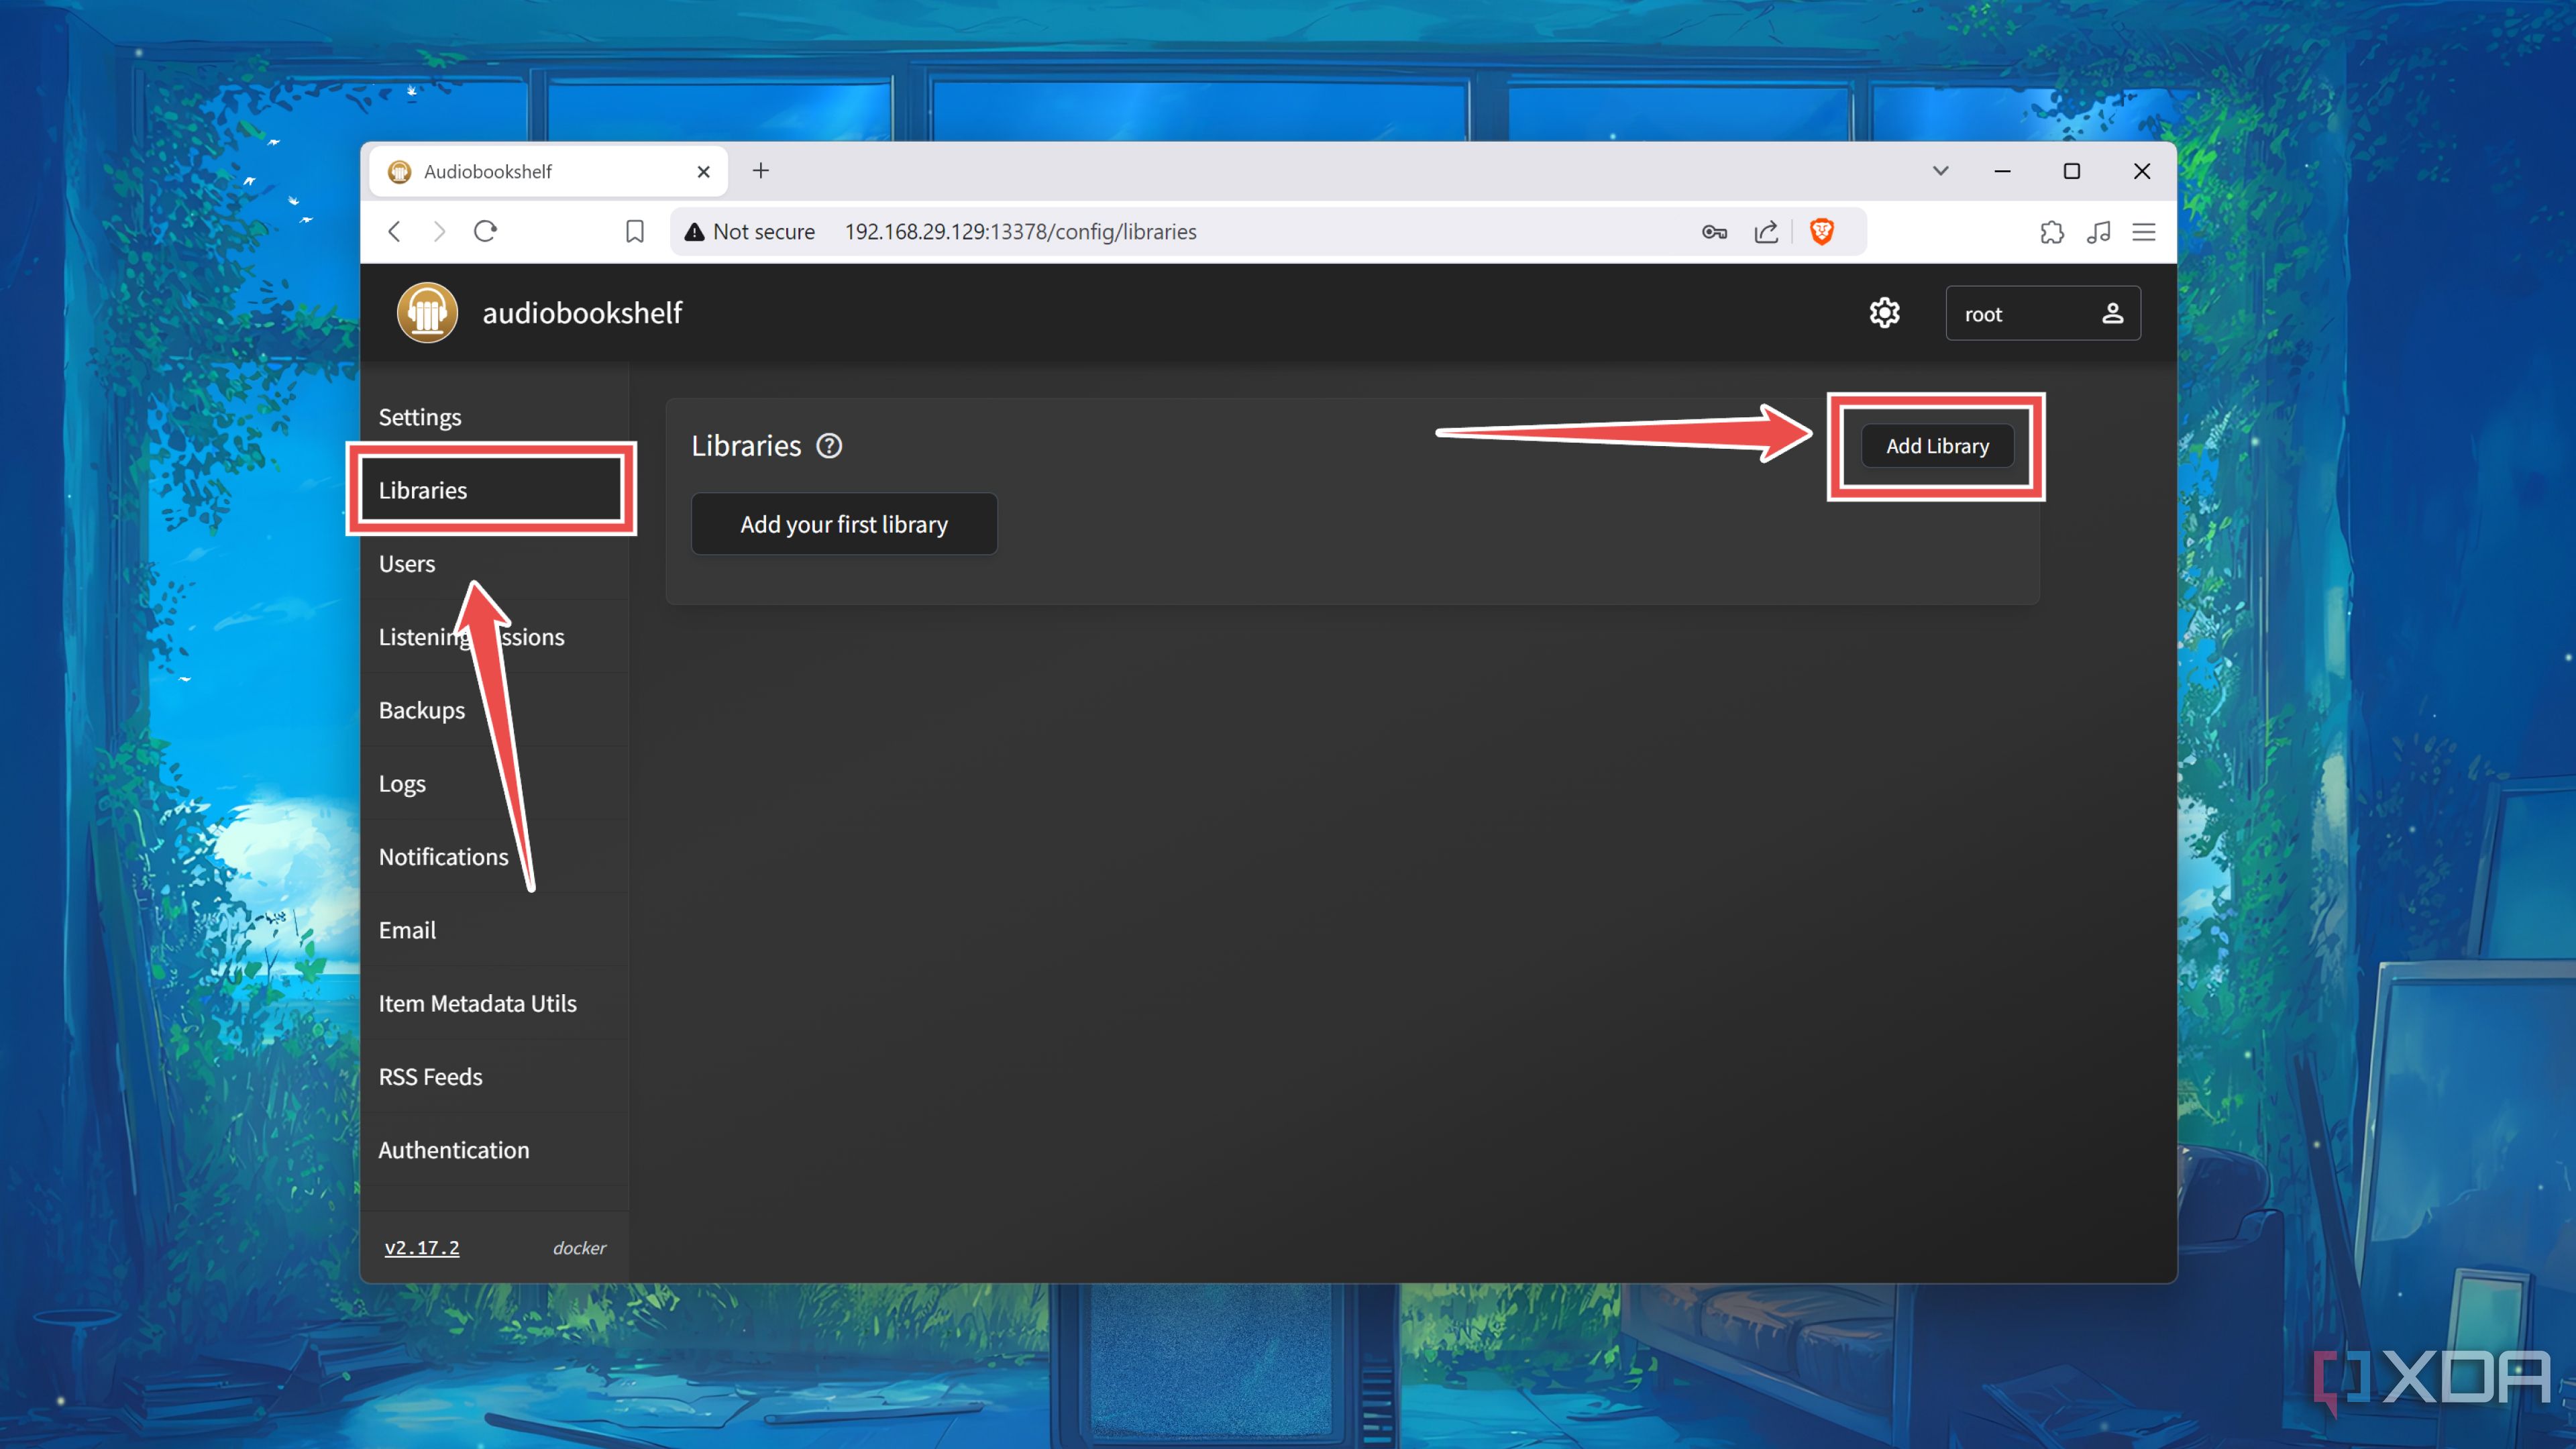
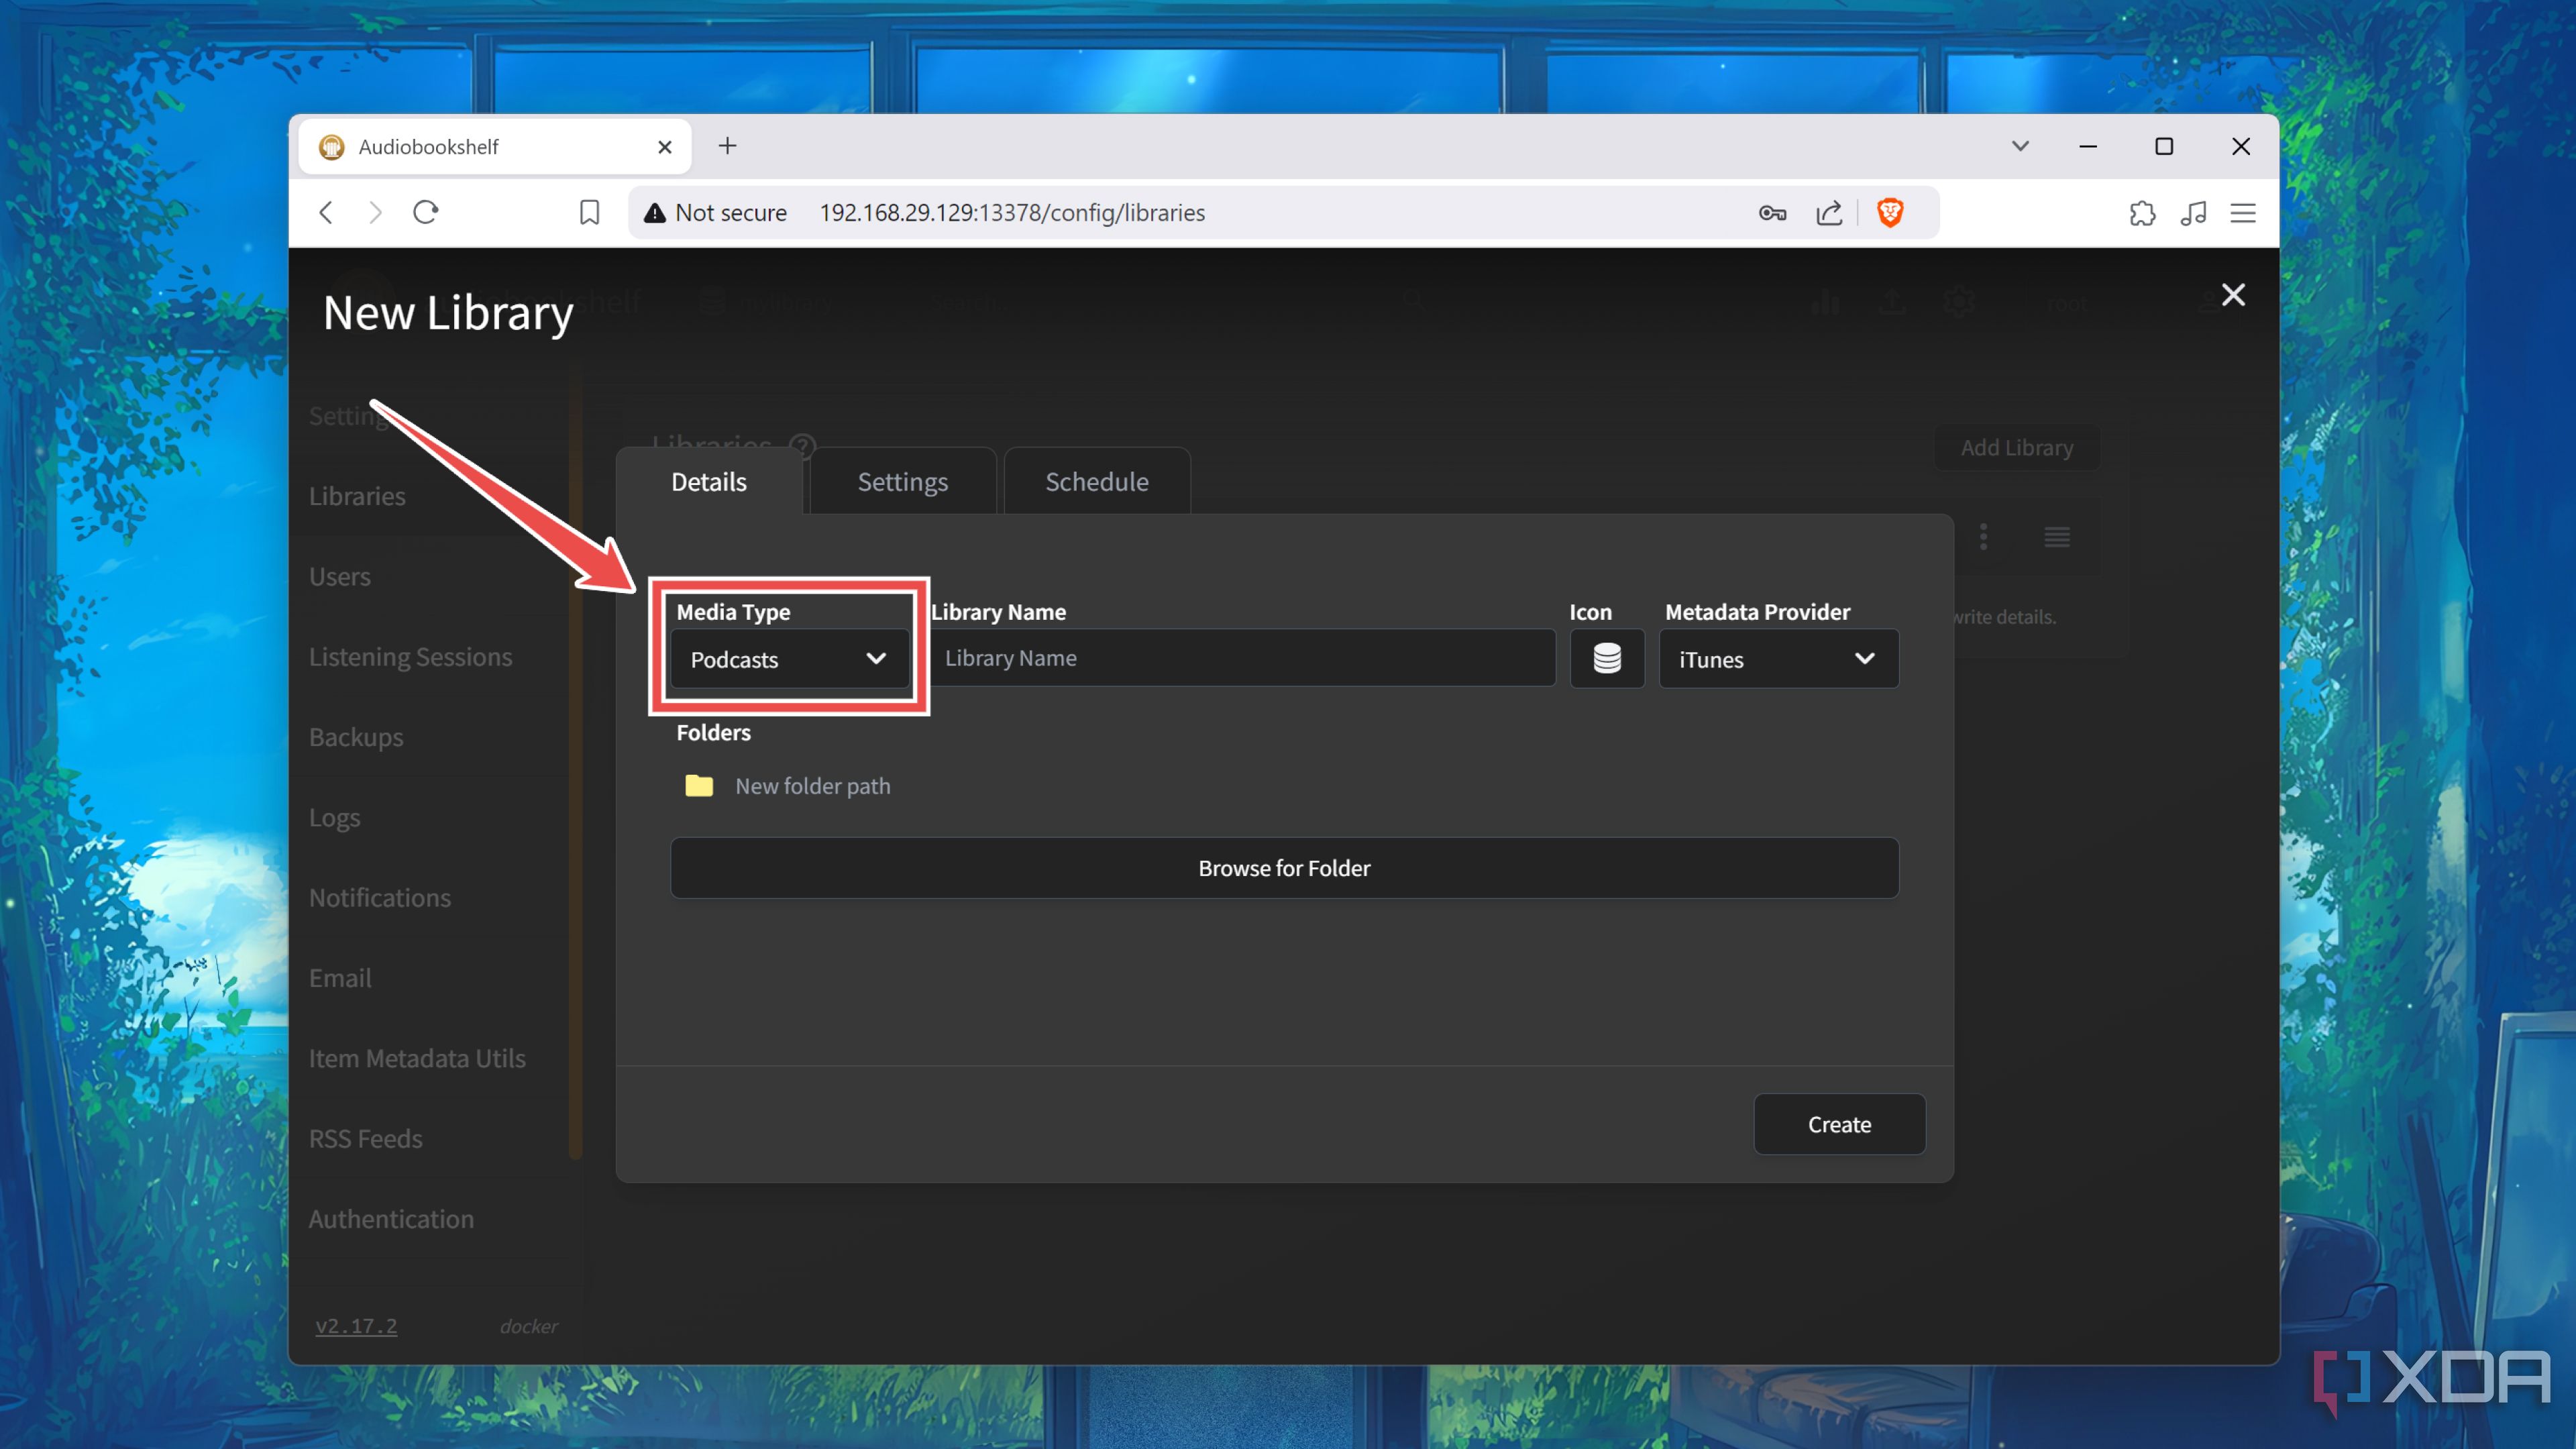
- Switch to the Libraries tab and tap the Add Library button.
- Enter the Library Name and click on Browse for Folder.
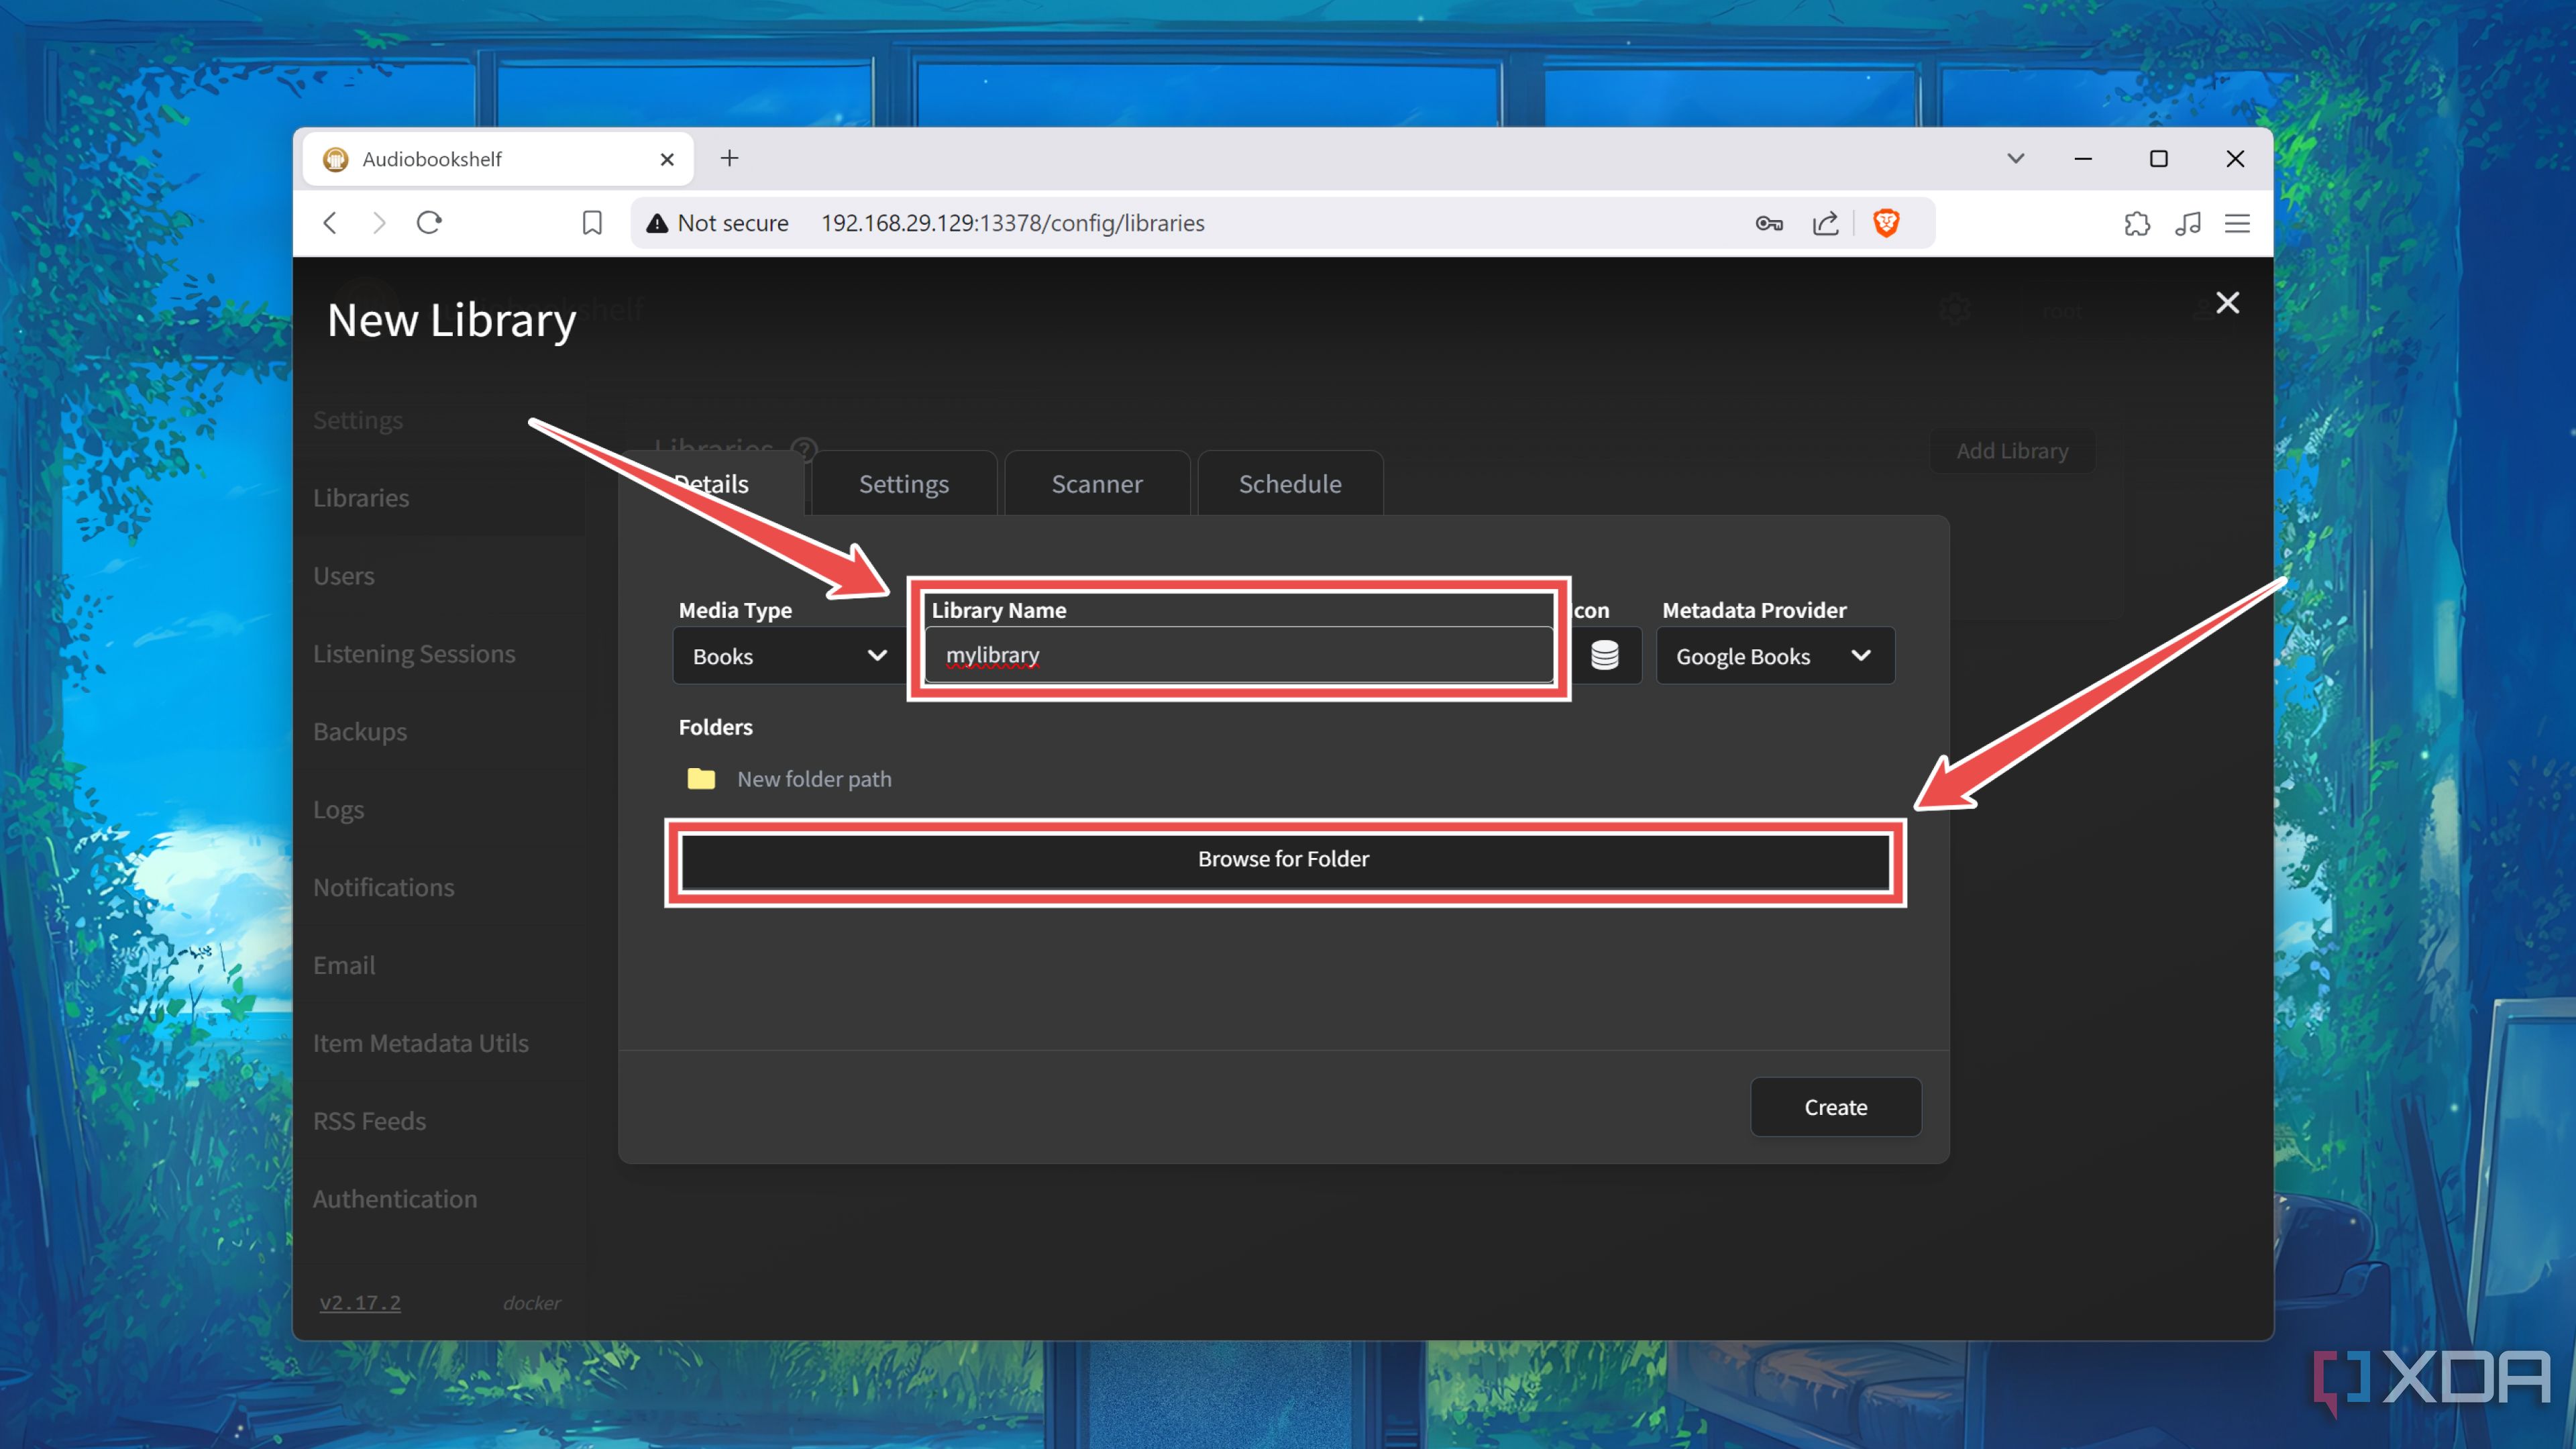
- Select the Folder Path you wish to use to store the audiobook/e-book files and click on Create.
- Switch the Media Type to Podcasts and repeat the last two steps to create a podcast library.
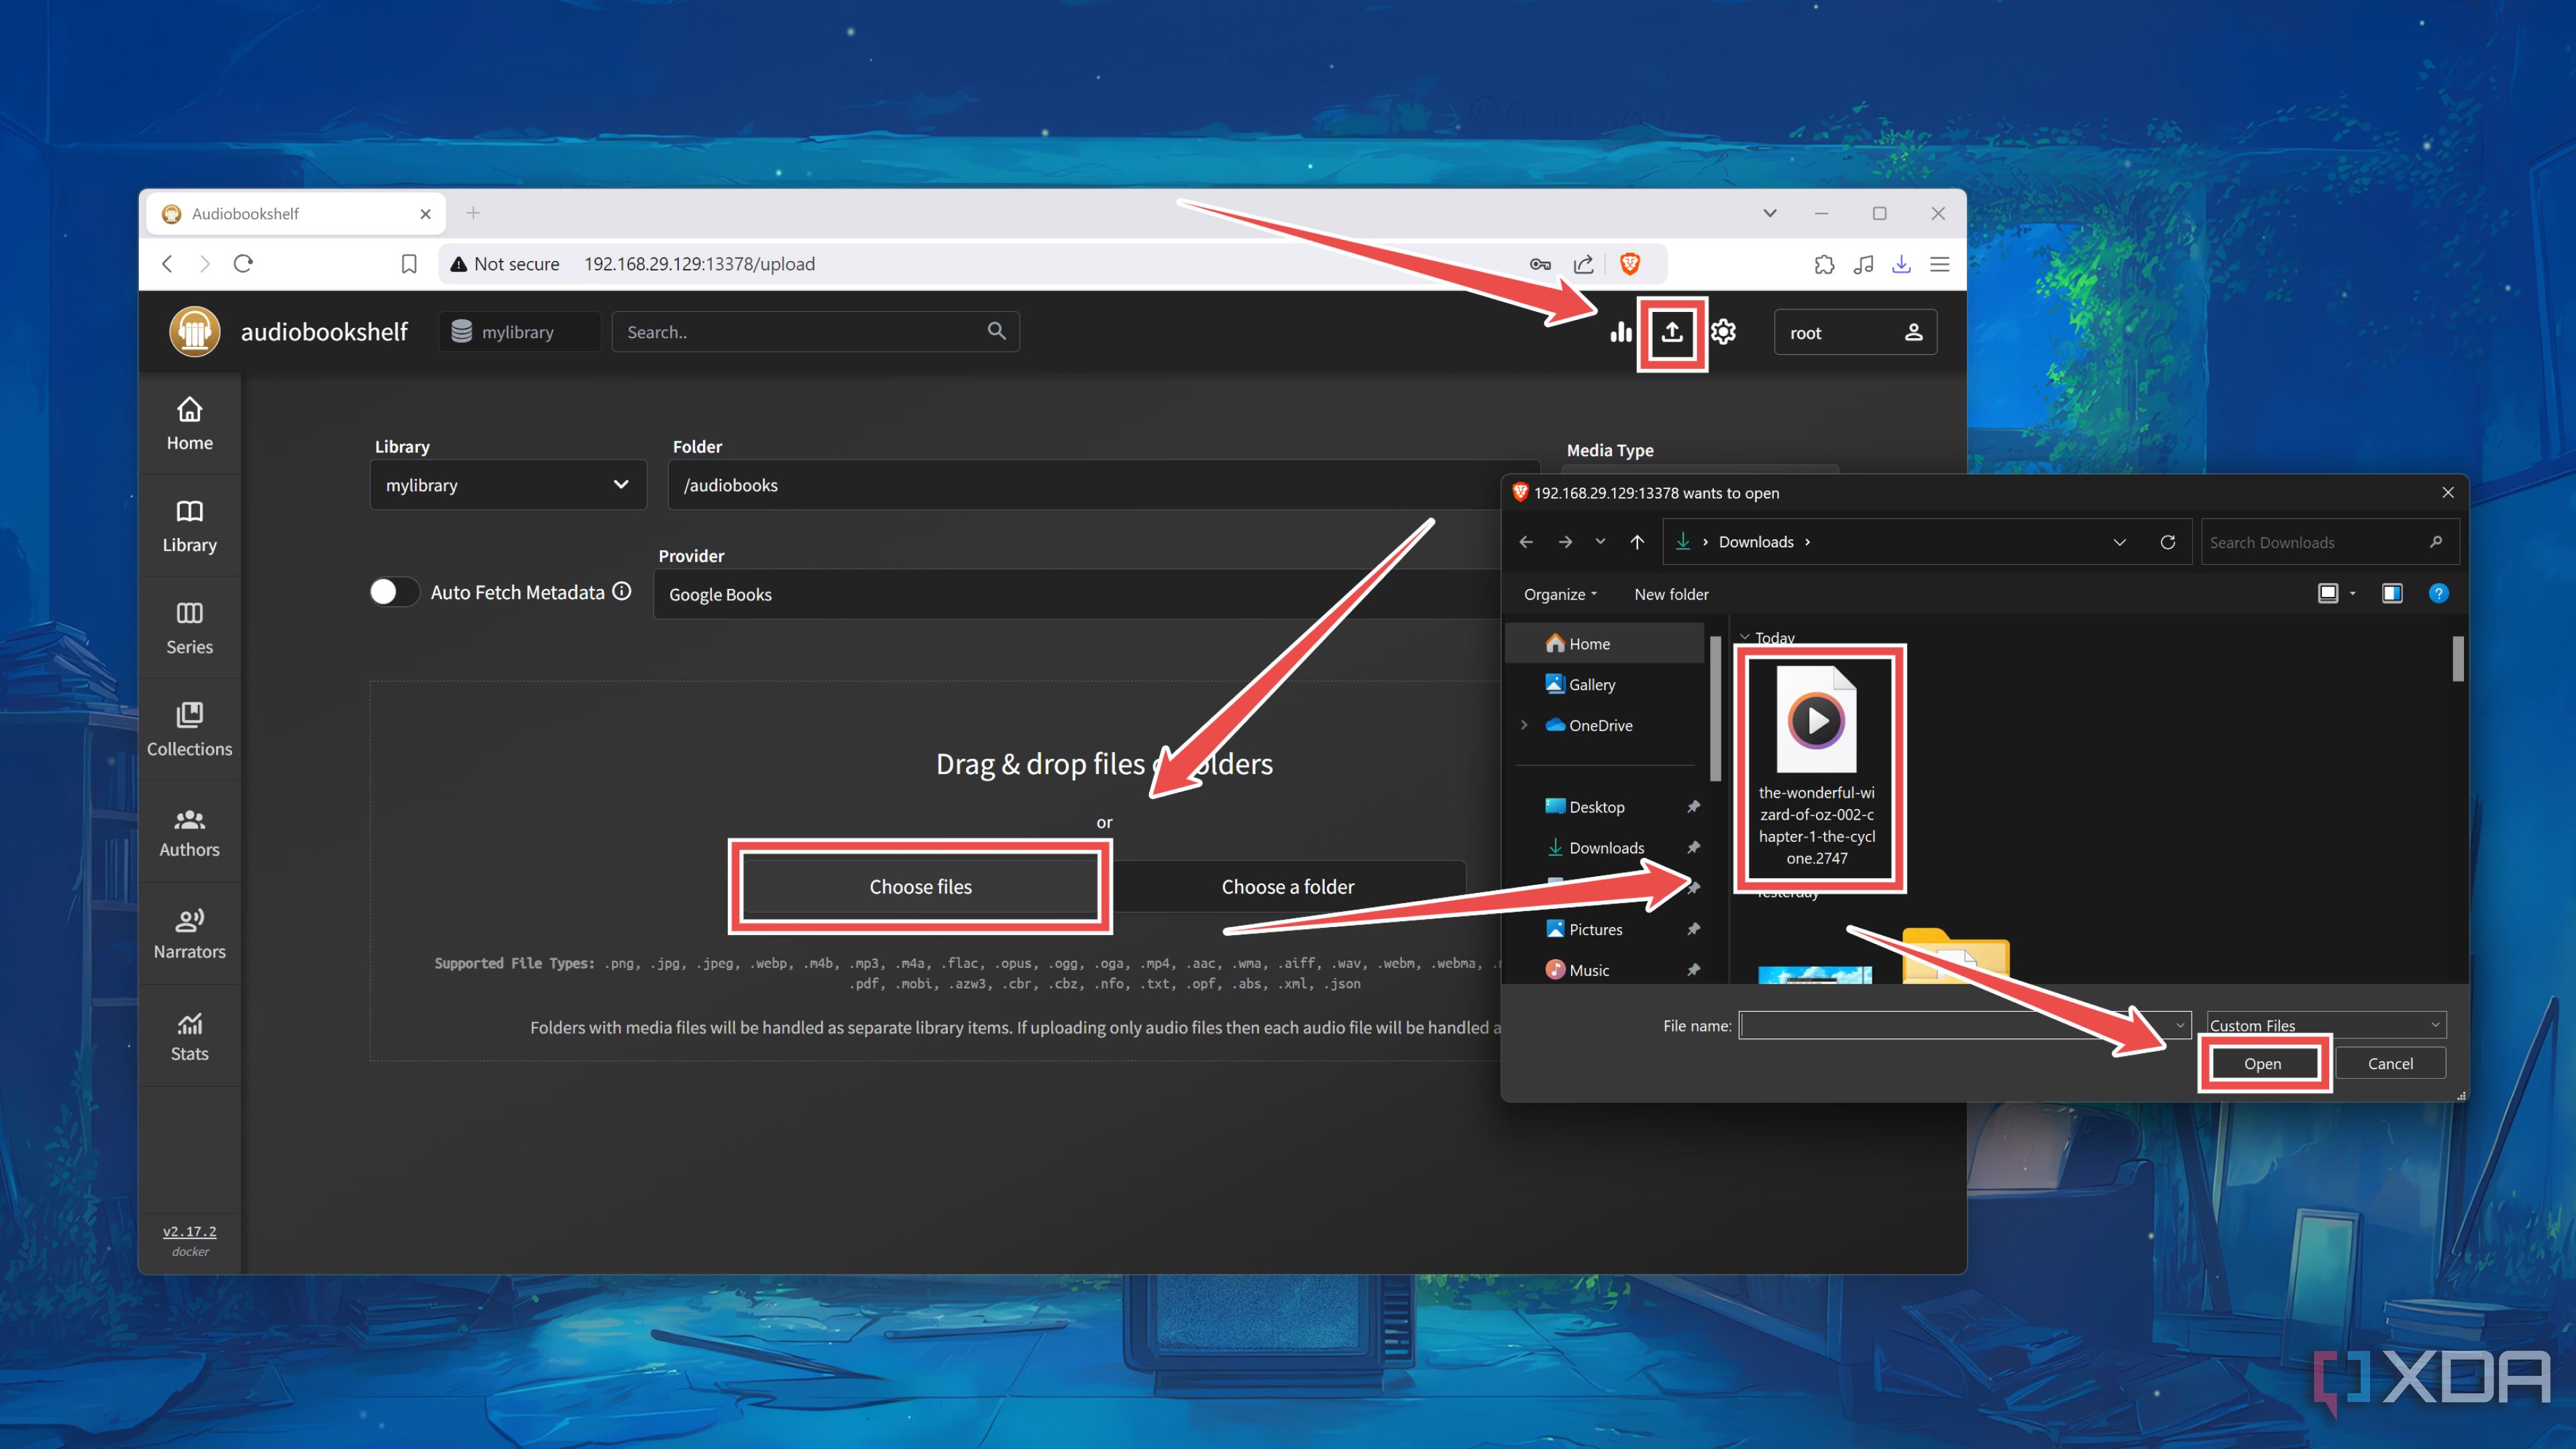
- Click on the Upload button and use the Choose files button to add all your audiobooks, e-books, and podcasts to Audiobookshelf.


Managing your audio-based literature like a pro with Audiobookshelf

Assuming you’ve followed the steps correctly, your uploaded files should appear in the Home tab, though you may need to tap the Scan Library button the first time around. If you wish to modify the Name, Authors, and other fields of your audiobooks, you can do so by hovering your cursor over them and pressing the Edit (pen) icon.
Besides audio-based media, Audiobookshelf can also help you manage e-books. However, I recommend checking out Calibre Web if you’re not very fond of audiobooks, as it has a lot more options than Audiobookshelf when it comes to helping you build a robust e-book library.

Related
Build a Unix-powered home lab with SmartOS
The Illumos-based SmartOS may be a bit different from your usual home lab OS, but it’s a solid option for Unix enthusiasts
#Host #audiobook #podcast #library #Audiobookshelf
source: https://www.xda-developers.com/host-your-own-podcast-library-with-audiobookshelf/

