

Switching from third-party apps to self-hosted services lets you reduce your software expenses and retain complete control over your data. However, things can get a little hairy once your app catalog evolves into a battalion of containers and virtual machines, with each service possessing a unique IP address and port number.
Thankfully, dashboard apps can take a lot of complexity out of home lab management. Plus, they’re also a great way to show off your formidable self-hosted library. While there are plenty of dashboard tools available on the Internet, Heimdall is great for beginners as it combines an aesthetically pleasing UI with a painless installation procedure. If the app strikes your fancy, here’s a step-by-step procedure on how to configure Heimdall on your home server.
Related
4 of the best tools to document your home-lab operations
Struggling to keep track of your home lab experiments? These apps can help you out!
Deploying the Heimdall instance
Like most other self-hosted services, you can set up Heimdall inside a container. For Proxmox users, the procedure is as simple as running a command from the community-managed Proxmox VE-Helper Scripts repository.
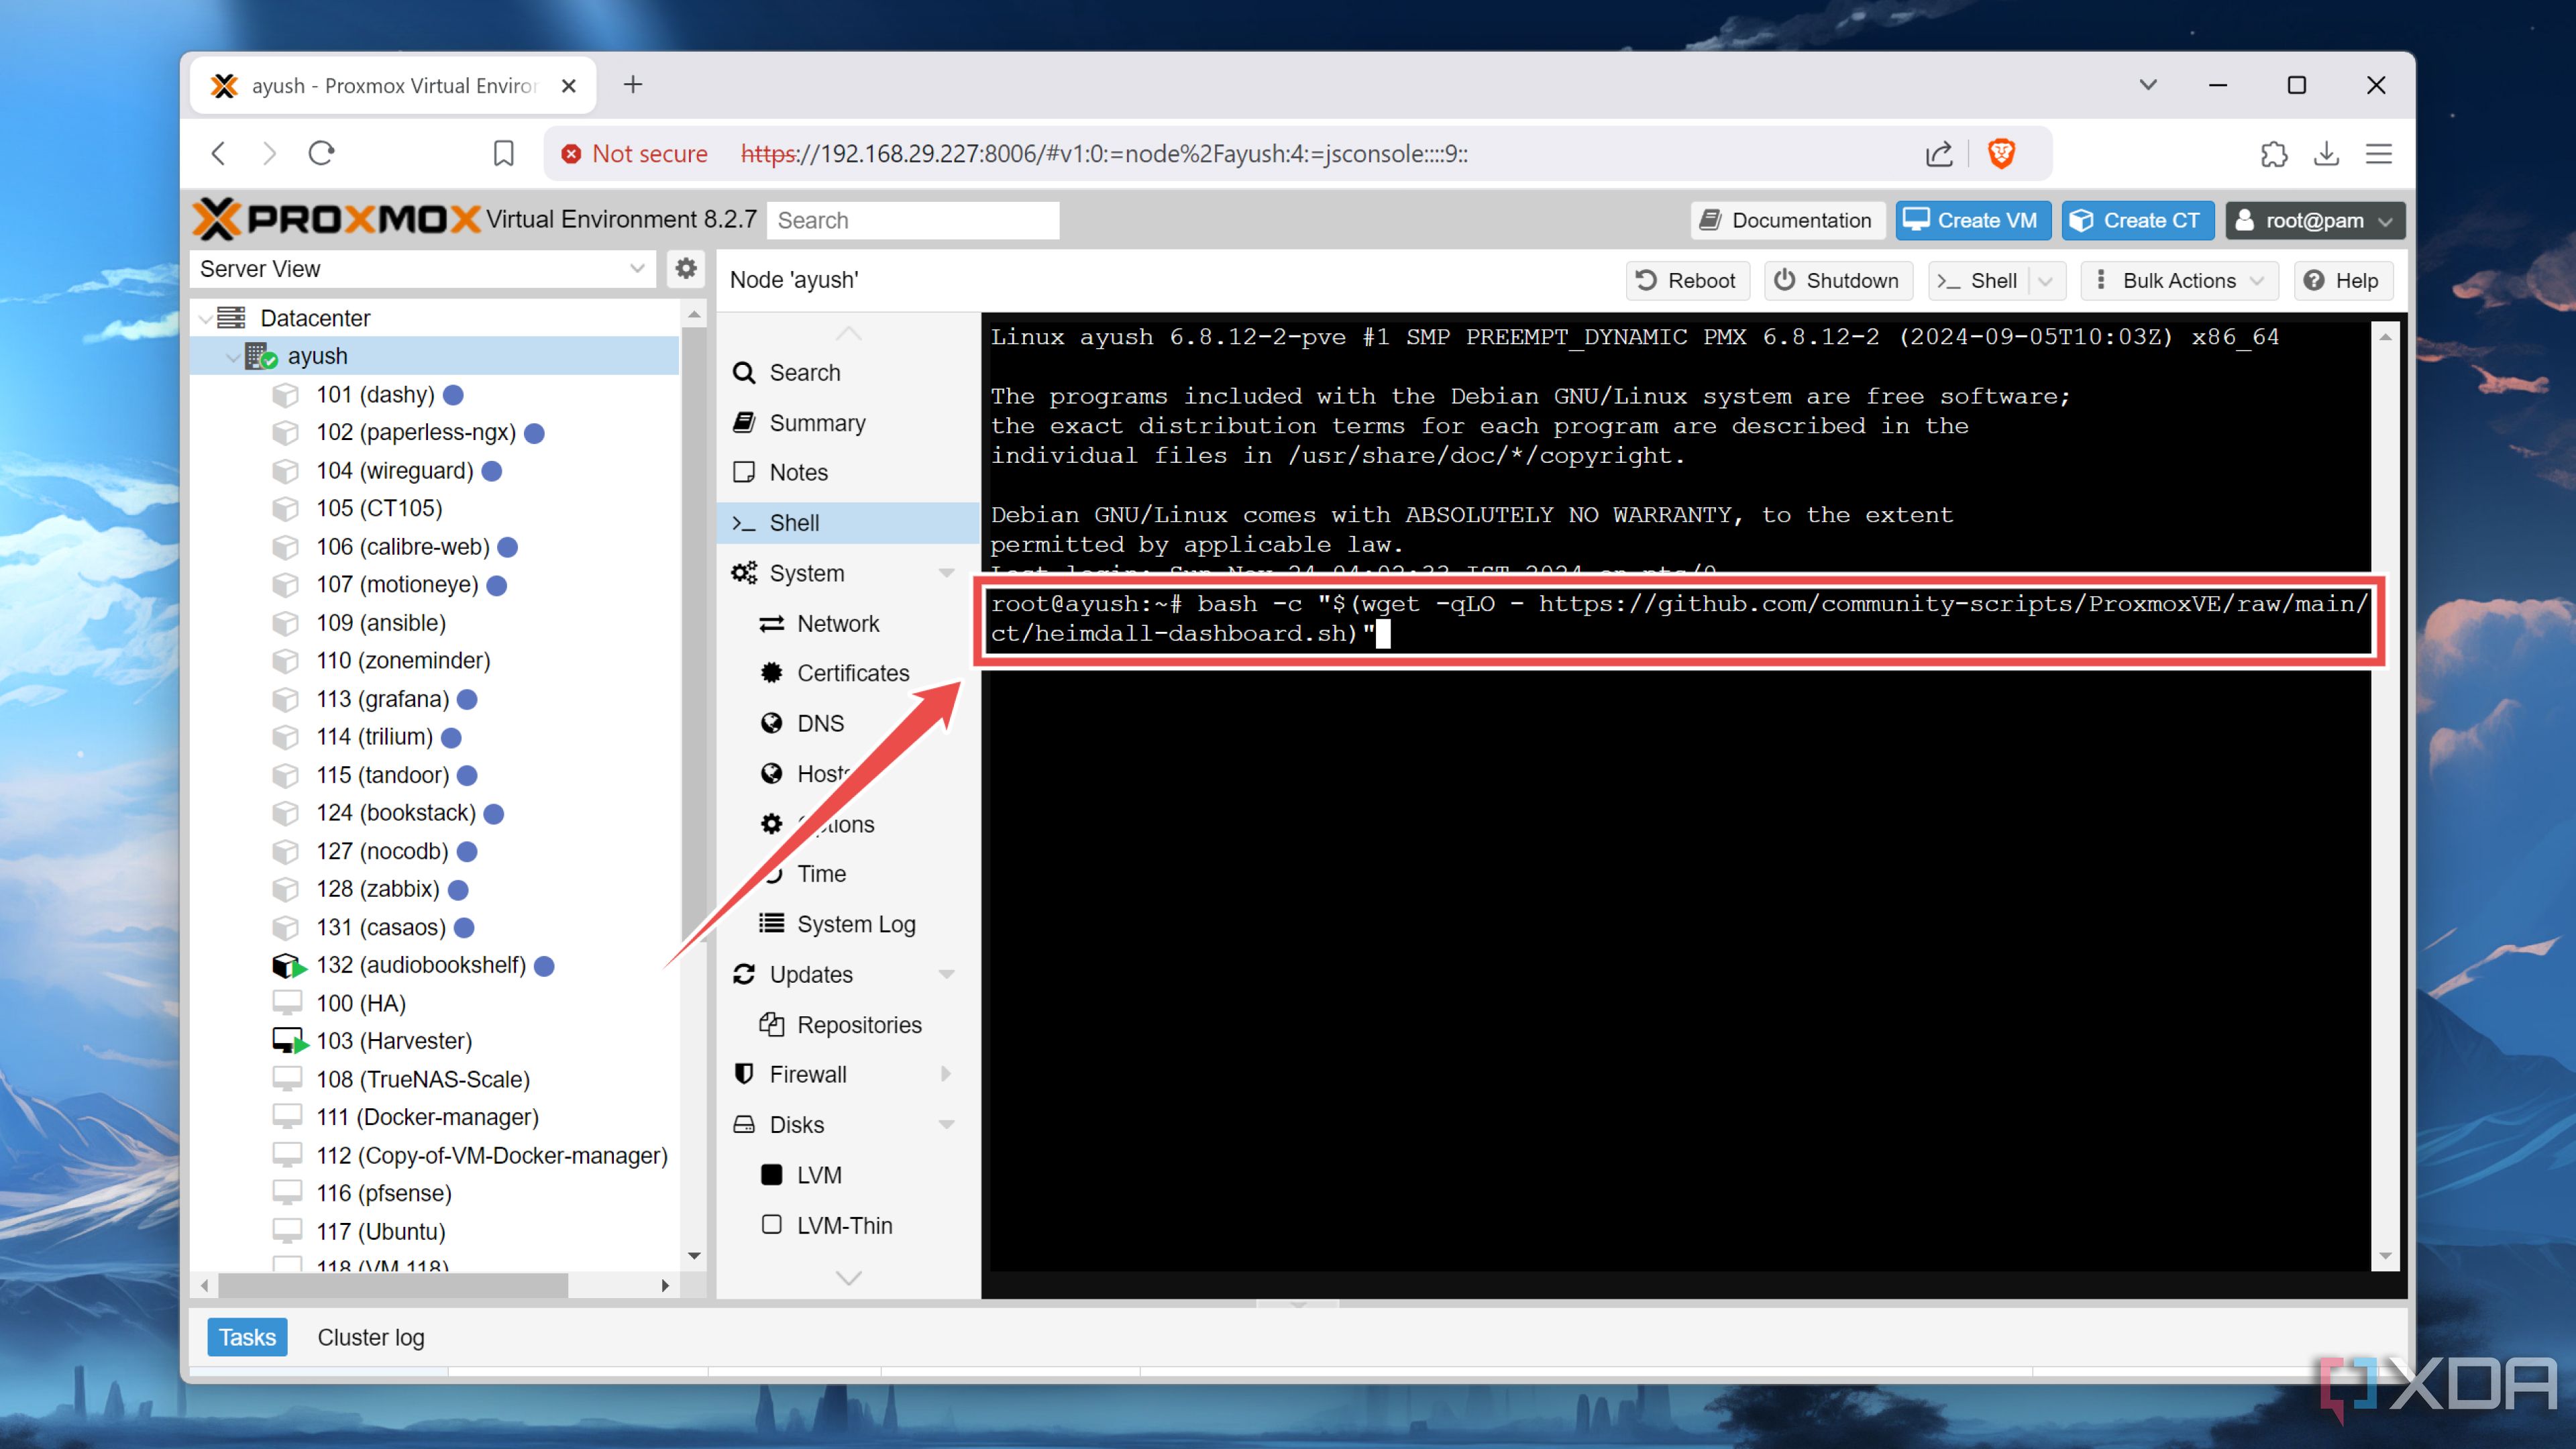
- Open the Shell tab of your Proxmox node.

- Paste this command inside the terminal interface:
bash -c "$(wget -qLO - https://github.com/community-scripts/ProxmoxVE/raw/main/ct/heimdall-dashboard.sh)"
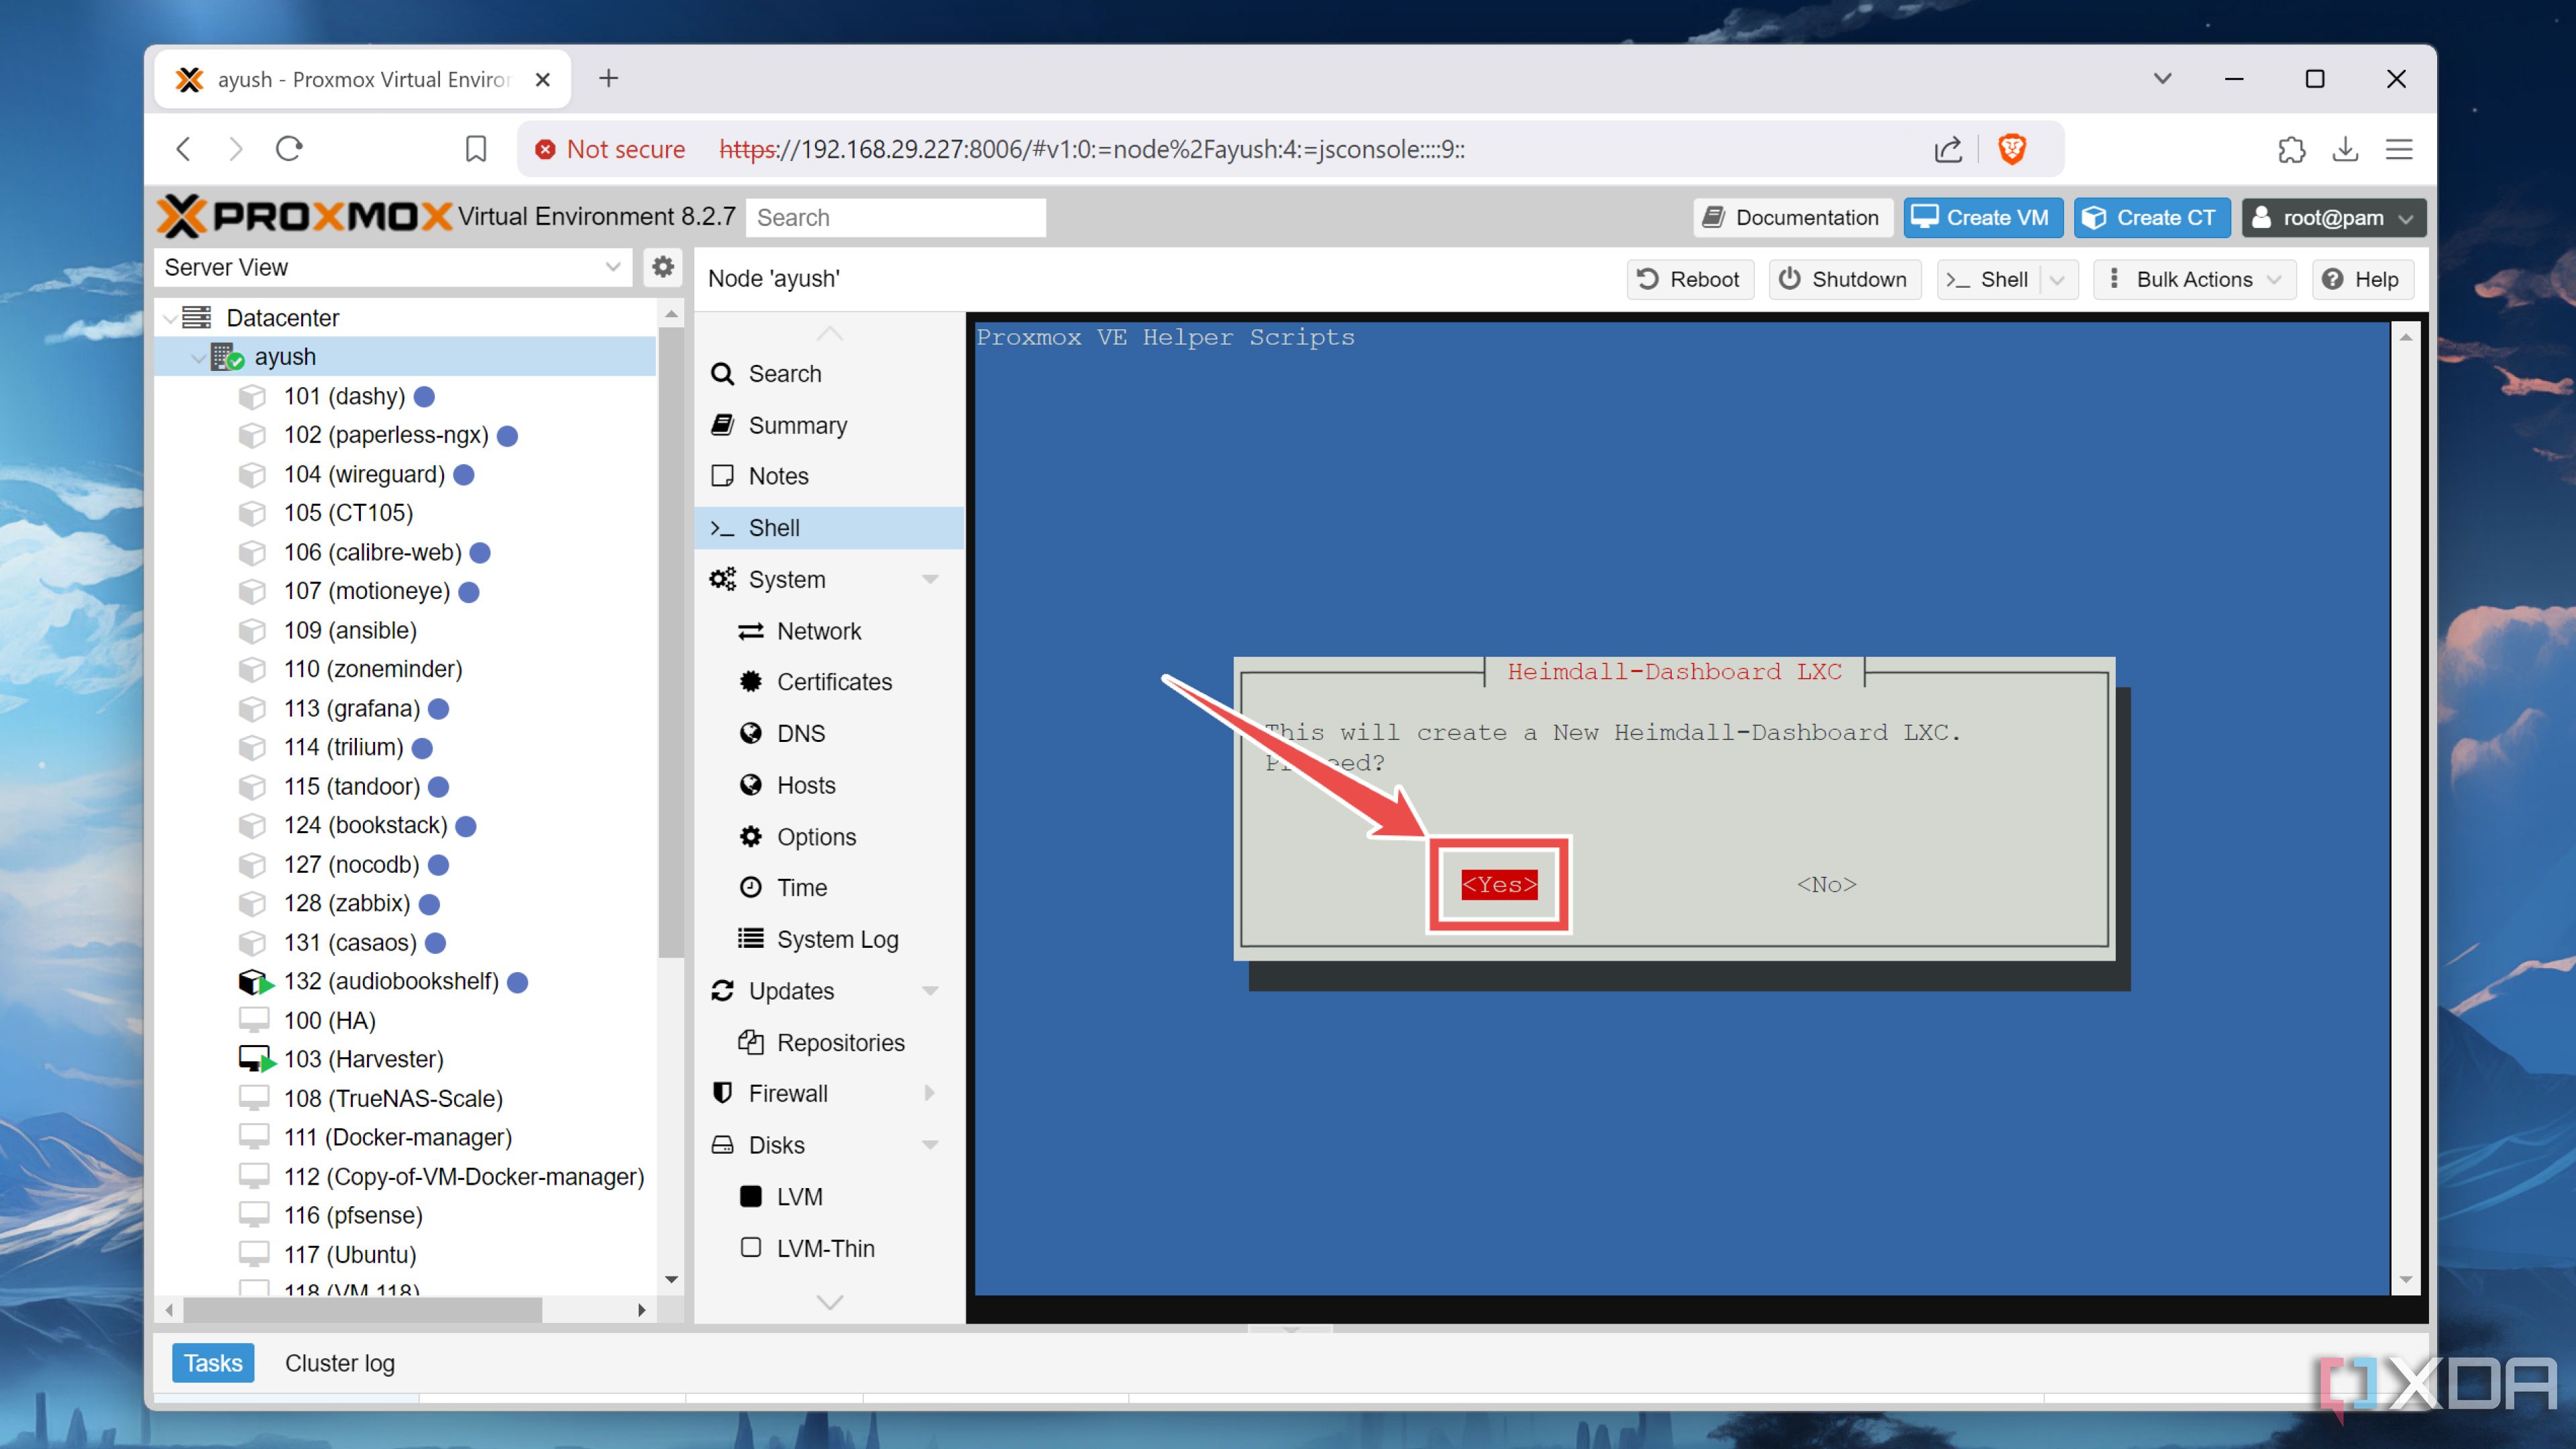
- Tap Yes twice and wait for the script to create the Heimdall LXC container.
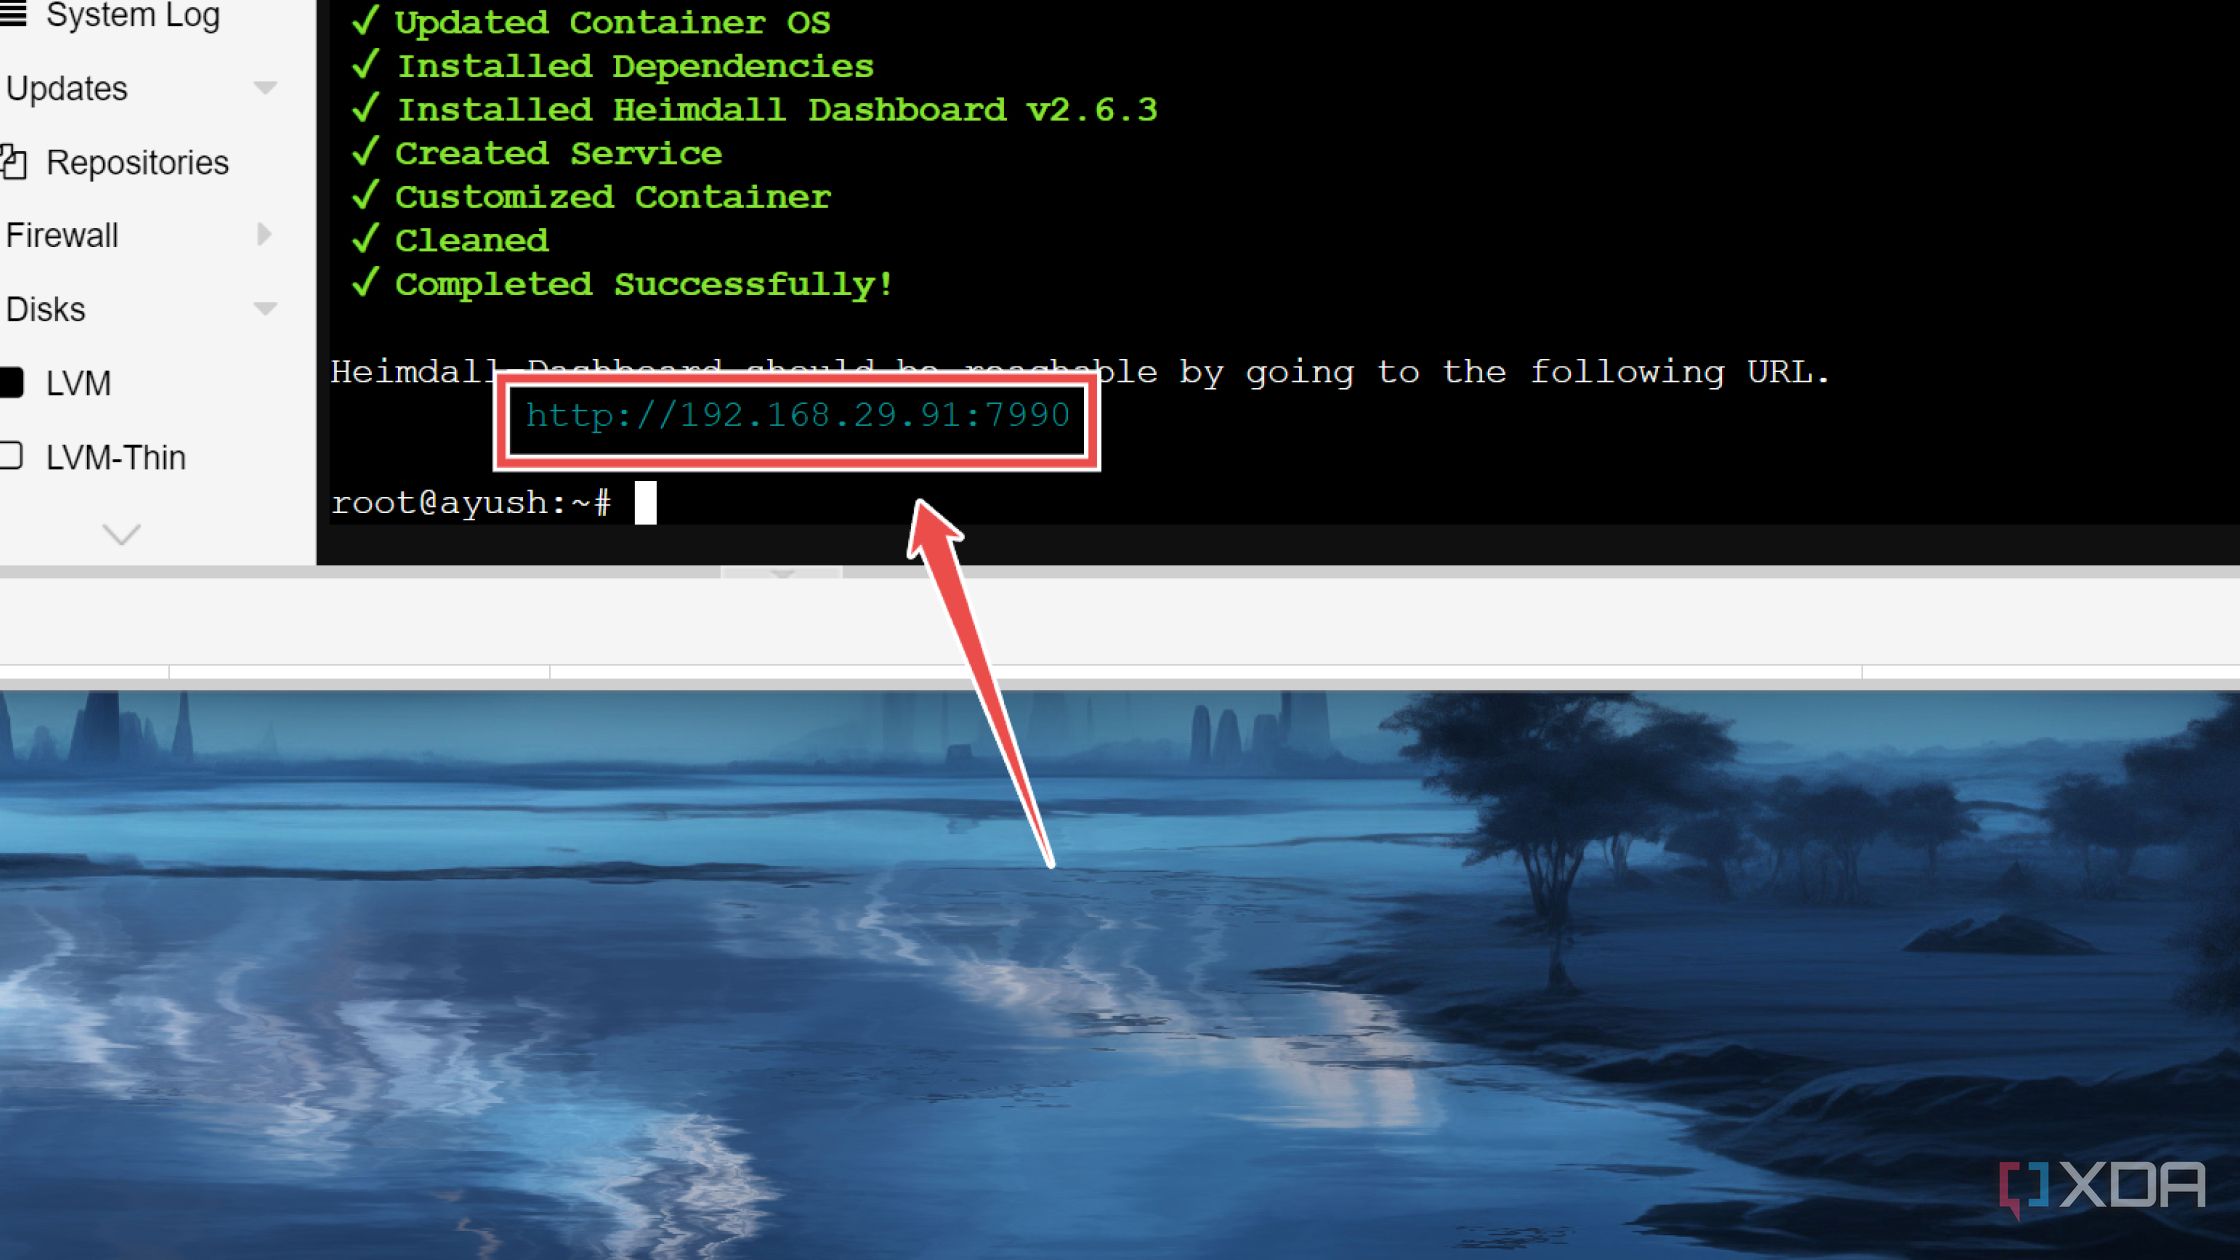
- Launch the Heimdall web UI by entering the URL displayed inside the Proxmox shell into your preferred web browser.


Alternatively, Linux users (and by extension, anyone running a Linux distribution on Windows using VirtualBox/VMware Workstation Pro) can spin up a dedicated Docker container for Heimdall. However, you’ll need Docker Engine installed on your system before you can proceed forward.
- Launch the terminal app on the Linux distro.
- Run the following command to create a new docker-compose.yml file:
sudo nano docker-compose.yml

- Head to the official page of the linuxserver/heimdall repo and copy the code under the Docker Compose section into this file.
- Create a new folder for the Heimdall config directory and paste its path inside the Volumes field.
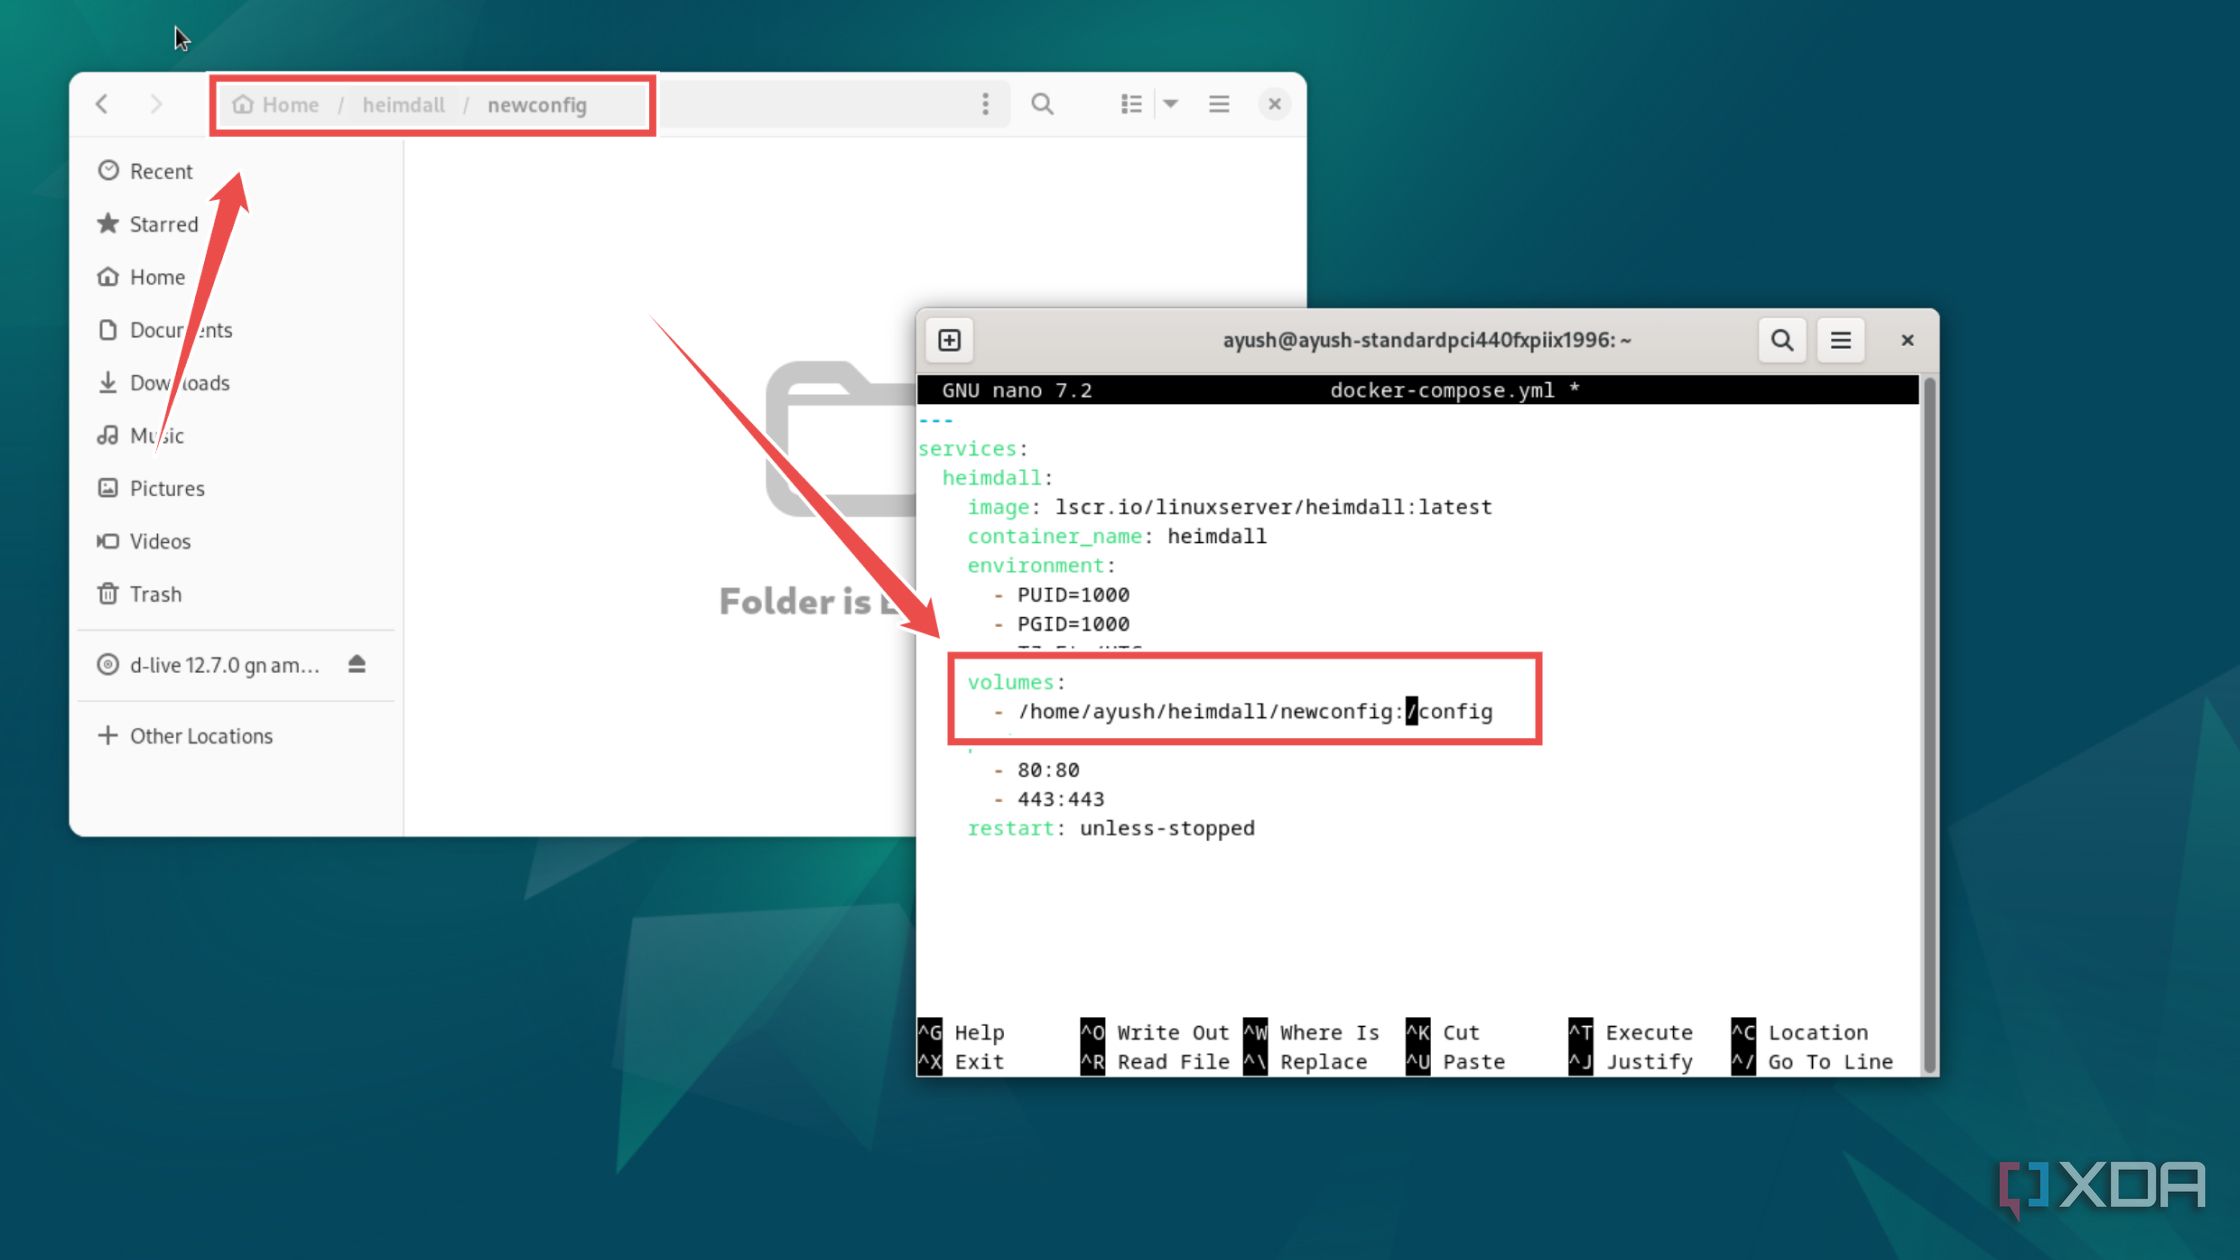
For home server enthusiasts running multiple containers, it’s possible that another service might be using port 80. If that’s the case, you can modify the port variables in the file to avoid port conflicts between Heimdall and other services.
- Press Ctrl+X before tapping the Y and Enter keys to save and exit the docker-compose.yml file.
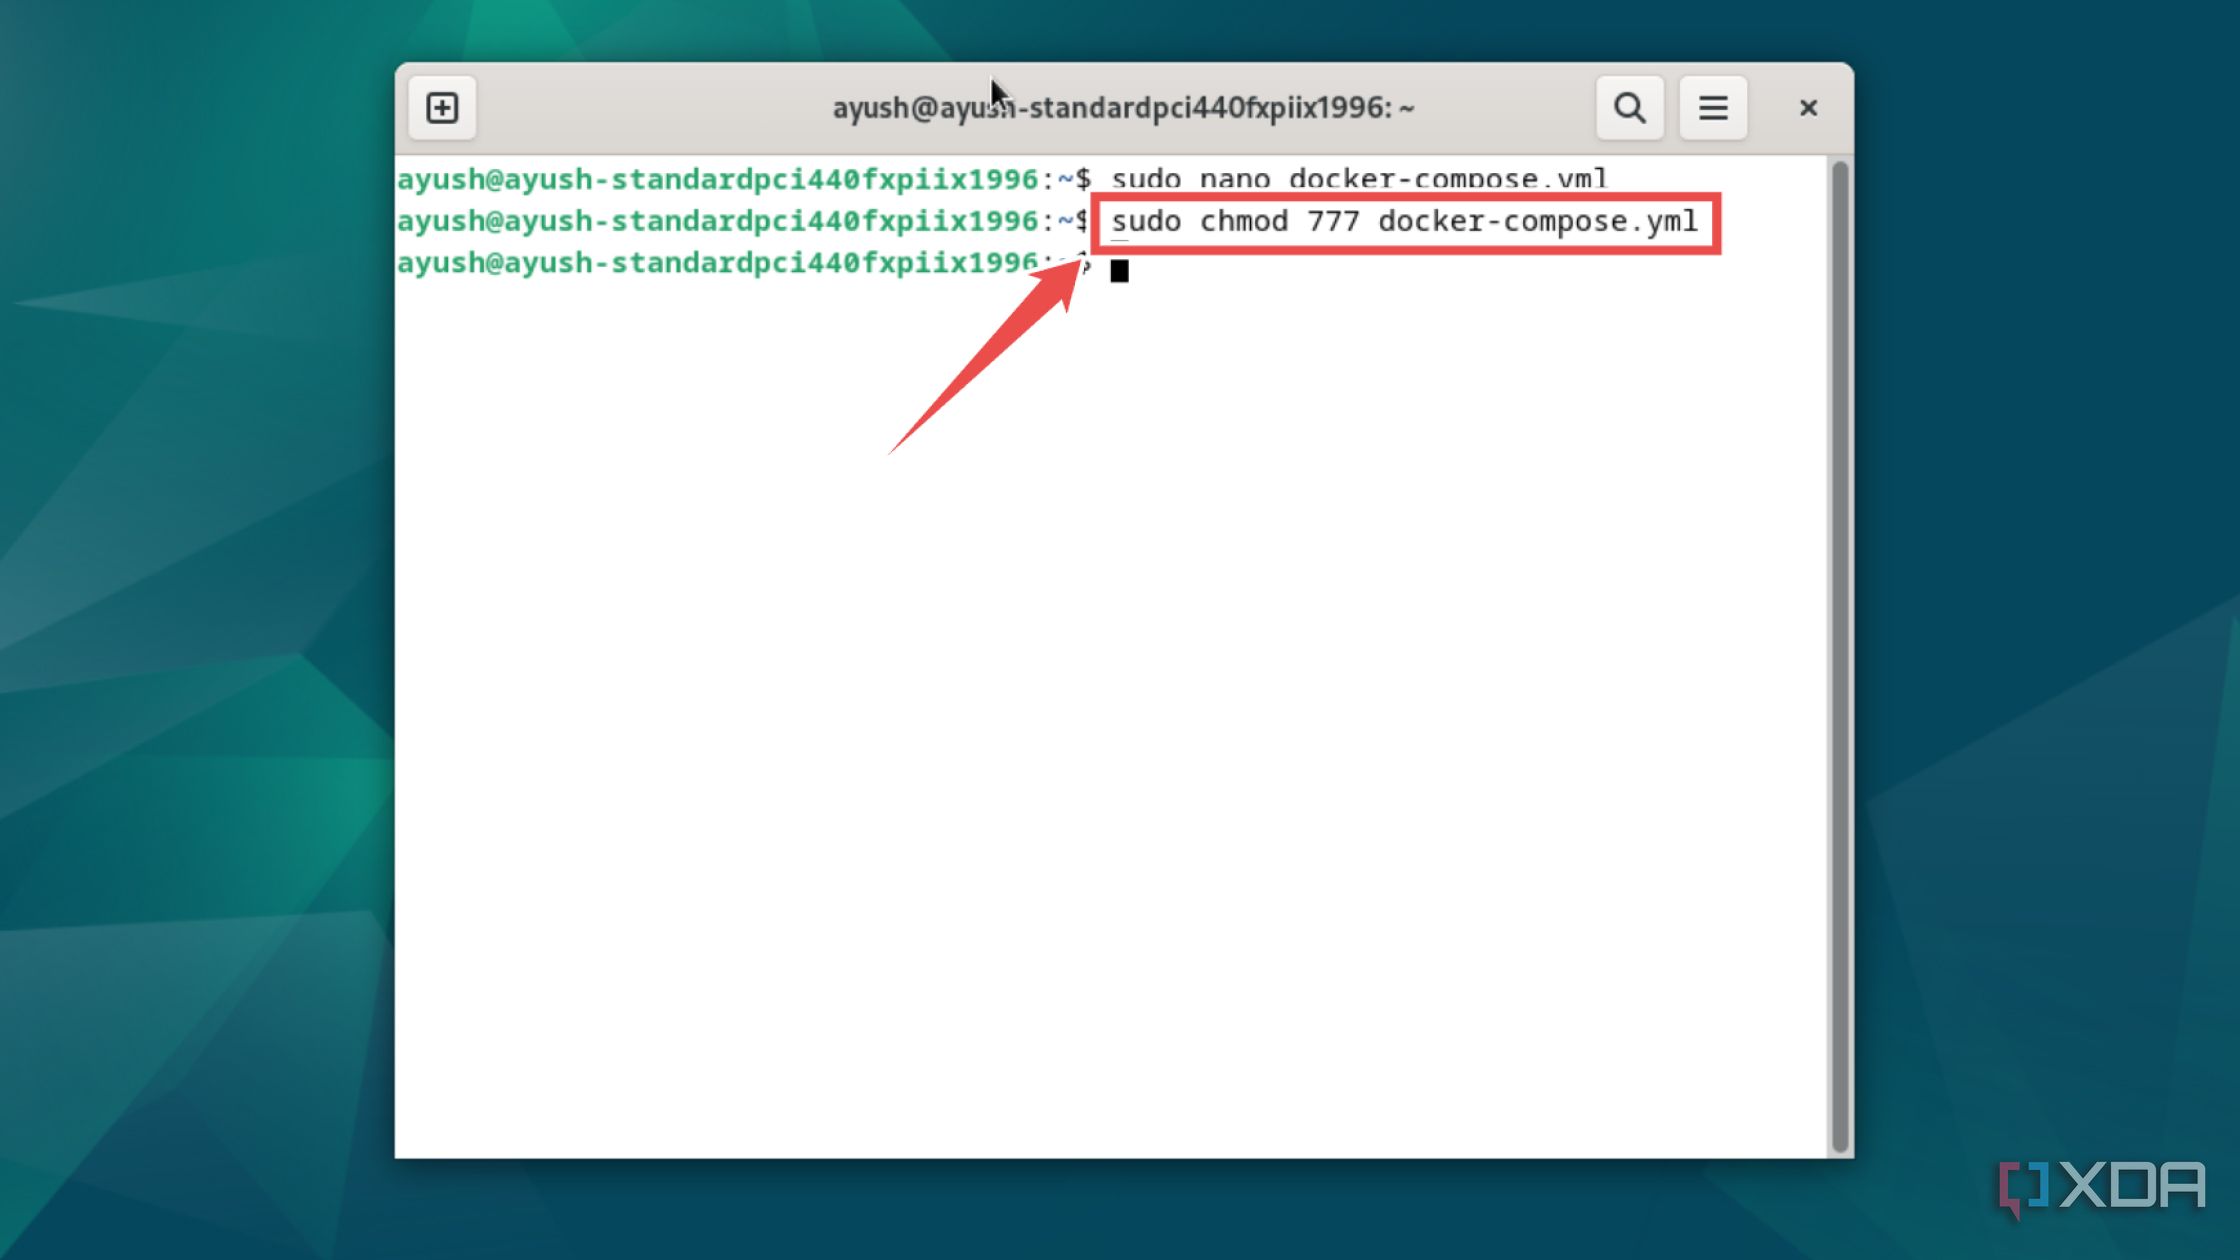
- Execute the chmod command to allow all users to read, write, and execute this file.
sudo chmod 777 docker-compose.yml
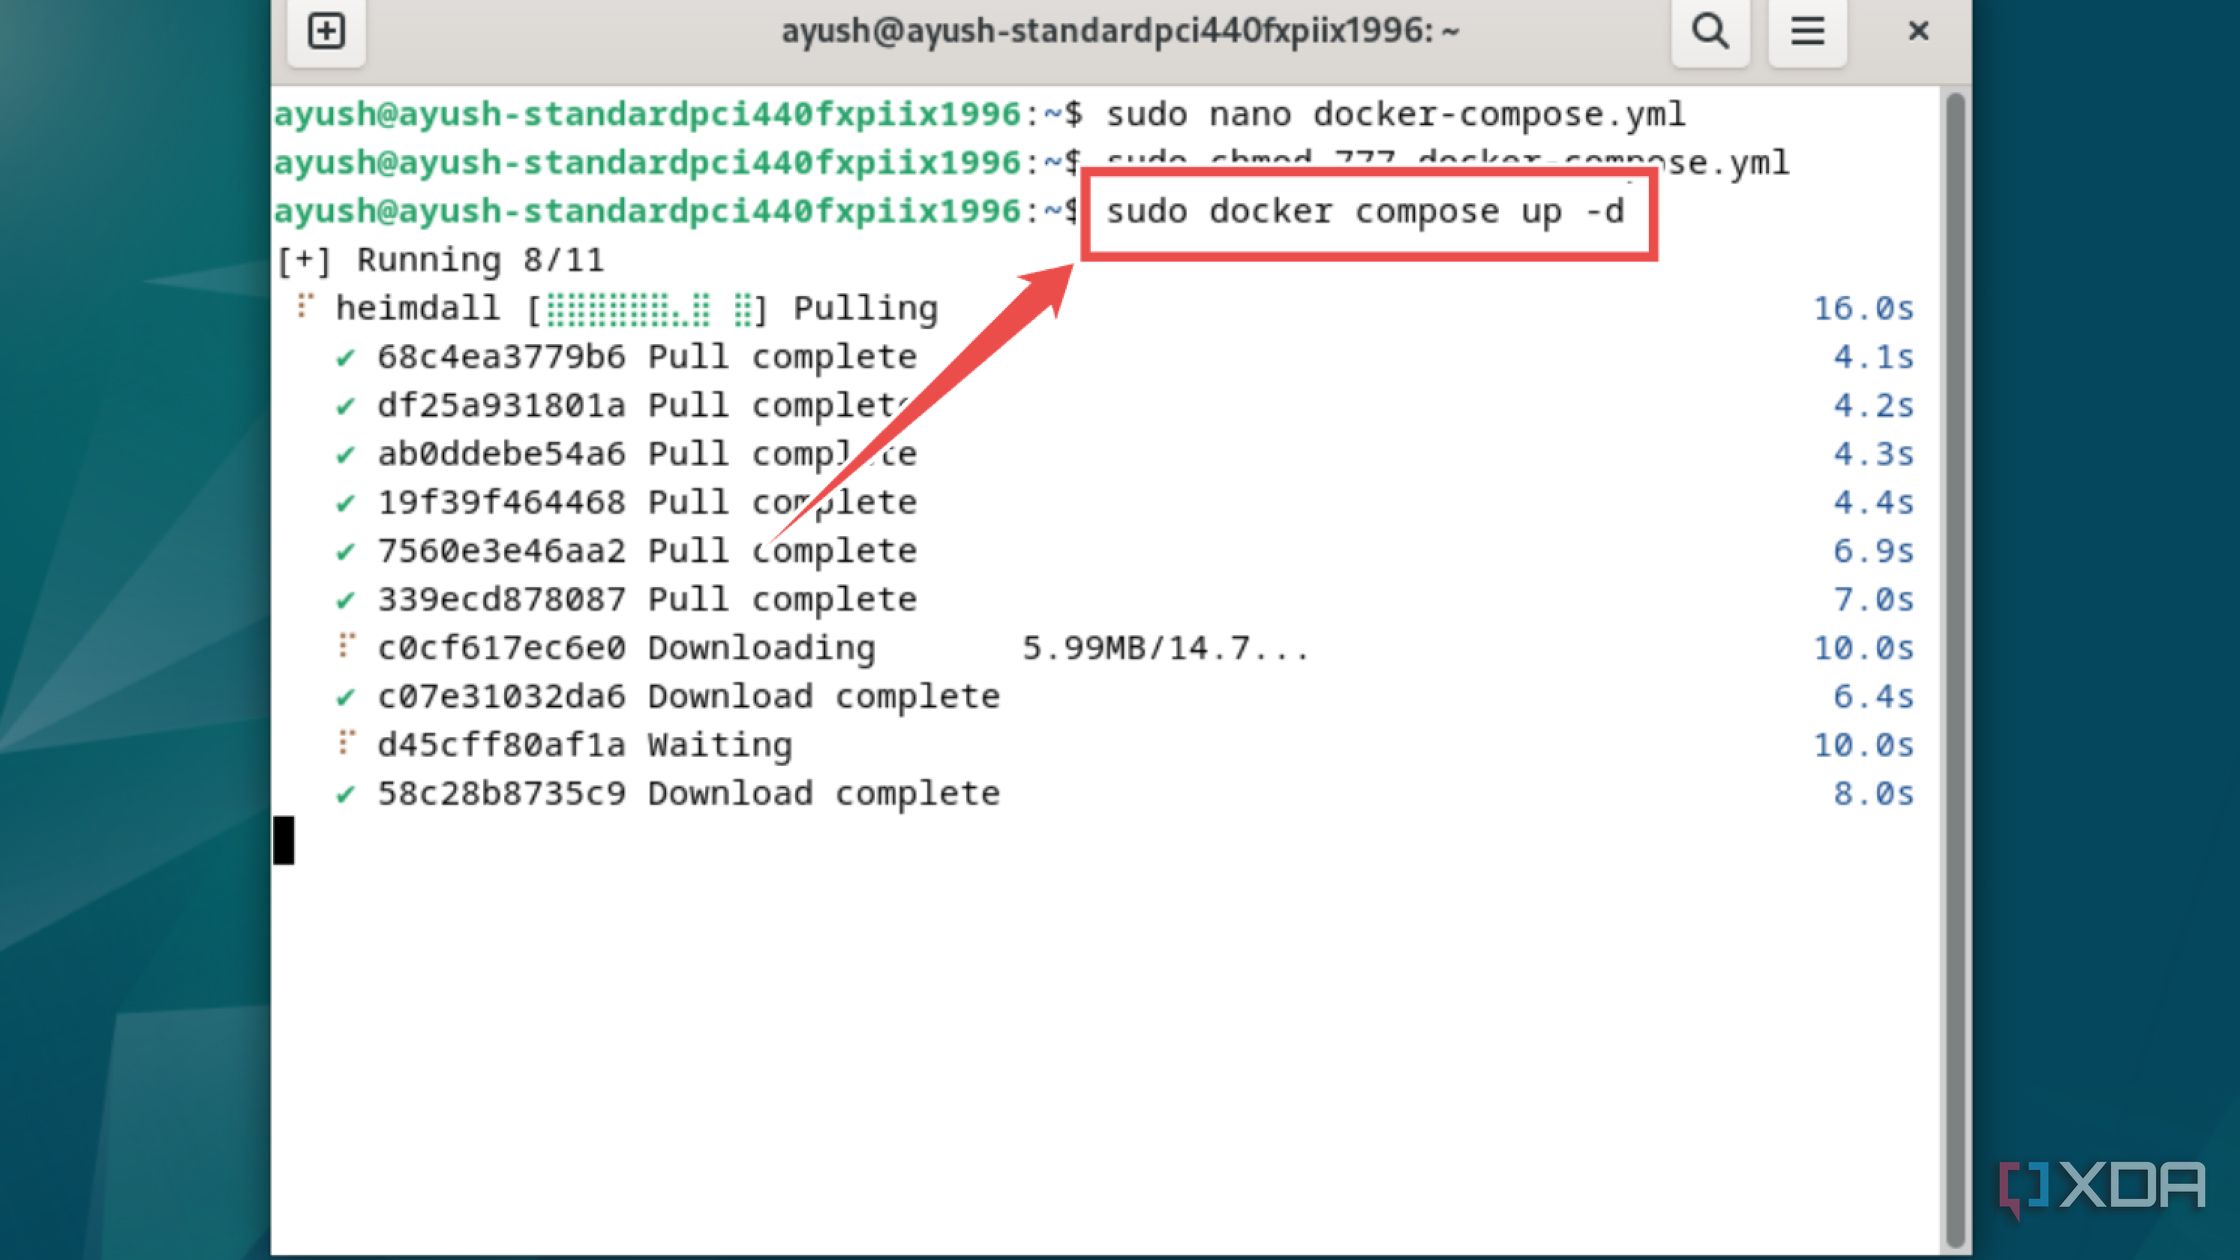
- Deploy the Heimdall container using the docker compose command:
sudo docker compose up -d
- Type localhost followed by a colon (:) and the port number 80 (or another port if you’ve modified this value in the config file) to access the Heimdall web UI. Alternatively, you can type the IP address of your PC instead of localhost to launch the Heimdall dashboard on another device on the same network.


Accessing the Heimdall dashboard
With the Heimdall service up and running, it’s time to pair all the self-hosted tools on your home server with the dashboard.
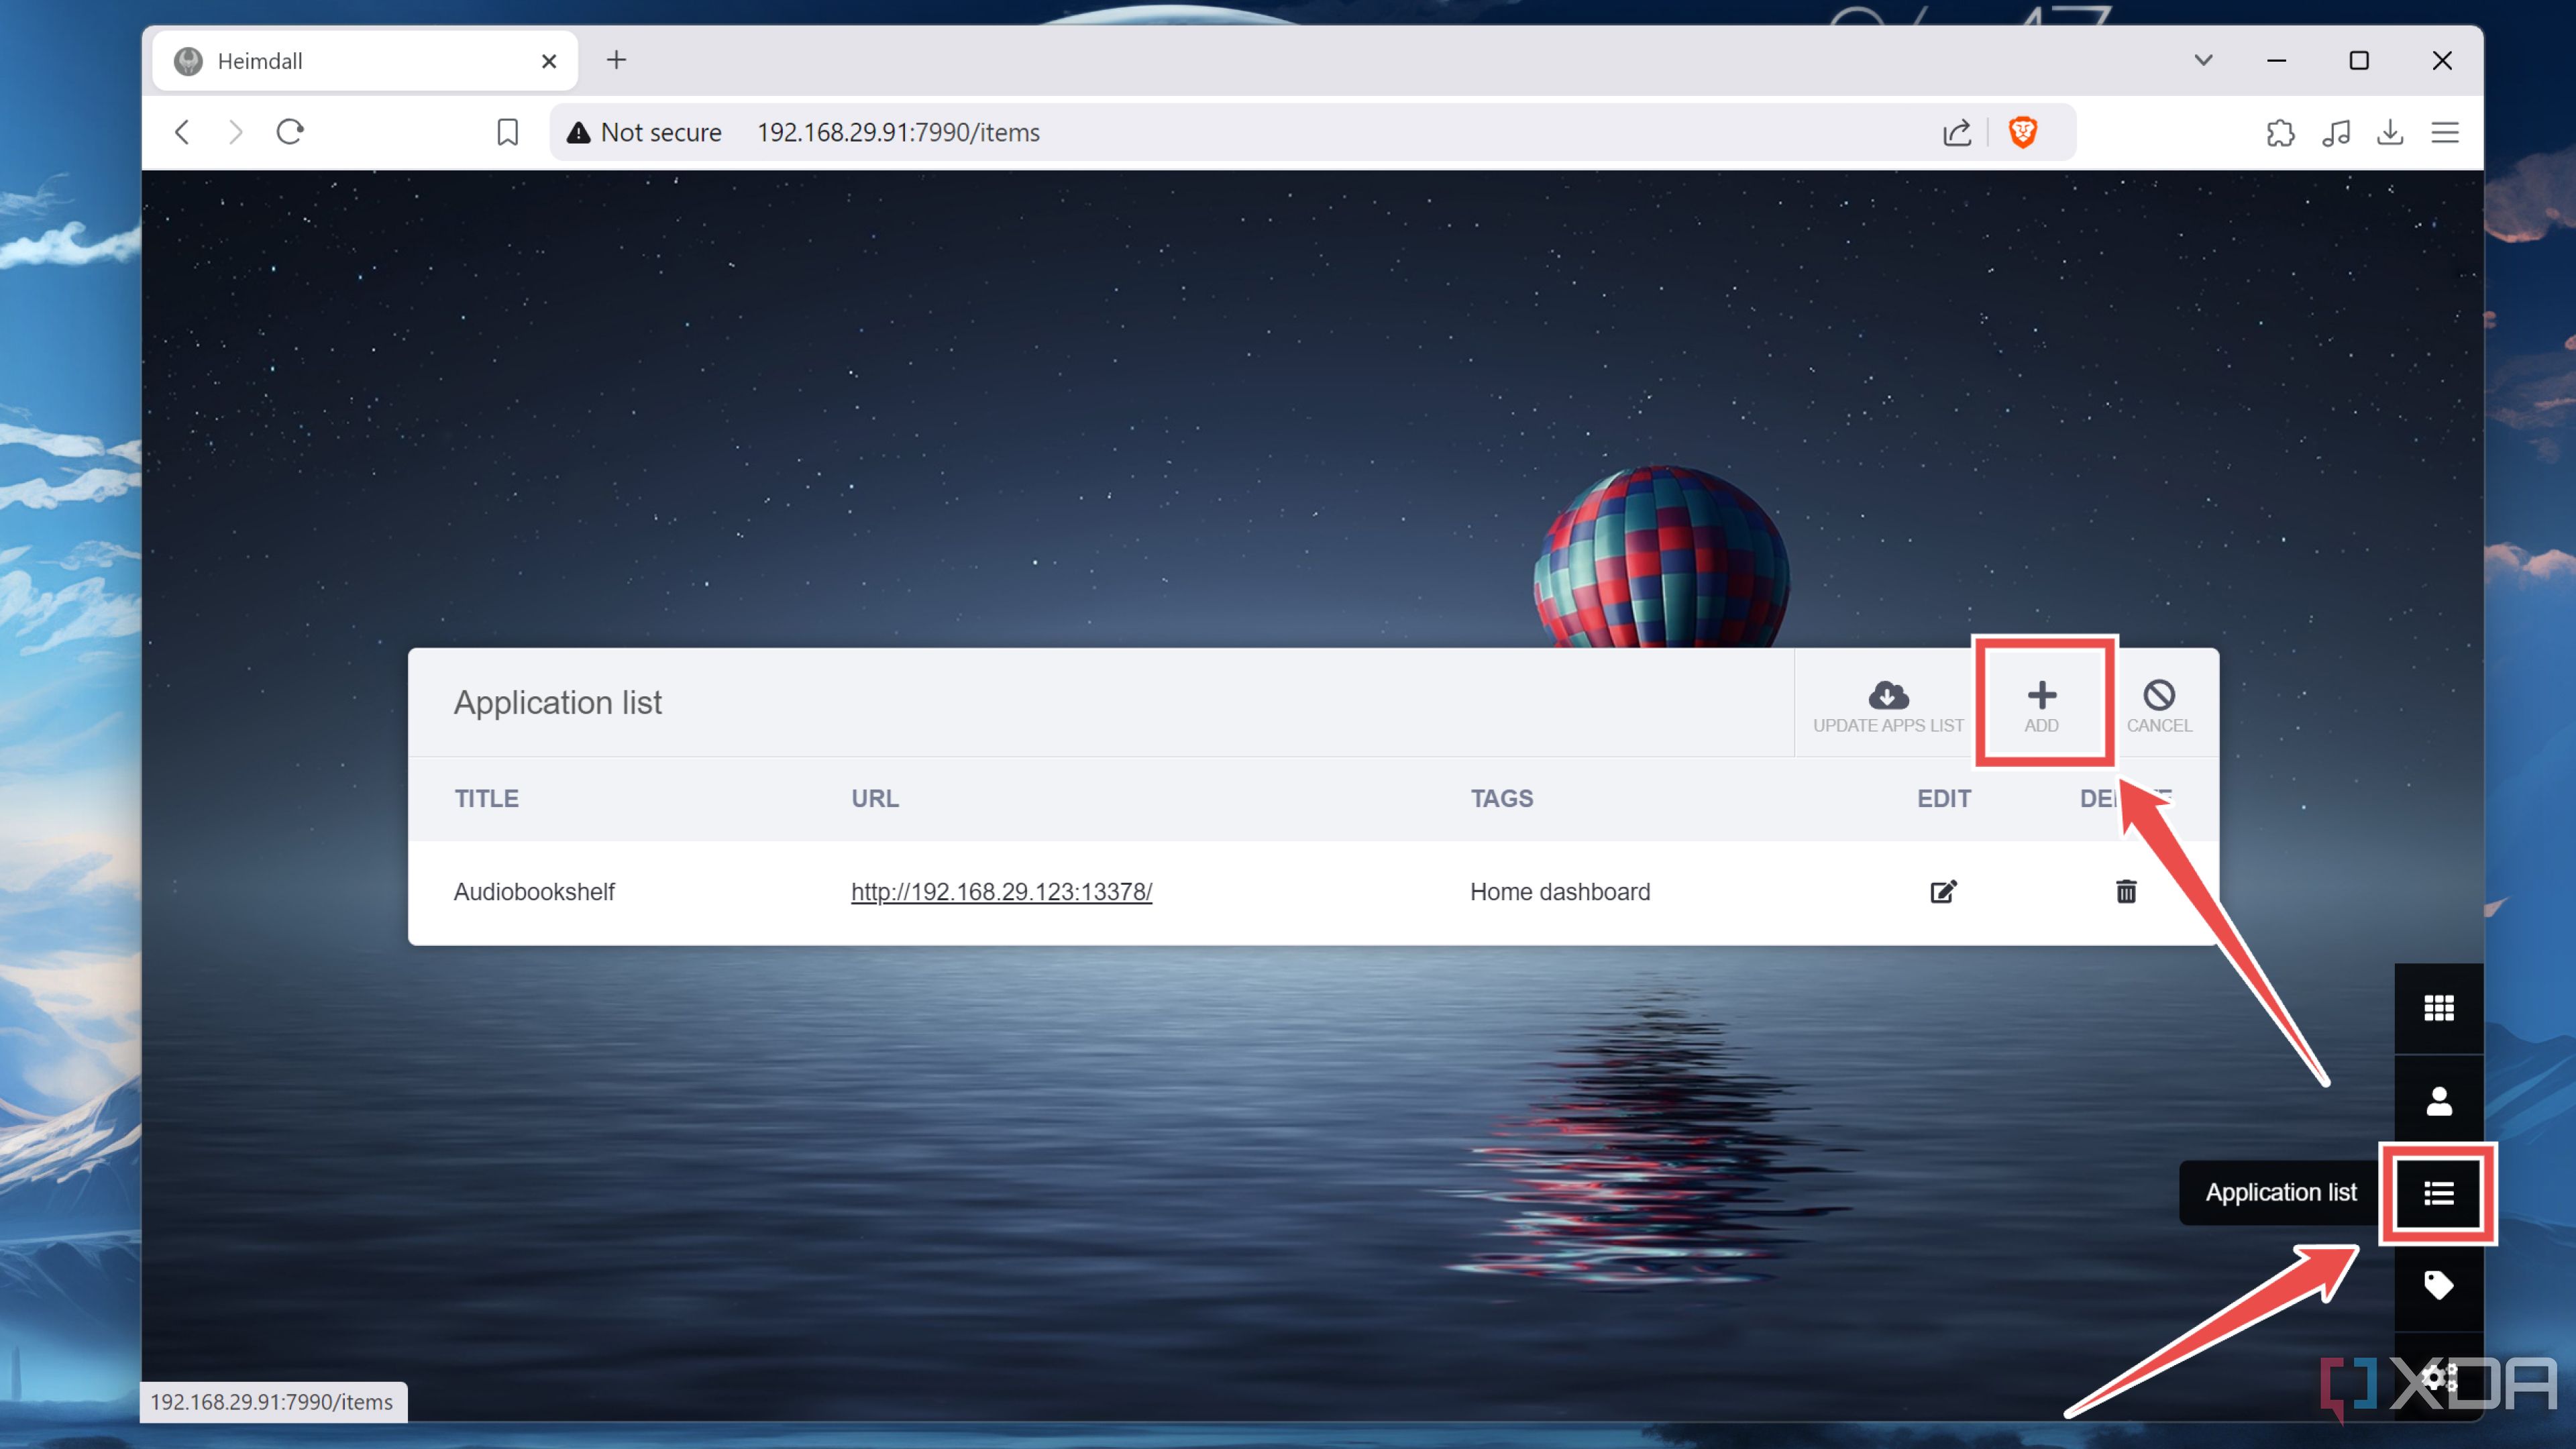
- Inside the Heimdall web UI, head to the Application List tab and hit the Add button.
- Enter the Application Name and its URL before tapping Save.
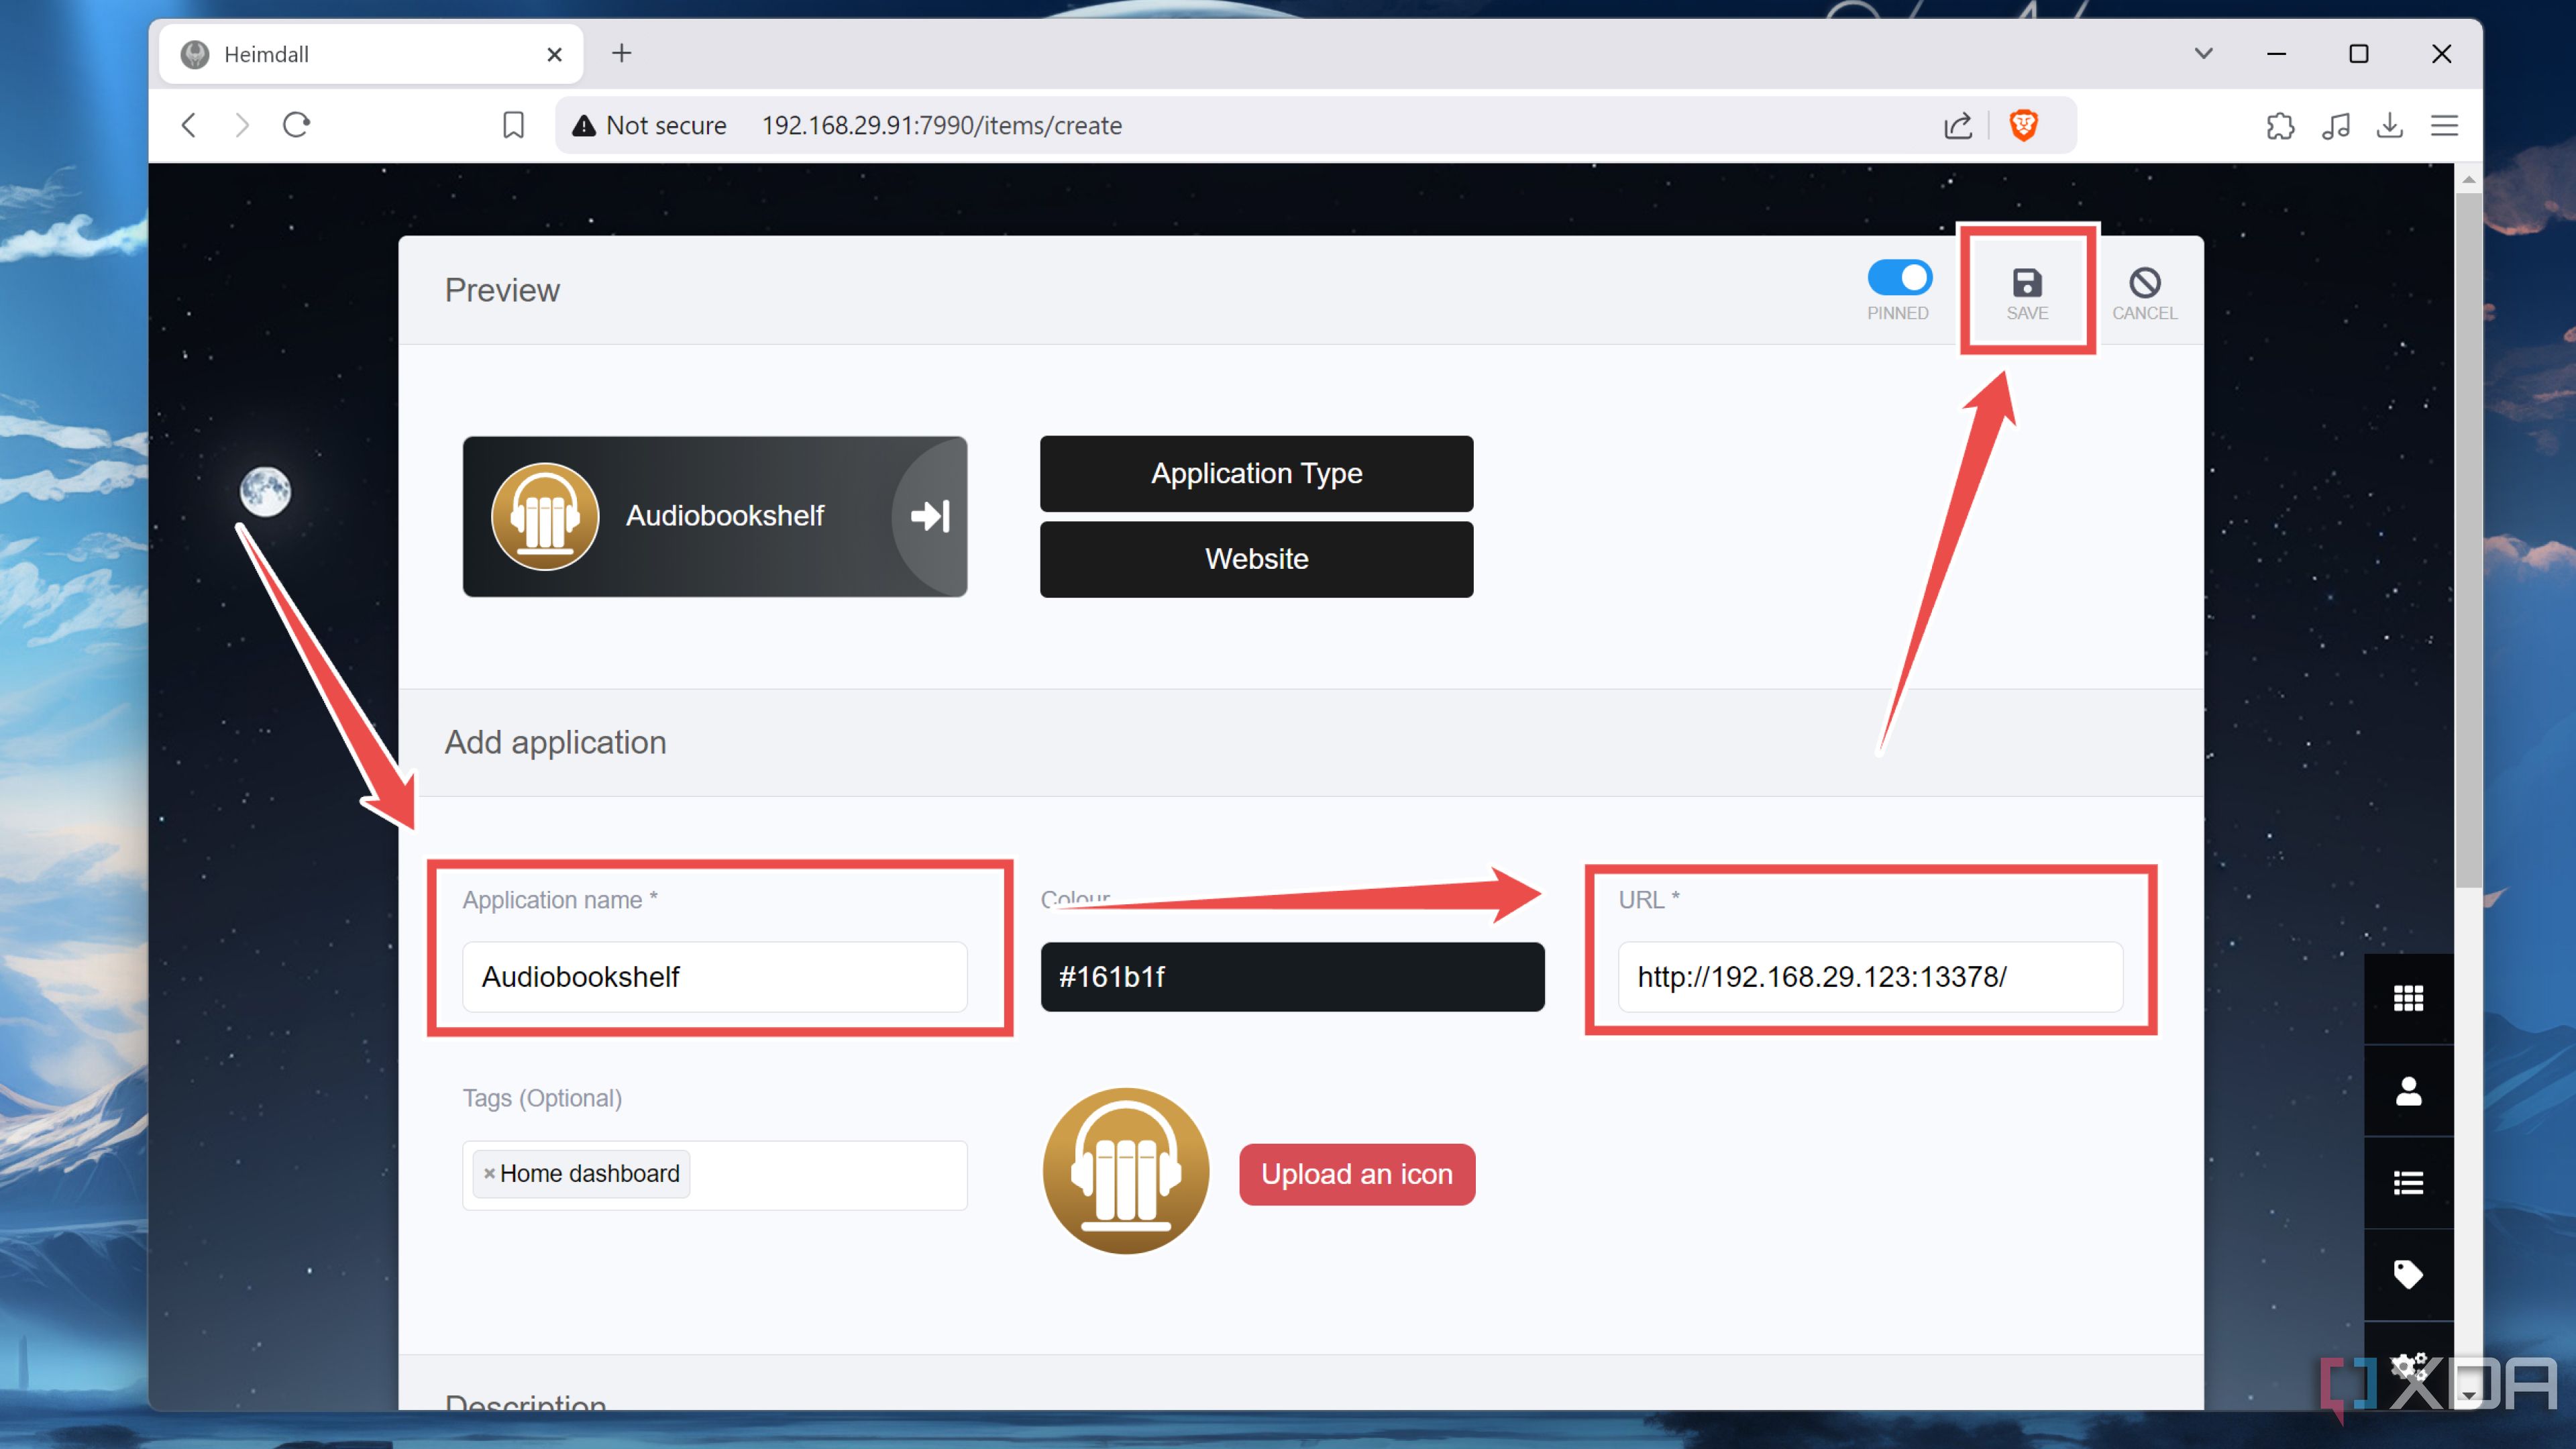
- The app will appear under the Home section of your Heimdall dashboard.


Decking out your home lab dashboard with other useful apps

While Heimdall is great when you want to manage your services, it doesn’t display the uptime, resource utilization, and other metrics of your self-hosted apps. Sure, you can check a few key details of the tools classified as Enhanced Apps, but it’s still not the best way to track the statistics of your favorite services. So, if you’re a number-crunching veteran who loves going through graphs and detailed logs, you can pair Heimdall with Grafana to keep a weather eye on all the tools running inside your home lab.

Related
5 of the best Proxmox alternatives for your home lab
Proxmox is great for tinkerers, but there are several other useful operating systems in the home lab space
#Heres #configure #Heimdall #dashboard #home #lab
source: https://www.xda-developers.com/configure-a-heimdall-dashboard-for-your-home-lab/

