

Manually leveling your 3D printer’s bed can sometimes be confusing, especially if you rely on vague instructions. Many people struggle with the “paper method,” which requires adjusting the bed’s leveling screws until a sheet of paper slides with just the right amount of resistance under the nozzle. This can feel unclear and difficult to judge. Fortunately, there is a more direct way to get your printer bed leveled correctly.
With this method, you’ll use a simple squares test and check actual prints, which is often far more straightforward than judging how much the nozzle drags on a piece of paper. By focusing on how the printed squares look and feel, you will better understand which corner of your printer bed needs adjusting.
If an automatic bed leveling system isn’t in the cards for you, this method is an efficient approach to bed leveling. You’ll use both visual and tactile cues to dial in your adjustments. Instead of second-guessing your changes, you’ll observe how each test square prints and make informed tweaks on the fly. This approach saves time and helps ensure your first layer is smooth, sturdy, and properly adhered to the print surface. Once you master these steps, you will find bed leveling far more straightforward.
Related
5 ways AI will improve your 3D printing
To revolutionize your 3D printing experience, you could inject a dose of AI into your workflow
Why this method is a helpful choice for leveling your 3D printer’s bed
Taking the time to level your printer bed in this hands-on way leads to better print quality and fewer project failures. Relying on physical cues from your test prints helps you confirm that the nozzle is placing the filament exactly where it should be. You also avoid confusion caused by guessing about nozzle drag on paper, which can often be misread.

Trying to level your 3D printer’s bed by how much the nozzle drags across a sheet of paper is a headache I was quick to eliminate
This method ensures that each corner of your bed is tested thoroughly, helping pinpoint areas needing more adjustment than others. As a result, you can confidently begin printing larger or more detailed models without worrying about poor first-layer adhesion.
What you need to begin the process
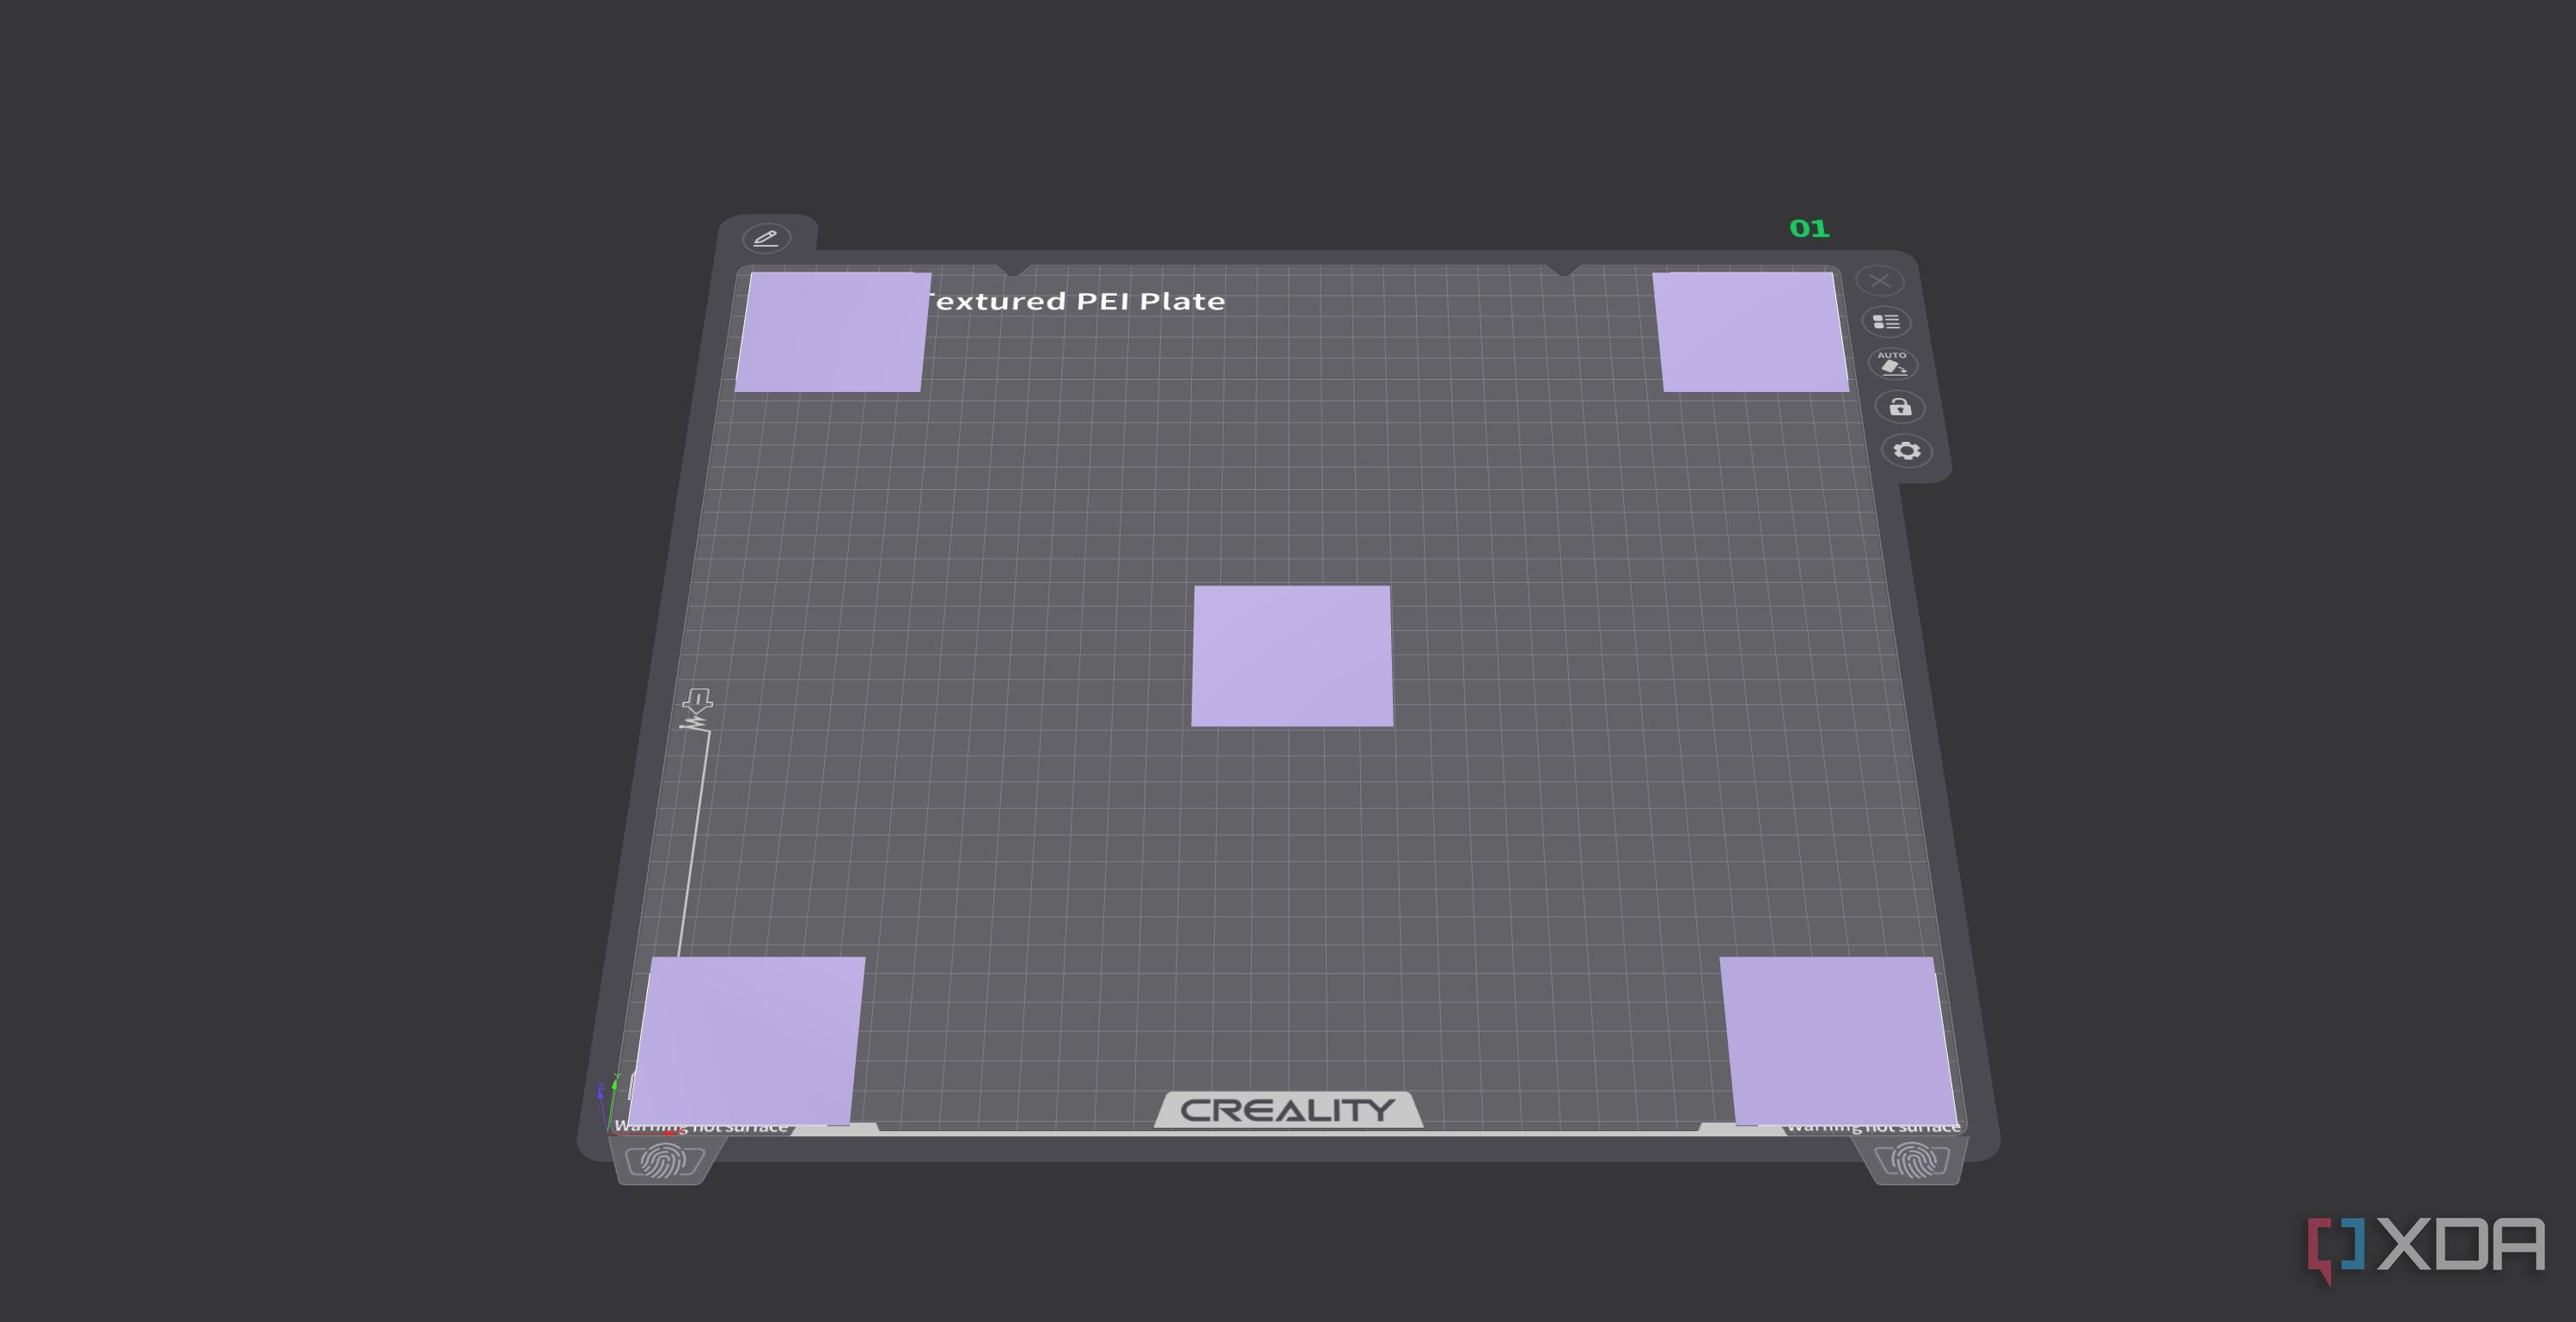
You will need your 3D printer and its bed heated to a temperature appropriate for your chosen filament type. You’ll also need a bed leveling squares test print file. This is a set of small squares placed around the build plate. You will probably need to resize this file to fit your printer’s bed, but keep it one layer thick to preserve the validity of the test. A glue stick or another preferred bed adhesive can be used if your filament requires extra stickiness.
Lastly, make sure you have a way to adjust the bed leveling screws or thumb wheels on your 3D printer.
How to level your bed using the squares test
Before you start, you can do a rough adjustment using paper if you wish, just to get the nozzle close enough for a first print. However, do not worry too much about the paper method because you’ll be fine-tuning with your actual test prints. Here is how to do it:
-
Load and resize the squares test: Import the squares test file into your slicer. Scale it to fit your bed dimensions, keeping in mind it only prints one layer.
-
Slice the file and prepare the printer: Slice the model without adding pauses between squares. Heat the bed and nozzle to the appropriate temperatures for your filament, and apply a glue stick or other adhesive if needed.

-
Print the test squares: Once the print starts, observe each square. Pay attention to whether the lines are fusing correctly or if the nozzle leaves gaps or creates rough spots.

-
Check for roughness (nozzle too low): If a square feels rough to the touch or looks squished, the nozzle is dragging. Turn the corresponding bed leveling wheel to lower that corner, typically in the opposite direction of the up arrow.
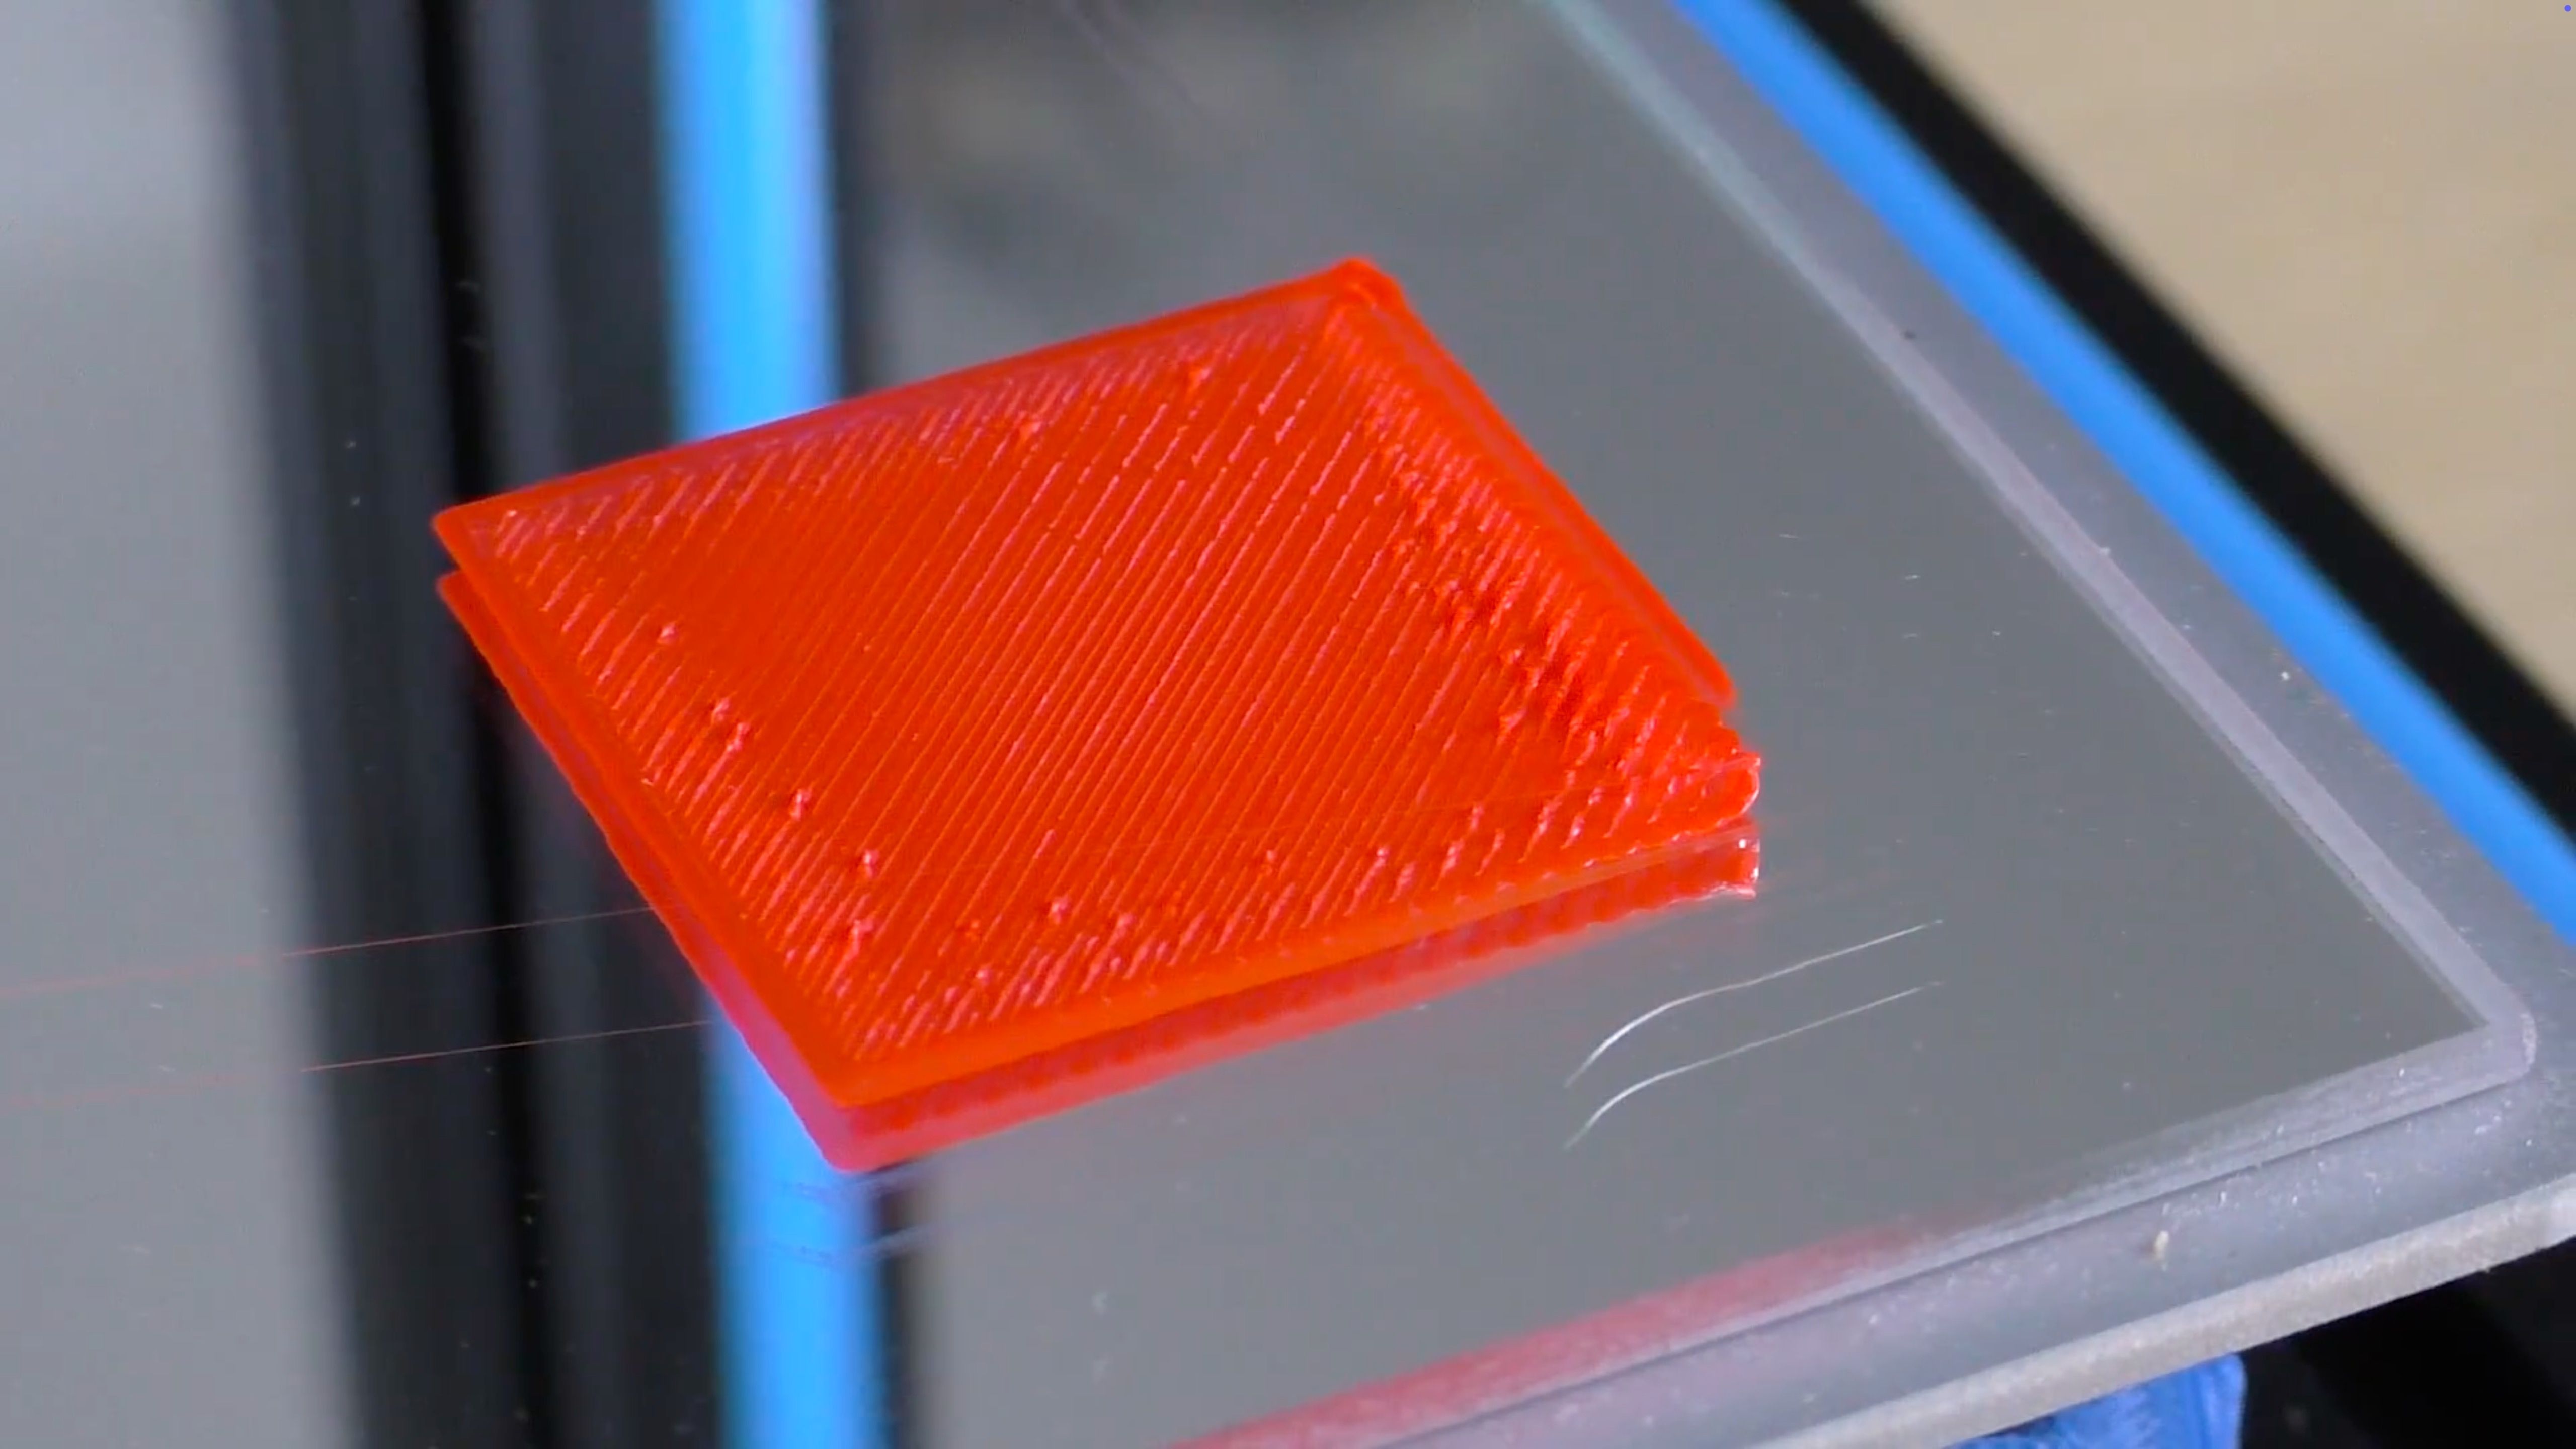
Source: Hobby Hoarder/YouTube
-
Check for gaps (nozzle too high): If there are visible gaps or your nail can catch between the lines, your nozzle is too high. Adjust that corner by turning the leveling wheel toward the up arrow to raise it.
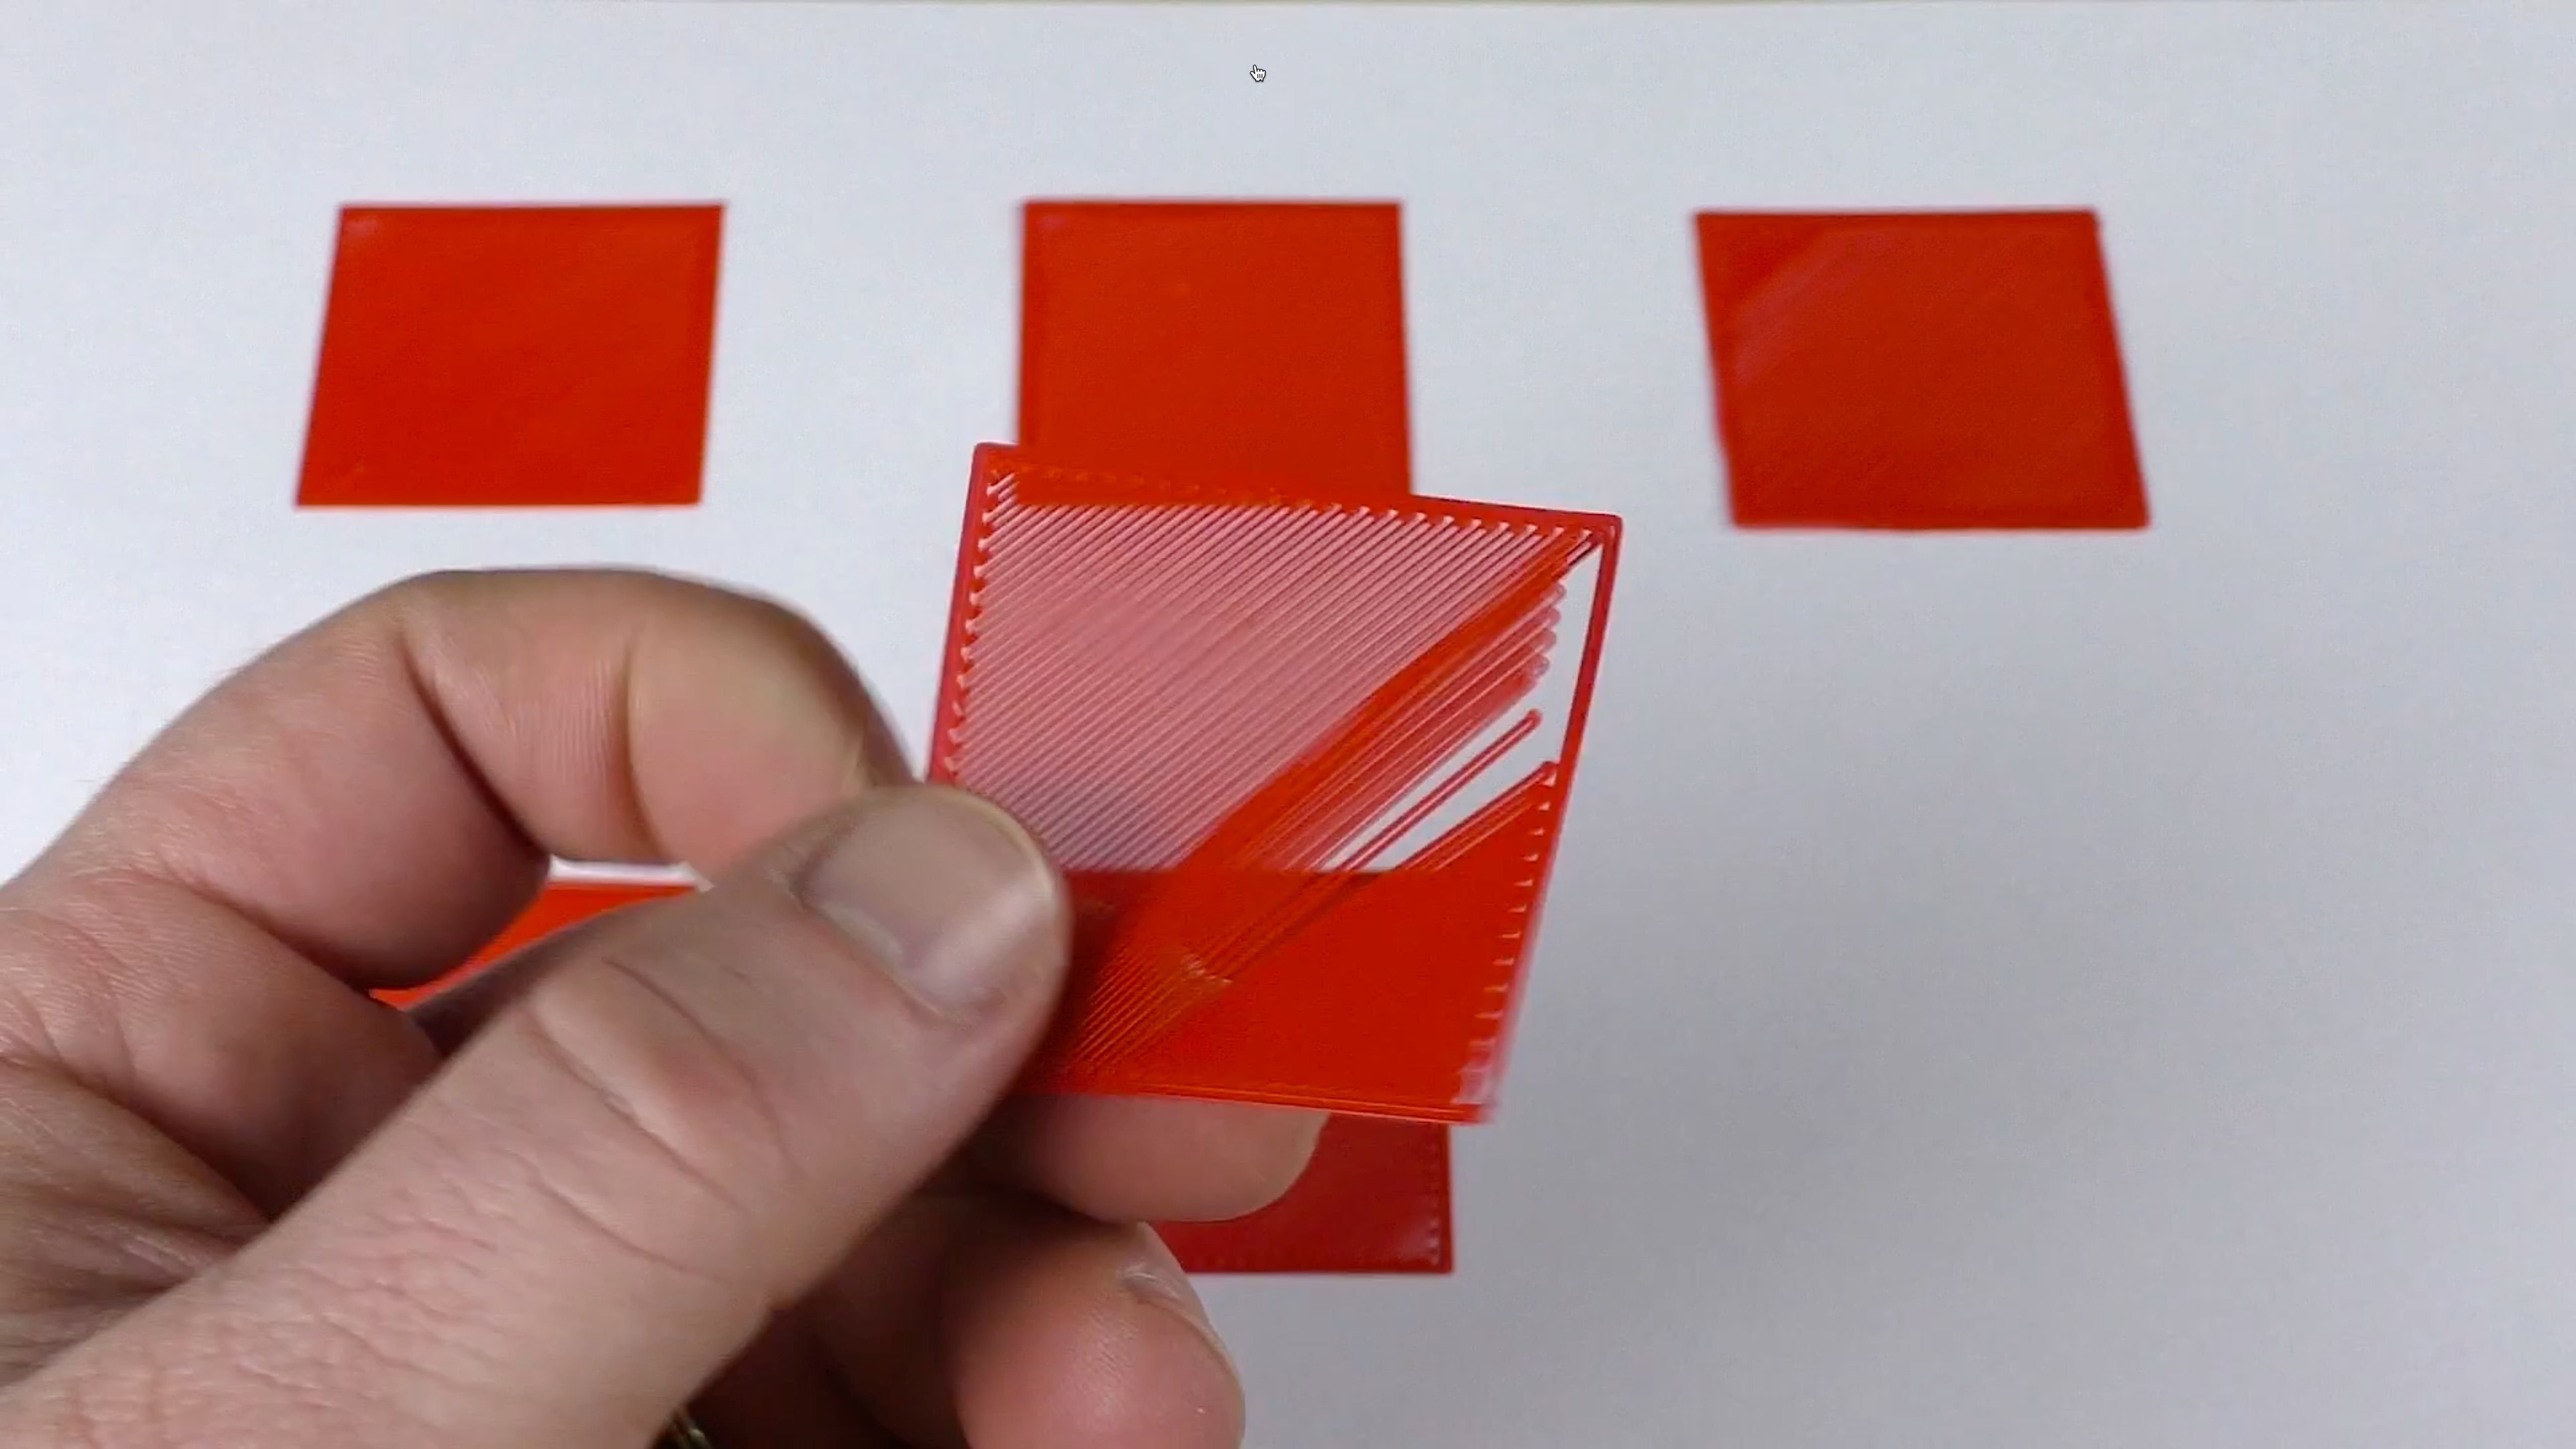
Source: Hobby Hoarder/YouTube
-
Confirm a smooth finish: A properly leveled square will feel smooth and look solid, with no noticeable gaps or roughness. If you notice smaller sections that need adjustment, make minor tweaks.
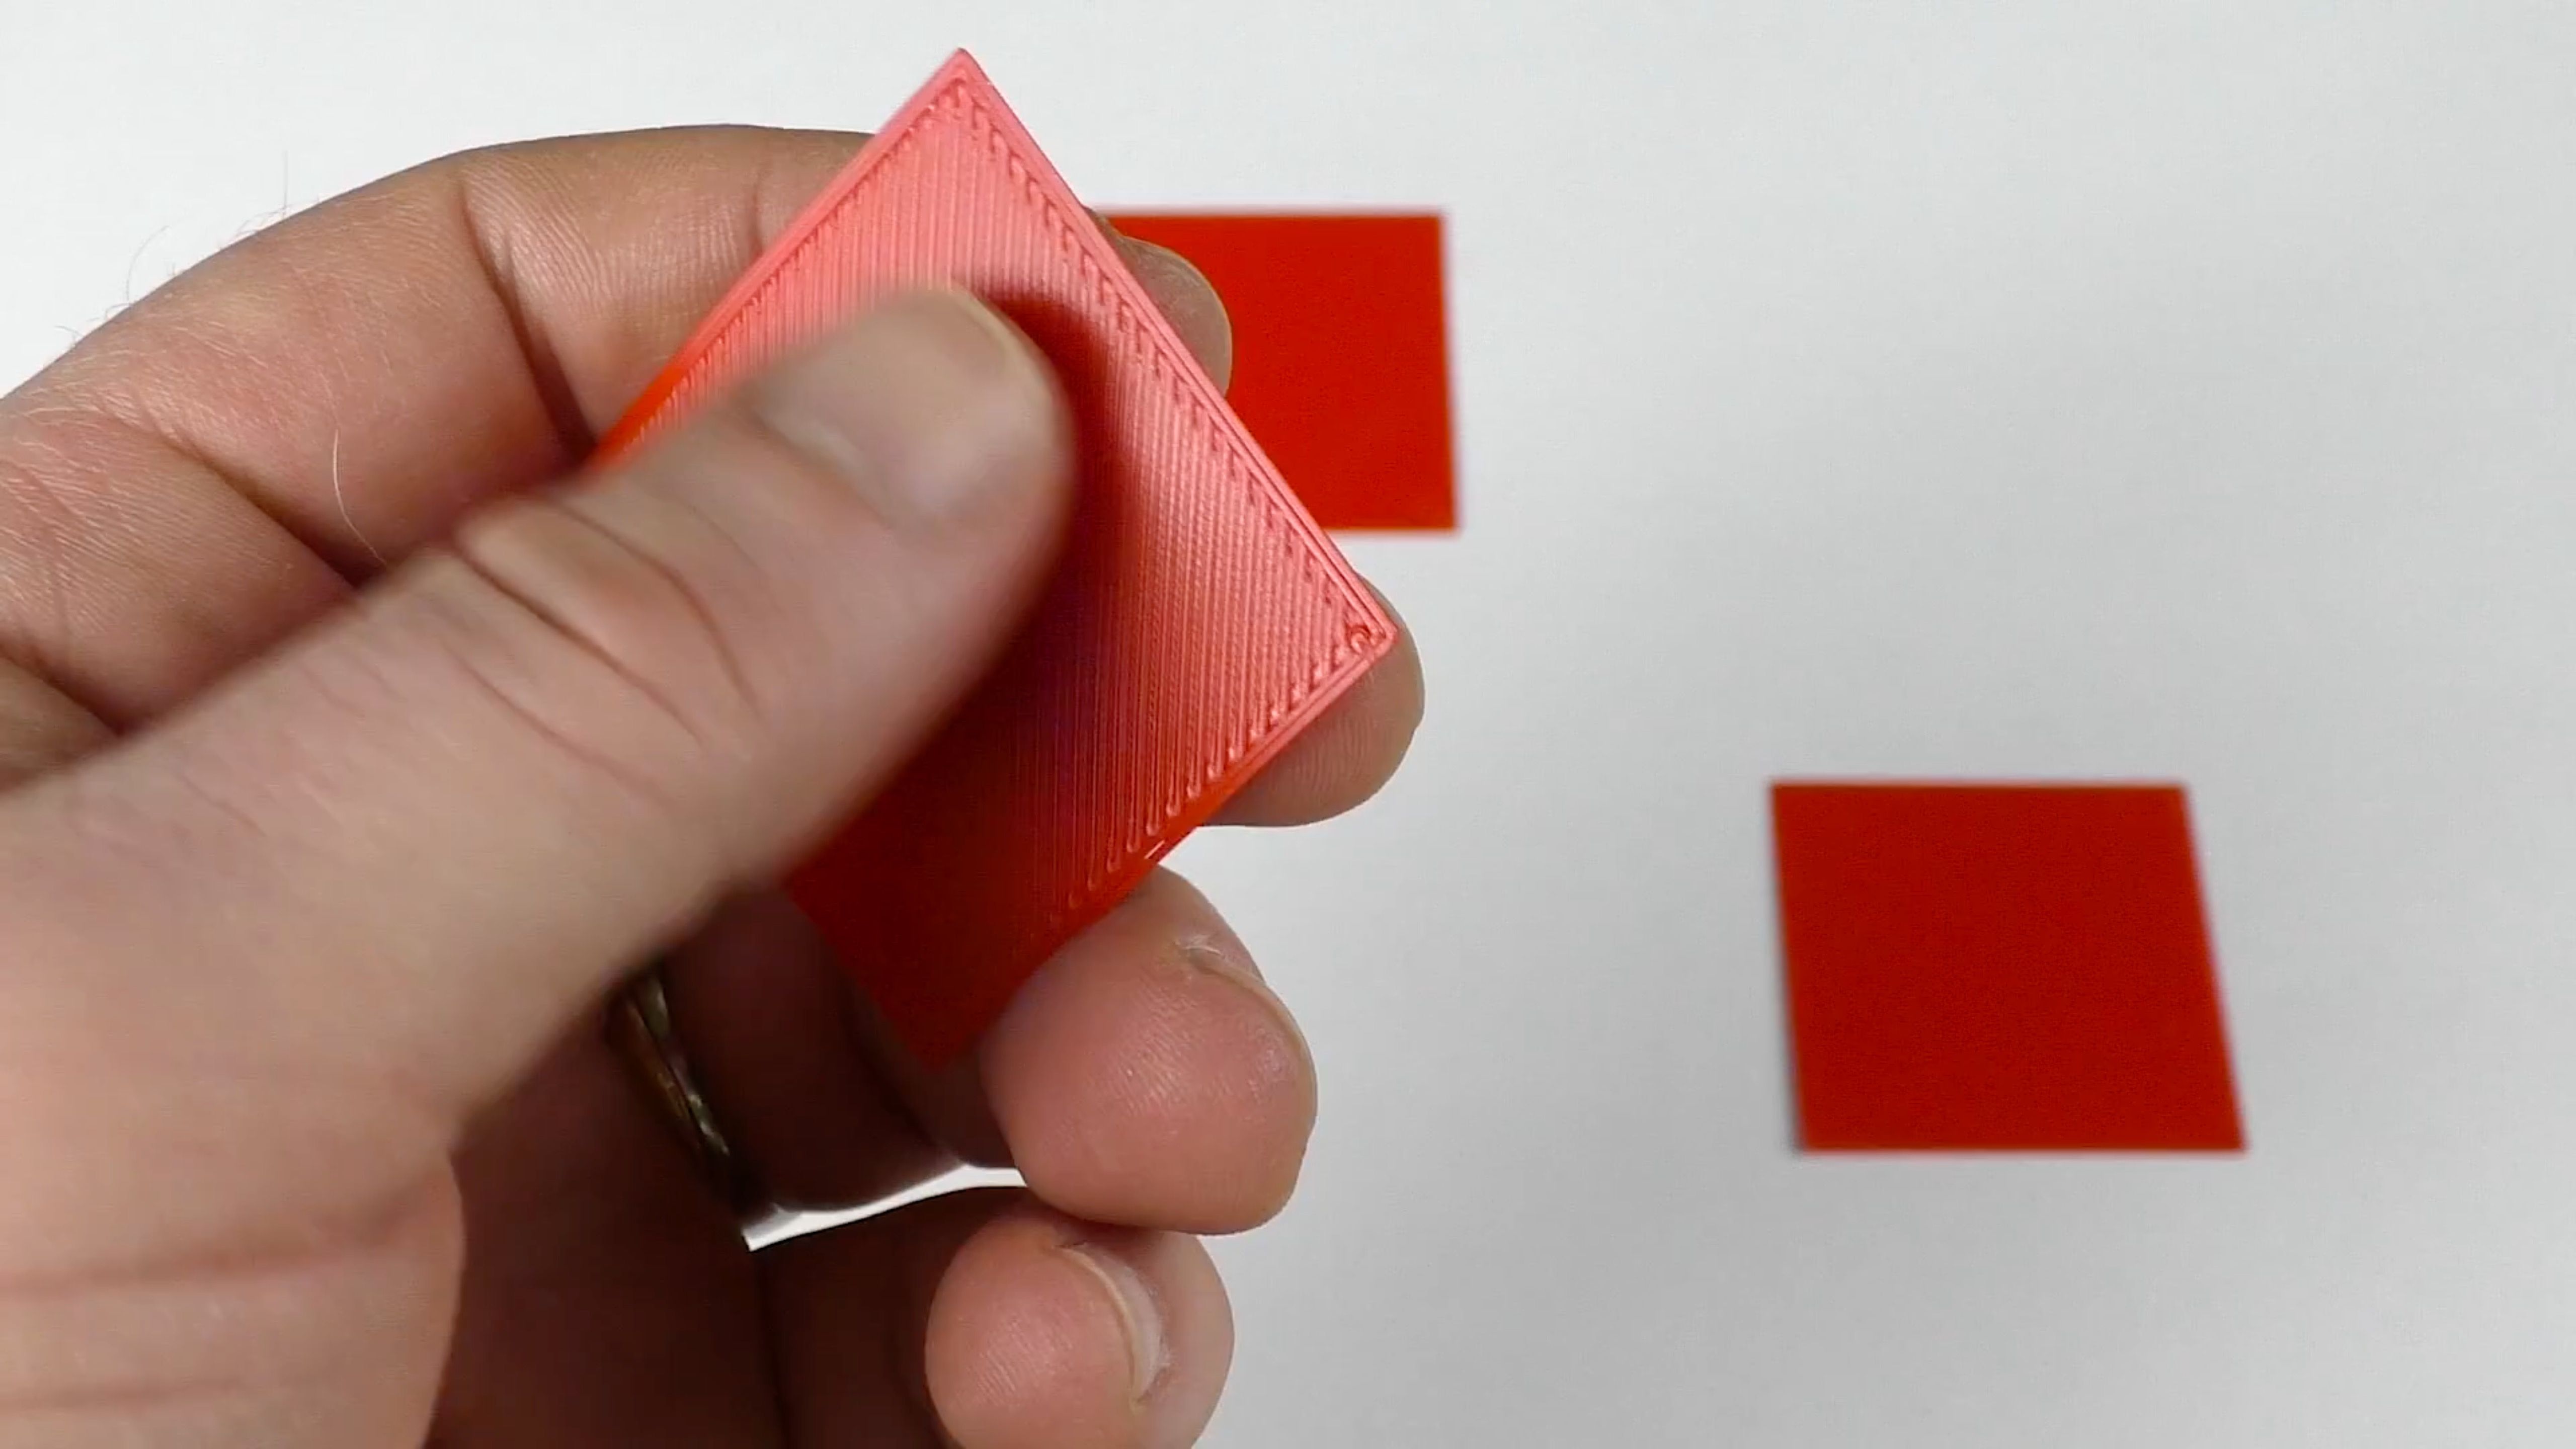
Source: Hobby Hoarder/YouTube
- Repeat as necessary: If you see issues in one corner, remember that it can affect other parts of the bed. Continue printing and adjusting until all squares look and feel consistently smooth.


The infographic below does a great job of offering reference images of how to read the test print.

Source: Billie Ruben/Imgur
Helpful tips for best results when leveling the print bed
Pay close attention to where the print starts to separate or becomes too flattened. This often signals which corner of the bed needs fine-tuning. Remember to examine the center square as well; this can show you if the overall height of the nozzle is set correctly. Keep the differences between rough, gapped, and perfect prints in mind as you work through the process. This practical approach eliminates uncertainty and makes leveling more enjoyable.
Key steps for consistent, high-quality 3D printing
Proper bed leveling is key to getting reliable, high-quality 3D prints. By examining the physical evidence of how your 3D printer lays down filament, you bypass the guesswork of older methods and maintain better control over your print quality. Taking time to master this squares test will save you hours of frustration later, since an incorrectly leveled bed can ruin an entire print project.
Over time, you will become more confident in your ability to identify and correct bed leveling issues on the spot. Before long, you’ll never again need to worry about bed adhesion issues or poor-quality first layers.
#bed #leveling #method #transformed #printing
source: https://www.xda-developers.com/bed-leveling-method-transformed-3d-printing/

