

While OneNote is a powerful tool for note-taking, organization, and knowledge management, the default settings aren’t always ideal for everyone. Out of the box, OneNote enables or disables certain features in a way that may hinder your workflow rather than help it. In this post, I will go over the essential OneNote settings you should tweak to unlock its true potential and create a truly personalized and productive note-taking setup.
Trust me, you will be wondering how you ever used OneNote without these changes.
I use OneNote on both my MacBook Pro and a Windows desktop. I will mention both platforms wherever required.
Related
10
Change OneNote theme
The default one is boring
I’m not really fond of the default OneNote theme, which shows a giant purple banner at the top. Thankfully, OneNote comes with a bunch of theme options to choose from. I prefer their White theme for clean aesthetics. Here’s how you can enable it.
-
Open OneNote on Windows and go to File.
- Select Account and expand the Office Theme
-
Select White.
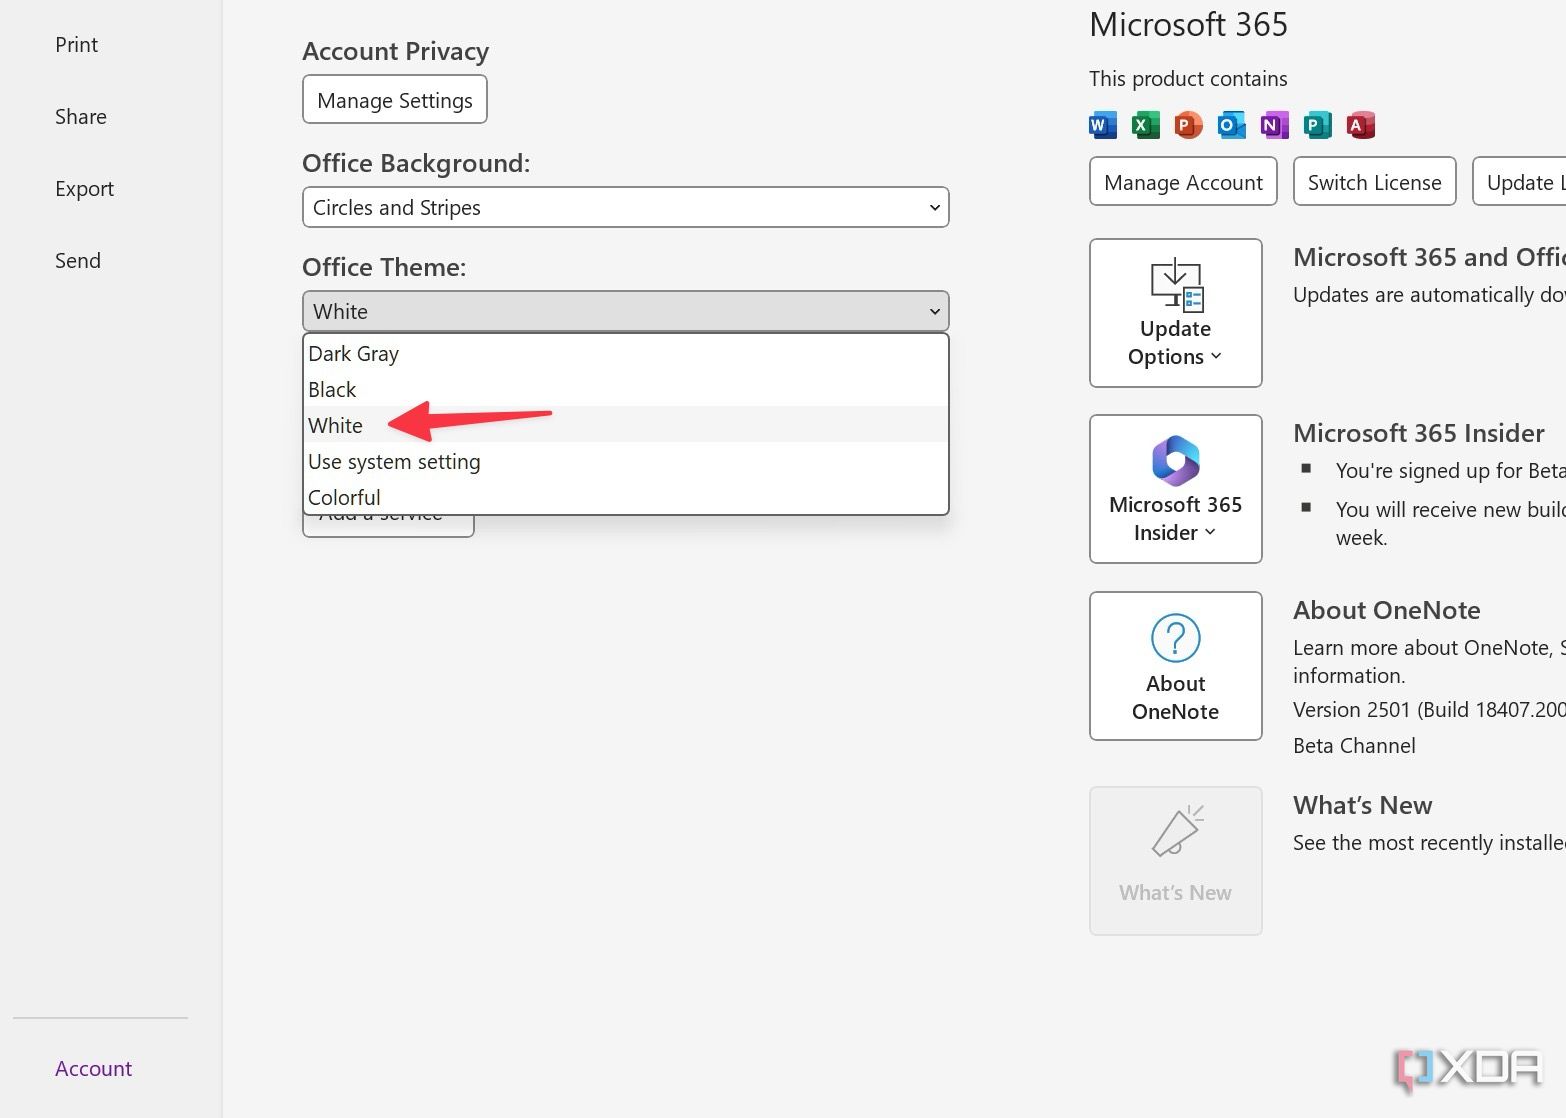


Do note that when you change the OneNote theme from colorful to White, the system changes the look for all Office apps, including PowerPoint, Word, and Excel.
9
Use simplified ribbon
Free up space
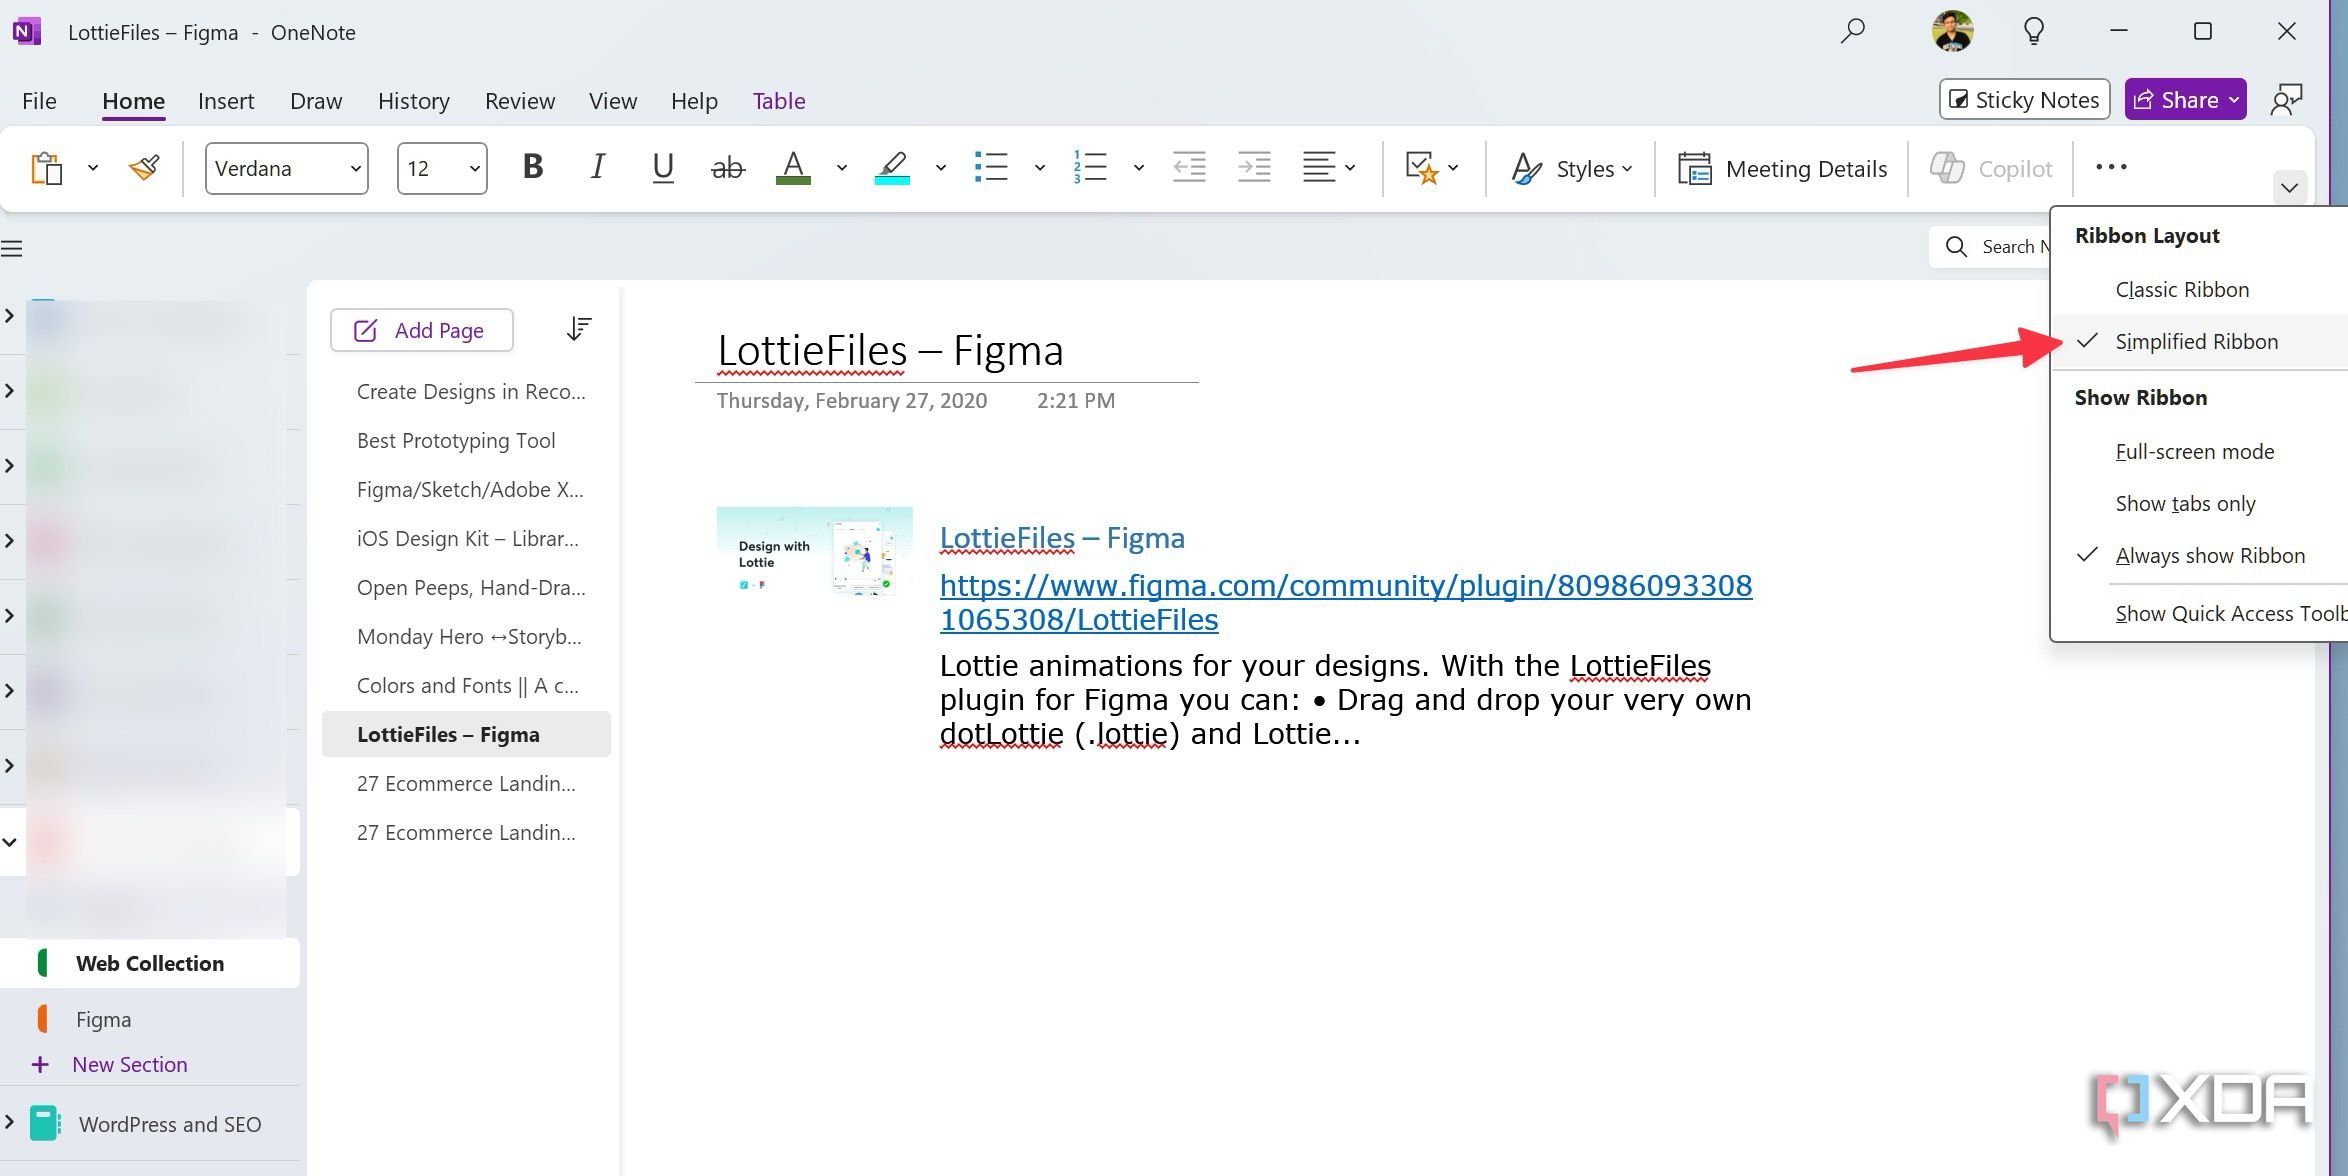
If you use OneNote on Windows, Microsoft has rolled out a simplified ribbon style to replace the classic and outdated one. If the ribbon is enabled for your Office account, make sure to enable it from the top menu.
- Open OneNote on Windows and click the down arrow at the top.
-
Select Simplified Ribbon.

8
Use Vertical tabs layout
Enjoy a familiar layout
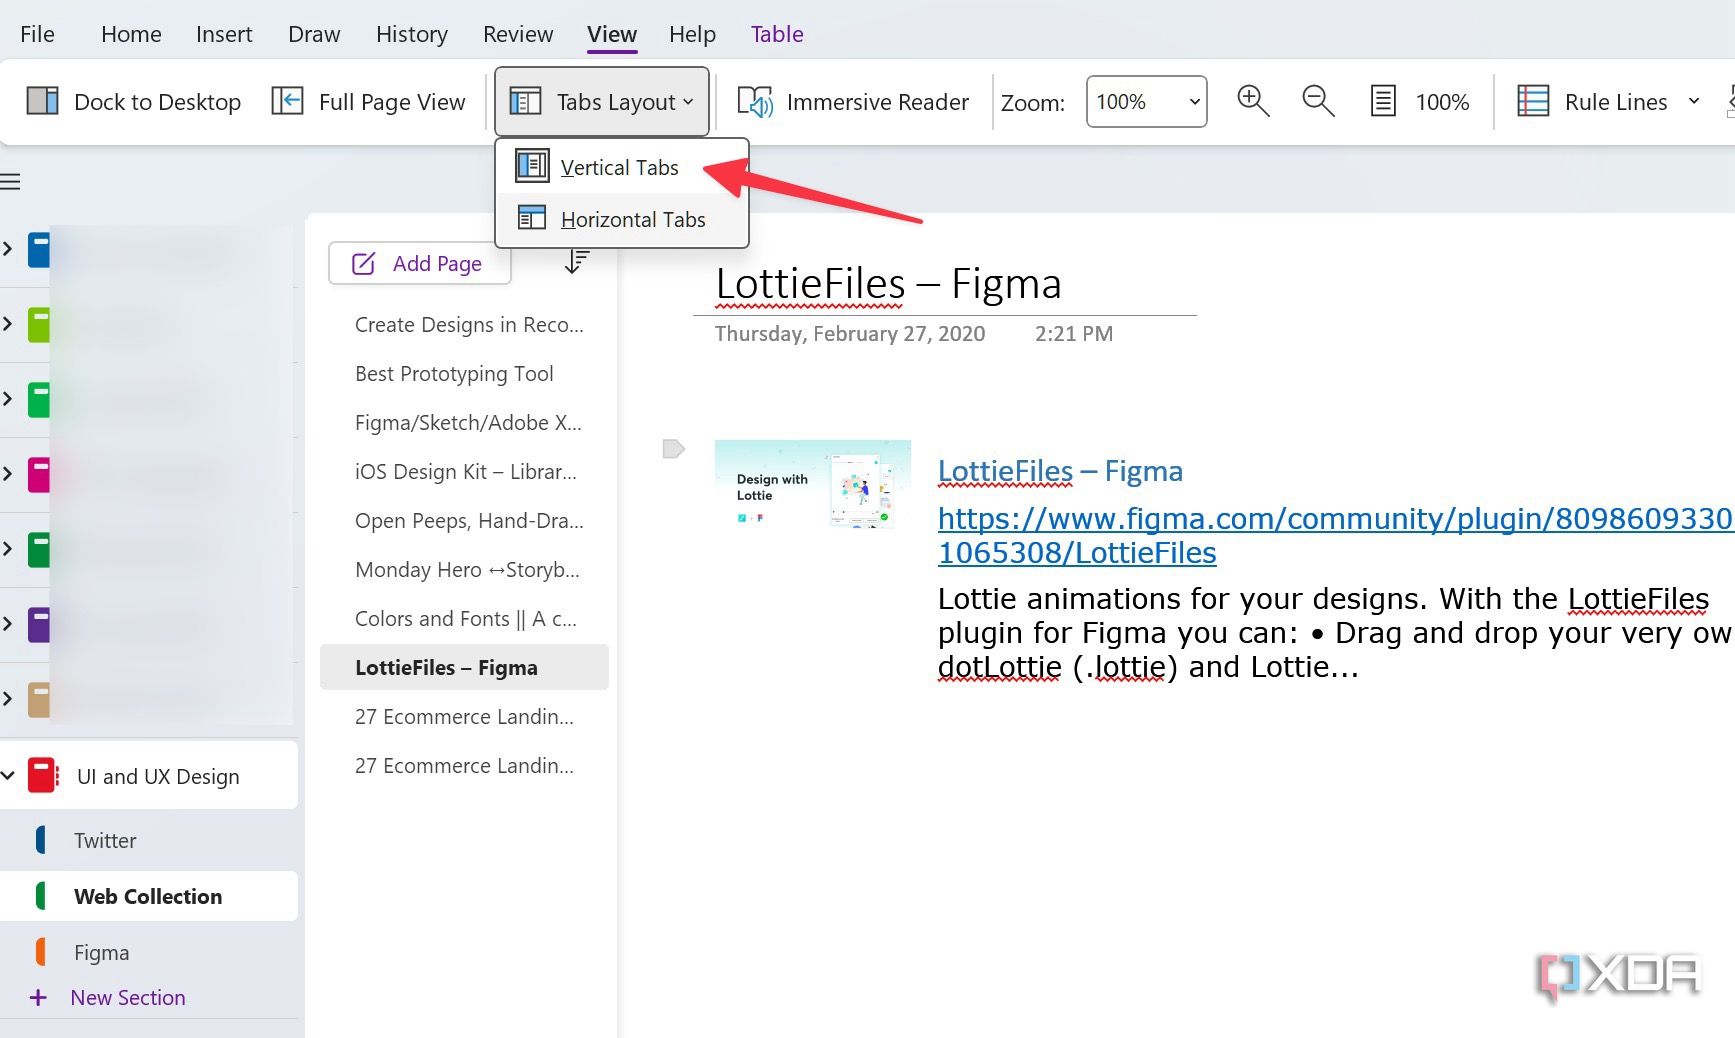
Microsoft used to offer a modern OneNote app on Windows with a dedicated sidebar for notebooks and sections. The company follows the same pattern on their Mac app, too. But now that the OneNote modern app is retired, use the trick below to enable a familiar vertical layout.
- Open OneNote on Windows. Head to the View
- Expand Tabs Layout and select Vertical Tabs.
-
You can now see your notebooks on the sidebar and expand them to view sections and notes.

7
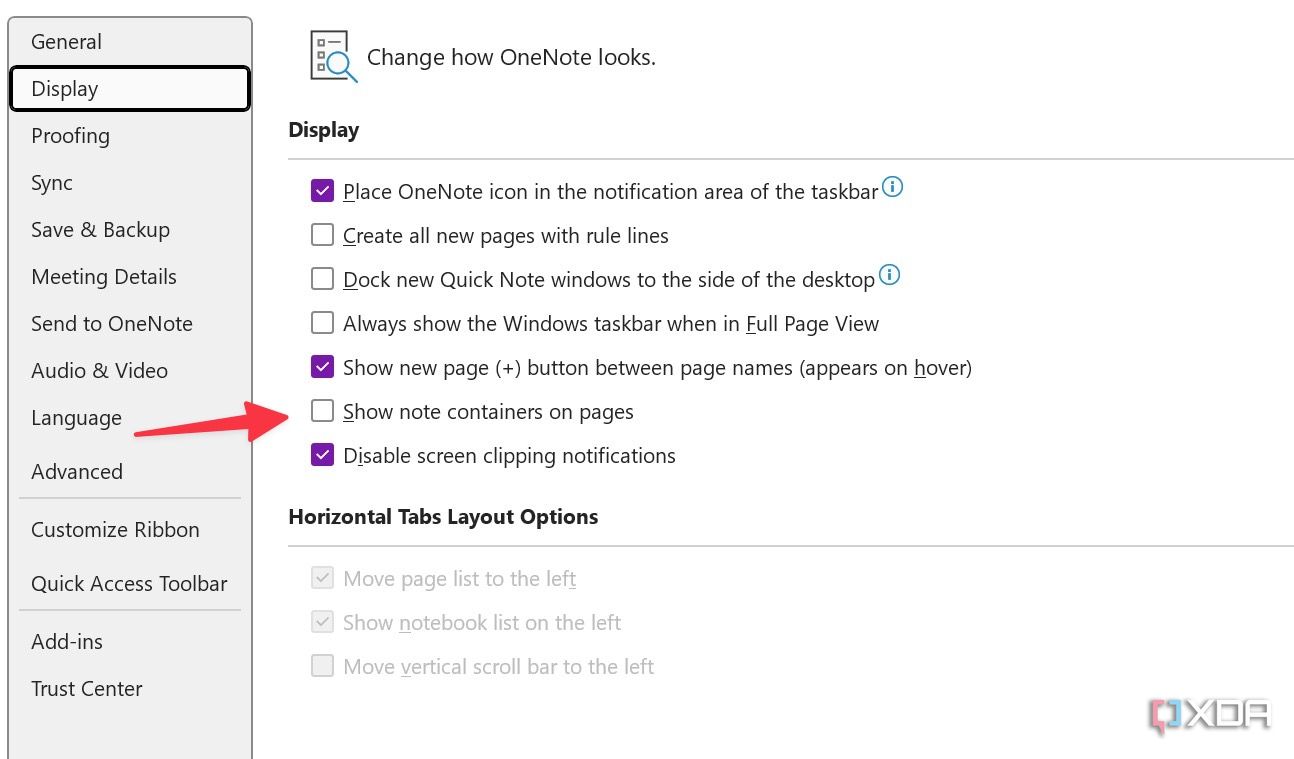
Disable note containers
It’s annoying
OneNote uses containers to arrange text and media content on a page. However, it feels outdated, and I’m not a fan of it. Before you switch to a OneNote alternative, follow the steps below to get rid of it once and for all.
-
Launch OneNote and head to the File Select Options.
-
Select Display from the sidebar and disable the checkmark beside Show note containers on pages.


If you use OneNote on Mac, head to the Preferences -> General -> disable Show Note Containers on Pages option.
6
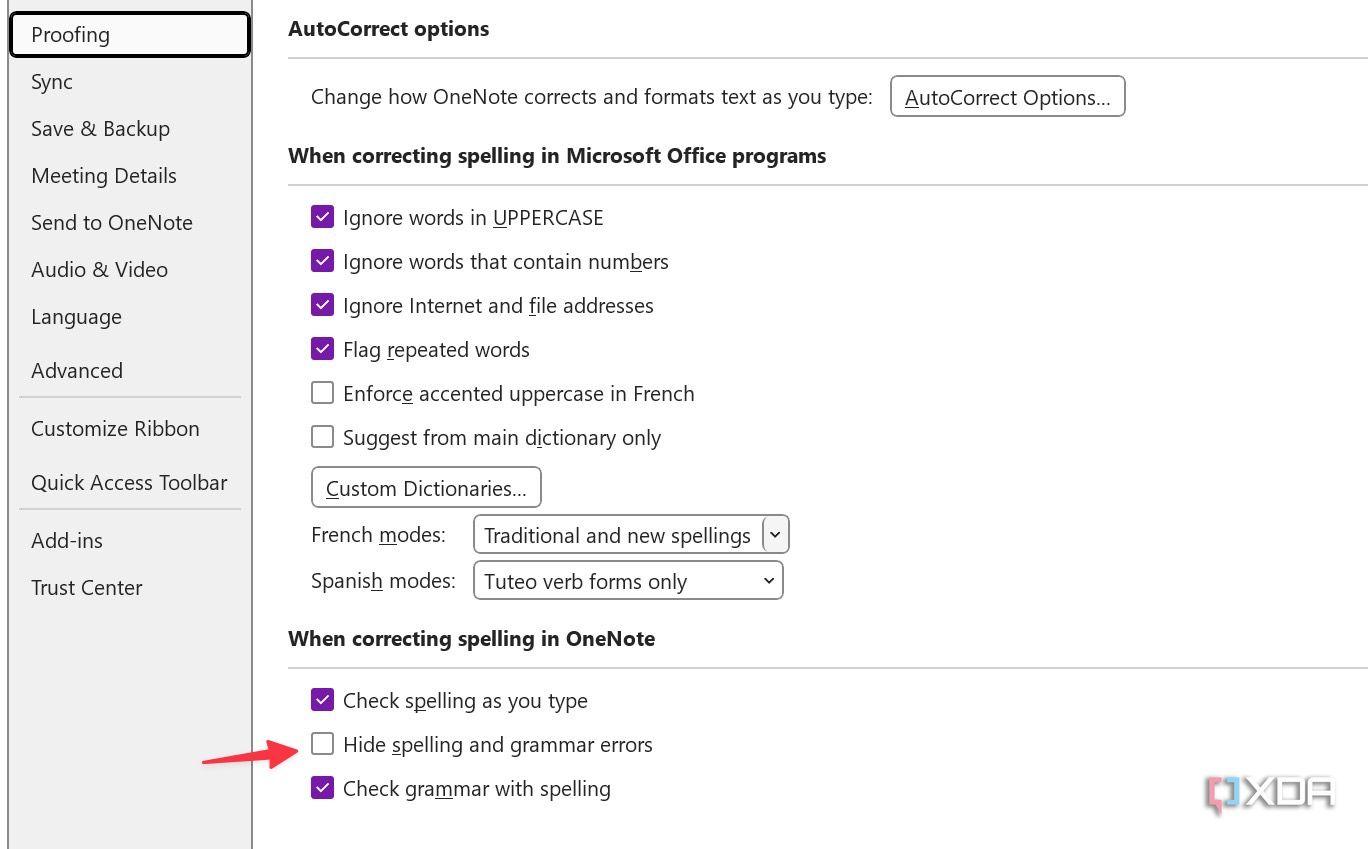
Hide spelling and grammar errors
I’m fine with mistakes here and there
I don’t use OneNote to write blogs or emails. It’s not an ideal tool for that, anyway. As expected, I mostly prefer it for jotting down quick notes and thoughts. I don’t want OneNote to irritate me with endless red lines throughout the paragraphs. I have disabled spelling and grammar errors on my OneNote.
- Open OneNote Options on Windows (refer to the steps above).
- Select Proofing from the sidebar.
-
Disable the checkmark beside Hide spelling and grammar errors.

5
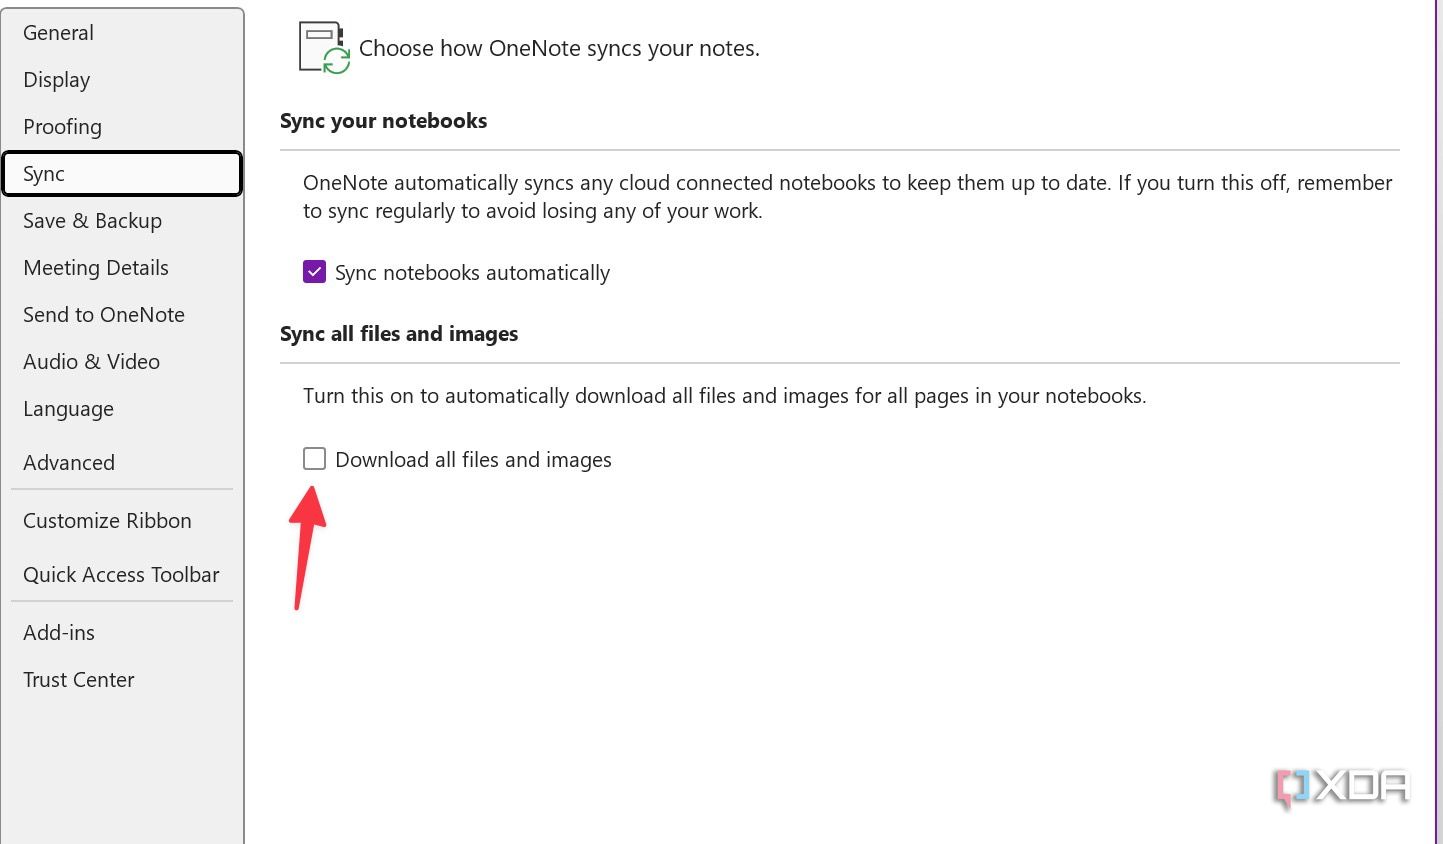
Download all files and images
Save those media files
This is another handy option that I keep enabled on my OneNote all the time. It automatically downloads all files and images for all pages in my notebooks.
- Head to OneNote Options (check the steps above).
-
Select Sync and enable the toggle beside Download all files and images.

4
Use pen pressure sensitivity
Draw and write like a pro
I frequently use OneNote on my HP Spectre x360 with a stylus. I have enabled pressure sensitivity for a better experience.
- Open OneNote Options and select Advanced.
-
Enable Use pen pressure sensitivity.
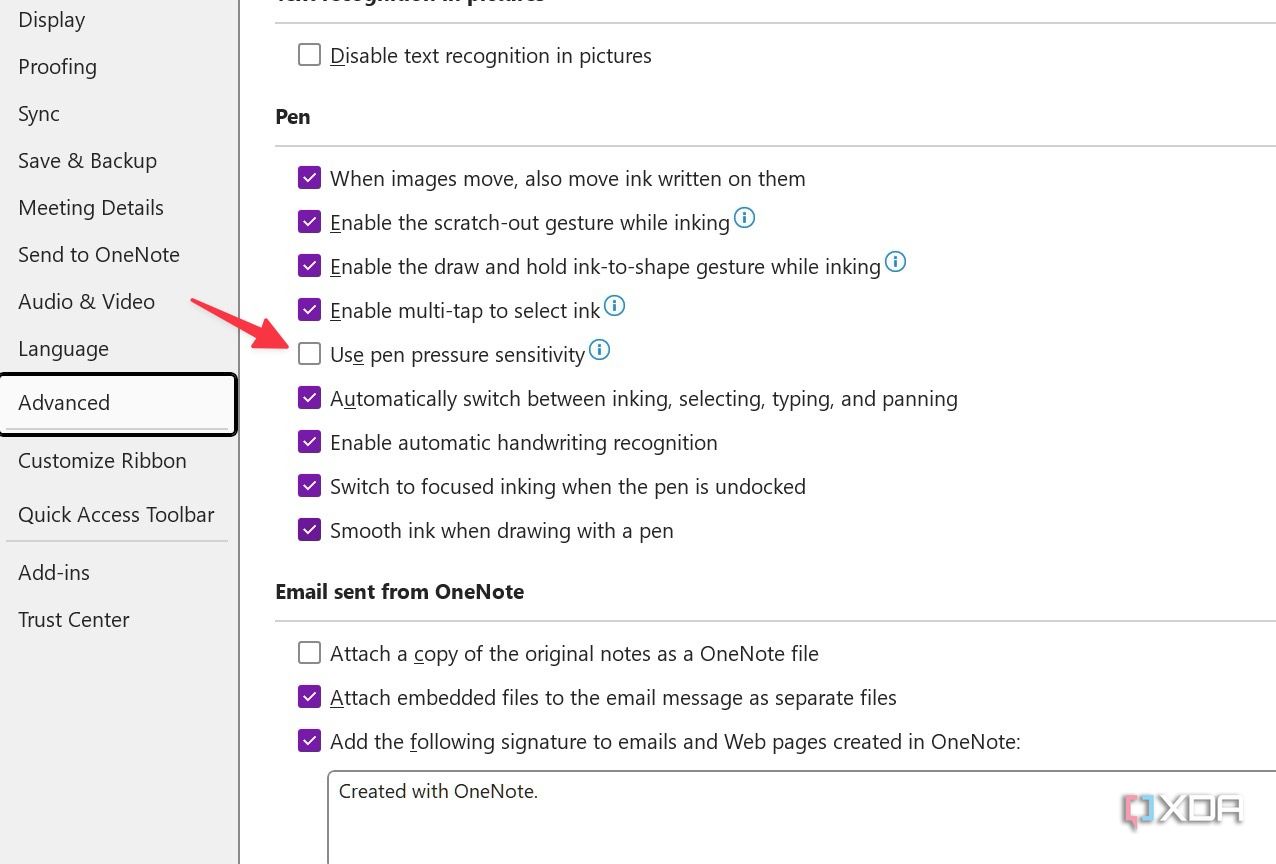

This is one of the reasons why OneNote is better than Evernote on Windows.
3
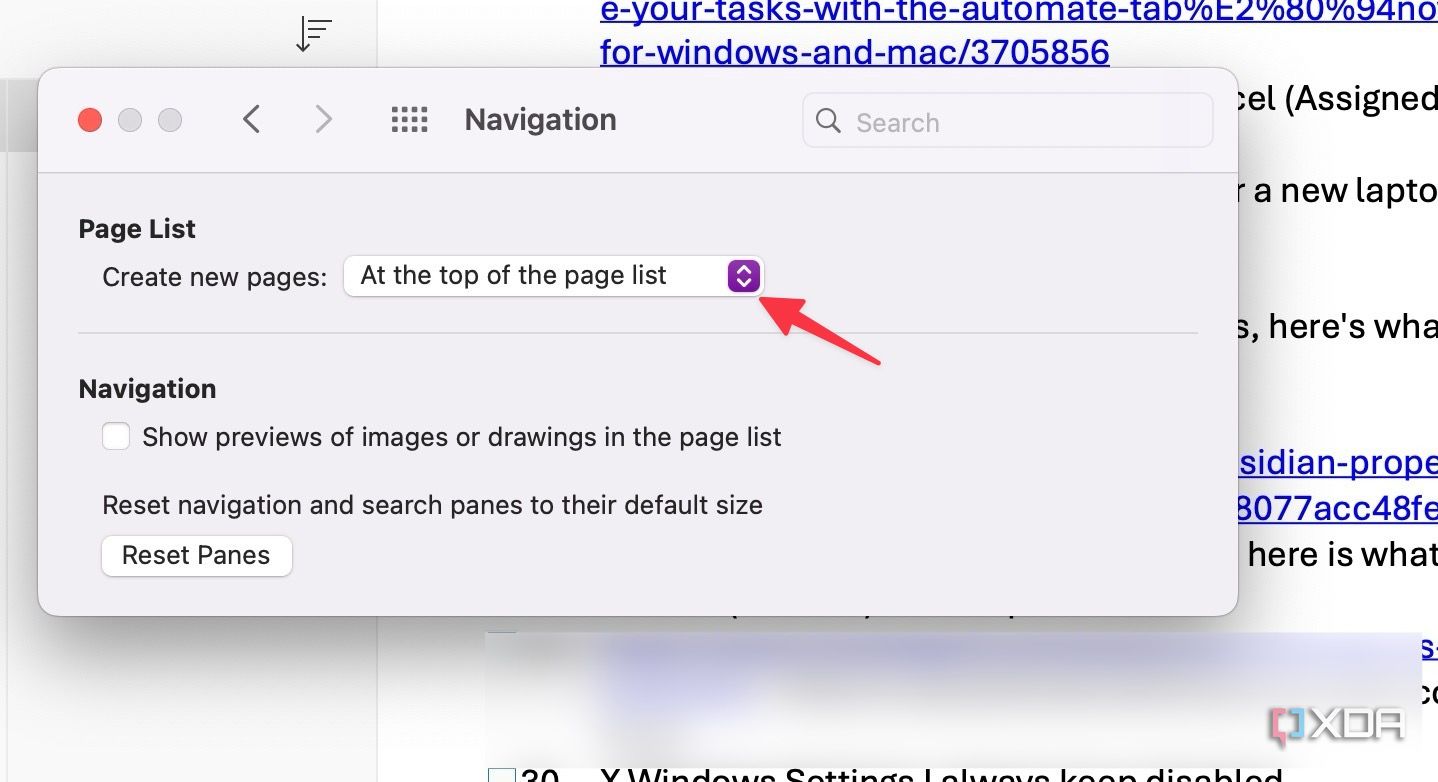
Create new OneNote pages at the top
It’s convenient
By default, OneNote on Mac creates new pages at the bottom of the section. It’s an irritating behavior. Here is how you can change the behavior.
- Launch OneNote on Mac and head to the Preferences.
-
Select Navigation. At Create new pages dropdown, select At the top of the list.

2
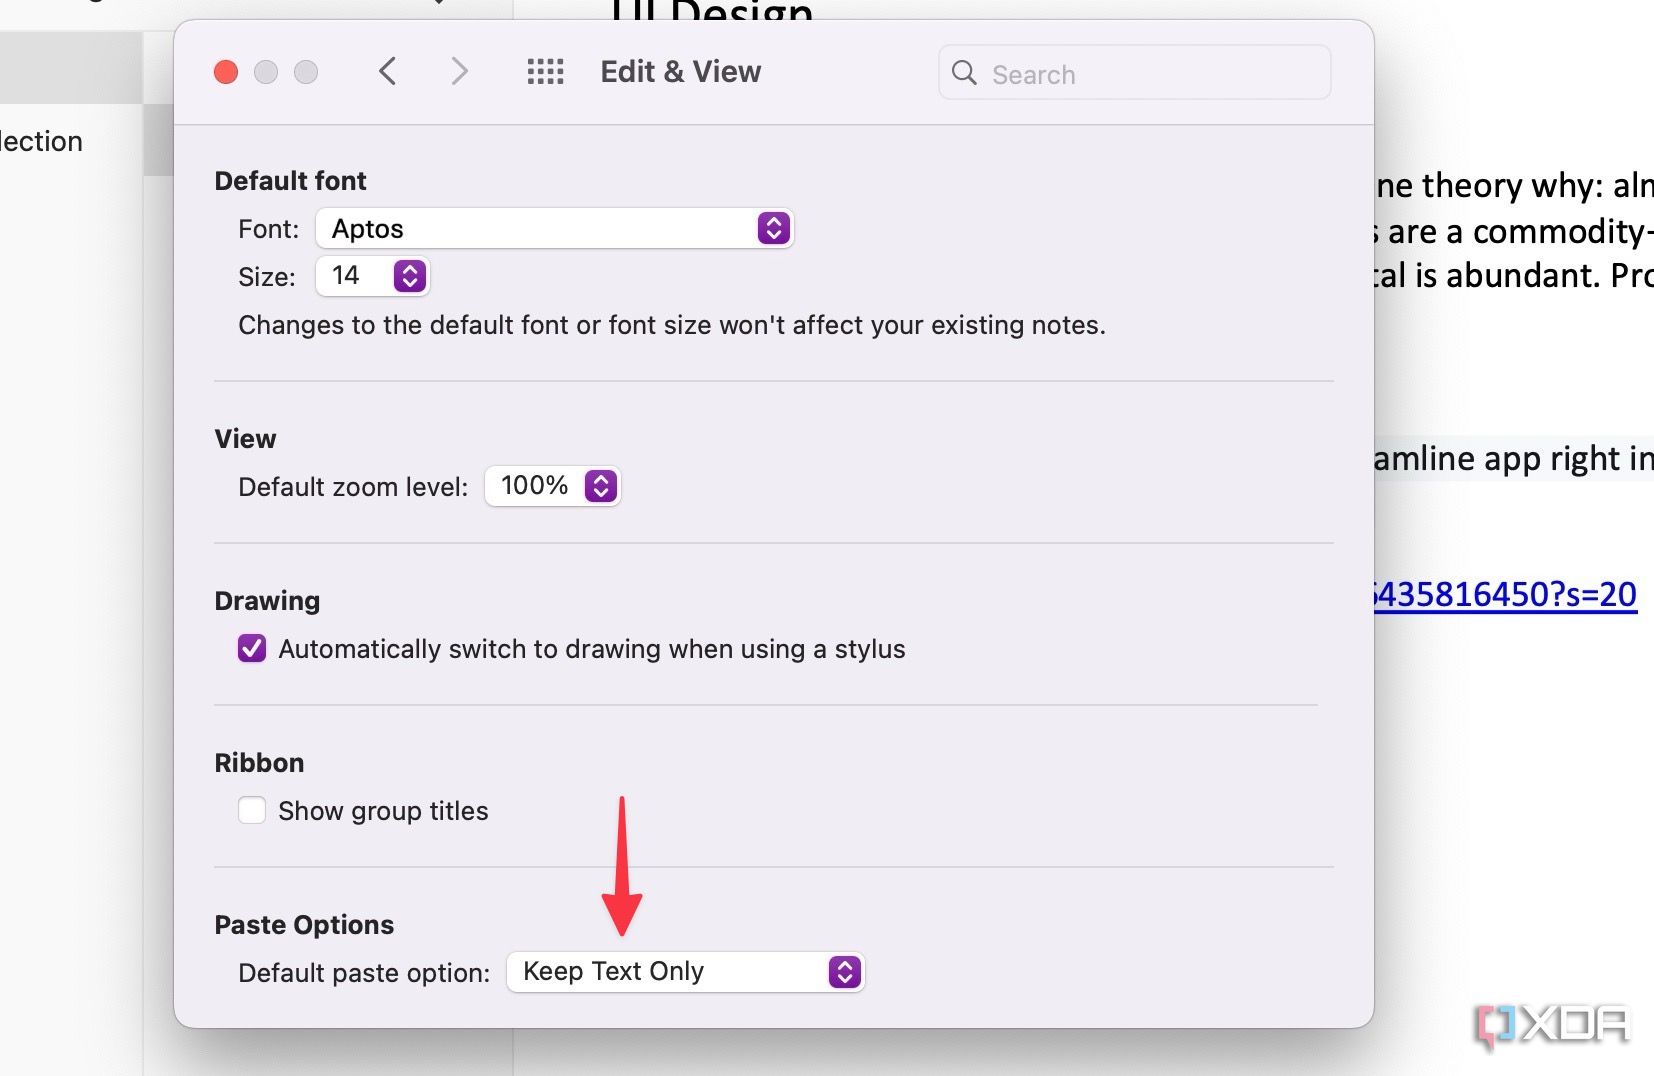
Set default paste options
Remove that formatting style
Whenever I copy and paste content from the web, I don’t want OneNote to use all the formatting styles. I have tweaked the default paste option.
- Open OneNote preferences on Mac.
-
Select Edit & View and change the paste option to Keep Text Only.

1
Set a default template for a specific section
Save time and effort
If you frequently use a specific note format in a OneNote section, set it as a default template.
- Open a OneNote section and design a page the way you want.
-
Select Notebooks at the top, expand Pages, and select Set as Default Template.
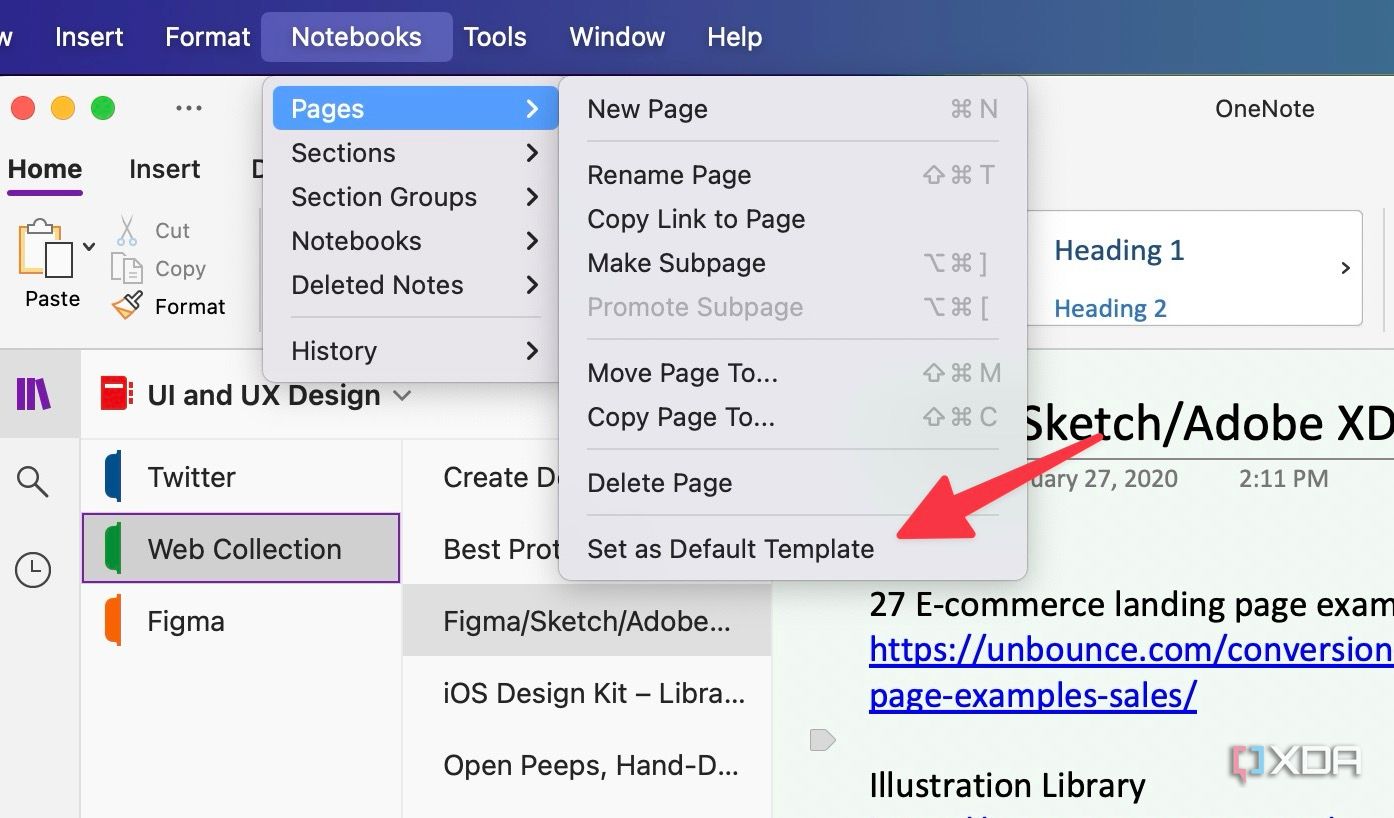

From now on, whenever you create a new note in the section, you can see the same format.
Make OneNote work for you
I used to struggle with OneNote. It felt clunky, disorganized, and just not quite right. I spent some time in Settings, and these hidden gems completely changed my OneNote game. Apply these tricks and transform OneNote from a decent digital notebook into a robust productivity hub.
If you are still not fond of OneNote, explore its alternatives. Among them, you can try Notion, Evernote, or Obsidian to replace your OneNote setup.

#OneNote #changing #settings
source: https://www.xda-developers.com/onenote-without-changing-settings/

