

When you’re putting together a server PC for all your computing experiments, there are multiple operating systems for you to choose from, ranging from the community-favorite Proxmox to the production-oriented XCP-ng. But if you’re looking for something completely unique, you can even leverage Unix-based Illumos distros in your home lab.
Thanks to its intuitive and clean UI, SmartOS is one of the more accessible virtualization distros in the Solaris/Illumos space, though setting it up can still be a job and a half. So, we’ve compiled a step-by-step guide to help you get your SmartOS home server up and running.
Related
5 of the best Proxmox alternatives for your home lab
Proxmox is great for tinkerers, but there are several other useful operating systems in the home lab space
What you’ll need
Unlike VMware Workstation Pro, VirtualBox, or other Type-2 hypervisors, SmartOS requires you to dedicate an entire machine to the platform. Sure, it’s technically possible to run a virtualized instance of SmartOS, but it’s better to run it as a bare-metal OS. Thankfully, SmartOS has fairly minimal system requirements and all you need is a relatively modern 64-bit x86 processor that supports virtualization alongside 1GB of memory. You’ll also need a USB drive to install the operating system. Given the small size of the SmartOS ISO, any flash drive with at least 2GB storage capacity should suffice.

PNY 128GB Elite-X Type-C USB 3.2 Gen 1 Flash Drive
Creating the bootable drive
Once you’ve gotten hold of everything needed for this project, you’ll have to write the SmartOS image onto a USB drive. We’ll use Rufus in this guide, but you’re free to use Balena Etcher and other image-flashing tools.
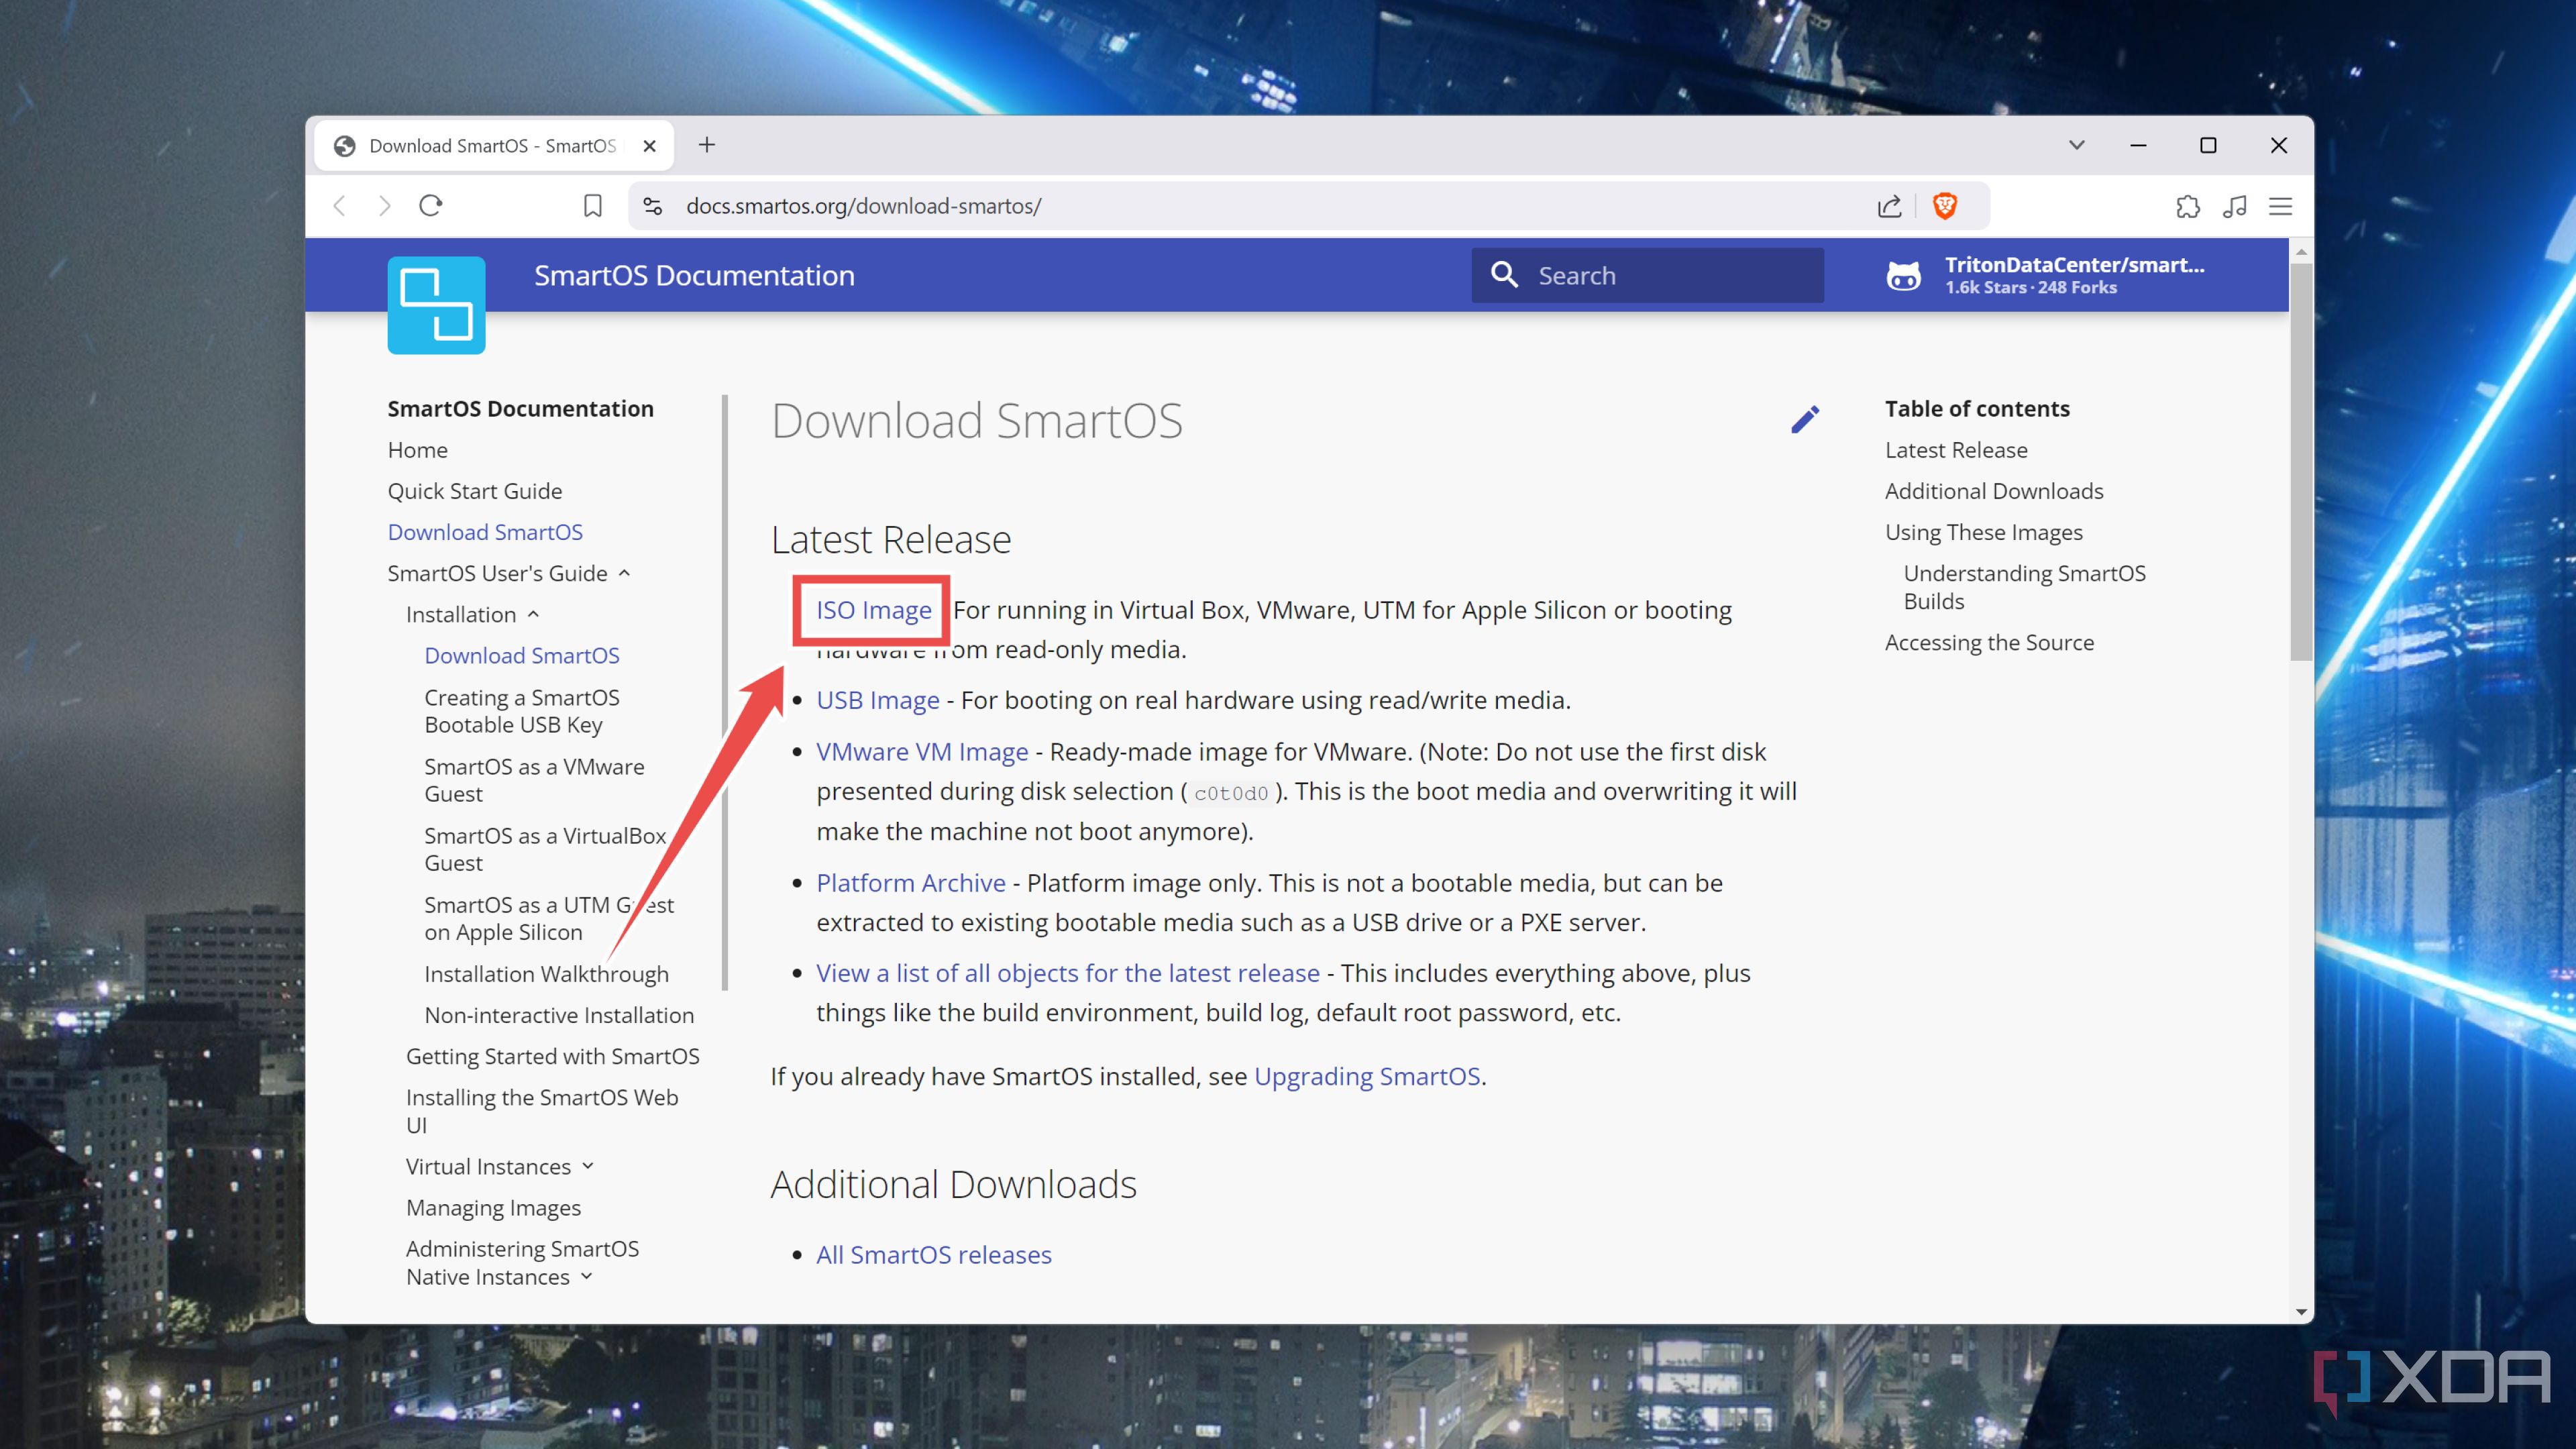
- Head to the SmartOS documentation page and download the ISO Image under the Latest Release section.
- Download the portable version of Rufus from its official website.
- Run Rufus.exe with admin privileges.
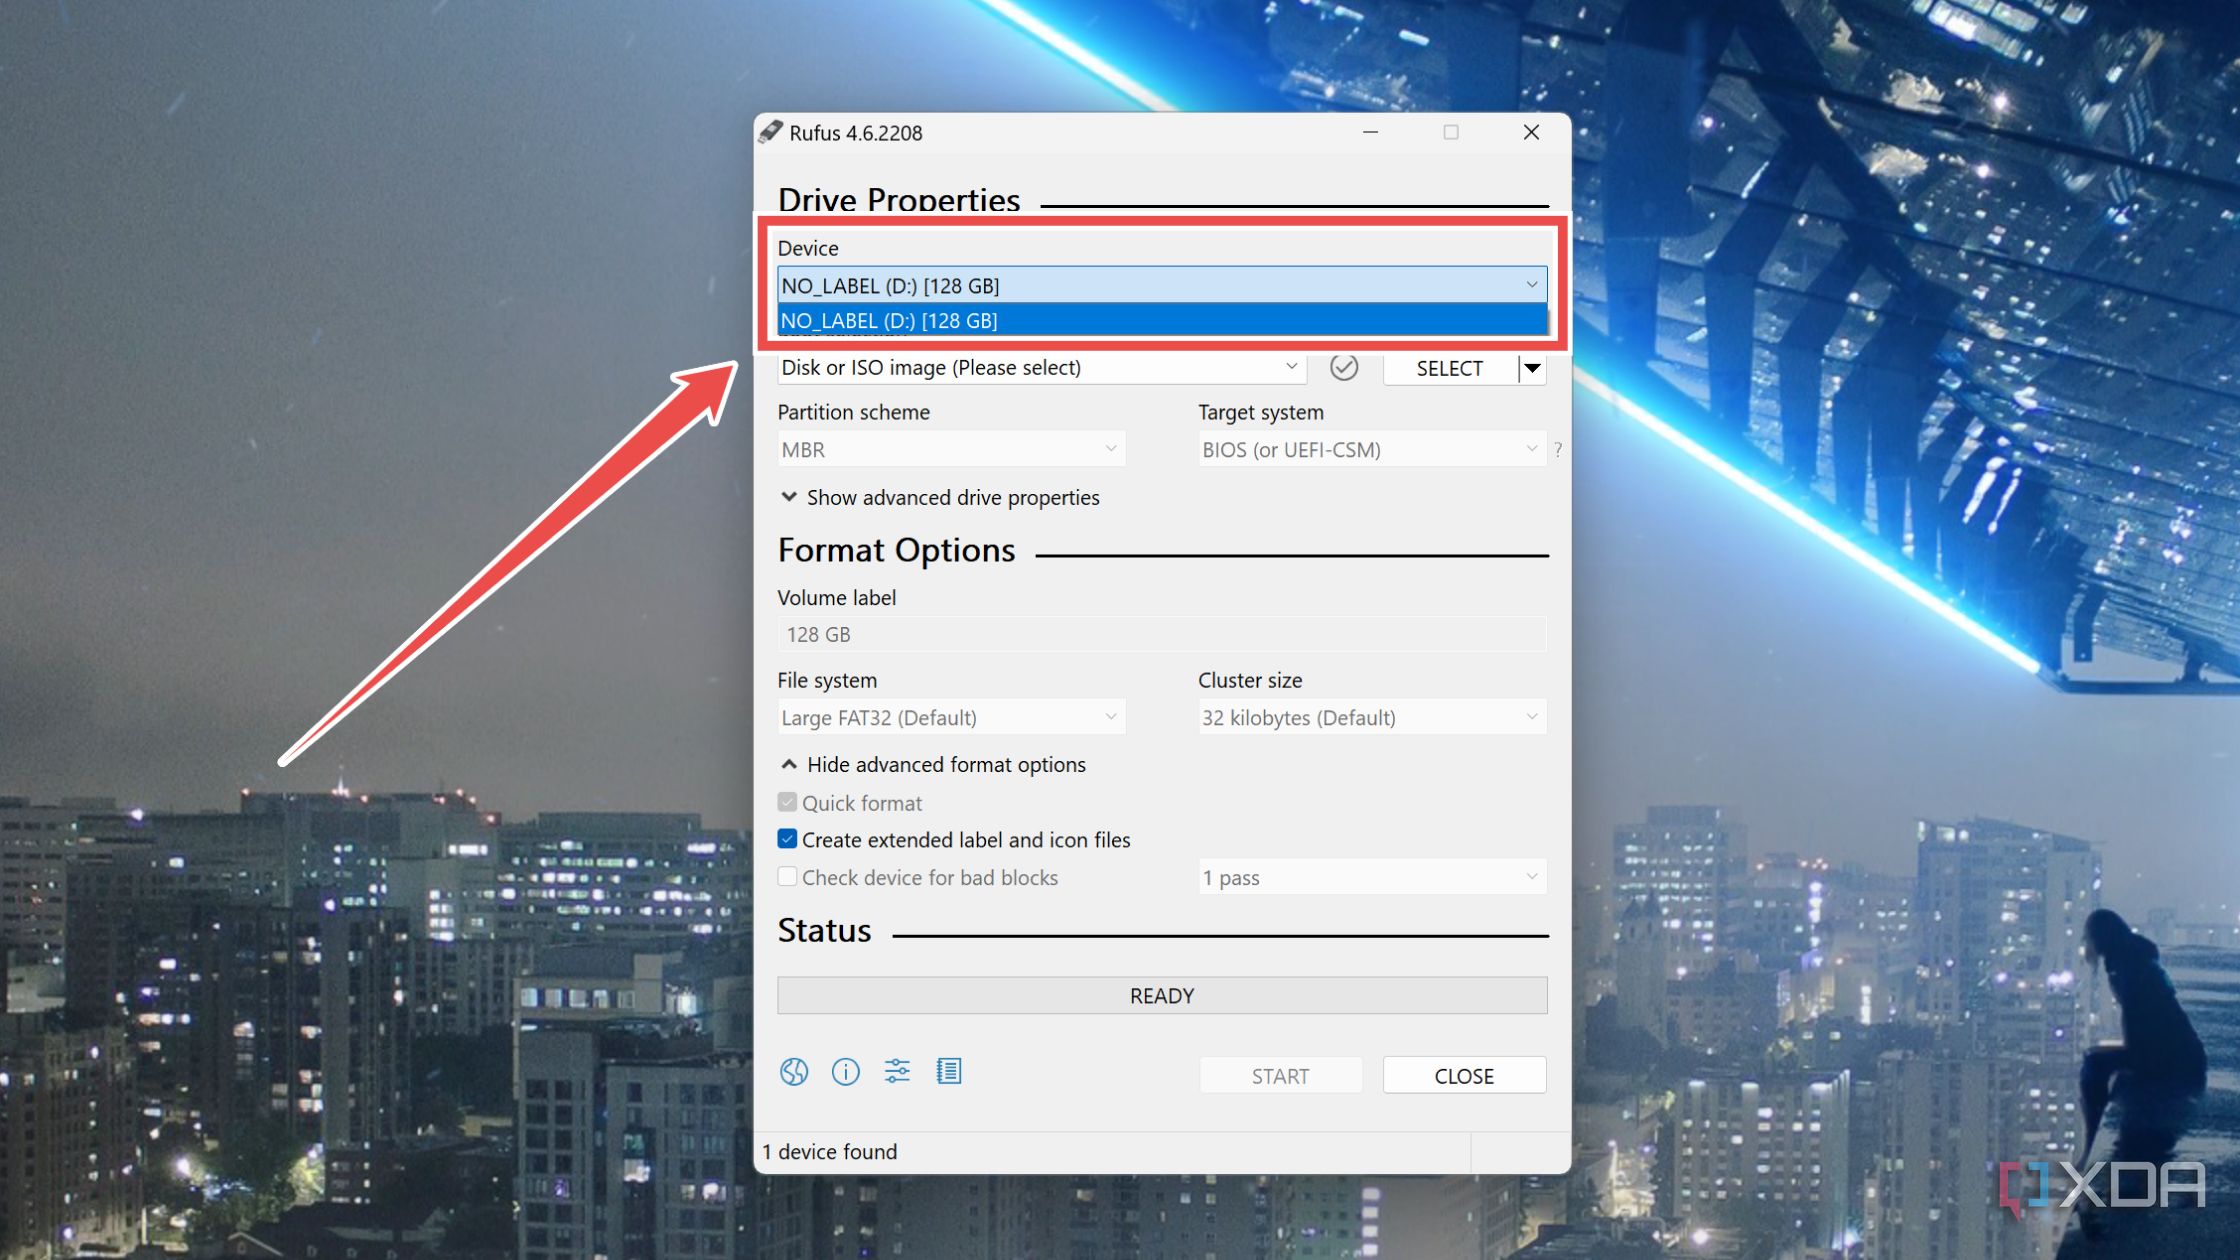
- Plug the USB drive into your PC and choose it as the Device inside Rufus.
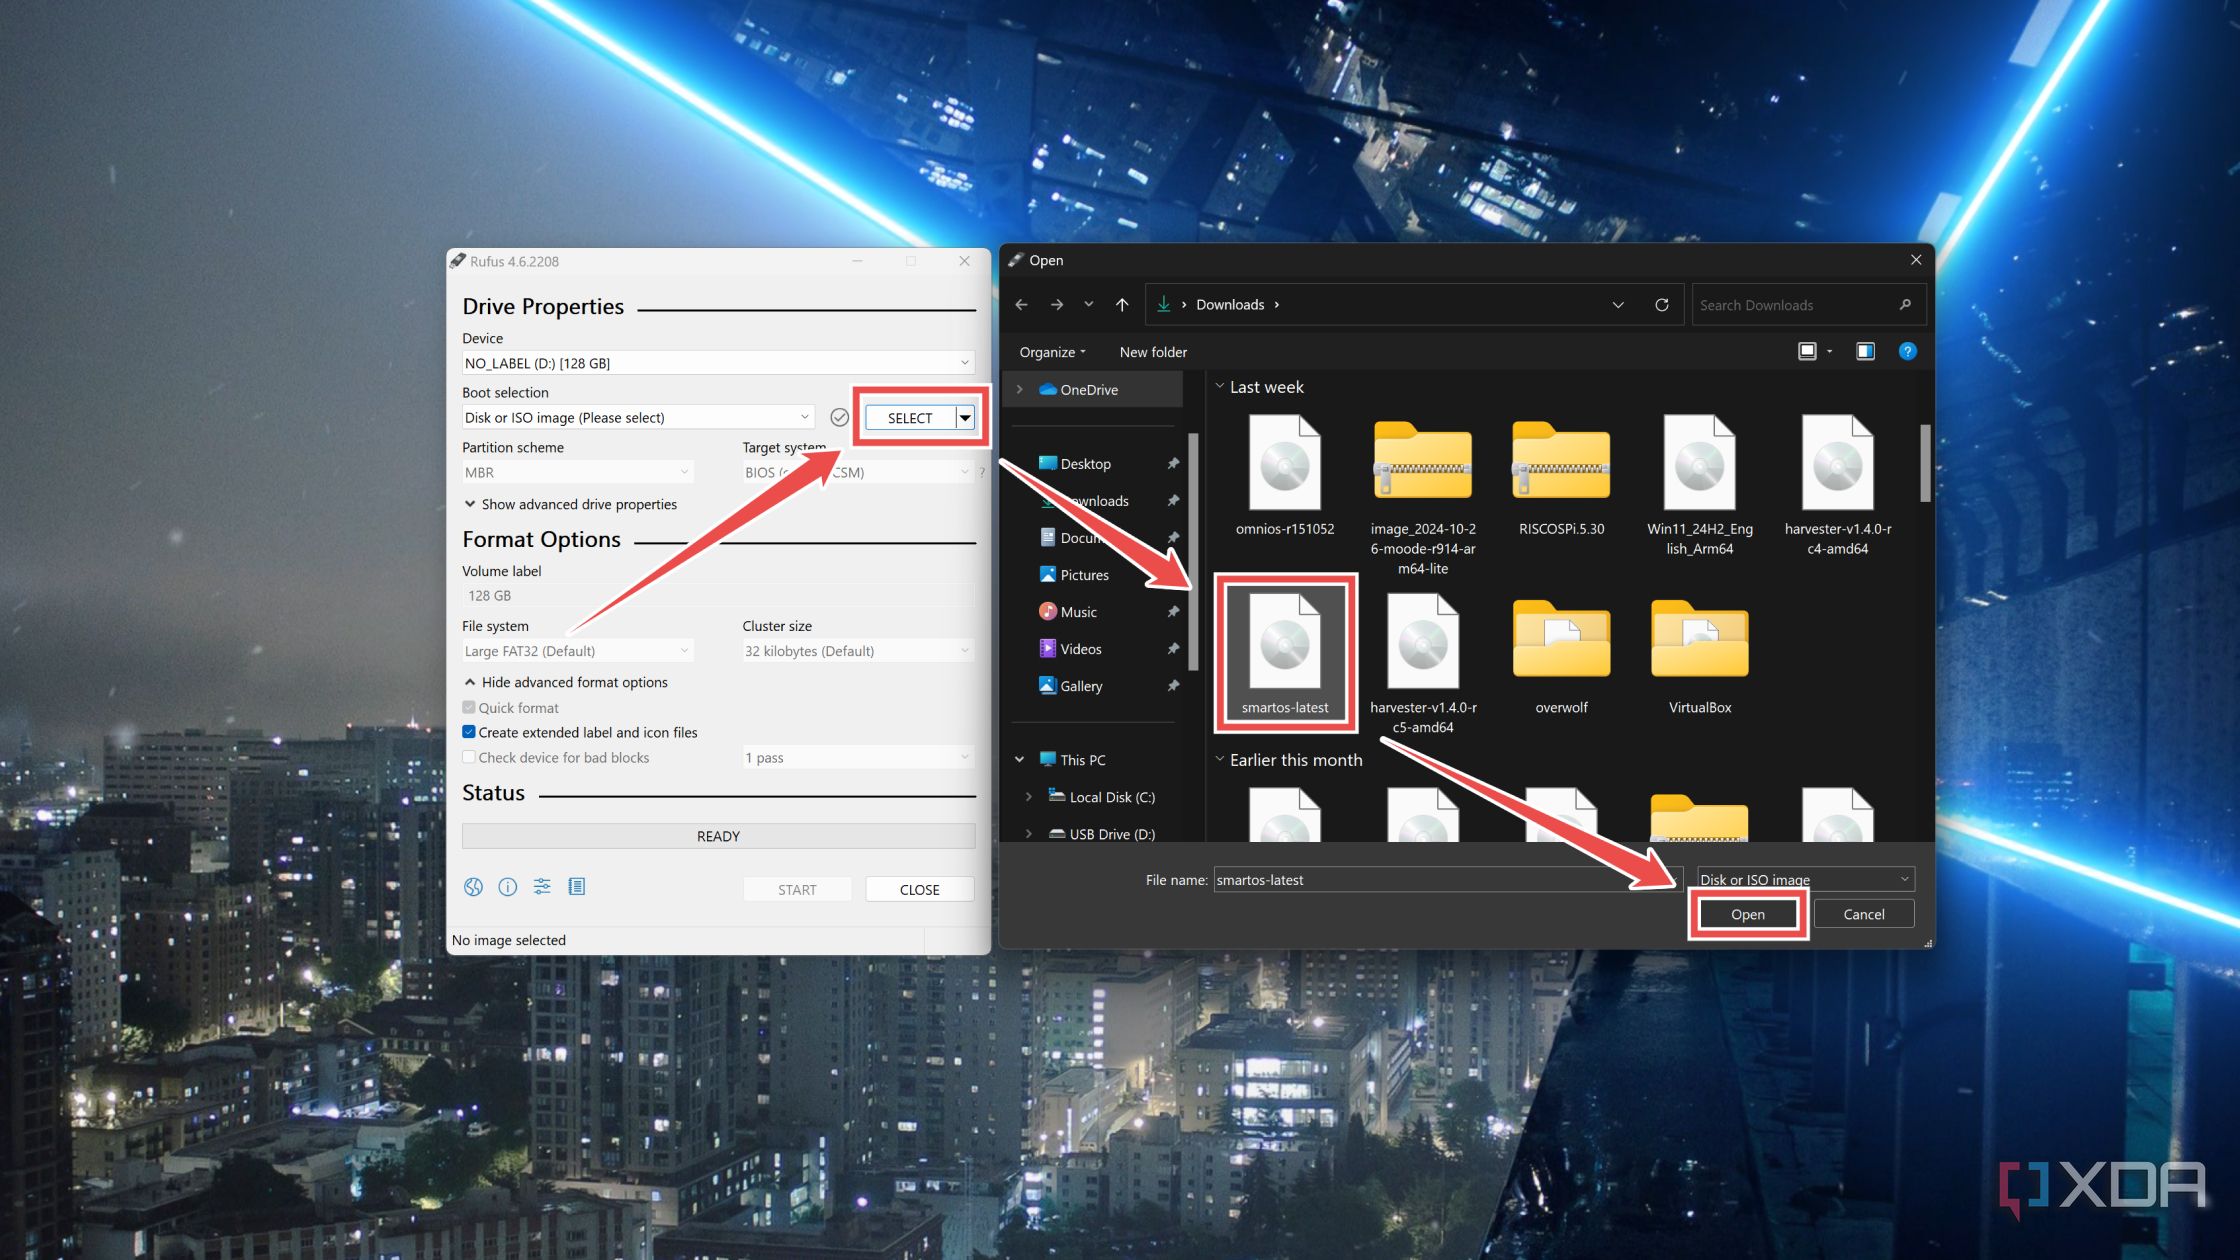
- Press the Select button under Boot Selection and pick the SmartOS ISO file you downloaded earlier.
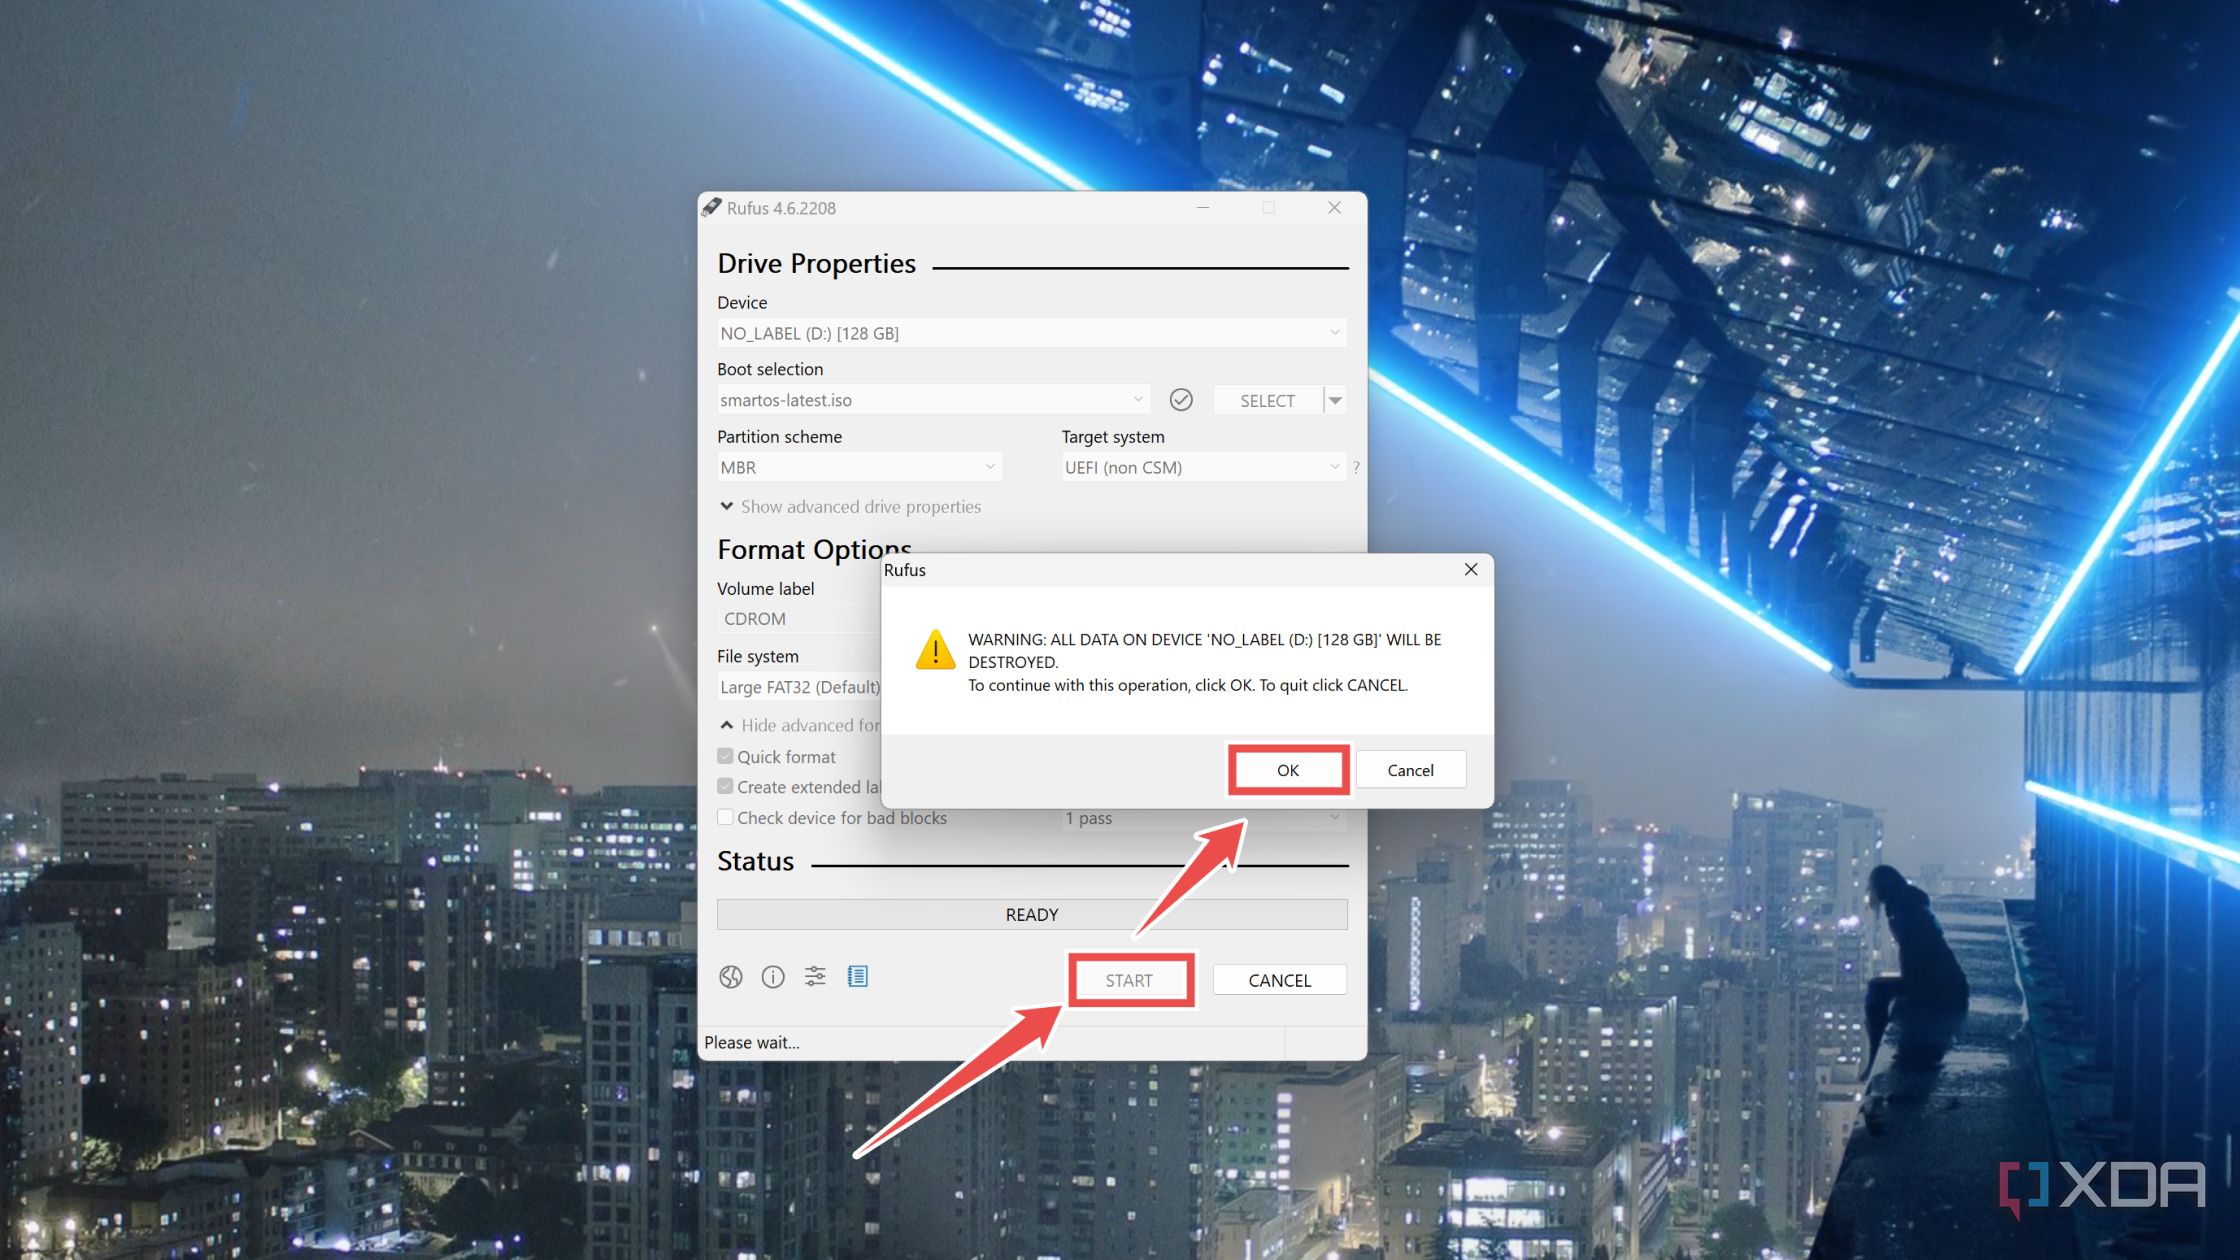
- Tap Start, hit OK when Rufus displays the warning, and wait for the tool to finish writing the OS files onto your USB drive.


Modifying the BIOS settings
Before you can proceed with the installation, you’ll need to modify the Boot settings to ensure the PC uses the bootable drive. Now’s also a good time to enable the virtualization settings, as you’ll need those to make full use of SmartOS.
- Insert the bootable drive into your PC and mash the Del/Delete key as it starts up.
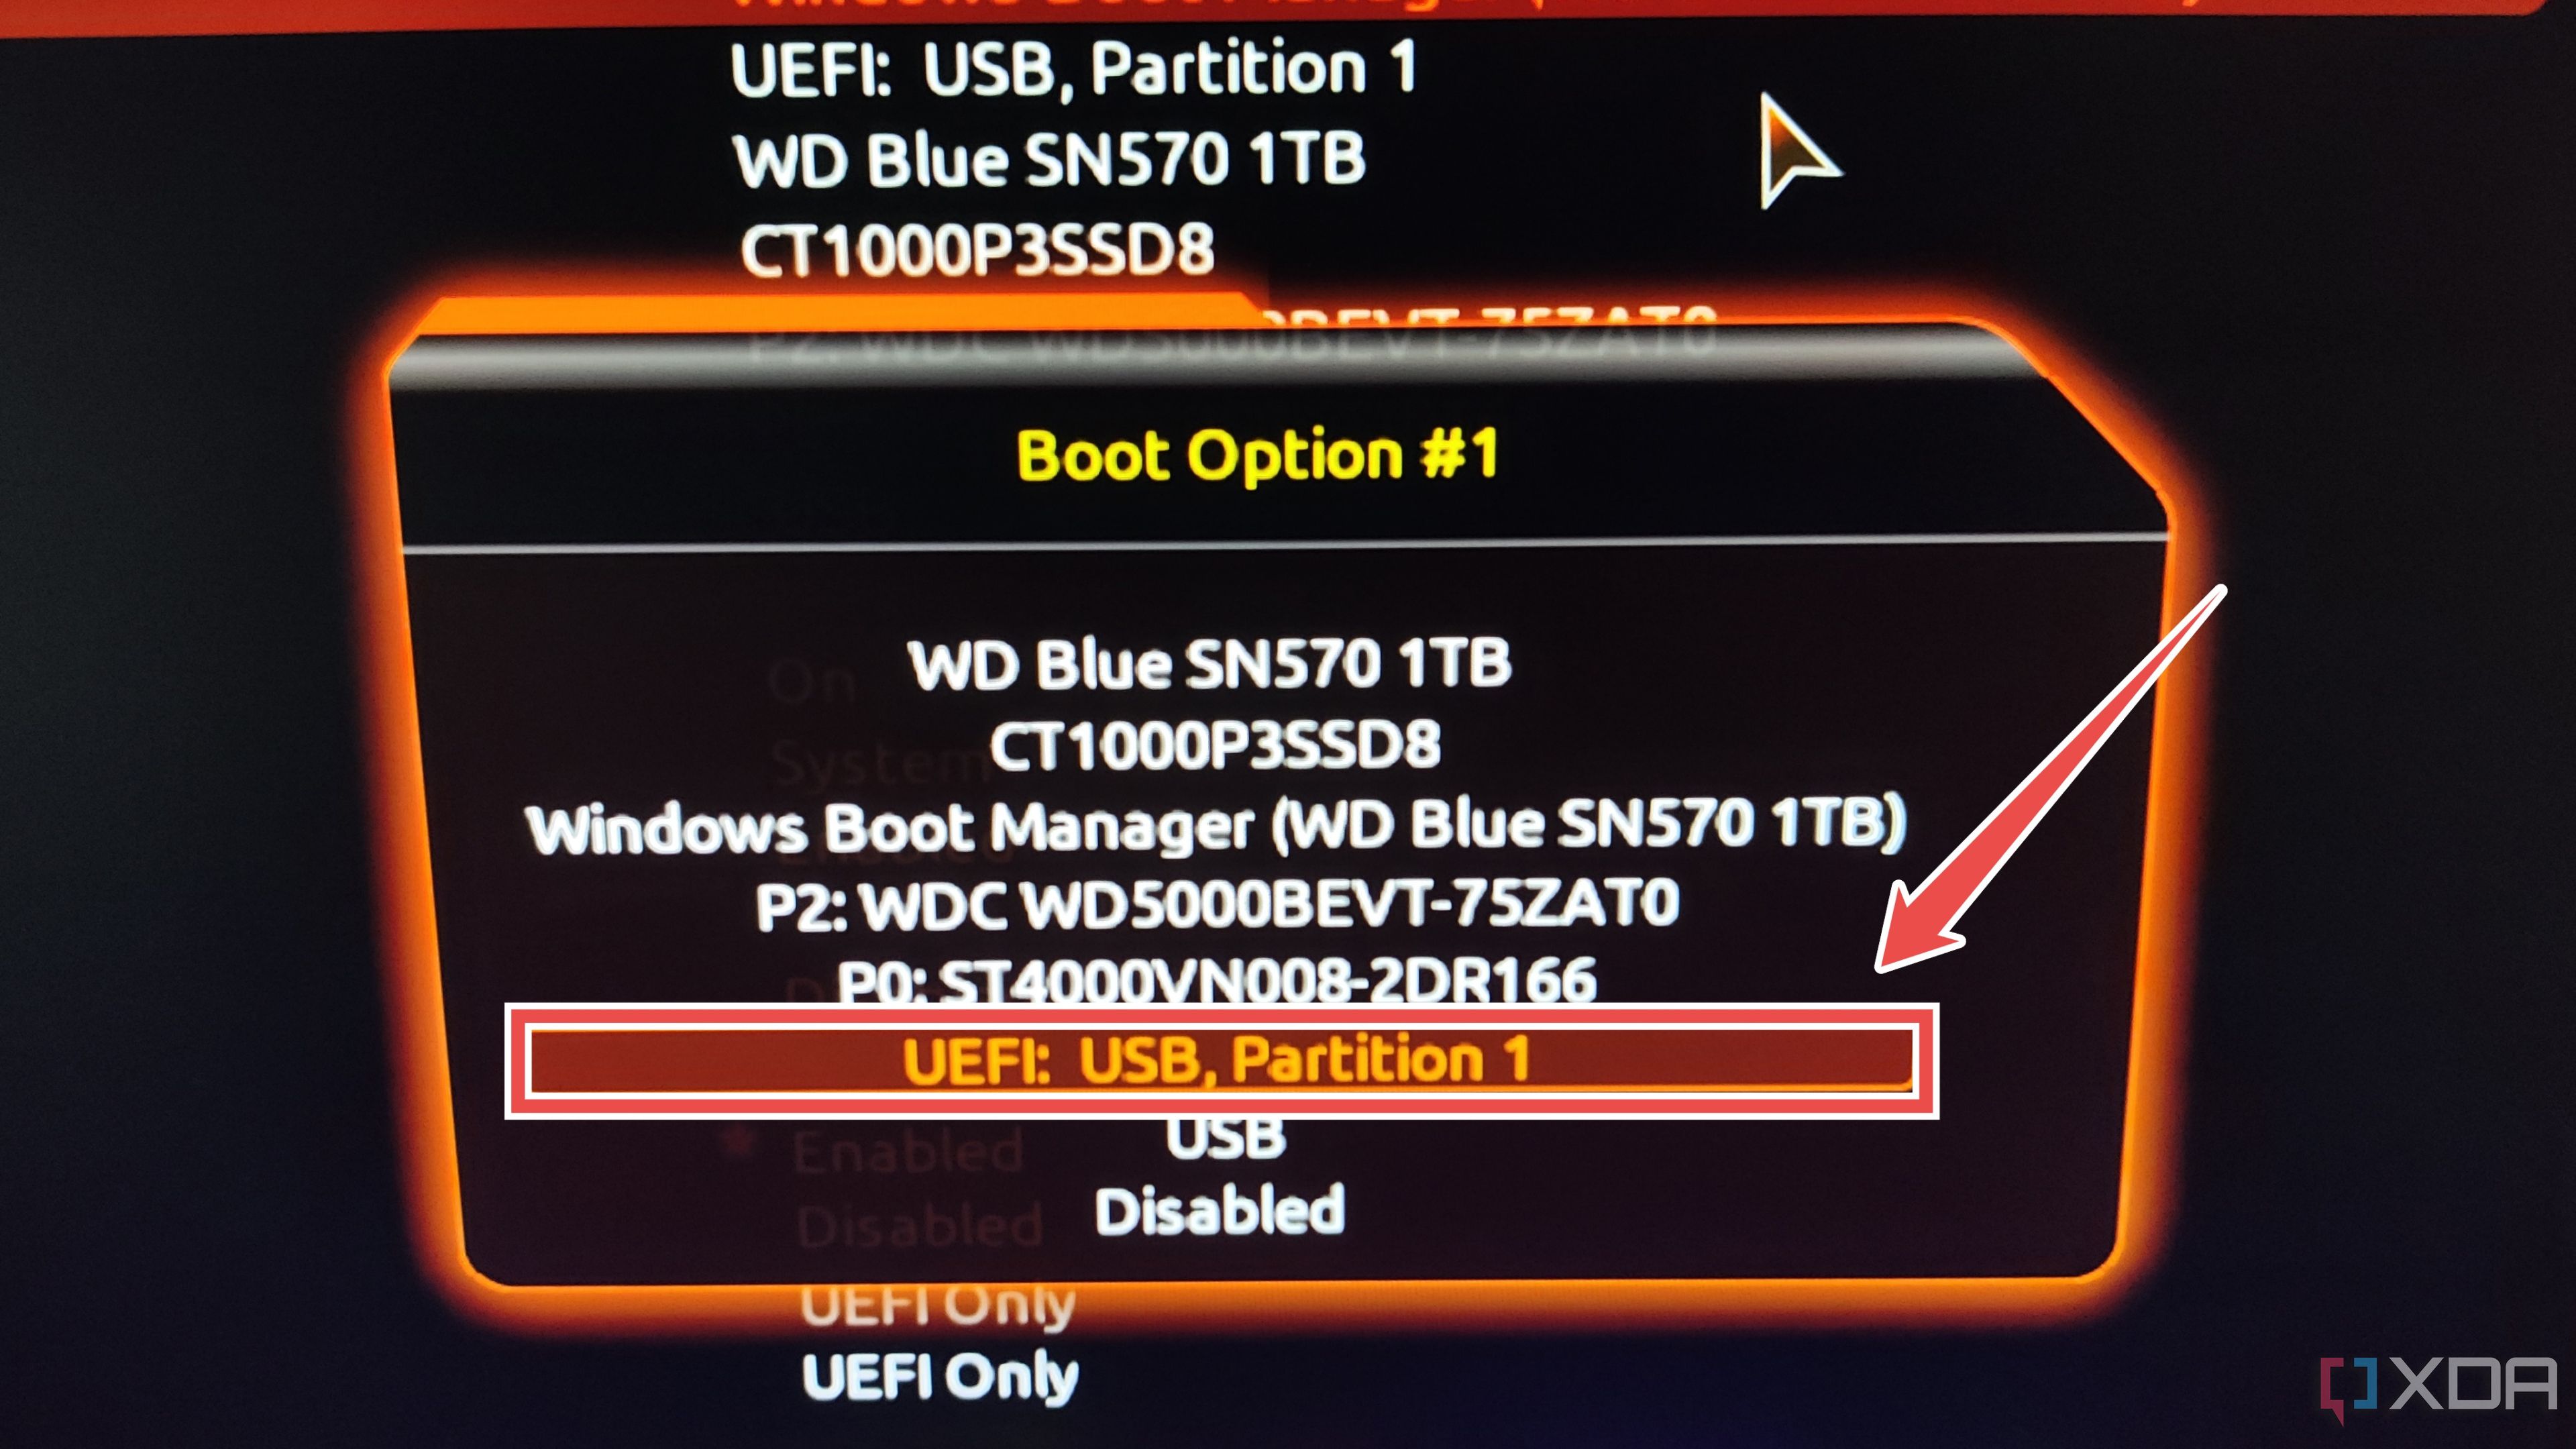
- Head to the Boot Settings, select Boot Option #1, and pick the flash drive.
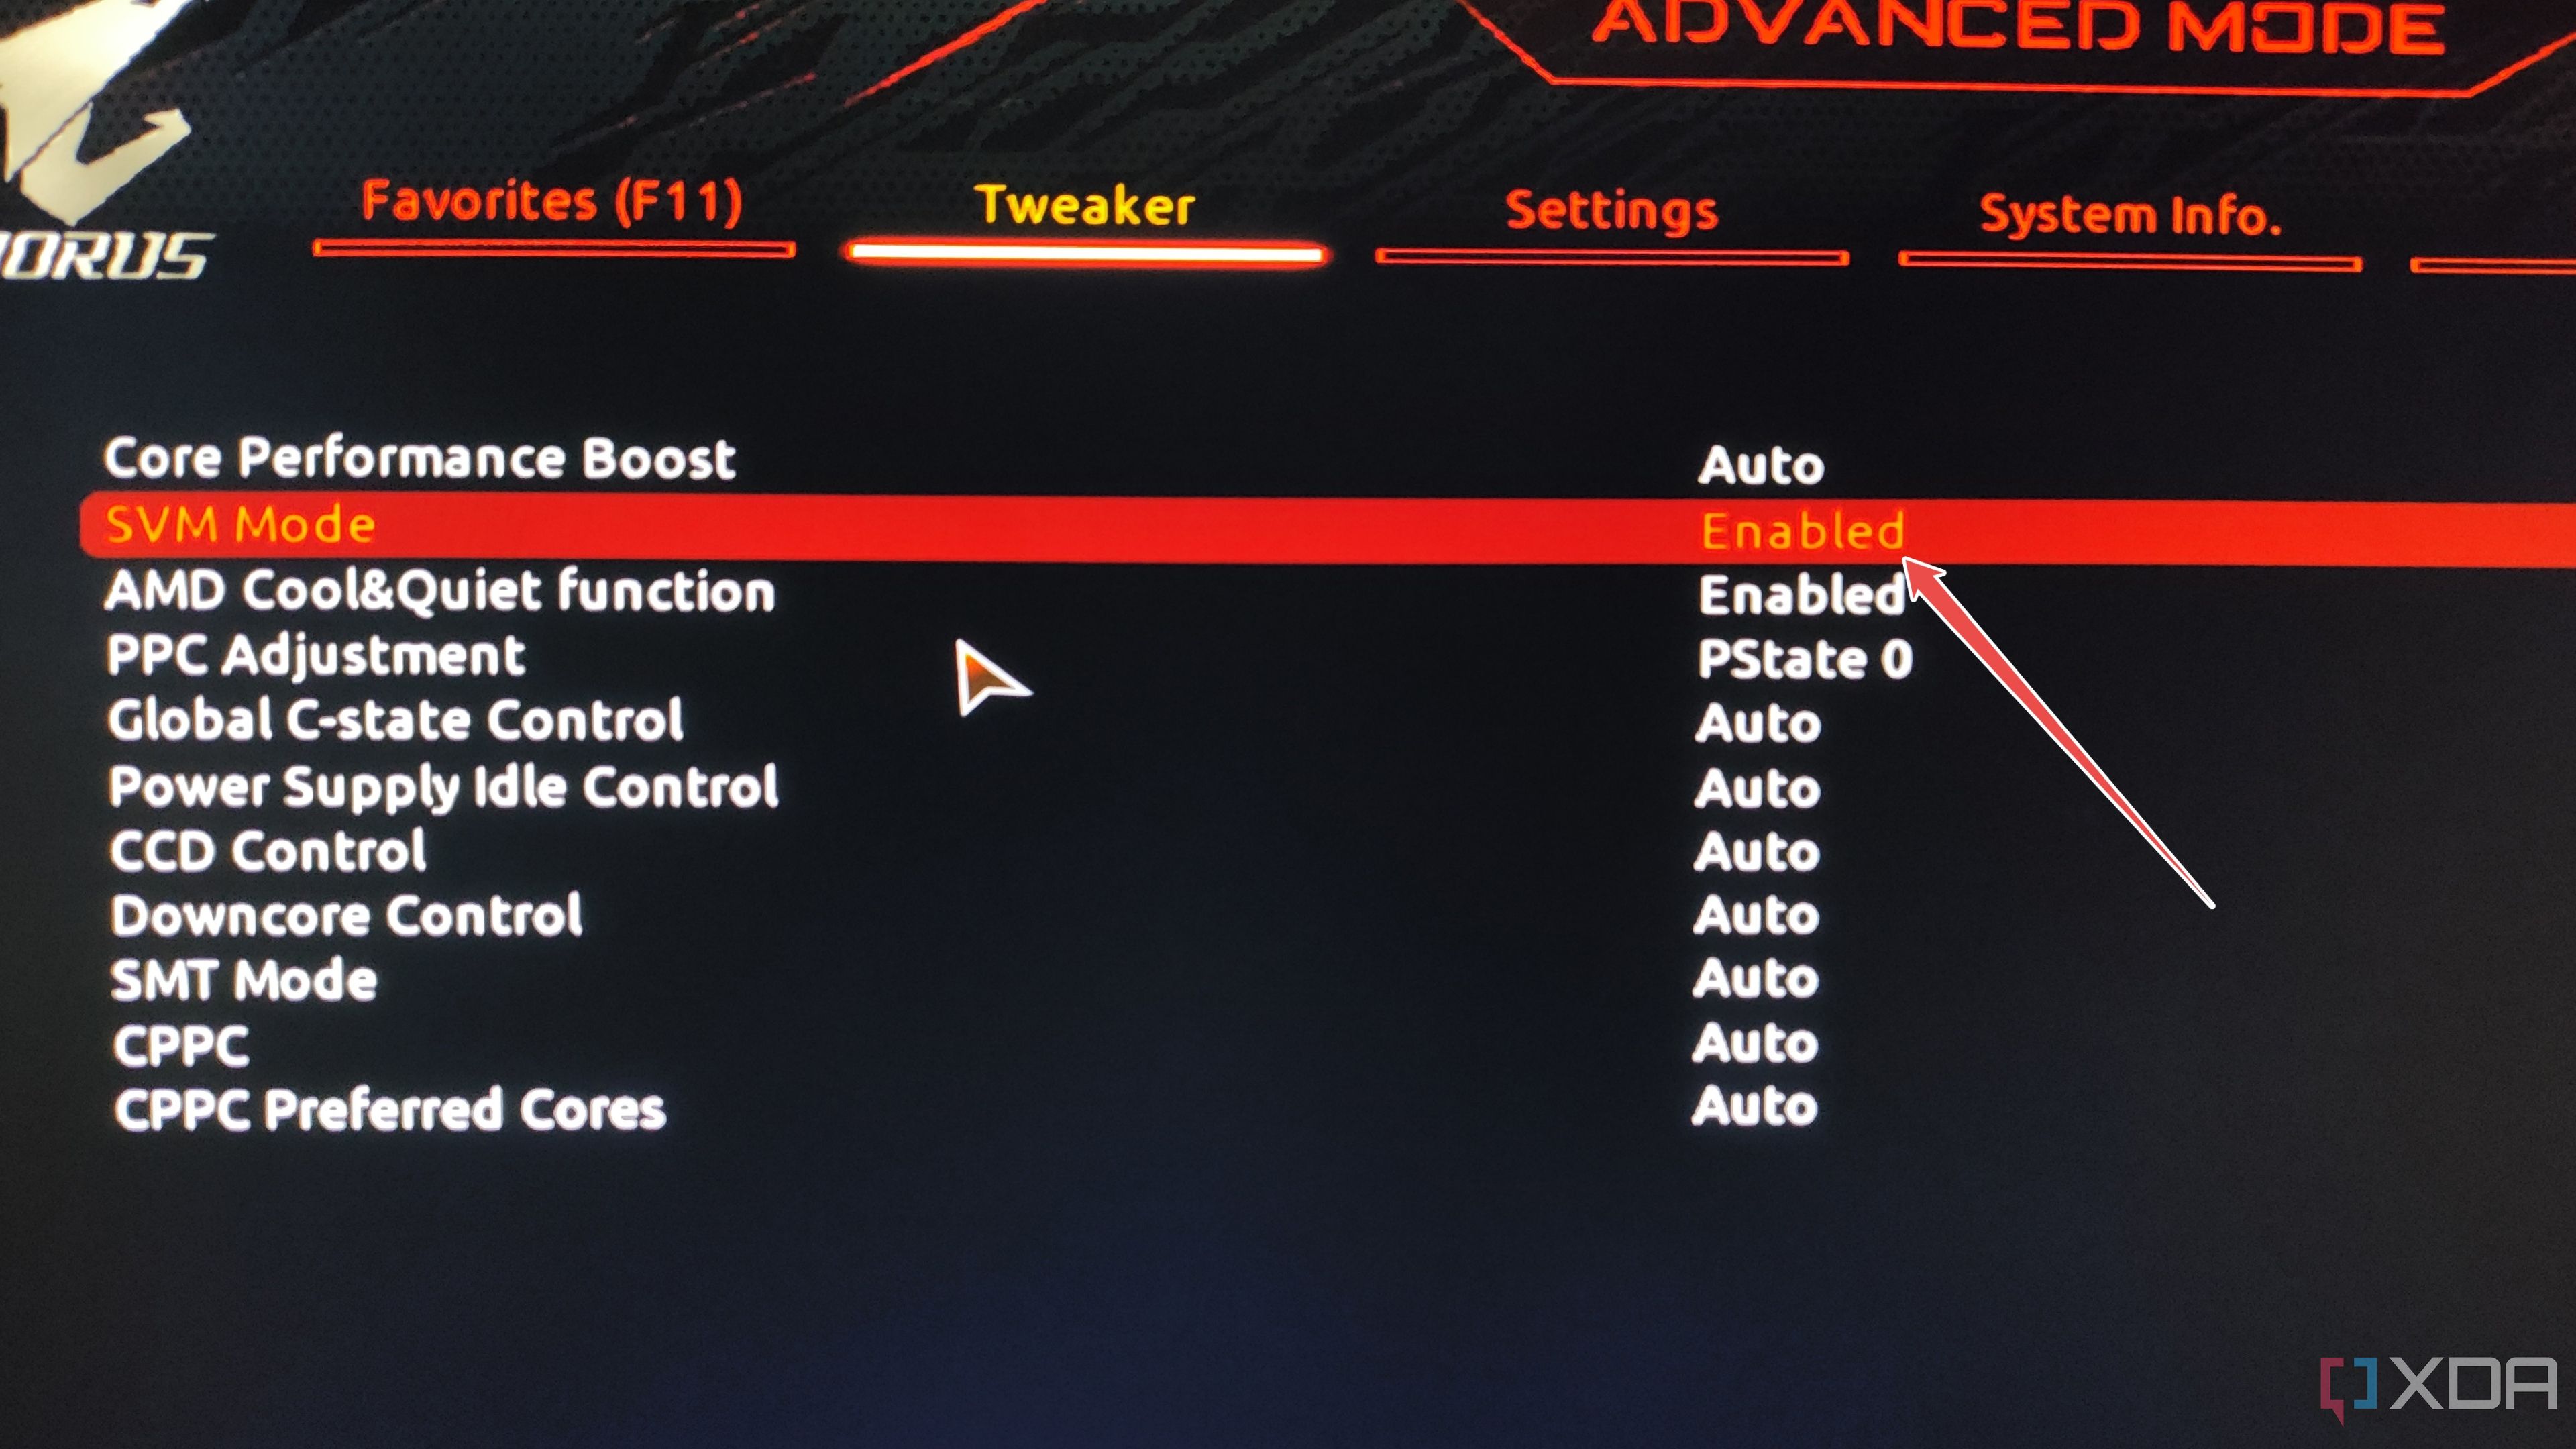
- Switch to the Advanced CPU Settings/Tweaker tab and set the SVM/Intel VT-x/AMD-V/Virtualization option to Enabled.
- Save the changes and exit the BIOS.


Installing SmartOS
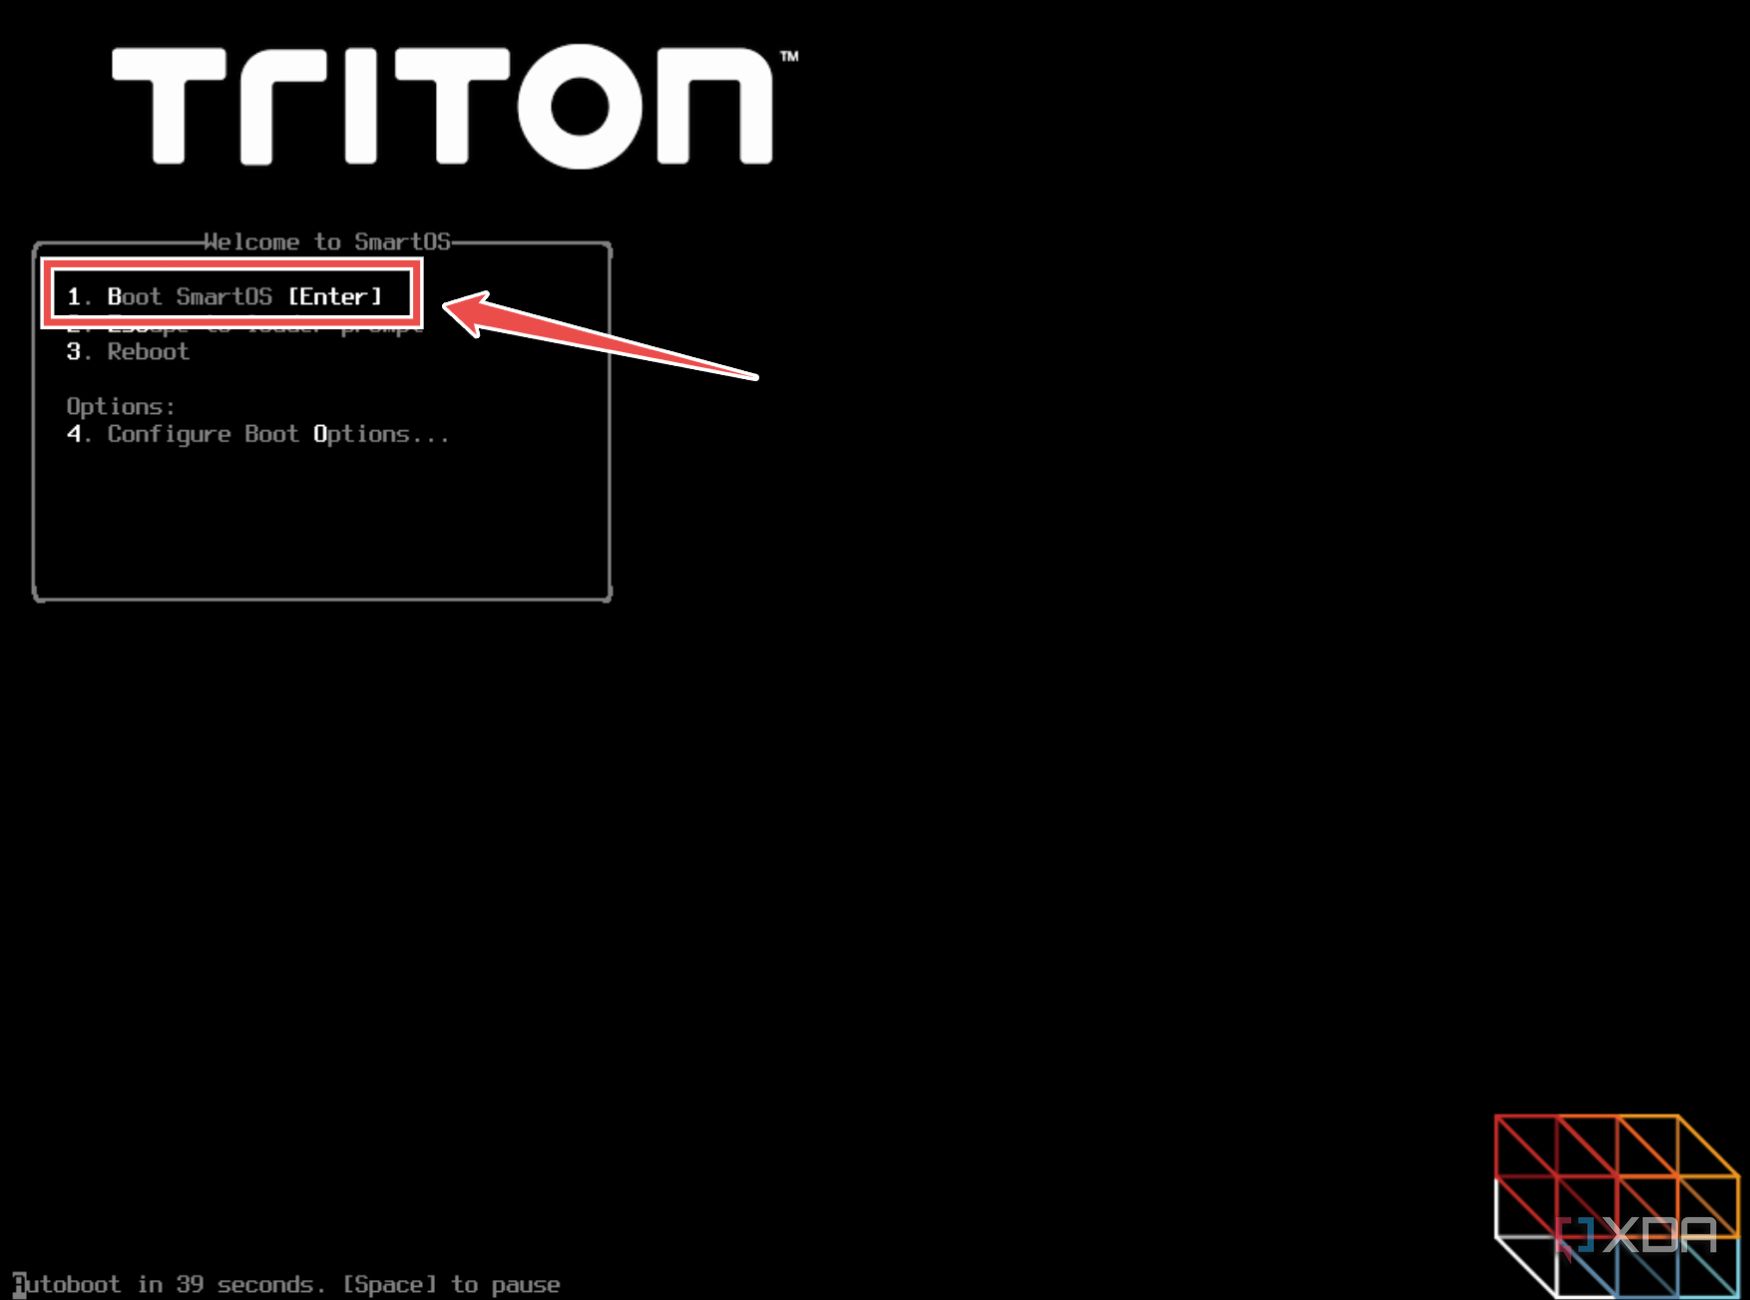
After the system reboots, you’ll arrive at the SmartOS installation screen. This is where you can modify certain system settings before setting up the OS.
- Tap 1 on the initial screen to launch the SmartOS installation wizard and press the Enter key twice.
- Type dhcp and let your router automatically assign the network settings.
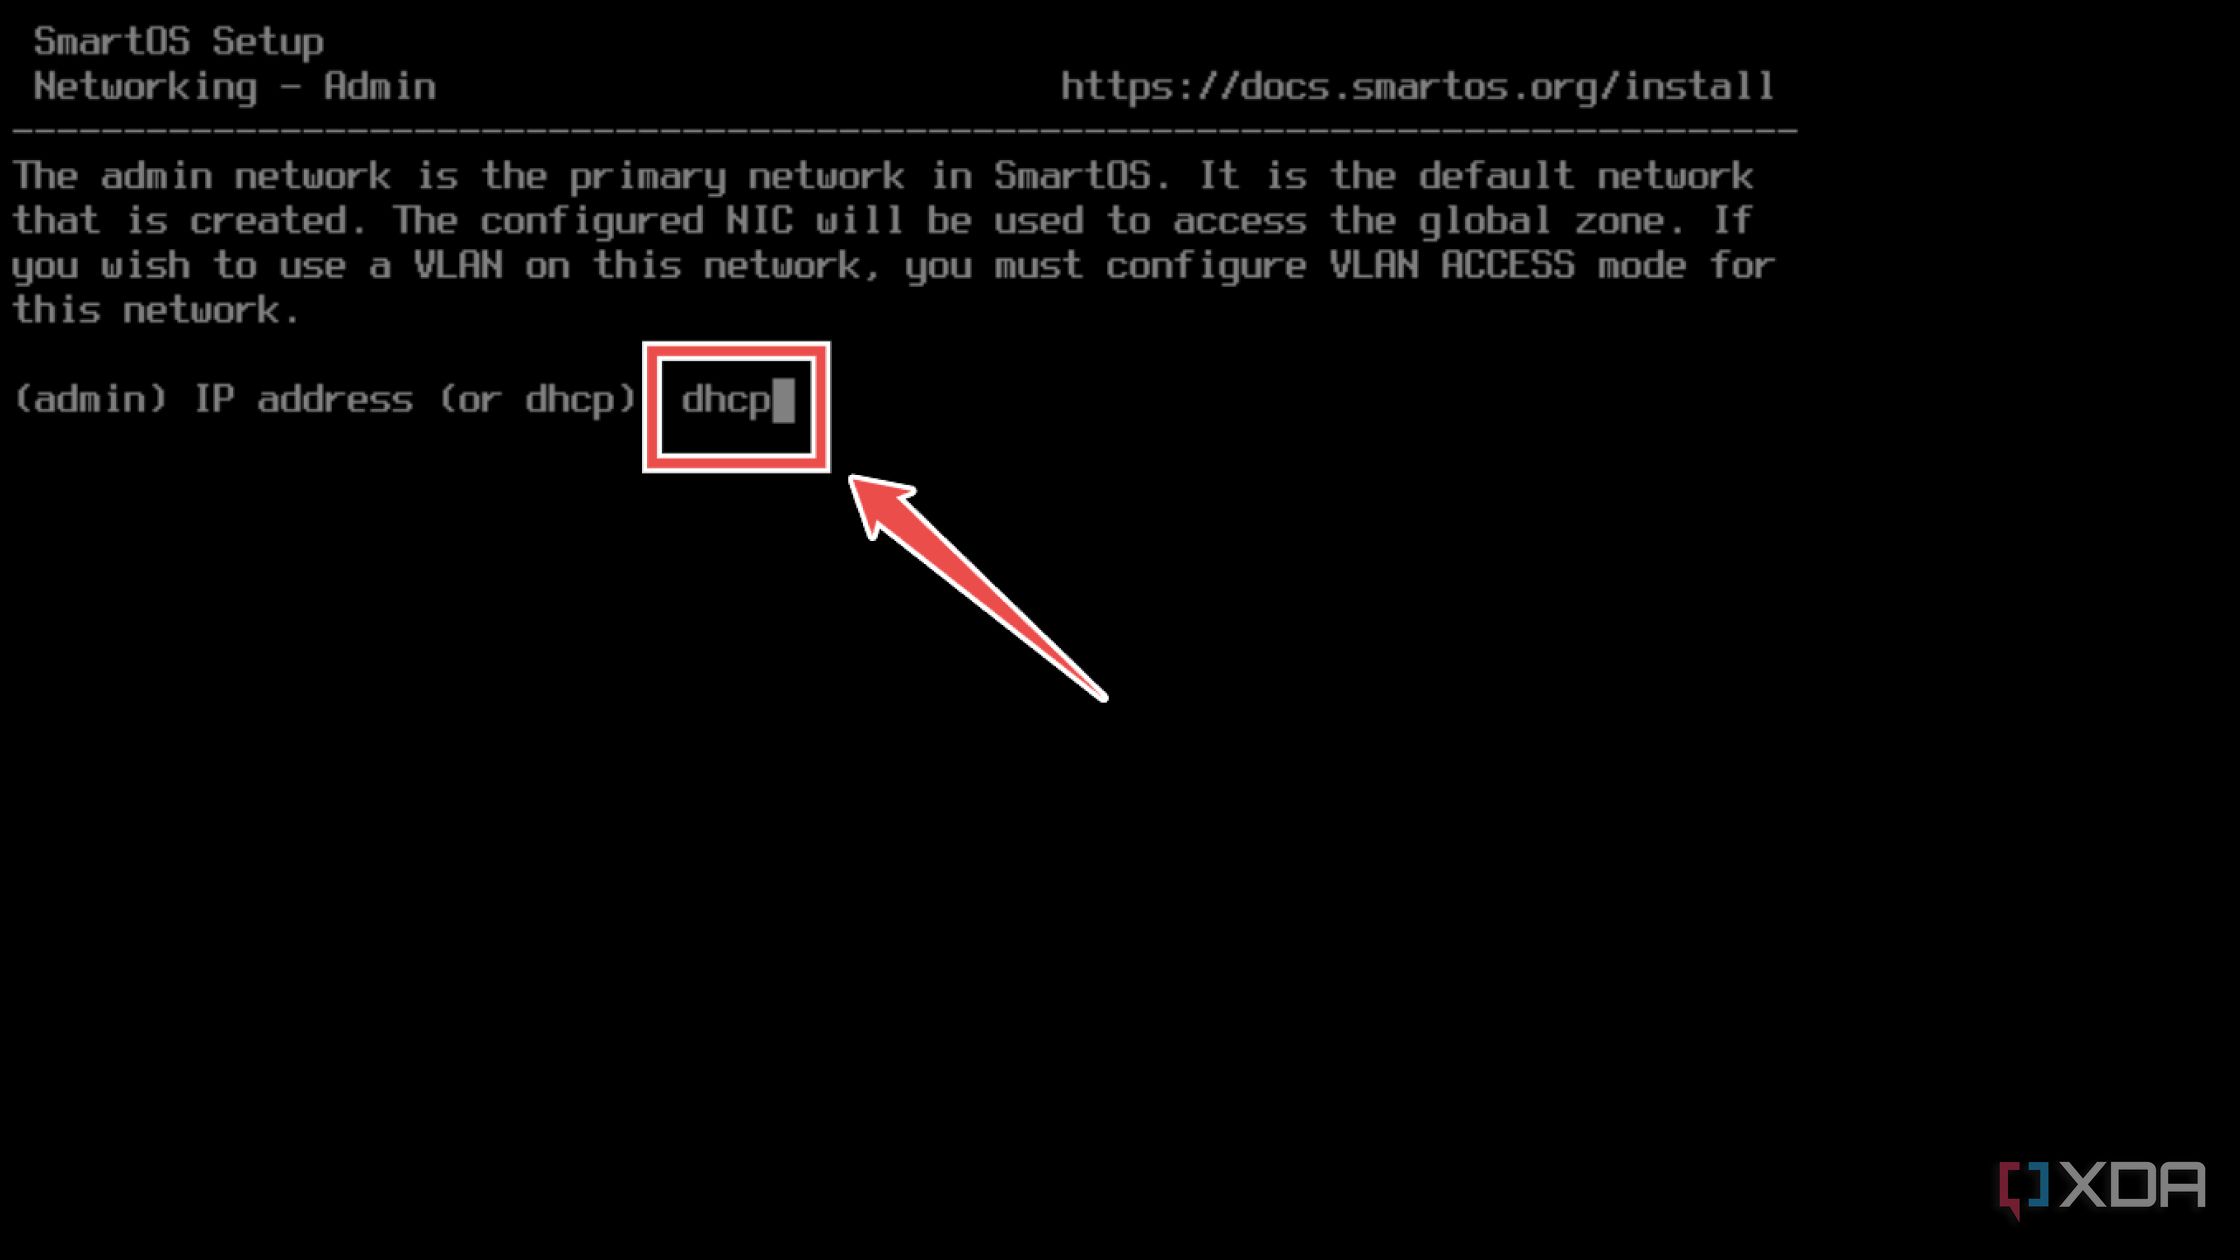
Alternatively, you can manually enter the IP Address and the Subnet Mask details.
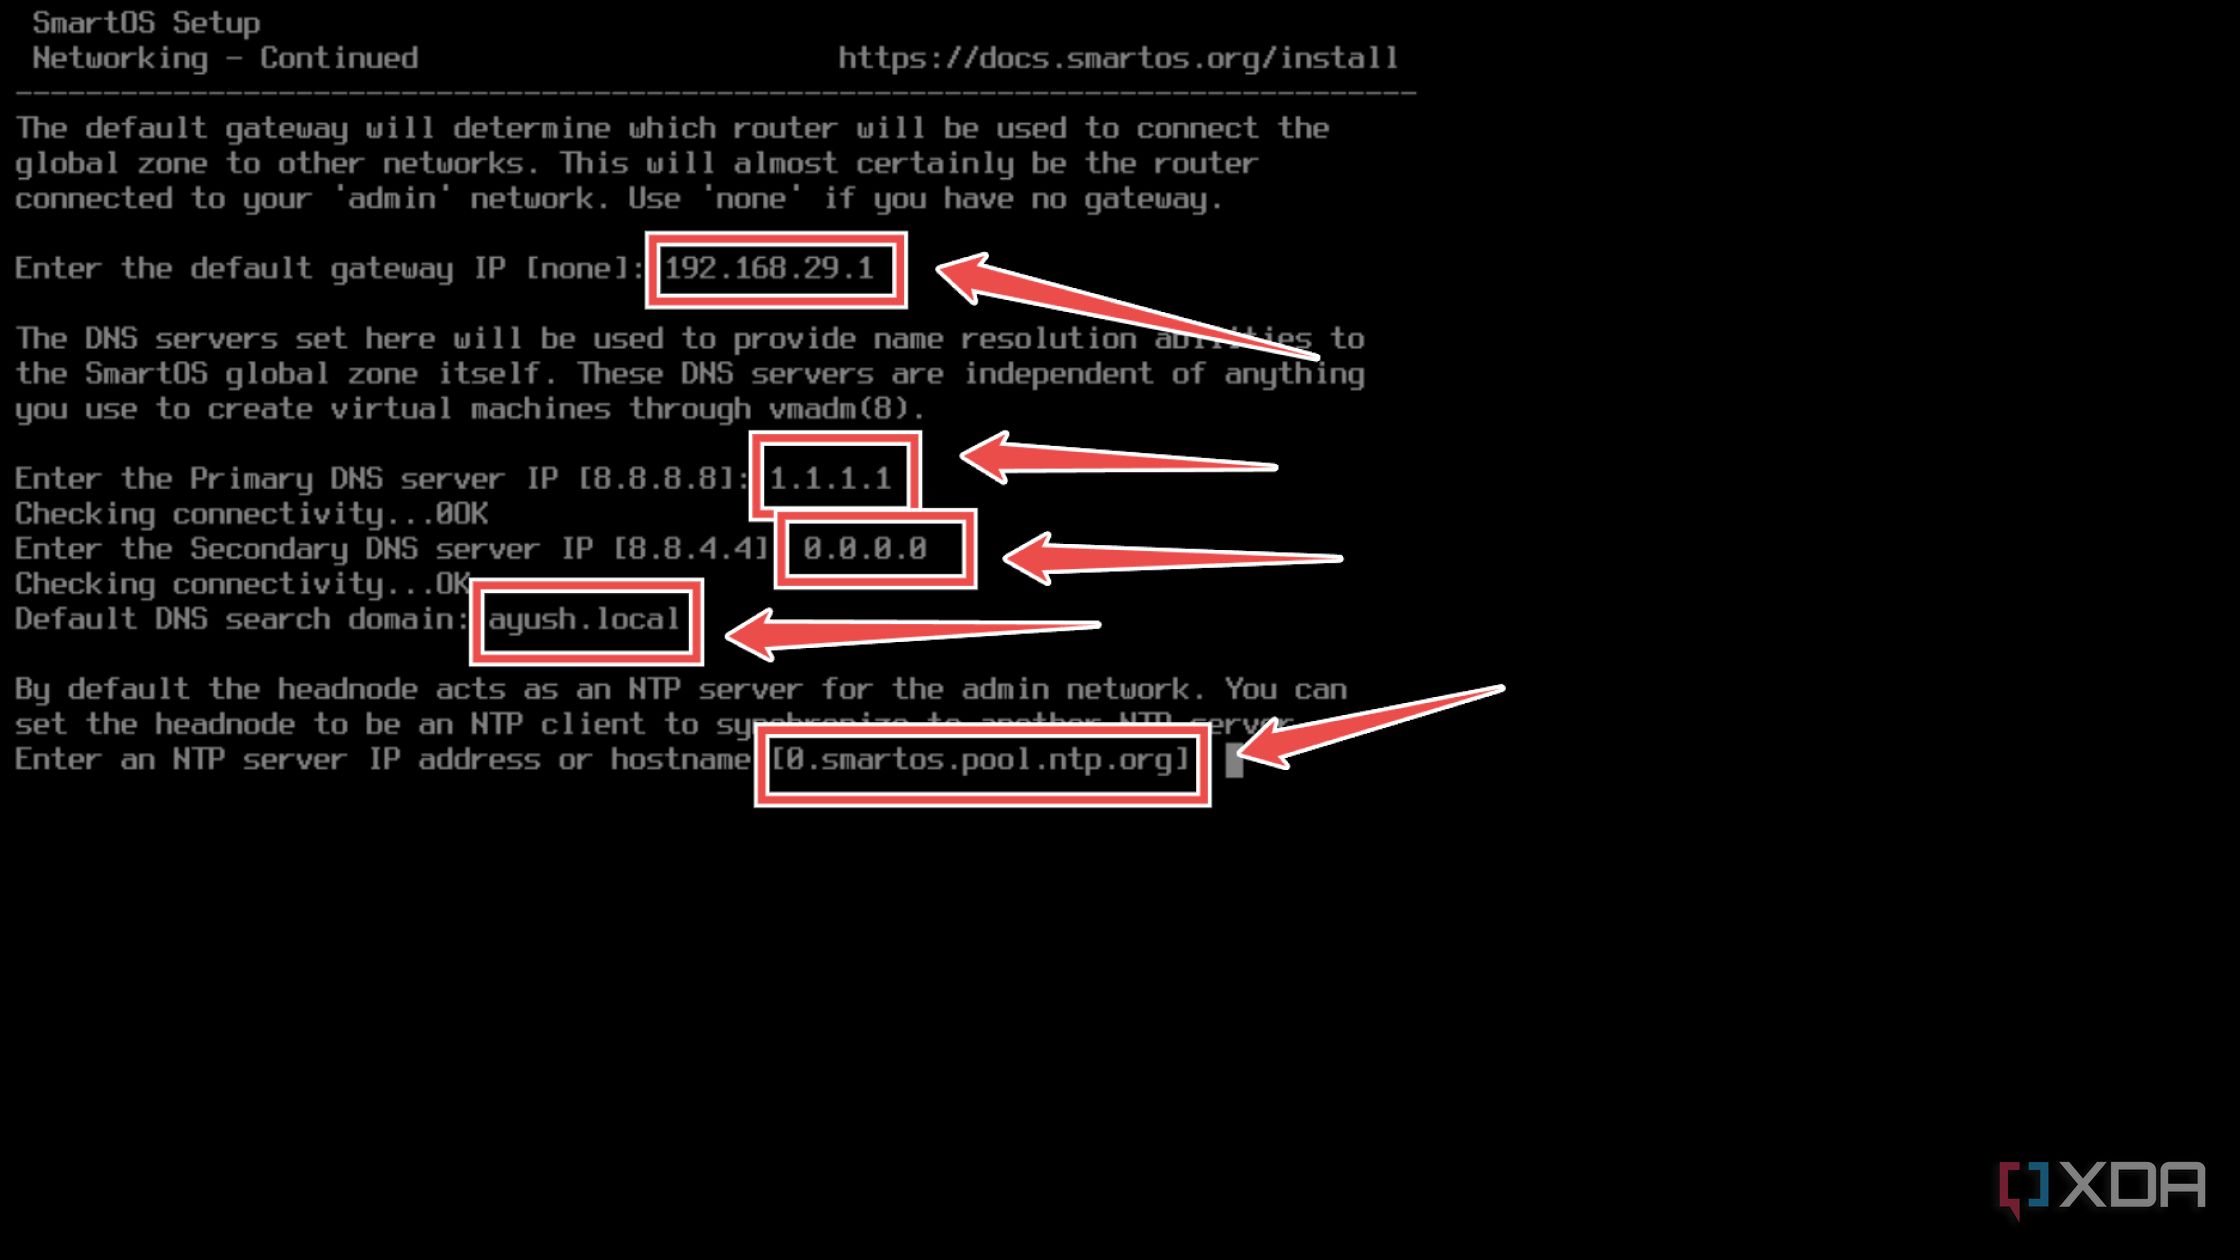
- Enter the Gateway, Primary DNS, Secondary DNS, DNS Search Domain, and an NTP Server.
- Choose yes when asked to pick the default storage device for SmartOS.
- Alternatively, you can type Manual, enter the command zpool create -f pool_name drive_name to build a new zpool, and enter exit once you’re done.


- Choose the pool from the previous step followed by media as the boot device.

- Press y when SmartOS asks you to install pkgsrc.
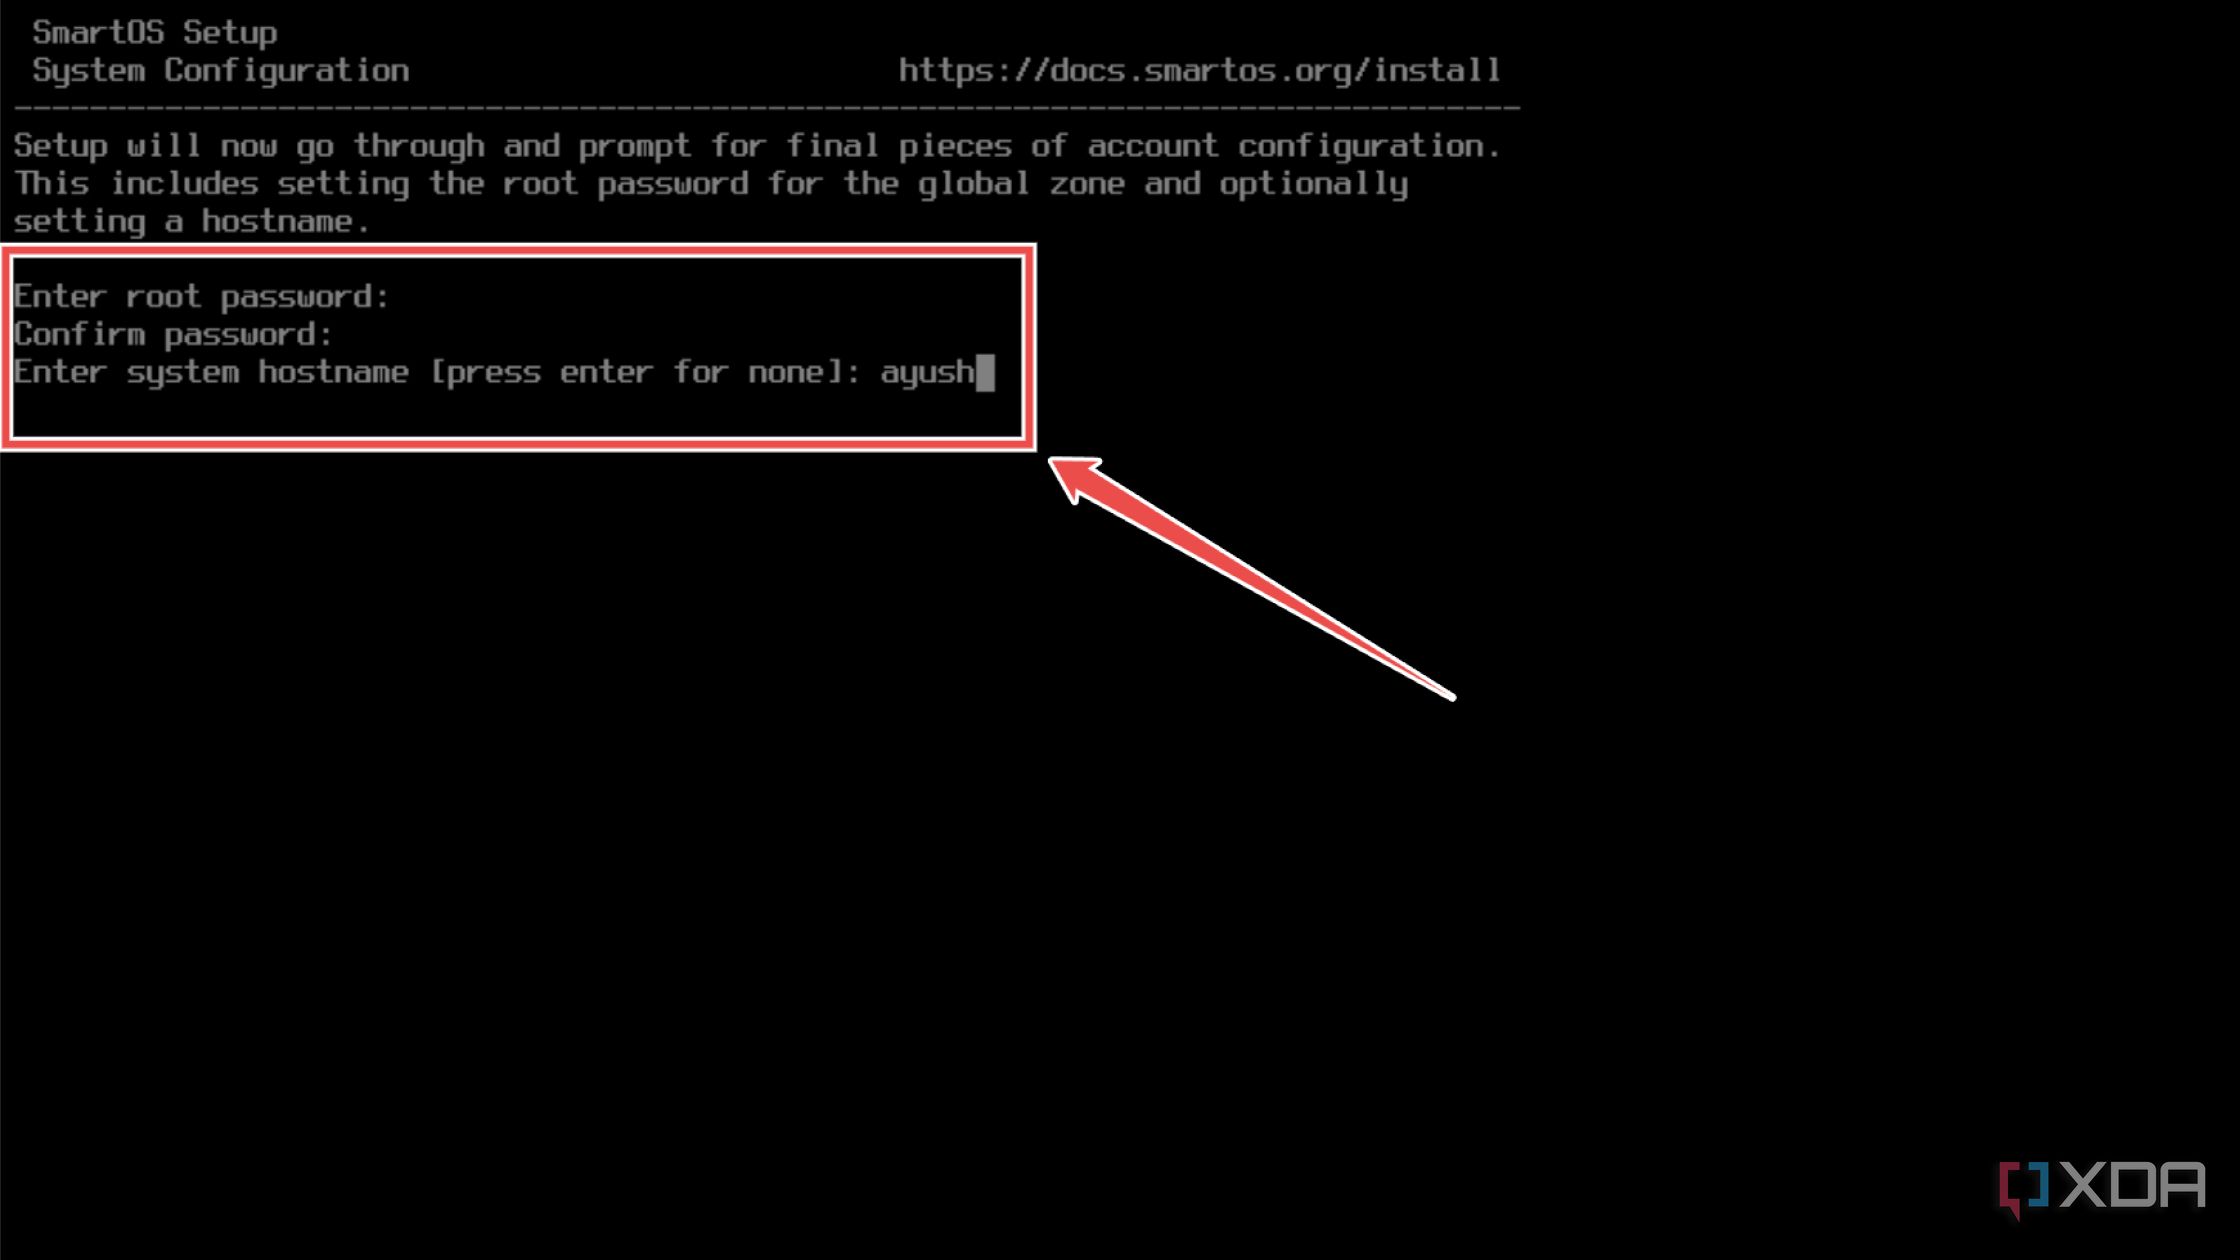
- Type the Root Password and Hostname for your SmartOS.
- Enter y at the final confirmation screen.
- Wait for the installer to finish setting up SmartOS and hit the Enter key to reboot your system.


Configuring the web UI
Soon, your PC will restart and you’ll be able to access the command-line interface of SmartOS. However, we’ll go the easier route and use a web UI instead of a complex CLI interface.
- Switch to another device, download the setup.exe file of PuTTY from the official website, and use it to install the tool on your system.
- Run PuTTY.exe as an administrator.
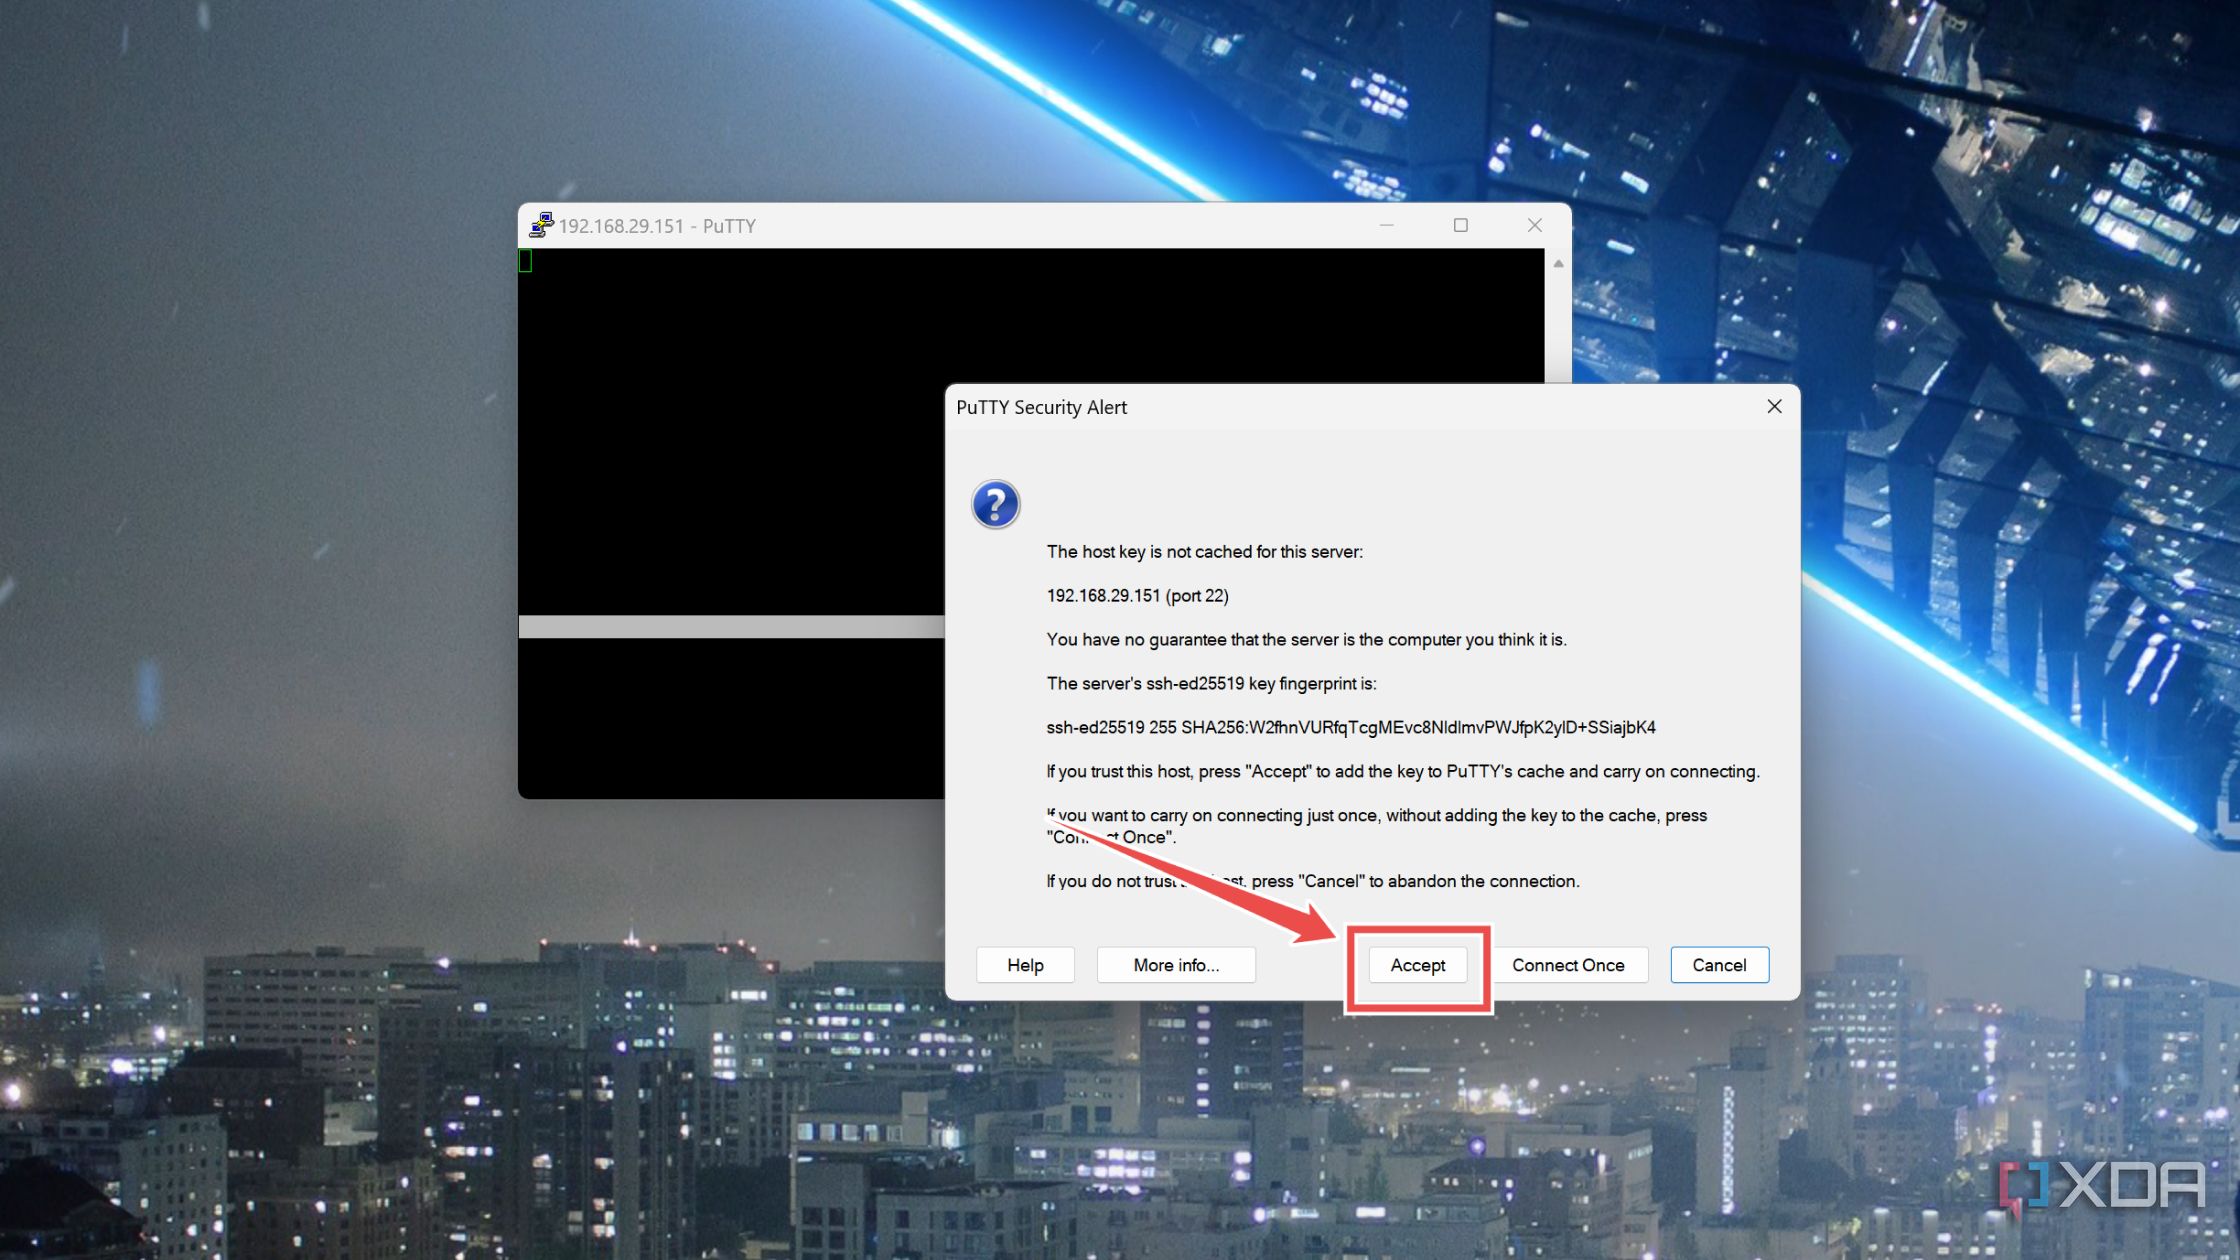
- Type the IP address of your SmartOS machine and make sure 22 appears in the Port section before hitting OK.

- Press Accept when PuTTY cautions you about connecting to the SmartOS machine.
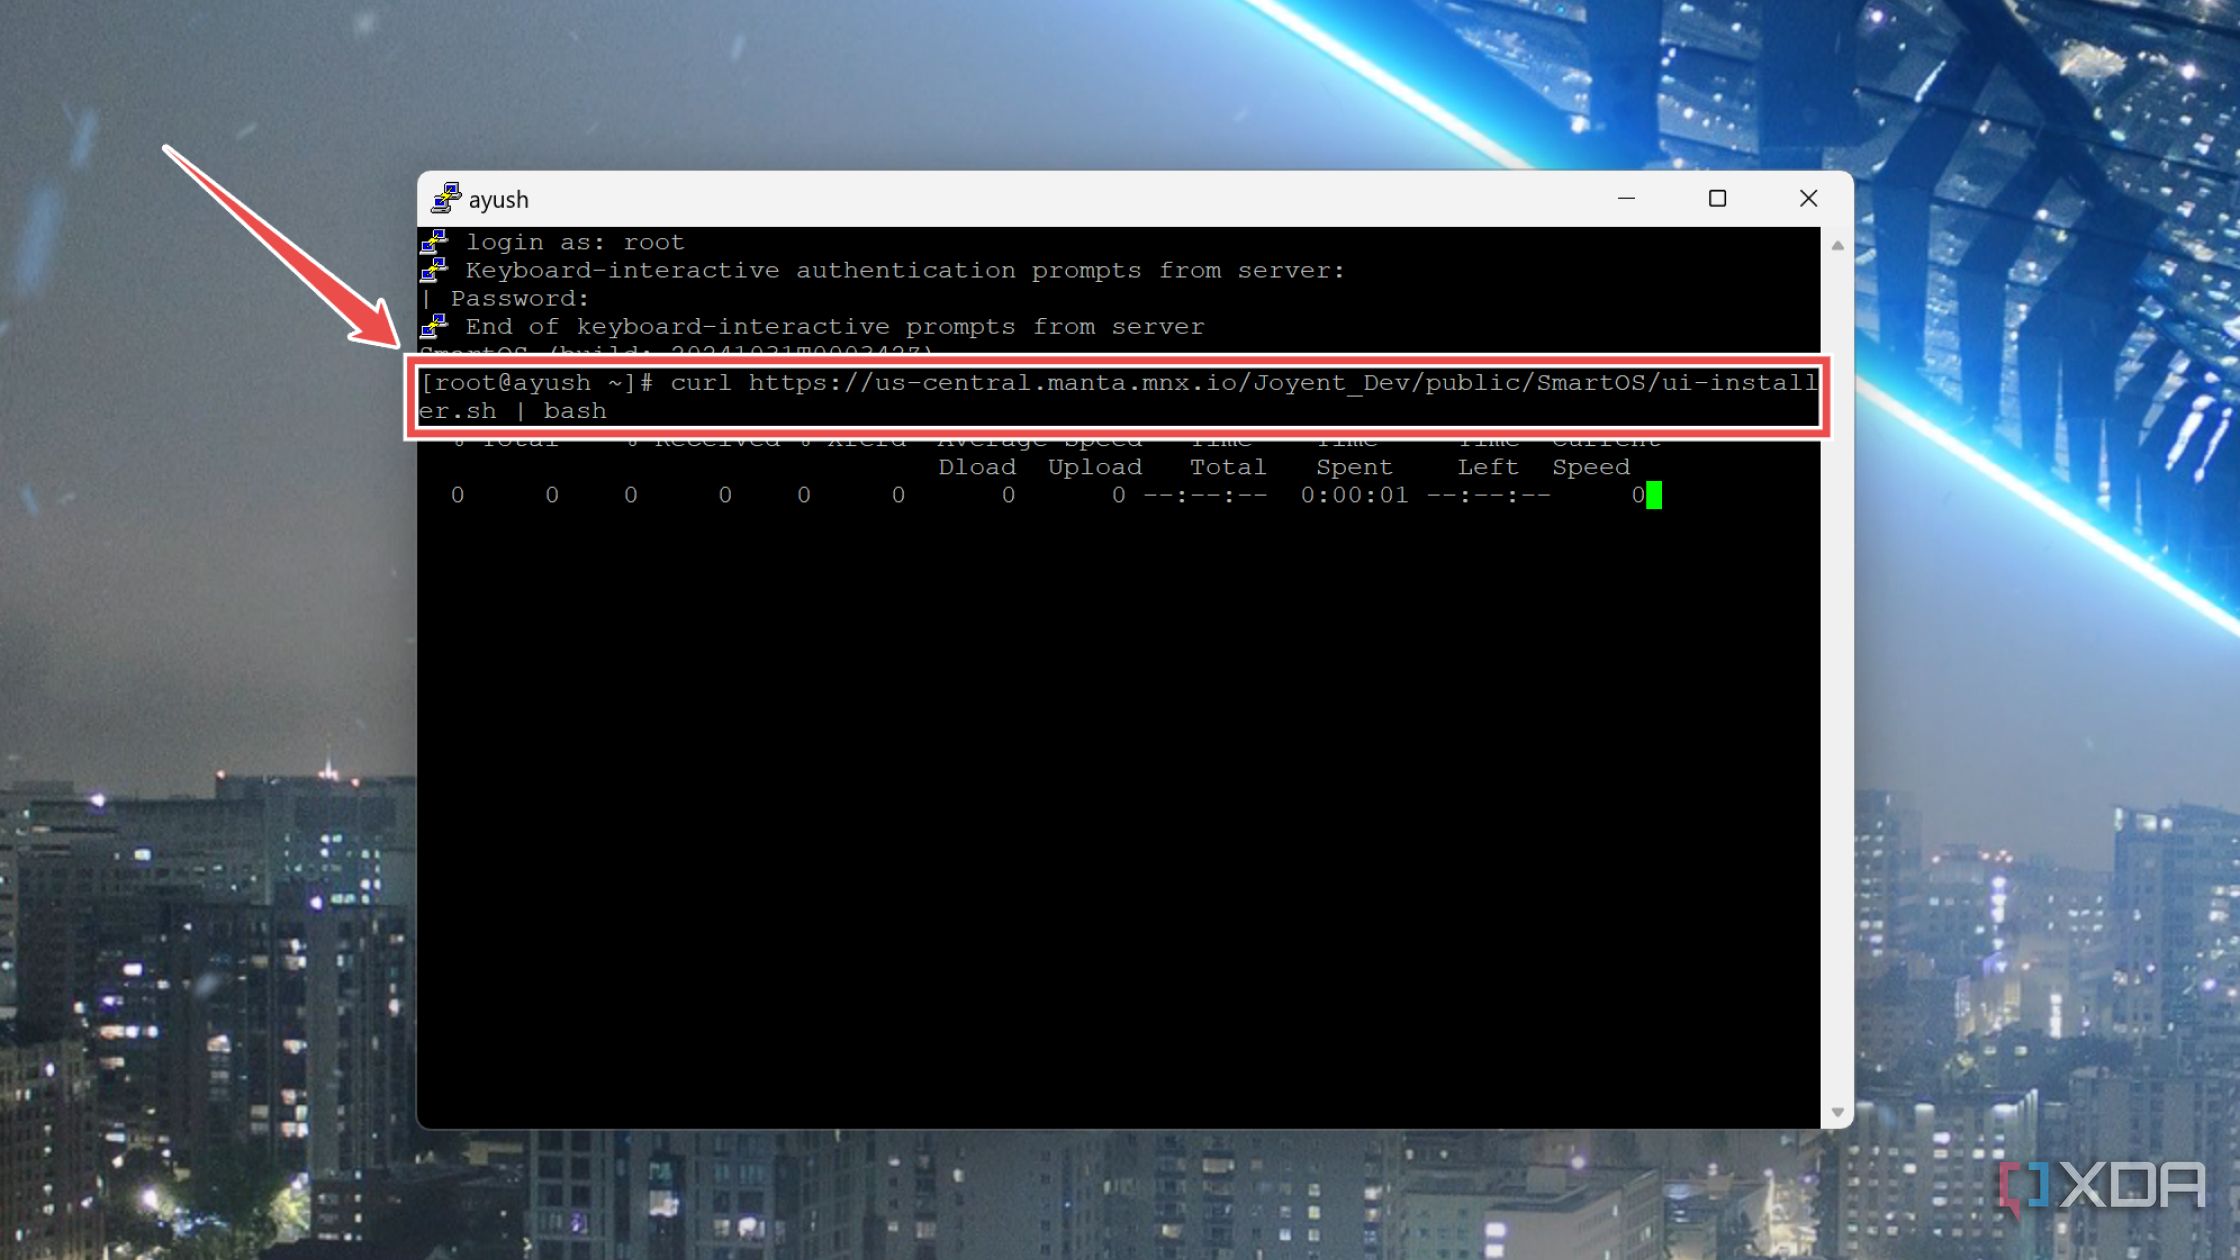
- Enter root as both the hostname and the password to log into your SmartOS system.
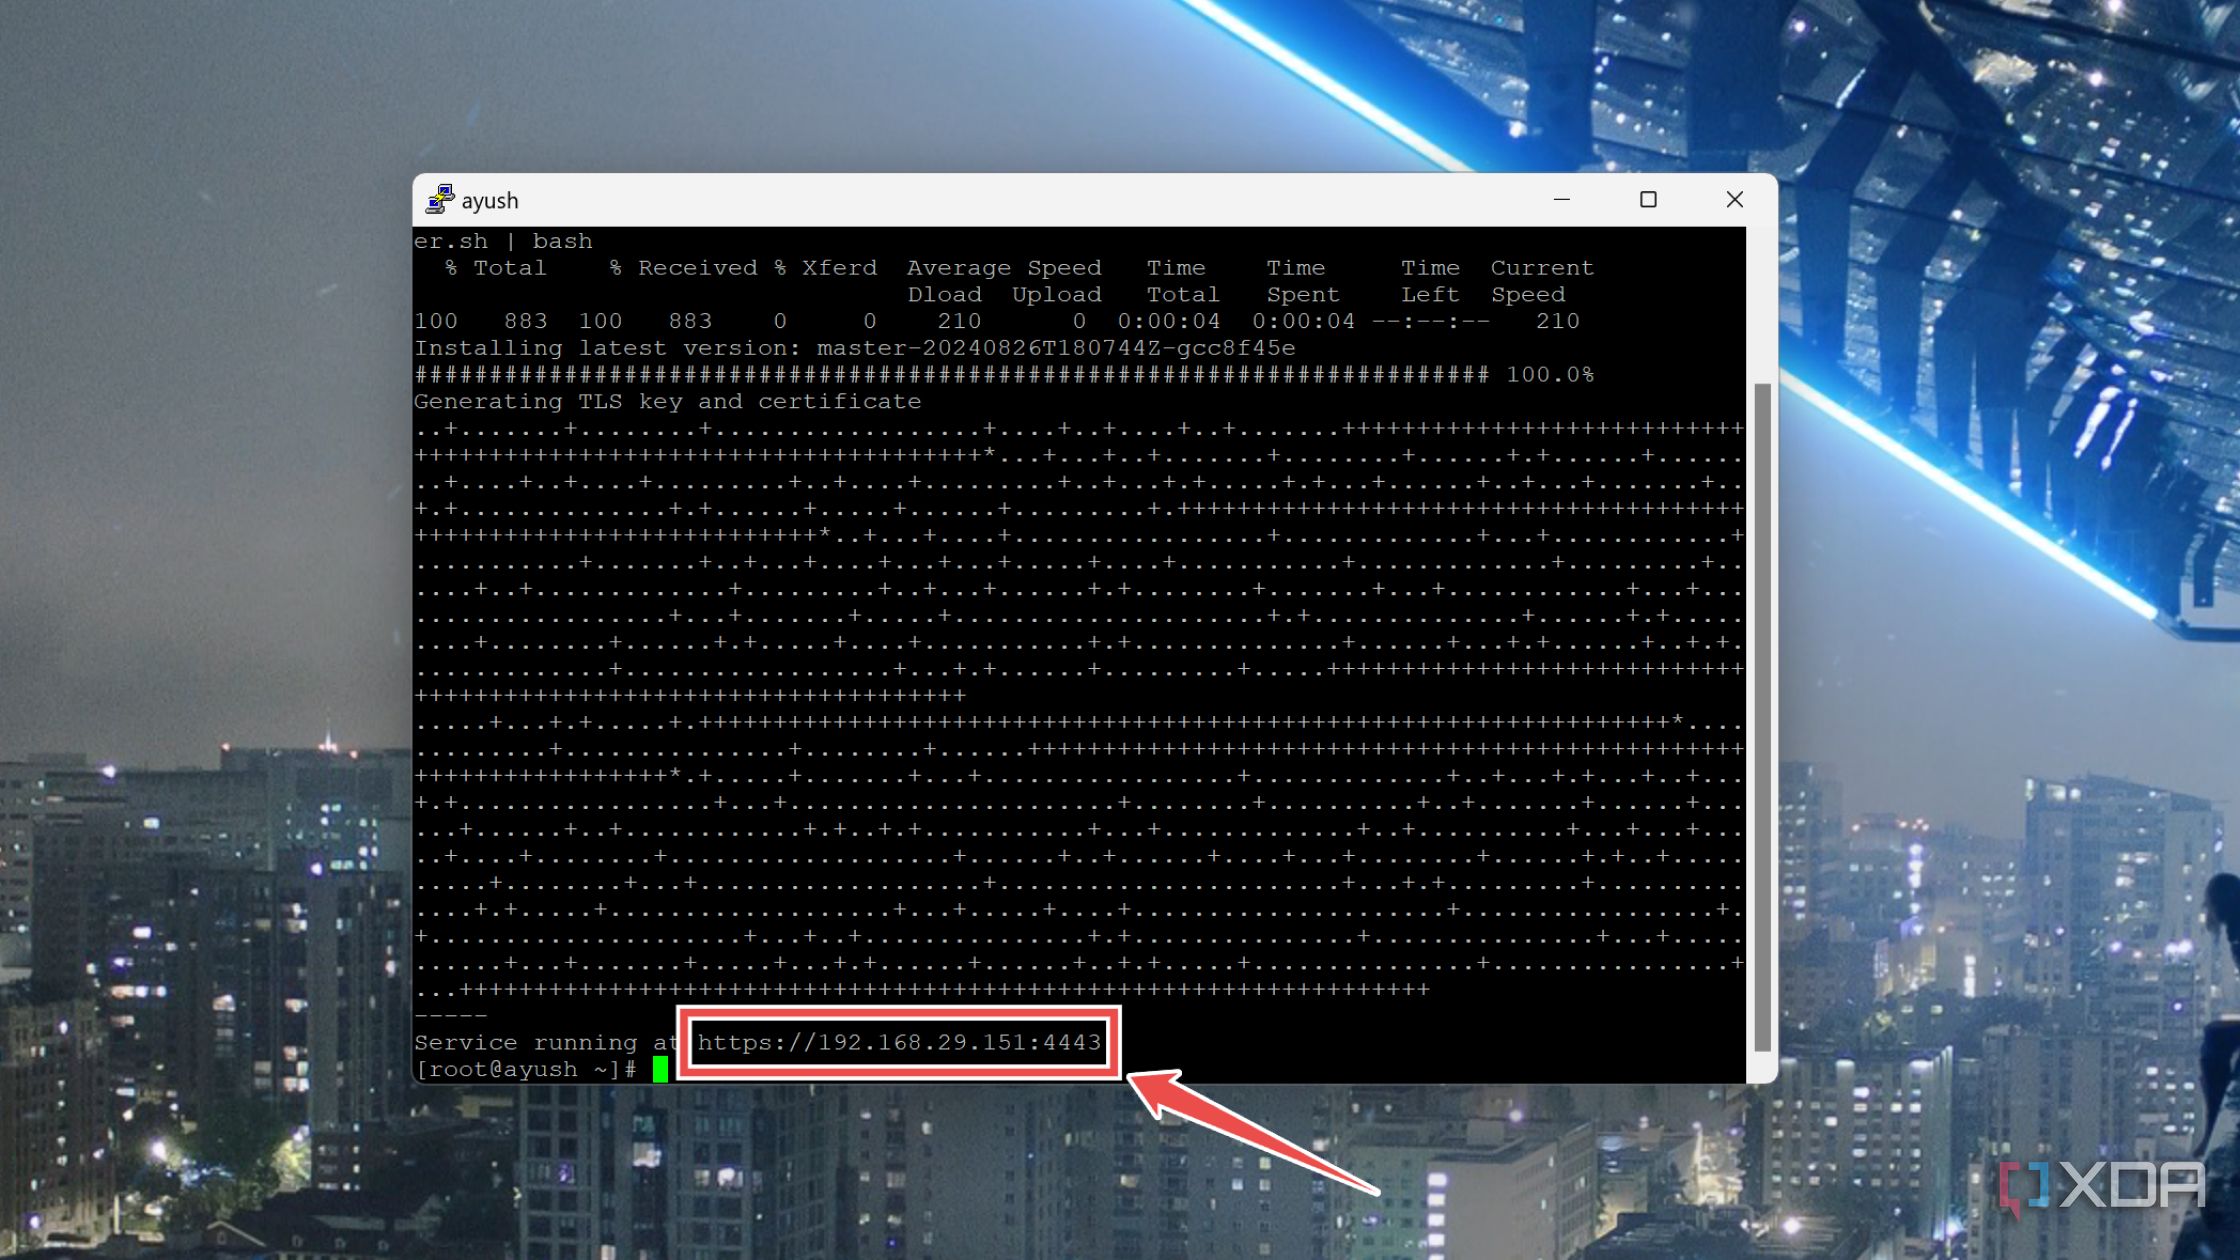
- Paste the following command inside the terminal:
curl https://us-central.manta.mnx.io/Joyent_Dev/public/SmartOS/ui-installer.sh | bash


Creating a virtual guest using the web UI
Finally, it’s time to deploy a container/zone on your SmartOS system.
- Copy the IP address from the terminal and paste it into your favorite web browser.
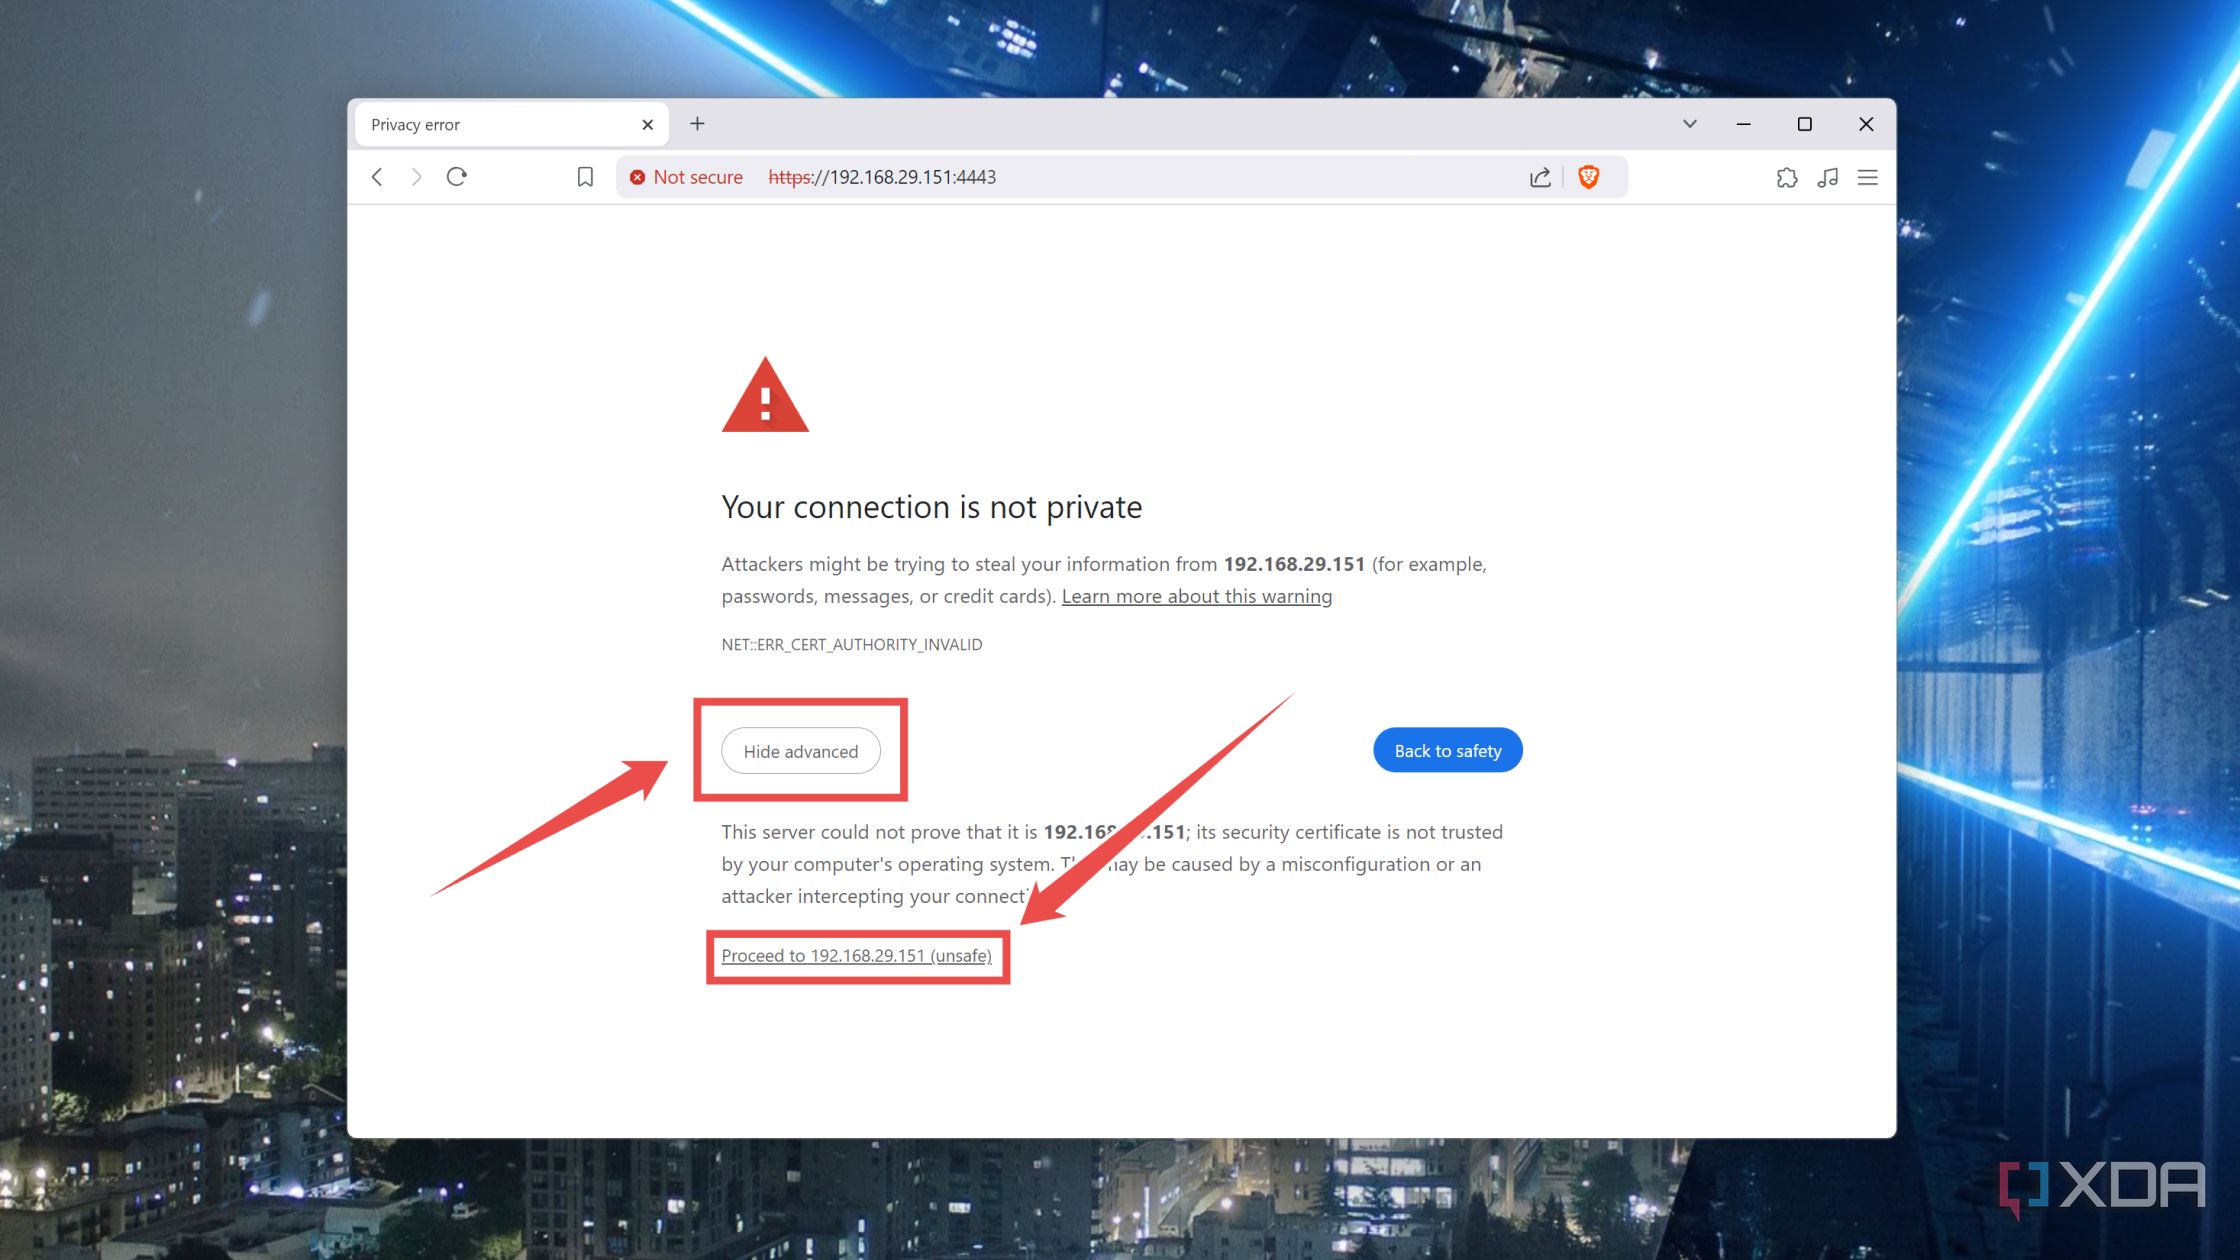
- Press Advanced and agree to Proceed to the IP address.
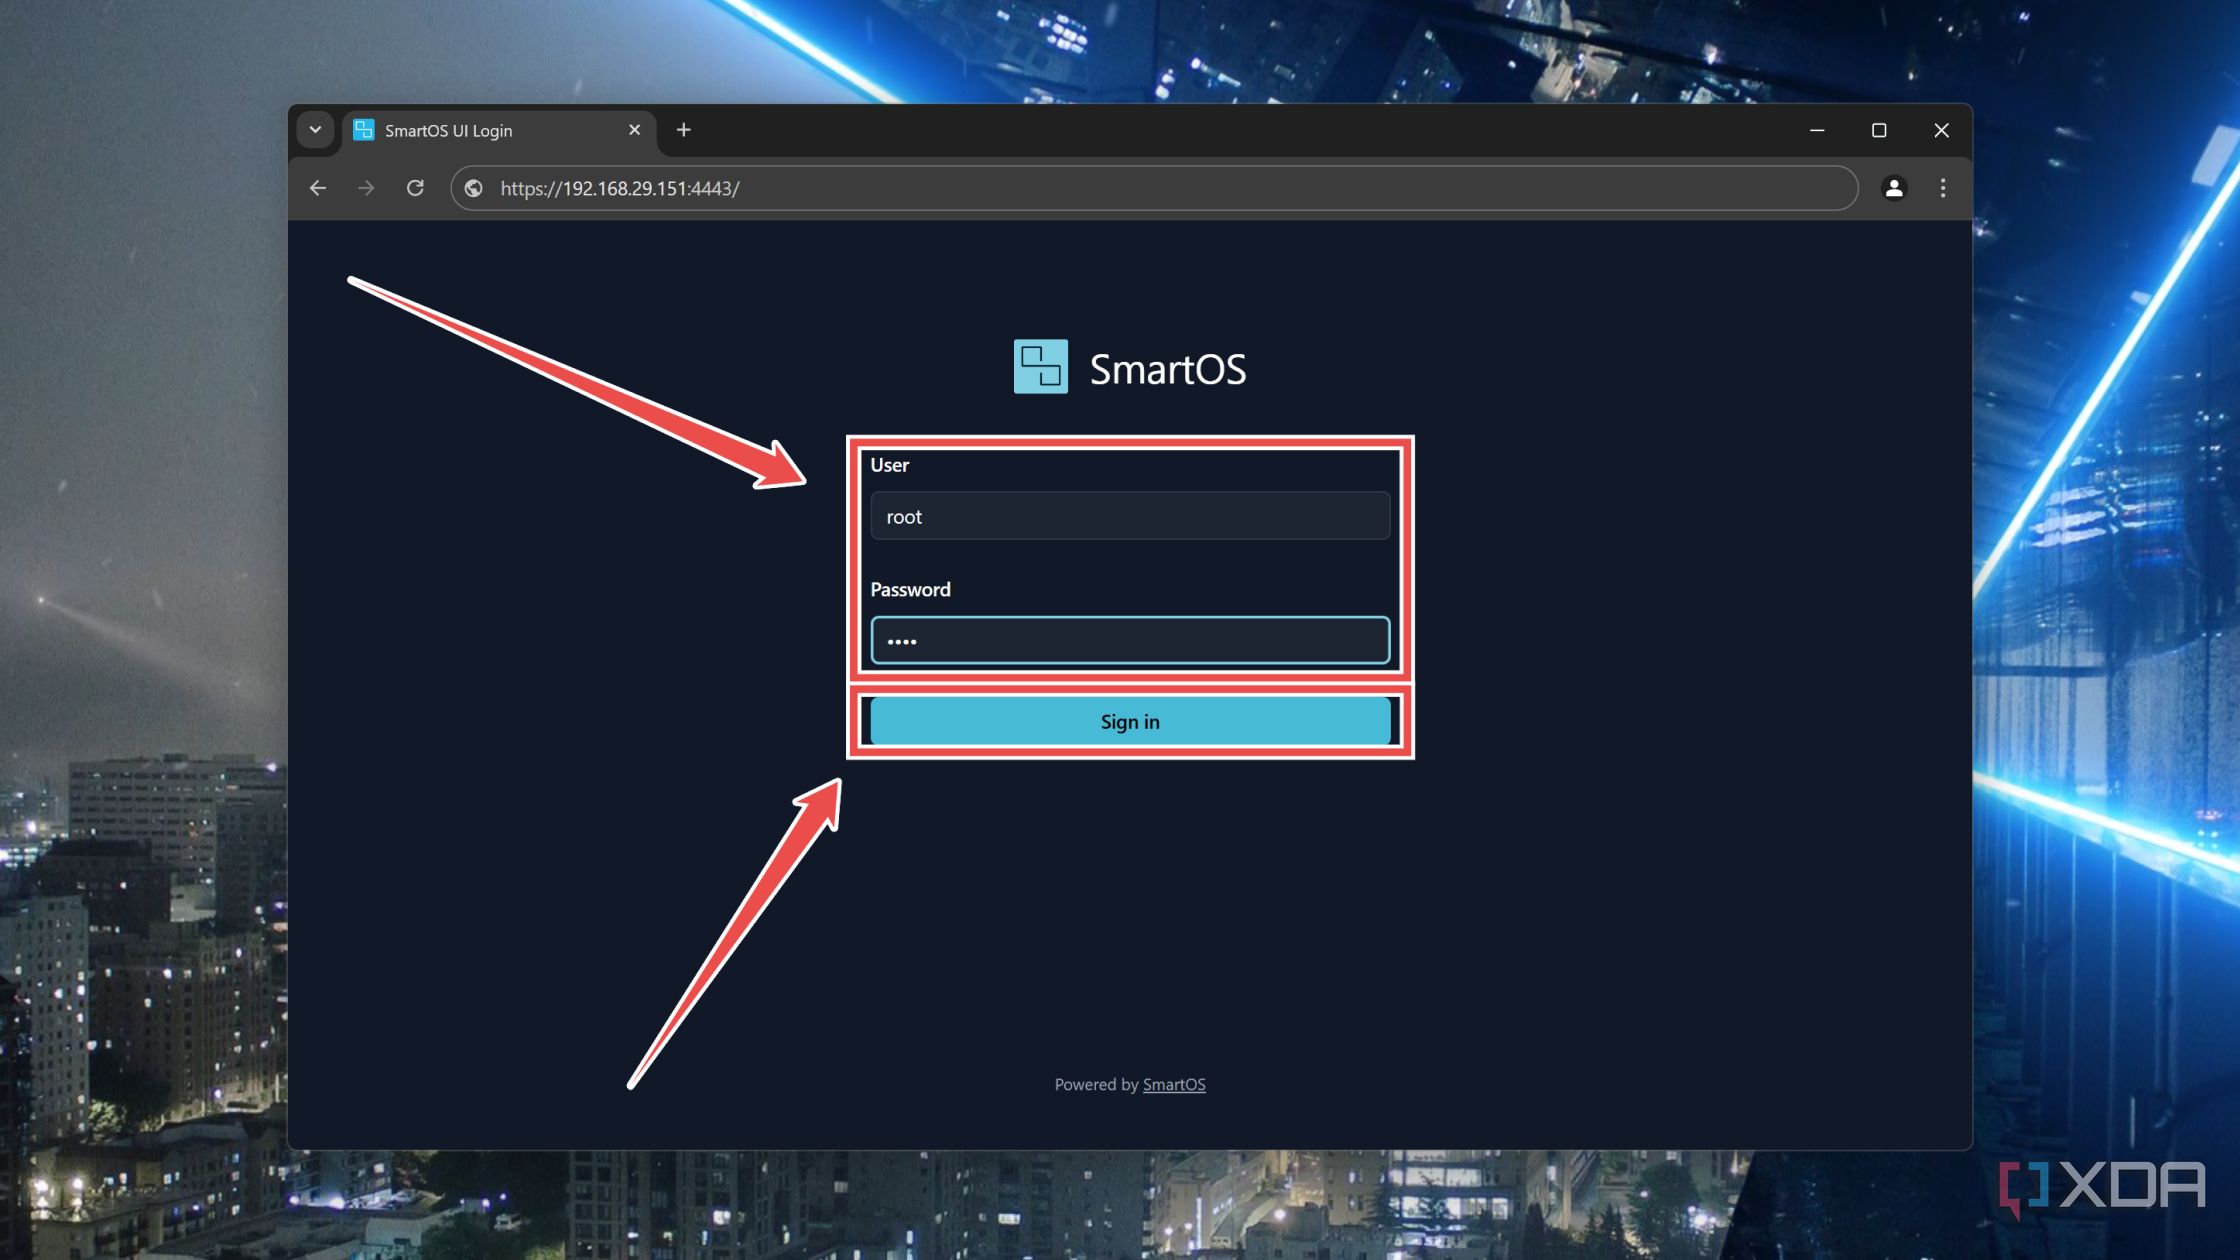
- Once again, type root under the User and Password fields and hit the Sign in button.
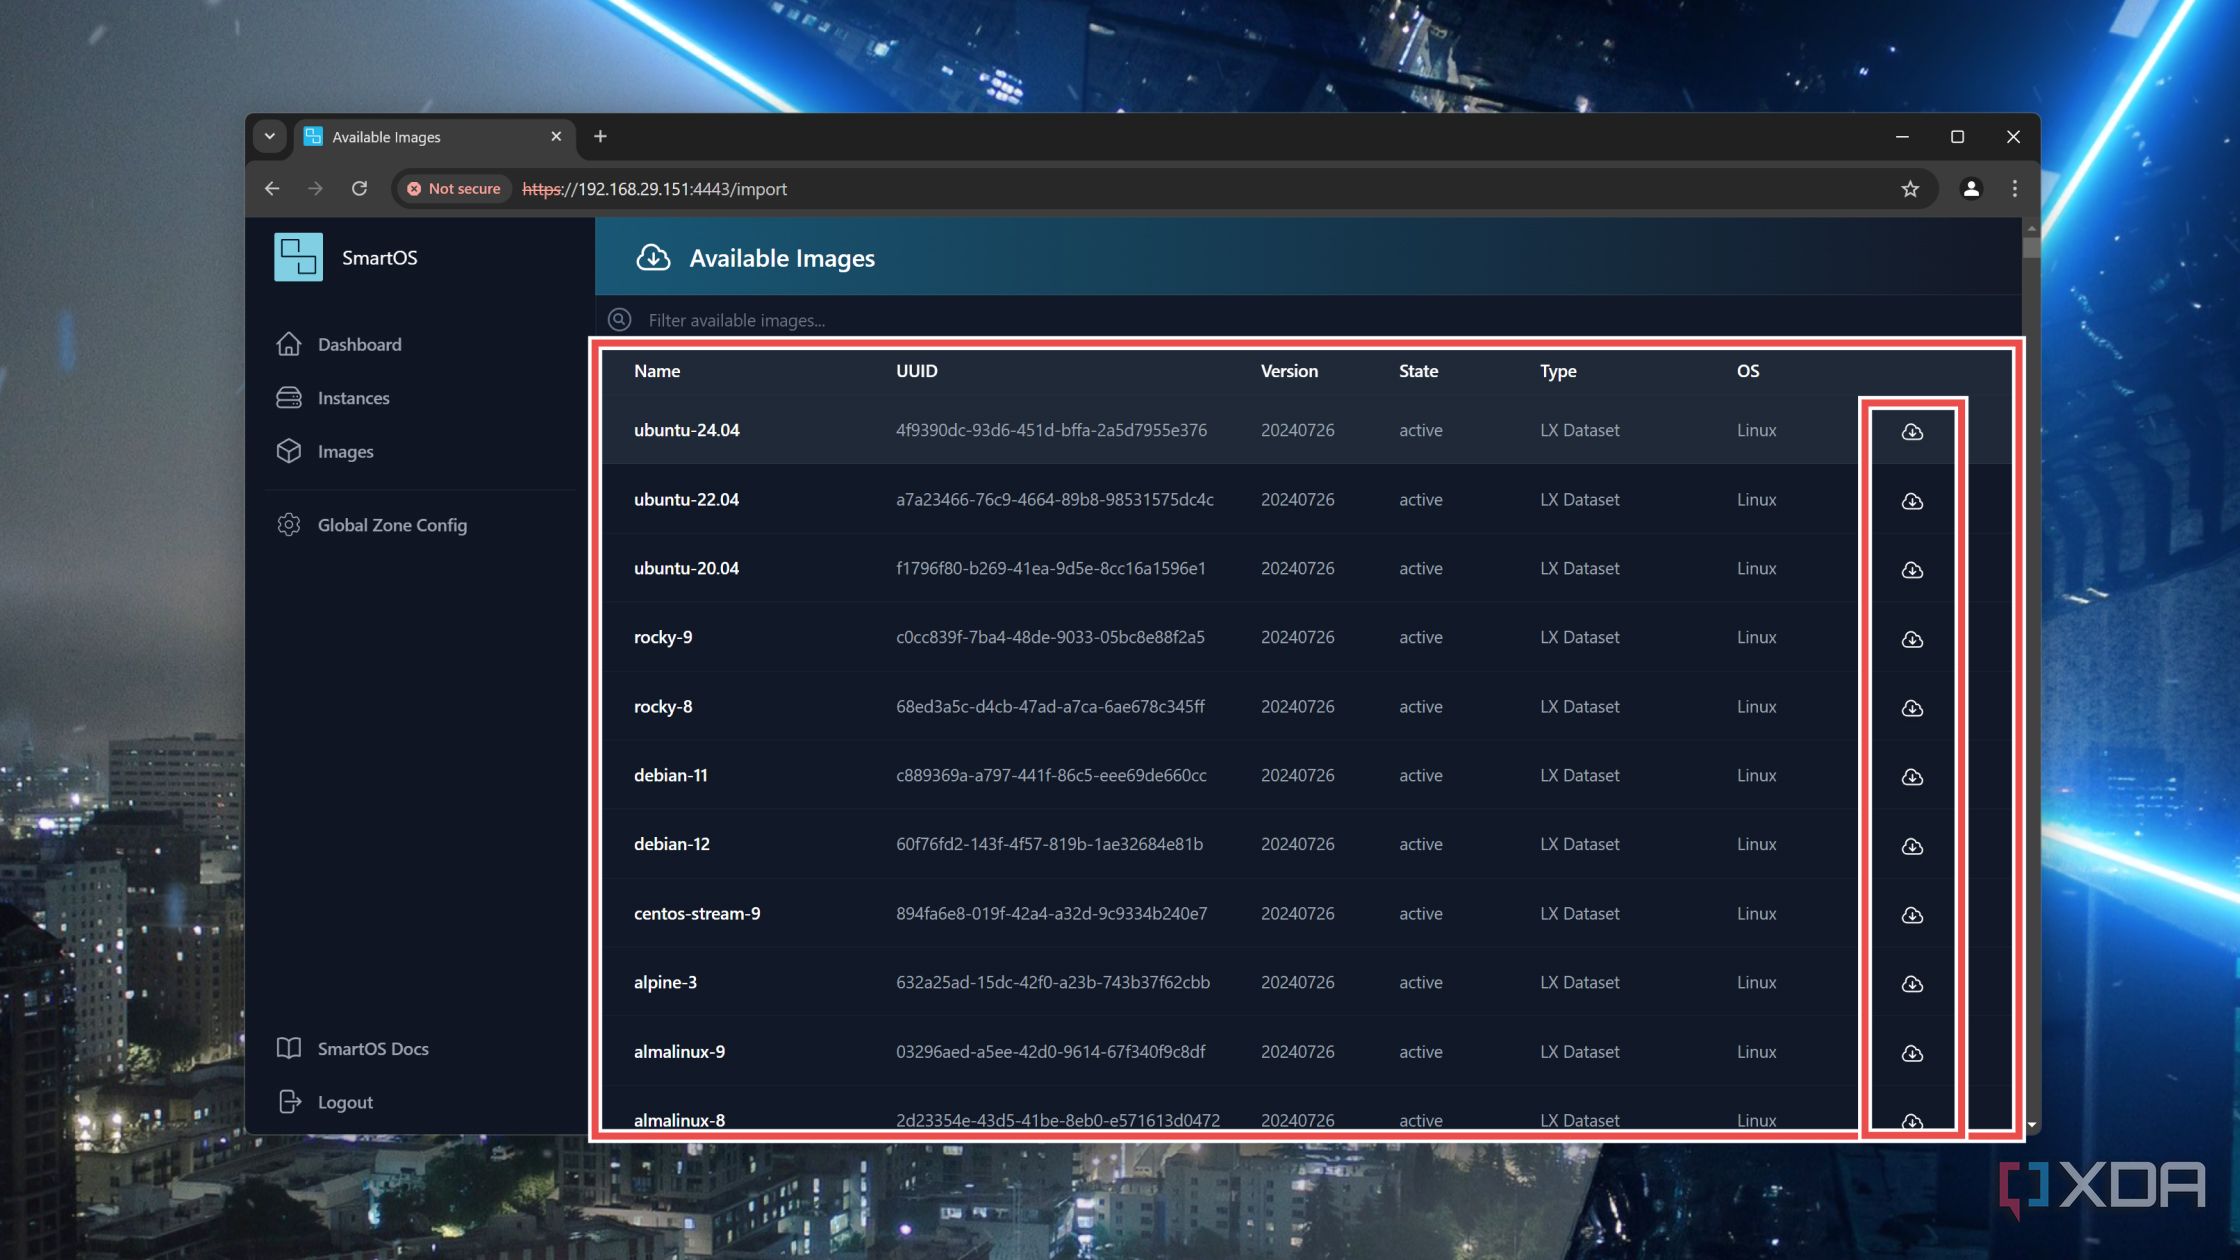
- Inside the web UI, navigate to the Images tab and click on Available Images.
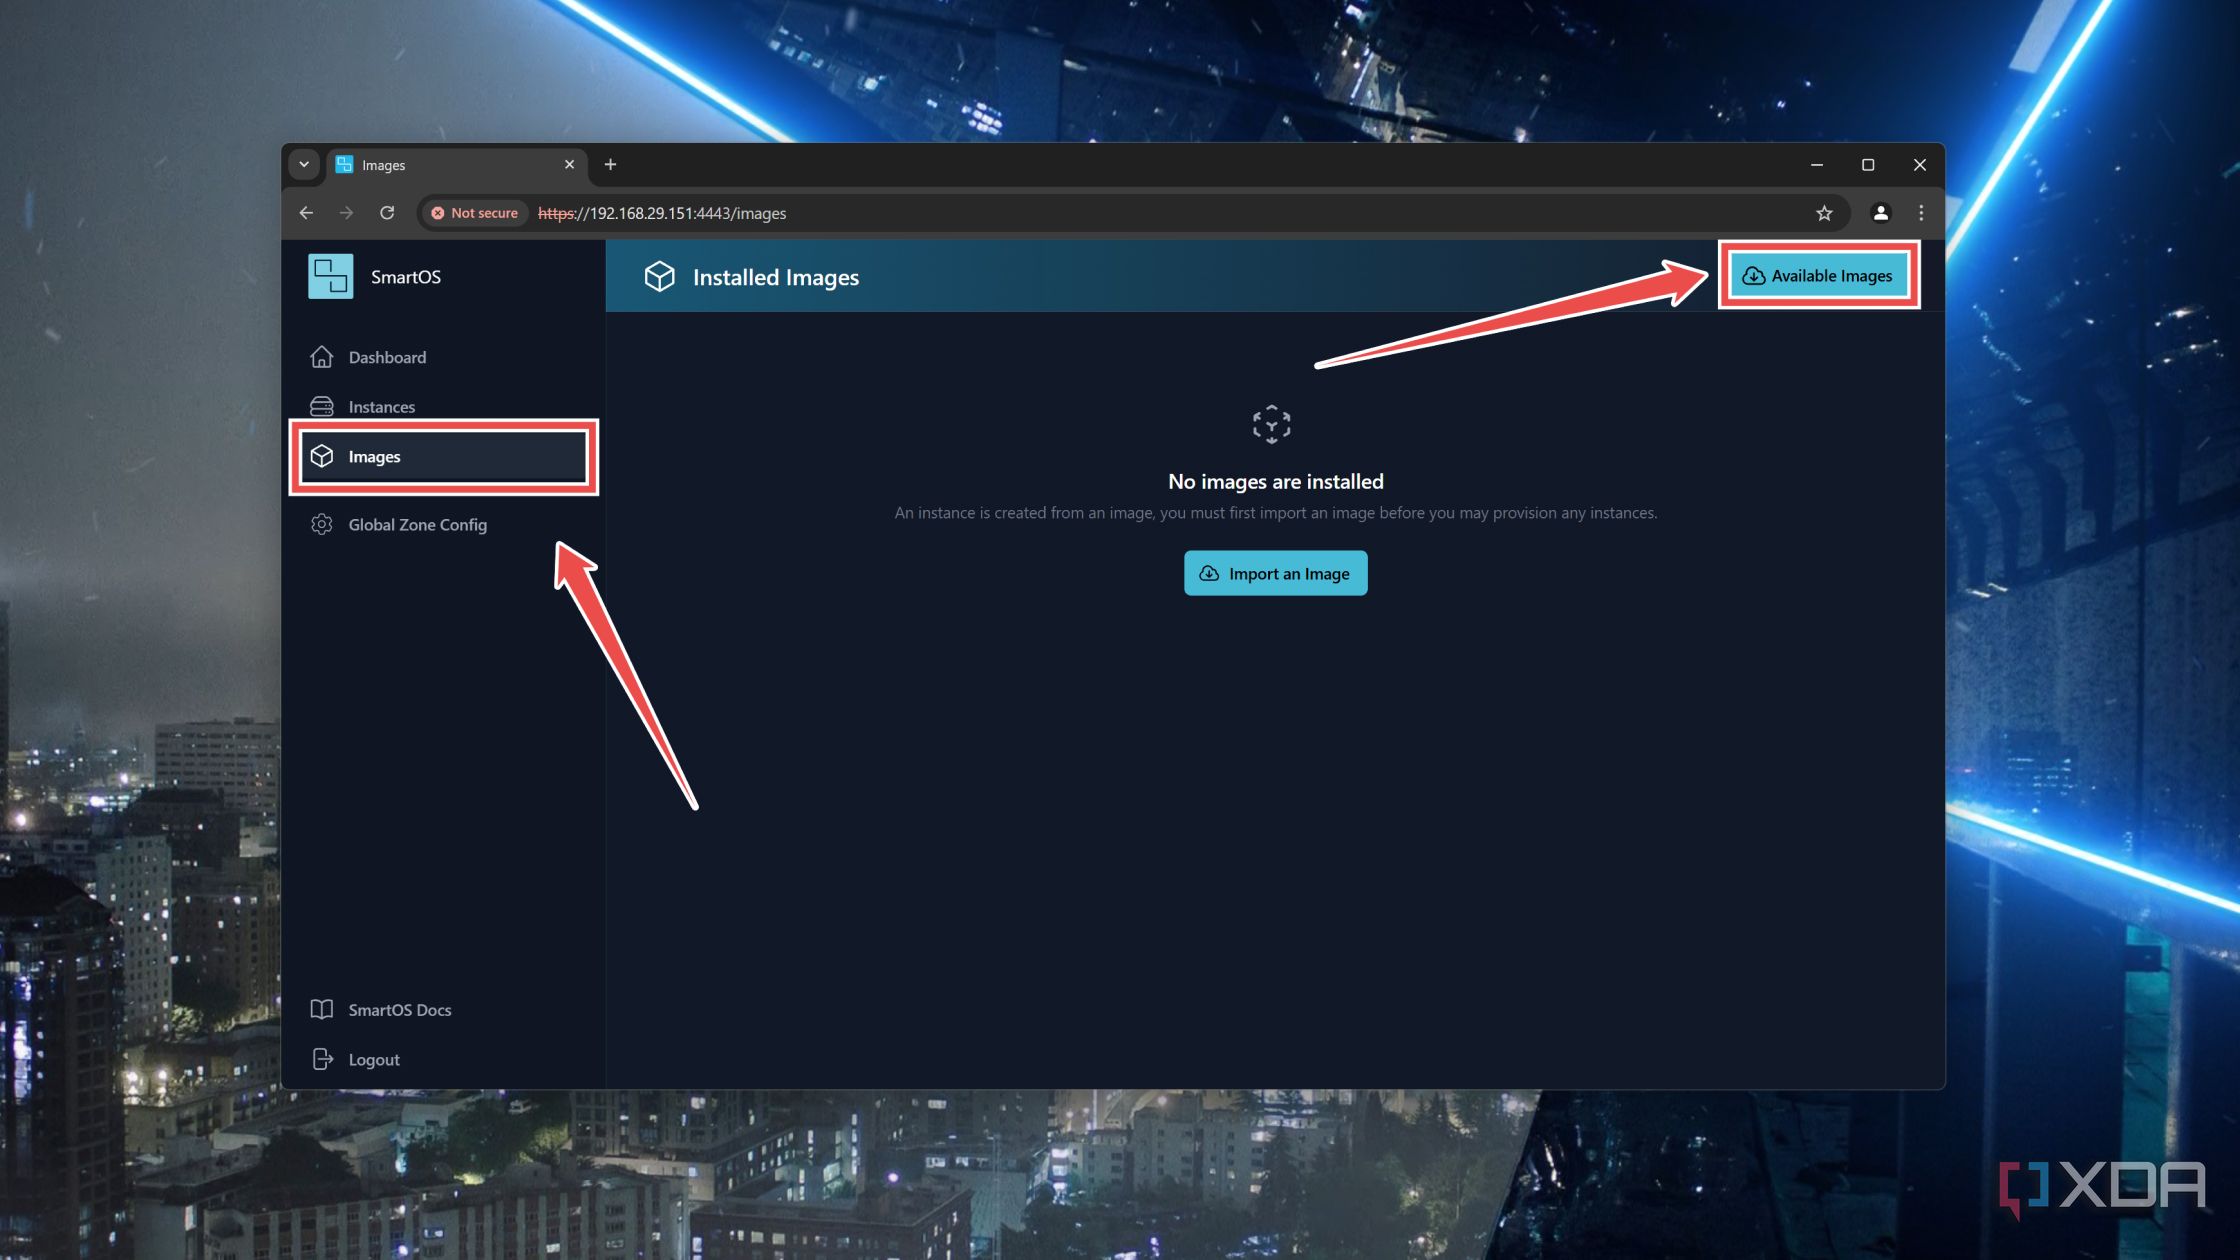
- Press the Download button next to your preferred Image and wait for the system to import it from the official servers.


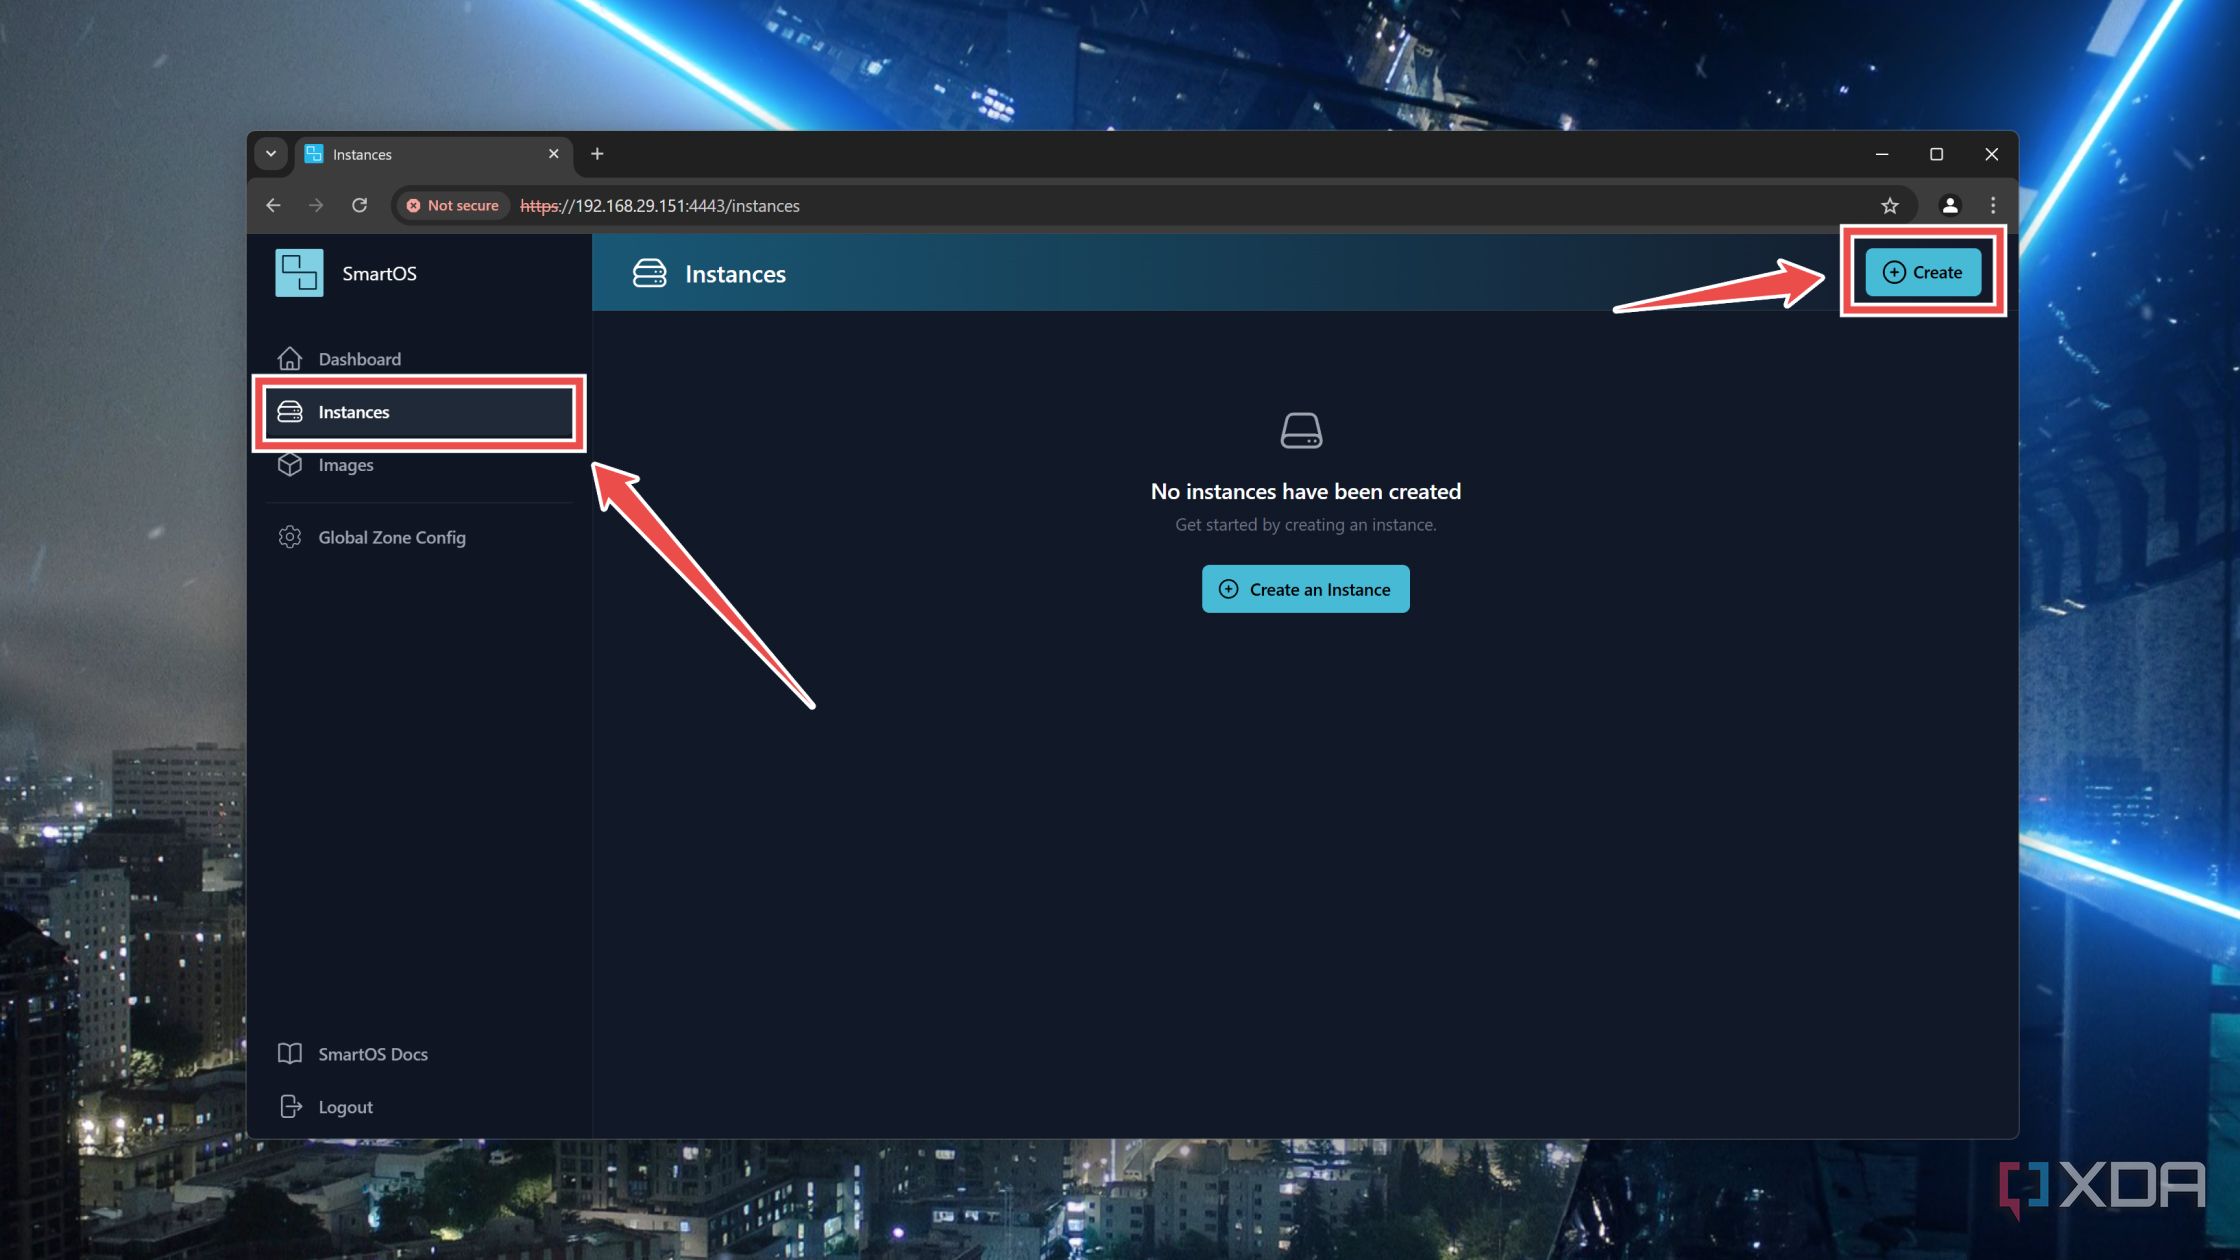
- Head to the Instances tab and tap the Create button.
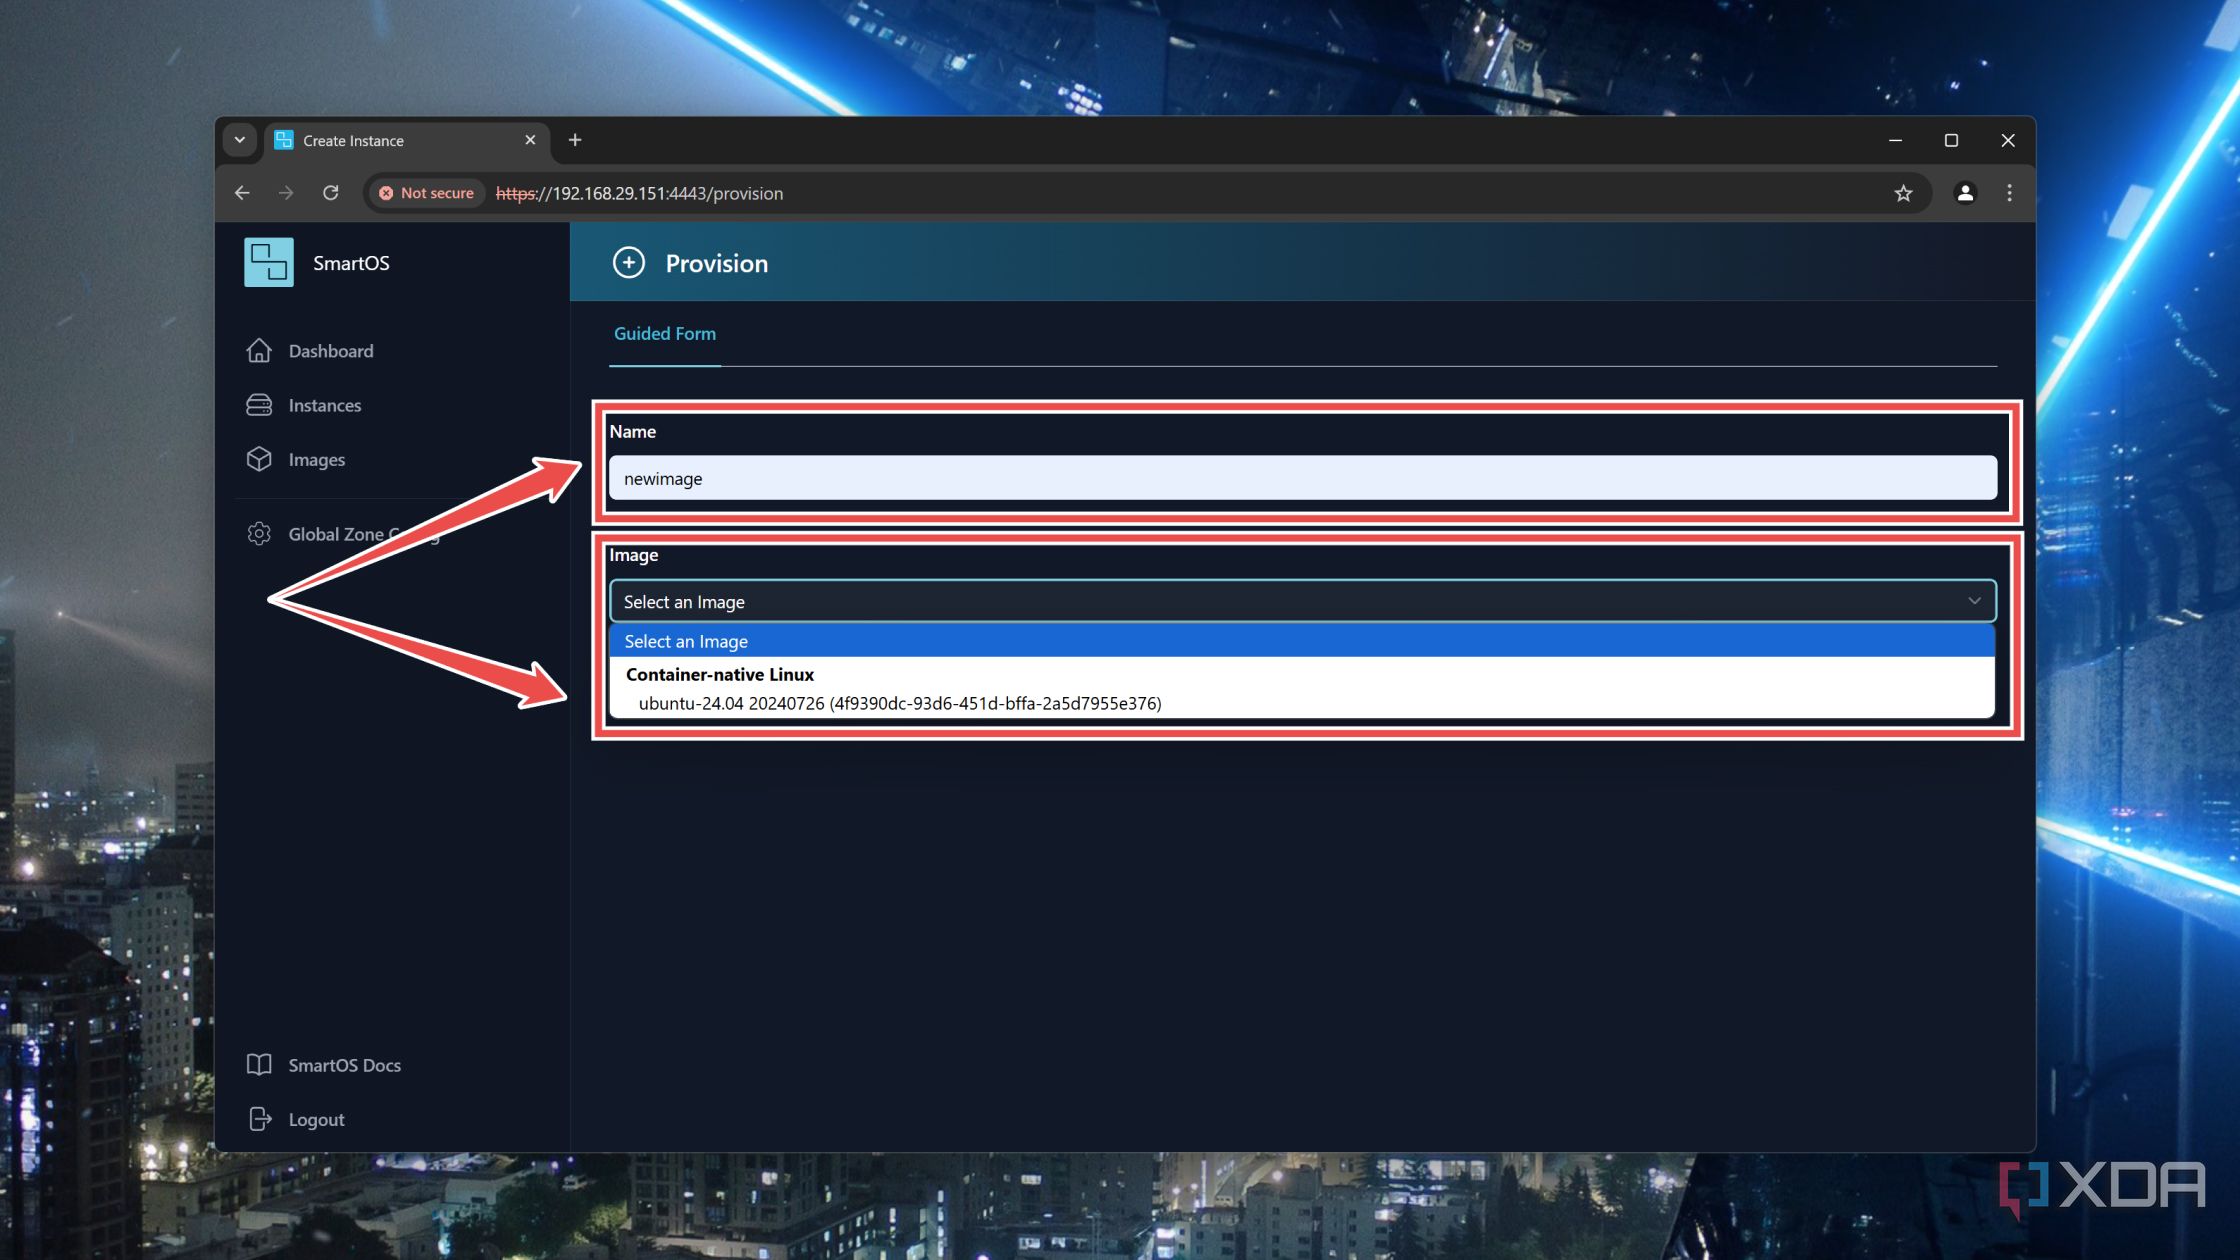
- Pick a Name for your virtual guest and select the Image you downloaded earlier.
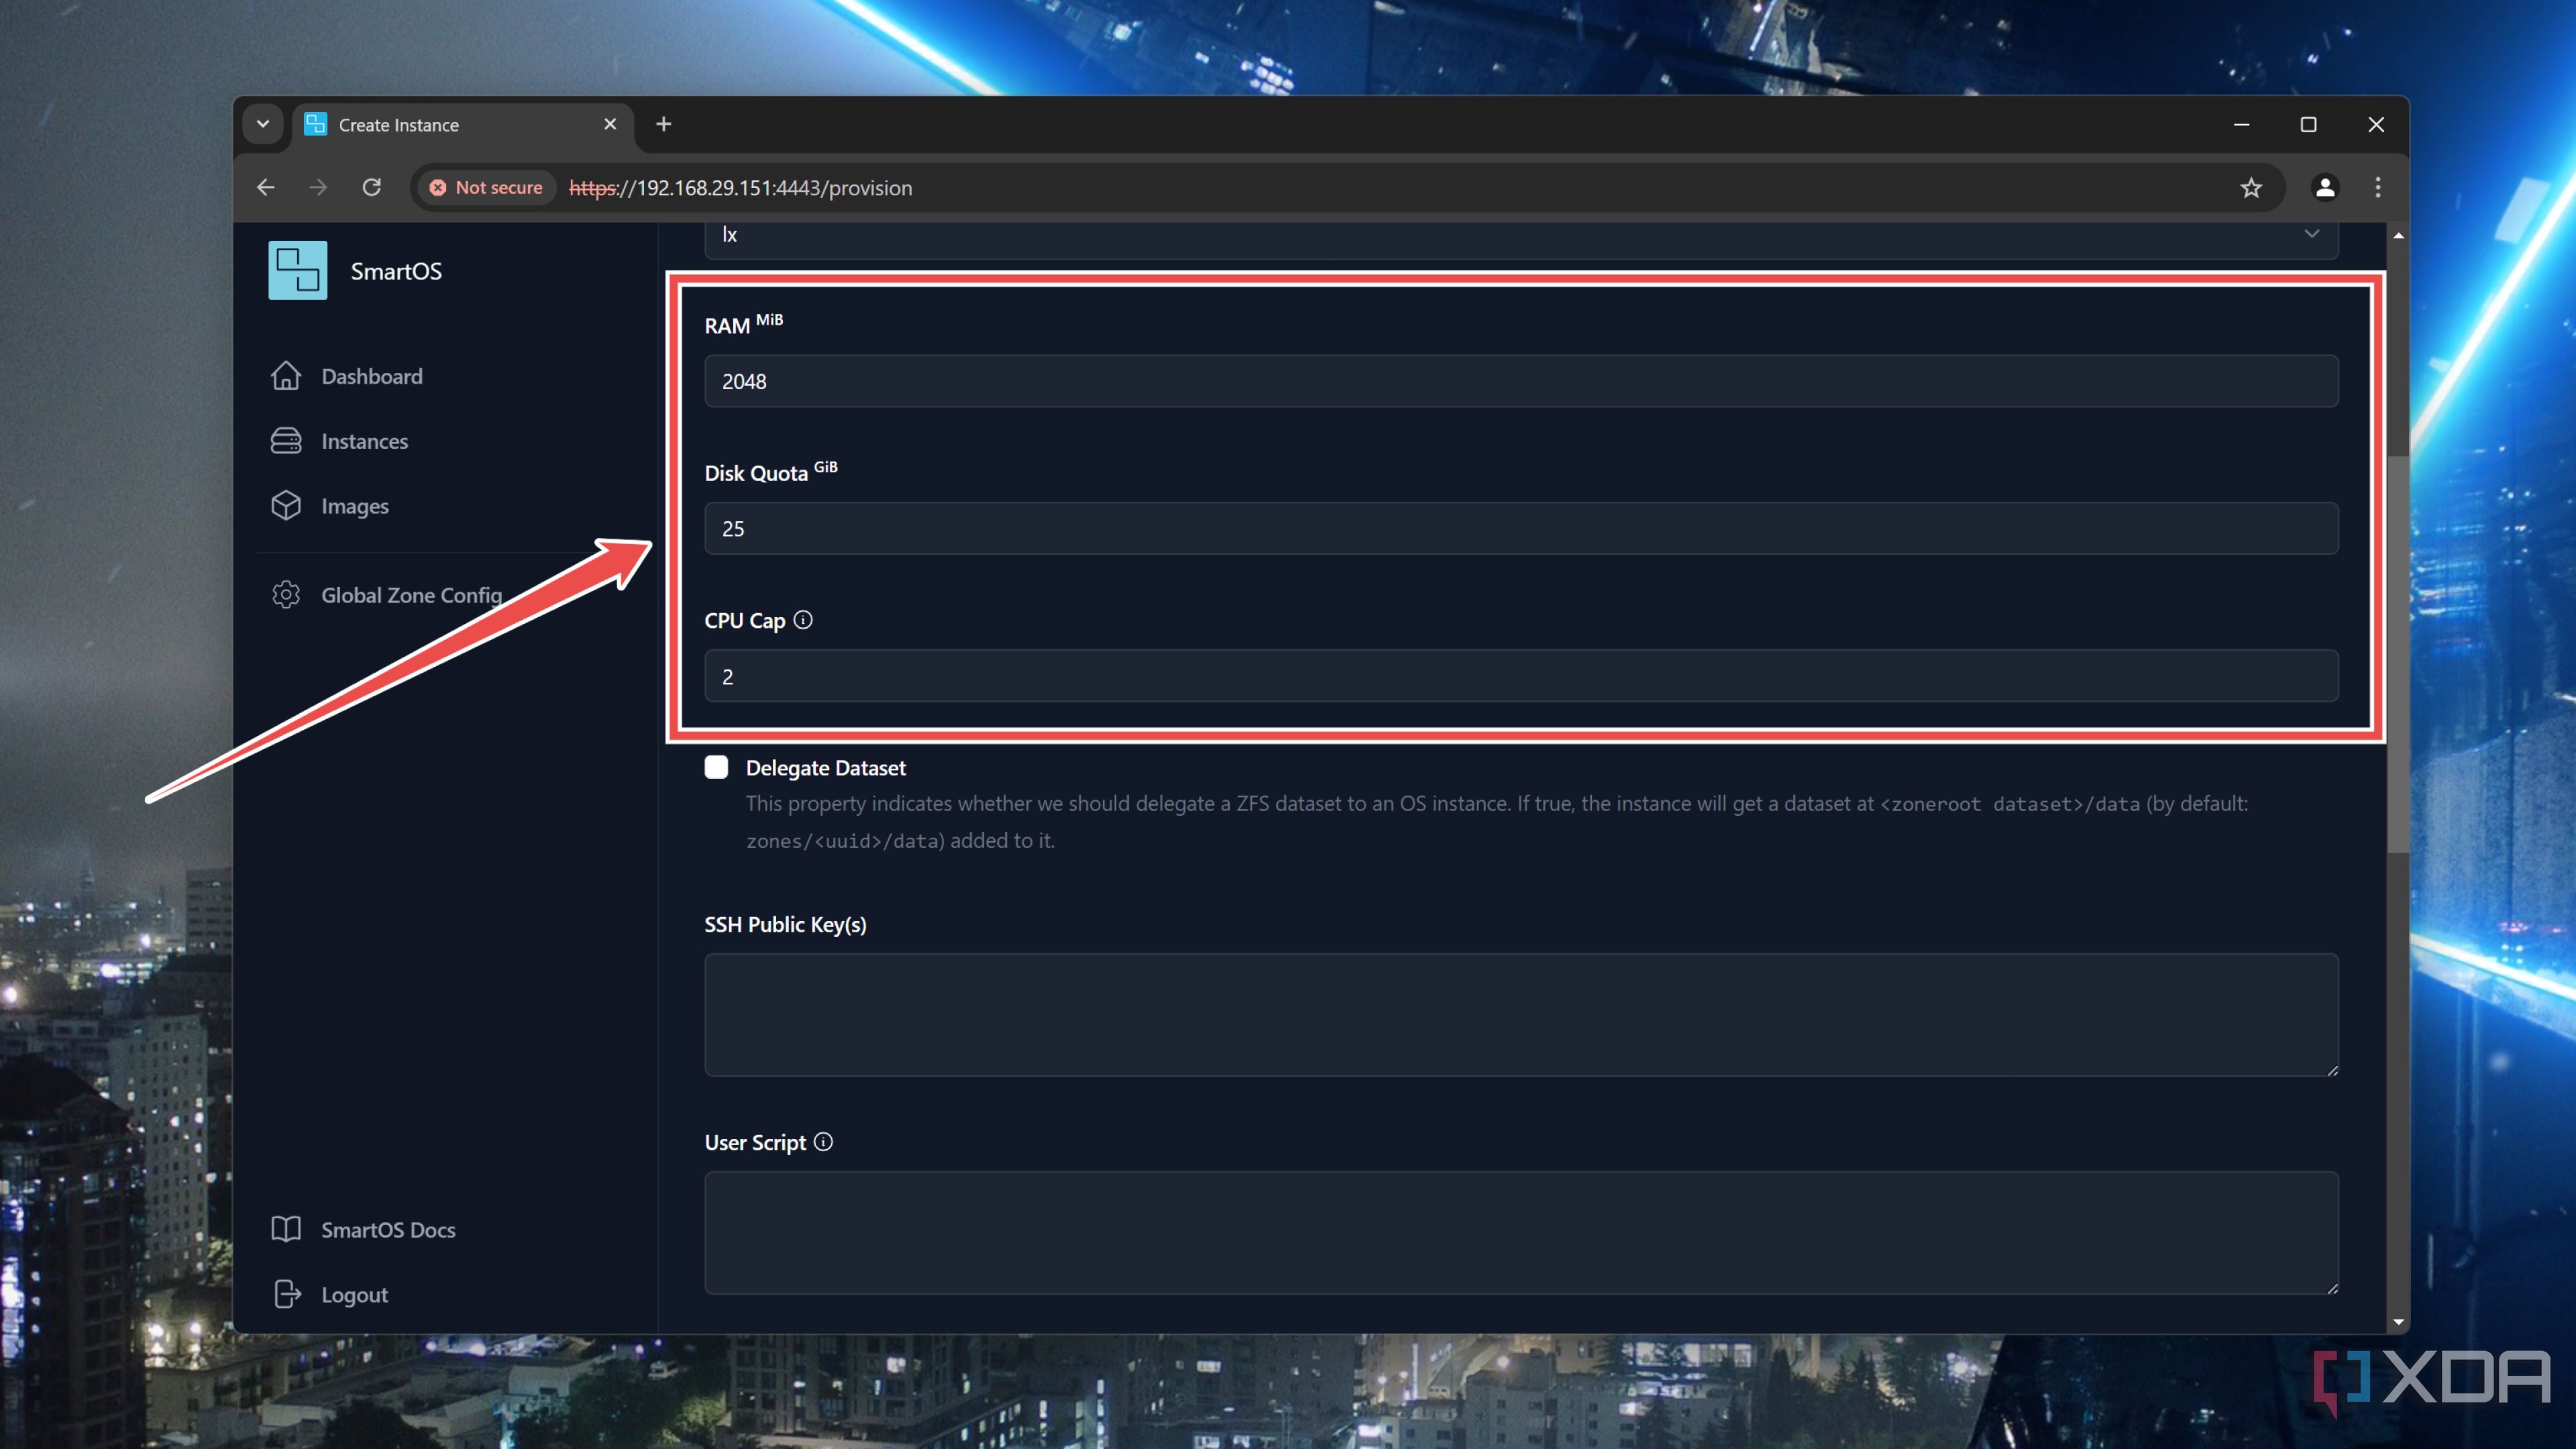
- Assign the RAM, Disk Quota, and CPU Cap to this guest.
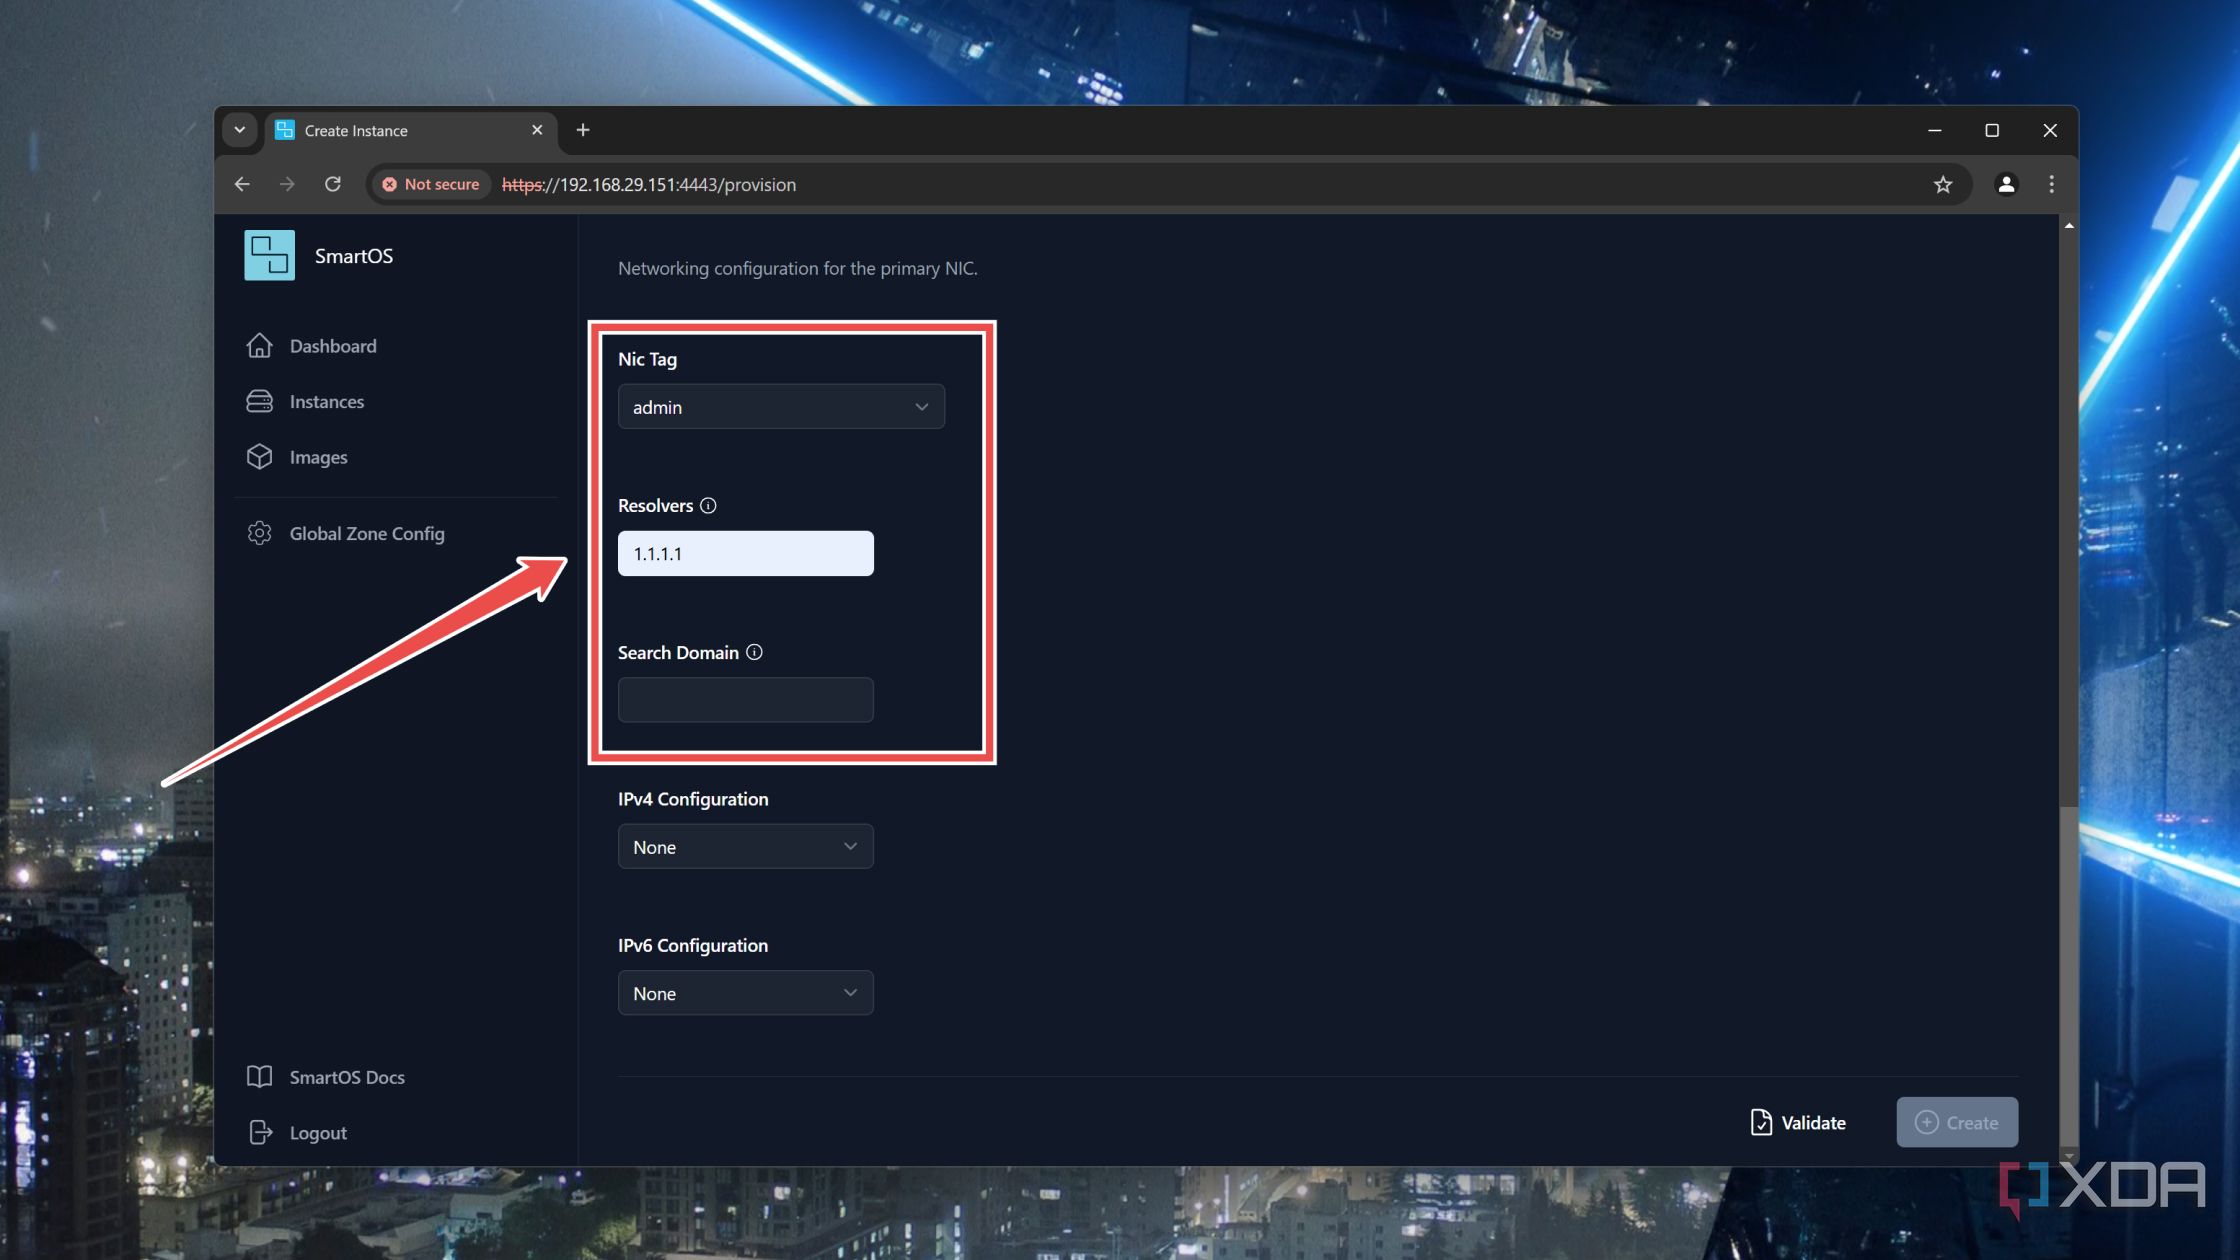
- Select admin as the NIC, type your preferred Resolver, and enter a Search Domain under the Primary NIC section.
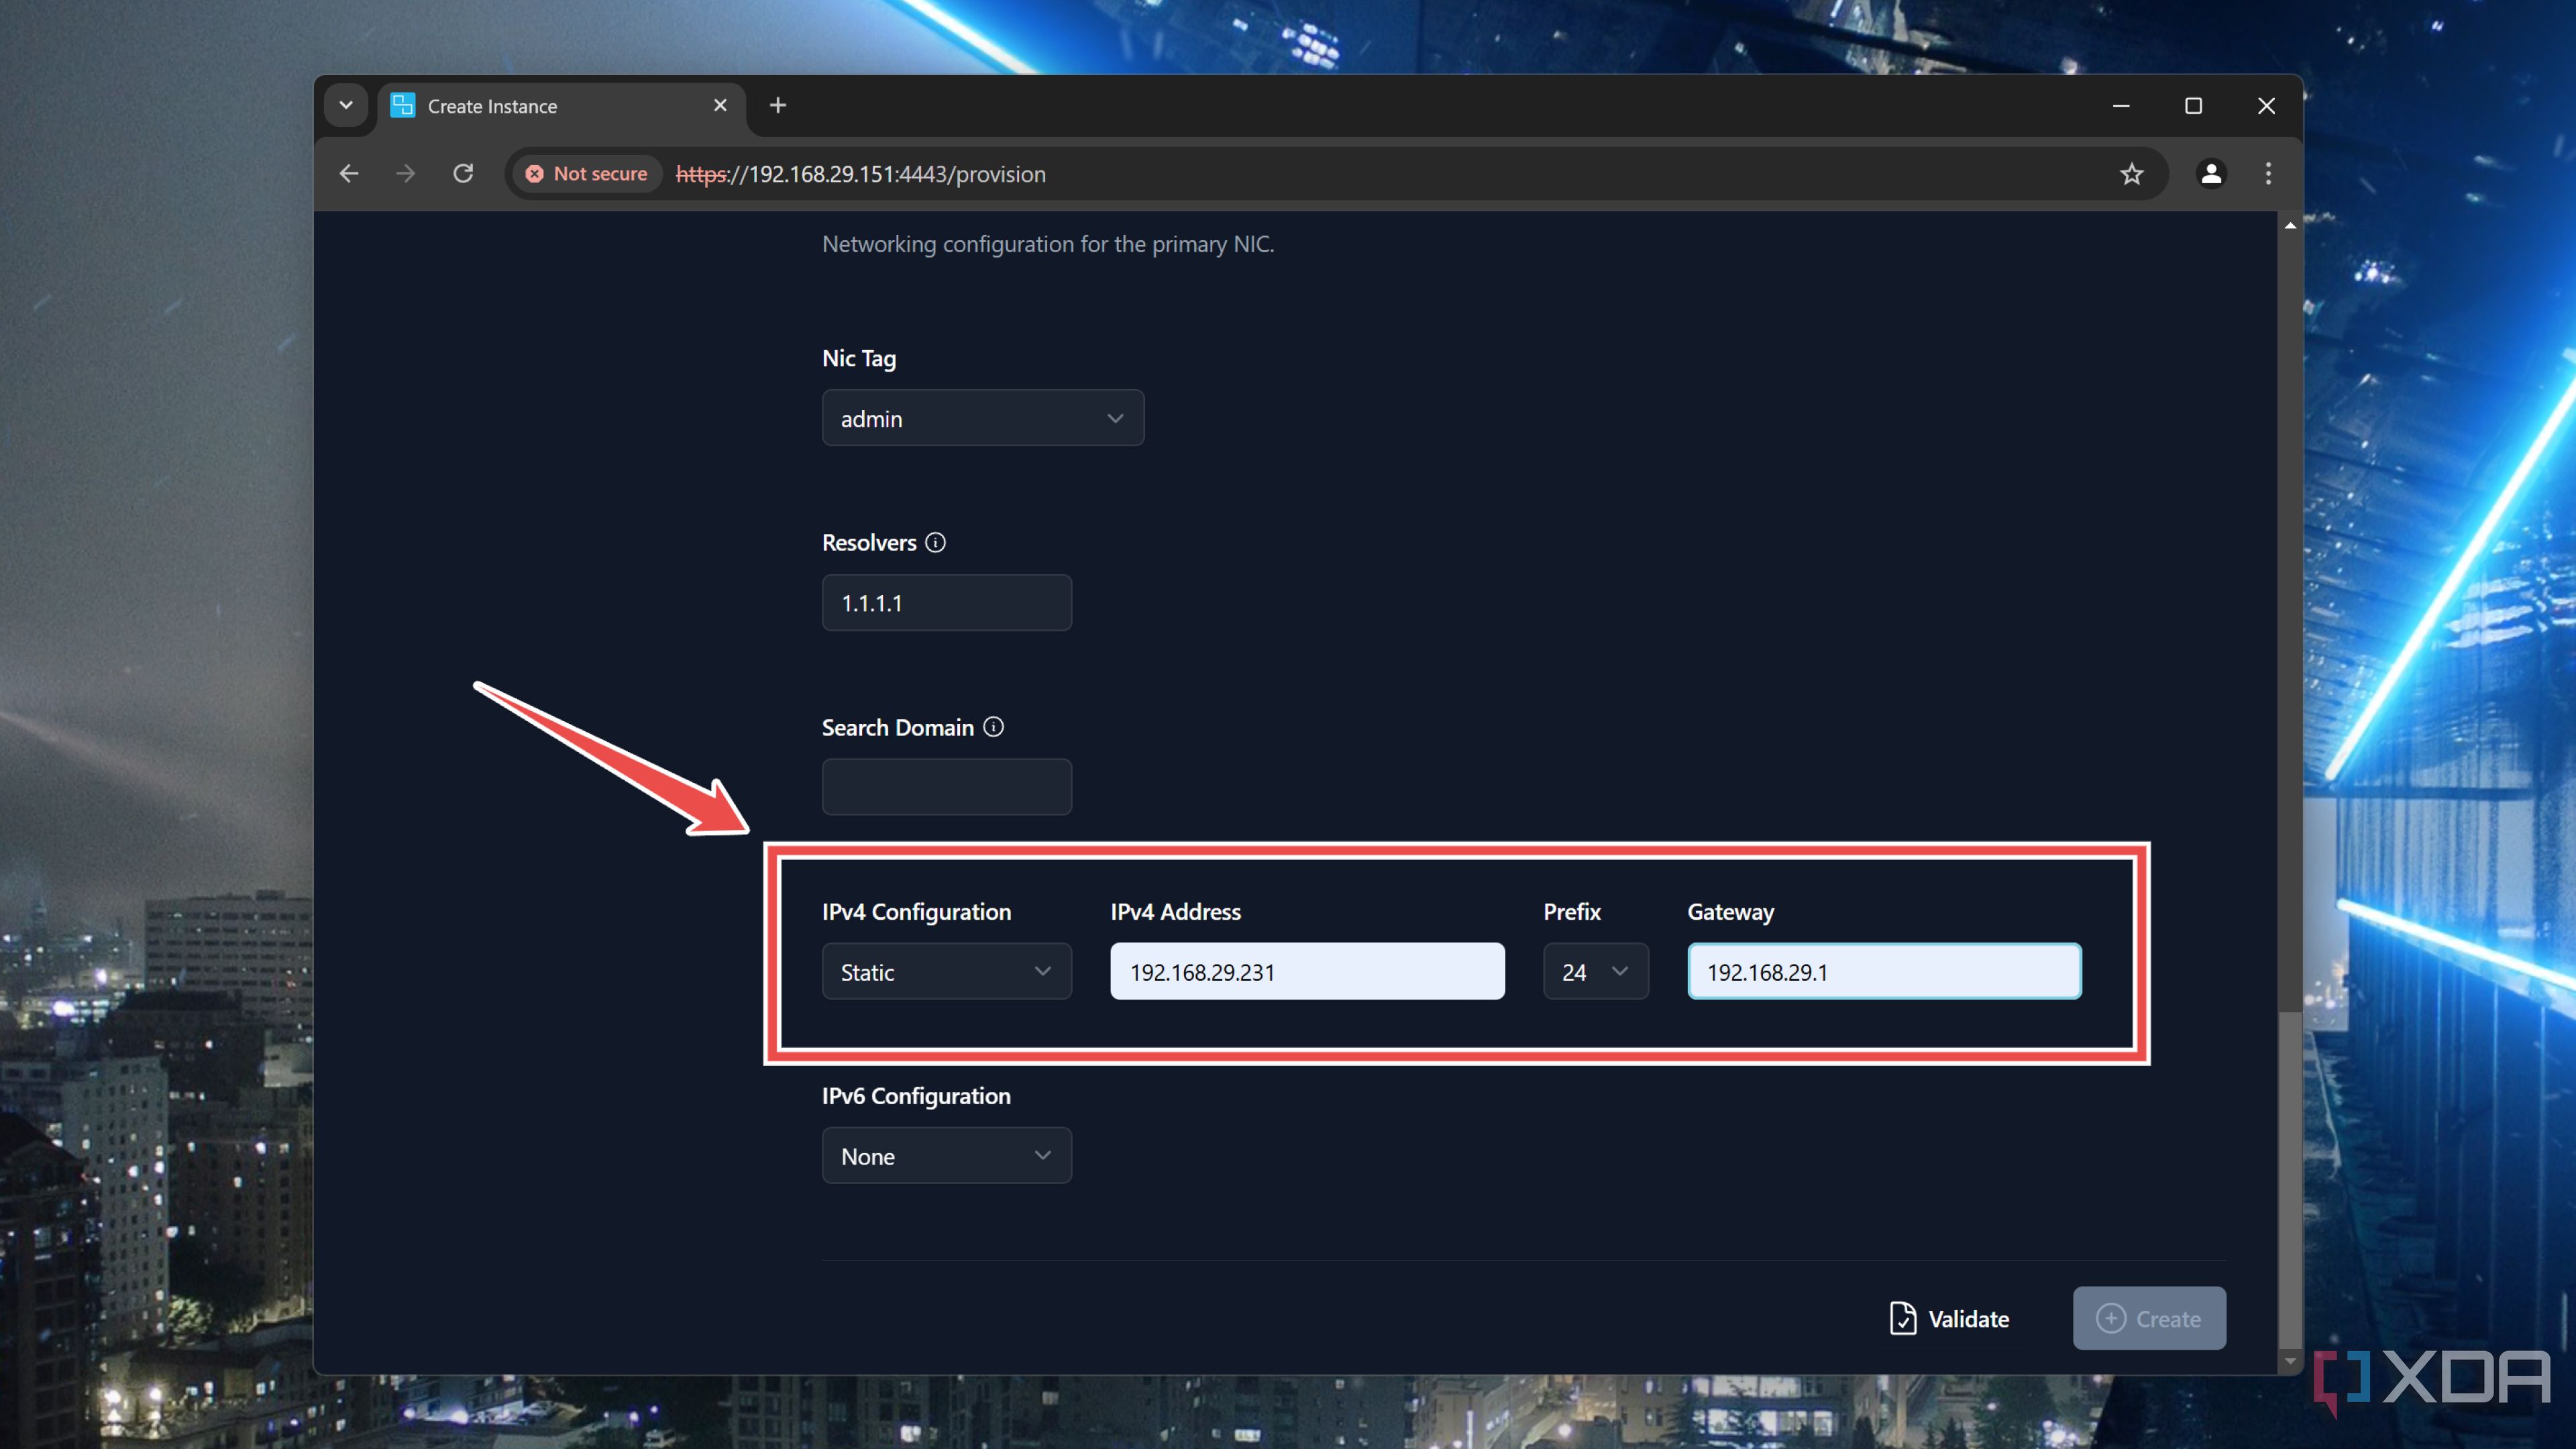
- Set the IPv4 Configuration to Static and enter the IPv4 Address followed by the Gateway.
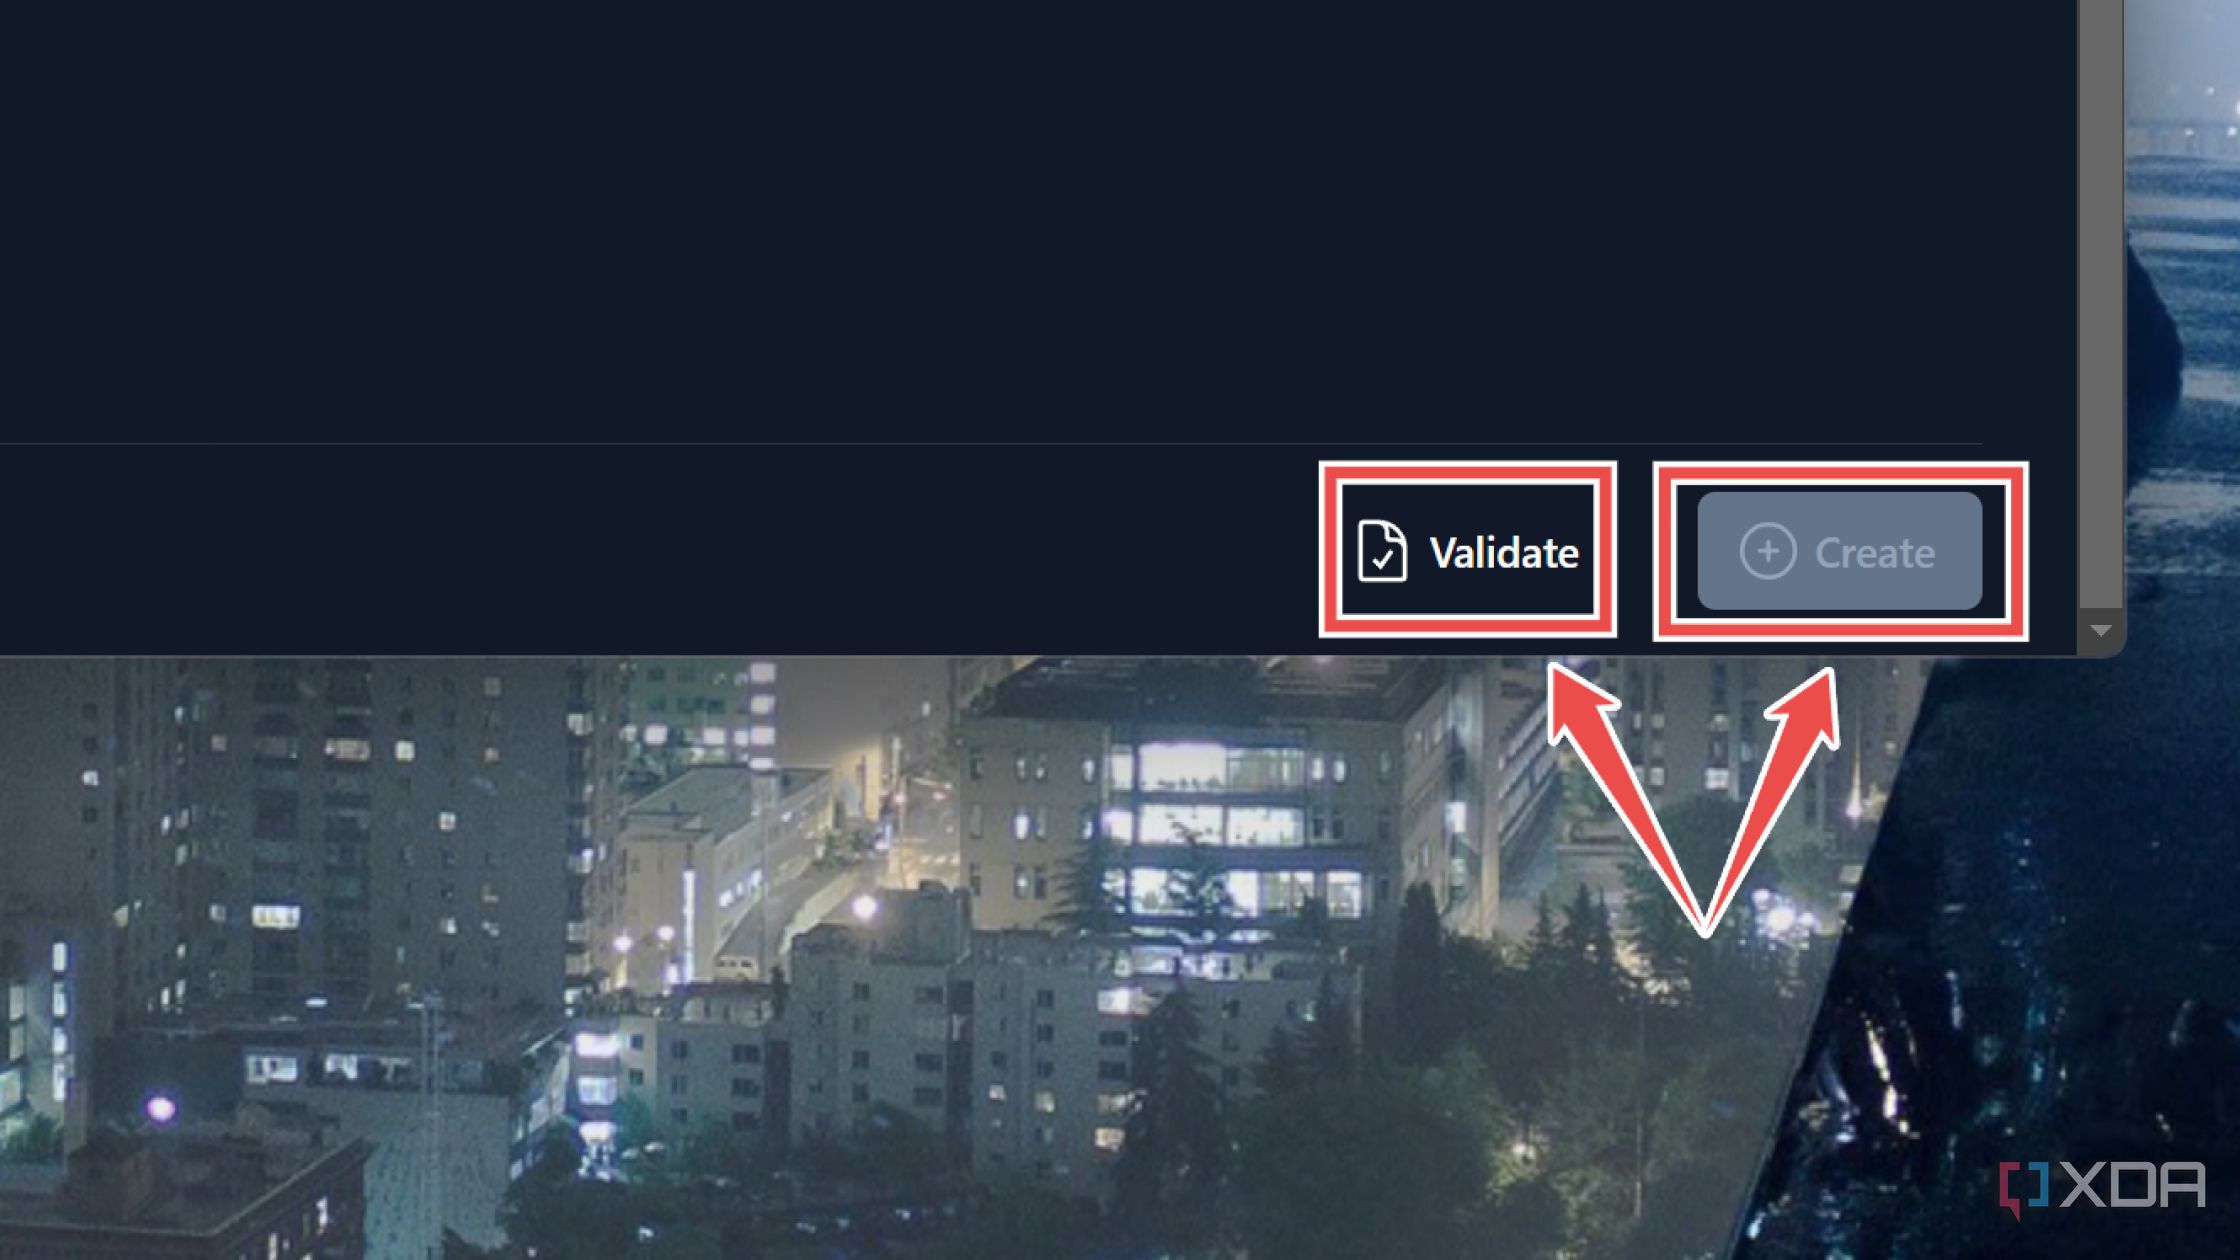
- Hit Validate and tap the Create button to deploy your container/zone/VM.


Bringing your favorite home projects to life using the SmartOS server
If you’ve followed all the steps correctly, the virtualized guest will start, and you can enter its IP address into PuTTY to access it over the local network. With that, you’re free to tinker with the SmartOS home server to your heart’s content.
That said, SmartOS is nowhere near as convenient as Proxmox. If you love Proxmox as much as I do, you might not be inclined to rebuild your home lab with SmartOS. Thankfully, you can still experiment with the Solaris Zones and other features of SmartOS by installing it inside a VM on Proxmox. While it’s better to configure it on top of existing hardware, you can still get decent performance by enabling nested virtualization and allocating sufficient system resources to the SmartOS virtual machine.

#Build #Unixpowered #home #lab #SmartOS
source: https://www.xda-developers.com/build-a-unix-powered-home-lab-with-smartos/

