

From file-sharing to scheduling regular backups, a Network-Attached Storage device serves as a great addition to any computing setup. Another impressive aspect of a NAS is that you can connect to it on almost any device — including a smartphone or tablet. What’s more, it’s surprisingly simple, especially if all your devices are connected to the same network. Once you set everything up, you’ll be up and running in no time.
Getting your NAS ready
The initial setup for a new, excellent NAS drive shouldn’t be difficult, but the level of complexity usually depends on the OS running on the NAS. Although we have a detailed guide on how to get your NAS up and running, here’s a general outline of the overall procedure:
1. Connect your NAS to your router.
2. Log in to the NAS’ web UI with your username and password.

3. Create a storage pool using your drives.

4. Set up an SMB share on top of your newly configured storage pool.

Note that before you connect a storage drive to your NAS, it must be formatted. If you’ve already used it with another device, it should be ready to go. If this is the first time you’re using it, hook it up to a computer and format it there first. Depending on which NAS and OS you use for the storage device, FAT32, ExFAT, or ZFS are worthwhile options for full compatibility across all operating systems, including Android, iOS, Windows, Mac, and Linux.
How to access NAS on Android
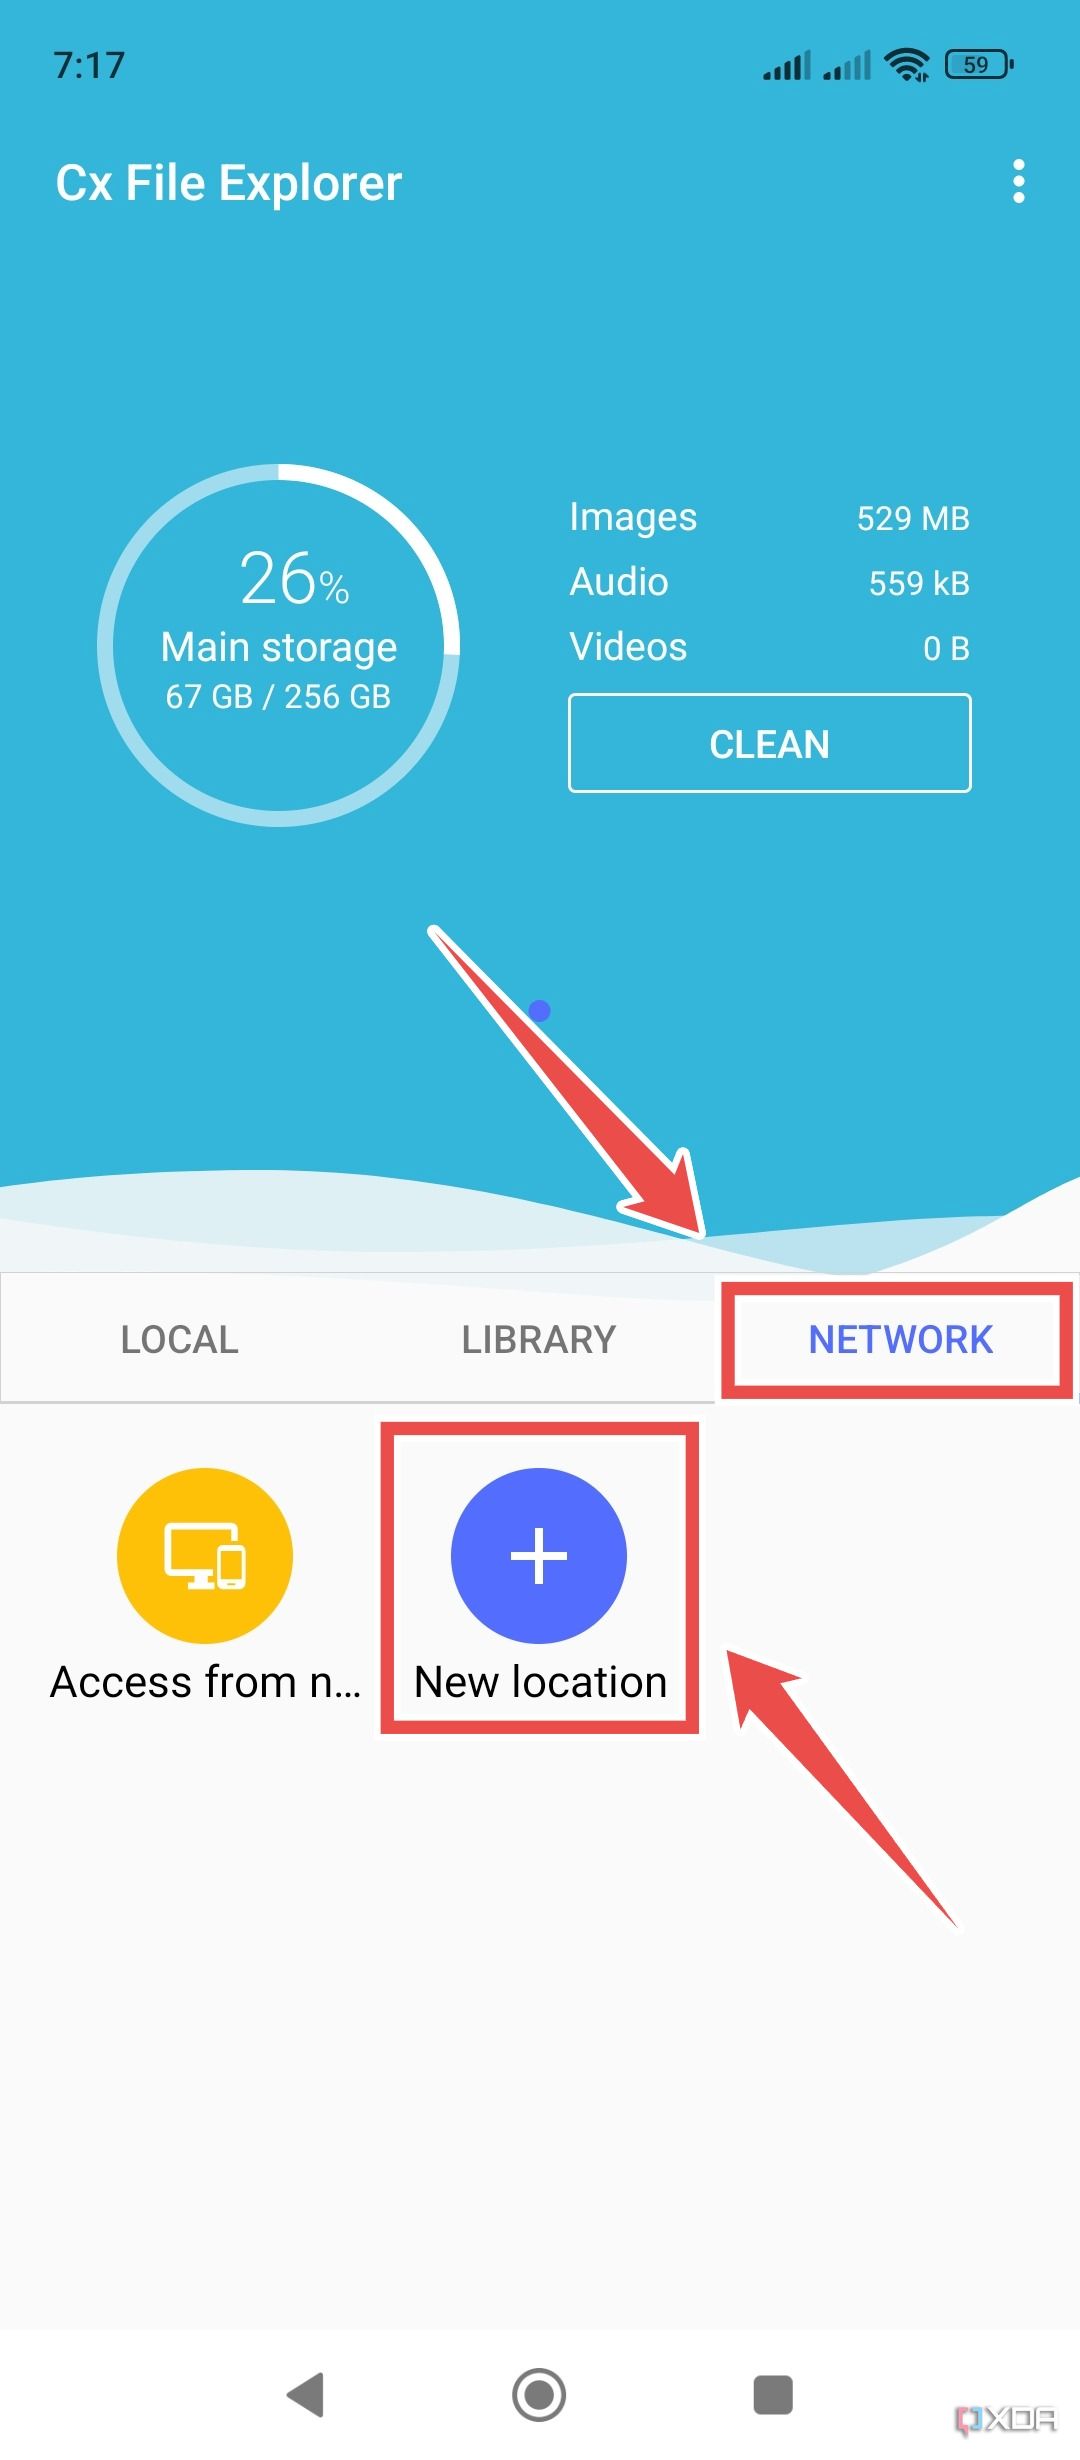
With your NAS ready to roll, it’s time to tell your Android device where it can find it. First, you’ll need a file manager that supports network storage. Some Android phones, like those from Samsung, ship with one built-in. Alternatively, you grab one of the best third-party file managers from the Play Store. I’ve used the Cx File Explorer for this guide, as it’s not only free-to-use, but also provides an easy way to pair your Android phone with the SMB share on your NAS.
- Launch the File Explorer and tap New Location inside the Network tab.
- Switch to the Remote header and select SMB.

- Enter the Host IP Address, Username, and Password before hitting OK.

- The storage pool you’ve shared via the SMB protocol will appear inside the File Explorer.


Bear in mind that network drives can disappear when you restart your device. If that happens, you’ll need to repeat the steps above.
How to access NAS on iPhone
The Files app that Apple ships with iOS and iPadOS makes it incredibly easy to connect to NAS drives on iPhone or iPad. Simply follow these steps:
1. Open the Files app and tap the Browse tab.
2. Tap the three dots in the top-right corner, then choose Connect to Server.
3. Enter the IP address of your NAS, then tap Connect.
4. Enter your username and password if necessary, then tap Next.


Once connected, your NAS drive will appear within the Files app. You will also have access to it within other apps that use Files for storage, such as Pages and Keynote.
Using NAS on Android and iPhone
The trickiest part of using NAS is the initial setup process. Once that’s out of the way, they operate in much the same way as cloud storage services, giving you access to all your files on Android, iPhone, and other devices.
NAS is particularly useful if you don’t like sending data to the cloud and for moving larger files that would typically take a long time to upload, and you can even access them remotely from anywhere in the world with a bit of extra work.
#access #NAS #Android #iPhone
source: https://www.xda-developers.com/how-access-nas-android-iphone/

